Beckman Coulter Avanti J-E Instructions For Use Manual
High-performance centrifuge
Hide thumbs
Also See for Avanti J-E:
- Instructions for use manual (36 pages) ,
- Instruction manual (64 pages) ,
- Instructions for use manual (158 pages)

Related Manuals for Beckman Coulter Avanti J-E


Summary of Contents for Beckman Coulter Avanti J-E
- Page 1 Instructions For Use Avanti J-E High-Performance Centrifuge PN SJ-IM-8AB January 2013 Beckman Coulter, Inc. 250 S. Kraemer Blvd. Brea, CA 92821 U.S.A.
- Page 2 Beckman Coulter, Inc. Beckman Coulter, the stylized logo, and Avanti are trademarks of Beckman Coulter, Inc. and are registered in the USPTO. All other trademarks, service marks, products, or services are trademarks or registered trademarks of their respective holders.
-
Page 3: Safety Notice
NOTE is used to call attention to notable information that should be followed during installation, use, or servicing of this equipment. Safety During Installation and/or Maintenance This instrument is designed to be installed by a Beckman Coulter Field Service representative. Installation by anyone other than authorized Beckman Coulter personnel invalidates any warranty covering the instrument. -
Page 4: Electrical Safety
Safety Notice Electrical Safety Electrical Safety To reduce the risk of electrical shock, this instrument uses a three-wire electrical cord and plug to connect this equipment to earth-ground. To preserve this safety feature: • Make sure that the matching wall outlet receptacle is properly wired and earth-grounded. Check that the line voltage agrees with the voltage listed on the name-rating plate affixed to the centrifuge. -
Page 5: Chemical And Biological Safety
• Dispose of all waste solutions according to appropriate environmental health and safety guidelines. It is your responsibility to decontaminate the instrument and accessories before requesting service by Beckman Coulter Field Service. PN SJ-IM-8AB... - Page 6 Safety Notice Chemical and Biological Safety PN SJ-IM-8AB...
-
Page 7: Table Of Contents
Contents Safety Notice, iii Alerts for Warning, Caution, and Note, iii Safety During Installation and/or Maintenance, iii Electrical Safety, iv Safety Against Risk of Fire, iv Mechanical Safety, iv Chemical and Biological Safety, v Introduction, xiii Certification, xiii Scope of Manual, xiii Conventions, xiv CFC-Free... - Page 8 Contents Specifications, 1-7 Available Rotors, 1-9 CHAPTER 2: Operation, 2-1 Introduction, 2-1 Summary of Avanti J-E Run Procedures, 2-2 Programmed Run, 2-2 Manual Run, 2-2 Preparation, 2-3 Installing the Rotor, 2-3 Manual Operation, 2-5 Selecting a Rotor, 2-5 Entering Run...
- Page 9 Contents APPENDIX A: Preinstallation Requirements, A-1 Introduction, A-1 Space Requirements, A-1 Electrical Requirements, A-3 Securing the Centrifuge to the Floor, A-4 Bio-Safety Level 3 Installation, A-4 Beckman Coulter, Inc. Avanti J-E Centrifuge Warranty Related Documents...
- Page 10 Contents...
- Page 11 Illustrations The Avanti J-E Centrifuge, 1-2 The Control Panel, 1-5 Manual Door Release, 3-5 Air Filter Replacement, 4-4 Dimensions of the Avant J-E Centrifuge, A-2 Single-Phase Power Connection, A-3...
- Page 12 Tables Diagnostic Message Chart, 3-2...
-
Page 13: Introduction
Further, the use of any equipment other than that recommended by Beckman Coulter has not been evaluated for safety. Use of any equipment not specifically recommended in this manual is the sole responsibility of the user. -
Page 14: Conventions
For Beckman Coulter products bearing this label please contact your dealer or local Beckman Coulter office for details on the take back program that will facilitate the proper collection, treatment, recovery, recycling and safe disposal of the device. -
Page 15: Description
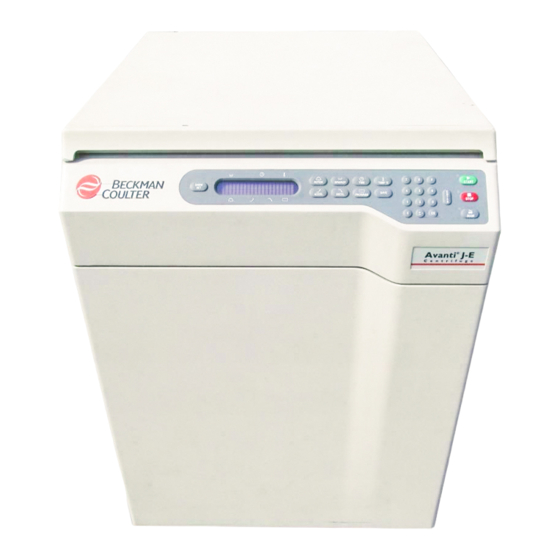
CHAPTER 1 Description Introduction This chapter provides a brief physical and functional description of the Beckman Coulter Avanti J-E centrifuge. The operating controls and indicators are also described; instructions for their use are in CHAPTER 2, Operation. Chemical compatibilities of materials listed in this manual can be found in Chemical Resistances (publication IN-175). -
Page 16: Safety Features
User messages and/or audible signals are provided to alert you to conditions that may need attention. Safety Features The Avanti J-E centrifuge has been designed and tested to operate safely indoors at altitudes up to 2000 m (6562 ft). Safety features include the following. Door The steel and structural foam door has an electromechanical door-locking mechanism, with dual latches, to prevent operator contact with a spinning rotor. -
Page 17: Centrifuge Chassis
Description Centrifuge Chassis Imbalance Detector An imbalance detector monitors the rotor during the run, causing automatic shutdown if rotor loads are severely out of balance. At low speeds, an incorrectly loaded rotor can cause an imbalance. Rotor instability can also occur if the instrument is moved, or if it is not resting level on the floor (see CHAPTER 3, Troubleshooting). -
Page 18: Temperature Control
Name Rating Plate A name rating plate is affixed to the rear of the instrument. Always mention the serial number and model number when contacting Beckman Coulter regarding your Avanti J-E centrifuge. Controls and Indicators Power Switch The power switch, located on the right panel of the centrifuge, controls electrical power to the centrifuge. -
Page 19: The Control Panel
Description Controls and Indicators Figure 1.2 The Control Panel Digital Displays The displays provide run information, user messages, and diagnostics. • During a run, they show the actual (real-time) operating conditions. • When the run parameters are being entered, they show the set values selected. Set values can be recalled during operation by pressing . - Page 20 Description Controls and Indicators Run-Parameter Keys Run-parameter keys are used to enter specific run information as follows. Pressed to display scrolling list of compatible rotors and rotor entry codes. Can be pressed repeatedly to scroll more quickly through the rotor list. If the display shows speed in RPM, the key is pressed once to enter run speed (using the keypad) in RPM (revolutions per minute);...
-
Page 21: Specifications
Description Specifications The ENTER key can be pressed to save parameter inputs to system memory during manual run setup, and to start the centrifuge (ENTER then START must be pressed to start the centrifuge). Pressed during a run to display set values for 5 seconds. Pressing ENTER, then START begins the run. - Page 22 Description Specifications Specification Description Temperature • Set temperature: — –10 to +40°C in 1° increments • Temperature control (after equilibration): — ±2°C of set temperature • Ambient temperature range: — 15 to 35°C Humidity restrictions <95% (noncondensing) Vacuum 1/2 atmosphere Acceleration two profiles—MAX (full acceleration to set speed) and SLOW Deceleration...
-
Page 23: Available Rotors
Description Available Rotors Specification Description Noise level 0.91 m (3 ft) <64 dBa in front of centrifuge at 21,000 RPM Installation (overvoltage) category Pollution degree a. Normally only nonconductive pollution occurs; occasionally, however, a temporary conductivity caused by condensation must be expected. - Page 24 Description Available Rotors Rotor Rotor Rotor Manual (´ g) Profile Description Code Capacity Number 14 ´ 50 mL JA-17 17,000 39,800 J-TB-017 Fixed Angle, 25° (15,000 (6 place) @ 2°C)c = 132 mm 6 ´ 250 mL JLA-16.250 16.25 16,000 38,400 J-TB-072 Fixed Angle, 25°...
- Page 25 2°C in a 50-Hz centrifuge is 14,000 RPM.) e. Maximum speed for rotor without magnets is 13,000 RPM. f. Temperature performance for the F14BCI-14x50cy rotor in the Avanti J-E is as follows: 12°C minimum at 14,000 RPM (at 35°C ambient); 4°C minimum at 13,000 RPM (35°C ambient).
- Page 26 Description Available Rotors 1-12 PN SJ-IM-8AB...
-
Page 27: Chapter 2: Operation
CHAPTER 2 Operation Introduction This section contains manual and programmed operating procedures. A summary is provided at the start of this section. If you are an experienced user of this centrifuge, you can turn to the summary for a quick review of operating steps. -
Page 28: Summary Of Avanti J-E Run Procedures
Operation Summary of Avanti J-E Run Procedures Summary of Avanti J-E Run Procedures For runs at other than room temperature, refrigerate or warm the rotor beforehand for fast equilibration. Programmed Run Turn the switch on ( POWER Press to unlock the chamber door; lift the door open. -
Page 29: Preparation
Operation Preparation Press , then use the keypad to enter the run speed (300 to 21 000 rpm). Press RPM/RCF RPM/RCF a second time to enter speed in RCF. Press , then use the keypad to enter the run time (to 99 hrs, 59 minutes); or press TIME TIME twice for a hold (continuous) run. - Page 30 To check for drive pins, hold the rotor up or turn it on its side and look into the drive hole. If you do not see at least two metal pins near the top of the hole, do not use the rotor in the Avanti J-E. 1. Drive Pins (Angled pins shown.
-
Page 31: Manual Operation
Operation Manual Operation Manual Operation When a run-parameter key ( , or ) is pressed, a parameter ROTOR, RPM/RCF, TIME, TEMP ACCEL DECEL can be entered or changed. Entry is completed when or another function key is pressed. ENTER To change an entry before you’ve pressed or another parameter key, press and enter ENTER... -
Page 32: Entering Run Time
Operation Manual Operation Use the keypad to enter required speed. Entered speed appears on the speed display. If the entered speed is higher than the rated speed of the installed rotor, a message showing the valid speed range will be displayed. a. -
Page 33: Entering Run Temperature
Operation Manual Operation Entering Run Temperature Run temperature can be set from –10 to +40°C. If no value is entered, the centrifuge selects the last entered temperature. Press TEMP The cursor and the temperature range for the selected rotor appear. Use the keypad to enter required temperature. -
Page 34: Starting A Run
Operation Programmed Operation Starting a Run Press ENTER START The green light next to the key flashes and the rotor begins to spin. START NOTE To begin a run, ENTER must always be the last key pressed before pressing START. If you wait more than 5 seconds, the START key will not activate. -
Page 35: Creating A New Program
Operation Programmed Operation Creating a New Program Press PROGRAM. Previously saved program numbers are displayed. Use the keypad to select a program number that is not in use or one that you want to overwrite and press ENTER The message “ ”... -
Page 36: Recalling And Changing A Program
Operation Programmed Operation Press to begin the programmed run (or press to exit program mode ENTER START PROGRAM and return to manual operation). The run starts, the green light next to the key flashes, and the rotor begins to spin. START NOTE. - Page 37 Operation Programmed Operation To begin the run, press ENTER START The run starts. Changing a Program Press PROGRAM Previously saved program numbers are displayed. Select the appropriate keypad number and press ENTER The message “ ” is displayed. Press ENTER START to run, or edit parameters Press to display program parameters.
-
Page 38: Program,
Operation Programmed Operation 2-12 PN SJ-IM-8AB... -
Page 39: Chapter 3: Troubleshooting
Beckman Coulter Field Service Representative at 1-800-742- 2345 (U.S.A. or Canada) or contact your local Beckman Coulter office. To help the field service representative diagnose and correct the problem, try to gather as much information about the situation as you can, including: —... - Page 40 • Check the air filter and replace if dirty Temp, call service temperature maximum brake (see CHAPTER 4, Care and Maintenance). • Call Beckman Coulter Customer Service. C5– Refrigeration system error Run shuts down with Call Beckman Coulter Customer Service. Temp, call service maximum brake T1 through T4–...
- Page 41 FRS, call service • Wipe any ice and excess moisture from chamber. • Call Beckman Coulter Customer Service. R1, and R2– No magnets identified, or Run continues, speed Press CE to clear message. If problem Rotor, ID problem...
-
Page 42: Accessing The Rotor In Case Of Power Failure
Keep the door opening closed as much as possible. a. For Beckman Coulter Customer Service call 1-800-742-2345 (U.S.A. or Canada) or contact your local Beckman Coulter office. b. Friction Reduction System. Accessing the Rotor in Case of Power Failure If facility power fails only momentarily, the instrument will resume operation when power is restored and the rotor will return to set speed. -
Page 43: Manual Door Release
Troubleshooting Accessing the Rotor in Case of Power Failure Insert the hex wrench (729317) or a similar tool into the openings on each side of the centrifuge (see Figure 3.1) to release the top front panel. CAUTION LISTEN CAREFULY. Do not proceed if any sound or vibration is coming from the drive. - Page 44 Troubleshooting Accessing the Rotor in Case of Power Failure After removing the rotor, replace the top front panel by pushing it into place. WARNING NEVER try to slow or stop the rotor by hand. PN SJ-IM-8AB...
-
Page 45: Chapter 4: Care And Maintenance
This section describes routine care and maintenance procedures that you should perform regularly. For maintenance not covered in this manual, call Beckman Customer Service at 1-800-742-2345 (U.S.A. or Canada) or contact your local Beckman Coulter office for assistance. User messages and recommended actions are discussed in CHAPTER 3, Troubleshooting. -
Page 46: Cleaning
Care and Maintenance Maintenance Check the air filter on the back panel for obstructions. Keep vents clear and clean. Wipe condensation out of the chamber between runs with a sponge or clean cloth to prevent chamber icing. If chamber icing occurs, defrost the system and wipe moisture out of the chamber before use. To defrost the system, set the temperature to 30°C for 20 minutes. -
Page 47: Decontamination
Ethanol is a flammability hazard. Do not use it in or near operating centrifuges. While Beckman Coulter has tested ethanol (70%) and found that it does not damage the centrifuge, no guarantee of sterility or disinfection is expressed or implied. When sterilization or disinfection is a concern, consult your laboratory safety officer regarding proper methods to use. -
Page 48: Replacing The Air Filter
Care and Maintenance Maintenance Replacing the Air Filter Check the air filter (see Figure 4.1) regularly and replace it about once a year, or more often if it looks dirty. The air filter is not fastened to the centrifuge, so no tools are required for removal or installation. -
Page 49: Circuit Breaker And Fuses
Storage and Transport Storage To ensure that the centrifuge does not get damaged, contact Beckman Coulter Field Service for specific instructions and/or assistance in preparing the equipment for transport or long-term storage. Temperature and humidity conditions for storage should meet the environmental... -
Page 50: Replacement Parts
978347 Latch override key 368247 Memory flash card 369173 Supplies NOTE For MSDS information, go to the Beckman Coulter website at www.beckmancoulter.com. Descirption Part Number Silicone vacuum grease (1 oz) 335148 Solution 555 (1 qt) 339555 Hex key (panel removal... -
Page 51: Appendix A: Preinstallation Requirements
Preinstallation Requirements Introduction Preinstallation requirements have been provided for your Avanti J-E centrifuge. The following information is included in case the instrument must be relocated. (After the centrifuge is moved it must be leveled by adjusting the two front feet.) NOTE This centrifuge is designed to be installed by a Beckman Coulter Field Service representative. -
Page 52: Dimensions Of The Avant J-E Centrifuge
Preinstallation Requirements Space Requirements In addition to space for the instrument itself, allow a 7.7-cm (3-in.) clearance on each side of the instrument and a 16-cm (6.25-in.) clearance behind the instrument for air circulation. Position the centrifuge so that the air diverter nearly touches the wall behind the centrifuge (see Figure A.1). -
Page 53: Electrical Requirements
To reduce the risk of electrical shock, this centrifuge uses a permanently attached 1.8-m (6-ft) three-wire UL/CSA approved electrical cord and plug to connect the centrifuge to earth-ground. (Contact your local Beckman Coulter office for specific information regarding local plug requirements.) To preserve this safety feature: •... -
Page 54: Securing The Centrifuge To The Floor
Refer to this document for additional installation instructions. NOTE Beckman Coulter representatives are not equipped to drill holes in your floor. The holes must be drilled before your scheduled installation. Bio-Safety Level 3 Installation For laboratories with epoxy aggregate floors, such as BSL-3 labs, a non-invasive installation kit (393316) is available. -
Page 55: Beckman Coulter, Inc
(1) year (2 years for the drive motor) after delivery of the Avanti J-E Centrifuge (the product), to the original buyer by Beckman Coulter or by an authorized representative, provided that investigation and factory inspection by Beckman Coulter discloses that such defect developed under normal and proper use. - Page 56 Beckman Coulter, Inc. Avanti J-E Centrifuge Warranty Warranty-2 PN SJ-IM-8AB...
- Page 57 English / Deutsch / Español / Français / Italiano / Portugués / Русский / 中文 / 日本語 / 국어 Symbol Simbole Symbol символ Title / Titel / Titulo / Titre / Titolo / Titulo / Название / 标题 / タイトル / 제목 符号...
-
Page 58: Related Documents
• Available at Accessories www.beckmancoulter.com Using Fixed-Angle Rotors • Using Swinging-Bucket • Anchoring Kit Installation Rotors Instructions for the Avanti J-E Using Vertical-Tube and • Centrifuge Rack Type Rotors PN SJ-TB-002 Care and Maintenance • Chemical Resistances • Available in hard copy only.
Need help?
Do you have a question about the Avanti J-E and is the answer not in the manual?
Questions and answers