DataCard CR500 Installation And Administrator's Manual
Instant issuance system
Hide thumbs
Also See for CR500:
- User reference manual (24 pages) ,
- Quick install manual (18 pages) ,
- Quick install manual (15 pages)

Related Manuals for DataCard CR500


Summary of Contents for DataCard CR500
- Page 1 ® Datacard CR500™ Instant Issuance System Installation and Administrator’s Guide January 2018 Part No. 527516-001, Rev. B...
- Page 2 Any use, operation or repair you perform that is not in accordance with the information contained in this documentation is at your own risk. Trademark Acknowledgments Datacard is a registered trademark and service mark of Entrust Datacard Corporation in the United States and other countries. MasterCard is a registered trademark of MasterCard International Incorporated.
- Page 3 Safety The following basic safety tips are given to ensure safe installation, operation, and maintenance of Entrust Datacard™ equipment. • Connect equipment to a grounded power source. Do not defeat or bypass the ground lead. • Place the equipment on a stable surface (table) and ensure floors in the work area are dry and non-slip.
- Page 4 Regulatory Compliance EMC Compliance Notice To ensure compliance of the model RX10 retransfer printer to the radiated emissions requirements for class “A” Information Technology Equipment, be sure to use a shielded Ethernet cable when connecting to your network Notice for USA (FCC Notice) This equipment has been tested and found to comply with the limits for Class A computing devices, pursuant to Part 15 of FCC rules.
- Page 5 Simplified EU Declaration of Conformity Entrust Datacard Corporation declares that the following radio equipment: MXD, MX6000, MX6100, PB6500, MX2000, MX2100, SP55k, SP35, SP55, CP40, CP60, CP80, SP75, FP65, SR200, SR300, PX10, PX30, EX30, MPR3800, CR500f, MX1100, RX10, and PB1000 is in compliance with the Directive 2014/53/EU.
- Page 6 Notice for Australia This is a Class A product. In a domestic environment this product may cause radio interference, in which case the user may be required to take adequate measures. Notice for China (Simplified Chinese) 警告 此为 A 级产品,在生活环境中, 该产品可能会造成无线电干扰。...
- Page 7 Wash hands after handling. Entrust Datacard believes that its products are not harmful when used as designed. However, the above warning is made in compliance with the State of California Safe Drinking Water and Toxic Enforcement Act of 1986, which requires warning labels on products that may contain elements that the State of California considers harmful.
- Page 8 viii...
- Page 9 Revision Log Datacard CR500 Instant Issuance System ® Installation and Administrator’s Guide Revision Date Description of Changes June 2015 First release of this document January 2018 Updated printer information...
-
Page 11: Table Of Contents
The CR500 Card Printer ........ - Page 12 Verify Network Communication ..........41 Access Printer Manager .
- Page 13 Cleaning Supplies ............. 79 Replacement Parts .
-
Page 15: Chapter 1: Introduction
Administrator’s Guide, and an introduction to the CR500 card printer. About This Manual This manual provides detailed instructions for installing the CR500 card printer and for performing setup and administration tasks for the card printer. The tasks described in this manual are not normally performed by the personnel who print cards. -
Page 16: Related Documentation
CR500 card printer. Intended Audience This manual provides information for: The site manager responsible for setting up the CR500 printer and the system that uses the printer. The technical professionals who set up and maintain card printing for issuance sites. -
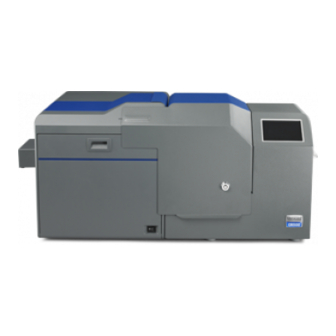
Page 17: The Cr500 Card Printer
The printer includes a multi-hopper that can be loaded with three different card types, and an exception card slide for printing single cards. The CR500 printer can print on one or both sides of the card. Magnetic stripe capability is standard, and the printer can be equipped with optional contact and contactless smart card capabilities. -
Page 18: Security Enclosure Touch Screen And Print Unit Front Panel
Caution: The print unit door contains a separate lock mechanism that could be locked or unlocked using the print unit front panel. Do not use this lock with the CR500 card printer. Do not use the print unit front panel menu to create a security key and lock the print unit door. -
Page 19: Cardwizard Issuance Software
CardWizard Issuance Software The CR500 card printer works with Datacard CardWizard issuance software to create and print cards. CardWizard software is a centralized application that processes card data and obtains the needed authorization from the financial system that manages customer accounts. - Page 20 Introduction...
-
Page 21: Chapter 2: Plan The Installation
Chapter 2: Plan the Installation This chapter provides step-by-step instructions for unpacking and choosing a location for the CR500 card printer. This chapter contains the following printer installation information and procedures: Packing List page 8 Unpack the Printer page 9 ... -
Page 22: Packing List
Packing List The shipping carton for the CR500 card printer contains the following items: CR500 Instant Issuance System CR500 Printer Quick Install Guide Security enclosure key (qty. 2) Card weights (qty. 3) Power cord for printer ... -
Page 23: Unpack The Printer
Do the following to open the shipping carton and remove the printer from the carton. Caution: The CR500 card printer weighs approximately 47 pounds (21.3 kg). Use care when removing the printer from the shipping carton. Ask another person for assistance. -
Page 24: Site Requirements
Select a suitable location for the printer using the following guidelines. Site Guidelines The performance of the CR500 printer is strongly influenced by the installation location. Install the unit in a location that meets the following criteria: Place the printer in a location that meets or exceeds ISO 14611-1 Class 8 cleanliness ... -
Page 25: Ventilation Clearance
Ventilation Clearance To ensure proper ventilation to the CR500 printer, maintain minimum clearance distances, as shown in the following illustrations. Ventilation holes are provided for the cooling fans at the bottom and sides of the print unit. Install the printer so that the sides are at least 7.9 inches (200 mm) away from the surrounding wall. -
Page 26: Printer Dimensions
Printer Dimensions The external printer dimensions are shown in the following illustrations. 21-3/8 in. (54.3 cm) Work Surface The printer requires a sturdy work surface at least 45 inches (1.143 m) wide and 19 inches (483 mm) deep. If you plan to use the bolt-down feature, you must be able to drill a hole through the work surface and you must have access to the underside of the work surface. -
Page 27: Security Lock
Network Security Requirements The CR500 printer requires use of the HTTPS protocol and does not recognize unsecured communications. If you are asked to specify a port, use port 9111 with browser access to Printer Manager. - Page 28 Plan the Installation...
-
Page 29: Chapter 3: Install The Printer
Chapter 3: Install the Printer This chapter provides step-by-step instructions for installing the CR500 card printer and connecting it to your network. This chapter contains information that describes: Printer Installation page 16 Use the Bolt-Down Feature page 16 ... -
Page 30: Printer Installation
Printer Installation To install the CR500 printer, place the printer on the selected work surface. Make sure that the work surface meets the requirements described in “Work Surface” page 12. Then, perform the following procedures: (Optional) Use the bolt-down feature to secure the printer to the work surface. - Page 31 Mark and drill the bolt- down hole here. 3-5/16 in. (83 mm) Drill the bolt hole. Place the printer over the drilled hole, aligning the front-right corner with the marked location from step CR500 Instant Issuance System Installation and Administrator’s Guide...
- Page 32 From under the work surface, insert the bolt through the washer, through the work surface, and through the spacer. Turn the bolt into the rivet nut on the printer base, turning until the bolt is snug but does not cause distortion. Install the Printer...
-
Page 33: Connect The Power Cords
Connect the round connector from the power supply to the back of the security enclosure (C). Connect the power cord to the power supply (D). Connect the other end of the security enclosure power cord to the facility power source (E). CR500 Instant Issuance System Installation and Administrator’s Guide... -
Page 34: Connect The Data Cable
Connect the Data Cable The data cable is an Ethernet cable that connects the card printer to your network. You must provide this cable. Connect one end of the data cable to the network port (A) on the back of the security enclosure. -
Page 35: Power On The Printer
Follow the instructions in the printer’s User’s Guide to load the ink ribbon and retransfer film cartridges. Install the ink ribbon cartridge in the printer. Do not install the retransfer film cartridge at this time. Close the print unit door. Continue with “Clean the Print Unit” page CR500 Instant Issuance System Installation and Administrator’s Guide... -
Page 36: Clean The Print Unit
Clean the Print Unit Run the single-sided, adhesive cleaning card (part no. 506277-001) through the newly-installed printer. This helps to ensure that the print unit internal rollers are clean before you begin to print cards. Do not clean the heated roller if it is hot. Allow the printer to cool, or run the cleaning card before the heated roller reaches operating temperature. - Page 37 Remove the protective paper from the single-sided cleaning card (C). Make sure to use the cleaning card with the part number 506277-001. Caution: The CR500 uses two different cleaning cards. Use the cleaning card with the label “Printer Only” and part number 506277-001 ...
- Page 38 If necessary, rotate the shuttle to the down position (E). Push the exception card slide in, past the resistance until it reaches the stop position (F). Install the Printer...
- Page 39 Power on the printer. After initializing, the message Film Search A1 displays on the print unit front panel (I). Press Menu to start the cleaning process. CR500 Instant Issuance System Installation and Administrator’s Guide...
- Page 40 Use the print unit front panel to run the cleaning card. The panel displays the Cleaning message. Press Enter. The Rollers OK? message displays. Press (Return). The Film Checking message displays, followed by Cleaning Start OK?. Press start the cleaning process. The print unit pulls the cleaning card into the print unit.
-
Page 41: Install The Concealed Output Stacker
Concealed Output Stacker To open the concealed output stacker, use the tab at the bottom of the card stacker and lift it up. Pull out the completed card(s). CR500 Instant Issuance System Installation and Administrator’s Guide... -
Page 42: Printer Configuration
Printer Configuration This section describes the tasks you need to perform to set up the printer in your network environment. Some tasks must be directed by your network support personnel. Perform these tasks in the order listed. 1. Activate the Printer page 29 2. -
Page 43: Activate The Printer
To activate the printer and enable printing: Obtain the activation code: If this is a new installation, call Entrust Datacard Technical Phone Support at 1-800-328-3996 with the printer serial number to obtain the activation code. The printer serial number is located on the back of the printer. It is a seven-character code beginning with AA and followed by five numbers. - Page 44 Enter the touch screen menus. Begin when Print job queue is deactivated displays on the touch screen. Press the U button (a) to make the menu available. Deactivated displays on line 1 and Menu available displays on line 2. Press E (b) to enter the menu system.
- Page 45 (g) to select the character and move the cursor to the right. NTER Repeat steps 7a and 7b until all characters are correct. The cursor should display to the right of the final digit. CR500 Instant Issuance System Installation and Administrator’s Guide...
- Page 46 If another message displays on line 2 of the touch screen, system activation failed. Repeat step 7. If activation fails again, contact Entrust Datacard Technical Phone Support at 1-800-328-3996. Press the U button (i) repeatedly until Ready displays on line 1 and the U button glows steady green.
-
Page 47: Set Or Retrieve The Printer Ip Address
Gateway address Power on the printer, if necessary. Begin when Ready displays on line 1 of the touch screen. The printer can require several minutes between power-on and the Ready status. CR500 Instant Issuance System Installation and Administrator’s Guide... - Page 48 Press the U button (a) to suspend the printer and make the menu system available. The U button turns amber and Menu available displays on line 2. Press E (b) to enter NTER the menu system. Maintenance displays on line 2. Press the down arrow key (c) twice. Configuration displays on line 2.
- Page 49 The current address method (DHCP or Static IP) displays on line 2. Use the up arrow or down arrow keys, if needed, to display Static IP on line 2. Press E (g). NTER IP Address displays on line 2. Press the Enter key (h). CR500 Instant Issuance System Installation and Administrator’s Guide...
- Page 50 Enter the assigned IP address obtained in step The IP address has four bytes, separated by periods. The values shown in the illustration are an example. Use the address values supplied by your network support personnel. Begin with the 3-digit byte on the left. Press the up arrow or down arrow keys (i) to enter the first byte.
- Page 51 Press E (n) to apply the static IP address, the subnet mask, and the gateway address. NTER Press the U button twice to exit the menu system. Continue with Set Up Network Access. CR500 Instant Issuance System Installation and Administrator’s Guide...
-
Page 52: Retrieve The Printer Ip Address
Retrieve the Printer IP Address You need to know the printer’s network IP address to access Printer Manager. If you need to retrieve the printer’s IP address, do the following. Power on the printer. Begin when Ready displays on line 1 of the touch screen. The printer can require several minutes between power-on and the Ready status. - Page 53 Serial Number displays on line 2. Press the down arrow key (e) three times. Network Status displays on line 2. Press E (f) to enter the Network Status submenu. NTER Address Mode displays on line 2. Press the down arrow key (g). CR500 Instant Issuance System Installation and Administrator’s Guide...
-
Page 54: Set Up Network Access
CardWizard issuance software. Define network permissions to the printer and to CardWizard software. Define the printer to CardWizard issuance software. Refer to the Datacard CardWizard Issuance Software and Card Printer Setup Guide for more information. -
Page 55: Verify Network Communication
The Printer Manager Welcome page displays, indicating that your printer and PC are communicating successfully. Refer to Chapter 4: "Using Printer Manager” for complete information about using Printer Manager. Continue with “Print a Test Card” page CR500 Instant Issuance System Installation and Administrator’s Guide... -
Page 56: Print A Test Card
Print a Test Card Print a test card to make sure that the printer is working properly. Open Printer Manager and log in as a WebAdmin user. Select TroubleShooting > Test Card. For a simple single-side card, make the following selections: For installation testing, use settings in the Card Front (Page 1) column (A). - Page 57 You can print additional test cards by selecting different options in Printer Manager. Refer to “Test Card” page If a card does not print, and no messages display, contact your network support personnel for assistance. CR500 Instant Issuance System Installation and Administrator’s Guide...
-
Page 58: Additional Setup Tasks
When you finish using Printer Manager, select Log Out > Log Out from the menu. For security, close the browser window after you log out. Additional Setup Tasks You might need to set up additional card features in Printer Manager, including: Magnetic stripe format ... -
Page 59: Set Up Cardwizard Issuance Software
Set Up CardWizard Issuance Software Refer to the Datacard CardWizard Issuance Software and Card Printer Setup Guide for complete information about how to define the CR500 card printer to CardWizard issuance software. Printer Use Guidelines With the card printer fully set up and operational, keep these guidelines in mind when using the printer: Keep the printer powered off and covered when not in use. - Page 60 Install the Printer...
-
Page 61: Chapter 4: Using Printer Manager
Chapter 4: Using Printer Manager This chapter describes how to use Print Manager to perform management tasks required to set up and operate the CR500 printer. Refer to the following sections for information about using Printer Manager: Start and Stop Printer Manager page 48 ... -
Page 62: Start And Stop Printer Manager
Start and Stop Printer Manager The CR500 printer includes Printer Manager, a web-based interface that displays information about the printer and provides setup and troubleshooting tools. Printer Manager is available through a web browser. Use a current browser, such as Internet Explorer, Firefox, or Chrome. - Page 63 Refer to “Printer Manager User Access Levels” page 48 for a description of the user access levels. Click Log In to display the Printer Manager Welcome page. CR500 Instant Issuance System Installation and Administrator’s Guide...
-
Page 64: Stop Printer Manager
For security, close the browser window after logging out. Printer Manager Settings The CR500 printer is shipped with recommended settings in Printer Manager. You may need to change these settings to customize the printer for your site. Printer Manager provides access to the printer settings. -
Page 65: Status Menu
Displays printer status information including the state, how long the printer has been on Seconds On (in seconds), the current conditions of the Current Conditions printer, and recent job status. Job Status CR500 Instant Issuance System Installation and Administrator’s Guide... - Page 66 Menu Option Description Purpose Supplies Ribbon Part Number Displays detailed ribbon information including the type of ribbon; identifying Ribbon Lot Code information, such as part number; and Ribbon Remaining percentage of ribbon remaining. Ribbon Max Length The information displays for each ribbon Ribbon Serial Number module, such as retransfer film and ink Ribbon Module...
-
Page 67: Printer Setting Menu
InternalLog Information, Debug, and Disabled. Use this option to change the current values or restore the default values. Refer to “ActivityLog Example” page 58 for an example of using the activity log. CR500 Instant Issuance System Installation and Administrator’s Guide... - Page 68 Menu Option Description Purpose Behavior (A) ActivityLogExternal Displays the default and current status of printer operation and control ActivityLogInternal methods. Use to change the current ContactAutoDetect information or restore the default ContactlessATRMode values. Refer to “Behavior” page 59 DPCL for more information on specifying DPCL2 Behavior settings.
- Page 69 secure the printer before transporting it. To re-enable an offline printer and set it back to online, you must enter the same password that was used to set it to offline. CR500 Instant Issuance System Installation and Administrator’s Guide...
-
Page 70: Communication
Communication Use the Printer Setting menu Communication options to specify the communication method used by the printer. Option Description EthAddressMethod Specify the communication method used by the printer. Options are DHCP and STATIC. EthDnsAddress1 These settings are not used at this time. EthDnsAddress2 EthDnsSearchSuffix EthGatewayAddress... -
Page 71: Activitylog
Write system information with the specified severity, and higher, to the activity log. A value of Information results in most events being written to the log. Default: Notice InternalLog Enable or disable the activity log on the printer. Default: Enabled CR500 Instant Issuance System Installation and Administrator’s Guide... - Page 72 ActivityLog Example The following example describes how to monitor the job state status to help troubleshoot a card production problem. Select ActivityLog from the Printer Setting menu. Set FilterJobStates to Error. Click Set Current to save your changes. Changes to the state of a job with this severity, or higher, will be written to the activity log. Using Printer Manager...
-
Page 73: Behavior
DPCL Enable or disable DPCL command access to the printer through the unsecured port. Default: Enabled DPCL2 Enable or disable DPCL2 command access to the printer through the unsecured port. Default: Enabled CR500 Instant Issuance System Installation and Administrator’s Guide... - Page 74 Option Description DPCL2Secure Enable or disable DPCL2 command access to the printer through the secure port. Default: Enabled DPCLSecure Enable or disable DPCL command access to the printer through the secure port. Default: Enabled Remake Enable or disable card remakes. If Remake is enabled and a print request fails, the print request is tried again with a new card.
-
Page 75: Vital Product Data
Caution: Do not disable the web server. If the web server is disabled, the printer cannot receive communications. To reverse this action, you must contact Entrust Datacard for a DPCL application. Vital Product Data The VitalProductData settings allow WebService access level users to change information about the printer or system in specific circumstances. -
Page 76: Print
Print Use the Printer Setting menu Print options to control the quality of the printing. Option Description SettingsGroupPurpose Describes the purpose of a settings group. Use it to state the reason for creating a settings group. ApplyBendRemedy Enable or disable the bend remedy. Caution: Do not enable if you are using smart cards. - Page 77 Sets the stop position of the card and changes the retransfer start position. Use this setting only if cards do not meet the ID-1 specification. Range: –7 to +7 special units (each unit moves the card about 0.17 mm.) Default: 0 special units CR500 Instant Issuance System Installation and Administrator’s Guide...
- Page 78 Option Description OffsetPrtX Sets the position of printing on the card in the short direction. Range: –7 to +7 special units (each unit moves the card about 0.085 mm.) Default: 0 special units If the image is not centered on the card in the short direction, contact your service provider for assistance to change this setting.
- Page 79 Enable ResinBlackMode to improve print quality if thin lines or small black text is blurred. This slows the print speed. Disable ResinBlackMode to improve print speed when fine black printing is not used. CR500 Instant Issuance System Installation and Administrator’s Guide...
- Page 80 Option Description RetransferRollerTemp Increases or decreases the temperature of the retransfer roller. Range: –2 to +2 special units Default: 0 special units Increase this setting if the retransfer results in concave cards. Decrease the setting to reduce wrinkling of the retransfer film or to ...
-
Page 81: Pick
Sets the linear offset to pick a card from hopper 3. Range: –500 to 500 steps Default: 0 Hopper3RotationOffset Sets the rotational movement offset to pick a card from hopper 3. Range: –10 to 10 steps Default: 0 CR500 Instant Issuance System Installation and Administrator’s Guide... -
Page 82: Magstripegeneral
MagStripeGeneral Magnetic stripe settings are available for WebAdmin and WebService access-level users to set up basic magnetic stripe options. Option Description Coercivity Select the coercivity setting that matches the cards you are using. Coercivity measures the resistance of magnetic material to the removal of encoded data. -
Page 83: Update Password
Caution: Do not change the WebService password. Set Job Queue State Enter or select values prior to shipping the printer or system to or from repair facilities. Refer to “Set Job Queue State” page 55 for more information. CR500 Instant Issuance System Installation and Administrator’s Guide... -
Page 84: Troubleshooting Menu
TroubleShooting Menu The options on the TroubleShooting menu allow you to print test cards, manage the audit log, and reset card counts. Menu Option Description Purpose Test Card (A) Input Hopper Number Select the options to print one or more test cards. -
Page 85: Test Card
TestPatternGrid: Used to print a full K panel test card. TestPatternManufactureA–E: Used only during manufacturing setup. Copies Enter the number of test cards to print for each test, from 1 to 10. Default: 1 CR500 Instant Issuance System Installation and Administrator’s Guide... - Page 86 Option Description Park Smart Card Parks the test card in the smart card bay. The test does not transmit any data, but is used to test the movement of the card into, and out of, the bay. Park Position Select the smart card park position from the following: ContactSmartCard or ContactlessSmartCard.
-
Page 87: Maintenance Menu
(You must be signed on with WebService-level access to download the printer settings used by Printer Manager. Contact your service provider for assistance.) Click Browse and select the file to upload. Click Upload File. CR500 Instant Issuance System Installation and Administrator’s Guide... -
Page 88: Log Out Menu
Printer Manager updates are included with firmware updates. A separate stand-alone utility, the Card Printer Firmware Update Utility Program, is used to update the printer firmware. The update utility is available as a separate download on the Entrust Datacard website. Using Printer Manager... -
Page 89: Chapter 5: Supplies And Parts
Chapter 5: Supplies and Parts This chapter describes the recommended supplies and replacement parts to use with the CR500 card printer. You can order the following supplies and replacement parts: Ink Ribbon and Retransfer Film page 76 Cards page 77 ... -
Page 90: Ink Ribbon And Retransfer Film
Ink Ribbon and Retransfer Film You can order replacement ink ribbon and retransfer film. Ink Ribbon Color print ribbons are designed for full-color card printing. The ribbons use the following color panels: Y=yellow, M=magenta, C=cyan, and K=black. The following ink ribbon is available: Type Part Number Panel Sets/Roll... -
Page 91: Cards
Cards This section describes the specifications and quality guidelines for card stock to use with the CR500 printer. For best results, use high-quality card stock that meets the specifications and recommendations described in this section. Card production success depends on the card manufacturer and card construction. -
Page 92: Card Handling
Card Handling These guidelines apply to unprinted cards. Any debris or particles on blank card stock can reduce card quality and damage the system. Grease or oils, such as oils from your fingers, also reduce card quality. Keep cards completely ... -
Page 93: Cleaning Supplies
Cleaning roller unit 534717-101 Replacement cleaning roller unit Printer fan filter 534717-134 Replacement printer fan filter Gloves 510034-001 box of 100 ESD-safe nitrile disposable card inspection gloves CR500 Instant Issuance System Installation and Administrator’s Guide... -
Page 94: Replacement Parts
Replacement Parts The following replacement parts are available: Ink Ribbon Cartridge 534717-144 (orange) Retransfer Film Cartridge 534717-145 (green) Card Weight 504416-001 Power Supply 810499-002 Power Cords Contact your local service provider for the correct power cord for your location. Supplies and Parts... -
Page 95: Appendix A: Print Unit Front Panel Menu And Messages
This appendix describes the LCD menu system accessed through the print unit front panel, and the messages that may display on the front panel. This appendix contains the: Front Panel Menu Structure page A-2 Front Panel Menu Description page A-3 CR500 Instant Issuance System Installation and Administrator’s Guide... -
Page 96: Front Panel Menu Structure
Front Panel Menu Structure The following chart shows the structure of the print unit front panel menu. Some menu items may not display, depending on the options installed in your printer. Do not use the print unit front panel menu to change printer settings unless instructed to do so. -
Page 97: Front Panel Menu Description
Transport Mode. Please, power off displays on the print unit front panel. Transport mode is canceled when the printer is powered back Refer to the printer’s User’s Guide for information about preparing the printer for transport. CR500 Instant Issuance System Installation and Administrator’s Guide... - Page 98 Media Ink Type: Displays the ink ribbon and retransfer film that are loaded in the printer. YMCK The CR500 printer supports only YMCK-PO ink YMCK-PO ribbon. (The printer detects the type of ink ribbon; it YMCKK cannot be set.) YMCK-UV ...
- Page 99 Displays the value set using Printer Manager. Refer “Behavior” page 59 for information on specifying the power saver mode. Up to 60 minutes HR Control: Displays the value set using Printer Manager. CR500 Instant Issuance System Installation and Administrator’s Guide...
- Page 100 Off. The sound can indicate an error or can confirm a menu selection. Unit No.: DO NOT USE. The Unit No defaults to 1 for the CR500 printer. No. 1–No. 10 Print Unit Front Panel Menu and Messages...
- Page 101 “MagStripeGeneral” page 68 for more Loco information. Hico Retry Count: Displays the value set using Printer Manager. Refer “MagStripeGeneral” page 68 for information 0, 1, 2, 3 on setting the retry value. CR500 Instant Issuance System Installation and Administrator’s Guide...
- Page 102 Menu Display Settings Function Network Printer Name DO NOT USE Host IF: This must be set to USB. IPv4 DO NOT USE IPv6 DO NOT USE Session Time Out DO NOT USE MAC Address DO NOT USE IPSec Mode DO NOT USE IPSec Type DO NOT USE...
-
Page 103: Appendix B: Printer Specifications
Appendix B: Printer Specifications This appendix describes the operating environment recommended for the CR500 card printer. This appendix contains: Operating Specifications page B-2 Operating Environment page B-2 Storage Environment page B-3 CR500 Instant Issuance System Installation and Administrator’s Guide... -
Page 104: Operating Specifications
Operating Specifications The CR500 printer operates under the following specifications. Recording method Dye sublimation retransfer Feed format Automatic feed Recording density 300 dpi Reproduction 256 levels each yellow (Y), magenta (M), and cyan (C); gradations two for black (K) Printing time... -
Page 105: Storage Environment
Storage Environment If you are storing the CR500 card printer with no ink ribbon or retransfer film installed, use the following storage environment guidelines. For ink ribbon and retransfer film storage requirements, refer to “Supply Storage Guidelines” page Storage 5°–131°F (-15°–55°C) - Page 106 Printer Specifications...
Need help?
Do you have a question about the CR500 and is the answer not in the manual?
Questions and answers