TP-Link TL-WR902AC User Manual
Ac750 wi-fi travel router
Hide thumbs
Also See for TL-WR902AC:
- User manual (269 pages) ,
- Quick start manual (6 pages) ,
- Quick installation manual (2 pages)
Table of Contents
Advertisement
Advertisement
Table of Contents

Related Manuals for TP-Link TL-WR902AC


Summary of Contents for TP-Link TL-WR902AC
- Page 1 User Guide AC750 Wi-Fi Travel Router TL-WR902AC REV3.0.0 1910012191...
-
Page 2: Table Of Contents
Contents About This Guide ......................1 Chapter 1. Get to Know About Your Router ......2 1. - Page 3 4. 3. 4. Wireless MAC Filtering ..........35 4.
- Page 4 4. 16. 5. Backup & Restore ........... 75 4.
- Page 5 5. 8. Log Out..............107 Chapter 6.
- Page 6 7. 5. 2. DHCP Client List ........... .136 7.
- Page 7 8. 6. 4. User Accounts ............179 8.
-
Page 8: About This Guide
The Quick Installation Guide can be found where you find this guide or inside the package of the router. Specifications can be found on the product page at http://www.tp-link.com. A Technical Support Forum is provided for you to discuss our products at http://forum.tp-link.com. -
Page 9: Chapter 1. Get To Know About Your Router
Chapter Get to Know About Your Router This chapter introduces what the router can do and shows its appearance. It contains the following sections: • Product Overview • Appearance... -
Page 10: Product Overview
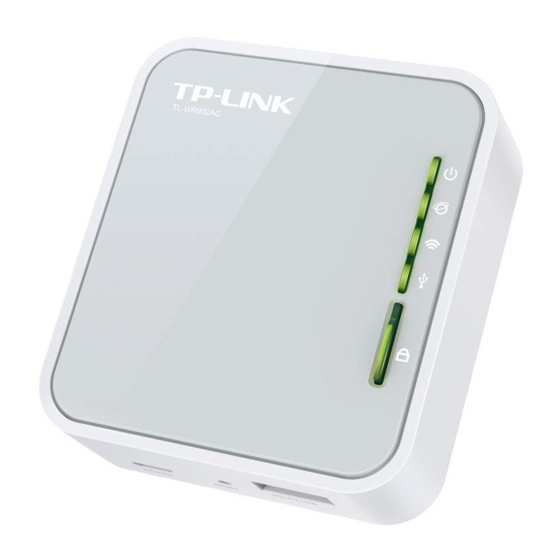
1. 1. Product Overview To meet the wireless needs of almost any situation you might encounter, the TP-Link portable router, with multiple operating modes, is designed for home and travel use. The portable size of the router means that you can put it in your pocket and take it with you wherever you go. - Page 11 Chapter 1 Get to Know About Your Router Status Indication The light stays on for 5 minutes when a WPS connection is established, then goes off. (WPS) Blinking WPS connection is in progress. No WPS connection is established. Port and Button Description Item Description Mode Switch...
-
Page 12: Chapter 2. Connect The Hardware
Chapter Connect the Hardware This chapter contains the following sections: • Position Your Router • Connect Your Router... -
Page 13: Position Your Router
Chapter 2 Connect the Hardware 2. 1. Position Your Router • The router should not be located where it will be exposed to moisture or excessive heat. • Place the router in a location where it can be connected to the various devices as well as to a power source. -
Page 14: Access Point Mode
Chapter 2 Connect the Hardware 2. 2. 2. Access Point Mode Create a wireless network from an Ethernet connection. This mode is suitable for dorm rooms or homes where there’s already a wired router but you need a wireless network. 1. -
Page 15: Hotspot Router Mode
Chapter 2 Connect the Hardware 1. Switch the operating mode to AP/Rng Ext/Client and plug the router into an electrical outlet within the signal range of your host AP. 2. Connect your device to the router wirelessly or via an Ethernet cable. The Wi-Fi network name and password are on the router’s label. -
Page 16: Chapter 3. Set Up Internet Connection Via Quick Setup Wizard
Chapter Set Up Internet Connection Via Quick Setup Wizard This chapter introduces how to connect your router to the internet via the web-based Quick Setup Wizard. It contains the following sections: • Log In to the Router • Configure the Router... -
Page 17: Log In To The Router
Chapter 3 Set Up Internet Connection Via Quick Setup Wizard 3. 1. Log In to the Router With a web-based utility, it is easy to configure and manage the router. The web-based utility can be used on any Windows, Macintosh or UNIX OS with a web browser, such as Microsoft Internet Explorer, Mozilla Firefox or Apple Safari. - Page 18 Chapter 3 Set Up Internet Connection Via Quick Setup Wizard 2. In this case, we take Dynamic IP for instance. Please select to clone the mac address or not and click Next. For other connection types, please enter the parameters provided by your ISP, and then click Next.
-
Page 19: Access Point Mode
Chapter 3 Set Up Internet Connection Via Quick Setup Wizard 5. Click Save to apply the settings. 3. 2. 2. Access Point Mode 1. Select Access Point for the operation mode of the router. 2. Either customize your Wireless Network Name Wireless Password for the 2.4GHz/5GHz wireless network or keep the default ones, and then click Next. -
Page 20: Range Extender Mode
Chapter 3 Set Up Internet Connection Via Quick Setup Wizard 4. Click Finish to apply the settings. 3. 2. 3. Range Extender Mode 1. Select Range Extender for the operation mode of the router. 2. Click Connect to connect to the host network in the AP List page. -
Page 21: Client Mode
Chapter 3 Set Up Internet Connection Via Quick Setup Wizard 4. Select the LAN IP type of the router or leave the default settings Smart IP for most cases, and then click Next. 5. Click Finish to apply the settings. 6. -
Page 22: Hotspot Router Mode
Chapter 3 Set Up Internet Connection Via Quick Setup Wizard 3. Enter the password of the host network. 4. Select the LAN IP type of the router or leave the default settings Smart IP for most cases, and then click Next. 5. - Page 23 Chapter 3 Set Up Internet Connection Via Quick Setup Wizard 2. Click Connect to connect to the public Wi-Fi in the AP List page. 3. Enter the password of the public Wi-Fi in the Password field of the Client Setting section.
- Page 24 Chapter 3 Set Up Internet Connection Via Quick Setup Wizard 4. Click Finish to apply the settings.
-
Page 25: Chapter 4. Configure The Router In Wireless Router Mode
Chapter Configure the Router in Wireless Router Mode This chapter presents how to configure the various features of the router working as a standard wireless router. It contains the following sections: • Status • Access Control • Network • Advanced Routing •... -
Page 26: Status
Chapter 4 Configure the Router in Wireless Router Mode 4. 1. Status 1. Visit http://tplinkwifi.net, and log in with the username and password you set for the router. 2. Go to Status. You can view the current status information of the router. •... -
Page 27: Network
Chapter 4 Configure the Router in Wireless Router Mode • IP Address - The LAN IP address of the router. • Subnet Mask - The subnet mask associated with the LAN IP address. • Wireless 2.4GHz/5GHz - This field displays the basic information or status of the wireless function, and you can configure them on the Wireless 2.4GHz/5GHz >... - Page 28 Chapter 4 Configure the Router in Wireless Router Mode Click Renew to renew the IP parameters from your ISP. Click Release to release the IP parameters. • MTU(Bytes) - The normal MTU (Maximum Transmission Unit) value for most Ethernet networks is 1500 Bytes. It is not recommended that you change the default MTU size unless required by your ISP.
- Page 29 Chapter 4 Configure the Router in Wireless Router Mode • IP Address - Enter the IP address in dotted-decimal notation provided by your ISP. • Subnet Mask - Enter the subnet mask in dotted-decimal notation provided by your ISP. Normally 255.255.255.0 is used as the subnet mask. •...
- Page 30 Chapter 4 Configure the Router in Wireless Router Mode • PPP Username/Password - Enter the username and password provided by your ISP. These fields are case-sensitive. • Confirm Password - Enter the Password provided by your ISP again to ensure the password you entered is correct.
- Page 31 Chapter 4 Configure the Router in Wireless Router Mode • IGMP Proxy - Select to enable the IGMP Proxy feature if the IPTV service provided by the ISP is IGMP techonology-based. • Use IP address specified by ISP - If your ISP does not automatically assign IP addresses to the router, please select Use IP address specified by ISP and enter the IP address...
- Page 32 Chapter 4 Configure the Router in Wireless Router Mode your internet connection active all the time, please enter 0 in the Max Idle Time field. Otherwise, enter the number of minutes you want to have elapsed before your internet access disconnects. •...
- Page 33 Chapter 4 Configure the Router in Wireless Router Mode • MTU(Bytes) - The default MTU size is 1480 bytes. It is not recommended that you change the default MTU size unless required by your ISP. • IGMP Proxy - Select to enable the IGMP Proxy feature if the IPTV service provided by the ISP is IGMP techonology-based.
-
Page 34: G/4G Settings
Chapter 4 Configure the Router in Wireless Router Mode • Username/Password - Enter the username and password provided by your ISP. These fields are case-sensitive. • Confirm Password - Enter the Password provided by your ISP again to ensure the password you entered is correct. - Page 35 Chapter 4 Configure the Router in Wireless Router Mode • Location - Please select the location where you are enjoying the 3G/4G service. • Mobile ISP - Please select the ISP providing the 3G/4G service. The router will automatically fill in the default Dial Number and APN of that ISP. •...
-
Page 36: Lan
If your 3G/4G USB modem cannot be identified by the router, please follow the steps below to have furtuer configuration. 1. Download a most recent 3G/4G USB modem configuration file from our website www.tp-link.com. 2. Visit http://tplinkwifi.net, and log in with the username and password you set for the router. -
Page 37: Mac Clone
Chapter 4 Configure the Router in Wireless Router Mode • MAC Address - The physical address of the LAN ports. The value can not be changed. • IP Address - Enter the IP address in dotted-decimal notation of your router (factory default - 192.168.0.254). -
Page 38: Wireless
Chapter 4 Configure the Router in Wireless Router Mode 4. 3. Wireless 4. 3. 1. Basic Settings 1. Visit http://tplinkwifi.net, and log in with the username and password you set for the router. 2. Go to Wireless 2.4GHz/5GHz > Basic Settings. - Page 39 Chapter 4 Configure the Router in Wireless Router Mode 1. Visit http://tplinkwifi.net, and log in with the username and password you set for the router. 2. Go to Wireless 2.4GHz/5GHz > WPS. 3. Follow one of the following three methods to connect your client device to the router’s Wi-Fi network.
-
Page 40: Wireless Security
Chapter 4 Configure the Router in Wireless Router Mode 2. Select Enter new device PIN, enter your client device’s current PIN in the filed and click Connect. 3. A success message will appear on the WPS page if the client device has been successfully added to the router’s network. - Page 41 Chapter 4 Configure the Router in Wireless Router Mode • Disable Wireless Security - The wireless security function can be enabled or disabled. If disabled, wireless clients can connect to the router without a password. It’s strongly recommended to choose one of the following modes to enable security. •...
-
Page 42: Wireless Mac Filtering
Chapter 4 Configure the Router in Wireless Router Mode • Type - The default setting is Auto, which can select Shared Key or Open System authentication type automatically based on the wireless client’s capability and request. • WEP Key Format - Hexadecimal and ASCII formats are provided here. -
Page 43: Wireless Advanced
Chapter 4 Configure the Router in Wireless Router Mode 1 ) Enter the MAC address 00:0A:EB:B0:00:0B/00:0A:EB:00: 07:5F in the MAC Address field. 2 ) Enter Client A/B in the Description field. 3 ) Leave the status as Enabled. 4 ) Click Save and click Back. - Page 44 Chapter 4 Configure the Router in Wireless Router Mode • Transmit Power - Select High, Middle which you would like to specify for the router. High is the default setting and recommended. • Beacon Interval - Enter a value between 40-1000 milliseconds for Beacon Interval here.
-
Page 45: Wireless Statistics
Chapter 4 Configure the Router in Wireless Router Mode 4. 3. 6. Wireless Statistics 1. Visit http://tplinkwifi.net, and log in with the username and password you set for the router. 2. Go to Wireless 2.4GHz/5GHz > Wireless Statistics to check the data packets sent and received by each client device connected to the router. -
Page 46: Dhcp
Chapter 4 Configure the Router in Wireless Router Mode • Guest Network Isolation - If enabled, one guest can not communicate with another. • Guest Network Bandwidth Control - If enabled, the Guest Network Bandwidth Control rules will take effect. •... -
Page 47: Dhcp Settings
Chapter 4 Configure the Router in Wireless Router Mode 4. 5. 1. DHCP Settings 1. Visit http://tplinkwifi.net, and log in with the username and password you set for the router. 2. Go to DHCP > DHCP Settings. 3. Specify DHCP server settings and click Save. •... -
Page 48: Address Reservation
Chapter 4 Configure the Router in Wireless Router Mode 2. Go to DHCP > DHCP Client List to view the information of the clients connected to the router. • Client Name - The name of the DHCP client. • MAC Address - The MAC address of the DHCP client. -
Page 49: Usb Settings
Chapter 4 Configure the Router in Wireless Router Mode 4 ) Click Save. 4. 6. USB Settings You can insert a USB drive to share files among users on the LAN, access the USB drive remotely on the internet and enjoy videos and photos stored in the USB drive. 4. - Page 50 Chapter 4 Configure the Router in Wireless Router Mode 1 ) Click in the top left corner of the desktop and go to Connect Server. 2 ) Type the server address smb://tplinkwifi.net/volume1. Note: Here we take volume1 for example. 3 ) Click Connect. 4 ) When prompted, select the Guest radio box (If you have set up...
-
Page 51: Ftp Server
Chapter 4 Configure the Router in Wireless Router Mode a shared folder which does not allow anonymous login, uncheck the box to disable this function. And Folder Table will be displayed as shown below. • Share Name - This folder’s display name. •... - Page 52 Chapter 4 Configure the Router in Wireless Router Mode 1. Visit http://tplinkwifi.net, and log in with the username and password you set for the router. 2. Go to USB Settings > Server. 3. Click Add New Folder. 4. Specify a name for the folder to be shared in the Share Name field.
- Page 53 Chapter 4 Configure the Router in Wireless Router Mode Open the Windows Explorer (or go to Computer), type the server address ftp://tplinkwifi.net in the address bar, enter a username and password and then press [Enter]. Note: Here we take Windows 8 as an example. Windows 1 ) Click in the top left corner of the desktop and go to...
-
Page 54: Media Server
Chapter 4 Configure the Router in Wireless Router Mode 1 ) Open the Windows Explorer (or go to Computer, only for Windows users) or open a web browser. 2 ) Type the server address in the address bar: Type in ftp://<WAN IP address of the router>:<port number>... - Page 55 Chapter 4 Configure the Router in Wireless Router Mode 5. Click Add New Folder. Specify a name for the folder to be shared in the Share Name field. And select the folder you want to share. 6. Click Apply. ¾ To access the USB disk: 1.
-
Page 56: User Accounts
Chapter 4 Configure the Router in Wireless Router Mode • Go to Computer > Network, and click the Media Server Name in the Media Devices section. Note: Here we take Windows 8 as an example. Windows • Use a third-party DLNA-supported player. Tablet 4. -
Page 57: Port Forwarding
LAN and realize some specific functions. The TP-Link router includes four forwarding rules. If two or more rules are set, the priority of implementation from high to low is Virtual Servers, Port Triggering, UPNP and DMZ. -
Page 58: Port Triggering
Chapter 4 Configure the Router in Wireless Router Mode Personal Website Router WAN: 218.18.232.154 Home 1. Set your PC to a static IP address, for example 192.168.0.100. 2. Visit http://tplinkwifi.net, and log in with the username and password you set for the router. 3. -
Page 59: Dmz
Chapter 4 Configure the Router in Wireless Router Mode ports will be opened for subsequent connections. The router can record the IP address of the host. When the data from the internet return to the external ports, the router can forward them to the corresponding host. Port triggering is mainly applied to online games, VoIPs, video players and common applications including MSN Gaming Zone, Dialpad, Quick Time 4 players and more. -
Page 60: Upnp
Chapter 4 Configure the Router in Wireless Router Mode Make the home PC join the internet online game without port I want to: restriction. example, due to some port restriction, when playing the online games, you can log in normally but cannot join a team with other players. -
Page 61: Security
Chapter 4 Configure the Router in Wireless Router Mode ports allowing the following data penetrating the NAT to transmit. Therefore, you can play Xbox online games without a hitch. Xbox Router If necessary, you can follow the steps to change the status of UPnP. 1. - Page 62 Chapter 4 Configure the Router in Wireless Router Mode • Firewall - A firewall protects your network from internet attacks. • SPI Firewall - SPI (Stateful Packet Inspection, also known as dynamic packet filtering) helps to prevent cyber attacks by tracking more state per session. It validates that the traffic passing through the session conforms to the protocol.
-
Page 63: Advanced Security
Chapter 4 Configure the Router in Wireless Router Mode into the gateway to support address and port translation for certain application layer “control/data” protocols such as FTP, TFTP, H323 etc. • FTP ALG - To allow FTP clients and servers to transfer data across NAT, keep the default Enable. -
Page 64: Local Management
Chapter 4 Configure the Router in Wireless Router Mode • ICMP-FLOOD Packets Threshold (5~3600) - The default value is 50. Enter a value between 5 ~ 3600. When the number of the current ICMP-FLOOD packets is beyond the set value, the router will startup the blocking function immediately. •... -
Page 65: Remote Management
Chapter 4 Configure the Router in Wireless Router Mode 1 ) Select Only the PCs listed can browse the built-in web pages to perform Administrator tasks. 2 ) Enter the MAC address of each PC separately. The format of the MAC address is XX:XX:XX:XX:XX:XX (X is any hexadecimal digit). -
Page 66: Parental Controls
For example, you want the children’s PC with the MAC address 00:11:22:33:44:AA can access www.tp-link.com on Saturday only while the parent PC with the MAC address 00:11:22:33:44:BB is without any restriction. -
Page 67: Access Control
If you want to restrict the internet activities of host with MAC address 00:11:22:33:44:AA on the LAN to access www.tp-link.com only, please follow the steps below: How can I 1. Visit http://tplinkwifi.net, and log in with the username and do that? password you set for the router. - Page 68 (e.g. target_1) for the target in the Target Description field and enter the URL address, either the full name or the keywords (for example TP-Link) in the Add URL Address field and click Add. Note: Any domain name with keywords in it (e.g. www.tp-link.com) will be blocked or allowed.
- Page 69 Chapter 4 Configure the Router in Wireless Router Mode 3 ) Click Save. 5. Go to Access Control > Rule and add a new access control rule. 1 ) Click New. 2 ) Give a name for the rule in the Description field.
-
Page 70: Advanced Routing
Chapter 4 Configure the Router in Wireless Router Mode Done! Now only the specific host(s) can visit the target(s) within the scheduled time period. 4. 11. Advanced Routing Static Routing is a form of routing that is configured manually by a network administrator or a user by adding entries into a routing table. -
Page 71: System Routing Table
Chapter 4 Configure the Router in Wireless Router Mode • Interface - It is empty by default. Please select a connection from the drop- down list if the Gateway is left empty or is not on the same network segment as LAN/WAN interface. - Page 72 Chapter 4 Configure the Router in Wireless Router Mode The values you configure for the Egress Bandwidth and Ingress Bandwidth should be less than 100,000Kbps. For optimal control of the bandwidth, please select the right Line Type and consult your ISP for the total egress and ingress bandwidth. •...
-
Page 73: Ip&Mac Binding
Chapter 4 Configure the Router in Wireless Router Mode 3. Click Save. 4. 13. IP&MAC Binding IP & MAC Binding, namely, ARP (Address Resolution Protocol) Binding, is used to bind a network device’s IP address to its MAC address. This will prevent ARP spoofing and other ARP attacks by denying network access to a device with a matching IP address in the ARP list, but with an unrecognized MAC address. -
Page 74: Arp List
Chapter 4 Configure the Router in Wireless Router Mode 2. Enter the MAC address and IP address and select the Bind checkbox. 3. Click Save. ¾ To modify or delete an existing entry: 1. Find the desired entry in the table. 2. - Page 75 Chapter 4 Configure the Router in Wireless Router Mode Comexe DDNS If the dynamic DNS Service Provider you select is www.comexe.cn, the following page will appear. To set up for DDNS, follow these instructions: 1. Enter the Domain Name received from your dynamic DNS service provider. 2.
- Page 76 Chapter 4 Configure the Router in Wireless Router Mode To set up for DDNS, follow these instructions: 1. Enter the Username for your DDNS account. 2. Enter the Password for your DDNS account. 3. Enter the Domain Name you received from dynamic DNS service provider here. 4.
-
Page 77: Ipv6
Chapter 4 Configure the Router in Wireless Router Mode 2. Enter the Password for your DDNS account. 3. Enter the Domain Name you received from dynamic DNS service provider. 4. Click Login. 5. Click Save. • Connection Status - The status of the DDNS service connection is displayed here. •... - Page 78 Chapter 4 Configure the Router in Wireless Router Mode 3 ) PPPoEv6: By default, the router uses the IPv4 account to connect to the IPv6 server. Click Advance to input further information if your ISP requires. Note: If your ISP provides two separate accounts for the IPv4 and IPv6 connections, please untick the PPPoE same session with IPv4 connection checkbox and manually enter the username and password for the IPv6 connection.
-
Page 79: System Tools
Chapter 4 Configure the Router in Wireless Router Mode • Start IPv6 Address - Enter a value for the DHCPv6 server to start with when issuing IPv6 addresses. • End IPv6 Address - Enter a value for the DHCPv6 server to end with when issuing IPv6 addresses. -
Page 80: Diagnostic
Chapter 4 Configure the Router in Wireless Router Mode ¾ To set time manually: 1. Select your local time zone. 2. Enter the Date in Month/Day/Year format. 3. Enter the Time in Hour/Minute/Second format. 4. Click Save. ¾ To set time automatically: 1. - Page 81 In this case, ensure that the domain name you are specifying can be resolved by using Domain Name System (DNS) queries. • IP address/Domain name - Enter the destination IP address (such as 192.168.0.1) or Domain name (such as www.tp-link.com). • Pings Count - The number of Ping packets for a Ping connection. •...
-
Page 82: Firmware Upgrade
4. 16. 3. Firmware Upgrade TP-Link is dedicated to improving and richening the product features, giving users a better network experience. We will release the latest firmware at TP-Link official website. You can download the latest firmware file from the... -
Page 83: Reboot
Chapter 4 Configure the Router in Wireless Router Mode 1. Visit http://tplinkwifi.net, and log in with the username and password you set for the router. 2. Go to System Tools > Backup & Restore. ¾ To backup configuration settings: Click Backup to save a copy of the current settings in your local computer. -
Page 84: Password
Chapter 4 Configure the Router in Wireless Router Mode 4. 16. 7. Password 1. Visit http://tplinkwifi.net, and log in with the username and password you set for the router. 2. Go to System Tools > Password, and you can change the factory default username and password of the router. -
Page 85: Statistics
Chapter 4 Configure the Router in Wireless Router Mode • Clear Log - All the logs will be deleted from the router permanently, not just from the page. • Save Log - Click to save all the logs in a txt file. •... -
Page 86: Log Out
Chapter 4 Configure the Router in Wireless Router Mode The total number of packets received and transmitted in the last Packets Statistic interval Packets seconds. Bytes The total number of bytes received and transmitted in the last Packets Statistic interval seconds. The number of the ICMP packets transmitted to WAN per second at the specified Packets ICMP Tx Current... -
Page 87: Chapter 5. Configure The Router In Access Point Mode
Chapter Configure the Router in Access Point Mode This chapter presents how to configure the various features of the router working as an access point. It contains the following sections: • Status • Operation Mode • Network • Wireless • DHCP •... -
Page 88: Status
Chapter 5 Configure the Router in Access Point Mode 5. 1. Status 1. Visit http://tplinkwifi.net, and log in with the username and password you set for the router. 2. Go to Status. You can view the current status information of the router in Access Point Mode. -
Page 89: Operation Mode
Chapter 5 Configure the Router in Access Point Mode • Wireless 2.4GHz/5GHz - This field displays the basic information or status of the wireless function, and you can configure them on the Wireless 2.4GHz/5GHz > Basic Settings page. • Operation Mode - The current operation mode of the router. -
Page 90: Wireless
Chapter 5 Configure the Router in Access Point Mode • LAN Type - Either select Smart IP(DHCP) to get IP address from DHCP server, or Static to configure IP address manually. • MAC Address - The physical address of the LAN port. The value can not be changed. •... -
Page 91: Wps
Chapter 5 Configure the Router in Access Point Mode • Wireless Network Name - Enter a string of up to 32 characters. The default SSID is TP-Link_XXXX (XXXX indicates the last unique four numbers of each router’s MAC address). It is strongly recommended that you change your network name (SSID). This value is case-sensitive. - Page 92 Chapter 5 Configure the Router in Access Point Mode 3. Within two minutes, press the WPS button on your client device. 4. A success message will appear on the WPS page if the client device has been successfully added to the router’s network. Method TWO: Enter the Client’s PIN 1.
-
Page 93: Wireless Security
Chapter 5 Configure the Router in Access Point Mode 5. 4. 3. Wireless Security 1. Visit http://tplinkwifi.net, and log in with the username and password you set for the router. 2. Go to Wireless 2.4GHz/5GHz > Wireless Security. 3. Configure the security settings of your 2.4GHz/5GHz wireless network and click Save. •... -
Page 94: Wireless Mac Filtering
Chapter 5 Configure the Router in Access Point Mode • Version - Select Auto, or WPA2. • Encryption - Select Auto, TKIP or AES. • Radius Server IP - Enter the IP address of the Radius server. • Radius Port - Enter the port that Radius server used. -
Page 95: Wireless Advanced
Chapter 5 Configure the Router in Access Point Mode 1. Visit http://tplinkwifi.net, and log in with the username and password you set for the router. can I do that? 2. Go to Wireless 2.4GHz/5GHz > Wireless MAC Filtering. 3. Click Enable to enable the Wireless MAC Filtering function. - Page 96 Chapter 5 Configure the Router in Access Point Mode 3. Configure the advanced settings of your wireless network and click Save. Note: If you are not familiar with the setting items on this page, it’s strongly recommended to keep the provided default values;...
-
Page 97: Wireless Statistics
Chapter 5 Configure the Router in Access Point Mode • Enable WMM - WMM function can guarantee the packets with high-priority messages being transmitted preferentially. It is strongly recommended to enable this function. 5. 4. 6. Wireless Statistics 1. Visit http://tplinkwifi.net, and log in with the username and password you set for the router. -
Page 98: Dhcp
Chapter 5 Configure the Router in Access Point Mode • Rate - The Throughput unit. • Run Time - How long this function is running. • Transmit - Wireless transmit rate information. • Receive - Wireless receive rate information. Click Start/Stop to start or stop wireless throughput monitor. -
Page 99: Dhcp Client List
Chapter 5 Configure the Router in Access Point Mode • DHCP Server - Enable or disable the DHCP server. If disabled, you must have another DHCP server within your network or else you must configure the computer manually. • Start IP Address - Specify an IP address for the DHCP Server to start with when assigning IP addresses. -
Page 100: Address Reservation
Chapter 5 Configure the Router in Access Point Mode • Client Name - The name of the DHCP client. • MAC Address - The MAC address of the DHCP client. • Assigned IP - The IP address that the outer has allocated to the DHCP client. •... -
Page 101: Usb Settings
Chapter 5 Configure the Router in Access Point Mode 5. 6. USB Settings You can insert a USB drive to share files among users on the LAN, access the USB drive remotely on the internet and enjoy videos and photos stored in the USB drive. 5. - Page 102 Chapter 5 Configure the Router in Access Point Mode 1 ) Click in the top left corner of the desktop and go to Connect Server. 2 ) Type the server address smb://tplinkwifi.net/volume1. Note: Here we take volume1 for example. 3 ) Click Connect. 4 ) When prompted, select the Guest radio box (If you have set up...
-
Page 103: Ftp Server
Chapter 5 Configure the Router in Access Point Mode a shared folder which does not allow anonymous login, uncheck the box to disable this function. And Folder Table will be displayed as shown below. • Share Name - This folder’s display name. •... - Page 104 Chapter 5 Configure the Router in Access Point Mode 1. Visit http://tplinkwifi.net, and log in with the username and password you set for the router. 2. Go to USB Settings > Server. 3. Click Add New Folder. 4. Specify a name for the folder to be shared in the Share Name field.
- Page 105 Chapter 5 Configure the Router in Access Point Mode Open the Windows Explorer (or go to Computer), type the server address ftp://tplinkwifi.net in the address bar, enter a username and password and then press [Enter]. Note: Here we take Windows 8 as an example. Windows 1 ) Click in the top left corner of the desktop and go to...
-
Page 106: Media Server
Chapter 5 Configure the Router in Access Point Mode 1 ) Open the Windows Explorer (or go to Computer, only for Windows users) or open a web browser. 2 ) Type the server address in the address bar: Type in ftp://<WAN IP address of the router>:<port number>... - Page 107 Chapter 5 Configure the Router in Access Point Mode 5. Click Add New Folder. Specify a name for the folder to be shared in the Share Name field. And select the folder you want to share. 6. Click Apply. ¾ To access the USB disk: 1.
-
Page 108: User Accounts
Chapter 5 Configure the Router in Access Point Mode • Go to Computer > Network, and click the Media Server Name in the Media Devices section. Note: Here we take Windows 8 as an example. Windows • Use a third-party DLNA-supported player. Tablet 5. -
Page 109: System Tools
Chapter 5 Configure the Router in Access Point Mode 5. You can check the newly added account and also edit or delete the account. 5. 7. System Tools 5. 7. 1. Diagnostic Diagnostic is used to test the connectivity between the router and the host or other network devices. -
Page 110: Ping Watch Dog
In this case, ensure that the domain name you are specifying can be resolved by using Domain Name System (DNS) queries. • IP Address/Domain Name - Enter the destination IP address (such as 192.168.0.1) or Domain name (such as www.tp-link.com). • Pings Count - The number of Ping packets for a Ping connection. •... -
Page 111: Firmware Upgrade
5. 7. 3. Firmware Upgrade TP-Link is dedicated to improving and richening the product features, giving users a better network experience. We will release the latest firmware at TP-Link official website. You can download the latest firmware file from the Support page of our website www.tp-link.com... -
Page 112: Factory Defaults
Chapter 5 Configure the Router in Access Point Mode 5. 7. 4. Factory Defaults 1. Visit http://tplinkwifi.net, and log in with the username and password you set for the router. 2. Go to System Tools > Factory Defaults. Click Restore to reset all settings to the default values. -
Page 113: Reboot
Chapter 5 Configure the Router in Access Point Mode 5. 7. 6. Reboot 1. Visit http://tplinkwifi.net, and log in with the username and password you set for the router. 2. Go to System Tools > Reboot, and you can restart your router. Some settings of the router will take effect only after rebooting, including: •... -
Page 114: System Log
Chapter 5 Configure the Router in Access Point Mode 5. 7. 8. System Log 1. Visit http://tplinkwifi.net, and log in with the username and password you set for the router. 2. Go to System Tools > System Log, and you can view the logs of the router. •... -
Page 115: Chapter 6. Configure The Router In Range Extender Mode
Chapter Configure the Router in Range Extender Mode This chapter presents how to configure the various features of the router working as a range extender. It contains the following sections: • Status • Operation Mode • Network • Wireless • DHCP •... -
Page 116: Status
Chapter 6 Configure the Router in Range Extender Mode 6. 1. Status 1. Visit http://tplinkwifi.net, and log in with the username and password you set for the router. 2. Go to Status. You can view the current status information of the router in Range Extender Mode. -
Page 117: Operation Mode
Chapter 6 Configure the Router in Range Extender Mode • Wireless 2.4GHz/5GHz - This field displays the basic information or status of the wireless function, and you can configure them on the Wireless 2.4GHz/5GHz > Basic Settings page. • Operation Mode - The current operation mode of the router. -
Page 118: Wireless
Chapter 6 Configure the Router in Range Extender Mode • LAN Type - Either select Smart IP(DHCP) to get IP address from DHCP server, or Static to configure IP address manually. • MAC Address - The physical address of the LAN port. The value can not be changed. •... -
Page 119: Extended Network
Chapter 6 Configure the Router in Range Extender Mode • Password - Enter the password of the host network you want to connect to if it is encrypted. 6. 4. 2. Extended Network 1. Visit http://tplinkwifi.net, and log in with the username and password you set for the router. -
Page 120: Wireless Advanced
Chapter 6 Configure the Router in Range Extender Mode 4. Select Allow the stations specified by any enabled entries in the list to access as the filtering rule. 5. Delete all or disable all entries if there are any entries already. 6. - Page 121 Chapter 6 Configure the Router in Range Extender Mode • Transmit Power - Select High, Middle which you would like to specify for the router. High is the default setting and recommended. • Beacon Interval - Enter a value between 40-1000 milliseconds for Beacon Interval here.
-
Page 122: Wireless Statistics
Chapter 6 Configure the Router in Range Extender Mode • Enable WMM - WMM function can guarantee the packets with high-priority messages being transmitted preferentially. It is strongly recommended to enable this function. 6. 4. 5. Wireless Statistics 1. Visit http://tplinkwifi.net, and log in with the username and password you set for the router. -
Page 123: Dhcp Client List
Chapter 6 Configure the Router in Range Extender Mode • DHCP Server - Enable or disable the DHCP server. If disabled, you must have another DHCP server within your network or else you must configure the computer manually. • Start IP Address - Specify an IP address for the DHCP Server to start with when assigning IP addresses. -
Page 124: Usb Settings
Chapter 6 Configure the Router in Range Extender Mode • Client Name - The name of the DHCP client. • MAC Address - The MAC address of the DHCP client. • Assigned IP - The IP address that the router has allocated to the DHCP client. •... - Page 125 Chapter 6 Configure the Router in Range Extender Mode Open the Windows Explorer (or go to Computer), type the server address \\tplinkwifi.net in the address bar, enter a username and password if required and then press [Enter]. Note: Here we take Windows 8 as an example. Windows 1 ) Click in the top left corner of the desktop and go to...
-
Page 126: Ftp Server
Chapter 6 Configure the Router in Range Extender Mode • Server Status - the Storage Sharing’s current status. • Anonymous access to all volumes - This function is enabled by default, so users can access all activated volumes of Storage Sharing without accounts. If you want to add a shared folder which does not allow anonymous login, uncheck the box to disable this function. - Page 127 Chapter 6 Configure the Router in Range Extender Mode 1. Insert your USB storage device into the router’s USB port directly or using a USB cable. Wait several seconds until the USB LED becomes solid on. 2. Visit http://tplinkwifi.net, and log in with the username and password you set for the router.
- Page 128 Chapter 6 Configure the Router in Range Extender Mode Tips: • If you use USB hubs, make sure no more than 2 devices are connected to the router. • If the USB storage device requires using bundled external power, make sure the external power has been connected.
-
Page 129: Media Server
Chapter 6 Configure the Router in Range Extender Mode 1 ) Open the Windows Explorer (or go to Computer, only for Windows users) or open a web browser. 2 ) Type the server address in the address bar: Type in ftp://<WAN IP address of the router>:<port number>... - Page 130 Chapter 6 Configure the Router in Range Extender Mode 5. Click Add New Folder. Specify a name for the folder to be shared in the Share Name field. And select the folder you want to share. 6. Click Apply. ¾ To access the USB disk: 1.
-
Page 131: User Accounts
Chapter 6 Configure the Router in Range Extender Mode • Go to Computer > Network, and click the Media Server Name in the Media Devices section. Note: Here we take Windows 8 as an example. Windows • Use a third-party DLNA-supported player. Tablet 6. -
Page 132: System Tools
In this case, ensure that the domain name you are specifying can be resolved by using Domain Name System (DNS) queries. • IP Address/Domain Name - Enter the destination IP address (such as 192.168.0.1) or Domain name (such as www.tp-link.com). • Pings Count - The number of Ping packets for a Ping connection. •... -
Page 133: Firmware Upgrade
6. 7. 2. Firmware Upgrade TP-Link is dedicated to improving and richening the product features, giving users a better network experience. We will release the latest firmware at TP-Link official website. You can download the latest firmware file from the Support page of our website www.tp-link.com... -
Page 134: Factory Defaults
Chapter 6 Configure the Router in Range Extender Mode 6. 7. 3. Factory Defaults 1. Visit http://tplinkwifi.net, and log in with the username and password you set for the router. 2. Go to System Tools > Factory Defaults. Click Restore to reset all settings to the default values. -
Page 135: Reboot
Chapter 6 Configure the Router in Range Extender Mode ¾ To restore configuration settings: 1. Click Choose File to locate the backup configuration file stored in your computer, and click Restore. 2. Wait a few minutes for the restoring and rebooting. Note: During the restoring process, do not power off or reset the router. -
Page 136: System Log
Chapter 6 Configure the Router in Range Extender Mode It is strongly recommended that you change the default username and password of the router, for all users that try to access the router’s web-based utility or Quick Setup will be prompted for the router’s username and password. Note: The new username and password must not exceed 15 characters and not include any spacing. -
Page 137: Log Out
Chapter 6 Configure the Router in Range Extender Mode • Log Settings - Click to set the logs in the screen. • Save Locally - If Save Locally is selected, events will be recorded in the local memory. • Minimum Level - Select the Minimum level in the drop-down list, for the Minimum Level, all logged events above or equal to the selected level will be displayed. -
Page 138: Chapter 7. Configure The Router In Client Mode
Chapter Configure the Router in Client Mode This chapter presents how to configure the various features of the router working as a client. It contains the following sections: • Status • Operation Mode • Network • Wireless • DHCP • System Tools •... -
Page 139: Status
Chapter 7 Configure the Router in Client Mode 7. 1. Status 1. Visit http://tplinkwifi.net, and log in with the username and password you set for the router. 2. Go to Status. You can view the current status information of the router in Client Mode. •... -
Page 140: Operation Mode
Chapter 7 Configure the Router in Client Mode • Wireless 2.4GHz/5GHz - This field displays the basic information or status of the wireless function, and you can configure them on the Wireless 2.4GHz/5GHz > Wireless Settings page. • Operation Mode - The current operation mode of the router. -
Page 141: Wireless
Chapter 7 Configure the Router in Client Mode • LAN Type - Either select Smart IP(DHCP) to get IP address from DHCP server, or Static to configure IP address manually. • MAC Address - The physical address of the LAN port. The value can not be changed. •... -
Page 142: Dhcp
Chapter 7 Configure the Router in Client Mode • Password - Enter the password of the host network you want to connect to if it is encrypted. 7. 5. DHCP By default, the DHCP (Dynamic Host Configuration Protocol) Server is enabled and the router acts as a DHCP server;... -
Page 143: Dhcp Client List
Chapter 7 Configure the Router in Client Mode • Default Domain (Optional) - Input the domain name of your network. • Primary DNS (Optional) - Input the DNS IP address provided by your ISP. • Secondary DNS (Optional) - Input the IP address of another DNS server if your ISP provides two DNS servers. - Page 144 Chapter 7 Configure the Router in Client Mode Tips: • If you use USB hubs, make sure no more than 2 devices are connected to the router. • If the USB storage device requires using bundled external power, make sure the external power has been connected.
-
Page 145: Ftp Server
Chapter 7 Configure the Router in Client Mode ¾ To customize your settings: 1. Visit http://tplinkwifi.net, and log in with the username and password you set for the router. 2. Go to USB Settings > Storage Sharing. • Server Status - the Storage Sharing’s current status. - Page 146 Chapter 7 Configure the Router in Client Mode 1. Insert your USB storage device into the router’s USB port directly or using a USB cable. Wait several seconds until the USB LED becomes solid on. 2. Visit http://tplinkwifi.net, and log in with the username and password you set for the router.
- Page 147 Chapter 7 Configure the Router in Client Mode ¾ To access the USB disk locally: 1. Connect Your USB Disk Insert your USB storage device into the router’s USB port directly or using a USB cable. Wait several seconds until the USB LED becomes solid on. Tips: •...
- Page 148 Chapter 7 Configure the Router in Client Mode 1 ) Click in the top left corner of the desktop and go to Connect Server. 2 ) Type the server address ftp://tplinkwifi.net. 3 ) Click Connect. 4 ) When prompted, select the Registered User radio box and enter a username and password (To learn how to set up an account...
-
Page 149: Media Server
Chapter 7 Configure the Router in Client Mode 1 ) Open the Windows Explorer (or go to Computer, only for Windows users) or open a web browser. 2 ) Type the server address in the address bar: Type in ftp://<WAN IP address of the router>:<port number> (such as ftp://59.40.2.243:21). - Page 150 Chapter 7 Configure the Router in Client Mode 5. Click Add New Folder. Specify a name for the folder to be shared in the Share Name field. And select the folder you want to share. 6. Click Apply. ¾ To access the USB disk: 1.
-
Page 151: User Accounts
Chapter 7 Configure the Router in Client Mode • Go to Computer > Network, and click the Media Server Name in the Media Devices section. Note: Here we take Windows 8 as an example. Windows • Use a third-party DLNA-supported player. Tablet 7. -
Page 152: System Tools
In this case, ensure that the domain name you are specifying can be resolved by using Domain Name System (DNS) queries. • IP Address/Domain Name - Enter the destination IP address (such as 192.168.0.1) or Domain name (such as www.tp-link.com). • Pings Count - The number of Ping packets for a Ping connection. •... -
Page 153: Firmware Upgrade
7. 7. 2. Firmware Upgrade TP-Link is dedicated to improving and richening the product features, giving users a better network experience. We will release the latest firmware at TP-Link official website. You can download the latest firmware file from the Support page of our website www.tp-link.com... -
Page 154: Factory Defaults
Chapter 7 Configure the Router in Client Mode 7. 7. 3. Factory Defaults 1. Visit http://tplinkwifi.net, and log in with the username and password you set for the router. 2. Go to System Tools > Factory Defaults. Click Restore to reset all settings to the default values. -
Page 155: Reboot
Chapter 7 Configure the Router in Client Mode 7. 7. 5. Reboot 1. Visit http://tplinkwifi.net, and log in with the username and password you set for the router. 2. Go to System Tools > Reboot, and you can restart your router. Some settings of the router will take effect only after rebooting, including: •... -
Page 156: System Log
Chapter 7 Configure the Router in Client Mode Note: The new username and password must not exceed 15 characters and not include any spacing. 3. Click Save. 7. 7. 7. System Log 1. Visit http://tplinkwifi.net, and log in with the username and password you set for the router. -
Page 157: Chapter 8. Configure The Router In Hotspot Router Mode
Chapter Configure the Router in Hotspot Router Mode This chapter presents how to configure the various features of the router working as a hotspot router. It contains the following sections: • Status • Access Control • Network • Advanced Routing •... -
Page 158: Status
Chapter 8 Configure the Router in Hotspot Router Mode 8. 1. Status 1. Visit http://tplinkwifi.net, and log in with the username and password you set for the router. 2. Go to Status. You can view the current status information of the router. •... -
Page 159: Network
Chapter 8 Configure the Router in Hotspot Router Mode • MAC Address - The physical address of the router. • IP Address - The LAN IP address of the router. • Subnet Mask - The subnet mask associated with the LAN IP address. •... - Page 160 Chapter 8 Configure the Router in Hotspot Router Mode Dynamic IP If your ISP provides the DHCP service, please select Dynamic IP, and the router will automatically get IP parameters from your ISP. Click Renew to renew the IP parameters from your ISP. Click Release to release the IP parameters.
- Page 161 Chapter 8 Configure the Router in Hotspot Router Mode • IP Address - Enter the IP address in dotted-decimal notation provided by your ISP. • Subnet Mask - Enter the subnet mask in dotted-decimal notation provided by your ISP. Normally 255.255.255.0 is used as the subnet mask. •...
- Page 162 Chapter 8 Configure the Router in Hotspot Router Mode • Confirm Password - Enter the Password provided by your ISP again to ensure the password you entered is correct. • Secondary Connection - It’s available only for PPPoE connection. If your ISP provides an extra connection type, select Dynamic IP Static IP...
- Page 163 Chapter 8 Configure the Router in Hotspot Router Mode • Use IP address specified by ISP - If your ISP does not automatically assign IP addresses to the router, please select Use IP address specified by ISP and enter the IP address provided by your ISP in dotted-decimal notation.
- Page 164 Chapter 8 Configure the Router in Hotspot Router Mode • Connect manually - You can click Connect/Disconnect to connect/disconnect immediately. This mode also supports the Max Idle Time function as Connect on demand mode. The internet connection can be disconnected automatically after a specified inactivity period (Max Idle Time) and not be able to re-establish when you attempt to access the internet again.
- Page 165 Chapter 8 Configure the Router in Hotspot Router Mode • IGMP Proxy - Select to enable the IGMP Proxy feature if the IPTV service provided by the ISP is IGMP techonology-based. • Connection Mode • Always On - Connect automatically after the router is connected. •...
-
Page 166: Lan
Chapter 8 Configure the Router in Hotspot Router Mode • Confirm Password - Enter the Password provided by your ISP again to ensure the password you entered is correct. • Connect/Disconnect - Click this button to connect or disconnect immediately. •... -
Page 167: Mac Clone
Chapter 8 Configure the Router in Hotspot Router Mode • MAC Address - The physical address of the LAN ports. The value can not be changed. • IP Address - Enter the IP address in dotted-decimal notation of your router (factory default - 192.168.0.254). -
Page 168: Wireless
Chapter 8 Configure the Router in Hotspot Router Mode 8. 3. Wireless 8. 3. 1. Basic Settings 1. Visit http://tplinkwifi.net, and log in with the username and password you set for the router. 2. Go to Wireless 2.4GHz/5GHz > Basic Settings. -
Page 169: Wps
Chapter 8 Configure the Router in Hotspot Router Mode • Channel - This field determines which operating frequency will be used. The default channel is set to Auto. It is not necessary to change the wireless channel unless you notice interference problems with another nearby access point. •... - Page 170 Chapter 8 Configure the Router in Hotspot Router Mode 3. Within two minutes, press the WPS button on your client device. 4. A success message will appear on the WPS page if the client device has been successfully added to the router’s network. Method TWO: Enter the Client’s PIN 1.
-
Page 171: Wireless Security
Chapter 8 Configure the Router in Hotspot Router Mode 8. 3. 3. Wireless Security 1. Visit http://tplinkwifi.net, and log in with the username and password you set for the router. 2. Go to Wireless 2.4GHz/5GHz > Wireless Security. 3. Configure the security settings of your 2.4GHz/5GHz wireless network and click Save. •... -
Page 172: Wireless Mac Filtering
Chapter 8 Configure the Router in Hotspot Router Mode • Radius Port - Enter the port that Radius server used. • Radius Password - Enter the password for the Radius server. • Group Key Update Period - Specify the group key update interval in seconds. The value should be 30 or above. -
Page 173: Wireless Advanced
Chapter 8 Configure the Router in Hotspot Router Mode 3. Click Enable to enable the Wireless MAC Filtering function. 4. Select Allow the stations specified by any enabled entries in the list to access as the filtering rule. 5. Delete or disable all entries if there are any entries already. 6. - Page 174 Chapter 8 Configure the Router in Hotspot Router Mode • Transmit Power - Select High, Middle which you would like to specify for the router. High is the default setting and recommended. • Beacon Interval - Enter a value between 40-1000 milliseconds for Beacon Interval here.
-
Page 175: Wireless Statistics
Chapter 8 Configure the Router in Hotspot Router Mode 8. 3. 6. Wireless Statistics 1. Visit http://tplinkwifi.net, and log in with the username and password you set for the router. 2. Go to Wireless 2.4GHz/5GHz > Wireless Statistics to check the data packets sent and received by each client device connected to the router. -
Page 176: Dhcp
Chapter 8 Configure the Router in Hotspot Router Mode • Guest Network Isolation - If enabled, one guest can not communicate with another. • Guest Network Bandwidth Control - If enabled, the Guest Network Bandwidth Control rules will take effect. •... -
Page 177: Dhcp Settings
Chapter 8 Configure the Router in Hotspot Router Mode 8. 5. 1. DHCP Settings 1. Visit http://tplinkwifi.net, and log in with the username and password you set for the router. 2. Go to DHCP > DHCP Settings. 3. Specify DHCP server settings and click Save. •... -
Page 178: Address Reservation
Chapter 8 Configure the Router in Hotspot Router Mode 2. Go to DHCP > DHCP Client List to view the information of the clients connected to the router. • Client Name - The name of the DHCP client. • MAC Address - The MAC address of the DHCP client. -
Page 179: Usb Settings
Chapter 8 Configure the Router in Hotspot Router Mode 4 ) Click Save. 8. 6. USB Settings You can insert a USB drive to share files among users on the LAN, access the USB drive remotely on the internet and enjoy videos and photos stored in the USB drive. 8. - Page 180 Chapter 8 Configure the Router in Hotspot Router Mode 1 ) Click in the top left corner of the desktop and go to Connect Server. 2 ) Type the server address smb://tplinkwifi.net/volume1. Note: Here we take volume1 for example. 3 ) Click Connect. 4 ) When prompted, select the Guest radio box (If you have set up...
-
Page 181: Ftp Server
Chapter 8 Configure the Router in Hotspot Router Mode a shared folder which does not allow anonymous login, uncheck the box to disable this function. And Folder Table will be displayed as shown below. • Share Name - This folder’s display name. •... - Page 182 Chapter 8 Configure the Router in Hotspot Router Mode 1. Visit http://tplinkwifi.net, and log in with the username and password you set for the router. 2. Go to USB Settings > Server. 3. Click Add New Folder. 4. Specify a name for the folder to be shared in the Share Name field.
- Page 183 Chapter 8 Configure the Router in Hotspot Router Mode Open the Windows Explorer (or go to Computer), type the server address ftp://tplinkwifi.net in the address bar, enter a username and password and then press [Enter]. Note: Here we take Windows 8 as an example. Windows 1 ) Click in the top left corner of the desktop and go to...
-
Page 184: Media Server
Chapter 8 Configure the Router in Hotspot Router Mode 1 ) Open the Windows Explorer (or go to Computer, only for Windows users) or open a web browser. 2 ) Type the server address in the address bar: Type in ftp://<WAN IP address of the router>:<port number>... - Page 185 Chapter 8 Configure the Router in Hotspot Router Mode 5. Click Add New Folder. Specify a name for the folder to be shared in the Share Name field. And select the folder you want to share. 6. Click Apply. ¾ To access the USB disk: 1.
-
Page 186: User Accounts
Chapter 8 Configure the Router in Hotspot Router Mode • Go to Computer > Network, and click the Media Server Name in the Media Devices section. Note: Here we take Windows 8 as an example. Windows • Use a third-party DLNA-supported player. Tablet 8. -
Page 187: Port Forwarding
Internet can reach devices on the LAN and realize some specific functions. The TP-Link router includes four forwarding rules. If two or more rules are set, the priority of implementation from high to low is Virtual Servers, Port Triggering, UPNP and DMZ. -
Page 188: Port Triggering
Chapter 8 Configure the Router in Hotspot Router Mode Personal Website Router WAN: 218.18.232.154 Home 1. Set your PC to a static IP address, for example 192.168.0.100. 2. Visit http://tplinkwifi.net, and log in with the username and password you set for the router. 3. -
Page 189: Dmz
Chapter 8 Configure the Router in Hotspot Router Mode ports will be opened for subsequent connections. The router can record the IP address of the host. When the data from the Internet return to the external ports, the router can forward them to the corresponding host. Port triggering is mainly applied to online games, VoIPs, video players and common applications including MSN Gaming Zone, Dialpad, Quick Time 4 players and more. -
Page 190: Upnp
Chapter 8 Configure the Router in Hotspot Router Mode Make the home PC join the Internet online game without port I want to: restriction. example, due to some port restriction, when playing the online games, you can log in normally but cannot join a team with other players. -
Page 191: Security
Chapter 8 Configure the Router in Hotspot Router Mode ports allowing the following data penetrating the NAT to transmit. Therefore, you can play Xbox online games without a hitch. Xbox Router If necessary, you can follow the steps to change the status of UPnP. 1. - Page 192 Chapter 8 Configure the Router in Hotspot Router Mode • Firewall - A firewall protects your network from Internet attacks. • SPI Firewall - SPI (Stateful Packet Inspection, also known as dynamic packet filtering) helps to prevent cyber attacks by tracking more state per session. It validates that the traffic passing through the session conforms to the protocol.
-
Page 193: Advanced Security
Chapter 8 Configure the Router in Hotspot Router Mode into the gateway to support address and port translation for certain application layer “control/data” protocols such as FTP, TFTP, H323 etc. • FTP ALG - To allow FTP clients and servers to transfer data across NAT, keep the default Enable. -
Page 194: Local Management
Chapter 8 Configure the Router in Hotspot Router Mode • ICMP-FLOOD Packets Threshold (5~3600) - The default value is 50. Enter a value between 5 ~ 3600. When the number of the current ICMP-FLOOD packets is beyond the set value, the router will startup the blocking function immediately. •... -
Page 195: Remote Management
Chapter 8 Configure the Router in Hotspot Router Mode 1 ) Select Only the PCs listed can browse the built-in web pages to perform Administrator tasks. 2 ) Enter the MAC address of each PC separately. The format of the MAC address is XX:XX:XX:XX:XX:XX (X is any hexadecimal digit). -
Page 196: Parental Controls
For example, you want the children’s PC with the MAC address 00:11:22:33:44:AA can access www.tp-link.com on Saturday only while the parent PC with the MAC address 00:11:22:33:44:BB is without any restriction. -
Page 197: Access Control
If you want to restrict the internet activities of host with MAC address 00:11:22:33:44:AA on the LAN to access www.tp-link.com only, please follow the steps below: How can I 1. Visit http://tplinkwifi.net, and log in with the username and do that? password you set for the router. - Page 198 (e.g. target_1) for the target in the Target Description field and enter the URL address, either the full name or the keywords (for example TP-Link) in the Add URL Address field and click Add. Note: Any domain name with keywords in it (e.g. www.tp-link.com) will be blocked or allowed.
- Page 199 Chapter 8 Configure the Router in Hotspot Router Mode 3 ) Click Save. 5. Go to Access Control > Rule and add a new access control rule. 1 ) Click New. 2 ) Give a name for the rule in the Description field.
-
Page 200: Advanced Routing
Chapter 8 Configure the Router in Hotspot Router Mode Done! Now only the specific host(s) can visit the target(s) within the scheduled time period. 8. 11. Advanced Routing Static Routing is a form of routing that is configured manually by a network administrator or a user by adding entries into a routing table. -
Page 201: System Routing Table
Chapter 8 Configure the Router in Hotspot Router Mode • Interface - It is empty by default. Please select a connection from the drop- down list if the Gateway is left empty or is not on the same network segment as LAN/WAN interface. - Page 202 Chapter 8 Configure the Router in Hotspot Router Mode The values you configure for the Egress Bandwidth and Ingress Bandwidth should be less than 100,000Kbps. For optimal control of the bandwidth, please select the right Line Type and consult your ISP for the total egress and ingress bandwidth. •...
-
Page 203: Ip&Mac Binding
Chapter 8 Configure the Router in Hotspot Router Mode 3. Click Save. 8. 13. IP&MAC Binding IP & MAC Binding, namely, ARP (Address Resolution Protocol) Binding, is used to bind a network device’s IP address to its MAC address. This will prevent ARP spoofing and other ARP attacks by denying network access to a device with a matching IP address in the ARP list, but with an unrecognized MAC address. -
Page 204: Arp List
Chapter 8 Configure the Router in Hotspot Router Mode 2. Enter the MAC address and IP address and select the Bind checkbox. 3. Click Save. ¾ To modify or delete an existing entry: 1. Find the desired entry in the table. 2. - Page 205 Chapter 8 Configure the Router in Hotspot Router Mode Comexe DDNS If the dynamic DNS Service Provider you select is www.comexe.cn, the following page will appear. To set up for DDNS, follow these instructions: 1. Enter the Domain Name received from your dynamic DNS service provider. 2.
- Page 206 Chapter 8 Configure the Router in Hotspot Router Mode To set up for DDNS, follow these instructions: 1. Enter the Username for your DDNS account. 2. Enter the Password for your DDNS account. 3. Enter the Domain Name you received from dynamic DNS service provider here. 4.
-
Page 207: System Tools
Chapter 8 Configure the Router in Hotspot Router Mode 3. Enter the Domain Name you received from dynamic DNS service provider. 4. Click Login. 5. Click Save. • Connection Status - The status of the DDNS service connection is displayed here. •... -
Page 208: Diagnostic
In this case, ensure that the domain name you are specifying can be resolved by using Domain Name System (DNS) queries. • IP address/Domain name - Enter the destination IP address (such as 192.168.0.1) or Domain name (such as www.tp-link.com). • Pings Count - The number of Ping packets for a Ping connection. •... -
Page 209: Firmware Upgrade
8. 15. 3. Firmware Upgrade TP-Link is dedicated to improving and richening the product features, giving users a better network experience. We will release the latest firmware at TP-Link official website. You can download the latest firmware file from the... -
Page 210: Backup & Restore
Chapter 8 Configure the Router in Hotspot Router Mode • The default Username: admin • The default Password: admin • The default Address: 192.168.0.1 • The default Subnet Mask: 255.255.255.0 8. 15. 5. Backup & Restore The configuration settings are stored as a configuration file in the router. You can backup the configuration file in your computer for future use and restore the router to the previous settings from the backup file when needed. -
Page 211: Password
Chapter 8 Configure the Router in Hotspot Router Mode Some settings of the router will take effect only after rebooting, including: • Change the LAN IP Address (system will reboot automatically). • Change the DHCP Settings. • Change the Web Management Port. •... -
Page 212: Statistics
Chapter 8 Configure the Router in Hotspot Router Mode 2. Go to System Tools > System Log, and you can view the logs of the router. • Refresh Refresh the page to show the latest log list. • Clear Log - All the logs will be deleted from the router permanently, not just from the page. -
Page 213: Log Out
Chapter 8 Configure the Router in Hotspot Router Mode • Traffic Statistics - Enable or Disable. The default value is disabled. To enable, click the Enable button. If disabled, the function of DoS protection in Security settings will disabled. • Statistics Interval - The default value is 10. -
Page 214: Faq
• If you’re in a hotel room or on a trade show, the internet may be limited and requires that you authenticate for the service or purchase the Internet access. • If your internet access is still not available, contact TP-Link Technical Support. Q2. How do I restore the router to its factory default settings? - Page 215 • Move the router to a new location away from Bluetooth devices and other household electronics, such as cordless phone, microwave, and baby monitor, etc., to minimize signal interference. • When in Range Extender mode, the ideal location to place the router is halfway between your host AP and the Wi-Fi dead zone.
- Page 216 Specifications are subject to change without notice. is a registered trademark of TP-Link Technologies Co., Ltd. Other brands and product names are trademarks or registered trademarks of their respective holders. No part of the specifications may be reproduced in any form or by any means or used to make any derivative such as translation, transformation, or adaptation without permission from TP-Link Technologies Co., Ltd.
- Page 217 FCC STATEMENT This equipment has been tested and found to comply with the limits for a Class B digital device, pursuant to part 15 of the FCC Rules. These limits are designed to provide reasonable protection against harmful interference in a residential installation. This equipment generates, uses and can radiate radio frequency energy and, if not installed and used in accordance with the instructions, may cause harmful interference to radio communications.
- Page 218 The device complies with RF specifications when the device used at 20 cm from your body. TP-Link hereby declares that the device is in compliance with the essential requirements and other relevant provisions of directives 2014/53/EU, 2009/125/EC and 2011/65/EU. The original EU declaration of conformity may be found at http://www.tp-link.com/en/ Restricted to indoor use.
- Page 219 Déclaration d’exposition aux radiations: Cet équipement est conforme aux limites d’exposition aux rayonnements IC établies pour un environnement non contrôlé. Cet équipement doit être installé et utilisé avec un minimum de 20 cm de distance entre la source de rayonnement et votre corps. Industry Canada Statement CAN ICES-3 (B)/NMB-3(B) Korea Warning Statements:...
- Page 220 − 電源適配器 ○ ○ ○ ○ ○ 備考1. "超出0.1 wt %" 及 "超出0.01 wt %" 系指限用物質之百分比含量超出百分比含 量基準值。 備考2. "○"系指該項限用物質之百分比含量未超出百分比含量基準值。 備考3. " − " 系指該項限用物質為排除項目。 Продукт сертифіковано згідно с правилами системи УкрСЕПРО на відповідність вимогам нормативних документів та вимогам, що передбачені чинними законодавчими...
- Page 221 Symbol Explanation RECYCLING This product bears the selective sorting symbol for Waste electrical and electronic equipment (WEEE). This means that this product must be handled pursuant to European directive 2012/19/ EU in order to be recycled or dismantled to minimize its impact on the environment. User has the choice to give his product to a competent recycling organization or to the retailer when he buys a new electrical or electronic equipment.