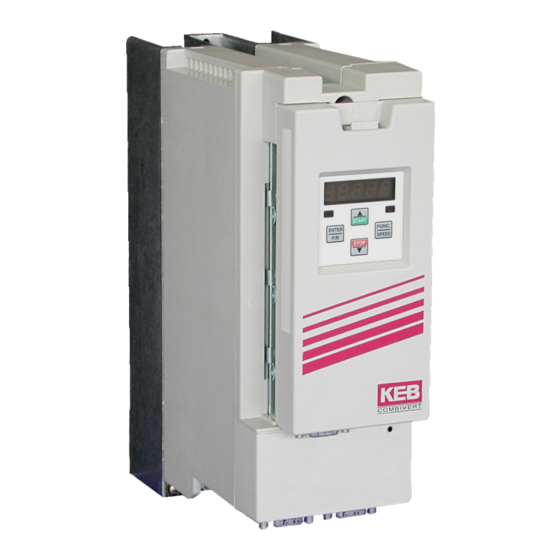
KEB COMBIVERT F5 Instruction Manual
Elevator drive
Hide thumbs
Also See for COMBIVERT F5:
- Applications manual (378 pages) ,
- Reference manual (349 pages) ,
- Instruction manual (196 pages)
Table of Contents
Advertisement
Quick Links
Advertisement
Table of Contents

Related Manuals for KEB COMBIVERT F5


Summary of Contents for KEB COMBIVERT F5
- Page 1 COMBIVERT F5 INSTRUCTION MANUAL ELEVATOR DRIVE...
-
Page 3: Table Of Contents
Table of Contents 1. General .............5 5. Initial Start-up ........42 1.2 Model number information ........6 5.2 Loading The Configuration ........42 1.3 Mounting instructions ..........7 5.1 Selecting The Configuration ........42 1.3.1 Classification ..............7 5.3 Setting The Control Type ........43 1.3.2 Physical Mounting ............ - Page 4 Tabel of Contents Carrier Frequency ..............75 Commanded torque ...............95 Set Speed SHL, High leveling Speed ........76 Actual torque ................95 Set Speed SINT, Intermediate Speed ........76 Actual load ................95 Starting Jerk ................76 Peak load ................95 Acceleration ..............
-
Page 5: General
General 1. General 1.1 Product description In selecting the COMBIVERT F5 series inverter, you have chosen a fre- quency inverter with the highest quality and dynamic performance. It is exclusively designed for smooth speed regulation of a three-phase motor. The operation of other electrical loads is forbidden and can lead to destruction of the unit. -
Page 6: Model Number Information
F = HIPERFACE, TTL output P = ENDAT, TTL output Voltage ident. R= 460V 3 Phase P = 230V 3 Phase L = KEB US Elevator Drive Housing type E, G, H, R, U, Accessories 1 = Braking transistor 3 = Braking transistor and EMI filter... -
Page 7: Mounting Instructions
General 1.3 Mounting instructions 1.3.1 Classification The elevator drive is classified as an "Open Type" inverter with an IP20 rating and is intended for use in a "pollution degree 2 environ- ment." The unit must be mounted inside of a control cabinet offering proper environmental protection. -
Page 8: Electrical Connections
General 1.3.4 Ambient Conditions The operating temperature range of the unit is -10°C to + 45°C (14° to +113°F). Operation outside of this temperature range can lead to shut down of the inverter. The unit can be stored (power off) in the temperature range -25°C to 70°C (-13 to +158°F). -
Page 9: Disconnect Switch
General 1.4.3 Disconnect switch A disconnect switch or contactor should be provided as a means of turning off the supply voltage when the unit is not in use or when it must be serviced. Repetitive cycling on and off of the input supply voltage more than once every two minutes can lead to damage of the inverter. -
Page 10: High Voltage Connections
General 1.4.8 High Voltage Connections Always note inverter voltage, select appropriate over current protection devices, select disconnect device, and select proper wire size before beginning the wiring process. Wire the inverter according to NEC Class 1 requirements. The correct wire gauge for each size inverter can be selected from the charts on pages 12-19. -
Page 11: High Frequency Shielding
General 1.4.10 High Frequency Shielding Use of shielded cable is recommended when high frequency emissions or easily disturbed signals are present. Examples are as follows: - motor wires connected to inverters: connect shield to ground at both the inverter and motor, NOTE the shield should never be used as the protective ground conductor required by NEC. -
Page 12: Technical Data
2. Technical Data 2.1 Summary of technical data 230V (size 13 to 21) Inverter Size Recommended Motor Power [hp] 7.5 Housing size Input Ratings Supply voltage 180...260 ±0 (230 V rated voltage) Supply voltage frequency [Hz] 50 / 60 +/- 2 Input phases Rated input current [A] 29... - Page 13 Technical Data Inverter Size Recommended Motor Power [hp] Housing size Input Ratings Supply voltage [V] 180...260 ±0 (230 V rated voltage) Supply voltage frequency [Hz] 50 / 60 +/- 2 Input phases Rated input current Recommended maximum input fuse [awg] Recommended wire gauge Output Ratings Rated output power [kVA]...
-
Page 14: Summary Of Technical Data 460V (Size 13 To 19)
Technical Data 2.2 Summary of Technical Data 460V (Size 13 to 19) Inverter Size Recommended Motor Power [hp] Housing size Input Ratings Supply voltage 305...500 ±0 (460 V Nominal voltage ) Supply voltage frequency [Hz] 50 / 60 +/- 2 Input phases Rated input current Recommended maximum input fuse... - Page 15 Technical Data Inverter Size Recommended Motor Power [hp] Housing size Input Ratings Supply voltage 305...500 ±0 (460 V Nominal voltage ) Supply voltage frequency [Hz] 50 / 60 +/- 2 Input phases Rated input current Recommended maximum input fuse [awg] Recommended wire gauge Output Ratings Rated output power [kVA]...
-
Page 16: Summary Of Technical Data 460V (Size 20 To 27)
Technical Data 2.2 Summary of Technical Data 460V (Size 20 to 27) Inverter Size Recommended Motor Power [hp] Housing size Input Ratings Supply voltage 305...500 ±0 (460 V Nominal voltage ) Supply voltage frequency [Hz] 50 / 60 +/- 2 Input phases Rated input current Recommended maximum input fuse... -
Page 17: Dimensions And Weight
Dimensions 2.3 Dimensions and weight Inverter Ø F Ø F Dimensions in inches Housing Weight [lb] 5.12 11.4 8.75 0.28 10.8 13.4 10.0 0.28 13.0 11.7 13.4 10.0 0.28 13.0 13.5 20.5 14.0 0.394 11.8 19.5 55-64 13.5 31.5 14.0 0.394 11.8 30.5... -
Page 18: Summary Of The Power Circuit Terminals
Power Circuit Terminals 2.4 Summary of the power circuit terminals Housing size E Note always verify input voltage with name plate for proper connection 230V or 460V L1, L2, L3 3 phase supply voltage ++, - - Connection for DC supply ++, PB Connection for braking resistor N/L2... -
Page 19: Connection Of The Power Circuit
Power Circuit Terminals Verify input voltage with name plate for proper connection 230V or 460V Housing size R and U Note always verify input voltage with name plate for proper connection T1, T2 Connection for temperature sensor L1, L2, L3 3 phase supply voltage U, V, W Motor connection... - Page 20 Connection of the Power Circuit Wiring diagram 3 (+)PA PB Supply fuse COMBIVERT F5 Disconnect switch or contactor Motor choke or output filter Line choke Motor Interference suppression filter Sub panel in control cabinet External motor temperature sensor (for all units)
-
Page 21: Time Dependent Overload Curve
Overload Characteristic 2.6 Time dependent overload curve If the load current exceeds the rated current but is below the over current level, an overload timer begins counting. The rate at which the timer increments is a function of load current. The higher the current the faster the increments. When the counter reaches the limit the fault E.OL is triggered and the output to the motor is shut off. -
Page 22: Low Speed Overload
Overload Characteristic 2.7 Low Speed Overload (E.OL2) Load [%] 150% E. OL E. OL2 105% Permanent current (0 Hz) f [Hz] 3 Hz At low speeds (below 3 Hz) the rms current flowing through the power transistors is higher, reaching 1.4 times the rated 60Hz rms value. This is caused by the low frequency sine wave created by the PWM. -
Page 23: Control Circuit
3.0 Installation and Connection 3.1 Control Circuit: 1 2 3 4 5 6 7 8 9 10 11 12 13 14 15 16 17 18 19 20 21 22 23 24 25 26 27 28 29 3.1.1 Terminal Strip Connections Function Name Description... -
Page 24: Connection Of The Control Signals
Installation and Connection 3.1.2 Connection of the In order to prevent a malfunction caused by interference voltages on the control signals control inputs, the following steps should be observed: • Establish a true earth ground for all ground connections! • Do not connect drive signal commons to earth ground! •... -
Page 25: Voltage Input / External Power Supply
Installation and Connection 3.1.5 Voltage Input / The supply to the control circuit through an external voltage source keeps External Power Supply the control in operational condition even if the power stage is switched off. To prevent undefined conditions (false triggering), first switch on the power supply then the inverter. -
Page 26: Encoder Connections
Installation and Connection 3.2 Encoder ONLY when the inverter is switched off and the voltage Connections supply is disconnected may the feedback connectors be removed or connected! Connect the incremental encoder mounted on the motor to the 15-pin Sub-D connector at X3A on the COMBIVERT F5M. This connection 3.2.1 X3A RS422/TTL provides speed feedback and is imperative to the proper operation of the Incremental Encoder... - Page 27 Installation and Connection 1. Maximum Encoder voltage: +5.2 V 2. Encoder line number: 1...16383 ppr 2500 ppr is recommended and gives best speed resolution and regulation performance for applications with a maximum motor speed of up to 4500 rpm. F5M Interface cutoff frequency: 300 kHz Observe cutoff frequency of the encoder: g •...
-
Page 28: X3A Ttl Inc. Enc. In Screw Terminals
Installation and Connection ONLY when the inverter is switched off and the voltage 3.2.2 X3A TTL Inc. Enc. supply is disconnected may the feedback connectors be In Screw Terminals removed or connected! Connect the incremental encoder mounted on the motor to the 8 position terminal connector at X3A. - Page 29 Installation and Connection Selection of the supply voltage 15 V 24 V or external supply via the control control card The maximum load capacity is dependant on the selected voltage supply. Max. load capacity with 15V internal supply: 300 mA Max.
-
Page 30: X3A Hiperface Encoder
Installation and Connection 3.2.3 X3A Hiperface The Hiperface encoder provides two differential analog channels for Encoder incremental position and one serial data channel for comunication with the encoder. This serial data channel can provide the drive with the absolute position of the motor as well as other operating data. The analog cosine and sine wave signals of tracks A and B have a voltage of 1 Vpp with an Offset of 2.5 V. - Page 31 Installation and Connection Drive connection Pin No Signal Description X3A Female SUBD 15 HD REF_COS signal input A- (difference signal to COS+) REF_SIN signal input B- (difference signal to SIN+) COS+ signal input A ( absolute track for counter and direction detection SIN+ signal input B ( absolute track for counter and direction detection +7.5V...
- Page 32 Installation and Connection Technical Data Input resistance: 120 Ohm Process data channel: 1Vpp Parameter channel: EIA RS485 half duplex Maximum input frequency: 200 kHz Encoder line number: 1...16383 inc (recommended: 1024 inc.at speeds < 4500 rpm) Maximum cable length: 100 m (based on signal levels) The following Hiperface®-encodera have been tested for use: •...
-
Page 33: X3A Endat Encoder
Installation and Connection 3.2.4 X3A EnDat The EnDat encoder provides two differential analog channels for incre- Encoder mental position and one serial data channel with clock for comunication with the encoder. This serial data channel can provide the drive with the absolute position of the motor as well as other operating data. - Page 34 Installation and Connection Drive connection Pin No Signal Description X3A Female SUBD 15 HD REF_COS signal input A- (difference signal to COS+) REF_SIN signal input B- (difference signal to SIN+) + CLOCK synch. signal for serial data - CLOCK synch. signal for serial data COS+ signal input A (absolute track for counter and direction detection) SIN+ signal input B...
- Page 35 Installation and Connection Technical Data Input resistance: 120 Ohm Process data channel: 1Vpp Parameter channel: EIA RS485 half duplex Clock signal output: EIA RS485 Maximum input frequency: 200 kHz Encoder line number: 1...16383 inc (recommended: 2048 inc.at speeds < 4500 rpm) Maximum cable length: 100 m (based on signal levels) The following EnDat encoders have been tested for use:...
-
Page 36: X3B Incremental Encoder Output
Installation and Connection 3.2.5 X3B Incremental ONLY when the inverter is switched off and the voltage supply is disconnected may the feedback connectors Encoder Output be removed or connected! The second incremental encoder connection serves as a buffered output of the motor encoder. This can be used by other control systems for speed or position control. - Page 37 Signal channels A and B 2...5 V 0...0,5 V 2...5V 0...0,5 V 2...5 V 0...0,5 V 2...5 V 0...0,5 V...
-
Page 38: Digital Operator
4. Operation of the unit 4.1 Digital Operator The Elevator drive uses a special operator which provides a user inter- face and functionality specific to elevator applications. The operator must be plugged into the drive in order for the drive to function correctly. Unplugging the operator while the drive is in operation will result in immediate shutdown of the drive and will cause the ready relay to drop and the fault output to activate. -
Page 39: Parameter Identification
Keypad Display 4.2 Parameter Identification Display Parameter Group Display Parameter Number The blinking point determines the active (changeable) part of the parameter identification 4.3 Parameter Selection change between parameter group and parameter number ENTER START START ENTER FUNC. ENTER FUNC. SPEED SPEED STOP... -
Page 40: Changing Parameter Values
Keypad Display 4.4 Changing Parameter Increase/Decrease Parameter Value Values START Display Parameter Display Parameter Identification Value FUNC. SPEED START START ENTER FUNC. ENTER FUNC. SPEED SPEED STOP STOP STOP Changing Parameter Values All parameter changes are accepted for operation and saved only after the ENTER key is pressed. 4.5 Parameter Structure Parameter Groups LF-Parameter: LF. -
Page 41: Keypad Display
Keypad Display 4.6 Saving Parameter Values If the parameter value is changed, a point appears behind the last position in the display. The adjusted parameter value is permanently saved when ENTER is pressed. The point after the value disappears to confirm. Example: ENTER SAVE... -
Page 42: Initial Start-Up
Initial Start Up 5. Initial Start-up 5.1 Selecting The Configuration Before trying to operate the drive it is necessary to establish the correct mode of operation. The TORQMAX F5 drive is capable of driving different types of motors both open and closed loop. Therefore prior to operation, the type of motor and mode of operation (open or closed loop) must be established. -
Page 43: Setting The Control Type
Initial Start Up 5.3 Setting The Control Type The TORQMAX drive supports three different control modes, digital speed selection and control, analog speed control, analog torque control. The drive’s I/O will need to be set up according to the desired scheme. From the table below select the desired control scheme and adjust the corresponding number in parameter LF.2. - Page 44 Initial Start Up as the synchronous speed less 2.9%, so 1200 rpm - 35 rpm = 1165 rpm. Enter the rated FLA of the motor in parameter LF.12. Enter the rated nameplate frequency in parameter LF.13. In some cases manufacturers of induction motors derate the motor by changing the frequency to something less than 60hz, i.e.
-
Page 45: Measuring The Motor Resistance
Initial Start Up 5.5.3 Measuring the For best performance the resistance of the induction motor should be Motor Resistance measured by the drive. Use the following steps to complete the measurement for induction motors. 1) Remove one brake wire from the controller, preventing it from picking 2) Verify LF.3 is set to “conF”... -
Page 46: Machine Data
Initial Start Up It is necessary to enter the machine data such that the drive can establish 5.7 Machine Data the relationship between linear travel, ft/min and rotary speed in rpm at the motor. Enter the job contract speed in parameter LF.20. Then enter the sheave diameter in LF.21. -
Page 47: Controller Settings
Initial Start Up Enter in LF.27 the pulses per revolution of the encoder, i.e. 1024, 2048, 4096 etc. LF.28 can be used to swap the encoder channels such that the encoder is incrementally counting in the same direction as the motor. Initially leave this parameter set to 0 or no reversal. -
Page 48: Running The Motor
Initial Start Up 5.11 Running the Motor 5.11.1 Absolute Encoder The following will outline the proceedure for aligning an absolute encoder Setup (no ropes) for use with a permanent magnet motor and the following encoders: Hiperface, Endat, SIN/COS. The motor must be mounted in place and be HIPERFACE, ENDAT, electrically connected to the elevator controller. - Page 49 Initial Start Up Alignment Process 1) Adjust LF.3 = conF 2) Set LF.77 = 2206 3) Press and hold the inspection up switch. Motor current will begin to flow in one phase and the current will ramp up to the motor’s rated value. The motor sheave should turn slowly and then stop when the motor rotor has lined up with one of the motor poles.
-
Page 50: Absolute Encoder Setup (With Ropes)
Initial Start Up 5.11.2 Absolute Encoder The following will outline the procedure for aligning an absolute encoder Setup (with ropes) for use with a permanent magnet motor and the following encoders: HIPERFACE, ENDAT, SIN/COS. The motor must be mounted in place and be electrically connected to the elevator controller. - Page 51 Initial Start Up Driving the car to a floor If possible let the car coast up to a floor where the weights can be loaded into the car to balance it. If this is not possible then it is possible to drive the car down under power.
-
Page 52: Absolute Encoder Position Verification
Initial Start Up 5.11.3 Absolute Encoder Position Verification Verification of the encoder position. Due to friction and the inertial load or the cab and counter weights can lead to a small error in the actual position value. The following proceedure will verify whether the position is correct or not. 1) Set LF.36 = to two times LF.17. -
Page 53: Encoder Synchronization
Initial Start Up 5.11.4 Encoder It is necessary to determine whether or not the motor encoder is in phase Synchronization with the rotation of the motor. As an example the motor is turning clockwise and the encoder is indicating clockwise rotation. The problem comes when TTL, HTL, SIN/COS the encoder indicates rotation opposite to the actual rotation of the motor. -
Page 54: Parameter Description
Parameter Description - Basic Set Up 6. Parameter Description 6.1 US-Parameters With different passwords different parameter groups can be accessed for advanced programming. Password By entering a value of 1, all the LF parameters are returned to the factory default values. Note the display will automatically change to show the value of LF.99 upon successful loading of the default LF Parameter Reset values. -
Page 55: Other Us Parameters
Parameter Description - Basic Set Up These US parameters are special parameter which are not needed in Other US parameters every applciation. They are turned off by default at the manufacturer. The following serves only as a list of these parameters. For further adjustment refer to section 8.0. -
Page 56: Signal Operating Mode
Parameter Description - Basic Set Up 6.2 LF-Elevator Parameters This value determines the type of speed selection and rotation setting. Value range: d SPd = Digital Speed Selection Signal Operating Mode A tor = Analog Torque Control = Analog Speed Control A SPd SErSP = Serial Com. - Page 57 Parameter Description - Basic Set Up d SPd d SPd d SPd a) Input coded set speed selection LF.02 = d SPd d SPd (Default setting) Digital speed setting uses preset digital values in the drive as command speeds. The drive creates the driving profile between selected speeds.
- Page 58 Parameter Description - Basic Set Up A SPd A SPd c) Analog set speed selection LF.02 = A SPd A SPd A SPd A Differential analog signal is connected to the terminals X2A.1(+) and X2A.2 (-). Terminals X2A.3 and X2A.4 can be used for pre-torque input.
-
Page 59: Drive Configuration
Parameter Description - Basic Set Up With LF.3 you disable the direction input to prevent the drive from responding. This allows the drive the measure the motor resistance or the alignment of the encoder on a PM motor by running the car on Drive Configuration inspection. -
Page 60: Electronic Motor Overload Protection
Parameter Description - Basic Set Up This parameter is used to activate and select the type of motor overload function. Depending on the setting of this parameter, the TORQMAX Elevator Drive will trigger a drive fault E.OH2 causing the motor to stop. The trigger level is Electronic established in parameters LF.9 or LF.12 Motor Overload... -
Page 61: Electronic Overload Current
Parameter Description - Motor Data The following parameters configure the Torqmax Elevator Drive to the particular motor. Correct adjustment of these parameters is critical for proper operation of the system. Depending on the mode of operation the units and or range of acceptable values may change. -
Page 62: Rated Motor Speed
Parameter Description - Motor Data Unit: Value range : 10.0..6000.0 or 500.0 (based on config mode) Rated Motor Speed Factory setting: 1165.0 or 150.0 (based on config mode) Adjustment value: in accordance with the motor name plate You may not enter the motor-synchronous speed (e.g. - Page 63 Parameter Description - Motor Data LF.11 Rated motor speed continued. Once all the other parameter adjustments are made it may necessary to come back to parameter LF.11 in order to fine tune the operation of the elevator drive with the motor. The parameter LF.11 will determine how much torque the motor can produce and has influence over the following aspects of operation: - motor current...
-
Page 64: Rated Motor Speed
Parameter Description - Motor Data Unit: Value range : 10.0..6000.0 or 500.0 (based on config mode) Rated Motor Speed Factory setting: 1165.0 or 150.0 (based on config mode) Adjustment value: in accordance with the motor name plate For permanent magnet synchronous motors there is no slip. Therefore the value entered must be exactly the value on the name plate of the motor. -
Page 65: Power Factor
Parameter Description - Motor Data This parameter is not the efficiency of the motor but the ratio of the magnetizing current to the total phase current of the motor. Lower power factor values will increase the magnetizing current Power Factor to the motor and thus increase the field strength resulting in tighter control of the motor. -
Page 66: Rated Motor Torque
Parameter Description - Motor Data Unit: Value range: 0.0...6000 rpm Factory setting: 960.0 rpm Initial adjustment value: approx. 80% of synchronous speed For PM motors this parameter is not necessary and therefore is not visible. For IM the torque value is calculated from the rated speed (LF.11) and rated power (LF.10). -
Page 67: Motor Stator Resistance
Parameter Description - Motor Data This parameter not required for closed loop induction motor opera- tion and will not be visible in these modes. In open loop control this is the phase to phase motor stator resistance or twice the per Motor Stator Resistance winding value. -
Page 68: Contract Speed
Parameter Description - Machine Data The following parameters relate to the machine data of the elevator. It is important to enter the correct values, such that both the motor and the car run at the correct speed. This is the elevator contract speed. The speeds adjusted in parameters LF.42, LF.43,LF.44 and LF.45 are limited by LF.20. -
Page 69: Roping Ratio
Parameter Description - Machine Data Unit: Value range: 1...8 (1:1...8:1) Factory setting: Roping Ratio Adjustment value: in accordance with the system data Unit: pounds Value range: 0...30000lbs Factory setting: 0 lb Load Weight Adjustment value: in accordance with the system This parameter is read only and will change when adjustments are made to LF.11, LF.20, LF.21 or LF.23. -
Page 70: Encoder Feedback
Parameter Description - Encoder Set Up This parameter displays the type of encoder feedback installed in the drive. It is also used to confirm a change in the encoder feedback card when a different card is installed or a change of Encoder Feedback motor encoder when an absolute encoder is used. -
Page 71: Encoder Sample Time
Parameter Description - Control Settings Unit: pulse per revolution Value range: 256...16384 pulse per revolution Encoder Pulse Number Factory setting: 1024 pulse per revolution Adjustment value: in accordance with the manufacturer specifications If the incremental encoder pulse number is not cor- rectly adjusted, the elevator drive can run very slowly, or over-speed is possible or other unforeseen condi- tions may occur. -
Page 72: Control Method
Parameter Description - Control Settings Used in conjunction with LF.2 to adjust the control method. Unit: Control Method Value range: 0...4 Factory setting: Adjustment values 0 or 1 Open loop induction motor operation for construction, inspection and test purposes only. Closed loop speed control. -
Page 73: Kp Speed
Parameter Description - Control Settings Proportional gain of the speed controller. The default values are a good staring point and will work for most applications. How- ever if the motor does not track the speed command tight enough, Kp Speed then the value should be increased. -
Page 74: Kp Current
Parameter Description - Control Settings Proportional gain of the current controller. The correct value is calculated from the motor data. Kp Current Unit: Value range: 1...32767 Factory setting: Calculated! Adjustment value: Do not change. Integral gain of the current controller. The correct value is calculated from the motor data. -
Page 75: Set Speed Sl, Leveling Speed
Parameter Description - Driving Profile Using parameter LF.38 the switching frequency of the inverter can be set. The switching frequency can be constantly 8 kHz or 16kHz with an automatic reduction based on the heat-sink temperature. Carrier Frequency If the display often shows the error message E.OL2, then this parameter should be set to zero. -
Page 76: Set Speed Shl, High Leveling Speed
Parameter Description - Driving Profile Selected by X2A.11, has priority over High speed and Inspection speed. Unit: feet per minute Set Speed S , High Value range: 0...25% of LF.20 leveling Speed Factory setting: 0 ft/min Adjusted value: dependent on the distance between the floors Selected by X2A.10 + X2A.11, has priority over High speed and Inspection speed. -
Page 77: Acceleration
Parameter Description - Driving Profile Empirical values: 2.00...3.00 ft/s for retirement homes, hospitals, apartment buildings 3.00...4.00 ft/s for office buildings, banks etc Acceleration Unit: feet per second Value range: 0.30...12.0 ft/s Factory setting: 3.00 ft/s Adjustment value: according to comfort, Note: 12.0 = no accel ramp and should be used for analog speed or torque control. -
Page 78: Speed Following Error
Parameter Description - Driving Profile Triggers a drive fault if the actual motor speed deviates from the commanded speed by more than the window defined in parameter LF.58 and for the length of time defined in LF. 59. This function only works in close loop Speed Following speed control mode, ie. -
Page 79: Brake Set Speed
Parameter Description In open loop it is not possible to produce holding torque at zero speed. Therefore, it is necessary to drop the brake just before the motor reached zero speed. This is parameter is only used when operating in open loop mode LF.4 = 0, and will cause the DRO output Brake Set Speed X2A.27...29 to drop when the motor goes below the adjusted speed. -
Page 80: Pre-Torque Direction
Parameter Description This parameter can be used to invert the direction of the pretorque being applied to the motor. Pre-torque Direction Unit: 1 Value range: => +10V = positive torque => -10v = positive torque Factory setting: Adjusted value: depends on the required torque direction This time delay allows the brake to release before the motor starts turning. -
Page 81: Ki Decel
Parameter Description This parameter is only visible in open loop mode (LF.4 = IOPEn). This parameter is used to prevent spotting and or overshoot during the deceleration phase. It is especially useful when running high slip KI Decel motors. Unit: Value range: 1...500 Factory setting:... -
Page 82: Absolute Encoder Position
Parameter Description This parameter is only visible in closed loop PM motor mode (LF.4 = PCLSd or P9LSS). LF.77 displays the position of the encoder in relation to one of the motor poles. Absolute Encoder Position Unit: Value range: 0 … 65535h Factory setting: Adjusted value: according to encoder position... -
Page 83: Current Hold Time
Parameter Description This parameter determines how long the drive will maintain full current and control of the motor after the direction inputs, X2A.14 and X2A.15 have been turned off. After the adjusted time, motor Brake Drop Delay current will continue to flow, however the analog input will be clamped and the speed control gains will be reduced. -
Page 84: Software Version
Diagnostic Parameters Display of the software version of the Elevator Operator. Software Version Display of the software date. Format DDMM.Y Software Date Note: The lead character of the date may be blanked if it is a zero. Example: data code 0208.1 display reads as 208.1... -
Page 85: X2A Input State
Diagnostic Parameters Terminal X2A This parameter displays the status of the digital inputs on terminal X2A. X2A Input State Each input has a specific value. See the table below for decoding. Displayed Terminal Value number(s) Description All X2 No signals are active on terminal X2A.10 to X2A.17 X2A.16 Only the enable signal is active on X2A.16. -
Page 86: X2A Output State
Diagnostic Parameters Terminal X2A This parameter displays the status of the digital outputs on terminal X2A. Each output has a specific value. If more than one output is X2A Output State active, the sum of the value is displayed. Value table: Value Output Function... -
Page 87: Motor Set Speed
Diagnostic Parameters Display of the actual inverter load in %. 100% equals rated load of the inverter. Inverter Load Displays the motor set speed in rpm, calculated from the system data. Motor Set Speed Displays the actual motor speed in rpm measured from the motor encoder . -
Page 88: Peak Dc Voltage
Diagnostic Parameters Display of the actual phase current. Resolution 0.1A Phase Current Maximum motor phase current that occurs during operation. Display in [A]. The value can be deleted by pressing the UP or DOWN key. The memory is also deleted when the inverter is switched off. Peak Phase Current Display of the actual dc-bus voltage Resolution: 1V... - Page 89 Diagnostic Parameters change between parameter group and parameter number ENTER START START ENTER FUNC. ENTER FUNC. SPEED SPEED STOP STOP change between change between parameter group parameter number ENTER and parameter ENTER and parameter offset number offset number START ENTER FUNC.
-
Page 90: Error Messages And Their Cause
Error Messages 6.3 Error Messages and their Cause Display Description Cause and Solution • Input voltage is too low or unstable The DC bus voltage drops below • Input wiring is wrong the permissible value, the input • Isolation transformer is too small is single phasing, or there is a Under voltage •... -
Page 91: Low Speed Overload
Error Messages Display Description Cause and Solution • The heat sink temperature rises Insufficient cooling – increase the airflow around the inverter above the permissible limit • Ambient temperature is too high - add a (see technical data) cabinet cooler Inverter •... -
Page 92: Encoder Card Change
Error Messages Display Description Cause and Solution • Disconnection of the encoder while the power This indicates that there is a to the drive is on. problem either with the serial • Absolute position value transferred from communication between the drive Encoder encoder does not match the current value and the encoder or the value of the... -
Page 93: Inverter Status
Diagnostic Parameters Display Description Cause and Solution • Excessive motor current above the value Electronic Motor Overload adjusted in LF.9 for IM or LF.12 for PM. protection was activated. • Look for mechanical loading problems or Electronic motor data adjustment in parameters LF.10...LF.19. -
Page 94: Run Parameters
Diagnostic parameters 7.0 Run Parameters The run parameters display operational values within the elevator drive. They can be used for trouble shooting or calibration purposes. Each parameter is listed below along with a description of what it displays. Some parameters may display information only used by factory service personnel during diagnostic or repair. -
Page 95: Commanded Torque
Diagnostic parameters ru.11 This is the internal torque command value which is fed into the current controller. Commanded Units: Nm torque ru.12 This is the actual torque value which is calculated from the motor current. Actual torque Units: Nm This is the load level of the inverter. 100% equals rated load. ru.13 Actual load Units: %... -
Page 96: Output Voltage
Diagnostic parameters ru.20 This is the actual phase to phase output voltage to the motor. Output Voltage Units: Volts The raw status of the input terminals. Each input is binary weighted according to the ru.21 table below. If an input is activated the value corresponding to the input is displayed. Input terminal If multiple inputs are activated the sum of the values is displayed. -
Page 97: Output Flag State
Diagnostic parameters This is the state of the internal output flags. Multiple active flags result in the sum of ru.24 the values. Output flag Flag Value state This is the state of the actual outputs. Multiple active outputs result in the sum of the ru.25 values. -
Page 98: Analog Pre-Torque Raw
Diagnostic parameters ru.29 This parameter displays the value of the actual pre-torque signal applied between terminal X2A.3 and X2A.4. The value is in percent +/- 100.0% = +/- 10.00V. This Analog pre- value is unfiltered and unprocessed. torque raw Units: % ru.30 This parameter displays the processed analog pre-torque value. -
Page 99: Motor Pot Value
Diagnostic parameters ru.37 Value of the internal function. Units:% Motor pot value This is the temperature of the output transistors. ru.38 Units: °C Power module temperature Overload counter display. Once the load of the drive goes above 100% this counter ru.39 begins to increment. -
Page 100: Advanced Adjustments
Advanced Parameters 8.0 Advanced Adjustments There are additional US parameters which can provide further functional adjustments of the drive. This US parameters are all those greater than US.10. They are turned ON or OFF through parameter US.8. Once turned ON, the higher US parameters are unlocked and can be adjusted as needed. -
Page 101: Pre-Torque Timer Ramp Up
Advanced Parameters US. 17 This timer controls the build time for the Pre-torque function. Once the direction input is activated this timer begins counting. In the mean time the current check takes Pre-torque place and then finally the motor is magnetized. At this point the Pre-torque value is timer ramp up evaluated and the torque begins to build on the motor. -
Page 102: Field Weakening Corner
Advanced Parameters This parameter provides a better adjustment of the field weakening torque curve. US. 19 Under certain situations, if the input voltage is sagging too low or the motor has very high slip, it is possible that the voltage limit might be reached. This can be confirmed Field by monitoring ru.42. -
Page 103: Speed For Max Ki
Advanced Parameters These parameters can be used to tailor the KI Offset gain to a specific speed range US. 20 at low speed. Worm gear applications require a smaller KI Offset value but over a broader speed range. Whereas a gearless motor will require a much higher KI Offset Speed for Max value but at only the very lowest speed. -
Page 104: Speed Dependent Kp Gain
Advanced Parameters These parameters allow the KP gain to be scaled dependent on the command speed US. 22 of the elevator. In some cases it is beneficial to reduce the gain at high speed to minimize system response to hoistway vibrations or disturbances. Parameter US.22 Speed turns the variable gain function on or off and parameter US.23 adjusts the value to dependent KP... -
Page 105: Phase Current Check
Advanced Parameters This parameter can be used to select what type of current check is performed. US. 25 Additionally it determines whether or not the brake on/off message is displayed. In the event there is a problem getting a consistently positive phase check, it is Phase current possible to switch to only a magnetizing current check. -
Page 106: Power Stage Id Code
Advanced Parameters Each voltage and size power stage has its own unique ID code. This parameter US. 27 displays the ID number of the power stage. In the event the control card is replaced, when the new control card is installed the drive will display the message E.PUCH Power stage ID indicating that the ID of the power stage has changed since the last power on code... -
Page 107: Input/Output Configuration
9.0 Input/Output Configuration 9.1 Digital Input The digital input parameters can be used to configure the digital Parameters inputs for operation. Normally these parameters only need to be adjusted by the Elevator control builder. di. 0 Determines whether the inputs are PNP (sourcing) or NPN (sinking). This setting is applied globaly to all inputs. -
Page 108: Digital Output Parameters
Input/Output Configuration 9.2 Digital Output The digital output parameters can be used to configure the digital Parameters outputs for operation. Normally these parameters only need to be adjusted by the Elevator control builder. Can be used to invert the function of the output. As an example, normally on becomes do. - Page 109 Input/Output Configuration Switching conditions for the digital outputs. Only one condition can be assigned to each output. Designator Function Fault, output activates when there is a drive fault, E.xxx Ready, output activates when the drive and ready for operation and there are no active faults E.xxx Drive On, output activates after the following conditions are met: enable input active, direction input active, motor phase current check passed, motor magnitizing current...
- Page 110 Input/Output Configuration This page left blank.
-
Page 111: Parameter List Reference
10.0 Parameter List Reference Para. Name Res. Lower Upper Default Unit Visable in Limit Limit modes LF.02 Steering/Operating Mode text G,M,S LF.03 Drive configuration text G,M,S LF.04 Drive Mode text G,M,S LF.05 Auto Reset G,M,S LF.08 Electronic Mtr Protection text G,M,S LF.09 Electronic Mtr Protection Current E... - Page 112 Parameter List Reference Para. Name Res. Lower Upper Default Unit Visable in Limit Limit modes LF.57 Speed Following Error text LF.58 Speed Difference LF.59 Following Error Timer LF.60 Level for Brake Set ft/min LF.67 Pretorque Gain 0.01 0.25 LF.68 Pretorque Offset -100 LF.69 Pretorque Direction...
-
Page 113: Customer Parameter Values
Customer Values 11.0 Customer Customer Customer parameter values Adjustment Adjustment Size Unit Size Unit LF.02 LF.37 LF.03 LF.38 LF.04 LF.41 ft/min LF.05 LF.42 ft/min LF.08 LF.43 ft/min LF.09 LF.44 ft/min LF.10 LF.45 ft/min LF.11 LF.50 ft/sec LF.12 LF.51 ft/sec LF.13 LF.52 ft/sec ft/sec... - Page 115 Notes...
- Page 116 KEB AMERICA INC. 5100 Valley Industrial Blvd. Shakopee, MN 55379 PHONE: 952-224-1400 www.kebamerica.com...
Need help?
Do you have a question about the COMBIVERT F5 and is the answer not in the manual?
Questions and answers