Sign In
Upload
Download
Table of Contents
Contents
Add to my manuals
Delete from my manuals
Share
URL of this page:
HTML Link:
Bookmark this page
Add
Manual will be automatically added to "My Manuals"
Print this page
×
Bookmark added
×
Added to my manuals
Manuals
Brands
Furuno Manuals
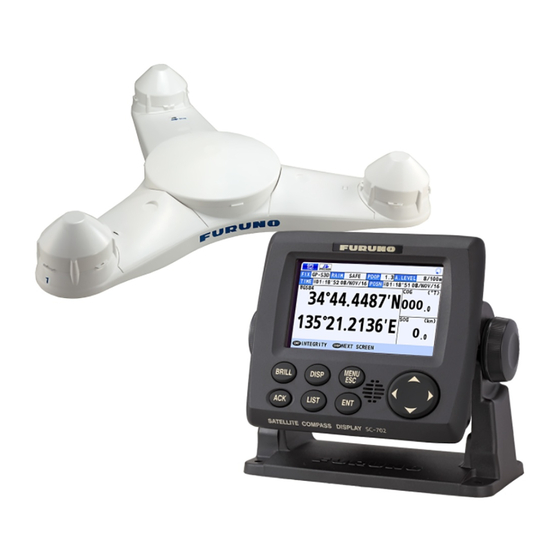
Compass
SC-130
Operator's manual
Furuno SC-130 Operator's Manual
Satellite compass
Hide thumbs
1
2
3
4
5
Table Of Contents
6
7
8
9
10
11
12
13
14
15
16
17
18
19
20
21
22
23
24
25
26
27
28
29
30
31
32
33
34
35
36
37
38
39
40
41
42
43
44
45
46
47
48
49
50
51
52
53
54
55
56
57
58
59
60
61
62
63
64
65
66
67
68
69
70
71
72
73
74
75
76
77
78
79
80
81
82
83
84
85
86
87
88
89
90
91
92
93
94
95
96
97
98
99
100
101
102
103
104
105
106
107
108
109
110
111
112
113
114
115
116
117
118
119
120
121
122
123
124
125
126
127
128
129
130
131
132
133
134
135
page
of
135
Go
/
135
Contents
Table of Contents
Troubleshooting
Bookmarks
Table of Contents
Table of Contents
Foreword
System Configuration
Equipment List
1 Installation
How to Install the Antenna Units
How to Install the SC-703 Antenna Unit
How to Install the SC-1303 Antenna Unit
How to Retrofit from SC-603/SC-1203
How to Install the Junction Box (SC-701)
How to Install the Display Unit (SC-702)
How to Install the SC-702 on a Desktop or Overhead
How to Flush Mount the SC-702
How to Install the Remote Display Unit (Option)
Wiring
How to Fabricate the Cables
How to Secure and Waterproof the Cable Connections
How to Fabricate the WAGO Connectors
How to Connect the Antenna Unit (SC-703/SC-1303)
How to Connect the Junction Box (SC-701)
How to Connect the Display Unit (SC-702)
How to Connect the Remote Display Unit (Option)
Initial Settings
Main Menu
How to Set Vessel Dimensions, Antenna Location and CCRP
How to Apply Offsets for Heading/Pitch/Heave/Roll/Position
How to Access and Use the [SERVICE] Menu
I/O Menu Settings
Initial Settings for the Remote Display
2 Operation
Controls Overview
How to Turn the Power On/Off
How to Adjust the Brilliance, Change the Background Color
How to Adjust the Screen and Key Panel Brilliance
How to Change the Background and Text Color
Menu Overview
LIST Screens Overview
Display Modes Overview
Icons and Indications
GPS Display Mode
GPS Coordinates Screen (Main Screen)
GPS Integrity Screen
BEACON INFO/TYPE 16 MESSAGE Screen
THD Display Mode
HDG Data Screen
ROT Data Screen
HDG/ROT Split Screen
THD Integrity Screen
ROTI Display Mode
ROTI Display for RD-50/RD-20 (Option)
SPD Display Mode (Non-IMO Types Only)
Speed and Distance Display Screen
Navigational Data Screen
Alerts
How to Acknowledge Alerts
How to Enable/Disable the Aural Alert (Non-IMO Type Only)
How to Access the Alert List
How to Access the Alert Log
How to View the Connected Devices
DISPLAY Menu
How to Change the Display Color
How to Change the Units of Measurement
How to Use the Smoothing Menu
How to Set the Number of Digits after a Decimal Point
How to Set Geodetic Data
How to Reset the Trip Meter
How to Adjust the Date and Time
How to Set the Display Language
GNSS Menu
How to Select the Positioning System to Use
How to Set the Positioning Conditions
How to Set up DGPS/SBAS
How to Set up RAIM
How to Set the Rollover Timing
How to Set up the I/O Menu
How to Set up Serial Data Output
How to Set up LAN Data Output
How to Set up Data Sources (Data Input)
How to Use the Input/Output Logs
How to Restart Heading Output
How to Change the Speed Reference (Non-IMO Types Only)
SENSOR Menu
OTHER Menu
SENSOR STATUS Menu
SYSTEM Menu
Simulation Mode
SYSTEM SOUND Menu
SYSTEM LOG Menu
How to Save a Sensor Log
How to Clear Display Settings and GPS Memory
ROTI Display Operations (RD-50/RD-20, Option)
3 Maintenance, Troubleshooting
Preventative Maintenance
Replacement of Fuse
Basic Troubleshooting
Maintenance Menu
How to Find Unit Information
How to Backup User Settings
Diagnostic Tests
Memory Test
Keyboard Test
LCD Test
Automatic Test
Sound Test
Appendix 1 Menu Tree
Appendix 2 Alert List
Appendix 3 Abbreviations and Units
Units of Measurement
Appendix 4 Icons and Symbols
Appendix 5 Geodetic Chart Codes
Appendix 6 What Is Sbas
Appendix 7 Digital Interface (Iec 61162-1 Edition 4(2010-11))
Appendix 8 Parts List/Location
Appendix 9 Jis Cable Guide
Specifications
Index
Advertisement
Quick Links
1
How to Access and Use the [Service] Menu
Download this manual
OPERATOR'S MANUAL
SATELLITE COMPASS
SC-70
SC-130
Model
www.furuno.com
Table of
Contents
Previous
Page
Next
Page
1
2
3
4
5
Advertisement
Table of Contents
Troubleshooting
MAINTENANCE, TROUBLESHOOTING
81
Basic Troubleshooting
82
Need help?
Do you have a question about the SC-130 and is the answer not in the manual?
Ask a question
Questions and answers
Related Manuals for Furuno SC-130
Compass Furuno Satellite Compass SC-50/110 Service Manual
Satellite compass (30 pages)
Compass Furuno SC-110 Operator's Manual
Thd satellite compass (93 pages)
Compass Furuno SC-110 Operator's Manual
Thd satellite compass (89 pages)
Compass Furuno SC50 Quick Manual
Satellite compass (2 pages)
Compass Furuno SC-120 Operator's Manual
Satellite compass (96 pages)
Compass Furuno SC-60 Operator's Manual
Satellite compass (106 pages)
Compass FURUNO SC-50S Operator's Manual
Thd satellite compass (65 pages)
Compass Furuno Sc 50 Specifications
Revolutionary heading sensor satellite compass (4 pages)
Compass Furuno SC-50 Product Specification
Satellite compass (2 pages)
Compass Furuno SC-50 Operator's Manual
Thd satellite compass (101 pages)
Compass Furuno SC-50 Operator's Manual
Thd satellite compass (2 pages)
Compass Furuno SC-30 Operator's Manual
Satellite compass (28 pages)
Compass Furuno SC-30 Operator's Manual
Satellite compass (28 pages)
Compass Furuno SC-70 Operator's Manual
Satellite compass (135 pages)
Compass Furuno SCX-20 Operator's Manual
Satellite compass (86 pages)
Compass Furuno SATELLITE COMPASS SCX20 Operator's Manual
(49 pages)
This manual is also suitable for:
Sc-70
Table of Contents
Save PDF
Print
Rename the bookmark
Delete bookmark?
Delete from my manuals?
Login
Sign In
OR
Sign in with Facebook
Sign in with Google
Upload manual
Upload from disk
Upload from URL


Need help?
Do you have a question about the SC-130 and is the answer not in the manual?
Questions and answers