Table of Contents
Advertisement
Advertisement
Table of Contents
Troubleshooting

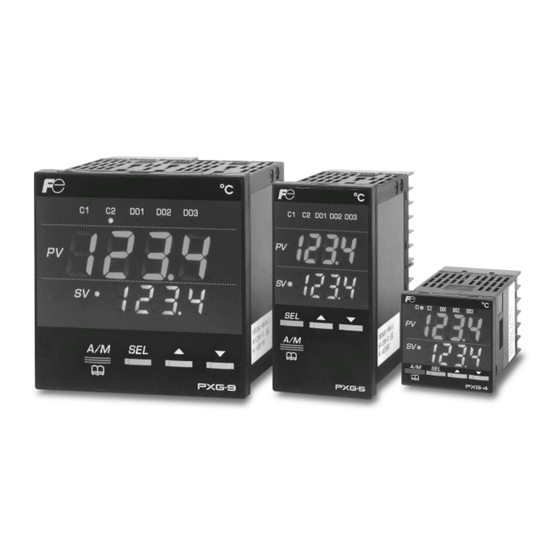
Related Manuals for FujiFilm PXG4


Summary of Contents for FujiFilm PXG4
- Page 2 According to IEC 1010-1 common) Degree of pollution ● Keep the following clearance and creepage distance ■ PXG4 between the temperature sensor and areas that generate Basic insulation No insulation Functional insulation or achieve the following voltages. Power...
- Page 3 To prevent controller damage and failure, supply the • For model PXG4, insert the unit through the back of the • controller with a correctly rated power voltage. included mounting frame, and push on the frame until the To prevent electric shock and controller failure, do not •...
- Page 4 Cautions for Wiring Connections Cautions for Key Operations/Error Operations For a thermocouple input use a prescribed compensating If the alarm function is not connected correctly, it will not • • sound during controller error. Be sure to check that it is lead wire.
-
Page 5: Table Of Contents
Contents 1. Part Names and Functions Setting the Output Convergence Value......35 Anti-reset Windup ..............36 Part Names and Functions ..........10 Setting the Anti-reset Windup ...........36 Keypad ................10 Normal/Reverse Setting............37 Display ................10 Setting the Normal/Reverse Setting .........37 SV Lower Limits, SV Upper Limits ........38 2. - Page 6 PV start................61 Adjusting Remote SV Zero/Span........80 Setting PV Start ............... 61 Remote SV Input Range ............81 Continue mode ..............61 Setting the Remote SV Input Range ........81 Setting the Continue Mode..........61 Remote SV Input Filter............82 Setting the Max Pattern Selection, Setting the Remote SV Filter ..........82 Setting the Min Pattern Selection ........
- Page 7 15. Environmental Parameters (Config Ch13) Control Target ..............108 Servo Control 1/Servo Control 2 ........108 Overview of Environmental Parameters (Ch13)....142 Changing to Servo Control 1 or Servo Control 2 ..108 Display Timeout Settings ...........143 Setting the Valve Stroke Time ........109 Setting the Display Timeout..........143 Position Feedback Control (PFB Control) ......
- Page 8 C, E, P, R nor S.) Current (0 to 20mA DC / Note 1 4 to 20mA DC) ■ PXG4 Motorized Valve Control Model List Voltage (0 to 5V DC / Note 1 1 to 5V DC / 0 to 10V DC / Digit Specifications...
- Page 9 PXG5/9 Model Specifications ■ PXG5/9 Standard Model List Digit Specifications 1 2 3 4 5 6 7 8 - 9 10 11 12 13 - 14 Notes Digit Specifications 1 2 3 4 5 6 7 8 - 9 10 11 12 13 - 14 Notes Note 1: For outer dimensions of 48 x 96, the transmitter power supply output <Size of front WxH>...
-
Page 10: Part Names And Functions
Chapter Chapter 1 Part Names and Functions Part Names and Functions – 10 – 9 –... -
Page 11: Part Names And Functions
Part Names and Functions This section details the name and function of each part of the face panel. D01 Lamp Chapter C2 Lamp D02 Lamp C1 Lamp D03 Lamp PV Display SV Display SV Lamp MAN/AT/SELF Lamp ▼ Key USER Key ▲... -
Page 12: Overview Of Basic Operations And Parameters
Chapter 2 Chapter Overview of Basic Operations and Parameters Basic Operation – 12 ● Parameter Overview – 14 ● Steps for Setting Parameters – 19 – 11 –... -
Page 13: Basic Operation
Basic Operation This device has four modes: operation mode, manual mode, monitor mode, and setup mode. This section outlines each mode and explains its key functions. Refer to the following diagram for information about key functions and changing modes. "Press and hold" means to press a key and hold it for about one second. Chapter (change operation mode... -
Page 14: Operation Mode
Operation Mode Operation mode is the regular mode of operation. PV and SV values are displayed. Control output and alarm output are suspended during standby, but the PV value is displayed as normal and the SV value blinks. The controller starts in this mode Chapter when the power is turned on. -
Page 15: Parameter Overview
Parameter Overview The parameters are divided into 13 channels. Each channel contains one series of parameters. Refer to the following chapter for a detailed explanation of each channel. The following is an overview of the channels. Channel Display Parameter Name Overview Page Ch 1... - Page 16 ● Setup Mode — Parameter Menu Chapter Manual mode RUN/Standby Remote mode Ramp/soak Auto-tuning switch switch switch control command run command Operation DO output latch Currently Currently cancel command selected SV No. selected PID No. Key lock ALM1 ALM2 ALM3 ALM4 ALM5 setting...
- Page 17 Ramp/soak Step16 Ramp/soak Step2 Ramp/soak Step1 SV set value Ramp/soak Ramp/soak Ramp/soak Ramp time Chapter operation time mode Soak time pattern (Step No.) Ramp/Soak Guaranteed soak Guaranteed Guaranteed PV start Continue mode ON/OFF soak band soak band (lower) (upper) Pattern selection Pattern selection max setting min setting...
- Page 18 USER key DI-1 DI-2 DI-3 DI-4 DI-5 Chapter allocation function function function function function settings select select select select select System do1T doP1 do5T doP5 ..Ramp SV Ramp SV - Output Option type event function effect/no effect Decline type setting setting Ramp SV - Ramp SV...
- Page 19 dP01 dP30 ..Display mask of Chapter each parameter Display Display Remote Soft start ALM blink, timeout setting blink setting blink setting LED lamp flicker Environmental Parameters L-C2 C2 lamp Controller reset allocation – 18 –...
-
Page 20: Steps For Setting Parameters
Steps for Setting Parameters The following explains the steps from power-up to operation. Prepare Operation Chapter Make a settings plan. Confirm that controlled object will operate in Decide how you want the controller to run and what manual mode. parameter values will be needed to make the controller run to your specifications. - Page 21 MEMO Chapter – 20 –...
-
Page 22: Operation Parameters (Ch1)
Chapter 3 Chapter Operation Parameters (Ch1) Overview of Operation Parameters (Ch1) – 22 ● Auto/Manual Switch – 23 ● Standby Switch – 24 ● Switching Between Local and Remote Operation – 24 ● Ramp/Soak Command – 25 ● Auto-tuning – 25 ●... -
Page 23: Overview Of Operation Parameters (Ch1)
Overview of Operation Parameters (Ch1) Operation parameters handle all operation controls. The operation menu includes the following items. Initial Display Parameter name Function Setting range Remarks Page value " " (Man) Switches to manual Switches between auto/manual oFF (off)/on (manual) mode modes STbY... -
Page 24: Auto/Manual Switch
Auto/Manual Switch Manual control allows you to set the control output to 2. Changing Modes from the Channel Menu any value. • Range oFF : Auto Operation mode on : Manual ● Manual Mode Display A decimal point will light up at the bottom right of the display during manual mode. -
Page 25: Standby Switch
Standby Switch Switching Between Local and Remote Operation The following will switch you between operation mode and The following will switch you between local SV and standby mode. remote SV operation. In remote SV operation, SV is The following items can be set beforehand in standby mode. controlled by an external SV input (RSV). -
Page 26: Ramp/Soak Command
Ramp/Soak Command Auto-tuning Switches between ramp/soak states. Running auto-tuning automatically sets the optimal PID. The following three conditions are possible. • Range oFF : Stop/Finish • "oFF" (stop) : The ramp/soak is stopped. : Auto-tuning (normal type) starts • "rUn" (run) : The ramp/soak starts. : Auto-tuning (low PV type) starts •... -
Page 27: Do Output Latch Cancel
SV No. Switch DO Output Latch Cancel The following steps will cancel the DO Latch. This function changes an SV No. previously set to a PID • Range: oFF palette. This allows SV to be changed easily. rST (latch reset) •... -
Page 28: Changing Pid No
Changing PID No. Alarm Settings The following changes a previously set PID No. The following steps set the values for ALM1 to ALM5 This allows you to change the PID No. to fit the SV and when DO1 to DO5 are set as alarms. control settings. -
Page 29: Key Lock
Key Lock Prevents SV parameters from being changed. The following three settings are available • 0: No lock • 1: All locked • 2: All but SV locked The channel menu can be displayed even when key lock Point is active. Chapter Refer to Accidental operation can also be prevented with a password. -
Page 30: Control (Pid) Parameters (Ch2)
Chapter 4 Control (PID) Parameters (Ch2) Chapter Overview of Control (PID) Parameters (Ch2) – 30 ● Proportional Band, Integration Time, Derivative Time – 31 ● ON/OFF Control Hysteresis – 32 ● Cooling Proportion Band Coefficient – 33 ● Dead Band – 34 ●... -
Page 31: Overview Of Control (Pid) Parameters (Ch2)
Overview of Control (PID) Parameters (Ch2) This section explains parameters related to PID and other controls. The PID menu contains the following items. Initial Display Parameter name Function Setting range Remarks Page value " " (P) Proportional band Sets the proportional band for the PID 0.0% to 999.9% 5.0% parameter. -
Page 32: Proportional Band, Integration Time, Derivative Time
Proportional Band, Integration Time, Derivative Time Specifies PID (Proportional Band, Integration Time, Setting PID Derivative Time) • Range P : 0.0% to 999.9% The following steps will explain how to set PID values, using I : 0 sec to 3200 sec as an example P=10.0%, I=100 sec and D=20 sec. -
Page 33: On/Off Control Hysteresis
ON/OFF Control Hysteresis Settings for ON/OFF Control (2 position) Setting ON/OFF Control Hysteresis • Range: 0.0% to 50.0% FS The control method varies with the size of the hysteresis. Press and hold the key to display the setup mode channel menu ("o o o o P P P P E E E E C C C C h h h h 1 1 1 1 "), then use the Small hysteresis •... -
Page 34: Cooling Proportion Band Coefficient
Cooling Proportion Band Coefficient Sets the cooling proportional band coefficient Setting Cooling Proportional Band • Range: 0.0 to 100.0 The relationship between heating control output and cooling Press and hold the key to display the setup control output is outlined below. mode channel menu ("o o o o P P P P E E E E C C C C h h h h 1 1 1 1 "), then use the output keys to display Pid ("P P P P i i i i d d d d C C C C h h h h 2 2 2 2 "). -
Page 35: Dead Band
Dead Band Cooling proportional band shifts with the setting value as Setting Dead Band shown below. output Press and hold the key to display the setup heating mode channel menu ("o o o o P P P P E E E E C C C C h h h h 1 1 1 1 "), then use the cooling keys to display Pid ("P P P P i i i i d d d d C C C C h h h h 2 2 2 2 "). -
Page 36: Output Convergence Value
Output Convergence Value Output convergence value is a function that adds MV Setting the Output Convergence Value value offset. • Range bAL : -100% to 100% Press and hold the key to display the setup ● The output convergence value function ("b b b b A A A A L L L L ") outputs to mode channel menu ("o o o o P P P P E E E E C C C C h h h h 1 1 1 1 "), then use the PV and SV a calculated result of the PID computed MV keys to display Pid ("P P P P i i i i d d d d C C C C h h h h 2 2 2 2 "). -
Page 37: Anti-Reset Windup
Anti-reset Windup Anti-reset windup is a function that limits the range of Setting the Anti-reset Windup valid integration to control overshooting. • Range Ar : 0% to 100% FS Press and hold the key to display the setup ● The anti-reset windup function ("A A A A r r r r ") cuts integration that mode channel menu ("o o o o P P P P E E E E C C C C h h h h 1 1 1 1 "), then use the falls outside of the Ar set range that is centered around SV. -
Page 38: Normal/Reverse Setting
Normal/Reverse Setting Specifies whether the control operations are normal or Setting the Normal/Reverse Setting reverse. • Range rv-- : heat (reverse) / cool (none) Press and hold the key to display the setup no-- : heat (normal) / cool (none) mode channel menu ("o o o o P P P P E E E E C C C C h h h h 1 1 1 1 "), then use the rvno : heat (reverse) / cool (normal) keys to display Pid ("P P P P i i i i d d d d C C C C h h h h 2 2 2 2 "). -
Page 39: Sv Lower Limits, Sv Upper Limits
SV Lower Limits, SV Upper Limits These settings specify the range to which SV can be set. Setting the SV Upper and Lower Limits SV can be set to any value in the measurement range. • Range: 0% to 100% FS (lower/upper limit) Press and hold the key to display the setup mode channel menu ("o o o o P P P P E E E E C C C C h h h h 1 1 1 1 "), then use the... -
Page 40: Out1 Proportional Cycles, Out2 Proportional Cycles
OUT1 Proportional Cycles, OUT2 Proportional Cycles When using contact output and SSR drive output with PV Setting the Preset OUT1/OUT2 Values input inside the proportional band, output will switch ON/ OFF at regular intervals. Press and hold the key to display the setup These intervals are called proportional cycles. -
Page 41: Out1 Upper/Lower Limits, Out2 Upper/Lower Limits
OUT1 Upper/Lower Limits, OUT2 Upper/Lower Limits This parameter specifies the upper and lower limits for Setting OUT1/OUT2 Upper/Lower Limits output control. • Setting range Press and hold the key to display the setup mode channel menu ("o o o o P P P P E E E E C C C C h h h h 1 1 1 1 "), then use the Output lower limit upper limit... -
Page 42: Setting Output Limiter Types
Setting Output Limiter Types When a limit is specified for the output value, you can Setting Output Limiters choose whether or not to apply the limit. The output changes according to the limit, as follows. Press and hold the key to display the setup output value mode channel menu ("o o o o P P P P E E E E C C C C h h h h 1 1 1 1 "), then use the (after limiting) - Page 43 MEMO Chapter – 42 –...
-
Page 44: Pid Palette Parameter (Ch3)
Chapter 5 PID Palette Parameter (Ch3) Overview of PID Palette Parameters (Ch3) – 44 ● SV Set Value – 46 ● Chapter Proportional Band, Integration Time, Derivative Time – 47 ● ON/OFF Control Hysteresis – 48 ● Cooling Proportional Band – 48 ●... -
Page 45: Overview Of Pid Palette Parameters (Ch3)
Overview of PID Palette Parameters (Ch3) This function records SV and control parameters such as PID. Any of the up to 7 sets stored can be easily recalled by using their number. This is very useful when operating conditions change frequently. The palette menu (ch3) consists of the following function blocks.: PID Palette Function Block Set Value (SV) - Page 46 Display Parameter name Function Setting range Initial value Remarks Page " " (d7) Derivative time 7 Sets the derivative time 0.0 sec to 999.9 sec 60.0 sec " hyS7 " (hyS7) ON/OFF control Sets the hysteresis when 0% to 50% FS 1°C hysteresis7 using ON/OFF control...
-
Page 47: Sv Set Value
SV Set Value Up to seven types of SV (SV1-SV7) can be recorded. Repeat steps 3 to 5 (excluding pressing and Recorded SVs can be recalled from SV selection (" S S S S v v v v n n n n ") holding the key) to set SV2 to SV7. -
Page 48: Proportional Band, Integration Time, Derivative Time
Proportional Band, Integration Time, Derivative Time The following steps set PID. Up to seven types of PID Setting PID (palettes 1 to 7) can be recorded. Recorded PIDs can be recalled from selected PID number ("P P P P L L L L n n n n 1 1 1 1 ") in the Press and hold the key to display the setup operation menu Ch1. -
Page 49: On/Off Control Hysteresis
ON/OFF Control Hysteresis Cooling Proportional Band The following sets the hysteresis during ON/OFF control. Sets the cooling proportional band when dual outputs Up to seven types of hysteresis (palettes 1 to 7) can be are selected. Up to seven types of cooling proportional recorded. -
Page 50: Dead Band
Dead Band Output Convergence Value Sets the dead band when dual outputs are selected. Up to seven types of dead band (palettes 1 to 7) can be Sets the output convergence value. Up to seven types of recorded. Recorded dead band can be recalled from output convergence value (palettes 1 to 7) can be selected PID number ("P P P P L L L L n n n n 1 1 1 1 ") in the operation menu. -
Page 51: Anti-Reset Windup
Anti-reset Windup Normal/Reverse Setting Sets the anti-reset windup. Up to seven types of anti- The following sets the normal/reverse setting. Up to seven types of normal/reverse settings (palettes 1 - 7) reset windup (palettes 1 to 7) can be recorded. Recorded can be recorded. -
Page 52: Setting The Maximum Sv Selection Number
Setting the Maximum Setting the Maximum SV Selection Number PID Selection Number The following sets the maximum number that can be The following sets the maximum number that can be switched to when switching the SV No. via the USER key. switched to when switching the PID No. - Page 53 MEMO Chapter – 52 –...
-
Page 54: Ramp/Soak Parameters (Ch4)
Chapter 6 Ramp/Soak Parameters (Ch4) Overview of Ramp/Soak Parameters (Ch4) – 54 ● Ramp/Soak Activation Pattern – 56 ● Ramp/Soak Time Units – 57 ● Ramp/Soak SV Select (step1) to (step16), Chapter Ramp Time (step1) to (step16), Time Soak (step1) to (step16) – 58 ●... -
Page 55: Overview Of Ramp/Soak Parameters (Ch4)
Overview of Ramp/Soak Parameters (Ch4) This function automatically runs after setting SV and the times for the SV changes. SV can be set to up to 16 steps using 6 different ramp/soak patterns. Ramp: Change SV to to reach a target SV •... - Page 56 Display Parameter name Function Setting range Initial value Remarks Page "M M M M o o o o d d d d " (Mod) Ramp/soak mode Sets the program (P-ON: Off, End: Maintain, operation method OFF: Maintain, Repeat: Off) (P-ON: Off, End: Maintain, OFF: Maintain, Repeat: On) (P-ON: Off, End: Maintain, OFF: Standby, Repeat: Off)
-
Page 57: Ramp/Soak Activation Pattern (Step No.)
Ramp/Soak Activation Pattern step7 step8 step9 step10 step11 step13 step12 step14 step4 SV-8 step2 step3 SV-9 SV-7 step5 step6 SV-13 SV-3 step15 SV-12 SV-4 step1 SV-10 SV-14 SV-2 step16 SV-5 SV-11 SV-15 SV-1 SV-16 SV-6 time step5 to 8 : pattern1 step1 to 4 : pattern 0 step9 to 12 : pattern 3 step13 to 16 : pattern 4... -
Page 58: Ramp/Soak Time Units
Ramp/Soak Time Units The following sets the ramp/soak time units for ramp/ soak activation. Select one of the following: • Range hh : MM(hour:min) MM : SS(min:sec) Time units cannot be set separately for each step. Point All steps use the same unit of time. Setting Ramp/Soak SV, Ramp Time and Soak Time Press and hold the key to display the setup... -
Page 59: Ramp/Soak Sv Select (Step1) To (Step16)
Ramp/Soak SV Select (step1) to (step16), Ramp Time (step1) to (step16), Time Soak (step1) to (step16) The following sets ramp/soak SV, ramp time and soak time. Setting Ramp/Soak SV, Ramp Time and Soak Time The range for each is shown below. Press and hold the key to display the setup SV lower limit (SV) to... -
Page 60: Ramp/Soak Mode
Ramp/Soak Mode The following sets the method of ramp/soak operation. Setting the Ramp/Soak Mode The following items can be set. Press and hold the key to display the setup Power-on Starts ramp/soak from the current PV value when mode channel menu ("o o o o P P P P E E E E C C C C h h h h 1 1 1 1 "), then use the start the equipment is turned on. -
Page 61: Guaranteed Soak, Guaranteed Soak Lower Limit
Guaranteed Soak, Guaranteed Soak Lower Limit, Guaranteed Soak Upper Limit This function guarantees soak time. Soak time only Press the key to confirm the setting. counts down when SV is in the proper temperature range. In the diagram below, the total of the shaded regions keys to display GS-L ("G G G G S S S S - - - - L L L L "). -
Page 62: Pv Start
PV start Continue mode When the ramp soak starts (RUN), this function searches "When the power of the PXG turns off during operation the first point where the measurement value (PV) and the due to power outage or other reasons, this function can program pattern match, and starts operation at that specify the ramp soak operation when the PXG turns on point. -
Page 63: Setting The Max Pattern Selection
Setting the Max Pattern Selection, Setting the Min Pattern Selection Pressing the USER key sets the maximum number or the Press the key, then use the keys to minimum number of patterns when sending a ramp/soak select 2 when the bottom part of the display pattern. -
Page 64: Monitor Parameters (Ch5)
Chapter 7 Monitor Parameters (Ch5) Overview of Monitor Parameters (Ch5) – 64 ● Ramp/Soak Operation Display – 65 ● Control Output Display – 65 ● PFB Input Value Display – 66 ● Remote SV (RSV) Input Display – 66 ● Chapter Heater Current Display –... -
Page 65: Overview Of Monitor Parameters (Ch5)
Overview of Monitor Parameters (Ch5) The monitor allows you to verify the current input and output conditions of the controller. The monitor can display the following items. These parameters are displayed only. The settings cannot be changed in these parameters. Display Parameter name Function... -
Page 66: Ramp/Soak Operation Display
Ramp/Soak Operation Display Control Output Display The current state of the ramp/soak can be shown on the The current output values of OUT1 and OUT2 can be display. shown on the display. The following conditions are possible: Checking the Control Output Display Display Condition "... -
Page 67: Pfb Input Value Display
PFB Input Value Display Remote SV (RSV) Input Display Motorized valve opening will be displayed when using Displays the remote SV input value. position feedback (PFB) as the control. Checking the Remote SV Input Value Refer to For details on PFB, refer to "Chapter 12, Position Feedback Parameters (PFB, Ch10)"... -
Page 68: Heater Current Display
Heater Current Display Leak Current Display Display the Heater current value. Display the Leak current value. Refer to Refer to For details on heater break alarms, refer to "HB Alarm Set Value, For details on heater alarms, refer to “Load short circuit alarm Hysteresis"... -
Page 69: Remaining Time On Timer
Error Source Display Remaining Time on Timer Displays the remaining time on the timer. Displays the source of an error. Refer to For more on alarm delay, refer to "Alarm Hysteresis, Delay Time, Checking the Error Source Delay Time Units" (p. 113). Press and hold the key to display the setup Checking the Time Remaining on Timer... -
Page 70: Current Palette No
Current palette No. Current pattern No. Displays the PID palette No. currently selected. Displays the ramp soak pattern No. currently selected. Checking the Palette No. Checking the Pattern No. Press and hold the key to display the setup Press and hold the key to display the setup mode channel menu ("o o o o P P P P E E E E C C C C h h h h 1 1 1 1 ") and use the mode channel menu ("o o o o P P P P E E E E C C C C h h h h 1 1 1 1 ") and use the... - Page 71 MEMO Chapter – 70 –...
-
Page 72: Setup Parameters (Ch6)
Chapter 8 Setup Parameters (Ch6) Overview of Setup Parameters (Ch6) – 72 ● PV Input Types – 74 ● PV Input Lower Limit, PV Input Upper Limit – 75 ● Decimal Place – 75 ● PV Input Shift – 76 ●... -
Page 73: Overview Of Setup Parameters (Ch6)
Overview of Setup Parameters (Ch6) This section covers the analog input and output of this device. This section applies to the following types of input: • PV(Input from sensors such as thermocouples and resistance thermometer bulbs) • RSV(Remote SV input) •... - Page 74 Reference Display Parameter name Function Setting range Initial value Remarks Page " " (C2r) OUT2 range Sets the range of the control output 0-5 (0mA to 5V) 0-10 Note 3 (OUT2)(Sets also for re-transmission 1-5 (1V to 5V) (Voltage) Note 4 output) 0-10 (0mA to 10V) 4-20...
-
Page 75: Pv Input Types
PV Input Types PV input source can be any of the following, including Setting the PV Input Type thermocouples and resistance thermometer bulbs. This section explains how to change the PV input type with Setting Input Type Sensor Type the example of changing from the factory thermocouple JPT 100Ω... -
Page 76: Pv Input Lower Limit Pv Input Upper Limit
PV Input Lower Limit Decimal Place PV Input Upper Limit This is the procedure for specifying the upper and lower This is the procedure for setting the decimal place in the limits of PV input. PV input can be set to any value within PV display. -
Page 77: Pv Input Shift
PV Input Shift SV Offset This function shifts PV input before display. This function specifies the SV shift. This is used when combining PV input with other instruments. This is used to eliminate remaining offset when using P • Range: -10% to 10% FS control. -
Page 78: Pv Input Filter
PV Input Filter This low-pass filter function reduces noise and signal Setting the PV Input Filter wavering. • Range: 0.0 sec to 120.0 sec (input filter damping) The following steps explain how to set the PV input filter by using 10 sec as an example. input control output filter... -
Page 79: Pv Display Zero Adjustment
PV Display Zero Adjustment, PV Display Span Adjustment This is the procedure for adjusting the PV display zero/span. Press and hold the key, then use the keys to select AdJ0 ("A A A A d d d d J J J J 0 0 0 0 "). Set the following equipment before using these parameters or starting revisions. -
Page 80: Cold Junction Compensation
Cold Junction Compensation This is the procedure for turning cold junction compensation on or off when using input from a thermocouple sensor. This setting should be left "ON" during normal operation. It should oly be turned off when cold junction compensation is being performed externally or you wish to record temperature differences. -
Page 81: Remote Sv Zero Adjustment
Remote SV Zero Adjustment, Remote SV Span Adjustment This function adjusts remote SV zero/span. Press the key, then use the keys to Use this function to match zero/span to an output gauge. select 5.0 when the bottom part of the display •... -
Page 82: Remote Sv Input Range
Remote SV Input Range This is the procedure for specifying the remote SV input range. • Range 0-5: 0V to 5V 1-5: 1V to 5V Setting the Remote SV Input Range Press and hold the key to display the setup mode channel menu ("o o o o P P P P E E E E C C C C h h h h 1 1 1 1 "), then use the keys to display "S S S S E E E E T T T T C C C C h h h h 6 6 6 6 ". -
Page 83: Remote Sv Input Filter
Remote SV Input Filter This low-pass filter function reduces noise and signal Setting the Remote SV Filter wavering. • Range: 0.0 sec to 120.0 sec (input filter damping) The following steps explain how to set the remote SV filter by using 10 sec as an example. -
Page 84: Out1 Range, Out2 Range
OUT1 Range, FALT OUT1 Value, OUT2 Range FALT OUT2 Value Specifies the range for control output (OUT1/OUT2) This is the procedure for specifying the output value of • Range : 0V to 5V OUT1/OUT2 should this device fall go into the FALT state : 1V to 5V (Input Error). -
Page 85: Soft Start Out1 Output, Soft Start Time
Soft Start OUT1 Output, Soft Start Time This function controls the maximum output produced Setting Soft Start OUT1 Output/OUT1 Time when turning on the equipment (including the temperature controller). This section explains how to set soft start output and time by The controls place an upper limit on the output for a set time using output = 5% and time = 30 min. -
Page 86: Standby Out1 Output Standby Out2 Output
Standby OUT1 Output Standby OUT2 Output Standby Mode Settings This is the procedure for setting the OUT1/OUT2 values This is the procedure for specifying re-transmission output, alarm output, and operation mode display in standby mode. for standby mode. The following three settings are available: •... -
Page 87: Ao Output Type
AO Output Type This is the procedure to specify what output is re- transmitted. The following five settings are available: • Range Pv: Measurement Sv: Set value Mv: Control output Dv: Variable (PV-SV) Setting AO Output Type The following steps explain how to set AO output by using SV as an example. -
Page 88: Ao Lower Limit Scaling, Ao Upper Limit Scaling
AO Lower Limit Scaling, AO Upper Limit Scaling This is the procedure for specifying the upper and lower Setting AO Upper/Lower Limit Scaling limits of re-transmission input. • Range: -100% to 100% FS (Upper/lower limit) The following steps explain how to set AO limit scaling by re-transmission output using -80% to 80% as an example. - Page 89 MEMO Chapter – 88 –...
-
Page 90: System Parameters (Ch7)
Chapter 9 System Parameters (Ch7) Overview of System Parameters (Ch7) – 90 ● USER Key Assignments – 93 ● DI Function Select – 94 ● DO Event Type – 96 ● DO Option Functions – 98 ● Ramp SV ON/OFF, Ramp SV decline, Ramp SV incline, Ramp SV slope time unit – 99 ●... -
Page 91: Overview Of System Parameters (Ch7)
Overview of System Parameters (Ch7) This section explains system parameters, which specify the basic operations and controls of this device. The following settings are available USER key ( ) function settings • DI function settings • DO function settings • SV ramp rate settings •... - Page 92 Initial Display Parameter name Function Setting range Remarks Page value " " (di1) DI-1 function select Sets the function of DI-1 28 (SV No.+4) Note 1 29 (PID No.+1) 30 (PID No.+2) 31 (PID No.+4) 32 (no function) 33 (no function) 34 (no function) 35 (SV No., PID No.
- Page 93 Initial Display Parameter name Function Setting range Remarks Page value " PrCS " (PrCS) Control target Allows you to select the control Srv1 (servo control 1) PFb/ Note 4 target. Srv2 (servo control 2) Srv1 PFB (position feedback control) (PFB on/ PFB off) "...
-
Page 94: User Key Assignments
USER Key Assignments This device includes a key, which has the following Setting USER Key Assignments two functions. How long to The follow steps explain how to set USER key assignments When to press Operations when pressing press the by using switch between standby ON/OFF as an example. Operation mode Displays other One click... -
Page 95: Di Function Select
DI Function Select DI1 to DI5 can each be assigned a function. The assigned Function Name Behavior Judgment play condition functions activate when an external digital signal is input. "3 3 3 3 1 1 1 1 " PID No. + 4 When selecting PID –... - Page 96 Selecting DI Function The following steps explain how to set DI functions by using DI1 = switches between standby ON/OFF as an example. Press and hold the key to display the setup mode channel menu ("o o o o P P P P E E E E C C C C h h h h 1 1 1 1 "), then use the keys to display SYS ("S S S S Y Y Y Y S S S S C C C C h h h h 7 7 7 7 ").
-
Page 97: Do Event Type
DO Event Type • • • • ● Dual Set Value Alarm Codes Sets the trigger to turn DO on. Select from the following. DO1 to Behavior Class Alarm Type diagram DO1 to Behavior Class Alarm Type diagram Upper/ Upper/lower limit absolute AL-H lower No alarm... -
Page 98: Setting Do Option Functions
● Ramp soak delay start Setting DO Option Functions Class Function 1 to 5 The following steps explain how to set Do event types by Ramp Delay start ON using absolute upper limit alarm as an example. soak delay start Press and hold the key to display the setup mode channel menu ("o o o o P P P P E E E E C C C C h h h h 1 1 1 1 "), then use the... -
Page 99: Do Option Functions
DO Option Functions • • • • DO1 to DO5 can each have an optional function set. The Setting DO Option Functions four types of optional functions are assigned in bit units. • Range: 0000 to 1111 The following steps explain how to set DO option functions by Each of DO1 to DO3 can be assigned the following functions using "alarm latch function"... -
Page 100: Ramp Sv Slope Time Unit
Ramp SV ON/OFF, Ramp SV decline, Ramp SV incline, Ramp SV slope time unit This function changes a previously set SV to the new keys to display rMPL ("r r r r M M M M P P P P L L L L "). Use the value at the ramp rate. -
Page 101: Sv Display Mode
SV Display Mode The target or currentSVcan be displayed during ramp SV. Displays target SV ("TrG") Displays current SV ("rnP") Setting the SV Display Mode The following steps explain how to set the SV display mode by using target SV as an example. Press and hold the key to display the setup mode channel menu ("o o o o P P P P E E E E C C C C h h h h 1 1 1 1 "), then use the... -
Page 102: Control Method
Control Method This controller has five temperature control functions ON/OFF (2 setting) control and three valve control functions. Select the best combination for the current application. Operates as ON/OFF control when the PID parameter ("P P P P ") is ●... -
Page 103: Pid Control
PID Control Fuzzy PID Control Operates as Pid control when the parameter "P P P P " is not set to This control minimizes the overshoot compared to normal PID. 0.0 ("P P P P i i i i d d d d C C C C h h h h 2 2 2 2 "), and "C C C C T T T T r r r r L L L L " is equal to Pid ("S S S S Y Y Y Y S S S S C C C C h h h h 7 7 7 7 "). Pid Fuzzy control can only be used after auto-tuning has been controls calculate Pid and output the result according to the set activated and a PID set. -
Page 104: Self-Tuning Control
Self-tuning Control Conditions to halt self-tuning Adds controls while automatically calculating PID to for a Halt self-tuning in the following situations: changing control target or set temperature (SV). When SV is changed (including when SV is changed by • Self-tuning is especially effective for situations when a high the ramp/soak function, remote SV function, or ramp SV.) level of control is not needed, but auto-tuning cannot be run When self-tuning has not finished after running for nine or... -
Page 105: Setting Self-Tuning
Setting Self-Tuning About Self-Tuning Methods Operation mode Self-tuning can calculate the PID one of two ways. Either self-tuning method will calculate values automatically depending on the characteristics of the controlled device. Stepwise • Limit Cycle • Use the keys to set SV. The following figures depict behavior supplying power to the device, a change in the SV and a loss of control. - Page 106 ● Behavior when control is lost control lost tuning Time 100% Limit Cycle Chapter – 105 –...
-
Page 107: Pid2 Control
PID2 Control Changing to PID2 Control This type of control reduces overshoot during control for Press and hold the key to display the setup processes that turn the control target off and then on again. mode channel menu ("o o o o P P P P E E E E C C C C h h h h 1 1 1 1 "), then use the The algorithm used prevents overintegration of the PID keys to display SYS ("S S S S Y Y Y Y S S S S C C C C h h h h 7 7 7 7 "). -
Page 108: Auto-Tuning
● Please note the following Auto-tuning The PID parameters after auto-tuning has finished will be • saved even if power is cut off. If power is cut off before Auto-tuning automatically calculates PID. auto-tuning is finished, PID parameters will not be Select from three types of auto-tuning in the operation menu changed and auto-tuning will need to be restarted. -
Page 109: Control Target
• Adjustments must be made to display the valve opening. Point CLOSE connection output • See "Position feedback (PFB) control" (p. 108, 128). • An interlock function is built in. (except for PXG4) valve motor Chattering may occur if the dead band ("PGAP") in the PFB (servo 1) Caution menu ("PFB Ch10") is set too small. -
Page 110: Setting The Valve Stroke Time
Position Feedback Control (PFB Control) Setting the Valve Stroke Time Position feedback control (PFB) controls the position of the This is the procedure for setting the valve stroke time to add motorized valve based on the opening signal from the valve. servo control. -
Page 111: Hys Mode Setting
HYS mode setting Startup Mode Settings Selects the hysteresis operation during two state action. This function specifies the mode that the device starts up OFF: Performs two state action at SV+HYS/2 and SV-HYS/2. in when power is supplied. ON: Performs two state action at SV, SV+HYS and SV, SV- Select from the following fore options. -
Page 112: Alarm Parameters (Ch8)
Chapter 10 Alarm Parameters (Ch8) Overview of Alarm Parameters (Ch8) – 112 ● Alarm Hysteresis, Delay Time, Delay Time Units – 113 ● HB Alarm Set Value, HB Alarm Hysteresis – 114 ● Load short-circuit alarm setting Load short-circuit alarm hysteresis – 116 ●... -
Page 113: Overview Of Alarm Parameters (Ch8)
Overview of Alarm Parameters (Ch8) The Alarm Menu (Ch8) consists of the following function blocks. Alarm Function Blocks • Alarm hysteresis • Alarm delay • Heater break alarm • Delay time units • Heater break hysteresis ALM1 • Load short-circuit alarm ALM2 •... -
Page 114: Alarm Hysteresis, Delay Time, Delay Time Units
Alarm Hysteresis, Delay Time, Delay Time Units Alarm parameter settings are as follows: Press and hold the key, then use the keys to select A1hY ("A A A A 1 1 1 1 h h h h Y Y Y Y "). Alarm Hysteresis Specifies alarm detection and recovery width. -
Page 115: Hb Alarm Set Value, Hb Alarm Hysteresis
HB Alarm Set Value, HB Alarm Hysteresis This function controls whether the heater break alarm is • This is not used when the heater is controlled by Point thyristor phase angle control. active. It is only available during ON/OFF (2 state) •... -
Page 116: Setting Heater Break Alarm Points
Press the key, then use the keys to Setting Heater Break Alarm Points select 5.0 when the bottom part of the display begins to blink. The following steps explain how to set alarm activation points The heater break alarm threshold is set to 5.0A. by using heater break alarm = 5A and hysteresis = 2A as an example. -
Page 117: Load Short-Circuit Alarm Setting Load Short-Circuit Alarm Hysteresis
Load short-circuit alarm setting Load short-circuit alarm hysteresis These are the functions to detect short-circuiting of the Press the key, then use the keys to SSR or SSC. They are valid only for the ON/OFF (two set the hysteresis to "1.2" when the bottom part positions) control. -
Page 118: Loop Break Detection Time
Loop Break Detection Time, Loop Break Detection Width This function detects if the control loop is broken. Setting Loop Break Time and Width This function does not use a CT like the heater break alarm, but instead PV change when using control output The following steps explain how to set alarm activation by to determine if the loop is broken. - Page 119 MEMO Chapter – 118 –...
-
Page 120: Communication Parameters (Ch9)
Chapter 11 Communication Parameters (Ch9) Overview of Communication Parameters (Ch9) – 120 ● ST No. Setting – 122 ● Parity Setting – 122 ● Communication Permission – 123 Chapter – 119 –... -
Page 121: Overview Of Communication Parameters (Ch9)
Overview of Communication Parameters (Ch9) This device uses an RS-485 interface and can therefore communicate with personal computers, programmable operation indicators, and other devices. These parameters set the communication conditions for sending and receiving data. Programmable controller RS-485 PXG series RS-232C Personal computer RS-232C... - Page 122 The center of communications (personal computer, etc) on a network is called the "master". There can only be one master per network. The other devices on the network (including this device) are called "slaves" (1: N connection communication). Set a station number for each slave so that they do not overlap with each other.
-
Page 123: St No. Setting
ST No. Setting Parity Setting This is the procedure for specifying the station number. This is the procedure to specify communications speed Range: 0 to 255 and parity check. • (Note that setting the station number to 0 will suspend Setting range •... -
Page 124: Communication Permission
Communication Permission This is the procedure to specify whether the master is permitted or forbidden to write to the slave. Range r (Read only) • rW (Read/write) Setting Communication Permission Press and hold the key to display the setup mode channel menu ("o o o o P P P P E E E E C C C C h h h h 1 1 1 1 "), then use the keys to display the communication menu ("C C C C o o o o M M M M C C C C h h h h 9 9 9 9 "). - Page 125 MEMO Chapter – 124 –...
-
Page 126: Position Feedback Parameters (Pfb, Ch10)
Chapter 12 Position Feedback Parameters (PFB, Ch10) Overview of Position Feedback Parameters (PFB, Ch10) – 126 ● PFB Dead Band – 127 ● Valve Stroke Time – 127 ● PFB Input Adjustment Command – 128 Chapter – 125 –... -
Page 127: Overview Of Position Feedback Parameters (Pfb, Ch10)
Overview of Position Feedback Parameters (PFB, Ch10) PFB parameters are the settings that control the motorized valve. Initial Reference Display Parameter name Function Setting range Remarks value Page " PGAP " (PGAP) PFB dead band Sets PFB dead band 0.0% to 100.0% Note 1 "... -
Page 128: Pfb Dead Band
PFB Dead Band Valve Stroke Time The dead band can be set to not output the valve open or This function controls the time it takes for the motorized close signal. valve to go from fully open to fully closed. Using the valve dead band suppresses the motorized valve Refer to the motorized valve makerís catalog for the hatching and allows greater stabilization of the output. -
Page 129: Pfb Input Adjustment Command
PFB Input Adjustment Command This function adjusts whether PFB input is zero (fully Press the key, then use the keys to closed) or span (fully opened). There are automatic and select 1 when the bottom part of the display manual methods for adjusting. begins to blink. -
Page 130: Making Adjustments Automatically
Making Adjustments Automatically When running automatic adjustment with Point “CAL” at “3”, an adjustment error has occurred if the display changes to “10” or The following steps explain how to make adjustments to zero “20”. Remove the source of the error and and span automatically. - Page 131 MEMO Chapter – 130 –...
-
Page 132: Password Setup (Ch11)
Chapter 13 Password Setup (Ch11) Overview of Password Setup (Ch11) – 132 ● Passwords 1 to 3 – 132 Chapter – 131 –... -
Page 133: Overview Of Password Setup (Ch11)
Overview of Password Setup (Ch11) Passwords 1 to 3 The password function allows you to hide displays by This section explains how to set passwords. block (multiple channels). Range: 0000 to FFFF Blocks set not to display can be changed by entering monitoring mode and inputting the password (PASS) to Steps for Setting the Password display the channels included in those blocks. -
Page 134: Display Mask For Each Parameter (Ch12)
Chapter 14 Display Mask for Each Parameter (Ch12) Overview of Display Mask (Ch12) – 134 ● Display Parameters 1 to 30 – 139 Chapter – 133 –... -
Page 135: Overview Of Display Mask (Ch12)
Overview of Display Mask (Ch12) Use the display mask function to hide parameters and skip Display Screen or Parameter parameter display. Channel Bit position This function is useful for hiding unused parameters or to skip Operation Ch 1 dP01 parameters and protect them from accidental change. STbY dP01 dP01... - Page 136 Display Screen or Display Screen or Parameter Parameter Channel Channel Bit position Bit position bAL5 PID palette Ch 3 dP05 PID palette Ch 3 dP07 dP05 dP08 rEv5 dP05 dP08 dP05 dP08 hyS1 dP05 dP08 CoL1 dP05 dP08 dP05 dP08 bAL1 hYS6 dP05...
- Page 137 Display Screen or Display Screen or Parameter Parameter Channel Channel Bit position Bit position Sv16 Ramp/Soak Ch 4 dP11 Ramp/Soak Ch 4 dP13 TiMU T16r dP11 dP14 Sv-1 T16S dP11 dP14 TM1r dP11 dP14 TM1S GSok dP11 dP14 Sv-2 GS-L dP11 dP14 TM2r...
- Page 138 Display Screen or Display Screen or Parameter Parameter Channel Channel Bit position Bit position UkEy Setup Ch 6 dP17 System Ch 7 dP19 dP17 dP19 dP17 dP19 dP17 dP19 dP17 dP19 dP17 dP19 PvoF do1T dP17 dP19 SVOF do2T dP17 dP19 do3T dP17...
- Page 139 Display Screen or Parameter Channel Bit position STno Communication Ch 9 dP23 dP23 dP23 PGAP PFB Ch 10 dP24 TrvL dP24 dP24 PAS1 Password Ch 11 dP25 PAS2 dP25 PAS3 dP25 ToUT Config Ch 13 dP26 r-Fk dP26 SoFk dP26 ALMF dP26 L-C1...
-
Page 140: Display Parameters 1 To 30
Display Parameters 1 to 30 This section explains procedure hiding The parameters and settings to be used are as follows: parameters that are not being used or that will not be Parameter : dP05 • changed. Set value : 85E0 •... - Page 141 MEMO Chapter – 140 –...
-
Page 142: Environmental Parameters (Config Ch13)
Chapter 15 Environmental Parameters (Config Ch13) Overview of Environmental Parameters (Ch13) – 142 ● Display Timeout Settings – 143 ● Remote Blink Setting – 144 ● Soft Start Blink Setting – 144 ● ALM Blink – 145 ● Burnout Control Selection – 146 ●... -
Page 143: Overview Of Environmental Parameters (Ch13)
Overview of Environmental Parameters (Ch13) This section covers the operating environment parameters for this device. Initial Display Parameter name Function Setting range Remarks value T T T T o o o o U U U U T T T T "... -
Page 144: Display Timeout Settings
Display Timeout Settings This section explains how to set the time that the device Setting the Display Timeout waits for input before returning from monitor or setup mode (channel or parameter display) to PV/SV display. This section explains how to set the display timeout by using •... -
Page 145: Remote Blink Setting
Remote Blink Setting Soft Start Blink Setting This section explains how to specify whether “r r r r S S S S v v v v ” This section explains how to specify whether “S S S S o o o o F F F F T T T T ” blinks in the SV display when remote SV is selected. -
Page 146: Alm Blink
ALM Blink This section explains how to specify whether the operation Press the key to confirm the setting. mode (PV/SV display) blinks when an alarm occurs. Setting display 0 to 255 (decimal) Press the key to return to the operation mode PV/SV display. -
Page 147: Burnout Control Selection
Burnout Control Selection Sets whether to maintain or stop the control when the PV input burnout is detected. • Setting range on: Continuous control oFF: Stop control (control output depends on the set values of FL01 and FL02.) When [maintain control] is selected in the burnout control Caution selection, PID calculation is performed with the burned-out PV value and the preset SV value. -
Page 148: Ramp Soak Pattern Order
Ramp soak pattern order You can change the ramp soak pattern order. Press the key to return to the operation mode The setting items of the ramp soak pattern order are as PV/SV display. follows: Display Meaning Pattern No. Run step (PTn) Normal order Step 1 to step 4... -
Page 149: C2 Lamp Allocation
C2 Lamp Allocation The C2 lamp output can be allocated to display the Setting the C2 Lamp Allocation following information. Setting Conditions where C2 Lamp Blinks This section explains how to allocate the lamp by using C2 = MV2 output/CLOSE output Auto Tuning as an example. -
Page 150: Controller Reset
Controller Reset This section explains how to specify whether or not the main unit is reset. • Range oFF : Do nothing rST : Reset Main Unit The main unit reset function is equivalent to turning the power on and off. Resetting the Main Unit Press and hold the key to display the setup... - Page 151 MEMO Chapter – 150 –...
-
Page 152: Troubleshooting
Chapter 16 Troubleshooting Troubleshooting – 152 Chapter – 151 –... -
Page 153: Troubleshooting
Troubleshooting When symptoms thought to be damage occur, first check that there are no problems with the model purchased, wiring, or parameter settings. The following lists examples of frequent problems and their solutions. Reference Trouble Cause Solution Cannot communicate Parity does not agree. Make the parity on the host and the unit the same. -
Page 154: Appendix
Chapter 17 Appendix Delay Start Function – 154 ● Return to Factory Default Setting Function – 155 Chapter – 153 –... -
Page 155: Delay Start Function
Delay Start Function Setting the Delay Start Function Ramp soak can be automatically started (RUN) after a certain The following steps will explain how to assign the delay start period of time has elapsed since the power of the controller is to DI 2, Do2 and to set the delay time to 15 minutes. -
Page 156: Return To Factory Default Setting Function
Return to Factory Default Setting Function The set values for all of the parameters can be returned to the factory default setting. This function is useful in various situations, such as when you want to redo the settings. Setting the Return to Factory Default Setting Function Follow the steps below to return all values to the factory default setting. - Page 157 MEMO Chapter – 156 –...
- Page 158 International Sales Div Sales Group Gate City Ohsaki, East Tower 11-2, Osaki 1-chome, Shinagawa-ku, Tokyo 141-0032, Japan http://www.fujielectric.com Phone: 81-3-5435-7280, 7281 Fax: 81-3-5435-7425 http://www.fujielectric.com/products/instruments/...
Need help?
Do you have a question about the PXG4 and is the answer not in the manual?
Questions and answers