
Related Manuals for HID CP1000


Summary of Contents for HID CP1000
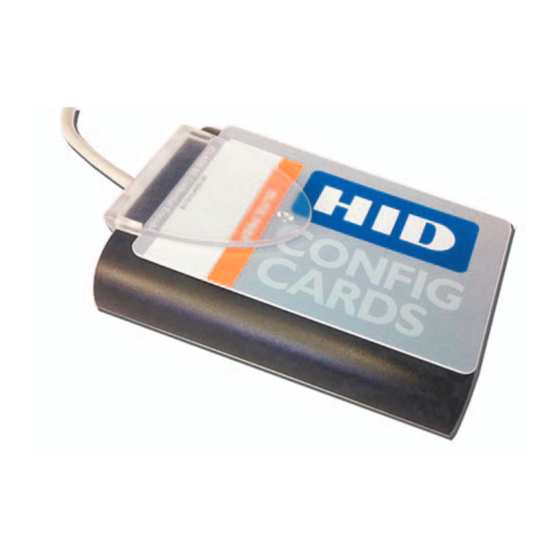
- Page 1 CLASS SE SURE CP1000 D ESKTOP NCODER UIDE PLT-01067 Version: A.7 July 2017 hidglobal.com...
- Page 2 HID Global Corporation. Trademarks HID GLOBAL, HID, the HID Brick Logo, ICLASS SE, and FARGO are the trademarks or registered trademarks of HID Global Corporation, or its licensors, in the U.S. and other countries. Lumidigm is a registered trademark of Lumidigm, Inc.
-
Page 3: Table Of Contents
Contents Chapter 1: Overview ..............1-1 Main Concepts. - Page 4 MIFARE Classic: HID Access Application ........
- Page 5 8.8 Load HID Application Keys........
- Page 6 Page vi 10.2 Log Files ............... 10-2 10.3 Database.
-
Page 7: Chapter 1: Overview
Manage all credential and reader transactions through work orders scripted from instruction sets In-line personalization of credentials Note: From this point, the iCLASS SE CP1000 Encoder is now referred to as the iCLASS SE Encoder. July 2017 PLT-01067, Version: A.7... -
Page 8: Main Concepts
The keys that are involved in encoding operation could be ones that are managed by HID Global or ones created by the customer and provisioned in SAM. -
Page 9: Media Keys
Custom Keys are not archived by HID. All the HID managed keys are delivered in the form of static SNMP messages targeted to the encoder, for which they were requested. Typically, the customer reads the engineId of the encoder device using the host application and orders from HID Global the appropriate key set (for example: standard, ICEXXX etc.). -
Page 10: Secure Channel Key
Note: It is called an encryption key but it also performs signature verification. The SO encryption key could be managed by HID as a standard key and/or an Elite key, which is similar to the management of Media keys described earlier. We also provide the support to create a customer managed SO encryption key, however a SO credential that is protected using such a key is not managed via HID and also has an additional signature using HID Global’s license key. -
Page 11: Formats
Reader configuration plugins are released as groups that organize parameters. Things to know about plugins: Each applet is digitally signed by a key managed by HID Global and known by all encoder devices (global key). This identifies the applet as Genuine HID. Only Genuine HID plugins are recognized by the encoder device. -
Page 12: Work Orders
Reader is configured with instructions for manipulating the raw data into a format that can be managed by the host or access control system. References ISO/IEC 7816: http://en.wikipedia.org/wiki/ISO/IEC_7816 SAM: http://en.wikipedia.org/wiki/Secure_access_module SNMP: http://tools.ietf.org/html/rfc3411 SIO: Secure Identity Objects; request information from HID Global HID Secure Channel version 0.87 PLT-01067, Version: A.7 July 2017... -
Page 13: Chapter 2: Encoder Application Navigation
Chapter Encoder Application Navigation The iCLASS SE Encoder Desktop application has the following structure: Application Modules, each with a subset of tabs. Work Order Manager (File tab, Home tab) Key Management (File tab, Home tab) Reader Configuration (File tab, Home tab) ... -
Page 14: Work Order Manager Module
Page 2-2 Encoder Application Navigation Work Order Manager Module The Work Order Manager module allows the user to define and save an encoding profile for a credential deployment. Each Work Order defines the number of data fields encoded, as well as the data type and field size. -
Page 15: Key Management Module
Encoder Application Navigation Page 2-3 2.2 Key Management Module The Key Management module of the CP1000 Desktop Encoder allows the user to view and manage the HID and Custom Keys. July 2017 PLT-01067, Version: A.7... -
Page 16: Reader Configuration Module
Page 2-4 Encoder Application Navigation 2.3 Reader Configuration Module The Reader Configuration window is used to create the Reader Data configuration cards (for both keys and reader limited settings) The application allows the user to change the keys or behavior of a Reader. -
Page 17: User Config Module
Encoder Application Navigation Page 2-5 2.4 User Config Module The User Config module allows the administrator to create users for Asure ID and to set the functions each user can access in the application. The Administrator can Add User, Remove User, Save Users and Change Passwords. -
Page 18: Home Tab
Page 2-6 Encoder Application Navigation 2.5 Home Tab The Home tab allows configuration and implementation of the iCLASS SE Desktop Encoder. See the Work Order Manager, Key Management, Reader Configuration, and User Configuration chapters for information on each of these Home tabs. PLT-01067, Version: A.7 July 2017... -
Page 19: File Tab
Encoder Application Navigation Page 2-7 2.6 File Tab The File tab contains specific options depending on which Application Module is selected. See the Work Order Manager, Key Management, Reader Configuration, and User Configuration chapters for information on each of these File tabs. July 2017 PLT-01067, Version: A.7... -
Page 20: Options Window
Page 2-8 Encoder Application Navigation 2.7 Options Window The Options window is available on every File tab, and allows you to manage the iCLASS SE Encoder Formats, Plugins, Database, Options and User Options. PLT-01067, Version: A.7 July 2017... -
Page 21: Language Options
Encoder Application Navigation Page 2-9 2.8 Language Options Asure ID allows you to set the default language of the application. Available languages are: English Indonesian Spanish Arabic Italian Thai Chinese Japanese Turkish ... -
Page 22: Skins Options
Page 2-10 Encoder Application Navigation 2.9 Skins Options Asure ID allows you to customize the look of the Asure ID application by selecting a predefined skin. 1. From the Skins options, select a Skin from the list. Note: The change is immediately visible. 2. -
Page 23: Resources Options
Encoder Application Navigation Page 2-11 2.10 Resources Options Asure ID allows you to access resource information for the application. Field Description Displays the current applets loaded and their version. About This is the connection string used to connect to the native Data Source. It Native Data Source contains location and connection information. -
Page 24: Licensing Options
To activate the License Key, enter the information listed below and click an activation button. Field Description Activate License Enter the first name as it appears in the HID license. First Name Enter the Last Name as it appears in the HID license Last Name Enter a valid email address that can obtain messages about licenses and accounts. - Page 25 This window displays an Offline Request Key Phone Activation that you submit to the HID Global contact. An Offline Response Key is given to you to enter and Submit in the window. This option requires an Internet connection and completely activates the license on Activate Online this device.
-
Page 26: Iclass Se Encoder Options
OEM or end user, and not freely distributed. The Formats tab (see graphic above) lists the formats Installed on an Encoder. The default format, delivered with Asure ID is H10301. Contact a HID Global representative for assistance if additional formats are required. -
Page 27: Iclass Se Encoder Plugins Tab
2.12.2 iCLASS SE Encoder Plugins Tab Each plugin used by the iCLASS SE Encoder is digitally signed by a key managed by HID and known by all encoders. Only Genuine HID plugins are recognized by the encoder. Initially, one plugin is created for each supported card type (iCLASS, MIFARE Classic, MIFARE DESFire EVI, Prox and Seos. -
Page 28: Iclass Se Encoder Database Tab
IMPORTANT: Admin Keys must be re-entered to retain access to credentials and credits on the encoder. Displays the number of known HID Keys loaded on the database. Clear HID Keys: Deletes all HID Keys from the database. Keys require Known HID Keys reloading in Key Management. - Page 29 Keys. If the passwords are different, you are prompted to enter the old password from the iCLASS SE Encoder Desktop software. HID Work Orders can be imported from the original iCLASS SE desktop Import Work Orders from application (version 2.3.6.8 or 2.4.0.10).
-
Page 30: Iclass Se Encoder Options Tab
Page 2-18 Encoder Application Navigation 2.12.4 iCLASS SE Encoder Options Tab The Options tab contains basic configuration options, along with the option of checking the SAM Firmware compatibility. Field Description You can set several basic configuration options, select all that are needed: •... -
Page 31: Iclass Se Encoder About Tab
A message is displayed if the firmware is up to date. Note: If the detected version is too new, you are directed to the HID support site to download the latest version of the software. It cannot downgrade an encoder. - Page 32 Page 2-20 Encoder Application Navigation This page intentionally left blank. PLT-01067, Version: A.7 July 2017...
-
Page 33: Chapter 3: Setup And Configuration
Chapter Setup and Configuration The following setup and configuration instructions are for the iCLASS SE Encoder Desktop application. System Requirements Microsoft Windows 10 (32-bit and 64-bit) Microsoft Windows 8.1 (32-bit and 64-bit) Type Microsoft Windows 8 (32-bit and 64-bit) Microsoft Windows 7 (32-bit and 64-bit) 1 GHz or higher Pentium-compatible CPU Computer/Processor USB Ports... -
Page 34: Getting Started
1. Plug in the CP1000 Desktop Encoder to a USB port on your PC. 2. Plug in the HID USB Flash Drive to a 2nd USB port on your PC. 3. From the USB flash drive, install the Asure_ID_Setup application file located in the Install folder. -
Page 35: Initial Configuration
Setup and Configuration Page 3-3 3.4 Initial Configuration Change Default Administrative Keys It is important to change the default Administrative Keys during initial setup for security reasons. 1. During the initial installation, the Unsecured Encoder! window will appear, click Yes to change the keys. - Page 36 IMPORTANT: Safely store the value of the admin keys for future reference as HID is unable to recover these keys if lost. If the admin keys are lost, the encoder will need to be sent to HID to be reset.
- Page 37 1. Select Work Order Manager > File tab > Options. 2. Select the Licensing option. 3. Enter the License Key AV352-YNRV6E6G and click your activation option. 4. When the License Key is activated, the CP1000 Edition will display as shown below. July 2017 PLT-01067, Version: A.7...
- Page 38 Page 3-6 Setup and Configuration Change Default Admin Password The Admin password should be modified from the default values for security reasons. 1. Select User Config > Home tab > Change Password. 2. Enter new and confirm password. Click OK. PLT-01067, Version: A.7 July 2017...
- Page 39 Setup and Configuration Page 3-7 Upload Encoder Configuration Package The following steps will load the required files (on the USB flash drive) on the CP1000 Desktop Encoder. 1. Go to Work Order Manager > File tab > Upload Encoder Configuration Package.
-
Page 40: Change Default Admin Password
Page 3-8 Setup and Configuration 3.5 Change Default Admin Password The Admin password must be modified from the default values immediately (Username: admin, Password: admin). For security reasons, this access should not be left on the application. Warning: When creating, a new Admin user, or changing an Admin password, it is important that this password is saved in a secure location. -
Page 41: Chapter 4: Initial Configuration (Startup)
MIFARE DESFire EV1 Elite Prep Card Prox Load HID Application Keys Seos iCLASS Legacy Config Card During initial installation, all required plugins are installed. By default, the iCLASS SE Encoder Kit ships with standard keys and a small number of credits to get started. See Section 2.12.2: iCLASS SE Encoder Plugins Tab for more information on plugins. -
Page 42: Formats
The Credential Credits and Keys are delivered on the USB Flash drive in the Credits and Keys folder. However, when additional credits are required they are ordered from HID Global. Note: Credential Credits and/or Keys can be received as a single .ise from HID Global. See Section 7.7: Load HID Key(s) for information on loading these files. - Page 43 1. Select Work Order Manager > File tab > Upload Encoder Configuration Package. 2. Browse to the iCLASS SE Encoder File (.ise file) provided by HID Global. 3. Double-click the file to be loaded or select the file and click Open.
- Page 44 Page 4-4 Initial Configuration (Startup) 5. When successfully loaded, the message Package has been successfully installed appears at the bottom of the window. PLT-01067, Version: A.7 July 2017...
- Page 45 Initial Configuration (Startup) Page 4-5 After the upload is complete, the installed package contents are displayed on the Key Management > Keys tab pane. July 2017 PLT-01067, Version: A.7...
-
Page 46: Custom Keys
Page 4-6 Initial Configuration (Startup) 4.4 Custom Keys The initial package provided to the customer includes a limited number of credentials to get the user started. Custom Keys are crated from the Key Management application. For information on Creating Custom Keys, see see Section 7.1.1: Key Management Toolbar. PLT-01067, Version: A.7 July 2017... -
Page 47: Chapter 5: Work Order Manager
Chapter Work Order Manager The Work Order Manager module allows the user to create, manage and execute Work Orders. Work Order Manager Home Tab The Work Order Manager Home window contains the following areas. July 2017 PLT-01067, Version: A.7... -
Page 48: Work Order Manager Toolbar
Page 5-2 Work Order Manager 5.1.1 Work Order Manager Toolbar Toolbar Function Description Opens an existing Work Order. See Section 5.3: Open a Work Order. Open Closes the current Work Order. See Section 5.4: Close a Work Order. Close If you select New, any currently opened Work Order closes and the Work Instruction Wizard opens to create a Work Order. - Page 49 Note: If there are not enough encoding credits for the process a message displays. You need to contact HID Global and order more encoding credits. Execute on all records in Work Order. The system selects all records and encode. The process continues until all the credential records have been encoded.
-
Page 50: Work Order Manager Configuration Pane
Page 5-4 Work Order Manager 5.1.2 Work Order Manager Configuration Pane Field Description All available encoders are listed in the drop-down list. Click the Refresh to refresh Selected Encoder the type of encoder. Displays all card technologies loaded on the encoder. Selected Technology Displays the status of the encoder. -
Page 51: Work Order Manager File Tab
Export Work Order upload the file at a later time. to File The Open Log File allows you to view the log file of events for the Asure ID CP1000 Open Log File Edition application. The Recent Items displays the Recent Work Orders, for quick reference. Work... -
Page 52: Open A Work Order
Page 5-6 Work Order Manager 5.3 Open a Work Order 1. To Open an existing Work Order, select Work Order Manager. 2. Select Open from the toolbar. 3. Select a Work Order from the list, and click OK. 4. The Work Order information populates the Work Order Manager window. PLT-01067, Version: A.7 July 2017... -
Page 53: Close A Work Order
Work Order Manager Page 5-7 5.4 Close a Work Order 1. When a Work Order is Open, select Close from the toolbar. See Section 5.3: Open a Work Order. 2. The Work Order is closed. July 2017 PLT-01067, Version: A.7... -
Page 54: Create A Work Order
Page 5-8 Work Order Manager 5.5 Create a Work Order A Work Order is comprised of one or many Work Instructions. A Work Instruction is a single command issued during Work Order execution. The single Work Instruction can either read or write to a specific memory location. - Page 55 Work Order Manager Page 5-9 4. Select Yes to save the Work Order. 5. Enter a descriptive name for the Work Order, and click OK 6. The Work Order information is now displayed on the Work Order Manager window, with the Work Order name displayed across the top of the window.
-
Page 56: Rename A Work Order
Page 5-10 Work Order Manager 5.6 Rename a Work Order 1. While in the Work Order Manager module, select Rename from the toolbar. 2. Select a Work Order from the Manage Work Order window, and click Rename Work Order. 3. Enter a new name of the Work Order on the New Work Order Name window, and click OK. 4. -
Page 57: Delete A Work Order
Work Order Manager Page 5-11 5.7 Delete a Work Order 1. While in the Work Order Manager module, select Delete from the toolbar. 2. Select a Work Order from the Manage Work Order window, and click Delete Work Order. 3. The file is removed from the list. 4. -
Page 58: Print A Work Order
Page 5-12 Work Order Manager 5.8 Print a Work Order Work Orders can be simply printed to a local printer. 1. Open the Work Order Manager module. 2. Open a Work Order. See Section 5.3: Open a Work Order. 3. Click Print from the toolbar. 4. -
Page 59: File Save As A Work Order
Work Order Manager Page 5-13 5.9 File Save As a Work Order This process makes a copy of the Work Instruction to a new Work Order, where it can then be modified, as needed. Note: The database is cleared for the new Work Order. 1. -
Page 60: Export Work Order Data To A Csv File
Page 5-14 Work Order Manager 5.10 Export Work Order Data to a CSV File Work Order Data can be exported to a Comma Separated Values file (CSV) file. 1. On the Work Order Manager toolbar click Export to CSV. 2. Browse to a location to save the file, and click Save. 3. -
Page 61: Export Work Order Data To A Pdf File
Work Order Manager Page 5-15 5.11 Export Work Order Data to a PDF File Work Order data can be exported to a Portable Document Format (PDF) file. 1. Work Order Manager module click Export to PDF. 2. Browse to a location to save the file, and click Save. 3. -
Page 62: Add A Work Instruction To A Work Order
Page 5-16 Work Order Manager 5.12 Add a Work Instruction to a Work Order A Work Instruction is a single routine issued during Work Order execution. The single Work Instruction can either read or write to a specific memory location. Note: This example is of a Custom Configuration. - Page 63 Work Order Manager Page 5-17 3. The Work Order information is displayed on the Work Order Manager window. Select Add Work Instruction. 4. Select the technology type from the list and click OK. 5. See Chapter 6: Work Instruction Wizard, for details on each technology wizard. When you have completed the wizard, return to the following step.
- Page 64 Page 5-18 Work Order Manager 6. Select Yes to save the Work Order. 7. The new Work Instruction is now listed on the Work Order Description. PLT-01067, Version: A.7 July 2017...
-
Page 65: Edit A Work Instruction
Work Order Manager Page 5-19 5.13 Edit a Work Instruction The following describes the simple process of editing an existing Work Instruction. 1. Open a Work Order. 2. Click Edit in the Work Instructions section of the toolbar. 3. Double-click a Work Instruction from the list to edit. 4. -
Page 66: Remove A Work Instruction
Page 5-20 Work Order Manager 5.14 Remove a Work Instruction The following describes the simple process of removing an existing Work Instruction. 1. Open a Work Order. 2. The Work Instruction is now displayed on the Work Order Manager page. 3. -
Page 67: Work Order Execution
Work Order Manager Page 5-21 5.15 Work Order Execution After the Work Instruction and Work Orders are created, you execute a work order. This section gives an overview of the process to write SIO credentials to an iCLASS card(s), but is applicable to other Use Cases. - Page 68 Page 5-22 Work Order Manager 3. A single credential record is added. PLT-01067, Version: A.7 July 2017...
-
Page 69: To Add A Batch Of Credential Records
Work Order Manager Page 5-23 5.15.2 To Add a Batch of Credential Records This section covers how to add a batch of credential records. Note: A single credential record or a batch of credential records can be added by following these steps. - Page 70 Page 5-24 Work Order Manager 4. The credential records are added to the list. PLT-01067, Version: A.7 July 2017...
-
Page 71: Remove Records
Work Order Manager Page 5-25 5.15.3 Remove Records 1. Open a Work Order. 2. Select one record, or a range of records. 3. Click Remove Records. 4. Click Yes to verify the deletion. July 2017 PLT-01067, Version: A.7... - Page 72 Page 5-26 Work Order Manager 5. The credential records are removed. PLT-01067, Version: A.7 July 2017...
-
Page 73: Execute Work Order On Selected Credential Records
This section covers how to execute a Work Order on a credential record. 1. Open a Work Order. 2. Place the correct card type on the CP1000 Desktop Encoder. 3. Select the records to encode (Ctrl+Click or Shift+Click) to select a range of records. - Page 74 Note: If there are not enough encoding credits for the process you are executing, a message appears with a similar message as shown below. You need to contact HID Global and order more Encoding Credits.
-
Page 75: Execute A Work Order On All Credential Records
Work Order Manager Page 5-29 5.15.5 Execute a Work Order on All Credential Records This is the same process, as Section 5.15.4: Execute Work Order on Selected Credential Records above. However, you do not need to select any credential records, and the process continues until all the credential records have been executed. -
Page 76: Read Back
Page 5-30 Work Order Manager 5.15.6 Read Back The Read Back functionality attempts to read a card and decipher/locate its corresponding record in the data. 1. To read a card, open a Work Order with the correct technology type and format. 2. -
Page 77: Chapter 6: Work Instruction Wizard
Chapter Work Instruction Wizard The Work Instruction Wizard appears any time you: Create a New Work Order Add a Work Instruction to a Work Order Edit a Work Instruction There are currently five (5) technology types available, with a corresponding Work Instruction wizard. iCLASS ... -
Page 78: Iclass Work Instructions
Work Instructions 6.1.1 iCLASS: HID Access Application This section covers the Work Instruction wizard for iCLASS, with the HID Access Application encoding. 1. Select the iCLASS technology type, and click OK. 2. The Work Instruction Wizard opens to allows you to configure the Work Instruction for iCLASS. - Page 79 Overwrite Existing Credential: Allows the iCLASS SE Encoder to write over an application that has already been recorded in the Work Order database. Options Enable User PIN Entry (available with SR (HID Access Application and SO only) SE (SO only), SR (HID Access Application and SO), or HID Access Credential Type Application.
- Page 80 Page 6-4 Work Instruction Wizard 4. Define Format Parameters: You select, then customize each parameter defined for the selected format. Select the line to modify. Each parameter is editable with text or from a drop-down menu. Field Description The name is read from the Format file. It is recommended to not change this Name name unless necessary.
- Page 81 16k16 (SO Only), 16k2+16k1 (SO Only), 16k16+16k1 (SO Only). Note: Memory Map is grayed out with the Data Type set to HID Access Application, as the HID Access Application is always encoded in the same place. However, if the Data Type is set to Custom, the Memory Map is active.
- Page 82 Description Card Authentication Keys Custom or HID defined Key Sets may be selected. Custom or HID defined SO Encryption Key Sets may be selected. SO Encryption Key 8. You have completed the wizard. Click Finish. 9. Return to Section 5.5: Create a Work Order, step 5 to save the Work Order.
-
Page 83: Iclass: Custom Encoding
Work Instruction Wizard Page 6-7 6.1.2 iCLASS: Custom Encoding This section covers the Work Instruction wizard for iCLASS, with Custom Encoding. 1. Select the iCLASS technology type, and click OK. 2. The Work Instruction Wizard opens to allow you to configure the Work Instruction for iCLASS. Click Next. - Page 84 Page 6-8 Work Instruction Wizard 4. Memory Map Selection: Select card configuration and location where the data is written. Click Next. Field Description Expected Card Type Configured or Unconfigured. Select the memory configuration from the drop-down list. Card Configuration Options are: 2K, 16k2, 16k16, 16k2+16k1, 16k16+16k1, 2K (SO Only), 16k2 (SO Only), 16k16 (SO Only), 16k2+16k1 (SO Only), 16k16+16k1 (SO Only) Default is 2K.
- Page 85 Description Keys Card Authentication Key: Custom or HID defined Key Sets may be selected. Select the key used to authenticate to the key currently securing the AppArea to encode. SO Encryption Key: Custom or Standard Key Sets may be selected.
-
Page 86: Mifare Classic Work Instructions
6.2.1 MIFARE Classic: HID Access Application This section covers the Work Instruction for MIFARE Classic, with HID Access Application encoding. 1. Select the MIFARE Classic technology type, and click OK. 2. The Work Instruction Wizard opens to allow you to configure the Work Instruction for MIFARE Classic. - Page 87 Work Instruction Wizard Page 6-11 4. Define Format Parameters: Select, to define each parameter for the selected format. Select the line to modify, each parameter is editable with text or from a drop-down menu. Field Description Name The name is read from the Format file. It is recommended to not change this name unless necessary.
- Page 88 6. Key Selection: Select a key to lock the AppArea after the data is written, and click Next. Field Description Key Set: Standard, Custom or HID defined Key Sets may be selected. Authentication Keys are the keys currently used to protect the Sector. Select Default if working with a blank card or Sector.
-
Page 89: Mifare Classic: Custom Encoding
Work Instruction Wizard Page 6-13 6.2.2 MIFARE Classic: Custom Encoding This section covers the Work Instruction wizard for MIFARE Classic, with Custom Encoding. 1. Select the MIFARE Classic technology type. Click OK. 2. The Work Instruction Wizard opens to allow you to configure the Work Instruction for MIFARE Classic. - Page 90 Memory Map Define (select) the MIFARE Sector/Block (scrollable field). Note: The legacy HID application can be encoded on Sector 1. This is a fixed location. The HID SIO application can be encoded in Sector 4 generally, but can be moved.
- Page 91 Work Instruction Wizard Page 6-15 5. Key Selection: Select a key to lock the AppArea after the data is written. Click Next. Field Description Keys Key Set: Not an option. Authentication Keys are the keys currently used to protect the Sector. Select Default if working with a blank card or Sector.
-
Page 92: Mifare Classic: Move Genuine So Sector
Page 6-16 Work Instruction Wizard 6.2.3 MIFARE CLASSIC: Move Genuine SO Sector This section covers the Work Instruction wizard for Move Genuine SO Sector process. 1. Select the MIFARE Classic technology type. Click OK. 2. The Work Instruction Wizard opens to allow you to configure the Work Instruction for Prox. Click Next. - Page 93 Work Instruction Wizard Page 6-17 4. Configure the HID Genuine SO to a new sector. Click Next. Field Description MIFARE Card Type Options are: 1K or 4K SO Sector Number Auto Detect Select new sector number from the drop-down menu. Range is 1-15 New Sector Number Options are: Key A or Key B.
-
Page 94: Mifare Desfire Ev1 Work Instructions
6.3 MIFARE DESFire EV1 Work Instructions 6.3.1 MIFARE DESFire EV1: HID Access Application This section covers the Work Instruction for MIFARE DESFire EV1, with HID Access Application encoding. 1. Select the MIFARE DESFire EV1 technology type. Click OK. 2. The Work Instruction Wizard opens to allow you to configure the Work Instruction for MIFARE DESFire EV1. - Page 95 Work Instruction Wizard Page 6-19 4. Define Format Parameters: Select to define each parameter for the chosen format. Select the line to modify. Each parameter is editable with text or from a drop-down menu. Field Description Name The name is read from the Format file. It is recommended to not change this name unless necessary.
- Page 96 None, NIST SENC HMAC, NXP AV1 1 Key Triple DES, or NXP AV1 2 Key Triple DES Auth Key None, NXP Default Transport Key, or HID SO PICC Master Key. Also custom Auth Key is listed. 7. The wizard is complete. Click Finish.
-
Page 97: Mifare Desfire Ev1: Custom Encoding
Work Instruction Wizard Page 6-21 6.3.2 MIFARE DESFire EV1: Custom Encoding This section covers the Work Instruction wizard for MIFARE DESFire EV1, with Custom Encoding. 1. Select the MIFARE DESFire EV1 technology type. Click OK. 2. The Work Instruction Wizard opens to allow you to configure the Work Instruction for MIFARE DESFire EV1. - Page 98 Page 6-22 Work Instruction Wizard 4. Memory Map Selection: Select the card configuration and location where the data is to be written. Click Next. Field Description Application ID Enter the 3-byte Application ID your company has registered with NXP, in hexadecimal form.
- Page 99 Work Instruction Wizard Page 6-23 5. Key Selection: Set the Application Key options in accordance with the NXP datasheets, and click Next. All options can be set from the associated drop-down menu. Note: Selections must abide by the rules you set up for the card. Field Description Application Keys...
- Page 100 Page 6-24 Work Instruction Wizard 6. When wizard is complete, click Finish. 7. Return to Section 5.5: Create a Work Order, step 5 to save the Work Order. PLT-01067, Version: A.7 July 2017...
-
Page 101: Prox Work Instructions
6.4.1 Prox: HID Access Application This section covers the Work Instruction wizard for Prox, with the HID Access Application encoding. 1. Select the Prox technology type. Click OK. 2. The Work Instruction Wizard opens to allows you to configure the Work Instruction for Prox. - Page 102 Page 6-26 Work Instruction Wizard 4. Define Format Parameters: Define each parameter for the selected format. Select the line to modify, each parameter is editable with text or from a drop-down menu. Field Description Name The name is read from the Format file. It is recommended to not change this name unless necessary.
-
Page 103: Seos Work Instructions
6.5.1 Seos: HID Access Application This section covers the Work Instruction wizard for Seos, with the HID Access Application encoding. 1. Select the Seos technology type. Click OK. 2. The Work Instruction Wizard opens to allow you to configure the Work Instruction for Prox. - Page 104 Page 6-28 Work Instruction Wizard 4. Define Format Parameters: You select, then customizes each parameter defined for the selected format. Select the line to modify, each parameter is editable with text or from a drop- down menu. Field Description The name is read from the Format file. It is recommended to not change this Name name unless necessary.
- Page 105 GDF Auth Key Set: Sets the key set to be used to authenticate to the GDF to GDF Key Sets grant access to create the ADF for the HID Access Application. If the card presented at the time of encoding has the factory default GDF keys, Asure ID attempts to change the GDF keys.
-
Page 106: Seos: Custom Encoding (Basic Mode)
Page 6-30 Work Instruction Wizard 6.5.2 Seos: Custom Encoding (Basic Mode) This section covers the Work Instruction wizard for Seos, with Custom Encoding/Basic Mode. The Basic - Single Key Mode Is designed to be the fastest way for users who are not familiar with the Seos architecture to create a Custom Seos Application. - Page 107 Work Instruction Wizard Page 6-31 July 2017 PLT-01067, Version: A.7...
- Page 108 GDF Auth Key Set: Sets the key set to be used to authenticate to the GDF to GDF Key Sets grant access to create the ADF for the HID Access Application. If the card presented at the time of encoding has the factory default GDF keys, Asure ID attempts to change the GDF keys.
- Page 109 Work Instruction Wizard Page 6-33 6. Review the configuration summary and click Export (to a .txt file) if required. Click Finish. 7. Return to Section 5.5: Create a Work Order, step 5 to save the Work Order. July 2017 PLT-01067, Version: A.7...
-
Page 110: Seos: Custom Encoding (Standard Mode)
Page 6-34 Work Instruction Wizard 6.5.3 Seos: Custom Encoding (Standard Mode) Standard Mode is designed to support advanced Custom Application Configurations. The user is not required to have intimate knowledge of the Seos architecture for simpler configurations of Standard Mode, but for more complex configurations it is helpful. Defaults are provided in this mode to create a single key with read/write/change key access to a single object tag. - Page 111 Work Instruction Wizard Page 6-35 3. Configure Seos Instruction Mode: You can make selections from the following. When complete click Next. Field Description For this example Custom must be selected. Data Type For this example Write must be selected. Instruction Type Options Not available with Custom.
- Page 112 Sets the key set that is used to authenticate to the GDF to grant access to GDF Key Set create the ADF for the HID Access Application. If the card presented at the time of encoding has the factory default GDF keys, Asure ID attempts to change the GDF keys.
- Page 113 Work Instruction Wizard Page 6-37 5. Primary User Key Role: Define a User Key/Role for accessing the default Data Object, and click Next. Field Description Rename the Role Name, if desired. Role Name Assign a Custom Key that this Role will use. Custom Key Note: If the desired key is not defined, select <Create New Key>...
- Page 114 Page 6-38 Work Instruction Wizard 6. ADF Configuration: Create and manager User Key Roles and Object Tags. Click Next. Field Description Add, Modify and delete User Key Roles. Available User Key Roles Note: At least one User Key Role must be defined and assigned to an Object Tag, before you can continue.
- Page 115 Work Instruction Wizard Page 6-39 7. Data Object Mapping: Configure which Object Tag will be written by this Work Instruction and how the data will be formatted, and click Next. Field Description This defines how the data will be entered by the user in the Work Order Manager, or in Plugin Type Data Entry.
-
Page 116: Seos: Custom Encoding (Update Existing Data Object)
Page 6-40 Work Instruction Wizard 6.5.4 Seos: Custom Encoding (Update Existing Data Object) To update a card where the ADF already exists, or if the ADF has multiple objects and was created in a previous Work Instruction, then a distinct type of write operation is required to update the data object only and not modify any existing keys or data objects. - Page 117 Work Instruction Wizard Page 6-41 Method 1 (Configure ADF using an existing Work Instruction) Field Description For this example Custom must be selected. Data Type For this example Write must be selected. Instruction Type Not available with Custom. Options ADF Configuration ADF OID: A number (8 byte minimum) used to reference the application after it is created.
- Page 118 Page 6-42 Work Instruction Wizard 4. Data Object Mapping: Configure which Object Tag will be written by this Work Instruction and how the data will be formatted, and click Next. Field Description This defines how the data will be entered by the user in the Work Order Manager, or in Plugin Type Data Entry.
- Page 119 Work Instruction Wizard Page 6-43 Method 2 (Configure ADF Manually) Field Description For this example Custom must be selected. Data Type For this example Write must be selected. Instruction Type Not available with Custom. Options ADF Configuration ADF OID: A number (8 byte minimum) used to reference the application after it is created.
-
Page 120: Seos: Custom Encoding (Rolling Custom Seos Keys)
Page 6-44 Work Instruction Wizard 6.5.5 Seos: Custom Encoding (Rolling Custom Seos Keys) This operation will change 1 or more keys present in an ADF. 1. Select the Seos technology type. Click OK. 2. The Work Instruction Wizard opens to allow you to configure the Work Instruction for Prox. Click Next. - Page 121 Select the Key ID in which the Privacy Keys will be stored. Key ID The default Key 0 is the Privacy Key ID recommended by HID. Advanced Options allows the Advanced Options user to set the Seos Key Flags.
- Page 122 Page 6-46 Work Instruction Wizard 5. Custom Privacy Change Keys: If the Roll Privacy Encryption and MAC Keys checkbox was selected in step 3 above, the Custom Privacy Change Keys window will display. Define the new Privacy Encryption Key and MAC, and click Next. Field Description The Privacy Encryption Key is used to encrypt the transactions between...
- Page 123 Work Instruction Wizard Page 6-47 6. Key Selection: Select the Keys that will be used for the authentication and securing of data on the card, and click Next. 7. The wizard is complete. Click Finish. 8. Return to Section 5.5: Create a Work Order, step 5 to save the Work Order. July 2017 PLT-01067, Version: A.7...
-
Page 124: Seos: Reading A Seos Data Object From A Custom Adf
Page 6-48 Work Instruction Wizard 6.5.6 Seos: Reading a Seos Data Object from a Custom ADF 1. Select the Seos technology type. Click OK. 2. The Work Instruction Wizard opens to allow you to configure the Work Instruction for Prox. Click Next. - Page 125 Select the Key ID in which the Privacy Keys will be stored. Key ID The default Key 0 is the Privacy Key ID recommended by HID. Advanced Options allows the Advanced Options user to set the Seos Key Flags.
- Page 126 Page 6-50 Work Instruction Wizard 5. Data Object Mapping: Configure which Object Tag will be written by this Work Instruction and how the data will be formatted, and click Next. Field Description This defines how the data will be entered by the user in the Work Order Manager, or in Plugin Type Data Entry.
-
Page 127: Seos: Deleting A Custom Adf
Work Instruction Wizard Page 6-51 6.5.7 Seos: Deleting a Custom ADF Warning: This operation will delete any data associated with an ADF and the ADF itself and should only be performed if the ADF and its data is no longer required. 1. -
Page 128: Work Instruction: Roll Card Authentication Key
3. Select Data Format: You can make selections from the following. Click Next. Field Description Instruction Type Select Roll Card Authentication Key for this option. Data Type Not available. Seos - HID Access Application Credential Type Not available PLT-01067, Version: A.7 July 2017... - Page 129 Description Card Authentication Key: Standard, or HID defined Key Sets may be selected New Card Authentication Key: Standard, or HID defined Key Sets may be selected SO Encryption Key: Standard, or HID defined Key Sets may be selected July 2017...
- Page 130 Page 6-54 Work Instruction Wizard PLT-01067, Version: A.7 July 2017...
- Page 131 The following section is the Key Selection window for MIFARE Classic Encoding. Field Description Key Set: Custom, Standard, or HID defined Key Sets may be selected. Keys Roll Key Set: Custom or HID defined Key Sets may be selected. Authentication Key A: Select an option from the drop-down menu.
- Page 132 Key Set: Standard or HID defined Key Sets may be selected. Keys Change Key Set: Standard or HID defined Key Sets may be selected. Custom PICC Master Key: Select to open the Application Keys section for configuration (see section circled below).
- Page 133 The following section is the Key Selection window for Seos Encoding. Field Description Auth Key Set: Standard or HID defined Key Sets may be selected. Key Sets Change Key Set: Standard or Custom Key Sets may be selected. SO Encryption Key: Standard or HID Standard Key Sets may be selected.
-
Page 134: Multi-Technology Card Support
4. Select the iCLASS technology type from the list and use the Work Instruction Wizard to create an iCLASS Write - HID Access Application instruction. Note: You must select the same format as in the Prox Read instruction in step 2 above. -
Page 135: Chapter 7: Key Management
Limits on Key Storage There is a limit to the number of and Keys (HID and Custom) that can be stored on the iCLASS SE Encoder. The Available Key Slots and Memory is easily monitored on the Encoder Info panel. -
Page 136: Key Management Home Tab
Page 7-2 Key Management Key Management Home Tab The Key Management Home tab contains the following areas. PLT-01067, Version: A.7 July 2017... -
Page 137: Key Management Toolbar
Key Management Page 7-3 7.1.1 Key Management Toolbar The Key Management module of the CP1000 Desktop Encoder allows the user to view and manage the HID and Custom Keys. Toolbar Function Description Allows the user to create or randomly generate a key. See Section 7.3: Create Key. -
Page 138: Encoder Info Panel
Authenticated is displayed, or if the encoders are changed, this process will allow Authentication Status the authentication of the new iCLASS SE Encoder. The number of HID and Custom keys stored on the encoder. As keys are loaded Available Key Slots and removed, the information is shown on the Encoder Info panel. -
Page 139: Key Manager File Tab
See Section 7.9: Revoke HID Key(s) for detailed information. See Section 7.15: Change Encoder Admin Keys for detailed information. Change Encoder Admin Keys The Open Log File allows you to view the log file of events for the Asure ID CP1000 Open Log File Edition application. July 2017... -
Page 140: Create Key
Page 7-6 Key Management 7.3 Create Key The Create Key process allows you to define and save a new Custom Key to the iCLASS SE Encoder. Note: When a Custom Key is created, it is encrypted and stored in the Asure ID native database and uploaded on demand in the following situations: A new Encoder is used to encode a credential ... - Page 141 Key Management Page 7-7 3. Enter the following information on the Create a Key window and click Create. Field Description Key Description Enter a description for the key. This can either be manually entered (hexadecimal) or click Generate Random Key, which generates a key based on the Random Key Size field and fills the field.
- Page 142 Page 7-8 Key Management 4. The new Key is created and is displayed in the Custom Keys pane. The Available Key Slots and Available Memory display the updated status. PLT-01067, Version: A.7 July 2017...
-
Page 143: Remove Selected Key
Key Management Page 7-9 7.4 Remove Selected Key The general rule is Keys are not removed or deleted. However, if the number of stored keys reaches its limit (number/size), it may be required to remove keys that are not required. Note: Custom Keys should be exported before removing them from the system. - Page 144 Page 7-10 Key Management 5. When complete, the Key is removed from the encoder and no longer appears on the list. Note: The Available Key Slots and Available Memory displays the updated status. PLT-01067, Version: A.7 July 2017...
-
Page 145: Import Keys And Key Sets
Key Management Page 7-11 7.5 Import Keys and Key Sets The Import Keys tool allows you to import Custom Key(s) and Key Sets exported from an iCLASS SE Encoder. To import Custom Keys from a file on a computer or USB flash drive, use the following steps. IMPORTANT: To import keys/key sets to another device, that device must have the same SNMP Admin keys as the device from which the custom keys were originally exported and each workstation must have the same PIN Code. - Page 146 Page 7-12 Key Management 3. Locate the file previously saved in Section 7.6: Export Keys. Double-click the file to import. 4. Enter the password set for the keys, if required. Click OK. PLT-01067, Version: A.7 July 2017...
- Page 147 Key Management Page 7-13 5. The Keys are displayed in the Custom Keys list. Note: The Available Key Slots and Available Memory displays the updated status. July 2017 PLT-01067, Version: A.7...
-
Page 148: Export Keys
PC to reconnect to the encoder, otherwise credential credits and other important information will be lost and the encoder will need to be returned to HID to be restored to factory settings. - Page 149 Key Management Page 7-15 2. Select any or all of the following: Export Custom Keys, Export Key Sets, Export Admin Keys and click OK. 3. The Password window only appears when the Export Admin Keys is selected. Enter a password (twice) to access the file, and click OK. Note: Make note of this password for future access to this file.
- Page 150 Page 7-16 Key Management This file can now be used to Import Keys to an iCLASS SE Cp1000 Encoder. See Section 7.5: Import Keys and Key Sets for information on this process. PLT-01067, Version: A.7 July 2017...
-
Page 151: Load Hid Key(S)
Page 7-17 7.7 Load HID Key(s) The Load HID Key(s) feature allows you to securely upload the HID Keys by using and .xml file. The following process loads the HID managed keys to the iCLASS SE CP1000 Encoder. 1. Select Home tab > Key Management > Load HID Key(s). - Page 152 Page 7-18 Key Management 2. Browse to and select the Keys ordered from HID Global. 3. Select the file(s) to be loaded, and click Open. 4. A progress bar displays as keys are loaded. PLT-01067, Version: A.7 July 2017...
- Page 153 Page 7-19 5. When the Keys are successfully loaded, a message will appear on the bottom of the window. 6. After the upload is complete, the installed Keys are displayed on the HID Keys pane. July 2017 PLT-01067, Version: A.7...
-
Page 154: Remove Hid Key(S)
Key Management 7.8 Remove HID Key(s) The Remove tool allows the user to remove specific HID Keys from the iCLASS SE CP1000 Encoder. 1. Select Home tab > Key Management. 2. Select the HID Key(s) to be removed from the HID Keys pane. - Page 155 Key Management Page 7-21 4. The selected keys are removed (in this example it was the last remaining keys). Note: The Available Key Slots and Available Memory display the updated status. July 2017 PLT-01067, Version: A.7...
-
Page 156: Revoke Hid Key(S)
Technical Support and is only used with their assistance. If there is a need to revoke HID key(s), a request to HID Global is made and a Key Revocation List is created, and delivered to the user. To perform a revocation, follow the steps below. -
Page 157: Refresh Hid Key List
7.10 Refresh HID Key List 1. Oftentimes it is necessary to refresh the list of keys. This often occurs when after Custom Keys have been added or deleted. When you select Refresh, all HID Keys and Keysets are updated from the current database. -
Page 158: Add Key Set
Page 7-24 Key Management 7.11 Add Key Set Key Sets are created as a means to group keys for the HID applications to simplify deployment. 1. Select Home tab > Key Management. 2. Select Add Key Set. PLT-01067, Version: A.7... - Page 159 Enter a Name for this Key Set. Key Set Name Select a Key Type from the list. Key Type Select a Custom Key or HID Key from the drop-down menu. Custom Key 4. The Key Set created displays on the Key Sets tab. July 2017...
-
Page 160: Edit Key Set
Page 7-26 Key Management 7.12 Edit Key Set 1. Select Key Management > Key Sets tab. 2. Select a Key Set to modify. 3. Click Edit Key Set from the menu bar 4. Edit the Key Set as needed. Click OK. PLT-01067, Version: A.7 July 2017... - Page 161 Key Management Page 7-27 5. The Key Sets pane displays the changes. July 2017 PLT-01067, Version: A.7...
-
Page 162: Delete Key Set
Page 7-28 Key Management 7.13 Delete Key Set 1. Select Key Management > Key Sets tab. 2. Select a Key Set to delete. 3. Click Delete Key Set. 4. Click OK to verify the deletion. PLT-01067, Version: A.7 July 2017... - Page 163 Key Management Page 7-29 5. The Key Set is no longer displayed in on the Key Sets tab. July 2017 PLT-01067, Version: A.7...
-
Page 164: Sync Encoder
Page 7-30 Key Management 7.14 Sync Encoder The following information describes how to synchronize the Database to the iCLASS SE CP1000 Desktop Encoder. The need to synchronize the database to the encoder is required if you have connected a new/different iCLASS SE encoder. The encoder configuration is stored on the encoder and only copied on the database. - Page 165 5. The custom keys in the database are now synchronized and the window returns to its original state (before the analysis). 6. The HID keys need to be re-installed to complete the synchronization. For more information Section 7.7: Load HID Key(s).
-
Page 166: Change Encoder Admin Keys
Page 7-32 Key Management 7.15 Change Encoder Admin Keys For security purposes the user should change the Administrative Keys on this device. 1. Select Key Management > File tab. 2. Select the Change Encoder Admin Keys option. 3. Enter the Admin Keys on the Provide New Admin Keys for Encoder window. This can be done by entering (copy/paste) keys that have been saved earlier. -
Page 167: Chapter 8: Reader Configuration
Reader Configuration Home Tab The Reader Configuration main window contains the following areas. Note: The center pane, changes dramatically with the selection of the Selected Plugin (Data Mapper, Elite Prep Card, or Load HID Application Keys) field. July 2017 PLT-01067, Version: A.7... -
Page 168: Reader Configuration Toolbar
8.1.1 Reader Configuration Toolbar The Reader Configuration toolbar of the CP1000 Desktop Encoder allows the user to create the Reader Data configuration cards (for both keys and reader limited settings). The application allows the user to change the keys or behavior of a Reader. -
Page 169: Encoder Info Panel
Reader Configuration Page 8-3 8.1.2 Encoder Info Panel The Key Management Encoder Info panel displays information about the CP1000 Desktop Encoder currently connected to the computer. Field Description Displays/selects the current Encoder to configure. Selected Encoder Displays the Engine ID of the current Encoder selected above. -
Page 170: Reader Configuration File Tab
The Install Plugin Package is a bundle of files that will install all the necessary Package plugins for the encoder. See Section 4.3: Upload Encoder Configuration Package. The Open Log File allows you to view the log file of events for the Asure ID CP1000 Open Log File Edition application. -
Page 171: Data Mapper
Reader Configuration Page 8-5 8.3 Data Mapper This process loads the Data Mapper information to the Reader Data Config Card. 1. Select Reader Configuration module. 2. Select Data Mapper from the Selected Plugin field. 3. Select the Reader Auth Keys. This is the key used by the reader to authenticate the configuration card and read/apply the configuration to the reader. -
Page 172: Data Mapper Wizard
Page 8-6 Reader Configuration 8.4 Data Mapper Wizard 1. Click Next to continue. 2. Select the Card Technology from the drop-down menu. 3. Click Next. PLT-01067, Version: A.7 July 2017... - Page 173 Reader Configuration Page 8-7 4. Enter the Application Properties. MIFARE 1k / MIFARE 4k Application Properties Window The following window appears when the MIFARE (1k or 4k) Card Technology has been selected. Field Description Application ID (HEX) Enter an Application ID (3-byte Hex value). The Sector number box sets the sector number where the application is Sector loaded.
- Page 174 Page 8-8 Reader Configuration MIFARE DESFire 0.6 / MIFARE DESFire EV1 Application Properties Window The following window appears when the MIFARE DESFire (.06 or EV1) Card Technology has been selected. Field Description Application ID (HEX) Enter an Application ID (3-byte Hex value). File Number Range is 0 - 31 File Size...
- Page 175 Reader Configuration Page 8-9 The options on the Data Fields window determine the data manipulation operations performed by the encoder prior to reporting the data to the access control system. The data read from the card can be split into multiple fields, each with its own conversion operation.
- Page 176 Page 8-10 Reader Configuration 8. Set the Output Format. Click Next. Field Description Determines the format. The following options are supported on the encoder: Output Format • Wiegand If the Data Type is set to Binary Hex/Integer on previous page, the least significant bits are sent.
- Page 177 Reader Configuration Page 8-11 9. Configure the Start and Stop bits for the Wiegand transmission. Click Next. Field Description Adds a bit at the start of the data transmission STX Bit Options are: None, Fixed Bit-Logic 0, Fixed Bit-Logic 1, Even Parity, Odd Parity STX computed from bit 0 to Bit Number.
- Page 178 Page 8-12 Reader Configuration 11. The information will populate the Data Mapper pane. 12. Select the number of Credits in the Credits to Transfer field. Note: Each Encoder configuration transaction is one credit. This is the number of Encoders that can be configured using this configuration card.
- Page 179 Reader Configuration Page 8-13 16. When complete, a message displays at the bottom of the window stating Programming of configuration card complete. The Remaining Credits are decreased by the number of credits that were transferred. Credits on Card increases by the number of credits that were transferred to the card. July 2017 PLT-01067, Version: A.7...
-
Page 180: Elite Prep Card
Page 8-14 Reader Configuration 8.5 Elite Prep Card This Configuration Plugin sets the Reader Configuration Key used to authenticate future Configuration cards. This is a means to privatize or localize Encoder configuration authorizations. 1. Select Reader Configuration module. 2. Select Elite Prep Card from the Selected Plugin drop-down menu. 3. - Page 181 Reader Configuration Page 8-15 9. When complete, a message displays at the bottom of the window stating Programming of configuration card complete. The Remaining Credits decreases by the number of credits that were transferred. Credits on Card increases by the number of credits that were transferred to the card. July 2017 PLT-01067, Version: A.7...
-
Page 182: Reader Options Config Card
1. Select Reader Configuration module. 2. Select Reader Options Config Card from the Selected Plugin drop-down menu. 3. Click Load Configuration File and browse to find the .ccxml or .eccxml file from HID Global. Note: The file information populates the Configuration Items field. -
Page 183: Iclass Legacy Config Card
Reader Configuration Page 8-17 8. When completed a message is displayed at the bottom of the window stating Programming of configuration card complete. The Remaining Credits decreases by the number of credits that were transferred. Credits on Card increases by the number of credits that were transferred to the card. 8.7 iCLASS Legacy Config Card This Configuration Plugin sets the Reader Configuration Key used to authenticate Legacy Configuration cards. - Page 184 Page 8-18 Reader Configuration 8. Click Config Card from the menu bar. This page intentionally left blank. 9. A Working status displays. PLT-01067, Version: A.7 July 2017...
- Page 185 Reader Configuration Page 8-19 10. When complete a message displays at the bottom of the window stating Programming of configuration card complete. The Remaining Credits decreases by the number of credits that were transferred. Credits on Card increases by the number of credits that were transferred to the card. July 2017 PLT-01067, Version: A.7...
-
Page 186: Load Hid Application Keys
This Configuration Plugin is designed to load media and application keys to one or more Encoders. 1. Select Reader Configuration module. 2. Select Load HID Application Keys from the Selected Plugin drop-down menu. 3. Select the currently deployed Reader Configuration Keys from the drop-down menu. - Page 187 Reader Configuration Page 8-21 9. When complete, a message displays at the bottom of the window stating Programming of configuration card complete. The Remaining Credits decreases by the number of credits that were transferred. Credits on Card increases by the number of credits that were transferred to the card. July 2017 PLT-01067, Version: A.7...
- Page 188 Page 8-22 Reader Configuration This page intentionally left blank. PLT-01067, Version: A.7 July 2017...
-
Page 189: User Config
Chapter User Config The User Config module manages all the User Records, configuration and passwords. User Config Home Tab The User Config Home window contains the following areas. July 2017 PLT-01067, Version: A.7... -
Page 190: User Config Home Toolbar
Page 9-2 User Config 9.1.1 User Config Home Toolbar The User Config module of the CP1000 Desktop Encoder allows the user to manager the records and passwords of the users. Toolbar Function Description This option will allow the user to copy the user record to the clipboard and delete the record. -
Page 191: User Config View Tab
User Config Page 9-3 9.3 User Config View Tab To manage Users Records, users can select from a variety of options. To modify the View complete the following tasks: 1. Select User Config > View tab. 2. Select the preferred viewing options. Option Description The Record view shows records individually, and the organization of the screen is in a... -
Page 192: Add A User
Page 9-4 User Config 9.4 Add a User The application is provided with an Admin level user configured. If a general operator level user, with limited access is needed, use the following instructions. 1. Select User Config > Add User. 2. - Page 193 User Config Page 9-5 Field Description Card Design These options do not apply to the iCLASS SE Encoder users. Card Printing User Config Reports Laser Engraving Data Entry Template Group 4. Select Save Users from the menu bar. 5. The new user is now listed on the Main View window. The Record identifier in the bottom of the window updates to reflect the number of records created in the application.
-
Page 194: Remove A User
Page 9-6 User Config 9.5 Remove a User To remove/delete an existing user, complete the following steps: 1. Select User Config module. 2. Select a User Record to remove/delete. Depending on the view, and the number of Users, this may require you to scroll through the list. 3. -
Page 195: Edit A User
User Config Page 9-7 9.6 Edit a User To edit an existing user, complete the following steps: 1. Select the User Config module. 2. Select a User Record to modify. Depending on the view, and the number of Users, this may require you to scroll through the list. -
Page 196: Change Password
Page 9-8 User Config 9.7 Change Password To modify a password complete the following steps: 1. Select the User Config module. 2. Select a User Record to modify the password. Depending on the view, and the number of Users, this may require you to scroll through the list. 3. -
Page 197: Manage Groups
User Config Page 9-9 9.7.0.1 Manage Groups To add, save, or delete a user group, complete the following steps: 1. Select User Config module. 2. Select Manage Group from the menu bar. July 2017 PLT-01067, Version: A.7... - Page 198 Page 9-10 User Config 3. A blank Manage Group window with the Add, Save, and Delete user group icons are displayed. Select the Add Group icon. 4. A blank User Group window is displayed. Enter the specific configuration for the new group. Field Description Add User Group.
-
Page 199: Assign A Template To A Group
User Config Page 9-11 Field Description This option sets the Data Entry access level. • No Access • Read/Write Access (with PACS) Data Entry • Read/Write Access (no PACS) • Read-Only Access (with PACS) • Read-Only Access (no PACS) The iCLASS SE option allow you to select a Security Level (User Role) for each group. •... - Page 200 Page 9-12 User Config The Assign Template To Group window is displayed. Field Description Select the group to assign a template to. Select Group Select the type of template to assign to this group. • All: Displays all Asure ID and SE Encoder Work Order templates. Filter •...
-
Page 201: Chapter 10: Troubleshooting
Troubleshooting 10.1 Backup and Recovery HID Global recommends that you backup the iCLASS SE Encoder folder at the following location: C:\ProgramData\HID Global\AsureID This folder contains all the essential files to recover from loss of the PC or other issues with th application. -
Page 202: Log Files
1. Select Work Order Manager > File tab > Open Log File 2. The Log file displays. 3. The user can copy/save the log file, for reference or to send to HID Global Technical Support for assistance. PLT-01067, Version: A.7... - Page 203 Troubleshooting Page 10-3 4. If you are not able to access the Asure ID Application, the log file can be found at the following location: C:\ProgramData\HID Global\Asure ID July 2017 PLT-01067, Version: A.7...
-
Page 204: Database
Page 10-4 Troubleshooting 10.3 Database The database for this application can be found at the following location: C:\ProgramData\HID Global\Asure ID Note: This database should be backed up and stored at a secure location. See Section 10.1: Backup and Recovery. 10.3.1... -
Page 205: Synchronize Database To Encoder
The fact that the encoder and database are out-of-sync may not be apparent, as there is no indicator that they are out-of-sync. Additionally the keys (custom and HID) from the first encoder continues to display on the second encoder, as this information is coming from the database. - Page 206 Configuration of Encoding iCLASS iCLASS Configuration file Encoder must be shipped to HID unconfigured iCLASS was not configured to and SAMPrePersoTool must be cards not allowed by allow configuration of used to upload modified encoder.
- Page 207 Legacy HID Access MIFARE attempting prepare the the encoder. Application. See log file for Credential sector for the Legacy HID 2. Verify the HID Access details. Access App (setting the Application sector has not keys and sector access already been written to by bits).
- Page 208 Page 10-8 Troubleshooting This page intentionally left blank. PLT-01067, Version: A.7 July 2017...
- Page 209 Glossary Glossary Term Description Advanced Encryption Standard The Advanced Encryption Standard (AES) is a specification for the encryption of electronic data established by the U.S. National Institute of Standards and Technology (NIST). AES is based on a design principle known as a substitution-permutation network, and is fast in both software and hardware.
- Page 210 Glossary - 2 Term Description Triple Data Encryption Standard Triple DES is the common name for the Triple Data Encryption Algorithm (TDEA or Triple DEA) block cipher, which applies the Data Encryption Standard (DES) cipher algorithm three times to each data block.
-
Page 211: Revision History
Update to Asure ID 7.7.3 software version. March 2015 Update to Asure ID 7.6 software version. January 2015 Update due to new Asure ID CP1000 Edition Software June 2014 SI information added to the User Guide March 2014 Software Release 2.4 (SP1) September 2013 Software Release 2.3.6 (Prox update) - Page 212 hidglobal.com...
Need help?
Do you have a question about the CP1000 and is the answer not in the manual?
Questions and answers