
Related Manuals for GE Transport PT878


Summary of Contents for GE Transport PT878
- Page 1 ® Advanced Test Equipment Rentals www.atecorp.com 800-404-ATEC (2832) Sensing & Inspection Technologies ® Transport PT878 Portable Liquid Ultrasonic Flowmeter Abridged Manual...
- Page 2 Sensing & Inspection Technologies ® Transport PT878 Portable Liquid Ultrasonic Flowmeter Abridged Manual 914-219E August 2008...
- Page 3 August 2008 Warranty Each instrument manufactured by GE Sensing is warranted to be free from defects in material and workmanship. Liability under this warranty is limited to restoring the instrument to normal operation or replacing the instrument, at the sole discretion of GE Sensing. Fuses and batteries are specifically excluded from any liability.
- Page 4 2. If GE Sensing instructs you to send your instrument to a service center, it must be shipped prepaid to the authorized repair station indicated in the shipping instructions.
-
Page 5: Table Of Contents
August 2008 Table of Contents Chapter 1: Installation & Operation Introduction ................1-1 The Flowcell . - Page 6 August 2008 Table of Contents (cont.) Chapter 3: Operation Configuring The Display Options ............3-1 The Format Option .
- Page 7 August 2008 Table of Contents (cont.) Chapter 5: Data Logging The Logging Menu ............... . . 5-1 The Log Manager Window .
- Page 8 Chapter 1...
- Page 9 Installation & Operation Introduction........... . 1-1 The Flowcell .
-
Page 10: Chapter 1: Installation & Operation
PC via an infrared port • context-sensitive on-line help • uses all standard GE Sensing transducers The Flowcell In addition to the PT878, a complete flowmeter system includes a flowcell. The flowcell is that part of the system that uses ultrasonic pulses to interrogate the flow. -
Page 11: Making Electrical Connections
August 2008 Making Electrical Before taking measurements with the PT878, you must make all the Connections necessary electrical connections to the unit. This includes: • power (required) • transducers (required) • Input/Output (optional) • infrared interface (optional) All electrical connections are made to the top of the PT878 as shown in Figure 1-1 below. -
Page 12: Power Connection
August 2008 Power Connection The PT878 may be powered by either of the following: • a 100-120/200-260 VAC wall-mount plug-in module • 5 internal C -size NiCad high-energy rechargeable batteries • a pack of 3.0 Ahr NiMH batteries Note: An optional power supplement, part #703-1283, uses 6 AA alkaline batteries. -
Page 13: The Infrared Interface
August 2008 Input/Output Connections Table 1-1: Cable Assembly for Analog Inputs/Outputs (cont.) Pin # Wire Color Description Black Analog Out 1 16 V (switched) White Temperature Transmitter Supply or Return (Input A) Yellow Temperature Transmitter Supply or Return (Input B) Green Analog Ground Orange... -
Page 14: Storing The Batteries
August 2008 Charging the Batteries IMPORTANT: To ensure the maximum charge, charge the batteries in an ambient temperature of 50 to 104°F (10 to 40°C). (cont.) To charge the batteries, simply plug the AC power module cord into the power jack (shown in Figure 1-1 on page 1-2) and be sure the battery pack is installed. -
Page 15: Replacing The Batteries
4. Install the new batteries (see Figure 1-2 below). Battery Located Behind Panel Figure 1-2: Back Panel of PT878 Note: To further extend the battery power of the PT878, the GE Sensing Part #705-1283 option uses 6 AA alkaline batteries. Installation & Operation... -
Page 16: Powering On And Off
Immediately upon power up, the PT878 emits a short beep and displays a “PCI Loader” message. It then validates the instrument programming, displays the GE Sensing logo and the software version, and emits a long beep. If the meter fails any of these tests, contact GE Sensing. - Page 17 August 2008 Powering ON and OFF To turn the PT878 OFF, press the red key and hold it for 3 seconds. The screen now appears similar to Figure 1-4 below. (cont.) Velocity, ft/s Signal, dB SHUTDOWN: Meter OFF SLEEP: Meter Idle CANCEL: Resume Operations Volume, l/s Delta-T, ns...
-
Page 18: Using The Screen And Keypad
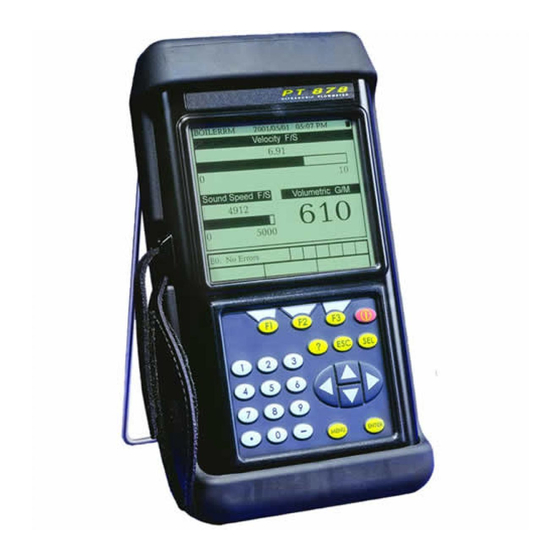
August 2008 Using the Screen and The essential features for operating the PT878 are the screen and Keypad keypad. Although these features are common on portable instruments, the PT878 design offers special features to simplify and speed the operation. The Screen The primary function of the screen is to display information in order for you to accurately and easily take measurements. - Page 19 August 2008 The Screen (cont.) The system tray displays icons that indicate meter operations not otherwise shown. Table 1-3 below lists the icons and their meanings. Table 1-3: Icons in the System Tray Icon Function Meaning IR Transfer IR data transfer in progress. Alert Indicates the meter encountered an error in operation.
-
Page 20: The Keypad
August 2008 The Keypad The PT878 keypad has 25 keys. The functions for each key are described on the following page (see Figure 1-6 below): Figure 1-6: The PT878 Keypad Installation & Operation 1-11... - Page 21 August 2008 • The Keypad (cont.) 3 function keys ( ) — enable you to select the special [F1] [F2] [F3] functions which appear at the bottom of the screen. • 12 numeric keys (including ) — enable you to enter numeric data.
- Page 22 Chapter 2...
-
Page 23: Initial Setup
Initial Setup Introduction........... . 2-1 Entering the Program Menu . -
Page 24: Chapter 2: Initial Setup
August 2008 Introduction The PT878 Program Menu enables you to program the parameters that define an installation site. As a minimum, the transducer, pipe and fluid data must be entered into the meter before measurements can be taken. The programmed data can then be saved as a site file, and the PT878 can store up to 1 MB (or 32 site files) of data. -
Page 25: Entering The Transducer Parameters
August 2008 Entering the Program When entering information in an option window, press: Menu (cont.) • the [ ] key to scroll down the list • the [ ] key to scroll up the list • key (Cancel) or the key to close a window at any time [F2] [ESC]... -
Page 26: Special Transducers
August 2008 Entering the Transducer 2. Press the [ ] key to reach the Transducer prompt and press Parameters (cont.) . A drop-down list of transducer numbers for your chosen [ENTER] transducer type opens. Scroll to the number engraved on your transducer body, or scroll to Special if there is no transducer number. -
Page 27: Entering The Pipe Parameters
August 2008 Special Transducers 5. Use the [ ] key to reach the Wedge Tmp prompt and press (cont.) . Use the numeric keys to enter the wedge temperature [ENTER] value provided with your transducer. Press to confirm [ENTER] your entry. 6. - Page 28 August 2008 Entering the Pipe Table 2-1: Pipe Material Options Parameters (cont.) Material Category Specific Material Al - Aluminum Rolled Brass None Cu - Copper Annealed or Rolled CuNi - Copper/Nickel 70% Cu 30% Ni or 90% Cu 10% Ni Glass Pyrex, Flint, or Crown Gold...
-
Page 29: Entering The Pipe Lining Parameters
“Other.” Press to confirm your choice. [ENTER] Note: If your pipe lining material is not listed, consult GE Sensing for assistance. 3. If you selected pipe lining material from the list, the correct sound speed is entered automatically. However, if you selected “Other,”... -
Page 30: Entering The Fluid Parameters
August 2008 Entering the Fluid To program your fluid parameters, scroll to the Fluid tab on the Parameters Program Menu (see Figure 2-5 below) and press [ENTER] Transducer/Pipe Fluid Transducer Fluid Path Pipe Lining Tracking Windows? Fluid Water (2C) Sound Speed 1496 Speed Min 1350... -
Page 31: Entering The Signal Path Parameters
August 2008 Entering the Fluid Table 2-2: Fluid Type Selection Parameters (cont.) Energy Tracking Windows OFF Tracking Windows ON Other Water (0-260°C) Water (0-260°C) Sea Water Other Oil (22°C) Crude Oil Lube Oil (X200) Methanol Ethanol LN2 (-199°C) Freon (R-12) Water/0-260°C Water/0-260°C Water/Glycol... -
Page 32: Clamp-On Transducers
[F2] Wetted Transducers 1. At the “Path Length” prompt, use the numeric keys to enter the path length (P) value provided by GE Sensing and press [ENTER] confirm the value. 2. At the “Axial Length” prompt, use the numeric keys to enter the... -
Page 33: Entering Correction Factors
August 2008 Entering Correction To enter Reynolds Correction or Calibration Factor data, scroll to the Factors Correction Factors tab in the Program Menu and press [ENTER] Entering Reynolds Scroll to the “Reynolds Correction” tab (see Figure 2-7 below), then Correction Data press and proceed as follows: [ENTER]... -
Page 34: Entering A Calibration Factor
August 2008 Entering Reynolds Entering a Single K/V Value Correction Data (cont.) a. If you chose to enter a single value, press to open the [ENTER] text box. b. Use the numeric keys to enter the K/V value for your fluid (see the Sound Speeds and Pipe Size Data booklet). - Page 35 August 2008 Entering a Calibration 1. To enable or disable Calibration Factor, use the [ ] and [ ] keys Factor (cont.) to scroll to the appropriate radio button and press [ENTER] 2. You must now choose to enter either a single K Factor or a table of values.
- Page 36 Chapter 3...
- Page 37 Operation Configuring The Display Options ....... . . 3-1 Customizing the Display Screen ........3-7 Error Messages .
-
Page 38: Chapter 3: Operation
August 2008 Configuring The Display The PT878 allows you to view 1 to 4 different measurement Options parameters simultaneously in either numeric or graphical format. To configure the display, press from the Operate Mode window and [SEL] a cursor appears next to the parameter closest to the upper left corner (see Figure 3-1 below). -
Page 39: The Format Option
August 2008 The Format Option The Number Format option, allows you to specify the type of notation and the number of decimal places for the selected parameter (see Figure 3-2 below). Note: For a line or bar graph display, the Limits option appears instead of the Format option. -
Page 40: The View Option
August 2008 The View Option The View option, allows you to specify the type of display for the selected parameter. 1. Use the arrow keys to select the View option. 2. Press to open the drop-down list of three display types [ENTER] (Numeric, Line Graph, and Bar Graph). -
Page 41: The Limits Option
August 2008 The Limits Option For a graphical display, the Limits option enables you to program: • the minimum or maximum values displayed • the time interval • the display of the average value Note: For a numeric display, the Format option appears instead of the Limits option. - Page 42 August 2008 The Limits Option (cont.) For a bar graph display, skip the following steps and proceed directly to the final paragraph below. For a line graph display, complete the following additional steps: 1. Scroll to the text box for the x-axis interval value and press to open the box.
-
Page 43: The Measurement Option
August 2008 The Measurement Option The Measurement option allows you to specify which parameter is displayed in the current window and to select the measurement units. 1. Use the arrow keys to select the Measurement option and press [ENTER] 2. At the Change drop-down menu option, press again and a [ENTER] window similar to Figure 3-5 below appears. -
Page 44: Customizing The Display Screen
August 2008 Customizing the Display The Site Menu enables you to customize your display screen. To enter Screen the Site Menu: Note: As an aid in following the programming instructions in this manual, refer to Appendix A, Menu Maps. 1. Press the [MENU] key at the lower right of the PT878 keypad. -
Page 45: Specifying The Number Of Displayed Parameters
August 2008 Specifying the Number of To change the number of open display windows, use the [ ]or [ Displayed Parameters arrow keys to move to the desired number of views (1 View, 2 View, 3 View, or 4 View) and press . -
Page 46: Customizing The Softkeys
August 2008 Customizing the Softkeys If you use certain menus frequently, you can program your PT878 to access these menus directly from Operate Mode by customizing the softkeys ( ). Then, pressing the associated softkey at [F1] [F2] [F3] any time will open the programmed menu directly. To program your softkeys, proceed to the appropriate section. - Page 47 August 2008 Customizing the Softkeys (cont.) Configure FKey Select a menu item (Clear) Cancel Figure 3-9: The Configure FKey Window 5. Press [ENTER] to open the menu drop-down list and use the [ and [ ] arrow keys to scroll to the desired menu (for example, Contrast).
- Page 48 August 2008 Customizing the Softkeys Setting a Softkey from the Target Menu: (cont.) 1. Press the key at the lower right of the PT878 keypad. The [MENU] Menu Bar replaces the Status Bar at the top of the screen. 2. Navigate to the desired menu (see the Menu Maps in Appendix A for guidance).
-
Page 49: Error Messages
August 2008 Error Messages To indicate a possible problem during a measurement, Error Messages may occasionally appear on the PT878 display. The possible Error Messages, along with tips for isolating and correcting the problem, are listed in Table 3-1 below. Note: On a graphical display, errors are indicated by a vertical gray bar at the point of the error. -
Page 50: Programming Global Meter Settings
August 2008 Programming Global Using the Meter Menu, you can program global settings for the meter Meter Settings that suit your individual preferences. To enter the Meter Menu: Note: As an aid in following the programming instructions in this manual, refer to Appendix A, Menu Maps. 1. -
Page 51: The Units Option
August 2008 The Units Option The Units option enables you to select either English or Metric as the global measurement units for the PT878. The selected units then become the default for every measurement that is taken. 1. Access the Meter Menu as described on page 3-13. 2. -
Page 52: The Battery Charger Option
August 2008 The Battery Charger The Battery option allows you to monitor the run time and status of Option the internal rechargeable batteries, as well as to condition NiCad batteries to maintain the maximum life. Note: When conditioning the batteries, be sure you have plugged the AC adapter into the PT878 and pressed the power key. -
Page 53: The Date/Time Option
August 2008 The Date/Time Option In Operate Mode, the PT878 Status Bar displays the current date and time in the upper right corner of the screen. The Date/Time option allows you to set these values to ensure accurate data logging. 1. -
Page 54: The Locale Option
August 2008 The Locale Option In addition to setting the correct date and time, you can also change their format to suit local preferences. This is accomplished using the Locale option. 1. Access the Meter Menu as described on page 3-13. 2. - Page 55 August 2008 The Locale Option (cont.) 4. Use the [ ] or [ ] arrow keys to scroll to the Date Format text box and press . The drop down menu offers the following [ENTER] options: • YYYY/MM/DD (year/month/day) • MM/DD/YYYY (month/day/year) •...
-
Page 56: The Contrast Option
August 2008 The Contrast Option For more comfortable viewing, the PT878 enables you to adjust the screen contrast. To use the Contrast option: 1. Access the Meter Menu as described on page 3-13. 2. Scroll to the Contrast option and press . -
Page 57: The Backlight Option
IMPORTANT: Before using this option, one or more of the available language translation files must be loaded into the meter. Contact GE Sensing for assisitance. The PT878 offers a selection of several languages for its display. To change the current display language (US English is the default): 1. -
Page 58: The Communications Option
August 2008 The Language Option 5. Changing the language requires restarting the PT878. When a window like the one in Figure 3-16 below appears, press (cont.) [F2] cancel the change or to confirm the change. [F3] Change Language Changing the meter’s language requires a restart. - Page 59 [ENTER] IMPORTANT: Do NOT change the default Node ID unless instructed to do so by GE Sensing. 4. Scroll to the Comm Interface prompt and use the [ ] and [ ] keys to select either the IrDA (Infrared Data Association) option or the IR232 (virtual interface) option.
-
Page 60: The Totals Option
August 2008 The Totals Option The PT878 features both Forward and Reverse Totalizer functions. If it becomes necessary to reset one or both of these totalizers, use the Totals option as follows: 1. Access the Meter Menu as described on page 3-13. 2. - Page 61 Chapter 4...
-
Page 62: Chapter 4: Managing Site Files
Managing Site Files The Site Menu ..........4-1 The Site Manager Window . -
Page 63: The Site Menu
August 2008 The Site Menu So that you don’t need to reenter all of your initial setup data (see Chapter 1) each time you use the meter, the PT878 can store this site data in files. Then, the Site Menu enables you to create and manage these site files. -
Page 64: The Site Manager Window
August 2008 The Site Manager The Site Manager is the tool that is used to perform a variety of Window operations on site files. To access the Site Manager, proceed as follows: 1. Access the Site Menu, as described on the previous page. 2. -
Page 65: The Site Manager Menu
August 2008 The Site Manager Menu To open the Site Manager menu, proceed as follows: 1. At the Site Manager window, press and then [MENU] [ENTER] window similar to Figure 4-3 below opens. Site Manager File Site Sort Info: DEFAULT:SIT DEFAULT New Site Open... - Page 66 August 2008 The New Option (cont.) 2. To begin entering a name for the new site, use the four arrow keys to scroll to the desired letter or number, and press [ENTER] 3. Repeat the previous step until you have created a site name of up to eight characters.
-
Page 67: The Open Option
August 2008 The Open Option To recall a site that has been previously created and saved: 1. Highlight the desired site in the Site Manager window (see Figure 4-2 on page 4-2). 2. Press to open the File menu. [MENU] 3. -
Page 68: The Save Option
August 2008 The Save Option You can save the current site in one of two ways: • From the Site Menu (see Figure 4-1 on page 4-1), scroll to the Save Now option and press [ENTER] . Or, • From the Site Manager (see Figure 4-3 on page 4-3), press [MENU] to open the File menu. -
Page 69: The Save As Option
August 2008 The Save As Option To save the current site with a different name: 1. From the Site Manager (see Figure 4-2 on page 4-2), press [MENU] to open the File menu. 2. Scroll to the Save As option and press . -
Page 70: The Refresh Option
August 2008 The Refresh Option To update the meter with the most current information, open the Site Manager (see Figure 4-2 on page 4-2). Then, proceed as follows: • Press (Refresh), or [F2] • press to open the File menu. Then, scroll to the Refresh [MENU] option and press [ENTER]... -
Page 71: The Delete Option
August 2008 The Rename Option (cont.) 5. When you have finished, press to accept the new name, or [F3] (OK) press to leave the window without renaming the site. [F2] (Cancel) The PT878 remains in the Site Manager window, and the site is now listed with the new name. -
Page 72: The Message Option
August 2008 The Message Option The Message option in the Site menu allows you to add a descriptive message of up to 30 characters to a site. To create a site message: 1. From the Site Manager (see Figure 4-2 on page 4-2), press [MENU] to open the File menu. - Page 73 August 2008 The Message Option 4. Scroll to the Message option and press . A text entry [ENTER] window similar to Figure 4-12 below opens. (cont.) “ ‘ < > Cancel Delete Figure 4-12: The Text Entry Window 5. To begin entering the site message, use the four arrow keys to scroll to the desired character, and press [ENTER] Note: Pressing...
-
Page 74: The Print Option
August 2008 The Print Option To print the current site, proceed as follows: 1. From the Site Manager (see Figure 4-2 on page 4-2), press [MENU] to open the File menu. 2. Press the [ ] arrow key once to scroll from the File menu to the Site menu (see Figure 4-11 on page 4-10). - Page 75 Chapter 5...
-
Page 76: Chapter 5: Data Logging
Data Logging The Logging Menu ..........5-1 The Log Manager Window . -
Page 77: The Logging Menu
August 2008 The Logging Menu A powerful feature of the PT878 is data logging. The logged data is stored internally in battery-backed-up memory, and a fixed amount of memory is assigned to data logging. To access the Logging Menu, proceed as follows: 1. -
Page 78: The Log Manager Window
August 2008 The Log Manager The Log Manager is the tool that is used to perform a variety of Window operations on logs and log files. To access the Log Manager, proceed as follows: 1. Access the Log Menu, as described on the previous page. 2. -
Page 79: The File Menu
August 2008 The File Menu The File menu is used to manage your existing log files and to set up new logs. To access the File menu, proceed as follows: 1. At the Log Manager window, press and then [MENU] [ENTER] window similar to Figure 5-3 below opens. - Page 80 August 2008 The New Option The New option enables you to set up the parameters for creation of a new log. To do so, proceed as follows: 1. Perform one of the following procedures: • In the Log Manager>File menu (see Figure 5-3 on the previous page), scroll to the New option and press .
- Page 81 August 2008 The New Option (cont.) Note: The Log Name shown in the window is the one you entered on the previous page. General Measurements Log Name 10SEC.LOG Format Circular Linear Error Type Standard Start Date/Time 01:38:08 2000/11/01 End Date/Time 09:38:08 2000/11/01 Logging Interval...
- Page 82 August 2008 The New Option (cont.) 1. Use the [ ] and [ ] arrow keys to scroll until the General tab is highlighted. 2. Press the [ ] key to select the Measurements tab. Press [ENTER] and the Measurements window (see Figure 5-6 below) opens. General Measurements NO UNIT...
- Page 83 August 2008 The New Option (cont.) 4. In the list on the left side of the window, scroll to the output parameter you wish to log and press to confirm the choice. [SEL] 5. When the prompt moves to the list of measurement units on the right side of the window, scroll to the desired units and press [F3] (OK) to confirm your selection.
- Page 84 August 2008 The Delete Option To delete a log from the PT878 memory, proceed as follows: 1. In the Log Manager window (see Figure 5-2 on page 5-2), use the ] and [ ] arrow keys to highlight the log you wish to delete. 2.
- Page 85 August 2008 The Delete All Logs? The Delete All Logs? option is used to remove all logs from the Option PT878 memory. To do this, proceed as follows: 1. In the Log Manager>File menu (see Figure 5-3 on page 5-3), scroll to the Delete All Logs? option and press [ENTER] 2.
-
Page 86: The Log Menu
August 2008 The Log Menu The Log menu is used to manage your active logs. To access the Log menu, proceed as follows: 1. At the Log Manager window, press and then [MENU] [ENTER] 2. Press the [ ] key to highlight the Log menu. Then, press [ENTER] and a window similar to Figure 5-9 below opens. - Page 87 August 2008 The Start Option Use the Start option to restart a log that has been paused: 1. In the Log Manager window (see Figure 5-2 on page 5-2), use the ] and [ ] arrow keys to highlight the log you wish to start. 2.
- Page 88 August 2008 The Start All Logs Option Use the Start All Logs option to restart all logs that have been paused: 1. At the Log Manager window (see Figure 5-2 on page 5-2), press and then [MENU] [ENTER] 2. Press the [ ] key to highlight the Log menu and press [ENTER] 3.
-
Page 89: The View Menu
August 2008 The View Menu The View menu is used to display the data from individual logs. To access the View menu, proceed as follows: 1. At the Log Manager window, press and then [MENU] [ENTER] 2. Press the [ ] key until the View menu is highlighted. Then, press and a window similar to Figure 5-10 below opens. - Page 90 August 2008 The Details Option Use the Details option to view the log data in text format: 1. In the Log Manager window (see Figure 5-2 on page 5-2), use the ] and [ ] arrow keys to highlight the log you wish to view. 2.
- Page 91 August 2008 The Graph Option Use the Graph option to view the log data in graphical format: 1. In the Log Manager window (see Figure 5-2 on page 5-2), use the ] and [ ] arrow keys to highlight the log you wish to view. 2.
- Page 92 August 2008 The Spreadsheet Option Use the Spreadsheet option to view the log data in spreadsheet format: 1. In the Log Manager window (see Figure 5-2 on page 5-2), use the ] and [ ] arrow keys to highlight the log you wish to view. 2.
- Page 93 Appendix A...
-
Page 94: Appendix A: Menu Maps
Menu Maps Main Menu ........... . . A-1... - Page 95 August 2008 MAIN MENU Site Program Meter Logging Service "Grayed Out" menus are not discussed in this abridged manual. See your full PT878 User's Manual. Manager File Site Sort Transducer Units New Log Message Pipe Battery Log Manager Save Lining 1 View Print Date/Time...
- Page 96 DECLARATION Sensing & Inspection Technologies CONFORMITY GE Sensing 1100 Technology Park Drive Billerica, MA 01821 U.S.A. declare under our sole responsibility that the ® TransPort PT878 Portable Liquid Ultrasonic Flowmeter ® TransPort PT878GC Clamp-On Portable Liquid Ultrasonic Flowmeter to which this declaration relates, are in conformity with the following standards: •...
- Page 97 1100 Technology Park Drive Billerica, MA 01821-4111 Web: www.gesensing.com Ireland Sensing House Shannon Free Zone East Shannon, County Clare...
Need help?
Do you have a question about the Transport PT878 and is the answer not in the manual?
Questions and answers