Table of Contents
Advertisement
Quick Links
Download this manual
See also:
User Manual
Advertisement
Table of Contents

Related Manuals for GE AT600


Summary of Contents for GE AT600
- Page 1 Measurement & Control Flow AT600 User’s Manual 910-312 Rev. A December 2014...
- Page 3 AT600 Panametrics Ultrasonic Flowmeter for Liquids User’s Manual 910-312 Rev. A December 2014 www.ge-mcs.com ©2014 General Electric Company. All rights reserved. Technical content subject to change without notice.
- Page 4 [no content intended for this page]...
-
Page 5: Table Of Contents
2.6.7 Wiring Gate Input ................22 AT600 User’s Manual... - Page 6 3.7.1 Programming the Meter Setup ..............57 AT600 User’s Manual...
- Page 7 5.2.2b Common Commands ..............87 AT600 User’s Manual...
- Page 8 B.3 Diagnostic Parameters ................160 Appendix C. Menu Maps AT600 User’s Manual...
- Page 9 WARNING! you perform maintenance procedures on the equipment. It is the responsibility of the user to make sure the PWR, Hart, Modbus and I/O cable WARNING! can meet the cable specification, which is described in Appendix A. AT600 User’s Manual...
- Page 10 Si vous le faites, cela peut entraîner de graves blessures. Assurez-vous que l'alimentation de l'équipement auxiliaire est éteinte et verrouillée ATTENTION! avant d'effectuer toute opération de maintenance ou d’entretien de l'équipement. viii AT600 User’s Manual...
- Page 11 Environmental Compliance Waste Electrical and Electronic Equipment (WEEE) Directive GE Measurement & Control is an active participant in Europe’s Waste Electrical and Electronic Equipment (WEEE) take-back initiative, directive 2002/96/EC. The equipment that you bought has required the extraction and use of natural resources for its production. It may contain hazardous substances that could impact health and the environment.
- Page 12 Preface AT600 User’s Manual...
-
Page 13: Chapter 1. Introduction
It is designed for the industrial market, including water, wastewater, steel, campus energy and other markets. AT600 utilizes a new electronics platform and industrial design to make it extremely simple to install and use in the field. -
Page 14: Theory Of Operation
The difference between the downstream and upstream transit times is proportional to the velocity of the flowing liquid and its sign indicates the direction of flow. Figure 2: Flow and Transducer Paths (Dual Traverse) Figure 3: Flow and Transducer Paths (Single Traverse) AT600 User’s Manual... -
Page 15: Chapter 2. Installation
Chapter 2. Installation Chapter 2. Installation 2.1 Introduction To ensure safe and reliable operation of the AT600, the system must be installed in accordance with the established guidelines. Those guidelines, explained in detail in this chapter, include the following topics: •... -
Page 16: Unpacking The At600 System
If anything is missing or damaged, contact GE Customer Care immediately for assistance. Please note that your AT600 system may come in different configurations based on your selection, so the packing list could be a little different. Below is the typical packing list: 10. -
Page 17: Installing The Electronics Enclosure
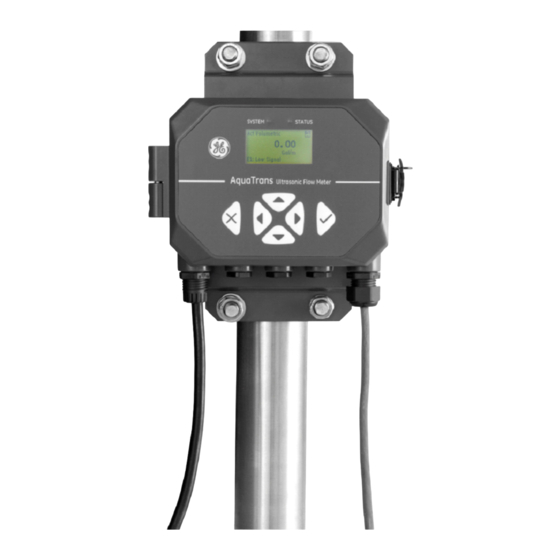
Chapter 2. Installation 2.3 Installing the Electronics Enclosure The AT600 electronics is housed in a powder-coated, aluminum, NEMA type 4X/IP67 enclosure suitable for indoor or outdoor use, See Figure 5 below for the mounting dimensions and weight of the AT600 electronics. - Page 18 Installing the Electronics Enclosure (cont.) The installation base of AT600 electronics can also be rotated by 90 degrees to keep a horizontal view of the user interface in a horizontal or vertical mounting condition. See Figure 6 below for AT600 mounting of the installation base.
-
Page 19: Installing The Clamp-On Fixture And Transducer System
2.4 Installing the Clamp-on Fixture And Transducer System 2.4.1 Clamp-on Fixture and Transducer Location For a given fluid and pipe, the accuracy of AT600 depends on the location and alignment of the transducers. In addition to accessibility, when planning for transducer location, adhere to the following guidelines: •... -
Page 20: Mounting Clamp-On Fixture Onto Pipe (At6 Transducers)
The AT600 clamp-on fixture and transducer system can support pipe size ranges from 2 inch to 24 inch.The customer can choose either dual traverse installation or single traverse installation for transducer mounting on the pipe. - Page 21 Figure 10: Clamp-on Fixture Installation 2. Wire power and transducer cables to the AT600; refer to Figure 22 on page 16. 3. Power meter and program flow meter to determine transducer spacing.(See AT600 Programming in Chapter 3.) 4.
-
Page 22: Dual Traverse Installation At Transducer Spacing Range 250 To 750Mm
2 to move the straps and tighten the second fixture. Note: Be sure the bar on the left side of the second fixture is in close contact with the bar on the first fixture. Figure 13: Dual Traverse Installation at Transducer Spacing Range 250 to 750mm AT600 User’s Manual... - Page 23 1. Spacing range from 0 to 250mm; only one fixture is needed. Put the upstream transducer at "zero" position, and then put the downstream transducer at the required position on the same fixture. Figure 15: Transducer Spacing between the Two Fixtures AT600 User’s Manual...
- Page 24 Spacing from 500 to 750mm Put the upstream transducer at "zero" position of the first fixture, and then put the downstream transducer at the required position on the second fixture, as shown below. Figure 17: Spacing Range from 500 to 750mm AT600 User’s Manual...
-
Page 25: Single Traverse Installation At Transducer Spacing Range 0 To 250Mm
Figure 19: Single Traverse Installation at Transducer Spacing Range 0 to 250mm AT600 User’s Manual... -
Page 26: Single Traverse Installation At Transducer Spacing Range 250 To 750Mm
Align the transducer side with the two marks done on step 1 in the first and second fixture. Figure 20: Single Traverse Installation at Transducer Spacing Range 250 to 750mm AT600 User’s Manual... -
Page 27: Installing C-Rs Fixture And Transducer System
2.5 Installing C-RS Fixture and Transducer System 2.5.1 Installation Guide for C-RS transducer Refer to GE document 916-077, the C-RS Installation Guide, for C-RS transducer installation onto the pipe (Section 6, Installing General Clamping Fixture). 2.5.2 Install Cable Adaptor for C-RS transducer and AT6 cable To match the BNC type connector on the C-RS transducer with the SMA type connector on the AT6 cable, one BNC to SMA adaptor is needed for C-RS transducer cabling. -
Page 28: Making Electrical Connections
Once the AT600 is completely wired, proceed to Chapter 3, Initial Setup, to configure the unit for operation. Figure 22: Wiring Diagram Note: HART or MODBUS communication are optional selections for the AT600 electronics and must be chosen at the time of ordering. -
Page 29: Wiring The Line Power
Appendix D, CE Mark Compliance The AT600 may be ordered from operation with power inputs of 85-264 VAC, or 12-28 VDC. The label on the shroud inside the electronics enclosure, lists the required line voltage. Be sure to connect the meter only to the specified line voltage. - Page 30 3. Connect the neutral or line lead (or the negative - DC power lead) to L2/N(-) and the line power lead (or the positive +DC power lead) to L1(+) as shown in Figure 22 on page 16. IMPORTANT: Do not remove the existing PC board ground wire or the cover ground wire. AT600 User’s Manual...
-
Page 31: Wiring The Transducers
2.6.3 Wiring System Ground Proper system ground must be connected to an AT600 Meter. Refer to Figure 25 to locate the system ground screw. This ground screw must be connected to a safe ground in the field. Figure 25: System Grounding Screw... -
Page 32: Wiring Analog Output/Hart Communication
Chapter 2. Installation 2.6.4 Wiring Analog Output/HART Communication The standard configuration of the Model AT600 flow meter includes one isolated 0/4-20mA analog output. Connections to this output may be made with standard twisted-pair wiring. The current loop impedance for this circuit must not exceed 600 ohms. -
Page 33: Wiring Modbus Communication
Chapter 2. Installation 2.6.5 Wiring Modbus Communication The AT600 is equipped with an optional Modbus communication port. The port is a two-wire, half-duplex RS485 interface. The standard AT600 disables the Modbus communication. Proceed to the appropriate configuration for menu instructions to activate the Modbus communication. -
Page 34: Wiring Gate Input
2.6.7 Wiring Gate Input The AT600 provides a Gate Contact Input port. This port is designed to start/stop the totalizer. During normal measurement mode, an operator can start the totalizer functionality by clicking the switch. And if the operator wants to stop the totalizer, another switching ON/OFF action stops the totalizer. -
Page 35: Chapter 3. Initial Setup And Programming
Chapter 3. Initial Setup and Programming 3.1 Introduction This chapter provides instructions for programming the AT600 flowmeter to place it into operation. Before the AT600 can begin taking measurements, the User Preferences, Inputs/Outputs, and Sensor setup must be entered and tested. -
Page 36: At600 Keypad Operation
3.2 AT600 Keypad Operation There are six keys and two LED on the AT600 keypad. The green light is a system health indicator and it is on when the meter is operational and not in error. The red light is a system status indicator and it is on when the meter is in error. -
Page 37: Display Programming
Chapter 3. Initial Setup and Programming 3.3 Display Programming The AT600 keypad has six keys and two LEDs. The green light is a system health indicator and it is on when the meter is operational and not in error. The red light is a system status indicator and it is on when the meter is in error. -
Page 38: Changing Measurement Type For One- Or Two-Variable Screens
[ ] again to confirm the selection or type, press Mass o cancel the selection. Note: To select a particular measurement unit, go to "Units Setting" on page 28. AT600 User’s Manual... -
Page 39: Changing The Measurement Type Or Value For Totalizer Screens
Use the [] and [] buttons to scroll to the appropriate value. (Available Display/Decimal options include 0, 1, 2, 3, 4, and Sci (Scientific Notation). Press [ o select the value, and then [ ] again to confirm the selection or o cancel the selection. AT600 User’s Manual... - Page 40 [ ] again to confirm the selection or o cancel the Seconds selection. Minutes Hours Note: If you selected “Time”, the available units are seconds, minutes, hours Days and days. AT600 User’s Manual...
-
Page 41: Starting Or Stopping Totalizer Measurement
Once the value is highlighted, press [ to start or stop totalizing. TOTAL m^3 Forward 0.000e+00 Reverse 0.000e+00 The icon then changes to indicate the new status (start or stop). TOTAL m^3 Forward 0.000e+00 Reverse 0.000e+00 AT600 User’s Manual... -
Page 42: Resetting The Totalizer
From the display screen, press either the [] or [] buttons until the Reset icon (a partial circle with an arrow) is highlighted. Forward 0.000e+00 Reverse 0.000e+00 TOTAL m^3 Once the Reset icon has been highlighted, press to reset the totalizer to 0. Forward 0.000e+00 Reverse 0.000e+00 AT600 User’s Manual... -
Page 43: Entering The Main Menu (Lock Button)
The Display Format submenu is used to set up the type of format to be used in representing information. On the initial screen, use the arrow keys to highlight the lock symbol and press [√]. Velocity The following screen appears. AT600 User’s Manual... -
Page 44: Keypad Lockout
To unlock the display, press [] and [] to highlight No and press . The screen returns to the previous display. Note: When the keypad is locked, press to unlock the screen. ], [ ], [ AT600 User’s Manual... -
Page 45: Language
The next section will explicitly state which access is required to edit parameters. To view all parameters without editing, select Program Review Figure 33: Program/Program Review Menu Map AT600 User’s Manual... -
Page 46: Program Review
[] or [] arrow keys to change the value of the selected 9999 number. When the password number is correct, press and the User screen appears. The password is 1111. Preference ]UNDO [ ]SAVE ]MOVE ]MODF AT600 User’s Manual... -
Page 47: User Preferences
Use the [] or [] arrow keys to select the correct time and press . The Set System Time screen returns to the previous display. Date: 11 / 12 / 2013 Time: 08 : 09 : 10 ]UNDO [ ]SAVE ]MOVE ]MODF AT600 User’s Manual... -
Page 48: Units Setting
To change the measurement type, select the desired option, press English twice, and a screen similar to the following appears. Metric Confirm the selected units, press three times and return to the Units Setting Vel / menu. Ft/s AT600 User’s Manual... -
Page 49: Density
Density Password Use the [] or [] arrow key to change the digit value and press [√]. Press the Enter the password ] key to return to the screen. Password 9999 ]UNDO [ ]SAVE ]MOVE ]MODF AT600 User’s Manual... -
Page 50: Display
Backlight Timeout Note: The default value for the timeout is 0, so users must set a timeout if they wish one. Press [√] again, and a screen similar to the following appears. Timeout Timeout AT600 User’s Manual... - Page 51 3.5.5b Timeout (cont.) Use the [] or [] arrow key to change the digit value and press [√]. Press [ Timeout three times to return to the screen. User Preference UNIT: S ]UNDO [ ]SAVE ]MODF ]MOVE AT600 User’s Manual...
-
Page 52: Inputs/Outputs
Units Setting Density Password Select the desired Output number with the [] or [] arrow keys, and press Input/Output to enter the relevant configuration menu. Analog Output A Digital Output B Digital Output C Modbus/Service Port AT600 User’s Manual... -
Page 53: Setting Analog Measurements
[] arrow keys to change the and press Base Value or Full Value UNIT: m/s 0.0000 Repeat these steps to set the Full Value setting. Press [ ] to return to the Analog ]UNDO [ ]SAVE menu. Output A ]MOVE ]MODF AT600 User’s Manual... -
Page 54: Calibrate The Output
Full Value Calibrate Error Handling Selecting will force the Analog Output to 3.6 mA or below, while will High Calibrate force it to 21.6 mA or above. Select the appropriate status and press High Hold Other AT600 User’s Manual... -
Page 55: Programming The Digital Output Menu
Analog Output A Note: The operation steps for “Digital Output B” and “Digital Output C” are Digital Output B Digital Output C the same. Modbus/Service Port Digital outputs can be programmed as Pulse, Frequency or Alarm, or turned off. AT600 User’s Manual... -
Page 56: Disable The Digital Output
Reverse Batch Total Net Batch Total Setting Pulse Value Use the [] or [] arrow keys to select and press . A screen Pulse Value Pulse similar to the following appears. Measurement Pulse Value Pulse Time Test Pulse AT600 User’s Manual... - Page 57 Pulse Time, Pulse Time changed, use the [] or [] arrow keys to provide a new number and press UNIT: ms to save. Press to return to the Pulse menu. ]UNDO [ ]SAVE ]MOVE ]MODF AT600 User’s Manual...
- Page 58 Enter a number of pulses and the instrument will send that many out. Note on Test Pulse your measurement system that the right number of pulses were received. After testing, ress [ ] to return to the menu. ]UNDO [ ]SAVE Digital Output ]MOVE ]MODF AT600 User’s Manual...
-
Page 59: Setting The Frequency
Base Value To change the existing number, press and a screen similar to the following appears. Base Value 0.0000 Note: The units that appear will be the units selected in Units Setting on page AT600 User’s Manual... - Page 60 Use the [] or [] arrow key to change the Other value and press to save Test Frequency the number. Press [ ] to return to the previous screen. UNIT: ]UNDO [ ]SAVE ]MOVE ]MODF AT600 User’s Manual...
-
Page 61: Setting The Alarm
Measurement Alarm State Alarm Type Alarm Value Measurement In the Measurement menu, select the type of analog output to be used, and press Velocity The screen returns to the previous display. Act Volumetric Std Volumetric Mass AT600 User’s Manual... - Page 62 • Fault — No alarm if no errors, alarm if errors. To change the type of alarm, select the appropriate type and press screen returns to the previous display. AT600 User’s Manual...
- Page 63 Alarm State Alarm Type Alarm Value Test Alarms Select to turn the alarm off, or to turn it on. To begin testing, select Error Handling and press To stop testing, press [ ]UNDO [ ]SAVE AT600 User’s Manual...
-
Page 64: Programming Modbus/Service Port
Digital Output C . The following screen appears. Modbus/Service Port 3.6.4 Programming Digital Communications The AT600 flow meter supports the digital communication types below: • MODBUS • HART They are activated by the Password. Please contact GE for assistance. - Page 65 ]UNDO [ ]SAVE ]MOVE ]MODF Selecting the Bits/Parity To set the , in the menu, select it and press . A screen Bits/Parity Modbus MODBUS similar to the following appears. Baud Rate Address Bits/Parity Stop Bits AT600 User’s Manual...
-
Page 66: Hart
. The following screen appears. Digital Output B Digital Output C Note: Please ensure the HART function is selected for your unit. Modbus/Service Port Digital Comm Digital Comm Press again, and a screen similar to the following appears. HART AT600 User’s Manual... - Page 67 Address Use the [] or [] arrow keys to change the address number (from 0 to 62) and Address press . Press [ ] to return to the previous screen. ]UNDO [ ]SAVE ]MOVE ]MODF AT600 User’s Manual...
-
Page 68: Sensor Setup
A screen similar to the following appears. Settings Units Setting Density Password Select the desired parameter with the [] or [] arrow keys, and press Sensor Setup enter the relevant configuration menu. Meter Setup Pipe Transducer Traverses AT600 User’s Manual... -
Page 69: Programming The Meter Setup
Setting Zero Cutoff Near a zero flow rate, the AT600’s readings may fluctuate due to small offsets caused by thermal drift or similar factors. To force a Zero display reading, when there is minimal flow, enter a zero cutoff value as described below. -
Page 70: Programming The Pipe
Repeat these steps to set the Pipe ID and Wall Thickness. Press [ ] to return to ]MOVE ]MODF the Pipe menu. Note: Changing the Pipe ID (inner diameter) with automatically change the wall thickness. Changing the wall thickness value will automatically change the Pipe ID. AT600 User’s Manual... -
Page 71: Setting Pipe Material
Select the appropriate option and press [ ] to return to the previous screen. Pipe Material CuNi If the material is not listed, select and press [√] twice. A screen similar to Other Glass the following appears. Plastic Other AT600 User’s Manual... -
Page 72: Setting The Lining
If there is a lining, select and press [√] twice. A screen similar to the following appears. To set the lining thickness, select it and press . A screen similar to the Lining following appears. Lining Thickness Lining Material AT600 User’s Manual... - Page 73 Use the [] or [] arrow key to select the digit to be changed, use the [] or Lining SOS UNIT: m/s [] arrow keys to change the Lining SOS value and press Press [ ] to 2000.000 return to the previous display. ]UNDO [ ]SAVE ]MOVE ]MODF AT600 User’s Manual...
-
Page 74: Programming The Transducer
[] arrow keys to change the Transducer setting, and press previous screen. Then press [ ] to return to the Transducer screen. ]UNDO [ ]SAVE ]MOVE ]MODF Note: Available transducer types for the AT600 are listed in Table 4 below. AT600 User’s Manual... - Page 75 3.7.3a Setting the Standard Transducer (cont.) Table 4: Transducer Types Transducer Name Transducer Type CPT-0.5CPT-0.5 CPT-2.0 CPT-0.5-MT C-PB-05-M CPT-1.0-MT C-PB-10-M CPT-2.0-MT C-PB-20-M CPT-0.5-HT CPT-1.0-HT CPT-2.0-HT CPS-0.5 CPSM-2.0 CTS-1.0 CTS-1.0-HT CTS-2.0 C-LP-40-HM C-LP-40-NM CPB-0.5-HT CPB-2.0-MT CPB-0.5-MT CPB-2.0 CPB-0.5 CPS-1.0 CPT-1.0 CWL-2 CPS-1.0 AT600 User’s Manual...
- Page 76 CPW (WT-1P-0.5 on NDT plastic CPW (WT-1P-1.0 on NDT plastic CPB-1.0-HT CPB-2.0-HT CPB-1.0 CPB-1.0-MT C-RL-0.5 C-RL-1 C-RL-0.5 C-RL-1 C-RL-0.5 C-RL-1 C-RV-0.5 C-RV-1 C-RW-0.5 C-RW-1 C-RS-0.5 C-RS-1 C-RS-2 UTXDR-2 UTXDR-5 CAT-0.5 CAT-1 CAT-2 Note: 1. Current support transducer AT600 User’s Manual...
-
Page 77: Setting A Special Transducer
Select the appropriate option and press twice to return to the previous screen. Frequency 0.5 Mhz 1 Mhz 2 Mhz 4 Mhz Select and press [√]. The following screen appears. Wedge Type Special Transducer Frequency Wedge Type Wedge Angle Wedge SOS AT600 User’s Manual... - Page 78 previous screen. Then press [ ] to return to the Transducer screen. ]UNDO [ ]SAVE ]MOVE ]MODF Select and press [√]. The following screen appears. Wedge SOS Special Transducer Frequency Wedge Type Wedge Angle Wedge SOS AT600 User’s Manual...
- Page 79 Time Wedge [] arrow keys to change the Time Wedge setting, and press o return to the UNIT: 7.500 previous screen. Then press [ ] to return to the Transducer screen. ]UNDO [ ]SAVE ]MOVE ]MODF AT600 User’s Manual...
-
Page 80: Programming The Traverses
2 Traverse 4 Traverse Figure 34: Traverse Examples Select and press [√]. The following screen appears. Traverses Sensor Setup Meter Setup Pipe Transducer Traverses Select the appropriate option and press to return to the previous screen. Traverses AT600 User’s Manual... -
Page 81: Programming The Fluid Type
[] arrow keys to change the Fluid SOS setting, and press o return to the UNIT: 1496.000 previous screen. Then press [ ] to return to the Sensor Setup screen. ]UNDO [ ]SAVE ]MOVE ]MODF AT600 User’s Manual... -
Page 82: Programming The Fluid Temperature
Then press [ ] to return to the Sensor Setup screen. ]UNDO [ ]SAVE ]MOVE ]MODF Note: Since meter calculations are based on customer inputs, temperature will affect the speed of sound during the measurement. AT600 User’s Manual... -
Page 83: Programming The Transducer Spacing
UNIT: 0.000 screen. Then press [ ] to return to the Sensor Setup screen. ]UNDO [ ]SAVE ]MOVE ]MODF Note: Changing the transducer spacing should only be completed with contact from the factory. AT600 User’s Manual... - Page 84 Chapter 3. Initial Setup and Programming [no content intended for this page] AT600 User’s Manual...
-
Page 85: Chapter 4. Error Codes And Troubleshooting
Action: Correct the programming errors. Refer to Diagnostics, to correct the flowcell and/or transducer problems. Also check the inputted value in the menu Program Advanced Error Limits SNSD +- limits. AT600 User’s Manual... -
Page 86: E3: Velocity Range
The acceleration exceeds the limits programmed in the menu Program Advanced Error Limits Acceleration. Cause: This condition is usually caused by poor flow conditions or improper transducer alignment. Action: Refer to Diagnostics, to correct any flowcell and/or transducer problems. AT600 User’s Manual... -
Page 87: Diagnostics
1. The fluid must be homogeneous, single-phase, relatively clean and flowing steadily. Although a low level of entrained particles may have little effect on the operation of the AT600, excessive amounts of solid or gas particles will absorb or disperse the ultrasound signals. This interference with the ultrasound transmissions through the fluid will cause inaccurate flow rate measurements. -
Page 88: Pipe Problems
4. The fluid sound speed must not vary excessively. The AT600 will tolerate relatively large changes in the fluid sound speed, as may be caused by variations in fluid composition and/or temperature. However, such changes must occur slowly. Rapid fluctuations in the fluid sound speed, to a value that is considerably different from that programmed into the AT600, will result in erratic or inaccurate flow rate readings. -
Page 89: Chapter 5. Communication
Listed below are two limits of this implementation: 1. The AT600 supports only four of the standard function codes. These are Read Holding Registers (0x03), Read Input Registers (0x04), Write Multiple Registers (0x10), and Read File Record (0x14). 2. The flowmeter needs a 15 ms gap between Modbus requests. The prime objective of the flowmeter is to measure flow and drive the output, so the Modbus server has a low priority. - Page 90 Batch request command INT32 1346 User inventory request command INT32 1348 Viewer system request password INT32 1350 Viewer system request command INT32 1792 System Reported error INT32 1794 System Error Bitmap INT32 1796 System Startup error Bitmap INT32 AT600 User’s Manual...
- Page 91 Analog Out Full Value (IEEE 32 bit) 3136 User Digital Out 1 Pulse Value (IEEE 32 bit) Digital Out 1 Frequency Base 3138 User Value (IEEE 32 bit) Digital Out 1 Frequency Full 3140 User Value (IEEE 32 bit) AT600 User’s Manual...
- Page 92 Digital Out 1 Test Frequency 3426 User Value INT32 Digital Out 1 Frequency Error 3428 User Handling INT32 Digital Out 1 Frequency Error 3430 User Handling Value INT32 Digital Out 1 Frequency Full 3432 User Frequency INT32 AT600 User’s Manual...
- Page 93 Measurement Value (IEEE 32 bit) Digital Out 2 Alarm 3596 Measurement Value (IEEE 32 bit) 1100 1100 4352 Viewer HART meter address INT32 1102 4354 Viewer HART preamble length INT32 1104 4356 Viewer HART device ID INT32 AT600 User’s Manual...
- Page 94 (IEEE 32 bit) 2002 8194 User Pipe Outer Diameter (IEEE 32 bit) 2004 8196 User Pipe Wall Thickness (IEEE 32 bit) 2006 8198 User Pipe Soundspeed (IEEE 32 bit) 2008 8200 User Lining Thickness (IEEE 32 bit) AT600 User’s Manual...
- Page 95 20A0 20A0 8352 User MultiK Reynolds KFactor1 (IEEE 32 bit) 20A2 8354 User MultiK Reynolds KFactor2 (IEEE 32 bit) 20A4 8356 User MultiK Reynolds KFactor3 (IEEE 32 bit) 20A6 8358 User MultiK Reynolds KFactor4 (IEEE 32 bit) AT600 User’s Manual...
- Page 96 User Min Peak% INT32 2184 8580 User Max Peak% INT32 2186 8582 User Errors Allowed INT32 21C0 21C0 8640 User Enable Active TW INT32 21C2 8642 User Enable Tracking Windows INT32 21C4 8644 User Response Time INT32 AT600 User’s Manual...
- Page 97 22C4 8900 Current Correction Factor (IEEE 32 bit) 22C6 8902 Path Length P (IEEE 32 bit) 22C8 8904 Axial Length L (IEEE 32 bit) 2300 2300 8960 Up +- Peak INT32 2302 8962 Dn +- Peak INT32 AT600 User’s Manual...
-
Page 98: Hart
8966 DOWN channel INT32 5.2 HART 5.2.1 Device Identification The AT600 flowmeter supports the HART communication, for which the manufacturer ID is 0x9D (157 Dec) and the Device type Code is 0x7F (127 Dec). 5.2.2 Commands 5.2.2a Universal Commands Table 6: Universal Commands for HART... -
Page 99: Common Commands
Secondary, Tertiary, and Quaternary Variables Read Device Variable Get device variable information Information Write Number of Response Sets the number of asynchronous preamble bytes to be sent by the Preambles meter before the start of a response message. AT600 User’s Manual... -
Page 100: C Device Specific Commands
Chapter 5. Communication 5.2.2c Device Specific Commands The AT600 flow meter supports the following device specific commands. In some commands, the parameter is the measurement type. Measurement types are shown in Table 8 below. Table 8: Measurement Type Index Meaning... - Page 101 None Table 13: Response Data Bytes for Logout and Save Byte Format Description None Command 129 (0x81): Logout and save (cont.) Table 14: Command-Specific Response Codes for Logout and Save Code Class Description Success No Command-Specific Errors AT600 User’s Manual...
- Page 102 Table 16: Response Data Bytes for Logout without Saving Byte Format Description None Table 17: Command-Specific Response Codes for Logout without Saving Code Class Description Success No Command-Specific Errors Undefined Error Device-Specific Command Error 7-15 Undefined Error Access Restricted 17-127 Undefined AT600 User’s Manual...
- Page 103 This command will send a new password to the flow meter. If the user has the right, the flow meter changes the user password. Table 21: Request Data Bytes for Sends New Password Byte Format Description 0 - 3 Unsigned-32 User password Table 22: Response Data Bytes for Sends New Password Byte Format Description None AT600 User’s Manual...
- Page 104 Table 24: Request Data Bytes for Read Unit Group Byte Format Description Unsigned-8 Group index: 1: Velocity unit; 2: Actual Volumetric unit; 3: Standard Volumetric unit; 4: Mass unit; 5: Totalizer unit; 6: Density unit; 7: Pipe Dimension; 8: Thermal; 9: Acceleration; AT600 User’s Manual...
- Page 105 7-127 Undefined Command 145 (0x91): Read Density Value This command will read density value in meter. Table 27: Request Data Bytes for Read Density Value Byte Format Description Unsigned-8 Density type: 1: Actual Density; 2: Reference Density; AT600 User’s Manual...
- Page 106 Table 30: Request Data Bytes for Read Backlight Setting Byte Format Description None Table 31: Response Data Bytes for Read Backlight Setting Byte Format Description Unsigned-8 Backlight control switch (0:off/ 1:on) 1 - 4 Unsigned-32 Display backlight timeout, unit is second. AT600 User’s Manual...
- Page 107 Request Data Bytes for Write Unit Group Byte Format Description Unsigned-8 Group index: 1: Velocity unit; 2: Actual Volumetric unit; 3: Standard Volumetric unit; 4: Mass unit; 5: Totalizer unit; 6: Density unit; 7: Pipe Dimension; 8: Thermal; 9: Acceleration; Enum unit code AT600 User’s Manual...
- Page 108 No Command-Specific Errors Undefined Error Invalid Selection 3 - 4 Undefined Error Too Few Data Bytes Received Error Device-Specific Command Error Error In Write Protect Mode 8 - 15 Undefined Error Access Restricted 17 - 127 Undefined AT600 User’s Manual...
- Page 109 No Command-Specific Errors Undefined Error Invalid Selection 3 - 4 Undefined Error Too Few Data Bytes Received Error Device-Specific Command Error Error In Write Protect Mode 8 - 15 Undefined Error Access Restricted 17 - 127 Undefined AT600 User’s Manual...
- Page 110 None Table 43: Response Data Bytes for Read Analog Measurement Range Value Byte Format Description Unsigned-8 Upper and Lower Range Values Unit Code 1 - 4 Float Upper Range Value 5 - 8 Float Lower Range Value AT600 User’s Manual...
- Page 111 1 - 4 Float Error Value, unit is mA Table 47: Command-Specific Response Codes for Read Loop Current Error Handling Code Class Description Success No Command-Specific Errors 1 - 5 Undefined Error Device-Specific Command Error 7 - 127 Undefined AT600 User’s Manual...
- Page 112 Too Few Data Bytes Received Error Device-Specific Command Error Error In Write Protect Mode 8 - 10 Undefined Error Loop Current Not Active 12 - 15 Undefined Error Access Restricted 17-31 Undefined Error Busy 33 - 127 Undefined AT600 User’s Manual...
- Page 113 Too Few Data Bytes Received Error Device-Specific Command Error Error In Write Protect Mode Undefined Error Incorrect Loop Current Mode or Value 10 - 15 Undefined Error Access Restricted 17-31 Undefined Error Busy 33 - 127 Undefined AT600 User’s Manual...
- Page 114 Command 171 (0xAB): Set Loop Current Percentage This command is to set the output percentage of loop current. Table 57: Request Data Bytes for Set Loop Current Percentage Byte Format Description 0 - 3 Float Loop Current Percentage, units of percent. AT600 User’s Manual...
- Page 115 Lower Range Value Table 61: Response Data Bytes for Set Analog Measurement Range Values Byte Format Description Unsigned-8 Upper and Lower Range Values Unit Code 1 - 4 Float Upper Range Value 5 - 8 Float Lower Range Value AT600 User’s Manual...
- Page 116 Table 63: Request Data Bytes for Set Loop Current Error Handling Byte Format Description Unsigned-8 Analog Output Error Handling: 0: Low; 1: High; 2: Hold; 3: Other value; 1 - 4 Float Error Value, unit is mA AT600 User’s Manual...
- Page 117 Table 65: Command-Specific Response Codes for Set Loop Current Error Handling Code Class Description Success No Command-Specific Errors Undefined Error Too Few Data Bytes Received Error Device-Specific Command Error Error In Write Protect Mode 8-15 Undefined Error Access Restricted 17-127 Undefined AT600 User’s Manual...
- Page 118 0: Off; 1: Pulse; 2: Frequency; 3: Alarm; Table 68: Command-Specific Response Codes Code Class Description Success No Command-Specific Errors Undefined Error Invalid Selection Undefined Error Too Few Data Bytes Received Error Device-Specific Command Error 7-127 Undefined AT600 User’s Manual...
- Page 119 2: Hold Good Value; 4: Stop; Table 71: for Read Pulse Configuration Command-Specific Response Codes Code Class Description Success No Command-Specific Errors Undefined Error Invalid Selection Undefined Error Too Few Data Bytes Received Error Device-Specific Command Error 7-127 Undefined AT600 User’s Manual...
- Page 120 Error Handling value, unit is Hz Table 74: Command-Specific Response Codes for Read Frequency Configuration Code Class Description Success No Command-Specific Errors Undefined Error Invalid Selection Undefined Error Too Few Data Bytes Received Error Device-Specific Command Error 7-127 Undefined AT600 User’s Manual...
- Page 121 Command 184 (0xB8): Write Digital Configuration This command is to write the digital output configuration. Table 78: Request Data Bytes for Write Digital Configuration Byte Format Description Unsigned-8 Channel Number(1/2) Unsigned-8 Digital Output type: 0: Off; 1: Pulse; 2: Frequency; 3: Alarm; AT600 User’s Manual...
- Page 122 6: Reverse Batch Total; 7: Net Batch Total; Unsigned-8 Pulse Value Unit 3 - 6 Float Pulse Value 7 - 10 Unsigned-32 Pulse Time, Unit is ms Unsigned-8 Pulse Error Handling: 2: Hold Good Value; 4: Stop; AT600 User’s Manual...
- Page 123 Table 83: Command-Specific Response Codes for Write Pulse Configuration Code Class Description Success No Command-Specific Errors Undefined Error Invalid Selection Undefined Error Too Few Data Bytes Received Error Device-Specific Command Error Error In Write Protect Mode 8-15 Undefined Error Access Restricted 8-127 Undefined AT600 User’s Manual...
- Page 124 7 - 10 Float Frequency Full Value 11 - 14 Float Full Frequency, unit is Hz Unsigned-8 Frequency Error Handling: 0: Low; 1: High; 2: Hold; 3: Value 16 - 19 Unsigned-32 Error Handling value, unit is Hz AT600 User’s Manual...
- Page 125 Response Data Bytes Byte Format Description Unsigned-8 Channel Number(1/2) Unsigned-8 Measurement Type Unsigned-8 Alarm Value Unit 3 - 6 Float Alarm Value Unsigned-8 Alarm Type: 0: Low; 1: High; 2: Fault Unsigned-8 Alarm State: 0: Normally; 1: Failsafe; AT600 User’s Manual...
- Page 126 This command is to test the digital output Table 90: Request Data Bytes for Test Digital Output Byte Format Description Unsigned-8 Channel Number(1/2) Unsigned-8 Test DO Type Test Stop Pulse Frequency Alarm 2 - 5 Unsigned-32 Test value AT600 User’s Manual...
- Page 127 Command-Specific Response Codes Code Class Description Success No Command-Specific Errors Undefined Error Invalid Selection Undefined Error Too Few Data Bytes Received Error Device-Specific Command Error Error In Write Protect Mode 8-15 Undefined Error Access Restricted 8-127 Undefined AT600 User’s Manual...
- Page 128 5 - 8 Float Pipe ID Value 9 - 12 Float Pipe WT Value Table 95: Command-Specific Response Codes for Read Pipe Size Code Class Description Success No Command-Specific Errors Undefined Error Device-Specific Command Error 7-127 Undefined AT600 User’s Manual...
- Page 129 Description None Table 100: Response Data Bytes for Read Pipe Lining Attribute Byte Format Description Unsigned-8 Lining Existing 1 – 4 Float Lining Thickness 5 - 8 Unsigned-32 Lining Material 9 – 12 Float Lining Sound speed AT600 User’s Manual...
- Page 130 Table 103: Response Data Bytes for Read Sensor Meter Setup Byte Format Description Float Zero Cutoff Table 104: Read Sensor Meter Setup Command-Specific Response Codes for Code Class Description Success No Command-Specific Errors Undefined Error Device-Specific Command Error 7-127 Undefined AT600 User’s Manual...
- Page 131 13: CPT-1.0-MT C-PB-10-M 14: CPT-2.0-MT C-PB-20-M 15: CPT-0.5-HT 16: CPT-1.0-HT 17: CPT-2.0-HT 18: CPS-0.5 19: CPSM-2.0 20: CTS-1.0 21: CTS-1.0-HT 22: CTS-2.0 23: C-LP-40-HM 24: C-LP-40-NM 25: CPB-0.5-HT 26: CPB-2.0-MT 27: CPB-0.5-MT 28: CPB-2.0 29: CPB-0.5 30: CPS-1.0 CPT-1. AT600 User’s Manual...
- Page 132 401: C-RS 0.5M 402: C-RS 1M 403: C-RS 2M 407: UTXDR-2 408: UTXDR-5 601: CAT0.5M 602: CAT1M 603: CAT2M 4 - 7 Unsigned-32 Transducer Frequency 8 - 11 Unsigned-32 Transducer Wedge Type 12 - 15 Float Transducer Wedge Angle AT600 User’s Manual...
- Page 133 Byte Format Description Unsigned-8 Transducer traverse 1 - 4 float Transducer spacing Table 110: Command-Specific Response Codes for Read Transducer Traverses and Spacing Code Class Description Success No Command-Specific Errors Undefined Error Device-Specific Command Error 7-127 Undefined AT600 User’s Manual...
- Page 134 Table 114: Request Data Bytes for Write Pipe Size Byte Format Description Unsigned-8 Pipe size unit 1 - 4 Float Pipe OD Value 5 - 8 Float Pipe ID Value 9 - 12 Float Pipe WT Value AT600 User’s Manual...
- Page 135 0 - 3 Unsigned-32 Pipe Material 4 - 7 Float Pipe Sound speed Table 118: Response Data Bytes for Write Pipe Material Byte Format Description 0 - 3 Unsigned-32 Pipe Material 4 - 7 Float Pipe Sound speed AT600 User’s Manual...
- Page 136 Lining Sound speed Table 121: Response Data Bytes for Write Pipe Lining Attribute Byte Format Description Unsigned-8 Lining Existing 1 – 4 Float Lining Thickness 5 - 8 Unsigned-32 Lining Material 9 – 12 Float Lining Sound speed AT600 User’s Manual...
- Page 137 Write Sensor Meter Setup Command-Specific Response Codes Code Class Description Success No Command-Specific Errors Undefined Error Too Few Data Bytes Received Error Device-Specific Command Error Error In Write Protect Mode 8-15 Undefined Error Access Restricted 17-127 Undefined AT600 User’s Manual...
- Page 138 27: CPB-0.5-MT 28: CPB-2.0 29: CPB-0.5 30: CPS-1.0 CPT-1.0 31: CWL-2 32: CPS-1.0 33: CPW (WT-1P-1.0 on AB82 34: CPW (WT-1P-0.5 on NDT plastic 35: CPW (WT-1P-1.0 on NDT plastic 36: CPB-1.0-HT 37: CPB-2.0-HT 38: CPB-1.0 39: CPB-1.0-MT AT600 User’s Manual...
- Page 139 Table 128: Command-Specific Response Codes for Write Transducer Information Code Class Description Success No Command-Specific Errors Undefined Error Too Few Data Bytes Received Error Device-Specific Command Error Error In Write Protect Mode 8-15 Undefined Error Access Restricted 17-127 Undefined AT600 User’s Manual...
- Page 140 Table 129: Request Data Bytes for Write Transducer Traverses and Spacing Byte Format Description Unsigned-8 Transducer traverse 1 - 4 float Transducer spacing Table 130: for Write Transducer Traverses and Spacing Response Data Bytes Byte Format Description Unsigned-8 Transducer traverse 1 - 4 Unsigned-32 Transducer spacing AT600 User’s Manual...
- Page 141 Description 0 - 3 Unsigned-32 Fluid Type: 0: Other 1. Water 4 - 7 Float Fluid SOS 8 – 11 Float Fluid minimum SOS 12 - 15 Float Fluid Maximum SOS 16 - 19 Float Fluid Temperature AT600 User’s Manual...
- Page 142 Read Calibration Configuration Response Data Bytes Byte Format Description Unsigned-8 Reynolds correction Unsigned-8 Active MultiK Enable Unsigned-8 KFactor Type: 0: Velocity, 1: Reynolds 3 – 6 Float Static KFactor Unsigned-8 KFactor Points 8 - 11 Float Kinematic Viscosity AT600 User’s Manual...
- Page 143 Velocity KV Value; Table 140: for Read Velocity KFactor Table Command-Specific Response Codes Code Class Description Success No Command-Specific Errors Undefined Error Invalid Selection Undefined Error Too Few Data Bytes Received Error Device-Specific Command Error 7-127 Undefined AT600 User’s Manual...
- Page 144 Reynolds KV Value; Table 143: Command-Specific Response Codes for Read Reynolds KFactor Table Code Class Description Success No Command-Specific Errors Undefined Error Invalid Selection Undefined Error Too Few Data Bytes Received Error Device-Specific Command Error 7-127 Undefined AT600 User’s Manual...
- Page 145 Table 146: Command-Specific Response Codes for Write Calibration Configuration Code Class Description Success No Command-Specific Errors Undefined Error Too Few Data Bytes Received Error Device-Specific Command Error Error In Write Protect Mode 8-15 Undefined Error Access Restricted 17-127 Undefined AT600 User’s Manual...
- Page 146 Table 149: Command-Specific Response Codes for Write Velocity KFactor Table Code Class Description Success No Command-Specific Errors Undefined Error Invalid Selection Undefined Error Too Few Data Bytes Received Error Device-Specific Command Error Error In Write Protect Mode 8-15 Undefined Error Access Restricted 17-127 Undefined AT600 User’s Manual...
- Page 147 Table 152: Command-Specific Response Codes for Write Reynolds KFactor Table Code Class Description Success No Command-Specific Errors Undefined Error Invalid Selection Undefined Error Too Few Data Bytes Received Error Device-Specific Command Error Error In Write Protect Mode 8-15 Undefined Error Access Restricted 17-127 Undefined AT600 User’s Manual...
- Page 148 Description Unsigned-8 Error limit : Correlation Peak Limit Acceleration Limit Velocity Low Limit Velocity High Limit Amp Disc Min Amp Disc Max Signal Low Limit Sound Speed Limit Errors Allowed 1 - 4 float Error limit Value; AT600 User’s Manual...
- Page 149 Table 157: Response Data Bytes for Read Signal Setup Byte Format Description Unsigned-8 signal setup type: 1. Delta T Offset 2. Percentage Peak 3. Min Peak Percentage 4. Max Peak Percentage 1 - 4 Float signal setup Value AT600 User’s Manual...
- Page 150 3. S/N 4. DN Sensor S/N Table 160: Response Data Bytes for Read Flowmeter S/N Byte Format Description Unsigned-8 signal setup type: 1. Electronic S/N 2. UP Sensor 3. S/N 4. DN Sensor S/N 1 - 16 Unsigned-8 AT600 User’s Manual...
- Page 151 Unsigned-8 Version Number Table 164: Command-Specific Response Codes for Read Flow Meter Version Code Class Description Success No Command-Specific Errors Undefined Error Invalid Selection Undefined Error Too Few Data Bytes Received Error Device-Specific Command Error 7-127 Undefined AT600 User’s Manual...
- Page 152 Format Description Unsigned-8 Error limit: Correlation Peak Limit Acceleration Limit Velocity Low Limit Velocity High Limit Amp Disc Min Amp Disc Max Signal Low Limit Sound Speed Limit Errors Allowed 1 - 4 float Error limit Value; AT600 User’s Manual...
- Page 153 Value Table 169: Response Data Bytes for Write Signal Setup Byte Format Description Unsigned-8 signal setup type: Delta T Offset percentage Peak Min Peak Percentage Max Peak percentage 1 - 4 Float signal setup Value AT600 User’s Manual...
- Page 154 Command 239 (0xEF): Reset Flow Meter Data This command is to reset flowmeter data. Table 171: Request Data Bytes for Reset Flow Meter Data Byte Format Description Unsigned-8 Reset type: Reset Error Log Forward Inventory Reverse Inventory Net Inventory Inventory Time Inventory AT600 User’s Manual...
- Page 155 In Write Protect Mode 8-15 Undefined Error Access Restricted 17-127 Undefined Command 241 (0xF1): Read the Factory Setting This command is to read the factory setting. Table 174: Request Data Bytes for Read the Factory Setting Byte Format Description None AT600 User’s Manual...
- Page 156 Unsigned-32 Sample Size: Table 176: for Read the Factory Setting Command-Specific Response Codes Code Class Description Success No Command-Specific Errors Undefined Error Invalid Selection Undefined Error Too Few Data Bytes Received Error Device-Specific Command Error 7-127 Undefined AT600 User’s Manual...
- Page 157 Request Data Bytes Byte Format Description Unsigned-8 Response time 0.5s 1 - 4 Unsigned-32 Sample Size: Table 178: Write the Factory Setting Response Data Bytes for Byte Format Description Unsigned-8 Response time 0.5s 1 - 4 Unsigned-32 Sample Size: AT600 User’s Manual...
- Page 158 Table 182: Command-Specific Response Codes Reset to Factory Setting Code Class Description Success No Command-Specific Errors Undefined Error Too Few Data Bytes Received Error Device-Specific Command Error Error In Write Protect Mode 8-15 Undefined Error Access Restricted 17-127 Undefined AT600 User’s Manual...
-
Page 159: Additional Device Status
4, 7 Flash Error 4, 7 KEY/LED Error 4, 7 I/O Error 4, 7 Display Error 4, 7 RTC Error 4, 7 Reserve In configure mode; 4, 0 Not calibrated; 4, 0 Reserve Reserve Reserve Reserve Reserve Reserve AT600 User’s Manual... -
Page 160: Device Variables
Not Classified SNR Dn Not Classified ActiveTW Up Not Classified ActiveTW Dn Not Classified Gain Up Not Classified Gain Dn Not Classified Error Status Not Classified Reported Error Not Classified Up Peak Not Classified Down Peak Not Classified AT600 User’s Manual... -
Page 161: Hart Engineering Units
Table 184: Device Variables (cont.) Peak % Up Analytical Peak % Down Analytical 5.3 HART Engineering Units The unit types allowed for the AT600 flowmeter device variables are listed below Table 185: HART Engineering Units Device Variable Unit Code Classification... - Page 162 Million Cubic Meter Cubic Feet Gallon Barrel Mega Gallons Million Cubic feet Standard Cubic Meter Standard Liters Kilogram Metric Ton Standard Cubic Feet Pound Kilo Pound Short Tons Length Feet Inch Meter Millimeter Time Nanoseconds Microseconds Milliseconds Seconds Minute AT600 User’s Manual...
- Page 163 Short ton per hour Short ton per day Mass per Volume Pounds per cubic feet Kilograms per cubic meter Viscosity Centistokes Square Meter per Sec Analytical Percent Acceleration Feet per second squared Meter per second squared Not Classification Hertz AT600 User’s Manual...
- Page 164 Chapter 5. Communication AT600 User’s Manual...
-
Page 165: A.1 Operation And Performance
Applications with piping arrangements that induce swirl (e.g., two out-of-plane elbows) may require additional straight run or flow conditioning. A.1.2c Calibration Fluid Water A.1.2d Repeatability ±0.2% of reading A.1.2e Range (Bidirectional) 0.1 to 40 ft/s (0.03 to 12.19 m/s) A.1.2f Range ability (Overall) 400:1 AT600 User’s Manual... -
Page 166: A.2 Meter Body/Transducer
Please contact sales representative for tropicalization the unit for 100% RH A.2.8 Altitude Range Up to 2000 meters maximum; A.2.9 CAT Transducer Cables Up to 90 meters (300 ft) RG316 coaxial cable. Temperature Range is -40° to 302°F (-40° to 150°C) AT600 User’s Manual... -
Page 167: A.2.10 Wiring Cable Specifications And Requirements
NEMA 4X/IP67 sealing between cable and gland: Operation torque for Gland Hole 1 and 5: 2.7 N.M Operation torque for Gland Hole 2, 3 and 4: 2.5 N.M AT600 User’s Manual... -
Page 168: A.3 Electronics
WEEE Compliance ROHS Compliance Note: The electronics package includes an installed battery which shall only be replaced at a GE Service center. Replacement involves de-soldering battery contacts, which could lead to a breach of Functional Safety. Please contact GE Service to get this battery replaced. -
Page 169: B.1 Service Record
An accurate service history of the meter can prove very helpful in troubleshooting any future problems. B.1.1 Data Entry Record the complete and detailed service data for the AT600 in Table 186 below. Make additional copies of the table as needed. - Page 170 Appendix B. Data Records Table 186: Service Record (cont.) Date Description of Service Performed Performed AT600 User’s Manual...
-
Page 171: B.2 Initial Settings
Pipe Sound speed Lining Thickness Lining Material Transducer ID Transducer Frequency Transducer Wedge Type Transducer Wedge Angle Transducer Wedge SOS Transducer TW Traverses Fluid Type Fluid SOS Fluid Minimum SOS Fluid Maximum SOS Fluid Temperature Transducer Spacing AT600 User’s Manual... -
Page 172: B.3 Diagnostic Parameters
Transit Time Up Transit Time Dn DeltaT Up Signal Quality Dn Signal Quality Up Amp Disc Dn Amp Disc SNR Up SNR Dn ActiveTW Up ActiveTW Dn Gain Up Gain Dn Error Status Reported Error Up Peak AT600 User’s Manual... - Page 173 Appendix B. Data Records Table 188: Diagnostic Parameters (cont.) Down Peak Peak % Up Peak % Down AT600 User’s Manual...
- Page 174 Appendix B. Data Records AT600 User’s Manual...
- Page 175 Appendix C. Menu Maps Appendix C. Menu Maps Figure 35: The Display Measurement Menu AT600 User’s Manual...
- Page 176 Appendix C. Menu Maps Figure 36: The Main Menu AT600 User’s Manual...
- Page 177 Appendix C. Menu Maps Figure 37: Main Menu > User Preferences Menu AT600 User’s Manual...
- Page 178 Appendix C. Menu Maps Figure 38: Main Menu > Inputs/Outputs Menu AT600 User’s Manual...
- Page 179 Appendix C. Menu Maps Figure 39: Main Menu> Sensor Setup Menu AT600 User’s Manual...
- Page 180 Appendix C. Menu Maps Figure 40: Main Menu>Calibration Menu AT600 User’s Manual...
- Page 181 Appendix C. Menu Maps Figure 41: Main Menu>Advanced Menu AT600 User’s Manual...
- Page 182 Appendix C. Menu Maps Figure 42: Main Menu>Factory Menu AT600 User’s Manual...
- Page 183 ....6 AT600 Mounting Installation Base ......7 Fixture Location .
- Page 184 ....109 Write Digital Configuration ......54 MODBUS Stop Bits AT600 User’s Manual...
- Page 185 Traverses, Programming ....119 Read Transducer Information ..121 Read Transducer Traverses and Spacing AT600 User’s Manual...
- Page 186 ....134 Write Velocity KFactor Table ......57 Zero Cutoff, Setting AT600 User’s Manual...
- Page 188 Customer Support Centers U.S.A. The Boston Center 1100 Technology Park Drive Billerica, MA 01821 U.S.A. Tel: 800 833 9438 (toll-free) 978 437 1000 E-mail: sensing@ge.com Ireland Sensing House Shannon Free Zone East Shannon, County Clare Ireland Tel: +353 (0)61 470200 E-mail: gesensingsnnservices@ge.com An ISO 9001:2008 Certified Company www.ge-mcs.com/en/about_us/quality.html...
Need help?
Do you have a question about the AT600 and is the answer not in the manual?
Questions and answers