Advertisement
Quick Links
DRAFT
Glowforge Manual
Version 2.1.4
Introduction
We are over-the-moon excited to introduce you to your Glowforge 3D Laser Printer. It's here.
You're here. This is a big deal.
With your Glowforge, you're going to do incredible things. You'll build that custom storage
solution that you can't seem to find in stores. You'll make the best birthday present your aunt
has ever received.
You'll start a business that knocks the socks off of every customer. You'll do things you haven't
even dreamed of yet.
But before you can do any of that, there's this.
Our job is to make sure that every part of the Glowforge experience is delightful. We're sorry,
but it is important that you read a few pages that are not delightful: the ones about safety.
They're a little dry, and a bit scary. Most of this manual is dedicated to helping you create
beautiful things, but this part was written by our safety team, in the most direct language
possible, to make absolutely certain you can operate your Glowforge printer safely.
Then, after the safety talk, we'll get back to the fun part: unboxing, the easiest laser setup
you've ever seen, and... Laser Time! Your very first Glowforge prints.
Copyright Glowforge, Inc. 2017
Advertisement

Related Manuals for Glowforge Glowforge


Summary of Contents for Glowforge Glowforge
- Page 1 But before you can do any of that, there's this. Our job is to make sure that every part of the Glowforge experience is delightful. We’re sorry, but it is important that you read a few pages that are not delightful: the ones about safety.
- Page 2 Ensure that you comply with all applicable rules. ● Do not touch the head or arm of the Glowforge unit while the power is on. If you do so by accident, turn it off, then back on again to prevent the possibility of damage.
- Page 3 Multiple sheets are more likely to burn. ● Clean out leftover bits inside the Glowforge unit when it builds up. (See “Cleaning”) ● Do not place things on top of the Glowforge unit. Do not store things that can catch fire above it.
-
Page 4: Laser Safety
The Glowforge Basic 3D Laser Printer is a Class 1 laser product containing an embedded Class 4 laser and the Glowforge Pro 3D Laser Printer is a Class 4 laser product. The laser in your Glowforge emits enough infrared light to cause instant skin and eye injury, or start a fire. This infrared laser light is invisible. - Page 5 Follow all of the instructions in “Setting Up” carefully. If there is a strong odor from your Glowforge while it is operating, stop immediately and re-check your exhaust setup. If the strong odor continues, discontinue using your Glowforge and contact support.
- Page 6 2 What if I’m not certain whether my materials are laser-compatible? If you aren’t completely sure that your material is laser-compatible, do not put it in the Glowforge unit. ● Some materials look similar to laser-compatible materials, but are different. For example, vinyl and fiberglass can be mistaken for laser-compatible materials but emit harmful smoke and fumes.
- Page 7 ● Materials must be no more than 21 in. wide and must not be so long as to touch the end of the Glowforge unit. Material must be less than ½ in. tall if the crumb tray is in, or less than 2 in.
- Page 8 The Glowforge Basic unit is a Class 1 laser product containing an embedded Class 4 CO2 laser and a Class 1 laser diode. Because the Class 4 laser is fully contained in a Class 1 enclosure, this laser product is designated as a Class 1 laser product during all procedures of operation.
- Page 9 ● Internal laser power: less than 0.39 milliwatts peak The Glowforge unit is manufactured by: Glowforge 2200 1st Avenue South, First Floor Seattle, WA 98134 For more information or support, contact s upport@glowforge.com The following label information applies to the Glowforge Basic Copyright Glowforge, Inc. 2017...
- Page 10 DRAFT The following label information applies to the Glowforge Pro Copyright Glowforge, Inc. 2017...
- Page 11 Send photos of the damage to support@glowforge.com and wait until you hear back from us. If the Glowforge itself is visibly damaged, do not plug it in or attempt to operate us; contact us immediately.
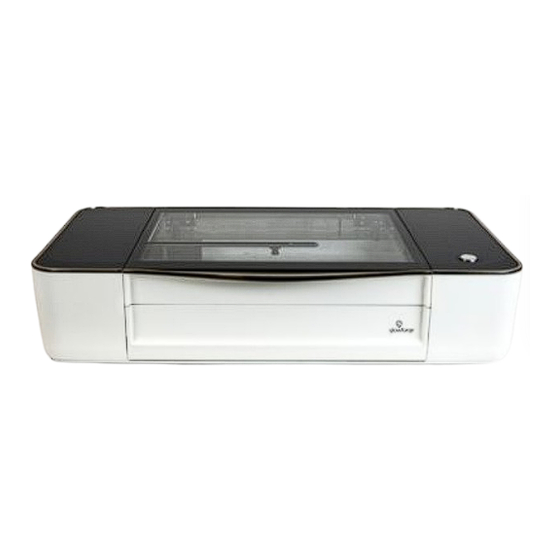
- Page 12 DRAFT Getting Acquainted Here’s a quick tour of parts you’ll need to know: Copyright Glowforge, Inc. 2017...
- Page 13 The box that’s short and wide is your Glowforge Accessory pack. Set it to the side for just a few minutes. Your Proofgrade™ materials arrived in a third box (not shown).
- Page 14 We've designed the packaging to make it easy to get your Glowforge out. The box is specially designed to protect your Glowforge through all shipments, domestic and international. Be sure to keep the box and packing materials, as you'll need them if you want to transport your Glowforge again or for any warranty repair.
- Page 15 4. Remove the Handle Locks a. Gently pull the frame of the white handle to remove it from the box 5. Keep all 4 Handle Locks a. These lock the Glowforge Box together and are required for proper shipping of your Glowforge unit 6.
- Page 16 Get a hard, flat, and stable surface ready. If the surface is unstable, uneven, or too small, then you could have inaccurate prints, the doors may not close properly, and the camera might be misaligned. You could even damage your Glowforge. 3. Remove the top layer of protective foam Copyright Glowforge, Inc. 2017...
- Page 17 Remove Printer Head, Power Cord, and Important Orange and Red Bits We’ve secured your Glowforge with two foam blocks and several important orange and red bits. In addition to providing support during travel, the rear foam block also holds your Printer Head and power cord.
- Page 18 Gently remove the rear foam block, including the Printer Head and power cord. Set these aside for now. 6. Remove Clip a. Under the glass tube, you’ll find an orange clip. Push down on it and it will pop off. Copyright Glowforge, Inc. 2017...
- Page 19 Your Glowforge Accessory Pack It’s time to open your Glowforge Accessory Pack. Glowforge Basic: Inside you’ll find your jet black ferrous steel crumb tray, your lens tool, lens wipes, and an exhaust hose. Glowforge Pro: You’ll find your Pro Glasses...
- Page 20 The black and metal crumb tray sits inside the bed of your Glowforge, supports the material you place inside, and catches leftover print bits to keep your Glowforge nice and tidy. It has four little feet that rest in four little dimples. The handle goes in front, and the feet go on the bottom.
- Page 21 DRAFT 6. Close the Front Door. Snap in the Printer Head Never connect or disconnect the printer head while the Glowforge is plugged in or you might break something. 1. Position the Laser Arm and Metal Plate a. Gently slide the metal plate on the laser arm all the way to the right, then push the arm to the back of the unit.
- Page 22 Then push it gently away from you – you’ll feel a “click” as magnets pull the printer head until it sits snugly atop the metal plate. 6. Close the front door and lower the lid on your Glowforge 7. Save Everything! a.
- Page 23 Changing weather conditions may cause hot, cold, or humid air to enter your Glowforge that could damage it. When your Glowforge is not in use, remove the hose from the vent or window, or disconnect it from your Glowforge.
- Page 24 Follow the instructions on screen to connect to your Glowforge unit’s Wi-Fi. You will not be able to access the internet again until you either finish, or stop and reconnect to your usual Wi-Fi network. When you...
- Page 25 Trace. Each piece of Proofgrade material has been labeled with a code that your Glowforge can read, which tells it exactly which settings to use to produce pristine cuts and engraves.
- Page 26 DRAFT Using Your Glowforge Pro Be sure to review Laser Safety before operating your Glowforge Pro. Moving material through the passthrough slot ● Your material must move from front to back. ● If your material is long enough to stick out either...
- Page 27 Use cotton swabs to gently remove bits that get caught. Be careful not to bend the grid. 3. Wipe the metal floor of the Glowforge unit with a soft cloth to sweep away any bits. 4. Pay special attention that the four dimples where the crumb tray sits are clean.
- Page 28 When you hear the magnet click, withdraw the tool and the lens. 3. Gently slide the lens off the lens tool and wipe both sides with a lens wipe. Be careful to touch only the metal ring to avoid fingerprints on the lens. Copyright Glowforge, Inc. 2017...
- Page 29 It will sit firmly on the tool and will not wiggle. Slide the lens tool up into the printer head until the magnet clicks, then remove the tool. 5. Review instructions for s napping in your printer head , then put the head back on. Copyright Glowforge, Inc. 2017...
- Page 30 8. Finally, gently wipe the lens of the wide angle camera on the unit’s lid. 9. It’s normal for some dust to accumulate inside your Glowforge. It is not necessary, but you can wipe the laser tube or the inside of the case with additional ZEISS cleaning wipes.
- Page 31 Glowforge to Wi-FI. Packaging Your Glowforge Whether it’s for a big move, taking your Glowforge to an event, or for any warranty repair, you’ll need to package your Glowforge properly with the original boxes, foam blocks, and important orange and red bits. The box is specially designed to protect your Glowforge through all shipments, domestic and international.
- Page 32 Pull the wire ribbon gently away and tuck it into the laser arm. 4. Insert the Orange Foam a. Being careful to only touch the finished black surfaces, insert the orange foam into the head Copyright Glowforge, Inc. 2017...
- Page 33 Afterwards, you may invert the crumb tray to remove anything that may be left. 3. Wipe the Floor of Your Glowforge a. Wipe the metal floor of the Glowforge unit with a soft cloth to sweep away any bits. Copyright Glowforge, Inc. 2017...
- Page 34 Using your flathead screwdriver, loosen the clamp until it will come off with a gentle tug. 5. Pack Accessory Box a. Place the crumb tray, exhaust vent, and lens tool in your Glowforge Accessory Pack box Copyright Glowforge, Inc. 2017...
- Page 35 DRAFT Pack the Unit Safely It's important to package your Glowforge properly with the original boxes, foam blocks, and important orange and red bits. 1. Place Red Strip on Both Rails a. Push the laser arm to the back of the unit.
- Page 36 Make sure the two black foam shells are in the bottom of the box. H ave two people lift the Glowforge unit into the box. T he unit will fit snugly into the foam inserts. Copyright Glowforge, Inc. 2017...
- Page 37 DRAFT 8. Place Top Foam a. Place the top layer of foam over your Glowforge. These pieces lay flat on your Glowforge. 9. Prepare to Lock Your Packaging a. Place the lid of your Glowforge Box over the unit and get out the four locking clips.
- Page 38 12. Lock the Handle Locks In Place a. Close the securing handle door and press to ensure it is locked in place. Your packaging should now be locked together and ready for transport. Copyright Glowforge, Inc. 2017...
- Page 39 G lowforge Community Forum , where hundreds of Glowforge owners post each day. You’ll find some incredibly talented (and helpful) folks who can provide assistance, suggestions, and ideas to help you make the most of your Glowforge. Here’s an easy way to start: ●...
Need help?
Do you have a question about the Glowforge and is the answer not in the manual?
Questions and answers