
Related Manuals for Glowforge Pro


Summary of Contents for Glowforge Pro
- Page 1 User Manual Version 2.7 Glowforge Pro | Glowforge Plus | Glowforge Basic Copyright Glowforge, Inc. 2020...
- Page 2 But before you can do any of that, there's this. Our job is to make sure that every part of the Glowforge experience is delightful. We’re sorry, but it is important that you read a few pages that are not delightful: the ones about safety. They’re a little dry, and a bit scary.
-
Page 3: Before You Start
Ensure that you comply with all applicable rules. ● Do not touch the head or arm of the Glowforge unit while the power is on. If you do so by accident, turn it off, then back on again to prevent the possibility of damage. -
Page 4: Electrical Safety
● Clean out leftover bits inside the Glowforge unit when it builds up. (See “Cleaning”) ● Do not place things on top of the Glowforge unit. Do not store things that can catch fire above it. ● Do not store sources of flammable vapors like oil-based paint, acetone, gasoline, or alcohol in the same room as your Glowforge unit. -
Page 5: Laser Products
The laser in your Glowforge emits enough infrared light to cause instant skin and eye injury, or start a fire. This infrared laser light is invisible. The Glowforge unit has a case and glass lid which block harmful levels of infrared and ultraviolet light to allow you to operate the laser safely. - Page 6 Glowforge Pro Only: Class 4 Laser Safety & LSO Training Because the Glowforge Pro has pass-through slots, it is a Class 4 laser device. For safe operation, a Class 4 laser device should be operated under a laser safety program under the control of a Laser Safety Officer (LSO).
-
Page 7: Safety Equipment
If the irritation and/or smoke emissions do not abate, discontinue using your Glowforge and contact support. Pro Users: There may be small openings around the edges of the passthrough slot. This is expected; your Glowforge Pro’s powerful fans will whisk smoke and fumes away into the exhaust hose. - Page 8 ● Materials must be no more than 21 in. wide and must not be so long as to touch the end of the Glowforge unit. Material must be less than ½ in. tall if the crumb tray is in, or less than 2 in. tall if it is removed.
-
Page 9: Operating Environment
Operating Environment To prolong the life of your Glowforge unit and to reduce the risk of fire or mechanical failure, do not put the Glowforge unit where it could experience: ● Extreme temperature or humidity ○ Temperatures below 40 degrees Fahrenheit (5 Celsius) or over 120 degrees Fahrenheit (48 Celsius) ○... - Page 10 DE: Informationen zur Sicherheit finden Sie im Anhang. IT: Trovare informazioni sulla sicurezza nell'appendice. ES: Encuentre información sobre seguridad en el apéndice. FR: Retrouvez les informations de sécurité en annexe. Copyright Glowforge, Inc. 2020...
- Page 11 Faster cut speed 120% 100% 100% Enhanced cooling for all day use Giant sized prints with Passthrough slot See “Using Your Glowforge Pro” TUV Certified to UL Standards (only when indicated on label on back of unit) ...
- Page 12 Class 1 laser product during all procedures of operation. The Glowforge Pro unit is a Class 4 laser product containing an embedded Class 4 CO2 laser and a Class 1 laser diode. It is designated as a Class 4 laser product.
- Page 13 The following label information applies to the Glowforge Basic This label appears on the back of every Glowforge Basic, with an appropriate serial number, in the spot indicated by the arrow in the diagram below. ...
- Page 14 The following label information applies to the Glowforge Plus This label appears on the back of every Glowforge Plus, with an appropriate serial number, in the spot indicated by the arrow in the diagram below. Copyright Glowforge, Inc. 2020...
- Page 15 The following label information applies to the Glowforge Basic, Plus and Pro This label appears on the laser tube in the spot indicated by the arrow in the diagram below and indicates that there is a high voltage shock hazard.
- Page 16 The following label information applies to the Glowforge Pro The Manufacturer’s Label and Aperture Label will appear on the back of every Glowforge Pro, with an appropriate serial number, in the positions indicated. Copyright Glowforge, Inc. 2020...
- Page 17 The Hazard and Explanatory Label appear on the right side of every Glowforge Pro in the position indicated. Copyright Glowforge, Inc. 2020...
- Page 18 Customer Success team can be reached at support@glowforge.com . Before you start, be sure you have a stable surface on which to place your Glowforge where you’ll have nearby access to an electrical outlet and exhaust vent.
-
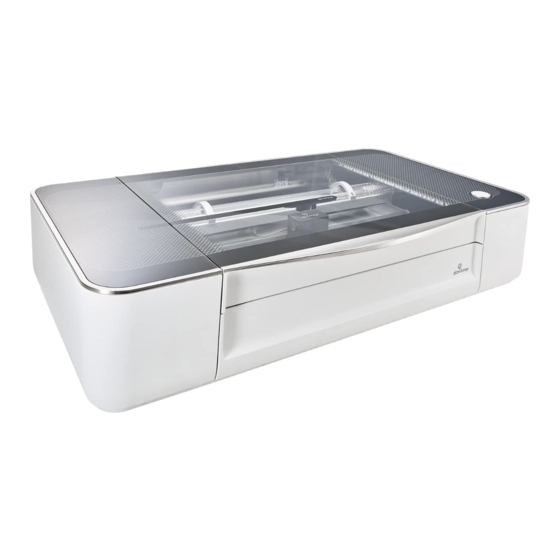
Page 19: Getting Acquainted
Getting Acquainted Here’s a quick tour of parts you’ll need to know: Copyright Glowforge, Inc. 2020... - Page 20 Remove straps and edge protectors (Selected Packages) If your Glowforge box has straps and edge protectors as shown, cut the straps and remove the edge protectors. You do not need to save these with the rest of your packaging.
- Page 21 We've designed the packaging to make it easy to get your Glowforge out. The box is specially designed to protect your Glowforge through all shipments, domestic and international. Be sure to keep the box and packing materials, as you'll need them if you want to transport your Glowforge again or for any warranty repair.
- Page 22 Remove the Handle Locks Gently pull the frame of the white handle to remove it from the box. Keep all 4 Handle Locks These lock The Glowforge Box together and are Required for proper shipping of your Glowforge unit. ...
- Page 23 Unfold the plastic bag without cutting or tearing it, and move it to the sides so you can reach in. Be sure to keep the plastic bag in case you need to ship your Glowforge again. Copyright Glowforge, Inc. 2020...
- Page 24 Remove Printer Head and Important Orange and Red Bits We’ve secured your Glowforge with two foam blocks and several important orange and red bits. In addition to providing support during travel, the rear foam block also holds your Printer Head.
- Page 25 To the left and right, you’ll find red knobs. Unscrew and pull them out. Reveal Printer Head and Lens Tool Remove the top layer of the rear foam block to reveal your printer head and lens tool. Copyright Glowforge, Inc. 2020...
- Page 26 Remove Rear Foam Block Gently remove the rear foam block, including the Printer Head and lens tool. Set these aside for now. Don’t worry! You’ll power up your Glowforge in mere minutes. Remove Orange Tape from Laser Arm Pull the tape from the point farthest away from you towards you, then gently remove it from the wire ribbon.
- Page 27 Your two Pro Shields arrive installed inside your Glowforge Pro. They finger-screw right into the front and back passthrough slots of your Glowforge Pro to ensure that nothing - material or laser light - comes in or out when the slot is not in use.
- Page 28 This will expose the rear Pro Shield so you can easily remove it. Remove the back Pro Shield from the inner back wall of your Glowforge Turn the black finger screws on either end of the Pro Shield counterclockwise to unscrew them, then lift the shield away from the wall.
- Page 29 The black and metal crumb tray sits inside the bed of your Glowforge, supports the material you place inside, and catches leftover print bits to keep your Glowforge nice and tidy. It has four little feet that rest in four little dimples. The handle goes in front, and the feet go on the bottom.
- Page 30 Snap in the Printer Head Never connect or disconnect the printer head while the Glowforge is plugged in or you might break something. Position the Laser Arm and Metal Plate Gently slide the metal plate on the laser arm all the way to the right, then push the arm to the back of the unit.
- Page 31 As shown, lower the printer head over the metal plate so that it rests next to the two round posts. Then push it gently away from you – you’ll feel a “click” as magnets pull the printer head until it sits snugly atop the metal plate. Copyright Glowforge, Inc. 2020...
- Page 32 ● If it doesn't slide easily, make sure that the ribbon cable is a simple loop with no twists, as shown. ● Move the head back to roughly the center of the bed, under the lid camera. Copyright Glowforge, Inc. 2020...
- Page 33 Glowforge printer. Let go, then check to be sure the clamp is settled over the white ring around the exhaust and will not come off with a gentle tug.
-
Page 34: Connect To Electrical Power
Disconnect Hose After Use Changing weather conditions may cause hot, cold, or humid air to enter your Glowforge that could damage it. When your Glowforge is not in use, remove the hose from the vent or window, or disconnect it from your Glowforge. - Page 35 Note that every user must have their own account. If another user needs an account email us at support@glowforge.com request one. It is a violation of your agreement to allow anyone other than you to use your Glowforge online account. Get Ready Find a device that uses Wi-Fi to access The internet, like a laptop computer.
- Page 36 When you connect successfully, the printer head will center and begin its calibration process before completing and moving back to the unit’s back left corner. You Are Connected Your Glowforge is now connected to the internet and ready to print! Proofgrade™ Materials ...
- Page 37 - material or laser light - comes in or out when the slot is not in use. The Pro Shields should always be installed except while the passthrough slot is in use. The Laser Safety Officer (LSO) training provided to Pro customers has important information about the Pro Shields.
- Page 38 Align the back Pro Shield against the passthrough slot on the inside of the Glowforge The back Pro Shield is an oval and has no screw holes aside from a black finger screw on either end. Using your fingers, screw the two black knobs clockwise to secure your Pro Shield.
- Page 39 Removing your Pro Shields (optional) Turn off your Glowforge Turn off your Glowforge using the power switch on the back. The lights and button should be off. Lower the front door and remove the crumb tray Lift the lid, then lower the front door. Lift the crumb tray slightly and slide it towards you to remove it.
- Page 40 Use cotton swabs to gently remove bits that get caught. Be careful not to bend the grid. Wipe the metal floor of the Glowforge unit with a soft cloth to sweep away any bits. Copyright Glowforge, Inc. 2020...
- Page 41 This will keep the unit working properly and prevent permanent damage to your unit. Turn off your Glowforge. Grasp the printer head as shown, and pull gently up and back to disengage the magnets and remove it.
- Page 42 When you hear the magnet click, withdraw the tool and the lens. Gently slide the lens off the lens tool and wipe both sides with a lens wipe. Be careful to touch only the metal ring to avoid fingerprints on the lens. Copyright Glowforge, Inc. 2020...
- Page 43 It will sit firmly on the tool and will not wiggle. Slide the lens tool up into the printer head until the magnet clicks, then remove the tool. Review instructions for snapping in your printer head , then put the head back on. Wipe the window on the left side of the head. Copyright Glowforge, Inc. 2020...
- Page 44 Finally, gently wipe the lens of the wide angle camera on the unit’s lid. It’s normal for some dust to accumulate inside your Glowforge. It is not necessary, but you can wipe the laser tube or the inside of the case with additional ZEISS cleaning wipes. Allow any moisture to dry completely before turning on your Glowforge again.
- Page 45 ● If the mirror has a spot in the middle of it after cleaning, or is generally unable to be cleaned to a reflective finish, it needs to be replaced. Please take a photo, share it with us, and skip the rest of these instructions. Copyright Glowforge, Inc. 2020...
- Page 46 If the mirror is unblemished, replace it carefully ● Replacing the mirror incorrectly can permanently damage your Glowforge. Fortunately, we designed it to be easy! ● Hold the mirror by the handle and gently slide it into the notch with the mirror at a 45 degree angle to the top of the Printer Head.
- Page 47 Additional Tidying It’s normal for some dust to accumulate inside your Glowforge. It is not necessary, but you can clean the circuit boards, laser tube, and inside the case. To avoid damage to your Glowforge, follow these instructions very closely: ...
- Page 48 ● Without disconnecting the wire ribbon, use canned air to blow the dust away from the circuit board ● Review instructions for snapping in your Printer Head, then put the Printer Head back on. Copyright Glowforge, Inc. 2020...
- Page 49 Spray a Lint-Free Cloth If you want to use Isopropyl Alcohol, spray it on a lint-free cloth, then wipe debris away with the damp cloth. Never spray liquid on or in your Glowforge printer. ...
- Page 50 http://www.homedepot.com/p/GE-4-in-x-8-ft-Dryer-Duct-PM8X73DS/100050673 Service The Glowforge unit may not be serviced or repaired by the user. Should service or repair be required, it must be returned to the factory; contact support@glowforge.com for instructions. Copyright Glowforge, Inc. 2020...
- Page 51 Packaging Your Glowforge Whether it’s for a big move, taking your Glowforge to an event, or for any warranty repair, you’ll need to package your Glowforge properly with the original boxes, foam blocks, and important orange and red bits. The box is specially designed to protect your Glowforge through all shipments, domestic and international.
- Page 52 Remove all the packaging pieces stored in the white rear foam block. Gently lay the printer head and power cord into the foam as pictured. (Note: Do not return power cord during a repair or warranty replacement.) Copyright Glowforge, Inc. 2020...
- Page 53 Afterwards, you may invert the crumb tray to remove anything that may be left. Wipe the Floor of Your Glowforge Wipe the metal floor of the Glowforge unit with a soft cloth to sweep away any bits. Remove the Exhaust Squeeze the ends of the ring clamp together and pull it and the hose off the exhaust vent with a gentle tug.
- Page 54 Pack the Unit Safely It's important to package your Glowforge properly with the original boxes, foam blocks, and important orange and red bits. Place Red Strip on Both Rails Push the laser arm to the back of the unit. Set the red silicone strips on the rails near the center of the unit with the knobby bit close to you as pictured.
- Page 55 Insert the Rear Foam Block With the lid removed, insert the foam block containing the printer head and power cord into your Glowforge. The bottom will lay flat against the floor of your unit. Screw in Red Knobs Locate the holes near the center of each rail.
- Page 56 Place the top layer of foam over your Glowforge. These pieces lay flat on your Glowforge. If your Accessory pack shipped in the same box as your Glowforge, insert the top pad above the protective foam and place the Accessory pack on top of the pad.
- Page 57 Use the pull tab to open the handles. Position the two back flaps so they face directly inside the box. Insert Handle Locks Insert all four handle locks so they sit flush against the outer box. Use your finger to gently lock the inner tabs down and up into their final position. Copyright Glowforge, Inc. 2020...
- Page 58 Lock the Handle Locks In Place Close the securing handle door and press to ensure it is locked in place. Your packaging should now be locked together and ready for transport. Copyright Glowforge, Inc. 2020...
- Page 59 ● You can start with a digital design, like a digital photo or a file made in Inkscape or Adobe Illustrator. ● You can also design right in the app in minutes using Glowforge Premium features. (Glowforge Premium is free right now while it’s in Beta - you can...
- Page 60 Hover over the design titled "Gift of Good Measure Keychain" and click "Open" Place Your Material Open the lid of your Glowforge. Choose a piece of medium Proofgrade™ Draftboard and place it in the center of the bed. Make sure the barcode is clearly visible on the material.
- Page 61 And now, the laser! Press the blinking button on your Glowforge. It’s important that you keep watch on your Glowforge while it is printing – luckily, it’s really fun to watch a laser in action. Need to Take a Break? If you need to take a break, you can press the white button to pause any time a print is happening.
- Page 62 Glowforge, even chicken scratches will look good. The idea is simple: you’ll draw something on paper, and the camera in the lid of your Glowforge will convert your drawing to a digital file. You’ll then add your drawing to a design we’ve provided to create a box that’s uniquely yours.
- Page 63 (not your Glowforge!) and use a black marker to fill in the blanks. Option 4: The Shadow Master Grab something nearby: a shoe, a leaf, a doll, your other hand - and plunk it on a blank white piece of paper.
- Page 64 Put Your Art in Your Glowforge Lift the lid of your Glowforge, place your artwork in the center of the bed, and close the lid. Add Artwork Look at the app. When the Workspace loads, you’ll see the box design and a picture of the bed of your Glowforge, including your drawing.
- Page 65 - probably not what you intended! When Your Trace Looks Ready… Click “Place Artwork” in the upper right-hand side. This will bring you back to the Workspace with your newly digitized artwork sitting on top of your piece of paper. Copyright Glowforge, Inc. 2020...
- Page 66 Remove Drawing, Insert Proofgrade™ Turn to your Glowforge. Say hi. Remove your drawing and place a piece of medium Proofgrade plywood on the center of the bed (it is very important you choose Plywood... so the fun 'snap' part of the project works... more later).
- Page 67 Print! Click the “Print” button in your browser window, then press the button on your Glowforge printer when it starts glowing. Watch your Glowforge (always!) while it’s printing. When the button stops glowing and the fans stop, remove your print, peel off the protective layer, and get ready to assemble.
- Page 68 When you do this, instructions will slide in from the right. You can view them in place or pop them open in a new window. Now, all you need to do is follow the steps. Your finished box is minutes away! Copyright Glowforge, Inc. 2020...
- Page 69 What Your Laser Can Do To create a great design for your Glowforge, it’s useful to understand the three things your laser can do. ● Cut: The laser moves slowly along a path, at full power, to cut all the way through the material.
- Page 70 Glowforge Premium gives you the superpower you need to print everything with boosted creativity and efficiency. It features millions of commercially-licensed vector graphics and fonts, outline and shape tools. You’ll be able to tell which tools on the Glowforge app are Premium because they have a gold gem icon next to them. See our...
- Page 71 Don’t worry about the size - we’ll adjust it later. Choose a Color Hold the Shift key and click a color in the palette. It doesn’t matter which you choose; let’s say a nice dark blue. If you look Copyright Glowforge, Inc. 2020...
- Page 72 Click the black arrow for the Selection tool in the upper left, then click on your smaller circle, and choose Edit > Duplicate from the menu. (If you’re on a Mac, resist the temptation to use copy and paste; duplicate works better!) Copyright Glowforge, Inc. 2020...
- Page 73 Click and drag inside your text box to select all of your text, then choose “Path” from the menu bar and click “Object to Path.” You can’t edit your text any more, but now it will print properly. Copyright Glowforge, Inc. 2020...
- Page 74 Pick a New Color Hold the shift key and select a pink from the palette. Making it a different color means you can apply a different setting to it in the Glowforge App. Shrink your Circle a Little Hold the shift key, click a corner of the circle’s selection box, and drag it towards the center of the circle just a bit.
- Page 75 Align Shapes To center things neatly, hold shift and click each element that you want lined up. Click Object > Arrange, then choose the “center” icon. Copyright Glowforge, Inc. 2020...
- Page 76 Congratulations - Your Design is Complete Save Your File 1. Go to the “File” Menu and click “Save As” 2. Type your File name 3. Choose “Plain SVG” Copyright Glowforge, Inc. 2020...
- Page 77 Upload Your File Go to app.glowforge.com to get to the Dashboard. Then click on the arrow at the top right of the “Create New” box, and click the “Upload” button. Choose the file you saved. Your design will open in the Workspace. Each color in your drawing will appear as a separate print step on the left side of the screen.
- Page 78 2. The Print Window will show you an animation of your upcoming print, and will also display the estimated time for your print. 3. When the button on your Glowforge starts blinking, press it and watch the laser go pew pew pew.
-
Page 79: Community Forum
The Learn By Doing area includes tutorials to get you started with your Glowforge, and you’ll also find Troubleshooters in case anything doesn’t go according to plan. Support by Email ... -
Page 80: Vor Der Benutzung
Verletzungen oder sogar zum Tod führen. Vor der Benutzung ● Lesen Sie diesen Abschnitt vor dem Einsatz Ihres Glowforge-Druckers, und achten Sie darauf, dass etwaige andere Nutzer des Druckers ihn auch lesen. ● Befolgen Sie immer alle in diesem Abschnitt und in der Glowforge App enthaltenen Anweisungen. -
Page 81: Elektrische Sicherheit
Feuer im Gebäude führen. Brandgefahr ● Legen Sie keine Gegenstände in den Glowforge-Drucker, die nicht laserfähig sind, auch wenn Sie nicht beabsichtigen, diese zu schneiden oder zu gravieren. Im Folgenden erfahren Sie mehr über laserfähige Materialien. - Page 82 Der Glowforge Basic 3D-Laserdrucker und der Glowforge Plus 3D-Laserdrucker sind Laserprodukte der Klasse 1, die einen integrierten Laser der Klasse 4 enthalten. Der Glowforge Pro 3D-Laserdrucker ist ein Laserprodukt der Klasse 4. Der Laser in Ihrer Glowforge sendet genügend Infrarotlicht aus, um sofortige Haut- und Augenverletzungen zu verursachen oder ein Feuer zu entfachen.
- Page 83 Glow Nur für Glowforge Pro: Lasersicherheits- und LSO-Training der Klasse 4 Da der Glowforge Pro Durchgangsschlitze hat, handelt es sich um ein Lasergerät der Klasse 4. Für den sicheren Betrieb sollte ein Lasergerät der Klasse 4 im Rahmen eines Laserschutzprogramms betrieben werden, das von einem Laserschutzbeauftragten (LSO) gesteuert wird.
- Page 84 Die vorliegenden Informationen schulen Sie im Umgang mit Ihrer Glowforge Pro unter Klasse 1 Bedingungen, die keine zusätzlichen besonderen Vorsichtsmaßnahmen erfordern. Wenn Sie Ihren Glowforge Pro unter Klasse 4 Bedingungen betreiben wollen, erklären Ihnen diese Materialien, wie Sie den sicheren Betrieb gestalten sollten. Die Materialien vermitteln Ihnen auch einen Überblick über die Laserphysik und Sicherheitsaspekte sowie die zu befolgenden Prozesse.
- Page 85 Nicht laserfähige Materialien können Feuer fangen oder gefährlichen Rauch und Dämpfe abgeben, die nicht durch Abluft oder Filtration kontrolliert werden können, und stellen damit eine Gefahr für Sie, Ihre Nachbarn und Ihren Glowforge-Drucker dar. Aus diesem Grund dürfen Sie nur laserfähige Materialien in die Glowforge-Einheit einlegen.
- Page 86 Materialien, die nicht richtig in das Gerät passen, können den Betrieb behindern und zu Schäden führen und die Brandgefahr erhöhen. ● Die Materialien dürfen nicht mehr als 21 Zoll breit und das Ende des Glowforge-Geräts nicht berühren. Das Material muss weniger als ½ Zoll hoch sein wenn das Krümelfach eingelegt ist oder weniger als 2 Zoll, wenn es ausgebaut ist.
- Page 87 Grad Celsius) ● Pro: zwischen 60 Grad Fahrenheit (16 Grad Celsius) und 81 Grad Fahrenheit (27 Grad Celsius) Verwenden Sie Ihr Glowforge-Gerät nicht, wenn…. Einer der folgenden Fälle eintritt, schalten Sie das Gerät sofort aus, ziehen Sie den Netzstecker heraus und setzen Sie sich mit support@glowforge.com...
-
Page 88: Prima Di Cominciare
● I laser sono soggetti a norme e regolamenti, in particolare se installati in istituti scolastici o nel posto di lavoro. Accertarsi di rispettare tutte le regole in vigore. ● Non toccare la testa o il braccio dell’unità Glowforge mentre la corrente è attiva. Se ciò accade inavvertitamente, spegnere l’unità e riaccenderla per evitare eventuali danni. -
Page 89: Sicurezza Elettrica
15 amp. Sicurezza antincendio Il laser dell’unità Glowforge taglia e incide con un raggio di luce a infrarossi ad alta intensità. Il laser può generare temperature estremamente elevate nel materiale che viene tagliato o inciso. Secondo le circostanze il materiale all’interno dell’unità... - Page 90 La stampante base Glowforge 3D Basic e la stampante laser Glowforge Plus 3D sono prodotti laser di Classe 1 contenenti un laser Classe 4 incorporato. La stampante laser Glowforge Pro 3D è un prodotto laser Classe 4. Il laser della vostra Glowforge emette luce a infrarossi sufficiente a provocare immediate lesioni alla cute e agli occhi, o a innescare un incendio.
- Page 91 Solo per Glowforge Pro: Sicurezza Laser Classe 4 & Addestramento LSO Incaricato Sicurezza Laser Poiché Glowforge Pro ha feritoie passanti, è un dispositivo laser di Classe 4. Per sicurezza un dispositivo laser di Classe 4 deve essere utilizzato secondo un programma di sicurezza laser sotto il controllo di un incaricato sicurezza laser (Laser Safety Officer (LSO)).
- Page 92 Far funzionare l’unità Glowforge solo quando lo scarico è diretto verso l’esterno o mediante filtro dell’aria Glowforge Air Filter. Il mancato scarico provoca la fuoriuscita di fumo e di vapori nel locale con rischio per la salute o pericolo di morte.
- Page 93 CO2 nell’unità Glowforge. Materiali non laser-compatibili possono prendere fuoco, emettere fumo e vapori pericolosi che non possono essere controllati dallo scarico o dalla filtrazione, e rappresentano un rischio sanitario per voi, per i vicini e per la stampante Glowforge. Per questo motivo si deve introdurre nell’unità Glowforge solo materiale laser-compatibile.
-
Page 94: Ambiente Di Lavoro
Se comincia a staccarsi, rimuoverlo dal materiale e non stamparci sopra. Ambiente di lavoro Per prolungare la durata dell’unità Glowforge e ridurre il rischio di incendio o di guasto meccanico, non collocare l’unità Glowforge in ambiente caratterizzato da: ●... - Page 95 . Non riprendere l’utilizzo dell’unità Glowforge fino a completa risoluzione da parte del servizio assistenza. ● Le impostazioni predefinite per un pezzo di materiale Proofgrade™ non eseguono il taglio del materiale anche dopo aver pulito la lente e le finestre ●...
-
Page 96: Antes De Comenzar
Estos pueden causar lesiones serias o incluso la muerte. Antes de comenzar ● Lea esta sección antes de usar su impresora Glowforge y asegúrese de que quien la use lea este contenido también. ● Siempre siga todas las instrucciones en esta sección y en la Aplicación de Glowforge. -
Page 97: Seguridad Eléctrica
15 amperios. Seguridad Contra Incendios El láser de la impresora Glowforge corta y graba con un haz de luz infrarroja de alta intensidad. El láser puede generar temperaturas extremadamente altas en el material que se está cortando o grabando. - Page 98 Las impresoras láser Basic 3D de Glowforge y la Plus 3D de Glowforge son productos con láser Clase 1, que contienen un láser Clase 4 incrustado. La impresora láser Pro 3D de Glowforge es un producto con láser Clase 4. El láser en su Glowforge emite la suficiente luz infrarroja como para provocar daños inmediatos en la piel o en los ojos, o iniciar un incendio.
- Page 99 Para Glowforge Pro únicamente: Seguridad para Láser Clase 4 y Capacitación para RSL Debido a que Glowforge Pro tiene espacios que permiten acomodar el material, es un dispositivo láser Clase 4. Para operarse de forma segura, un dispositivo láser Clase 4 debe operarse según un programa de seguridad láser bajo el control de un Responsable en Seguridad Láser.
- Page 100 Si no se reduce la irritación o las emisiones de humo, interrumpa el uso de su Glowforge y póngase en contacto con el servicio técnico.
-
Page 101: Equipo De Seguridad
Glowforge. Por esta razón, solo debe poner materiales compatibles con láser en la impresora Glowforge. -
Page 102: Entorno Operativo
Si comienza a desprenderse, descarte el material y no imprima sobre él. Entorno Operativo Para prolongar la vida de su impresora Glowforge y para reducir el riesgo de incendio o falla mecánica, no coloque su Glowforge en donde pueda experimentar: ●... - Page 103 Basic y Plus: Entre 60 grados Fahrenheit (16 Celsius) y 75 grados Fahrenheit (24 Celsius). ● Pro: Entre 60 grados Fahrenheit (16 Celsius) y 81 grados Fahrenheit (27 Celsius). Interrumpa el uso de su Glowforge si… Si ocurre alguna de las siguientes situaciones, apague el interruptor de encendido de inmediato, desenchufe la unidad y contacte a support@glowforge.com...
-
Page 104: Avant De Commencer
établissement scolaire ou sur un lieu de travail. Assurez-vous de respecter toutes les règles applicables. ● Ne touchez pas la tête ou le bras de l’imprimante Glowforge lorsque l’appareil est sous tension. Si vous y touchez par erreur, éteignez-la, puis rallumez-la pour éviter tout dommage. -
Page 105: Sécurité Électrique
être de 15 ampères. Sécurité incendie Le laser de l’imprimante Glowforge coupe et grave à l’aide d’un faisceau de lumière infrarouge à haute intensité. Le laser peut générer des températures extrêmement élevées dans le matériau à couper ou à... - Page 106 L’imprimante laser 3D Glowforge Basic et l’imprimante laser 3D Glowforge Plus sont des produits laser de classe 1 qui sont équipés d’un laser intégré de classe 4. L’imprimante laser 3D Glowforge Pro est un produit laser de classe 4. Le laser de votre Glowforge émet suffisamment de lumière infrarouge pour provoquer des lésions cutanées et oculaires instantanées ou un départ d’incendie.
- Page 107 Glowforge Pro uniquement : Sécurité pour les lasers de classe 4 & Formation d’un Responsable Sécurité Laser (LSO) L’imprimante Glowforge Pro dispose de fentes de passage et est donc considérée comme un appareil laser de classe 4.
- Page 108 Il est important de lire, comprendre et suivre ces supports de formation Glowforge Pro pour utiliser votre imprimante Glowforge Pro. Les supports de formation Glowforge Pro pour les Responsables Sécurité Laser (LSO) sont envoyés par email à tous les propriétaires de Glowforge Pro sous forme de fichier PDF protégé par mot de passe. ...
-
Page 109: Équipement De Sécurité
Utilisateurs professionnels : Il peut y avoir de petites ouvertures sur les bords de la fente de passage. C’est normal. Les puissants ventilateurs de votre Glowforge Pro évacueront la fumée et les émanations par le tuyau d’échappement. Équipement de sécurité ... -
Page 110: Environnement De Fonctionnement
échéant) ou le fond métallique de la zone d’impression (sans plateau de récupération des résidus). ● Ne placez pas de matériau enroulé dans la Glowforge. Il pourrait être trop volumineux ou se dérouler pendant l’impression, ce qui gêne le fonctionnement. - Page 111 ○ en cas d’évacuation vers l’extérieur, assurez-vous que les conditions changeantes ne provoquent pas de températures ou une humidité extrêmes dans l’imprimante Glowforge via le tuyau d’évacuation. Débranchez le tuyau d’évacuation vers l’extérieur lorsque la Glowforge n’est pas en fonctionnement.
Need help?
Do you have a question about the Pro and is the answer not in the manual?
Questions and answers