Table of Contents
Advertisement
Advertisement
Table of Contents

Related Manuals for Ametek iPac


Summary of Contents for Ametek iPac
- Page 1 Pachymeter ® User’s Guide...
- Page 2 ©2017 AMETEK, Inc. iPac, Reichert and Reichert Technologies are registered trademarks of Reichert, Inc. The Bluetooth word mark, figure mark, and combination mark are registered trademarks owned by Bluetooth SIG. AMETEK is a registered trademark of AMETEK, Inc. The information contained in this document was accurate at time of publication.
-
Page 3: Table Of Contents
Instrument Setup ..............10 Unpacking Instructions ............10 Parts Identification ...............11 Accessories .................11 Optional Accessories ............11 Icon Description ..............12 Charging the iPac Pachymeter ..........13 Power Up Mode ..............14 Measurement Mode ............14 Sleep Mode .................14 iPac Setup Menu ..............15 iPac Menu Options .............17 Bluetooth ................17... -
Page 4: Warnings And Cautions
WARNING: THE BATTERY SHOULD ONLY BE REPLACED WITH THE BATTERY SPECIFIED IN THIS MANUAL. USE OF ANOTHER BATTERY MAY CAUSE FIRE OR AN EXPLOSION. WARNING: DO NOT USE THE IPAC PACHYMETER IF THE MEASUREMENT TIP IS CRACKED, CHIPPED OR SHOWS ANY IRREGULARITY OF THE SURFACE, TO PREVENT PATIENT INJURY AND OR INACCURATE READINGS. - Page 5 TO LIGHTLY TOUCH THE CORNEA. WARNING: TO ENSURE PATIENT ISOLATION FROM HIGH ELECTRICAL POTENTIAL, DO NOT USE THE IPAC ON A PATIENT WHEN THE INSTRUMENT IS CHARGING. IPAC CHARGING MUST ONLY TAKE PLACE AT A DISTANCE OF AT LEAST 1.5 M FROM THE PATIENT.
- Page 6 MENDED THAT THE IPAC BE ATTACHED TO ITS CHARGER (OR CHARGING BASE) WHEN NOT IN USE TO ENSURE PROPER OPERATION. CAUTION: DO NOT ATTEMPT TO CHARGE THE IPAC OR POWER THE CHARGING CRADLE US- ING THE USB PORT OF A COMPUTER OR DAMAGE TO THE IPAC OR COMPUTER MAY OCCUR. 16040-101 Rev. J...
-
Page 7: Symbol Information
Symbol Information Caution Protective Earth - Indicates that a protective earth ground is connected where the symbol is located. Catalog Number Serial Number Manufacturer Date of Manufacture 2017 Waste of Electrical and Electronic Equipment Compliance to Medical Device Directive 93/42/EEC Consult Instructions for Use - Indicates that important operating and maintenance instructions are included in this User’s Guide. -
Page 8: Introduction
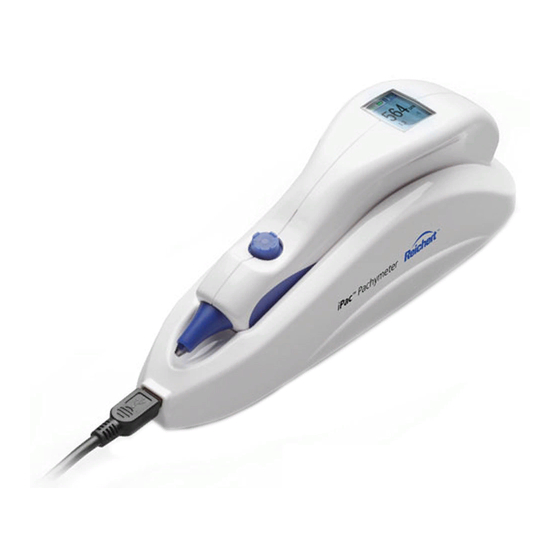
These are used to produce an averaged pachymetry measurement. The measurement is displayed on the Organic Light Emitting Diode (OLED) display. A rechargeable battery is used in the iPac Pachymeter and consists of a lithium ion battery. -continued-... - Page 9 • Easy to Use - corneal thickness can be measured accurately by medical eye care professionals. • Portable - The iPac Pachymeter weighs just 3.53 oz. (100 g) and is rechargeable. • Versatile - The iPac Pachymeter may be used easily with the patient in any position, making the instrument suitable for the office, in clinics, at the hospital bedside, and in remote locations.
-
Page 10: Instrument Setup
Instrument Setup Unpacking Instructions Great care has been taken to deliver your iPac Pachymeter to you. The packaging was specifically designed to transport this instrument. Please retain the packaging for future use in case transportation is required. Removing the iPac Pachymeter Shipping Box 1. -
Page 11: Parts Identification
Carrying Case (P/N 16040-380) Lanyard (P/N 13851-096) Measurement Tip Cover (P/N 16040-027) iPac Rechargeable Lithium Ion Battery (P/N 16042) iPac Pachymeter Charging Cradle (P/N 16041) A/C Adapter w/ Mini USB (P/N 16040-430) Including Country Specific Pin Connector*: • North America (P/N 16040-410-001) •... -
Page 12: Icon Description
Instrument Setup (continued) Icon Description Move the Control button forward to go UP Move the Control button back to go DOWN Move the Control button left to go LEFT Move the Control button right to go RIGHT Press and hold the Control button for the indicated time Press the Control button once and then release it Bluetooth ON, but not connected Bluetooth ON, Bluetooth Connected... -
Page 13: Charging The Ipac Pachymeter
Cradle operation. Note: The iPac comes with a mini USB port cap installed in the mini USB port hole. This should remain in the iPac to help ensure the iPac properly sits on the cradle. 1. Plug the A/C Adaptor with Mini USB into an appropriately volted outlet. -
Page 14: Power Up Mode
Pachymeter for the recommended period of time to ensure correct operation. Note: The iPac comes with a mini USB port cap installed in the mini USB port hole. This needs to be removed before charging directly. 1. Plug the A/C Adaptor with Mini USB into an appropriately volted outlet. -
Page 15: Ipac Setup Menu
Instrument Setup (continued) iPac Setup Menu The iPac setup menu enables the user to select the options that are preferred when using the pachymeter. Press and hold ( )the Control button for three seconds to display the Setup menu. At the top of the Display is a menu title (e.g., SETUP). If there is a small arrow on the left or right, moving the Control button LEFT or RIGHT will navigate through the menu screens in accordance with the arrows. - Page 16 • Search - Highlight the search option and press the control button to find any Bluetooth printer in the immediate area such as the iPac Bluetooth printer. The display will show the devices that have been discovered. (See printing section in this guide for connection instructions for the iPac Bluetooth printer.)
-
Page 17: Ipac Menu Options
Bluetooth connection process. Note: When a connection is made to a Bluetooth printer, the connection information is stored in the iPac. Whenever Bluetooth is turned on and no other connection has been made, the iPac will attempt to reconnect to the same printer. -
Page 18: About
Detectable mode is active The computer may request this passkey code when attempting to connect to the iPac. Note: The iPac can only have one active Bluetooth connection at a time. If a SEARCH is performed while DETECTABLE mode is active, the DETECT- ABLE mode will be turned OFF and any Bluetooth connection with the com- puter will be lost. -
Page 19: Date/Time
Instrument Setup (continued) iPac Menu Options (continued) Date/Time The Date and Time format can be changed in Setup. • Date Format Sets the month, day and year format. • 12 or 24 Sets the option to display the hours in 12 hour or 24 hour format. -
Page 20: Display
Instrument Setup (continued) iPac Menu Options (continued) Display The Display screen allows changes to the following options: • Eye: Displays the selected eye as OD/OS or R/L. OD = Right Eye. OS = Left Eye. • IOP Corr: IOP Correction value is displayed if the Option is set ON. -
Page 21: Instrument Operation
OD/OS: This represents the patient’s eye. The highlighted option is the eye selected to be measured. The iPac always defaults to the right eye at the beginning of the measurement process. Move the control button right or left to select the eye you wish to measure. - Page 22 Instrument Operation (continued) Measurement Screen (continued) Asterisks Asterisks When the instrument is ready to take measurements, three asterisks (***) are displayed on the screen. After five or more measurements are acquired the asterisks will change and display the average value. The number of measurements are displayed below the asterisks (e.g., 6/25).
-
Page 23: Operation
Note: The instrument will automatically enter the power OFF sequence after inactiv- ity of approximately one minute. 3. Check the battery icon to ensure that the battery is fully charged. If the iPac needs charging, plug in the charger until the icon indicates that it is fully charged, or place it in the iPac Charging Cradle. -
Page 24: Measurement Process
Indentation or additional pressure is not required and may lead to injury to the eye. Note: Do not ‘tap’ the iPac on the cornea. Hold it steadily against the cornea. 6. Support the iPac with your hand, and if necessary, stabilize the movement of the iPac by resting your hand against the patient. - Page 25 Instrument Operation (continued) Measurement Process (continued) 10. Move the Control button to the right ( ) or left ( ) as needed to acquire measurements on the other eye and repeat the above process. 11. To review the measurement data, you can “toggle” between the right and left eye by moving the control button right ( or left ( 12.
-
Page 26: Bluetooth Printing
Bluetooth is a wireless communication protocol for exchanging data over short distances. The iPac uses Bluetooth for printing and communicating with a computer EMR system. To setup these options please refer to the iPac Menu Options, Bluetooth section of this User’s guide. -
Page 27: Ipac Bluetooth Printer
Bluetooth Printer (continued) 5. Exit the iPac setup mode. 6. The iPac is now connected to the iPac printer, to send measurement data to the printer after measuring a patient, move the Control button down ( ), the data will be sent to the iPac printer and printed. -
Page 28: Cleaning And Disinfection
Measurement Tip Cleaning Instructions Perform the following procedure when cleaning and disinfecting the iPac measurement tip. WARNING: DO NOT ATTEMPT TO USE THE IPAC IF THERE IS ANY INDICATION THE MEASUREMENT TIP HAS BEEN DAMAGED AND/OR THEIR PHYSICAL INTEGRITY HAS BEEN COMPROMISED. IF THE MEASUREMENT TIP HAS MADE CONTACT WITH ANYTHING BETWEEN APPLANATIONS, CLEAN THE TIP ACCORDING TO THE MEA- SUREMENT TIP CLEANING INSTRUCTIONS OR SERIOUS INJURY MAY OCCUR. -
Page 29: Measurement Tip High Level Disinfection Instructions
6. Visually inspect the iPac for cleanliness and integrity. 7. The iPac can be stored in the iPac case with a new lint free cloth or tissue over the tip if not to be used for an extended period of time. -
Page 30: Maintenance And Storage
Battery Orientation proper disposal of the battery. Storage If the instrument is to be stored for an extended period or prepared for transportation, remove the iPac battery to avoid possible damage to the instrument due to battery leakage. 16040-101 Rev. J... -
Page 31: Troubleshooting
Troubleshooting The table below provides a guide for troubleshooting some basic iPac Pachymeter operational problems. If a problem persists after using this guide contact Reichert for further assistance. SYMPTOM PROBABLE CAUSE CORRECTION Remove the battery, wait 10 seconds, re- Unsuccessful boot. -
Page 32: Specifications
Specifications PHYSICAL DIMENSIONS ENVIRONMENTAL REQUIREMENTS Size Operational Environment Length: 7.05 in. (179 mm) Ambient Temperature range: Width: 1.46 in. (37.0 mm) 50°F to 95°F (10 °C to 35°C) Height: 2.20 in. (56.0 mm) Relative Humidity range: 20 to 80% RH Weight: 3.53 oz.(100 g) Atmospheric Pressure range:... -
Page 33: Guidance & Manufacturer's Declaration
Guidance and Manufacturer’s Declaration – Electromagnetic Emissions The iPac is intended for use in the electromagnetic environment specified below. The customer or user of the iPac should ensure that it is used in such an environment. Electromagnetic Environment Emissions Test... - Page 34 Recommended Separation Distances for between Portable and Mobile RF Communications Equipment and the iPac The iPac is intended for use in the electromagnetic environment in which radiated RF disturbances are controlled. The customer or user of the iPac can help prevent electromagnetic...
- Page 35 All Equipment and Systems Guidance and Manufacturer’s Declaration – Electromagnetic Immunity The iPac is suitable for use in electromagnetic environment specified below. The customer or user of the iPac should ensure that it is used in such an environment. Immunity...
- Page 36 Equipment and Systems that are NOT Life-supporting Guidance and Manufacturer’s Declaration – Electromagnetic Immunity The iPac is intended for use in the electromagnetic environment specified below. The customer or user of the iPac should ensure that it is used in such an environment. Immunity IEC 60601...
-
Page 37: Regulatory Compliance - Bluetooth
Regulatory Compliance - Bluetooth The LMX9838 has been tested and approved to be com- USA-Federal Communications Commission (FCC) pliant to the following regulatory standards: This equipment has been tested and found to comply with the limits for a Class B digital device, pursuant to CE Compliance: Part 15 of FCC Rules. -
Page 38: Acoustic Output
Acoustic Output Acoustic Output SPTA.3 SPPA.3 (mW/cm (W/cm Global Maximum Value 0.155±0.014 3.72±0.98 12.2±2.0 (MPa) 0.70±0.07 (mW) 0.040±0.010 0.040±0.010 (MHz) 20.2±1.4 20.2±1.4 20.2±1.4 Associated Acoustic (cm) Parameters Beam Dimensions 0.11 0.11 (cm) 0.11 0.11 PD (ms) 0.07 0.07 PRF (Hz) 4600 4600 EBD (cm) - Page 39 EBD - entrance beam dimensions for the azimuthal and elevational planes (centimeters). Tissue Exposure To Ultrasound Energy The ultrasound energy emitted by the iPac is of low intensity and will have no adverse effects on the patient and/or user. However, the user is still cautioned to perform examinations using the principle of ALARA (As Low As Reasonably Achievable).
-
Page 40: Warranty
Warranty This product is warranted by Reichert, Inc. against defective material and work- manship under normal use for a period of three years from the date of invoice to the original purchaser. (An authorized dealer shall not be considered an original purchaser). -
Page 41: Appendix A
Appendix A The IOP correction value is based on data of Ehlers et al (1975), modified from Stodmeis- ter (1998). Mean of corneal thickness in healthy subjects; 545µm (Doughty and Zaman 2000) See adjustment chart indicated below for more information. 16040-101 Rev. - Page 42 Notes 16040-101 Rev. J...
- Page 43 Notes 16040-101 Rev. J...
- Page 44 Manufacturer Reichert, Inc. 3362 Walden Ave Depew, NY 14043 Toll Free: 888-849-8955 Phone: 716-686-4500 Email: reichert.information@ametek.com www.reichert.com Authorized European Representative AMETEK GmbH Business Unit Reichert Carl-von-Linde-Strasse 42 85716 Unterschleissheim / Munich GERMANY Tel: +49 (89) 315 8911 0 Fax: +49 (89) 315 891 99 Email: info.reichert-de@ametek.com...
Need help?
Do you have a question about the iPac and is the answer not in the manual?
Questions and answers