
Subscribe to Our Youtube Channel
Related Manuals for Ametek IPS-4-UV


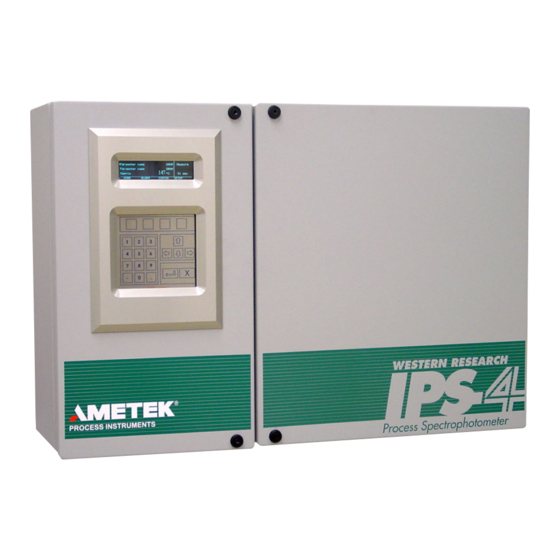
Summary of Contents for Ametek IPS-4-UV
- Page 1 AMETEK Western Research IPS-4-UV Analyzer General Purpose/Division 2 User Manual Process Instruments 455 Corporate Blvd. Newark, DE 19702 COMMITTED TO TOTAL QUALITY PN 903-8630, Rev P...
-
Page 2: Offices
AMETEK does not guarantee results and assumes no obligation or liability. This publication is not a license to operate under, or a recommendation to infringe upon, any process patents. -
Page 3: Table Of Contents
Table of Contents Offices ..........................ii Safety Notes ........................viii Electrical Safety ......................viii Grounding ........................viii Personnel and Equipment Safety Information ...................ix Warnings ............................ix Cautions ............................x Warning Labels ......................... xi Electromagnetic Compatibility (EMC) ............... xii Special Warnings and Information ................xiii Warranty and Claims ..................... xiv EC Declaration of Conformity ..................xv Chapter 1 ............................Overview Principles of Operation .................... - Page 4 Permanent Ethernet Cable Connections (Optional)..............3-17 Start-Up and Verification ................... 3-19 Powering Up the Analyzer .......................3-19 Start-Up Diagnostic Checklist......................3-26 Sample System Leak Check ......................3-28 Manually Zeroing the Analyzer Sample System ................3-29 Adjusting the Zero/Span Fluid Flow Rate ..................3-30 iv | IPS-4-UV Analyzer-GPDiv2...
- Page 5 Adjusting the Sample Flow Rate .....................3-30 Setting Sample Response Time ....................3-31 Normal Operation ....................... 3-33 Recording Initial Readings ......................3-33 Recording Initial Sample Response Time ................3-33 Analyzer Configuration ....................3-35 Chapter 4 ......................Controller / User Interface Introduction to the User Interface Panel ..............4-2 User Interface Panel Components ....................
- Page 6 Chapter 6 ..........................Service & Parts Technical Support ......................6-1 Returning Equipment ....................6-2 AMETEK Service & Aftermarket Sales Support ............. 6-3 Recommended Spare Parts ..................6-4 Measuring Cell Assembly Spare Parts ....................6-4 Optical Bench Assembly Spare Parts ....................6-4 Spare Analyzer Fuses ..........................
- Page 7 SETTINGS Menu Screen .........................7-10 Calibration Settings Screen ......................7-11 Actions Screen ...........................7-12 Current Output Screen ......................7-13 Relay Setup Screens ........................7-14 Network & Modbus Screen ......................7-15 System & Customition Screen ....................7-16 Analytes Screen ........................7-17 Limits Screen ..........................7-18 Diagnostics Screen ........................7-19 Save/Restore Files Screen ......................7-20 CHAPTER 8 ..................modbus communication interface Hardware: .............................
-
Page 8: Safety Notes
Grounding Instrument grounding is mandatory. Performance specifications and safety pro- tection are void if instrument is operated from an improperly grounded power source. Verify ground continuity of all equipment before applying power. CAUTION viii | IPS-4-UV Analyzer-GPDiv2... -
Page 9: Personnel And Equipment Safety Information
Personnel and Equipment Safety Information This section describes important safety information to avoid personal injury and damage to the equipment while installing, operating, maintaining, or servicing the equipment. All safety regulations, standards, and procedures at the analyzer location must be followed. All personnel involved with the installation, start-up, operation, maintenance, service, or troubleshooting of the IPS-4 Analyzer must review and follow these Warnings and Cautions. -
Page 10: Cautions
CAUTION light. The window is the flat surface at the end of the narrow glass tube. The lamp assembly is fragile and should be handled with care. x | IPS-4-UV Analyzer-GPDiv2... -
Page 11: Warning Labels
Achtung - Heiße Oberfläche Environmental Information (WEEE) Th is AMETEK product contains materials that can be reclaimed and recycled. In some cases the product may contain materials known to be hazardous to the environment or human health. In order to prevent the release of harmful substances into the environment and to conserve our natural resources, AMETEK recommends that you arrange to recycle this product when it reaches its “end of life. -
Page 12: Electromagnetic Compatibility (Emc)
Analyzer or the overall system. Examples of elec- trical events and devices known for the generation of harmful electromagnetic disturbances include motors, capacitor bank switching, storm related transients, RF welding equipment, static, and walkie-talkies. xii | IPS-4-UV Analyzer-GPDiv2... -
Page 13: Special Warnings And Information
SPECIAL WARNINGS AND INFORMATION Equipment Used in Class I, Division 2 Hazardous Locations Refer to Chapter 2 – Specifications for details about the suitability of this equip- ment in hazardous areas. Explosion Hazard – Substitution of Components May Impair Suitability for hazardous locations. -
Page 14: Warranty And Claims
Process photometric analyzers, process moisture analyzers, and sample systems are warranted to per- form the intended measurement, only in the event that the customer has supplied, and AMETEK has accepted, valid sample stream composition data, process conditions, and electrical area classification prior to order acknowledgment. - Page 15 Contents | xv...
- Page 16 This page intentionally left blank. xvi | IPS-4-UV Analyzer-GPDiv2...
-
Page 17: Principles Of Operation
This chapter discusses the features of the IPS-4 Analyzer and a summary of how the entire system operates. This chapter also provides an overview of the AMETEK electronics and sample system, and the various sub-sys- tems that make up the entire analyzer system. -
Page 18: The Implementation
Depending on the grating type, and which of the two detectors are chosen, different subsets of the wavelength range between 220 nm and 800 nm are available. The polychromator is maintained at a constant temperature for stability. 1-2 | IPS-4-UV Analyzer-GPDiv2... -
Page 19: Sample System
Figure 1-1. Analyzer light path schematic. Sample System The sample system is contained within an attached but separate, insulated enclosure (Oven/Sample System Enclosure). If this enclosure is heated, components within this enclosure are specified to operate at temperatures of up to 150 °C. The system components are configurable for both gas and liquid applica- tions. -
Page 20: Electronics
• Control the sample system including valves, etc. • Calculate the fluid absorbances and concentrations. For external communication, RS232, RS485, and Ethernet ports are avail- able. Analog signals are also available to the customer through configu- rable 0–20 mA or 4–20 mA outputs. 1-4 | IPS-4-UV Analyzer-GPDiv2... - Page 21 Classified, Hazardous Area Protection Components and Functions The General-purpose version of the IPS-4 is designed to be, and complies with requirements for, electrical equipment in Division 2 classified hazard- ous areas. The methods of protection used include type “n” (non-incen- dive) and type “m”...
-
Page 22: Analyzer Electronics And Sample System Features
Two analog input signal channels Each non-isolated analog input is jumper selectable to read a 0–20 mA or 4–20 mA signal or a 0–5 V signal. Two (2) optically isolated discrete DC inputs are also available. 1-6 | IPS-4-UV Analyzer-GPDiv2... - Page 23 Four independent analog output signal channels The full-scale concentration for each output are configurable as either 0–20 mA or 4–20 mA. Sample control system that can control and monitor the state of up to five tem- perature-control zones within the sample system Temperature-control zones include the Oven/Sample System Enclo- sure and Optical Bench.
- Page 24 This page intentionally left blank. 1-8 | IPS-4-UV Analyzer-GPDiv2...
-
Page 25: Methodology
SPECIFICATIONS Methodology Diode array ultraviolet based spectrophotometer. Wavelength Ranges 220–375 nm 512 element array 300–500 nm 512 element array 220–550 nm 1024 element array 300–800 nm 1024 element array Analyzer Range ppm to 100 %, depending on the application. Photometric Range 0–3.0 AU (wavelength dependent);... -
Page 26: Measurement Accuracy
256 x 64 pixel vacuum-fluorescent display with multilingual capability. Four (4) isolated analog outputs, configurable as 0–20 mA or 4–20 mA (two are standard; two are optional). Up to eight (8) relays (NO, contact rating 100 VA, 240 V maximum), which 2-2 | IPS-4-UV Analyzer-GPDiv2... -
Page 27: Sample System Limits
indicate the operational status of the analyzer. Each relay provides one SPST (Form A) dry (potential free) contact. RS485 serial port, isolated. RS232 serial port, non-isolated. Fast Ethernet (IEE802.3). Modbus TCP (Supports single Modbus client). Sample System Limits Sample Pressure Up to 10,000 kPag (1,450 psig / 100 barg) can be accommodated, depend- ing on the application. -
Page 28: Zero Fluid
Hastelloy C-276, or Monel with Sapphire or UV-grade Quartz windows), to suit a variety of applications. Pressure Input Signals Two pressure input signals. Manifold Block: 0–100 psig Measuring Cell: (0–30 psia, 0–100 psia, or 0–500 psia) 2-4 | IPS-4-UV Analyzer-GPDiv2... -
Page 29: Xenon Flash Lamp
Xenon Flash Lamp 1–4 W continuous average. Life expectancy: 18 to 24 months Environmental Ambient Temperature -20 °C to +50 °C (-4 °F to +122 °F), without external heating or cooling. Humidity 0–90 % Relative Humidity. Pollution Degree Pollution Degree 2 Maximum Altitude 2000 metres Installation Category... -
Page 30: Physical Dimensions
Div 2 Groups F & G, and Class III Pending: Class I Zone 2 AEx nA IIC T3 and Class II Zone 2 AEx nA T3, Class I Zone 2 Ex nA IIC T3 and Class II Zone 2 Ex nA 2-6 | IPS-4-UV Analyzer-GPDiv2... - Page 31 INSTALLATION & START-UP The Installation & Start-Up chapter contains information about the fol- lowing topics: • Where to find safety information in this guide before working with the analyzer. • How to store the analyzer before installation. • How to uncrate and inspect the analyzer for damage before installing •...
-
Page 32: Safety Considerations
WARNING occurs with occasional condensation) and Installation Category II (lo- cal level transients, less than those found at power distribution level). Mains supply voltage fluctuations are not to exceed 10 percent of the nominal supply voltage. 3-2 | IPS-4-UV Analyzer-GPDiv2... -
Page 33: Pre-Installation Requirements
Pre-Installation Requirements Storage Prior to Installation If the analyzer is stored for any period of time prior to installation, it must be housed in a temperature-controlled environment where it is not sub- ject to dripping or splashing liquids, corrosive gases/liquids, high humid- ity, or excessive heat or cold. -
Page 34: General Installation Information
• A supply of 1/4” O.D. 316 stainless steel tubing for the Instrument Air (or N ) and Span fluid lines. Length will vary, depending on the distance between the analyzer and the supply source. Supplied by the customer. 3-4 | IPS-4-UV Analyzer-GPDiv2... - Page 35 Figure 3-1. Analyzer component layout details, example only. Installation & Start-Up | 3-5...
-
Page 36: Installing The Mechanical Components
Above: 305 mm (12”) Below: 610 mm (24”) Front: 762 mm (30”) – door swing clearance Oven/Sample System side: 762 mm (30”) – door swing clearance Electronics Enclosure side: 457 mm (18”) – door swing clearance 3-6 | IPS-4-UV Analyzer-GPDiv2... - Page 37 Figure 3-2. Analyzer mounting details, with unistruts, Figure 3-2 is an example of an analyzer layout on unistruts and with example only. Sample/Vent Line fittings for unheated lines. Mounting configuration and layout for your analyzer system may vary. Refer to the customer- specific drawings in the “Supplemental Information”...
- Page 38 The surrounding ambient temperature of the analyzer should be main- tained between -20 °C to +50 °C (-4 °F to +122 °F). If the analyzer system is mounted within an AMETEK-designed shelter, these conditions are taken into consideration in the design of shelter.
-
Page 39: Installing The Optical Bench Assembly
Installing the Optical Bench Assembly After the analyzer has been installed, the Optical Bench Assembly can be mounted in the Electronics Enclosure. All electrical connections to the Optical Bench Assembly are made via pre-wired connector plugs (no hard wiring is required). Ensure there is no power being supplied to the analyzer while install- ing the Optical Bench Assembly. - Page 40 BENCH ASSEMBLY IN PLACE) OPTICAL BENCH ASSEMBLY RIBBON CABLE, CONNECTS TO P2 ON DETECTOR INTERFACE BOARD ON XENON FLASH ELECTRONICS ENCLOSURE DOOR LAMP ASSEMBLY IPS-4, OPTICAL BENCH / LAMP ASSEMBLY REV. WX-14865 05/06/21 Figure 3-3. Optical Bench Assembly. 3-10 | IPS-4-UV Analyzer-GPDiv2...
-
Page 41: Installing The Sample System
“Supplemental Information” tab of this manual or the Documentation Package shipped with the analyzer for installation infor- mation. If the Sample Probe/Sample Tap is not supplied by AMETEK, refer to the information and drawings shipped with the probe. -
Page 42: Installing And Connecting The Sample And Vent Lines
Installing and Connecting the Sample and Vent Lines The Sample and Vent Lines can be supplied by AMETEK or the customer. Heated lines, which are not supplied by AMETEK, can only be monitored by the analyzer; they cannot be controlled. - Page 43 To install the Sample and Vent Lines: 1. Lay out the Sample and Vent Lines. Route the Sample Line from the analyzer to the sample probe (or process tap) and the Vent Line from the analyzer to the return/vent location. Ensure there are no loops, sags, or other traps in the Sample and Vent Lines.
-
Page 44: Installing And Connecting The Instrument Air/Zero Fluid Line
3. Connect the line to the Instrument Air/N supply and to the analyzer. The plumbing for purge systems and the Instrument Air/N feed through the analyzer manifold is already made by AMETEK. 3-14 | IPS-4-UV Analyzer-GPDiv2... -
Page 45: Installing The Calibration (Span) Fluid Line (Optional)
3. Connect the line to the calibration fluid supply and to the analyzer. The plumbing for the calibration fluid feed through the analyzer manifold is already made by AMETEK. Installation & Start-Up | 3-15... -
Page 46: Connecting I/O Signals, Alarm Relay Contacts, And Ac Power
2. Route the analog input/output signal wiring and alarm relay contact conductors through one of the Signal cable entry ports and into the Electronics Enclosure. Terminate the signal and alarm relay contact wires as detailed in the Customer Connections drawing. 3-16 | IPS-4-UV Analyzer-GPDiv2... -
Page 47: Permanent Ethernet Cable Connections (Optional)
100 m, special requirements may be necessary. Con- tact your network administrator for information. For systems using a permanent Ethernet connection, a ferrite core (Part Number 301-1044, supplied by AMETEK) must be installed on the Ethernet cable (supplied by customer), inside the Electronics Enclosure. - Page 48 Figure 3-4. Terminal Strip TB1 and Customer Connection board (100-1971). Refer to figure 3.1 for location of TB1 termianl strip. NOTE 3-18 | IPS-4-UV Analyzer-GPDiv2...
-
Page 49: Start-Up And Verification
Start-Up and Verifi cation This section describes equipment and controls on the analyzer system that require adjustments and settings before, during, and after power-up. Refer to Figure 3-1 for the general locations of analyzer equipment or con- trols that require adjustments. The customer-specific Component Layout drawing illustrates the actual layout for your system. - Page 50 2. After applying AC main power to the analyzer, the message “System Starting” is displayed momentarily on the top line of the User Inter- face Panel. Following this, the AMETEK Process Instruments start-up screen will appear. This screen also displays the software version.
- Page 51 3. Perform a leak (pressure) check to ensure there are no leaks in the sys- tem, then return to this procedure and complete the remaining start- up and verification tests. To perform the leak check, follow the procedure under “Sample Sys- tem Leak Check,”...
- Page 52 T90 when the sample system is clean and operating at peak ef- ficiency – response time may vary due to Sample Line length. The response is application-specific and will vary, depending on the sample system. 3-22 | IPS-4-UV Analyzer-GPDiv2...
- Page 53 7. View the current output ranges. To do this: a. Press the soft key to view the SETUP menu screen. Scroll SETUP down to select Current Outputs and press to display the ENTER Current Outputs 1 thru 4 screen. Scroll down to select Current Outputs 1 screen (Figure 3-6).
- Page 54 Compare the values to the values recorded earlier to ensure they have increased, have reached their normal operating temperatures, and have stabilized. Normal operating temperatures are values that are within 5 °C (typi- cal; set point may vary) of the Set Point values. 3-24 | IPS-4-UV Analyzer-GPDiv2...
- Page 55 Cell Temperature Heater Temperature Figure 3-8. Active alarms displayed (example), Current Alarms screen. HOME ALARMS STATUS SETUP No alarms Figure 3-9. No active alarms, Current Alarms screen. HOME ALARMS STATUS SETUP 12. Open the Vent Line isolation valve (on the Sample Probe, process tap, or inside the Oven/Sample System Enclosure).
-
Page 56: Start-Up Diagnostic Checklist
Xenon Flash Lamp will not operate when the system is in the Not Ready state. If the system is in a state other than Not Ready, take appropriate safety precautions and check for proper wiring connections.. 3-26 | IPS-4-UV Analyzer-GPDiv2... - Page 57 Problem Encountered Temperature zone values do not increase. Corrective Action The over-temperature circuits may have been tripped; press the Reset Switch (S501) on the Relay board or the Reset Switch on the Optical Bench. If the temperature zone values still do not increase, check the fuses (Bench Heater and Oven Heater, if used) for proper connections and blown fuses (located at TB1 in Electronics Enclosure).
-
Page 58: Sample System Leak Check
After all piping and electrical connections have been made: Refer to the system Analyzer flow diageram in the Ametek supplied drawing package (403900XXX-3). Identify the portions of the system to be tested. -
Page 59: Manually Zeroing The Analyzer Sample System
Manually Zeroing the Analyzer Sample System The Zero function forces the analyzer to purge the sample system with a Zero fluid to remove any residual contaminants in the sample system. For heated systems, all temperature zones must be at their operating set points before performing a Zero. -
Page 60: Adjusting The Zero/Span Fluid Flow Rate
Pressure higher than 70 kPa (10 psi) above the sample stream pres- sure. View the flow indicator (or meter), if used. To avoid damaging the pressure transducer, do not set the pressure higher than 105 kPag (15 psig). NOTE 3-30 | IPS-4-UV Analyzer-GPDiv2... -
Page 61: Setting Sample Response Time
The analyzer pressure – measured by the pressure transducer – can also be used to set the sample flow rate. This is accomplished by first measur- ing the sample stream pressure with no aspiration (Drive Air Isolation Valve closed) and then adjusting the Aspirator Pressure Regulator with the Drive Air Isolation Valve open to obtain a pressure of 5–10 mmHg (0.20–0.39 inHg or 0.10–0.20 psi) less than the value obtained with the valve closed. - Page 62 If the sample response time is adequate (first response after a Zero is less than 30 seconds to T90), no further adjustment is necessary. The sample response time may vary, depending on Sample Line length. NOTE 3-32 | IPS-4-UV Analyzer-GPDiv2...
-
Page 63: Normal Operation
AMETEK recommends that you observe and record this information every month to obtain a history. From these recordings, you will be able to determine if there are problems with the analyzer, such as increasing sample response. - Page 64 “Measure” is less than 30 seconds to T90), no further adjustment is necessary. The sample response time may vary, depending on Sample Line length. NOTE 4. Record these signals in a log book every month. 3-34 | IPS-4-UV Analyzer-GPDiv2...
-
Page 65: Analyzer Configuration
Analyzer Confi guration The Parameter List (Factory Settings) sheets are shipped with each ana- lyzer. These configuration sheets list all of the settings that have been made to the analyzer at the factory (to meet customer requirements). These sheets are located in the “Supplemental Information” tab of this manual and in the Documentation Package shipped with the analyzer. - Page 66 This page intentionally left blank. 3-36 | IPS-4-UV Analyzer-GPDiv2...
- Page 67 CONTROLLER / USER INTERFACE The Controller / User Interface chapter contains information about the following topics: • An introduction to the User Interface Panel, and how to enter com- mands to view various screens. Information about passwords and how to change them is also discussed in this chapter. •...
-
Page 68: Introduction To The User Interface Panel
The other lines can display the output results (concentrations, temperatures, pressures), alarms (current and historical), system status, system information, and various configurable parameters that allow you to set up the analyzer to perform various functions (calibration, communication, etc.). 4-2 | IPS-4-UV Analyzer-GPDiv2... - Page 69 • The Main Keypad allows you to change information from any of the editable parameters. The keypad consists of: Description 0–9 Numeric keys 0–9 are used to enter numerical data or as part of a password. – The minus (‘–’) key can be used as part of a negative number or as part of a password.
-
Page 70: Special Software Characters
When both of these characters (located in the lower-left corner) are displayed, there are other options to be viewed above and below the items currently being displayed. To scroll through other options, press the arrow key. DOWN 4-4 | IPS-4-UV Analyzer-GPDiv2... -
Page 71: Working From The User Interface Panel - Conditions And Messages
Working From the User Interface Panel – Conditions and Messages While working from the User Interface Panel, the following conditions apply: The analyzer is shipped from the factory without a password (security is disabled). Upon powering up the analyzer for the first time, all con- NOTE figurable parameters can be changed until a password is entered in the Change Password function (Login/Set Password screen, SYSTEM... -
Page 72: Summary Of Analyzer Operation
The analyzer will leave its normal sequence of states if there is an alarm condition, such as a temperature or pressure out of range, and will return to the first state in the sequence once the offending condition has been cleared (reset). 4-6 | IPS-4-UV Analyzer-GPDiv2... -
Page 73: Working In The Main Menus
Working in the Main Menus During normal operation, the concentrations of the analytes can be dis- played on the HOME screen. Other parameters that display real-time sys- tem temperatures or pressures can also be displayed. Up to three analytes or parameters can be displayed on the screen at one time. To view more concentrations or other data, scroll up or down using the DOWN row key. - Page 74 Aspirator Pressure Displays the real-time pressure (psia, or other unit) being used to drive the Aspirator system (gas applications only). Cell Pressure Displays the real-time pressure (psia, or other unit) being measured in the Measuring Cell. 4-8 | IPS-4-UV Analyzer-GPDiv2...
-
Page 75: System Status Messages (Home Screen)
System Status Messages (HOME Screen) While working from the HOME screen, messages that are displayed on the right side of this screen indicate the current operating status (mode) of the analyzer, also known as System Status or System State. Please refer to supplemental material/documentation for any modes not described below. - Page 76 The alarm or warning at the top of the list is most recent; the alarm or warning at the bottom is the oldest. The Alarm Log and Warning Log will be cleared when the analyzer is powered off. 4-10 | IPS-4-UV Analyzer-GPDiv2...
-
Page 77: Viewing Current Alarms
ALARMS and WARNINGS Menu Screen The ALARMS and WARNINGS screen (Figure 4-3) displays active ana- lyzer alarm conditions (Current Alarms and Warnings screen) that have been set by the built-in diagnostics function and a history of alarms and warnings that have been reset (Alarm Log or Warnings Log screen). The alarms are read-only. -
Page 78: Viewing Logged Alarms
HOME ALARMS STATUS SETUP Alarm Log empty Figure 4-8. No history of alarms, Alarm Log screen. HOME ALARMS STATUS SETUP Warnings Log empty Figure 4-9. No history of warnings, Warnings HOME ALARMS STATUS SETUP Log screen. 4-12 | IPS-4-UV Analyzer-GPDiv2... -
Page 79: Status Menu Screen
STATUS Menu Screen The STATUS screen (Figure 4-10) displays the real-time data results of various analyzer functions. These items are factory-set, according to cus- tomer specifications. This screen is particularly useful when performing analyzer diagnostics. These outputs are read-only. > Heater 19 °C Bench 24 °C... - Page 80 Automatic Calibration 2 screen. The Calibration Trigger (TIMER-2) must be selected for the countdown time to be displayed. Refer to the section “Calibration Control” in this chapter for descriptions about setting up all Auto-Calibration parameters. 4-14 | IPS-4-UV Analyzer-GPDiv2...
-
Page 81: Setup Menu Screen
SETUP Menu Screen The SETUP screen (Figure 4-11) provides access to the sub-menu screens containing the functional parameters that control the operation of the analyzer. This screen allows the user to set up certain parameters. The settings for your analyzer have been configured at the factory to meet specified customer requirements. -
Page 82: Calibration Control Screen
The two setup screens allow multiple timers to be set. Automatic Calibration 1 Calibration Trigger Timer Mode Zero + Span Timer Interval 0 day Figure 4-14. Unit Calibration Settings Start Time 00:00:00 screen. HOME ALARMS STATUS SETUP 4-16 | IPS-4-UV Analyzer-GPDiv2... - Page 83 Calibration Trigger Use this to select how auto-calibration is triggered. Calibration Trigger options include: • Timer Enables the Auto-Calibration timer. The system will automatically Zero and/or Span the analyzer. • Input1 and Input 2 Auto-Calibration will be initiated by a user-supplied contact clo- sure.
- Page 84 20 sec Figure 4-15. Flush Times Settings screen. HOME ALARMS STATUS SETUP Zero flush time Defines the duration (seconds) the analyzer will flush the sample sys- tem with Zero fluid during the analyzer’s normal operating sequence. 4-18 | IPS-4-UV Analyzer-GPDiv2...
- Page 85 Span flush time Defines the duration (seconds) the analyzer will flush the sample sys- tem with Span fluid during the analyzer’s normal operating sequence. Sample flush time Defines the duration (seconds) the analyzer will flush the sample sys- tem with sample fluid before it will begin measuring. Calibration Values The Calibration Values screen (Figure 4-16) allows the user to enter the calibration fluid concentration value used for each analyte (Analyte cal...
-
Page 86: Calibration Actionsscreen
“Span Gas Flush” mode. The analyzer span (calibration) is automatically adjusted based on an inte- grated reading during the span calibration. After the span is complete, the analyzer will return to normal operation (Measure mode). 4-20 | IPS-4-UV Analyzer-GPDiv2... -
Page 87: Manually Starting A Zero Calibration
Inject Zero fluid This function injects Zero fluid into the sample system to flush the Measuring Cell of light-absorbing compounds. During this operation, the zero solenoid is open and “Zero Hold” is displayed in the Status area of the HOME screen. Note that this mode does not actually Zero the analyzer. -
Page 88: Relay Setup Screen
Figure 4-18a. Relay 4 Relay Setup screen. Relay 5 HOME ALARMS STATUS SETUP Relay 1 Function Disable Source None Value Figure 4-18b. Delay 0 Sec Relay Setup screen (Relay 1). HOME ALARMS STATUS SETUP 4-22 | IPS-4-UV Analyzer-GPDiv2... - Page 89 Relay 1–8 Function The analyzer can use up to eight relays to indicate the operational status of the analyzer. Each relay provides one SPST (Form A) dry (potential free) contact. The relays are energized (closed) on start-up. Relay Function options include: Disable Select Disable to turn off the functionality of a relay.
- Page 90 LEFT characters to the left of the cursor ( ‘_’ ) if applicable, then use the numeric keys to enter the new value. This works best for drastic changes. 4-24 | IPS-4-UV Analyzer-GPDiv2...
-
Page 91: Current Output Setup Screens
Current Output Setup Screens The Current Output screens (Figure 4-19a and 4-19b) display current out- put assignments and allows you to set up the parameters for each of the four current outputs. Source Defines the analyte assigned to each analog output. Current Out Source options include: NONE Select NONE if you do not wish to assign an output to a channel. -
Page 92: Setpoints
The Setpoints screens (Figure 4-20 thru 4-23) allow you to view config- ured normal operating (factory set) parameters for span, pressure, and temperature low/high limits. Setpoints > Span Limits Pressure Limits Temperature Limits Figure 4-20. Setpoints Screen. HOME ALARMS STATUS SETUP 4-26 | IPS-4-UV Analyzer-GPDiv2... - Page 93 Span Limits If Span limits are exceeded, calibration is required. Pressure Limits If pressure limits are exceeded, the system alarm will activate and the ana- lyzer will go into “Not Ready” state. Limits are disabled if set to 0. Temperature Limits If temperature limits are exceeded, the system alarm will activate and the analyzer will go into “Not Ready”...
- Page 94 SETUP Relay Diagnostics Force relay contacts on or off to test the hardware. Relay Diagnostics Diagnostics State Relay 1 Relay 2 Relay 3 Figure 4-27. Relay 4 Relay Diagnostics Diagnostics Screen. HOME ALARMS STATUS SETUP 4-28 | IPS-4-UV Analyzer-GPDiv2...
- Page 95 Valve Diagnostics Force valve contacts on or off to test the solenoid valves. Valve Diagnostics Diagnostics State Valve 1 Valve 2 Valve 3 Figure 4-28. Valve 4 Valve Diagnostics Diagnostics Screen. HOME ALARMS STATUS SETUP Lamp Diagnostics Monitor detector operation for a given wavelength. Lamp Diagnostics ...
-
Page 96: Systems Settings Screen
Because the analyzer is shipped from the factory without a password, you must first enter a password in the Change Password function. Record and store the password in a safe place for reference. 4-30 | IPS-4-UV Analyzer-GPDiv2... -
Page 97: Changing The Password
If you attempt to enter a password but one hasn’t been entered in the Change Password function yet, the message “Use Change Password to enable” is displayed. If you enter a password incorrectly, the message “Password incorrect” is displayed. If a password has been entered here, and you press , the message “System Unlocked”... -
Page 98: Locking The Password
NOTE or the factory-default settings in the event of a serious internal system error. Backup settings Restore settings Restore factory settings Figure 4-32. Backup/Restore Settings screen. HOME ALARMS STATUS SETUP 4-32 | IPS-4-UV Analyzer-GPDiv2... -
Page 99: Backing Up Analyzer Configuration Settings
Backup settings Saves the current analyzer configuration settings to a file that can later be used to restore these settings. The settings are stored in a file called “user.xml.” See “Backing Up Analyzer Configuration Settings” for details about how to save configuration settings to a file. Restore settings Retrieves and restores the most recently saved analyzer configuration settings from the “user.xml”... - Page 100 Press X for no. Figure 4-34. Restore Settings screen. HOME ALARMS STATUS SETUP Restore factory settings. Are you sure? Press for yes. Press X for no. Figure 4-35. Restore Factory Settings screen. HOME ALARMS STATUS SETUP 4-34 | IPS-4-UV Analyzer-GPDiv2...
-
Page 101: Ethernet Network Screen
Ethernet Network Screen The Ethernet Network screen (Figure 4-36) allows the user to enter Ether- net settings. This is used to enable your analyzer system to communicate over an Ethernet network for viewing analyzer and stream composition data, viewing analyzer diagnostics, or backing up/restoring analyzer con- figuration settings. - Page 102 Ethernet Network. Press to view the Eth- ENTER ernet Network screen. d. Select Ethernet enable and press to go into Edit mode. Use ENTER arrow key to select Enabled and press again. DOWN ENTER 4-36 | IPS-4-UV Analyzer-GPDiv2...
-
Page 103: System Screen
e. Enter the IP Address, IP Subnet Mask address, and Gateway IP address (optional), pressing after entering each address. ENTER Ensure the DHCP server is on the same server as the analyzer. g. Press to back out of this sub-menu. CANCEL 5. -
Page 104: Customization Screen
Defines the format for displaying the decimal point in a value: - Period (example, 3.14) - Comma (example, 3,14) Language Defines the language in which the software descriptions will be displayed. To view the software in a language other than the default 4-38 | IPS-4-UV Analyzer-GPDiv2... -
Page 105: Modbus Screen
English, select Language, press , then use the arrow ENTER DOWN keys to scroll through the list until you locate the language of choice. Press again to select the language. ENTER Available languages for viewing the software include: - English - German - Russian - French... - Page 106 Modbus Timeout This displays and allows you to change the time out value (duration) that the software will use to attempt to establish communications with the analyzer when using Modbus communications. AMETEK recom- mends a value of 1000 ms Modbus Port This displays and allows you to change the Modbus communications with the analyzer when using Modbus communications Port format.
-
Page 107: Safety Considerations
MAINTENANCE & TROUBLESHOOTING The Maintenance & Troubleshooting chapter discusses preventive main- tenance to keep the analyzer system operating at peak efficiency, how to check for plugging in the analyzer sample system, and how to replace internal parts. This chapter also discusses how to view alarm messages to diagnose and troubleshoot problems with the analyzer. -
Page 108: Maintenance
Preventive Maintenance To reduce the occurrence of problems with the analyzer, AMETEK recom- mends that you follow the “Analyzer Preventive Maintenance Schedule,” as outlined in the following pages. Since most analyzer problems originate within the sample handling system, the primary objective of the preven- tive maintenance schedule is proper care of the sample system. -
Page 109: Analyzer Preventive Maintenance Schedule
Analyzer Preventive Maintenance Schedule Frequency Task As required Clean the Analyzer Cleaning the exterior of the analyzer is required occasionally to re- move dust and other debris. Use a damp cloth to clean the analyz- er’s exterior, including the User Interface Panel screen. Daily Check for Alarms To view alarms, press the... - Page 110 Ensure these gaskets are intact. If the seals are damaged, cracked, or show signs of wear, replace them immediately. Contact AMETEK for assistance. Every Six Months Sheltered Systems If your analyzer system is installed in a custom shelter, check the air fi...
-
Page 111: Before Performing Maintenance
Before Performing Maintenance Under normal operating conditions, lethal concentrations of H or other toxic gases/liquids from the sample stream may be present WARNING within the analyzer sample system. Before working on the sample system, manually Zero the analyzer (from the Calibration screen, select Start zero calibration and press ), isolate it (block it in) from the sample stream, and disconnect ENTER the main AC power. -
Page 112: Preventing A Plug In The Sample System (Gas Applications)
5. After locating the cause of the restriction or plug (and after cleaning or replacing the part or line), leak test the fittings or connections that were loosened or replaced. To do this, follow the procedures under “Sample System Leak Check” in Chapter 3. 5-6 | IPS-4-UV Analyzer-GPDiv2... - Page 113 6. Return the Vent Line Shut Off valve to the open position. Both isola- tion valves should be open. 7. After the Zero is complete, determine the sample response time by switching the analyzer back to Measure mode (from the Calibration screen, select Start measure and press ).
-
Page 114: Changing Out Replaceable Parts
This section discusses the parts that should be changed out and/or cleaned, according to the “Analyzer Preventive Maintenance Schedule.” These descriptions focus on the AMETEK sample system. When replacing parts in the analyzer refer to Figure 5-1 for the location of the main assem- bly. -
Page 115: Tools, Equipment, And Supplies Required For Maintenance
“Supplemental Information” tab of this manual and the Documenta- tion Package shipped with the analyzer. • Cell removal/installation tools, supplied by AMETEK. These tools are only required for 0.1–1 mm, 50 mm, and 100 mm Single-Pass Liquid/ Gas Cells. - Page 116 Actual layout and components may vary. Refer to customer-specific drawings in the “Supplemental Information” tab of this manual or the NOTE Documentation Package shipped with the analyzer. 5-10 | IPS-4-UV Analyzer-GPDiv2...
-
Page 117: Measuring Cell Preventive Maintenance
Measuring Cell Preventive Maintenance The o-rings in the Measuring Cell should be replaced every year to avoid a leak in the sample system. If the sample system operates above atmo- spheric pressure, sample fluid can leak from the Measuring Cell into the Oven/Sample System Enclosure. - Page 118 If an explosive gas atmosphere is present, do not power down WARNING the analyzer or any alternate power sources that supply power to the analyzer components. Proceed only when the area is found to be safe. 5-12 | IPS-4-UV Analyzer-GPDiv2...
- Page 119 General Purpose (GP) applications: Open the Electronics Enclosure door and disconnect AC power from the analyzer and its temperature-control zone circuitry by opening the Main AC Power, DC Power, Bench Heater, and Oven Heater (if used) fuses. Refer to the Fuse Legend at the back of the Electronics Enclo- sure for the locations of these fuses.
- Page 120 Cell, refer to the “Supplemental Information” tab of this manual for a Measuring Cell Manual Supplement and for ap- NOTE plication-specific spare parts, either in the Measuring Cell Manual Supplement or in a Custom Spare Parts List. 5-14 | IPS-4-UV Analyzer-GPDiv2...
- Page 121 If the Oven/Sample System Enclosure is heated, close its door to help maintain the temperature inside the enclosure while working on the Cell. In the next steps use a soft, non-abrasive cloth to place the Cell parts NOTE c. If the Measuring Cell has an Optical Bench/Cell Insulator, remove the three screws that secure it to the Cell and remove the Insulator.
- Page 122 Cell, on top of the o-ring. Install a second, new o-ring on top of the Window. If an Optical Bench/Cell Insulator is used, properly align it and secure it to the Cell using the three M4 x 12 mm screws. 5-16 | IPS-4-UV Analyzer-GPDiv2...
- Page 123 c. Systems with a Cell RTD: Replace the RTD Clamp on the Cell but do not tighten it until the Cell is in place in the Oven/Sample System Enclosure. Properly orient the Cell in the Oven/Sample System Enclosure and secure it to the Window Housing Assembly using the three M4 x 40 mm screws.
- Page 124 The Flow Indicator (if used) should be in the centre of the meter for an optimal flow rate. 15. Close and secure the analyzer enclosure doors with their latches. 5-18 | IPS-4-UV Analyzer-GPDiv2...
-
Page 125: Xenon Flash Lamp Assembly Replacement
Xenon Flash Lamp Assembly Replacement The typical life span of the Xenon Flash Lamp is approximately 18–24 months of continuous operation. However, the Xenon Flash Lamp can exhibit signs of degradation after 12–15 months. When the Xenon Flash Lamp requires replacement, the entire assembly (Figure 5-3) is replaced. See Figure 5-1 for the location of this assembly in the Electronics Enclo- sure. -
Page 126: Replacing The Xenon Flash Lamp Assembly
If heated Sample and Vent Lines are used, disconnect power to them. NOTE 4. Disconnect the DC Power Cable connector (from the Lamp Housing) at J2 on the Xenon Lamp board located near the top of the Electronics Enclosure (see Figure 5-1 for location). 5-20 | IPS-4-UV Analyzer-GPDiv2... - Page 127 5. While holding the Lamp Assembly with one hand, loosen (by hand) the blue knurled nut that secures it to the Optical Bench Assembly and remove the Lamp Assembly. Dispose of the Lamp Assembly fol- lowing company policy, or local regulations. Do not use any tool to loosen the blue nut on the Optical Bench when removing or replacing the Lamp Assembly.
- Page 128 I. Based on the calculation from step H adjust the flashes value to a num- ber that will give you the counts to match factory settings. This value cannot exceed 30 flashes. 5-22 | IPS-4-UV Analyzer-GPDiv2...
-
Page 129: Replacing The Mcu Battery
J Repeat steps A thru E to verify correct values. If not repeat F thru I until values are in range of factory settings. Zero and Span (if applicable) the analyzer. Open the Vent Line Shut Off valve (in the Oven/Sample System En- closure). - Page 130 Proceed only when the area is found to be safe. WARNING When the analyzer doors are open, take appropriate precautions to avoid electrical shock. Hazardous voltages are present inside. 5-24 | IPS-4-UV Analyzer-GPDiv2...
- Page 131 General Purpose (GP) Applications: Apply power to the analyzer and its temperature-control zone cir- cuitry by closing the Main AC Power, DC Power, Bench Heater, and Oven Heater (if used) fuses. For all applications: If heated Sample and Vent Lines are used, apply power to them. NOTE Close the analyzer enclosure doors and secure them with their latches to allow the analyzer to warm up to operating temperature and stabi-...
-
Page 132: Troubleshooting And Diagnostics
(white) screen with the alarm name in black text. It will then switch to a black screen with white text and will continue to flash until the alarm conditions that triggered the alarm are reset. 5-26 | IPS-4-UV Analyzer-GPDiv2... -
Page 133: Viewing Current Alarm Messages
Viewing Current Alarm Messages All active alarms are displayed on the Current Alarms screen. Each line will occupy one alarm description. Up to six active alarms can be dis- played on the screen at once. If more than six alarms are active, use the arrow keys to scroll through the list. -
Page 134: Alarm Conditions And Corrective Action
- Check each of the associated confi guration parameters for temperature control. These parameters may have been lost as a result of a power interruption or a power spike. 5-28 | IPS-4-UV Analyzer-GPDiv2... - Page 135 - Check the electrical connections between the heater and the Relay board. Check for proper connections and damage to the wiring. - Replace the Relay board. Contact AMETEK for assistance. - Replace the Customer Connection board. Contact AMETEK for assistance.
- Page 136 (cuts, nicks, burn marks, etc.). For cable connection locations, refer to the Electronics Enclosure Wiring Diagram in the Appendix. • One or both boards may need to be replaced. Contact AMETEK for assistance. Failed communications to the Relay board This alarm condition indicates that the MCU board cannot establish reliable communications with the Relay board.
-
Page 137: Analyzer Reset
Corrective Action: The Relay board and/or MCU board fi rmware will have to be replaced: • Contact AMETEK for assistance. Display board fi rmware not compatible This alarm condition occurs if the Display board cannot communicate with the MCU board due to incompatible fi rmware versions. - Page 138 Figure 5-4. Over-Temperature alarm Reset Switch (S501), Relay board (100-1942). 5-32 | IPS-4-UV Analyzer-GPDiv2...
-
Page 139: Technical Support
SERVICE & PARTS The Service & Parts chapter discusses what to do if you need technical support from AMETEK, or if you are returning parts for service. This chapter also lists the recommended spare parts to have on hand to ensure all consumable and replaceable parts are replaced according to the “Ana-... -
Page 140: Returning Equipment
Material Authorization (RMA) number. This will ensure your equip- ment is serviced and returned to you in a prompt and efficient manner. To obtain an RMA number, contact your local or nearest AMETEK Service Center and have the following information available: •... -
Page 141: Ametek Service & Aftermarket Sales Support
ASAP plans may be written to provide cover- • START UPS age for a single analyzer, or all of the AMETEK process Your decision to buy an AMETEK analyzer is greatly analyzers at your facility. -
Page 142: Recommended Spare Parts
Maintenance Schedule” for your analyzer vary, depending on the application. AMETEK recommends having this part available, to ensure your analyzer will operate at peak efficiency. Before ordering spare parts for the Measuring Cell, refer to the “Supple- mental Information” tab of this manual or the Documentation Package shipped with the analyzer for a Measuring Cell Manual Supplement or a Custom Spare Parts List. -
Page 143: Spare Analyzer Fuses
NOTE These main analyzer fuses do not need to be changed out at regular intervals, but AMETEK recommends these fuses are available in the event that a replacement fuse is required. Fuses, IPS-4 Analyzer – Recommended Parts to Have On-Site... - Page 144 This page intentionally left blank. 6-6 | IPS-4-UV Analyzer-GPDiv2...
-
Page 145: Chapter 7 Controller / User Web Interface
CONTROLLER / USER WEB INTERFACE The Controller / User Web Interface chapter contains information about the following topics: • An introduction to the User Web Interface, and how to access, moni- tor, and control your analyzer through a web interface •... -
Page 146: Introduction To The Web Interface
The analyzer IP address is listed on the Ethernet Network Screen on the user interface panel. To use the web interface the analyzer ethernet must be enabled. Refer to Chapter 4 for ethernet network information. Analyzer IP Address Figure 7-1. Web Interface with Analyzer IP Address. 7-2 | IPS-4-UV Analyzer-GPDiv2... -
Page 147: Web Interface Components
Web Interface Components The Web Interface is divided into six sections. Navigation buttons lo- cated on the left-hand side of the screen are used to view analyzer sta- tus, alarms, trends, and spectra; view and change analyzer settings; and transfer data. The information displayed on the right-hand side varies depending on the selected section. -
Page 148: Home Menu Screen
The HOME screen (Figure 7-2) displays the current operational status of the analyzer. Descriptions of these states are described under “System Status Messages (HOME Screen),” in Chapter 4. Analyzer State Analyte Concentration Navigation Buttons Displays Real Time System Temperatures and Pressures Figure 7-2. Home Screen. 7-4 | IPS-4-UV Analyzer-GPDiv2... -
Page 149: Alarms Menu Screen
ALARMS Menu Screen The ALARMS screen (Figure 7-3) displays any active analyzer alarm con- dition that has been set by the built-in diagnostics function and a history of alarms and warnings that have been reset (Figure 7-4). The alarms are read-only. -
Page 150: Logged Alarms And Warnings
When an alarm or warning is set by the analyzer, the alarm is displayed in the banner accross the top of the screen. Most Current Active Alarm Use Check Boxes to Filter Alarms/Warnings Displayed Click to Show only Log of All Alarms Active Alarms Figure 7-4. Alarm Log Screen. 7-6 | IPS-4-UV Analyzer-GPDiv2... -
Page 151: Trends Menu Screen
TRENDS Menu Screen The TRENDS screen (Figure 7-5) displays the trends of selected param- eters in one second, fifteen seconds or one hour intervals. Use this screen to view the most recent data held in short term memory. Data can not be saved. -
Page 152: Parameters
• 1 second interval will contain 60 minutes before overwriting • 15 second interval will contain 900 minutes or 15 hours before over- writing • 1 hour interval will contain 3,600 hours or 150 days before overwrit- ing. 7-8 | IPS-4-UV Analyzer-GPDiv2... -
Page 153: Spectra Menu Screen
SPECTRA Menu Screen The SPECTRA screen (Figure 7-6) allows the user to temporarily store spectra and compare it to future live spectra readings. Select data source to display Click to Update Chart Click to View Spectra Click to Clear User Data Click to Save User Data Figure 7-6. -
Page 154: Settings Menu Screen
Detailed descriptions of each menu item and parameters are described in Chapter 4. The list of available sub-menu items includes: • Calibration Control • Actions • Current Outputs • Relays • Network & Modbus • System & Custom • Analytes • Limits • Diagnostics 7-10 | IPS-4-UV Analyzer-GPDiv2... -
Page 155: Calibration Settings Screen
Calibration Settings Screen The CALIBRATION SETTINGS screen (Figure 7-7) displays the avail- able analyzer calibration controls and allows the user to set up and initial- ize the calibration functions. Descriptions of these parameters are de- scribed under “Calibration Settings Screens” in Chapter 4. Use to Set up Calibration View and Modify... -
Page 156: Actions Screen
The ACTIONS screen (figure 7-8) allows the user to enter calibration con- centrations and initiate on demand calibration actions. Enter Cal Fluid Concentration Initiate Action View and Modify Settings Click to Save Settings Figure 7-8. Settings Menu Actions Screen. 7-12 | IPS-4-UV Analyzer-GPDiv2... -
Page 157: Current Output Screen
Current Output Screen The CURRENT OUTPUT screen (Figure 7-9) displays current output assignments and allows you to set up the parameters for each of the four current outputs. Descriptions of these parameters are described under “Current Output Setup Screens” in Chapter 4. View and Modify Settings Click to Save Settings... -
Page 158: Relay Setup Screens
(Relay Function option). Descriptions of these parameters are described under “Relay Setup Screens” in Chapter 4. View and Modify Settings Relay Function Options Click to Save Settings Figure 7-10. Settings Menu Relay Setup Screen. 7-14 | IPS-4-UV Analyzer-GPDiv2... -
Page 159: Network & Modbus Screen
Network & Modbus Screen The NETWORK & MODBUS screen (Figure 7-11) allows the user to enter ethernet settings and set up modbus parameters. Ethernet settings Enable the analyzer system to communicate over an Ethernet network for viewing analyzer and stream composition data, viewing analyzer diagnostics, or backing up/restoring analyzer configuration settings. -
Page 160: System & Customition Screen
The SYSTEM & CUSTOMIZATION screen (Figure 7-12) allows the user to view and/or setup analyzer system parameters. Use to View System Parameters Customize Display View and Modify Settings Click to Save Settings Figure 7-12. Settings Menu Sytem & Cumstomization Screen. 7-16 | IPS-4-UV Analyzer-GPDiv2... -
Page 161: Analytes Screen
Analytes Screen The ANALYTES screen (figure 7-13) allows you to view and modify ana- lyte names and span factor min/max. Use to Change Use to Name Enter Min/Max Values View and Modify Settings Click to Save Settings Figure 7-13. Settings Menu Analyte Screen. -
Page 162: Limits Screen
Descriptions of these parameters are described under “Setpoints Screens” in Chapter 4. Use to Change Use to Change Temperature Limits Pressure Limits View and Modify Settings Click to Save Settings Figure 7-14. Settings Menu Limits Screen. 7-18 | IPS-4-UV Analyzer-GPDiv2... -
Page 163: Diagnostics Screen
Diagnostics Screen The DIAGNOSTICS screen (Figure 7-15) allows the user to disable normal operations while troubleshooting or setting up external control systems. Descriptions of these parameters are described under “Diagnostics” in Chapter 4. The analyzer should be in normal operations for lamp diagnostics. The lamp does not flash in diagnostics mode. -
Page 164: Save/Restore Files Screen
This file can then be used to restore all parameters to their most recently used settings NOTE or the factory-default settings in the event of a serious internal system error. 7-20 | IPS-4-UV Analyzer-GPDiv2... -
Page 165: Hardware
MODBUS COMMUNICATION INTERFACE This chapter describes the customer serial communication interface on Model IPS-4 Analyzer. The communication protocol implemented is Modicon Modbus as defined in “Modicon Modbus Protocol Reference Guide” (PI-MBUS-300 RevJ). The Modbus protocol transmission mode implemented is Remote Terminal Unit (RTU) with the analyzer operating as a slave device. -
Page 166: Confi Guration
• When operating in MODBUS TCP mode. Use TCP Port 502 for mod- bus communications. • Modbus TCP is only available on software version: 2.05 or later (UV) 3.03 or later (Full Spectrum) 8-2 | IPS-4-UV Analyzer-GPDiv2... -
Page 167: Analyzer Modbus Interface Parameters
Analyzer Modbus Interface Parameters A number of analyzer Modbus interface parameters need to be set up in order to establish communication with the Modbus master. These pa- rameters are accessed via the service port on the analyzer using a service program running on a PC. -
Page 168: Holding Registers
PIXELS 1024 char[20] SYSTIME char[20] SYSDATE uint16 ACUNIT char[20] CONCUNIT int16 FLOATFRMT uint16 IDATEFRMT int16 LANGUAGE char[10] PRESUNIT char[10] TEMPUNIT degreeC uint DATAVALID uint16 AUTOCAL int16 CALMODE int16 DMODE int16 MANCMD int16 COMPPT uint SYSALARM1 8-4 | IPS-4-UV Analyzer-GPDiv2... - Page 169 Access Data Type Data Size mnemonic Typical value MB Starting Regs MB Reg Size uint SYSALARM2 uint SYSALARM3 uint CONCALARM int16 SYSSTATUS int16 SYSSTATE uint TOTUPTIME uint UPTIME TIMER1 TIMER2 TIMER3 uint MFTIME uint CALTIME uint ZFTIME uint SFTIME int16 ANAHOLD float ANAIN1...
- Page 170 RELAY6S float RELAY6V uint16 RELAY7 uint16 RELAY7D uint16 RELAY7F char[20] RELAY7NM Relay 7 uint16 RELAY7S float RELAY7V uint16 RELAY8 uint16 RELAY8D uint16 RELAY8F char[20] RELAY8NM Relay 8 uint16 RELAY8S float RELAY8V boolean RELAYENA uint16 VALVE1 8-6 | IPS-4-UV Analyzer-GPDiv2...
- Page 171 Access Data Type Data Size mnemonic Typical value MB Starting Regs MB Reg Size char[20] VALVE1NM Valve 1 uint16 VALVE2 char[20] VALVE2NM Valve 2 uint16 VALVE3 char[20] VALVE3NM Valve 3 uint16 VALVE4 char[20] VALVE4NM Valve 4 uint16 VALVE5 char[20] VALVE5NM Valve 5 float ACONC1H...
- Page 172 SAMLIT float SAMLPB float SAMLRTD float SAMLSP 110.00 float SAMLST float VENDEVT int16 VENLAT float VENLDT float VENLHDC 1.00 float VENLIT float VENLPB float VENLRTD float VENLSP float VENLST int16 REMIN1 int16 REMIN2 int16 LAMPM 8-8 | IPS-4-UV Analyzer-GPDiv2...
- Page 173 Access Data Type Data Size mnemonic Typical value MB Starting Regs MB Reg Size int16 LAMPF int16 FREQ 2000 int16 LAMDF float PRESX1 float PRESXS1 30.00 float PRESXOS1 0.03 float PRESX2 float PRESXS2 float PRESXOS2 float MPRES float APRES int16 VALFAULT int16 HTRFAULT...
- Page 174 LOGSAVEINT uint SELSPAN char[20] SPANNM1 Span 1 char[20] SPANNM2 Span 2 char[20] SPANNM3 Span 3 char[20] SPANNM4 Span 4 char[20] SPANNM5 Span 5 char[20] SPANNM6 Span 6 char[20] SPANNM7 Span 7 char[20] SPANNM8 Span 8 8-10 | IPS-4-UV Analyzer-GPDiv2...
- Page 175 Access Data Type Data Size mnemonic Typical value MB Starting Regs MB Reg Size uint SPANMAP1 uint SPANMAP2 uint SPANMAP3 uint SPANMAP4 uint SPANMAP5 uint SPANMAP6 uint SPANMAP7 uint SPANMAP8 char[10] CONCUNIT2 ppmV char[10] CONCUNIT3 ppmV char[10] CONCUNIT4 ppmV char[10] CONCUNIT5 ppmV char[10]...
- Page 176 1051 int16 STATICPT 1053 float STCELLT 1054 float STCELLP 1056 uint16 ANAOUT1H 1058 uint16 ANAOUT2H 1059 uint16 ANAOUT3H 1060 uint16 ANAOUT4H 1061 uint MINDARK 1062 uint MAXDARK 60000 1064 uint ZEROMININT 1066 float ZERODRIFTMULT 10000000 1068 8-12 | IPS-4-UV Analyzer-GPDiv2...
- Page 177 Access Data Type Data Size mnemonic Typical value MB Starting Regs MB Reg Size float ALYTE1SPLO 0.85 1070 float ALYTE1SPHI 1.15 1072 float ALYTE2SPLO 0.85 1074 float ALYTE2SPHI 1.15 1076 float ALYTE3SPLO 0.85 1078 float ALYTE3SPHI 1.15 1080 float ALYTE4SPLO 0.85 1082 float...
- Page 178 TRENDPAR14 1209 int16 TRENDPAR15 1210 int16 TRENDPAR16 1211 int16 TRENDPAR17 1212 int16 TRENDPAR18 1213 int16 TRENDPAR19 1214 int16 TRENDPAR20 1215 int16 TRENDPAR21 1216 int16 TRENDPAR22 1217 int16 TRENDPAR23 1218 int16 TRENDPAR24 1219 float ZEROTOL 1220 8-14 | IPS-4-UV Analyzer-GPDiv2...
-
Page 179: Appendix
APPENDIX – DRAWINGS This Appendix includes many of the drawings that are included in the main body of this manual, plus additional drawings that aren’t. Drawings such as “Analyzer Mounting Details, Unistruts” and “Analyzer Overall Component Layout” are examples only; customer-specific draw- ings for your system are located in the “Supplemental Information”... -
Page 180: Analyzer Light Path Schematic
Analyzer Light Path Schematic A-2 | IPS-4-UV Analyzer-GPDiv2... -
Page 181: Analyzer Mounting Details, Unistruts
Analyzer Mounting Details, Unistruts Actual layout may vary. Refer to customer-specific drawings in the “Supplemental Information” tab of this manual or the Documentation Package shipped with the analyzer. NOTE Appendix – Drawings... -
Page 182: Analyzer Overall Component Layout
Analyzer Overall Component Layout Actual layout may vary. Refer to customer-specific drawings in the “Supplemental Information” tab of this manual or the Documentation Package shipped with the analyzer. NOTE A-4 | IPS-4-UV Analyzer-GPDiv2... -
Page 183: Detector Interface Board (100-1937
Detector Interface Board (100-1937) Appendix – Drawings... -
Page 184: Detector Board (100-1955
Detector Board (100-1955) A-6 | IPS-4-UV Analyzer-GPDiv2... -
Page 185: Display Interface Board (100-1978
Display Interface Board (100-1978) Appendix – Drawings... -
Page 186: Customer Connection Board (100-1971
Customer Connection Board (100-1971) A-8 | IPS-4-UV Analyzer-GPDiv2... -
Page 187: Relay Board (100-1942
Relay Board (100-1942) Appendix – Drawings... -
Page 188: Analog Board (100-1922
Analog Board (100-1922) A-10 | IPS-4-UV Analyzer-GPDiv2... -
Page 189: Mcu Board (100-1914
MCU Board (100-1914) Appendix – Drawings A-11... -
Page 190: Xenon Lamp Board (100-2061
Xenon Lamp Board (100-2061) A-12 | IPS-4-UV Analyzer-GPDiv2... -
Page 191: Electronics Enclosure Wiring Diagram, Sheet 1 Of 3 (Wx-102877
Electronics Enclosure Wiring Diagram, Sheet 1 of 3 (WX-102877) Appendix – Drawings A-13... -
Page 192: Electronics Enclosure Wiring Diagram, Sheet 2 Of 3 (Wx-102877
Electronics Enclosure Wiring Diagram, Sheet 2 of 3 (WX-102877) A-14 | IPS-4-UV Analyzer-GPDiv2... -
Page 193: Electronics Enclosure Wiring Diagram, Sheet 3 Of 3 (Wx-102877
Electronics Enclosure Wiring Diagram, Sheet 3 of 3 (WX-102877) Appendix – Drawings A-15... - Page 194 This page intentionally left blank. A-16 | IPS-4-UV Analyzer-GPDiv2...
-
Page 195: Supplemental Information
SUPPLEMENTAL INFORMATION This chapter consists of information that supports the operation of this analyzer. All information in this chapter comprises the Documentation Package. A duplicate of the Documentation Package is also shipped with the analyzer. Information typically included in this chapter includes: •... - Page 196 This page intentionally left blank. S-2 | IPS-4-UV Analyzer-GPDiv2...
- Page 197 Appendix G System alarm and warning bit map When System Status (parameter 138, 16-bit integer, modbus register 126) contains none-zero value, th bit map of System Alarms (parameter 134, 135, 136; 32-bit integer, modbus register 118, 119, 120, 121, 122, and 123) contains system alarms as defined: Modbus Description Type...
- Page 198 Verification operation failure Warning Fail to check verification filter Sample temperature high limit Alarm Heater temperature (292) is outside alarm of a band set by parameter 287 around the setpoint (293) Sample Temp low limit alarm Alarm G-2 | IPS-4-UV Analyzer-GPDiv2...
- Page 199 Vent temperature high limit Alarm Bench temperature (283) is outside alarm of a band set by parameter 278 around the setpoint (284) Vent temperature low limit Alarm alarm Not used Not used Not used Not used Not used The bit map of System Warning (parameter 514, 515, 516; 32-bit integer, modbus register 1034, 1035, 1036, 1037, 1038, 1039) contains warnings as defined: Modbus Description...
- Page 200 1035 Not used 1036 Not used 1037 Not used 1038 Not used 1039 Not used G-4 | IPS-4-UV Analyzer-GPDiv2...
Need help?
Do you have a question about the IPS-4-UV and is the answer not in the manual?
Questions and answers