
Subscribe to Our Youtube Channel
Related Manuals for SHOWTEC Data Flash Strobe


Summary of Contents for SHOWTEC Data Flash Strobe
- Page 1 MANUAL ENGLISH Data Flash Strobe Ordercode: 40296 Highlite International B.V. – Vestastraat 2 – 6468 EX – Kerkrade – the Netherlands...
-
Page 2: Table Of Contents
Installation ................................... 8 Set Up and Operation ............................... 8 Control Modes ................................9 One Data Flash Strobe (Auto Run Mode and Built-in programs) ..............9 One Data Flash Strobe (Sound-controlled) ......................9 Multiple Data Flash Strobes (Master/Slave control) .................... 9 Multiple Data Flash Strobes (DMX Control) ......................10... -
Page 3: Warning
Save the carton and all packing materials. In the event that a fixture must be returned to the factory, it is important that the fixture be returned in the original factory box and packing. Your shipment includes: Showtec Data Flash Strobe • Pro power cable (1,5 m) •... - Page 4 • If your Showtec device fails to work properly, discontinue the use immediately. Pack the unit securely (preferably in the original packing material), and return it to your Showtec dealer for service.
-
Page 5: Operating Determinations
If the Data Flash Stobe is lowered from the ceiling or high joists, professional trussing systems have to be used. • Use a clamp to mount the Data Flash Strobe, with the mounting bracket, to the trussing system. • The Data Flash Strobe must never be fixed swinging freely in the room. -
Page 6: Connection With The Mains
Data Flash Strobe The Data Flash Strobe can be placed on a flat stage floor or mounted to any kind of truss with a clamp. Improper installation can cause serious injuries and/or damage of property! Connection with the mains Connect the device to the mains with the power-plug. -
Page 7: Return Procedure
Data Flash Strobe Return Procedure Returned merchandise must be sent prepaid and in the original packing, call tags will not be issued. Package must be clearly labeled with a Return Authorization Number (RMA number). Products returned without an RMA number will be refused. Highlite will not accept the returned goods or any responsibility. -
Page 8: Description Of The Device
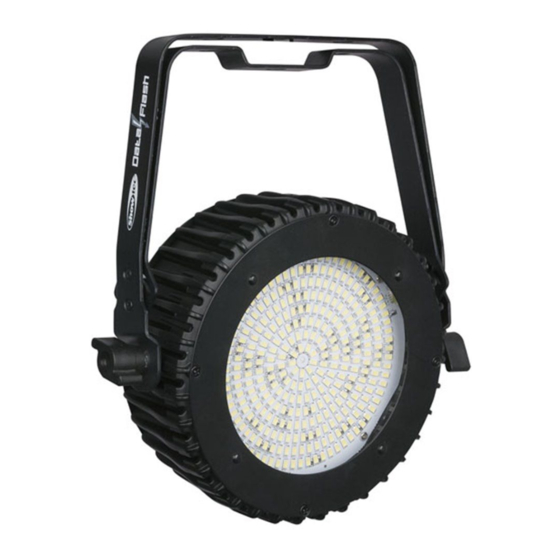
Data Flash Strobe Description of the device Features The Data Flash Strobe is a compact LED strobe with an intense strobe effect. It has 8 sections which can be used for creating dynamic strobe effects. 8 controllable sections • Double mounting bracket •... -
Page 9: Backside
08) 110-240V AC Pro power connector IN (Blue) 09) Ground/earth connection Installation Remove all packing materials from the Data Flash Strobe. Check if all foam and plastic padding is removed. Connect all cables. Do not supply power before the whole system is set up and connected properly. -
Page 10: Control Modes
02) Plug the end of the electric mains power cord into a proper electric power supply socket. 03) Turn on the music. If the device is set to sound-control, then the Data Flash Strobe will react to the beat of the music. Please see page 15 for more information about the sound-control options. -
Page 11: Multiple Data Flash Strobes (Dmx Control)
Data Flash Strobe Multiple Data Flash Strobes (DMX Control) 01) Fasten the effect light to a firm trussing. Leave at least 0,5 meter on all sides for air circulation. 02) Always use a safety cable (ordercode 70140 / 70141). 03) Use a 3-pin XLR cable to connect the Data Flash Strobes and other devices. -
Page 12: Fixture Linking
FL09150 (1,5 m), FL093 (3 m), FL096 (6 m), FL0910 (10 m), FL0915 (15 m), FL0920 (20 m). DAP Audio DMX adapter: 3-pin/5-pin. Ordercode FLA30. • The Data Flash Strobe can be operated with a controller in DMX mode or without the controller in stand- alone mode. Ordercode: 40296... -
Page 13: Control Panel
When using multiple Data Flash Strobes, make sure you set the DMX addresses right. Therefore, the DMX address of the first Data Flash Strobe should be 1(001); the DMX address of the second Data Flash Strobe should be 1+12=13 (013); the DMX address of the third Data Flash Strobe should be 13+12=25 (025), etc. -
Page 14: Menu Overview
Data Flash Strobe Menu Overview Ordercode: 40296... -
Page 15: Main Menu Options
With this menu you can start Auto Run mode. 01) Press the MODE button and then the UP/DOWN buttons, until the display shows 02) The Data Flash Strobe will now run all the built-in programs in a sequence. 2. Built-in Programs With this menu you can you can set the built-in programs. -
Page 16: Dmx Addressing
Data Flash Strobe 4. DMX Addressing With this menu you can set the DMX address and control the DMX configuration. 01) Press the MODE button and then the UP/DOWN buttons, until the display shows 02) Press the SETUP button to open the menu. You can choose 512 different DMX addresses. -
Page 17: Settings
Data Flash Strobe 7. Settings 01) Press the MODE button and then the UP/DOWN buttons, until the display shows 02) Press the SETUP button to open the menu. 03) Press the UP/DOWN buttons to choose between the 6 available options, 04) Press the SETUP button to open one of the 6 options. - Page 18 Data Flash Strobe you can select one of the 4 dimming curves, by pressing the UP/DOWN buttons. 05) In menu , you can set the dimmer speed, by pressing the UP/DOWN buttons. You can 06) With the menu choose Smooth or Fast.
-
Page 19: Info
Data Flash Strobe 8. Info 01) Press the MODE button and then the UP/DOWN buttons, until the display shows 02) Press the SETUP button to open the menu. 03) Press the UP/DOWN buttons to choose between the 2 options, 04) Press the SETUP button to open one of the 2 options. -
Page 20: Channels
Data Flash Strobe 12 channels Channel 1 – Dimmer intensity 0-255 Gradual adjustment, from dark to brightest 0-100% Channel 2 – Section 1 ( Dimmer must be open 0-255 Gradual adjustment section 1, from dark to brightest 0-100% Channel 3 – Section 2 (... -
Page 21: Maintenance
03) If all of the above appears to be O.K., plug the unit in again. 04) If you are unable to determine the cause of the problem, do not open the Data Flash Strobe, as this may damage the unit and the warranty will become void. - Page 22 Data Flash Strobe 03) Determine whether the controller or light effect is at fault. Does the controller operate properly with other DMX products? If not, take the controller in for repair. If so, take the DMX cable and the light effect to a qualified technician.
-
Page 23: Product Specifications
Data Flash Strobe Product Specifications Model: Showtec Data Flash Strobe Input Voltage: 110-240V AC, 50/60Hz Power consumption: 120W (full output) DMX linking: 30 pcs Protection rate: IP-20 Dimensions: 263 x 83 x 293 mm (LxWxH) Weight: 2,6 kg Operating and Programming:... -
Page 24: Dimensions
Data Flash Strobe Dimensions Ordercode: 40296... -
Page 25: Notes
Data Flash Strobe Notes Ordercode: 40296... - Page 26 Data Flash Strobe Ordercode: 40296...
- Page 27 Data Flash Strobe Ordercode: 40296...
- Page 28 ©2016 Showtec...
Need help?
Do you have a question about the Data Flash Strobe and is the answer not in the manual?
Questions and answers