Table of Contents
Advertisement
Quick Links
Advertisement
Table of Contents
Troubleshooting

Related Manuals for 3D Systems ProX 950


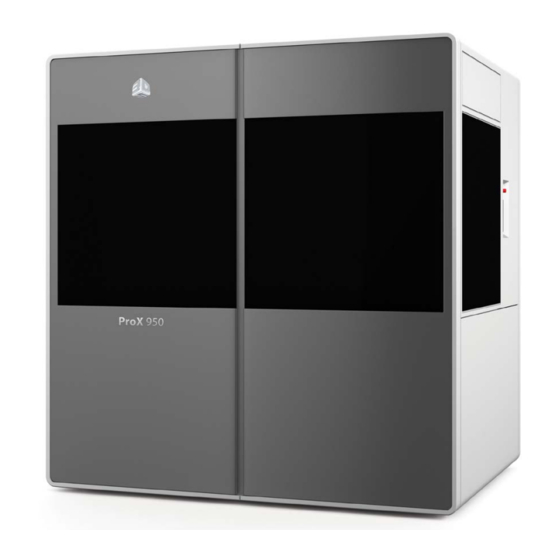
Summary of Contents for 3D Systems ProX 950
- Page 1 ProX™ 950 3D Printer User Guide Original Instructions Rev. E P/N 40-D045...
-
Page 2: Table Of Contents
ProX 950 AT A GLANCE . . . . . . . . . . . . . . . . . . . . . . . . . . . . . . . . . . . . . . . . . . . . . . . . . . . . . . . . . . . . . . . . . . . . . . . . . . . . . . . . . . 13 3D Systems, Inc. - Page 3 ERROR SYMPTOMS AND OTHER PROBLEMS . . . . . . . . . . . . . . . . . . . . . . . . . . . . . . . . . . . . . . . . . . . . . . . . . . . . . . . . . . . . . . . . 53 3D Systems, Inc.
- Page 4 GLOSSARY . . . . . . . . . . . . . . . . . . . . . . . . . . . . . . . . . . . . . . . . . . . . . . . . . . . . . . . . . . . . . . . . . . . . . . . . . . . . . . . . . . . . . . . . . . . . . 58 3D Systems, Inc.
-
Page 5: Introduction To The Prox™ 950
ProX 950 . SYSTEM OPERATIONS System Operations section describes how to operate the ProX 950. The process of creating a print is covered in its entirety. SOFTWARE Software Overview section gives you a detailed overview of the software that operates your ProX 950 . -
Page 6: Prox 950 Production Printer Features
The ProX 950 refill containers incorporates smart cartridge technology that contains information about the material that is in the bottle and the MDM. This information enables the ProX 950 to verify that the user does not use the wrong material, use material incorrectly, or use an empty or expired containers, ensuring the material is safe to use. -
Page 7: Additional Documentation
Only a 3D Systems Certified Field Service Engineer is allowed to install the printer. ProX 950 MATERIAL GUIDES The Material Guides detail the use of materials that have been certified for use in the ProX 950. Each material has its own Material Guide. Information specific to each material is included in the guides. -
Page 8: General Safety
Always follow the safety procedures. Do not, in any way, risk injury by working dangerously. Safety is a part of work, and not an obstacle to it. The ProX 950 was designed with safety in mind; however, improper use and malfunctions can cause injury. To prevent unsafe operation, the ProX 950 automatically shuts down immediately if it detects an unsafe condition. -
Page 9: Laser Safety
RADIATION: During normal operation, and with all panels installed, the ProX 950 is classified as a Class I Laser device . If any of the interlocks are defeated, the ProX 950 becomes a Class IV device . Eye damage can occur by looking directly into the beam or by viewing any type of beam reflection. -
Page 10: Safety Labels And Interlocks
Laser safety labels are located at system entry locations which are indicated below. An interlock is located close to each label. SAFETY WARNING LABELS Laser safety warning labels for the ProX 950 are located at system entry locations which are indicated above. SAFETY INTERLOCK SWITCHES Safety interlock switches protect the user from possible UV Laser radiation exposure when certain doors or panels are opened. -
Page 11: Chemical Safety
The photopolymers used in stereolithography may be hazardous if handled improperly. Repeated skin contact with materials may cause sensitization. Consult the manufacturer’s Material Safety Data Sheet (MSDS) for information on specific materials. For further information on this and related topics, consult the 3D Systems – Materials website at http://www.3dsystems.com/... -
Page 12: First Aid And Protective Equipment
1.4 kW. We recommend an HVAC system that changes the air two to five times per hour. To avoid adversely affecting part quality, do not expose the ProX 950 system to direct air flow from the air conditioning system. -
Page 13: Prox 950 At A Glance
Print Zone A: Print Zone A is located on the left side of the ProX 950, as you face the machine, and is utilized for the printing of all machine configurations up to 30” wide. -
Page 14: System Components
Note: The chamber lights can be repositioned to view specific areas as needed. Check the switch on the lights themselves if they do not come on when you press the button under the user interface . 3D Systems, Inc. -
Page 15: Material Delivery Module (Mdm)
The refill containers incorporates smart cartridge technology that contains information about the material that is in the bottle and the MDM. This information enables the ProX 950 to verify that the user does not use the wrong material, use material incorrectly, or use an empty or expired containers, ensuring the material is safe to use. -
Page 16: Electrical Cabinet
Manual Offload Cart manual offload cart is included in the base configuration of the ProX 950. The offload cart allows you to easily remove the print platform when it is loaded with a large or heavy part and transport it to the finishing area where supports are removed and the part is cleaned before it is cured. -
Page 17: Setting The Offload Position
1/2 inch . 5. Select Set Offload (1). 6. Repeat Steps 3-5 of To Remove a Part. NOTE: This position will now be saved and can be used from now on by selecting Move to Offload (2) . 3D Systems, Inc. -
Page 18: Software Overview
New Functionality for GUI v1.1.5443 NOTE: Please see the section on pg. 32. The touchscreen of the ProX 950 uses Google’s Android operating system, running the 3D Systems’ Print3D Pro™ application. HOME SCREEN When tablet is powered on, there should be a 3D Print Pro icon (A) displayed. -
Page 19: Manual Printer Connection Screen
If you do not know your address, contact your systems administrator. Enter the correct address into the field and press ADD. Your printer will appear in the list. Press the name of the printer to continue launching Print3D Pro 3D Systems, Inc. -
Page 20: Status Screen
These are the Preset Views: The 3D model has 3 preset views. From values programmed using the application software. left to right, they are: front, isometric, and top. Current Layer: The end value of the layer 3D Systems, Inc. -
Page 21: Print Queue Screen
Or he can exit the queue and go back it will automatically refresh the list. Unlock Door: Pressing this button will toggle the Lock Unlock doors between positions. Queued Files: Number of files currently in the queue. 3D Systems, Inc. -
Page 22: Print History Screen
Press the information icon to bring up a dialog box which gives you the choice to which will copy the chosen job to the active print queue, or Delete which will remove the print job from the Print History. 3D Systems, Inc. -
Page 23: Detail Popup Screen
Select this button to move to the Print history. If currently in the print history, selecting this will take you back to the Print Queue. Delete: Delete the job from the print queue.Selecting this button after selecting the desired job, will move it to the trash. 3D Systems, Inc. -
Page 24: Material Status Screen
Displays the weight of the material in refill bottle 1. Refill Bottle 2: Displays the weight of the material in refill bottle 2. Print Tray Level: Indicates the amount of material in the print tray. Line indicates the nominal level of material. 3D Systems, Inc. -
Page 25: Tools Menu Screen
IPM which is selected. The “A” IPM is on the left side of the machine (while the user is facing the Page 27 print chamber doors) and the “B” IPM is on the right side. See for more information. Shutdown: This feature shuts down the printer. 3D Systems, Inc. -
Page 26: Elevator/Leveler Settings Screen
Set Start: Saves the elevator’s current position Printing a Part as the Start position. See Back: Navigate back to the Tools Menu Screen. instructions on setting the Set Start position. Set Offload: Saves the elevator’s current position 3D Systems, Inc. -
Page 27: Print Applicator Screen
Press and hold to move. Reset Home: This recalibrates the home positions of the left and right sides. This will need to be used if the left and right side motors of the print applicator blade get out of synch. 3D Systems, Inc. -
Page 28: Printhead Settings Screen
IPM Beam Power (Set Value): Set the IPM Beam the rest position. power using the edit button. Move to Rest: Move the IPM Beam to the stored rest position. Back: Navigate back to the Tools Menu Screen. 3D Systems, Inc. -
Page 29: Network Settings Screen
View the network host name of the system. DNS Address: View the main TCP/IP address for the DNS Server. Default Gateway Address: View the TCP/IP address for the Default Gateway. DHCP: Switch the Dynamic Host Configuration Protocol (DHCP) on or off. 3D Systems, Inc. -
Page 30: Heater Settings Screen
For any field that you need to set press the key to edit. Back: Use this to navigate to previous screen. Set Print Chamber Temperature: Saves settings of the Print Chamber Temperature Set Print Tray Temperature: Saves settings of the Print Tray Temperature. 3D Systems, Inc. -
Page 31: Drawing Settings Screen
This is where the current Y Value can be edited. Select key to edit. Back: Use this to navigate to previous screen. Set Offset: Saves the current Offset values. For any field that is editable press the key to edit. 3D Systems, Inc. -
Page 32: Global Scale Factor Settings Screen
NEW FUNCTIONALITY FOR GUI V1.1.5443 RESTART BUILD WIZARD In GUI v1.1.5443, this feature provides the user more control over the process of restarting a build that has been interrupted. Select Restart Last Job from the status screen. 3D Systems, Inc. - Page 33 RECOAT PARAMETER MODIFICATIONS ON-THE-FLY WIZARD In GUI v1.1.5443, this feature assists with making mid-build recoat adjustments. To access this wizard while a build is in progress, tap the Recoat Style button. 3D Systems, Inc.
- Page 34 All modifications can be reverted by selecting Restore Ranges. When you tap the Edit button next to Support Recoat Style, you will see the dialog window at the right. NOTE: It is not recommended to add sweeps to this range. 3D Systems, Inc.
- Page 35 3D Manage. The user selects start and end Z ranges. 10. Ranges added between existing ranges will automatically create additional ranges to fill in the full Z range. Example: Add range 12mm- 20mm to a build with Z range of 0-21.2mm 3D Systems, Inc.
- Page 36 Once the Stir wizard is opened, the user is granted more control over how the machine stirs the material. While the machine is stirring, the user will be shown a countdown to when the stir will end, seen at right. 3D Systems, Inc.
-
Page 37: 3Dsprint Software Overview
3D SPRINT is the 3D Systems’ software application used for preparing CAD models to be printed on an SLA printer. It is installed on a standalone computer which is provided by the customer. Double-click the 3D SPRINT icon on your computer/ laptop, or select it from your list of available programs loaded on your computer. -
Page 38: System Operations
Home the elevator Select Tools from main screen (4). Elevator/Leveler Select (5). If machine was not already turned on, select Move to Home (6). If machine has been on and used, this step is unnecessary. Continue to next page. 3D Systems, Inc. - Page 39 Setting the Start Position Start Position is the position of the platform when the machine is Start Position set up for optimal build success. The will need to be set either when it’s the first time the machine has built anything or any of the three conditions below are not met: Top of platform must be exposed Bottom of platform must be submerged...
- Page 40 Play button (5). Wait for the machine to fully print the first layer to ensure that the print has successfully started. You can see which layer the machine is printing by looking at the UI. 3D Systems, Inc.
-
Page 41: Assembly Of Offload Cart
ProX 950 print platform, either to install it in the printer or to off-load it and transfer it to a cleaning station after a build is complete. While a 3D Systems certified Field Engineer can assemble the off- load cart, it is not required that one be present. -
Page 42: Manual Operations
The applicator, which contacts the material, can be removed from the ProX 950. The applicator should be kept with the MDM so that when the material is changed, the applicator remains with the material that it has been in contact with. -
Page 43: Print Platform Installation Without Offload Cart
“Setting the Offload Position.” 2. Lower the print platform onto the elevator forks by pulling lever on the offload cart down. 3. Perform steps 2-4 in above section. Cart shown outside of printer for clarity. 3D Systems, Inc. -
Page 44: Print Platform Removal With The Manual Offload Cart
(1), so that the cart raises up and locks in position. Carefully wheel cart out of machine and proceed with the next step of preparing your part for use on pg. 44. Build parts have been blurred for privacy. 3D Systems, Inc. -
Page 45: Material Delivery Module (Mdm) Installation
CAUTION: Ensure no alcohol gets spilled into material . Alcohol will contaminate material causing it to build ineffectively . 3. Open the front doors of the ProX 950 and slowly roll the MDM into the machine. locking pins 4. -
Page 46: Mdm Removal
4. Turn off the heater power switch and disconnect the AC power cord from the electrical outlet. 5. Disconnect the following cables: • Left Side: I/O Connection Cord and the Serial Connection Cable • Right Side: I/O Connection Cord and the Serial Connection Cable 3D Systems, Inc. -
Page 47: Material Delivery Module Temperature Control
MATERIAL DELIVERY MODULE TEMPERATURE CONTROL The ProX 950 offers offline and online heating. When the power cord from the machine is connected to the MDM, the system has online heating; when the power from a wall outlet is connected, the system has offline heating. The MDM can be heated either outside the system enclosure, via the stand-by mode, or inside the enclosure. -
Page 48: Material Container Removal
6. Using a disposable paper towel, wipe all material from the container seal assembly. If you notice any material on the container seal assemblly use a paper towel with a small amount of isoporopyl alcohol on it to clean it up. 3D Systems, Inc. -
Page 49: Replacing Material Containers
Unless the vent has been previously punctured, and you are very certain of this, puncture the vent . 7. Close the refill container door firmly until it latches securely. 8. Close the chamber doors, until they latch securely. 3D Systems, Inc. -
Page 50: Post-Processing Build Parts
16 Due to the large size of the ProX 950 build platform and the potentially large size of 3D builds, it is highly recommended to have a two-RAMCO system for part cleaning, one filled with TPM (Tripropylene Glycol Methyl Ether) and the other filled with water. A RAMCO is machine that agitates 3D parts in different liquids to remove uncured resin. - Page 51 Build parts have been blurred for privacy. Carefully remove the build’s remaining support structures by hand. Build parts have been blurred for privacy. 3D Systems, Inc.
- Page 52 Build parts have been blurred for privacy. 11. If necessary, use sand paper to smooth out the bottom layer of your build, which was touching the bottom of the build platform and supports. Procedure is now complete . 3D Systems, Inc.
-
Page 53: Troubleshooting
ProX 950 CENTER SHUTDOWN If you do not plan on operating the system on a regular basis and want to shut it down for an extended period of time, power off the touchscreen and turn off the main power disconnect. -
Page 54: Customer Support
Laser Safety on page The ProX 950 conforms to applicable requirements of 21 CFR Subchapter J at the date of manufacture. It is designated a Class I Laser Device by the Center for Devices and Radiological Health (CDRH). In normal operation, the Laser beams are completely confined and the viewing windows in the Process Module block the UV Laser radiation. -
Page 55: Maintenance
. DUST REMOVAL Remove dust from the outer surfaces of the ProX 950 by wiping with a clean, dry, lint-free cloth. CAUTION! Do not remove any outer panels when cleaning the system . Panels must be removed only by a qualified 3D Systems Customer Support Representative. -
Page 56: Legal Notices
(the “Licensed User”) does not have the right to copy, reproduce, or translate this document in any way or to any media without the prior written consent of 3D Systems, Inc. No copies of the document may be sold or given to any person or other entity. -
Page 57: Ec Declaration Of Conformity
EC DECLARATION OF CONFORMITY LA DÉCLARATION DE CE DE CONFORMITÉ We, 3D SYSTEMS, INC. herewith declare that the following described machine in our delivered version complies with the basic safety and health requirements of the EC Directive 2006/42/EC of the European Parliament and of the Council of 17 May 2006, based on its design and type, as brought into circulation by us. -
Page 58: Glossary
The total light energy absorbed by a point on the material surface. Exposure increases with higher Laser power and decreases with higher drawing speed. Fill vectors (skin fill) Overlapping parallel vectors that comprise the horizontal surfaces (skins) of stereolithographic parts. 3D Systems, Inc. - Page 59 A chemical substance composed of photoinitiators and monomers that polymerizes when exposed to light energy. Photopolymerization The process whereby light energy converts monomers into a polymer. Platform The perforated base on which parts are printed by the ProX 950. Platform locators Features that secure and position the edges of the platform. Platform supports L-shaped brackets that support the platform and attach it to the elevator.
- Page 60 The chamber in which the MDM, elevator, and beam profilers are located. Material Delivery Module (MDM) The metal container inside the process chamber in the ProX 950 that holds the material from which the part is formed. On older SLA Centers, the MDM is referred to as the vat.
- Page 61 Electromagnetic radiation having a wavelength shorter than visible light, (i.e., below 390 nanometers). On older SLA Centers, the metal container inside the process chamber that holds the material from which the object is formed. On the ProX 950, this container is called the MDM. Vector A directed line segment represented by starting and ending coordinates as defined in a stereolithography slice or print file.
- Page 62 3D Systems, Inc. 333 Three D Systems Circle | Rock Hill, SC | 29730 www.3dsystems.com ©2017 3D Systems, Inc. All rights reserved. P/N 40-D045 Rev. E...
Need help?
Do you have a question about the ProX 950 and is the answer not in the manual?
Questions and answers