
Related Manuals for Elan VIA!4.0-EM


Summary of Contents for Elan VIA!4.0-EM
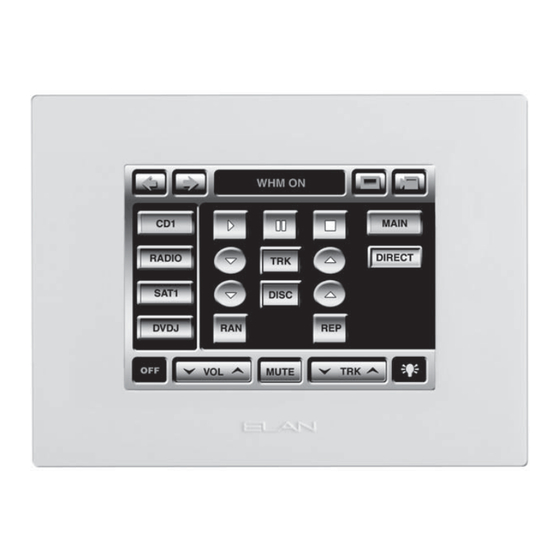
- Page 1 VIA!4.0-EM VIA!7.0-EM VIA!10.0-EM 4"/7"/10" Color LCD Touch Panels INSTALLATION MANUAL...
-
Page 2: Important Information
• Connect the equipment into an outlet on a circuit different from that to which the receiver is connected. • Consult the dealer or an experienced radio/TV technician for help. Caution: Changes or modifi cations not expressly approved by ELAN could void the user’s authority to operate this equipment. -
Page 3: Table Of Contents
ELAN S12 and S8 ..................34 ELAN S6 ................35 ELAN Z•System ..............35 External Power Connector 4. Operation ...................36 5. Troubleshooting ................38 Appendix A: Specifications ............39 Appendix B: Programming .............40 Warranty ................. Back Page © ELAN Home Systems 2007 • All rights reserved. Page 1... -
Page 4: Introduction
(in a Home Theater, for example). With System and Local IR control, RS-232 control, and full-motion video display, these touch panels ® have all of the features that have made ELAN’s award-winning VIA! 6.4 and ® VIA! Valet6.4 Touch Panels the most successful products in their category. -
Page 5: System Design & Applications
-10° to +115°F (-23° to +46°C). If the LCD display is over-heated, or its temperature reduced below the recommended minimum, the liquid crystal polymer can be damaged and the display image may not recover. © ELAN Home Systems 2007 • All rights reserved. Page 3... -
Page 6: Mounting Height
Side View Figure 2.1: Mounting Height and Viewing Angle VIA!4.0-EM VIA!7.0-EM VIA!10.0-EM Up Angle 35º 50º 45º Down Angle 15º 70º 65º Left/Right 50º 70º 65º Table 2.1: Viewing Angles Page 4 © ELAN Home Systems 2007 • All rights reserved. -
Page 7: Applications
VIA! Touch panels can be used for any Stand-Alone (non-ELAN) system application or as a Home Theater controller. Figure 2.2 shows a basic appli- cation using one VIA! Touch panel, a PVIA1 Wall Plate, and an ELAN IRD4 Amplified IR Connection Block to control a stack of A/V equipment. -
Page 8: Stand-Alone/Home Theater - Expanded
E L A N H O M E S Y S T E M S Stand-Alone/Home Theater - Expanded Stand-Alone systems (without an ELAN multi-room controller) can be as simple as one VIA! Touch Panel controlling one IR source, or as complex as multiple VIA!s, Olé... -
Page 9: Elan S12 Multi-Room A/V Controller
VIA!4.0-EM/VIA!7.0-EM/VIA!10.0-EM ELAN S12 Multi-Room A/V Controller Use either ELAN's PS12 Precision Panel or SPP System Precision Panel when installing VIA! Touch panels in an S12-based application. A PVIA Wall Plate is not necessary when using VIA!s with an S12; the PS12 or SPP has all necessary provisions. -
Page 10: Elan S8 Multi-Room A/V Controller
E L A N H O M E S Y S T E M S ELAN S8 Multi-Room A/V Controller ELAN's SPP (System Precision Panel) is designed to work with any S Series Multi-Room controller. Figure 2.7 shows ten VIA! Touch Panels connected to a System8 (S8.6AV or S8.6P) Multi-Room A/V Controller using an SPP. -
Page 11: Elan S6 Integrated Multi-Room Controller
Use a PVIA Wall Plate appropriate for the number of VIA!s to be installed or an SPP System Precision Panel. Figure 2.4 shows four VIA!4.0-EM's and a PVIA4 configured for use with an ELAN S6. Note: The SPP can be used with ANY ELAN S Series Multi-Room Controller. -
Page 12: Elan Z•System
ELAN Z•System Advanced features like Audio Detect and Spatial Enhancement can be accessed using a VIA! in an ELAN Z•System. Figure 2.5 shows how to con- figure four VIA!s using a PVIA4 and a PZ6 Precision Panel for Z•Systems. PVIA4... -
Page 13: Rs-232 Controlled Devices (Regardless Of System Type)
12VDC COM1 ETHERNET 0.5 AMPS ELAN RS-232 COM 3 COM 4 VIA-NET COM2 HOST COM3 LINK ELAN COM4 RX/TX EXT IR INPUT RS-232 Devices Figure 2.7: RS-232 Controlled Devices © ELAN Home Systems 2007 • All rights reserved. Page 11... -
Page 14: Installation/Connections
RJ-45 / CAT-5 Local Port RJ-45 / CAT-5 Interface Port Removable Screw Terminal / CAT-5 External Power Removable Screw Terminal / 2 Conductor 16/18 AWG Table 3.1 VIA! Connectors Page 12 © ELAN Home Systems 2007 • All rights reserved. - Page 15 System Port The System RJ-45 port provides required functionality for all system types. Use this port when the VIA! is used in an ELAN Multi-Room Controller- based System (ELAN S or Z•System). Use ELAN Standard RJ-45 Pinout configura- tion (as shown in Figure 3.2).
- Page 16 IR system, such as a TV or DVD player located within the same room as the touch panel, or an ELAN Electronic Volume Control. IR is routed to an emitter or IR distribution block connected to the IR OUT (LOC) in two...
- Page 17 IR IN The Local IR Input is typically used to connect an external IR receiver to the touch panel. Typical applications include a plasma-friendly IR receiver (ELAN IRS8EP, for example) placed near a TV, or an auxillary IR receiver placed in an area more convenient than the location of the touch panel.
- Page 18 Connect SENSE and GROUND to a contact closure device as shown in Figure 3.6 Contact Closure Device Figure 3.6: Interface Port Sense Connections Page 16 © ELAN Home Systems 2007 • All rights reserved.
- Page 19 16/18 AWG wire from an external power supply or Precision Panel connected to the removable screw terminal plug. Connect +16 VOLTS and GROUND as shown in Figure 3.7 External Power Connector Figure 3.7: External Power Connections © ELAN Home Systems 2007 • All rights reserved. Page 17...
-
Page 20: Installation
Installation ELAN Precision Panels and Wall Plates VIA! Touch Panels require an ELAN Precision Panel or Wall Plate to function properly. The specific application will determine the Precision Panel or Wall Plate needed. Each of these panels provides a power supply of the correct voltage (+16VDC) and amperage for the application being covered. - Page 21 The SPP is designed to accomodate all connectivity required for S6, S8 and S12 installations, including VIA! Touch Panels and Olé™ Touchpads. Each SPP provides connections for ELAN systems of up to eight zones. A sepa- rate power supply must be used when connecting VIA! Touch Panels to an ELAN System Controller.
-
Page 22: Pre-Wire
Use an RCA “Y” cable to split the video signal going to a VIA!; a coaxial splitter or splitter/combiner will not pass composite video signals! From Video VIA! Source Video In RG-6/RG-59 F-to-RCA Coax Adaptor Figure 3.7: RG-6/RG-59 and F-to-RCA Adaptor Page 20 © ELAN Home Systems 2007 • All rights reserved. -
Page 23: Video Termination Switch
A single video feed is routed through the VIA! to additional VIA!s or TV(s). • Each VIA! and/or TV displays video independently. Independent video feeds are routed to each VIA! and/or TV. © ELAN Home Systems 2007 • All rights reserved. Page 21... - Page 24 Figure 3.9: Video Loop Out For applications where different, independent video is displayed on each VIA!/TV, run separate feeds of RG-6 or RG-59 from a video switcher (ELAN Z•880, S8 or S12) to each VIA!/TV as shown in Figure 3.10. Keep the 75 Ohm Termination Jumper in the 75 Ohm TERM position.
-
Page 25: Rough-In
Right Side Mounting Left Side Mounting VIA!40EMBKT/VIA!70EMBKT VIA!40EMBKT/VIA!70EMBKT Stud Stud Center Mounting Stud Mounting All Models VIA!100EMBKT Cross Beam Stud Stud Stud Stud Figure 3.11: New Construction - Rough-In Bracket © ELAN Home Systems 2007 • All rights reserved. Page 23... -
Page 26: Retro-Fit
Use the clamping winglets on the side of the unit. Use the pre-drilled holes to attach the unit to a stud or other secure point. Winglet Winglet Tighten Down (Clockwise) Side View Figure 3.12: Retro-Fit - Clamping Winglets Page 24 © ELAN Home Systems 2007 • All rights reserved. - Page 27 VIA! enclosures are equipped with two clamping winglets that flush up against the drywall when tightened. Rear View Clamping Winglets Clamping Winglets Clamping Winglets Clamping Winglets Figure 3.13 Clamping Winglets © ELAN Home Systems 2007 • All rights reserved. Page 25...
-
Page 28: Cutout Dimensions
AWAY FROM DRYWALL. P/N: 9801446 REV:A 6.96” .34” 1.41” .54” 1.93” VIA!7.0-EM 4.21” 1.93” .54” 1.76” .34” 9.66” .34” 1.75” 1.44” 2.44” 2.18” VIA!10.0-EM 2.18” Figure 3.14: Cut-Out Template Page 26 © ELAN Home Systems 2007 • All rights reserved. -
Page 29: Mounting
This allows the VIA!'s housing to mount flush against the stud. See Figure 3.15 for details. Remove Screw Remove Winglet Bottom Bend Screw Stud Winglet Front Screw Figure 3.15: Stud Mounting © ELAN Home Systems 2007 • All rights reserved. Page 27... -
Page 30: Removal From Wall (Winglets Deployed)
Make sure to protect the touch panel/LCD assembly and faceplate from damage when it is not in the wall. Front Figure 3.16: Removal From Wall Page 28 © ELAN Home Systems 2007 • All rights reserved. -
Page 31: Connections
Home Theater controllers. For control of a Home Theater system, the VIA! and PVIA Wall Plate are combined with a method for IR distribution such as ELAN’s IRD4 Amplified Connection Block. Signals originate at the VIA!4.0- EM, pass through the PVIA Wall Plate, then travel to the connection block where they are routed to each component. -
Page 32: Elan System12 And System8
E L A N H O M E S Y S T E M S ELAN System12 and System8 ELAN System12 (S12) and System8 (S8.6AV /S8.6AVP) Multi-Room A/V Controllers were designed with VIA! Touch Panels in mind. Rather than using a PVIA Wall Plate, provisions have been made on the SPP System Precision Panel for complete VIA! connectivity. -
Page 33: Elan System6 (W/ Pvia Wall Plate)
VIA!4.0-EM/VIA!7.0-EM/VIA!10.0-EM ELAN System6 (w/ PVIA Wall Plate) Use VIA Touch Panels to add functionality and flexibility to ELAN’s System6 (S6) six-source, six-zone Integrated Multi-Room Controller. A PVIA1, PVIA4, PVIA10 or SPP System Precision Panel must be used when interfacing VIA!s to an S6. -
Page 34: Elan Z•System
PIN # COLOR CODE P & DB BLUE WHITE/BLUE ORANGE WHITE/ORANGE GREEN WHITE/GREEN Use BOTH Twisted BROWN Pairs For Power WHITE/BROWN CABLE (GR,GR/WH & BR, BR/WH) Figure 3.21: Z•System Connections Page 32 © ELAN Home Systems 2007 • All rights reserved. -
Page 35: Increasing Wire Runs Beyond The 200 Foot Maximum
PVIA Wall Plate (typically a PVIA1) to power the unit locally (within 110 feet). The diagrams in this section show specific wir- ing schemes for Stand-Alone systems and each ELAN Multi-Room System. Alternatively, a 2-conductor, 18AWG wire may be used to connect to the External Power Port for wire runs longer than 200 feet. -
Page 36: Elan S12 And S8
White/Brown Figure 3.23: S12/S8 Connections > 200' ELAN S6 Use a local PVIA1 to connect a VIA! to an ELAN S6 located more than 200 feet away. Note: The SPP System Precision Panel may also be used for this application. Connections are identical to those shown in Figure 3.23. -
Page 37: Elan Z•System
VIA! Touch Panel for wire runs greater than 200 feet. All other wiring remains the same. See Figure 3.26 for details. External Power Connector Figure 3.26: External Power Connector © ELAN Home Systems 2007 • All rights reserved. Page 35... -
Page 38: Operation
The following products have been tested and approved for cleaning VIA! Touch Panels: ® ® ® Windex Glass Cleaner, Formula 409 Cleaner, and Mr. Clean Page 36 © ELAN Home Systems 2007 • All rights reserved. -
Page 39: Cleaning Mode
The CLEAN button should be placed in a location that the homeowner or housekeeper can easily remem- ber (see the VIATOOLS HELP File for more details). Figure 4.1: CLEAN Button © ELAN Home Systems 2007 • All rights reserved. Page 37... -
Page 40: Troubleshooting
Video source turned off Turn on source Incorrect camera or video Source's video output(s) Connect properly source displayed incorretly connected Incorrect or missing IR/RS232 Verify IR commands in VIA!TOOLS commands in VIA!TOOLS Page 38 © ELAN Home Systems 2007 • All rights reserved. -
Page 41: Appendix A: Specifications
(w/o packaging) .48 kg .91 kg 1.5 kg Weight 3 lb, 0 oz 3 lb, 0 oz 4 lb, 11 oz (w/ packaging) 1.36 kg 1.36 kg 2.13 kg © ELAN Home Systems 2007 • All rights reserved. Page 39... -
Page 42: Appendix B: Programming
E L A N H O M E S Y S T E M S Appendix B: Programming ® All VIA! Touch Panels must be programmed with ELAN VIA! TOOLS Setup Software using a PC running Windows 98 or higher. VIA!TOOLS utilizes the VIA!Learner to interface between the PC and the touch panel to be pro- grammed. -
Page 44: Limited Warranty
With respect to equipment sold by, but not manufactured by ELAN, the warranty obligations of ELAN shall in all respects conform to the warranty actually extended to ELAN by its supplier. The foregoing warranties do not cover reimbursement for labor, transportation, removal, installation or other expenses which may be incurred in connection with repair or replacement.
Need help?
Do you have a question about the VIA!4.0-EM and is the answer not in the manual?
Questions and answers