Table of Contents
Advertisement
Quick Links
Advertisement
Table of Contents

Subscribe to Our Youtube Channel
Related Manuals for TIPTEL Ergophone 6040


Summary of Contents for TIPTEL Ergophone 6040
- Page 1 Operating instructions (en) tiptel Ergophone 6040 tiptel...
-
Page 2: Please Note
Please note! For safety reasons, the battery switches off before it is totally dis- charged. If you have not used the telephone for a long time, wait up to 5 minutes after you have plugged the charger in. This will switch the battery back on and the charging process will start. -
Page 3: Table Of Contents
Contents Contents Contents ..................3 Safety information ..............7 Bringing into service ..............8 Check packing contents ............8 Installing the SIM card and battery ........8 Switching on the telephone ........... 9 Setting the time and date ............10 Charging the battery .............. - Page 4 Contents Sending SMS ..............22 SMS settings ................22 SMS server ................. 22 Voicemail server ..............23 Common settings ............... 23 Preferred storage ..............23 Phonebook ................24 Call ..................24 Send text message ..............24 View ..................25 Add new contact ..............25 Edit ..................
- Page 5 Contents Settings ................32 Play back recordings ............. 32 Options in the recording list ..........32 Play ..................32 Append ................32 Rename ................32 Delete .................. 32 Delete all files ..............33 FM radio ..................34 Options in radio mode ............34 Channel list .................
- Page 6 Contents Caller ID ................43 Call waiting ................. 43 Call divert ................43 Call barring ................. 44 Network selection ..............44 Security settings ..............44 SIM lock ................45 Phone lock ................45 Change password .............. 45 Emergency settings ............... 45 Restore factory settings ............
-
Page 7: Safety Information
Safety information Safety information Only use the telephone at locations where calling is allowed. As a rule, use of mobile phones is prohibited in hospitals, aircraft and at filling stations. Do not open the device yourself, and do not attempt repairs on your own. -
Page 8: Bringing Into Service
Bringing into service Bringing into service Check packing contents Included in the scope of delivery: tiptel Ergophone 6040 mobile phone Power supply unit Charger Li-Ion 3.7 V/800mAh battery pack Headset User guide Installing the SIM card and battery Before the telephone is first used, the SIM card and battery need to be installed. -
Page 9: Switching On The Telephone
Bringing into service Push the SIM card into the SIM card bracket, as shown. The SIM card is pushed, with the card's contacts underneath, be- tween the telephone's con- tacts and the metal retain- ing clip. The hollow in the casing must be in the same direction as the SIM card. -
Page 10: Setting The Time And Date
Bringing into service Note: You can change your SIM card PIN using the telephone settings, and you can also disable the PIN prompt given when the telephone is switched on. The telephone is now ready to be used. Setting the time and date After the telephone has been switched on for the first time (and after removing the battery), the time and date need to be set. -
Page 11: Charging The Battery
Bringing into service Charging the battery Your telephone is delivered with a charger and the corresponding power supply unit. Insert the small connector on the power supply unit into the jack at the rear of the charger, then connect the power supply unit to the wall socket. -
Page 12: Telephone Controls
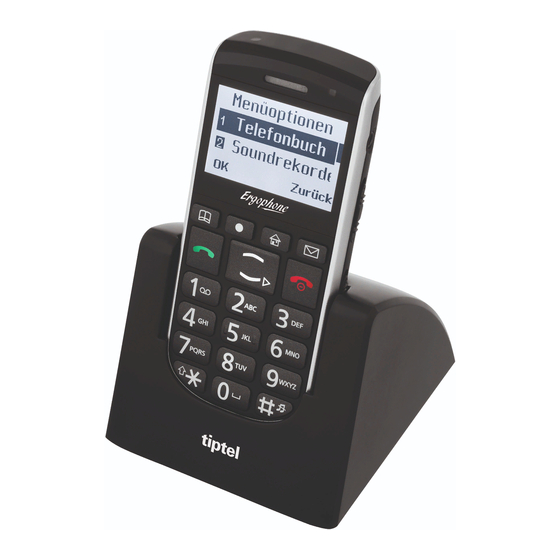
Telephone controls Telephone controls The telephone has controls and connections on the front and back, left and right, and top and bottom. Controls on the front Four speed dial keys: Quick Contacts Voice Recording Top Contacts Up arrow key: Dial key: For selecting in men- Dialling and call acceptance,... -
Page 13: Controls On The Rear
Telephone controls Controls on the rear The emergency call (SOS) button is here. The emergency call function is triggered if this is pressed for about 3 seconds. You'll find a de- scription of this function in the "Emergency Call" chapter. Controls on the left Here is a rocker switch marked with + and –. -
Page 14: Features On The Top
Telephone controls Features on the top The integrated torch is on the top. The upper sliding switch on the right-hand side is used to switch it on and off. Features on the bottom On the bottom, on the right and left, you will find the contacts for the charger and, between them, the mini-USB jack for charging the battery using the power unit supplied or a computer. -
Page 15: Symbols On The Display
Telephone controls Symbols on the display As well as the name of the mobile phone provider, the date and the time, the display always shows the strength of the mobile network signal and the battery charge status. The other symbols shown only appear depending on the situation. -
Page 16: Calling
Calling Calling Accepting calls When a call comes in, the telephone rings (providing "Silent" is not enabled). The calling number appears in the display. If the caller for that number is saved in the phone book, the name of the caller is dis- played instead of the number. -
Page 17: Speed Dialling
Speed dial set- tings. Dialling with the quick phone book key The tiptel Ergophone 6040 has the key for opening the quick phone book. When this key is pressed, a list opens with all the con- tacts saved to the SIM card and the telephone, and showing the number of the contact. -
Page 18: Dialling From Phonebook
Calling Dialling from phonebook When you press the key when the telephone is on standby, the main menu opens. If you press the and then the key, the phonebook opens and the first entry is displayed. You can scroll up and down with the arrow keys If one of the number keys is pressed several times in quick succes- sion, the first entry starting with the corresponding letter is displayed. -
Page 19: Messaging (Sms)
Messaging (SMS) Messaging (SMS) With your telephone, you can receive and send short text messages (SMS). View SMS received If you have received a text message (SMS), the display will show this and the telephone's red LED will flash. Pressing the dial key shows you the message content. -
Page 20: Writing And Sending Sms
Messaging (SMS) However, in the telephone's base status, you can press the key to open its main menu and choose "Messaging" to open your telephone's mes- sage centre. There, in "Inbox", you will see all the text messages that you have re- ceived and not deleted. - Page 21 Messaging (SMS) You may also select from the input methods "lower case", "numerals" and "smart input" in upper and lower case. Hint: You can use the main menu Settings Phone set- tings Pref. input methods to set the input method to be used when writing an SMS.
-
Page 22: Sending Sms
Messaging (SMS) Sending SMS When the SMS text has all been entered, press the dial key select "Send to". You are given a choice by which you can either enter a number man- ually or add the recipient from your phonebook. Hint: If you want to send the same SMS to more than one recip- ient, you can enter more than one number, one after the... -
Page 23: Voicemail Server
Messaging (SMS) tings here, because your service provider's SMS number is automati- cally taken from the inserted SIM card. Voicemail server This is where the number of your service provider for calling the (an- swering machine) mailbox for your mobile number. This number is dialled if you keep the key pressed down while the telephone is on ... -
Page 24: Phonebook
Phonebook Phonebook The telephone has storage space for up to 100 numbers and names. Additional numbers can be stored on the SIM card. To open the phonebook, press the key while on standby. You go to the main menu. There, use the ar- row keys to select the "Phonebook"... -
Page 25: View
Phonebook View Displays the details (name and number) of the selected contact. Add new contact Creates a new contact. You are given selection fields for name and number. With the "Name" field, you press the dial key to enter the name. You enter it in the same way as you write text messages (see above). -
Page 26: Move
Phonebook Move Moves the selected contact to the telephone memory if it was stored on the SIM card, or to the SIM card if it was stored in the telephone. Copy/Move/Delete all contacts These entries copy, move or delete not just the selected contacts, but all the contacts. -
Page 27: Call History
Call history Call history When the telephone is on standby, your attention is drawn to calls that you have not taken by the text "Missed Calls" and the flashing red LED. When the telephone is on standby and you press the dial key , the calls log opens and displays only your missed calls. -
Page 28: Other Call Log Functions
Call history Other call log functions With "Delete call logs" you can delete individual call logs or all the logs. "Call timers" shows the duration of the last call, of all outgoing con- nections, and all accepted calls, and you can reset the call time me- ter. -
Page 29: Silent Mode
Silent mode Silent mode Switches the telephone to silent mode so that you and other people, e.g., during an event, are not disturbed by it ringing. Note: It is usually better to switch the telephone off rather than put it on silent, as the caller then is then informed by text that your telephone cannot be reached. -
Page 30: Recorder
Recorder Recorder You can use the recorder to record brief voice messages or to record phone calls. E.g., you can quickly record a shopping list, or save a set of directions during a call. The recorder functionality is accessed via the "Re- corder"... -
Page 31: Options After Recording
Recorder Options after recording After recording, you can use the dial key to access the recording options. New record Starts a new recording. Play Plays back the recording you have just saved. This option is only available after saving a recording. Append Restarts the recording and adds it to the file that has just been saved. -
Page 32: Settings
Recorder Settings Here you can choose whether recordings are to be saved in the "AMR" or "WAV" file format and with lower or higher audio quality. The "WAV" and "High" choice for the audio quality delivers the best result, but also leave you with correspondingly less recording time. Play back recordings When you press the key when the telephone is on standby, the... -
Page 33: Delete All Files
Recorder Delete all files Deletes all the recordings. -
Page 34: Fm Radio
FM Radio FM radio Your telephone features an integrated FM radio. You switch it on by pushing the lower sliding switch on the left of the telephone, or via the "FM radio" item in the main menu. Note: The headset must be connected to use the radio. When you switch on the radio, the station last set starts playing and the station's frequency appears in the display. -
Page 35: Auto Search
FM Radio Auto search Automatically searches for stations and saves them to the memory fields in the channel list. Note: The automatic search overwrites the stations saved in the channel list. Settings Here you can specify whether the background playback and the loudspeaker are to be switched on or off. -
Page 36: Alarm Clock
Alarm clock Alarm clock Your telephone has an integrated alarm clock with up to five alarm times. To use your telephone as an alarm clock, select "Alarm" in the main menu. Select the alarm time that you want to edit, and press the dial key In the alarm settings, you first set whether the alarm is to be switched on or off. -
Page 37: Birthdays
Birthdays Birthdays You can use this function to manage birthdays with your telephone and remind you of them. Select the "Birthdays" item in the main menu. After selecting this function, press the dial key to create a birth- day. If a birthday has already been saved, the Options menu opens when you press the dial key . - Page 38 Birthdays phone display will show the date, time and subject, and the alarm will go off. It also shows "OK", which you can select with the dial key , and "Snooze", which you select with the hang up key . "OK" termi- nates the reminder.
-
Page 39: Calculator
Calculator Calculator Your telephone has a simple, integrated calculator. When the telephone is on standby, you access it via the Calculator item in the main menu. To use the calculator, first you enter the first number. The full stop for then entering decimal places is entered by pressing the key. -
Page 40: Settings
Settings Settings In the default setting, you get to the telephone set- tings via the Settings. Phone settings Here you specify certain telephone settings. Time and date Here you can set the date and the time. The date and time appear in the display when the telephone is on standby, but they are also re- quired for internal functions, e.g. -
Page 41: Contrast
Settings Contrast Here you can change the contrast in the display. Select a setting which enables you to easily read the text on the background. Make any change with the keys. LCD backlight Here you can specify how long the display light will remain on if no key is pressed. -
Page 42: Alert Type
Settings Note: During a call, the volume of the receiver is adjusted using the rocker switch with the + and – symbol on the left of the device. This change will then be automatically saved. Alert type Here you set whether your telephone will only ring, only vibrate, first vibrate and then ring, or ring and vibrate at the same time. -
Page 43: Call Settings
Settings Call settings This is where you set the network settings for calls. Caller ID Here you can specify whether your number is displayed to the person you are calling on outgoing calls. "Hide ID" means that your number is not displayed, while "Send ID" means that it is sent. -
Page 44: Call Barring
Settings you specify that calls are only diverted if your telephone is switched off or not logged onto the network. Select the diversion type you require with the dial key. In the sub- menu, you can then enable or disable the diversion, and query the current status with the network provider. -
Page 45: Sim Lock
Settings SIM lock Here you can specify whether the telephone queries your SIM card's PIN (personal ID number) or not when it is switched on. Switching off the PIN query is more convenient, of course, because you do not then need to make a note of the PIN and enter it each time. -
Page 46: Restore Factory Settings
Settings Restore factory settings Here you can reset the telephone to the settings it had when sup- plied. Some settings are not reset, e.g. the phone book is not deleted, the telephone password is not reset, and any saved audio files are not deleted. -
Page 47: Emergency Call
Emergency call Emergency call Your telephone features an emergency call function which is trig- gered by pressing the SOS button at the back of the device for about 2 seconds. If at least one emergency number has been configured and the emergency call button is enabled, the telephone initiates the emer- gency call when the SOS key is pressed for approximately 2 seconds. -
Page 48: The Answering Machine Problem
Emergency call The answering machine problem The telephone cannot differentiate whether the emergency call is ac- cepted by a person, an answering machine or a fax machine. Should an emergency call be accepted by an answering machine, you can end the current call by quickly pressing the hang up key . -
Page 49: Configuring The Emergency Call
Emergency call Configuring the emergency call To configure the emergency call it must be enabled, and the emer- gency text and numbers must be entered. When the telephone is on standby, select the key and then Set- tings Emergency Settings. Here, you will find all the settings for configuring the emergency call. -
Page 50: Emergency Sms Content
Emergency call Emergency SMS content This is where you enter the text which is sent as an SMS if there is an emergency call. You may change the text. Emergency alarm Here you specify if the emergency call alarm is to be played before the actual emergency call function. -
Page 51: Important Information On Emergency Call Functions
Emergency call Important information on emergency call functions Do not rely exclusively on this emergency call function. In certain situations (e.g. no network coverage or no credit for outgoing calls), the emergency call function might not operate. Make sure that no answering machines are associated with emer- gency call numbers. -
Page 52: Appendix
Your contact for services arising from guarantee obligations is the authorised dealer where you bought the device. TIPTEL will grant a guarantee of 2 years from the date of handover for the material and for the manufacturing of the telecommunications terminal unit. -
Page 53: Ce Sign
Please do not damage or remove this seal because otherwise, your guarantee will expire. The General Terms and Conditions of TIPTEL, which are part of the contract for a dealer, shall also apply. In the event of a complaint,... -
Page 54: Ecological Information
The packaging materials do not consist of plastics but of partially recycled cardboard and paper. If you do not have further use of your TIPTEL device, TIPTEL will take back the device without any charge. The device will be properly... - Page 56 Tiptel.com GmbH Business Solutions Halskestraße 1 D - 40880 Ratingen Tel.: 0900 100 – 84 78 35* Vanity Tel.: 0900 100 – TIPTEL* *(1.49 euros/min. from Deutsche Telekom landlines, Internet: www.tiptel.de varying mobile network charges possible) International: Internet: www.tiptel.com Tiptel GmbH...
Need help?
Do you have a question about the Ergophone 6040 and is the answer not in the manual?
Questions and answers