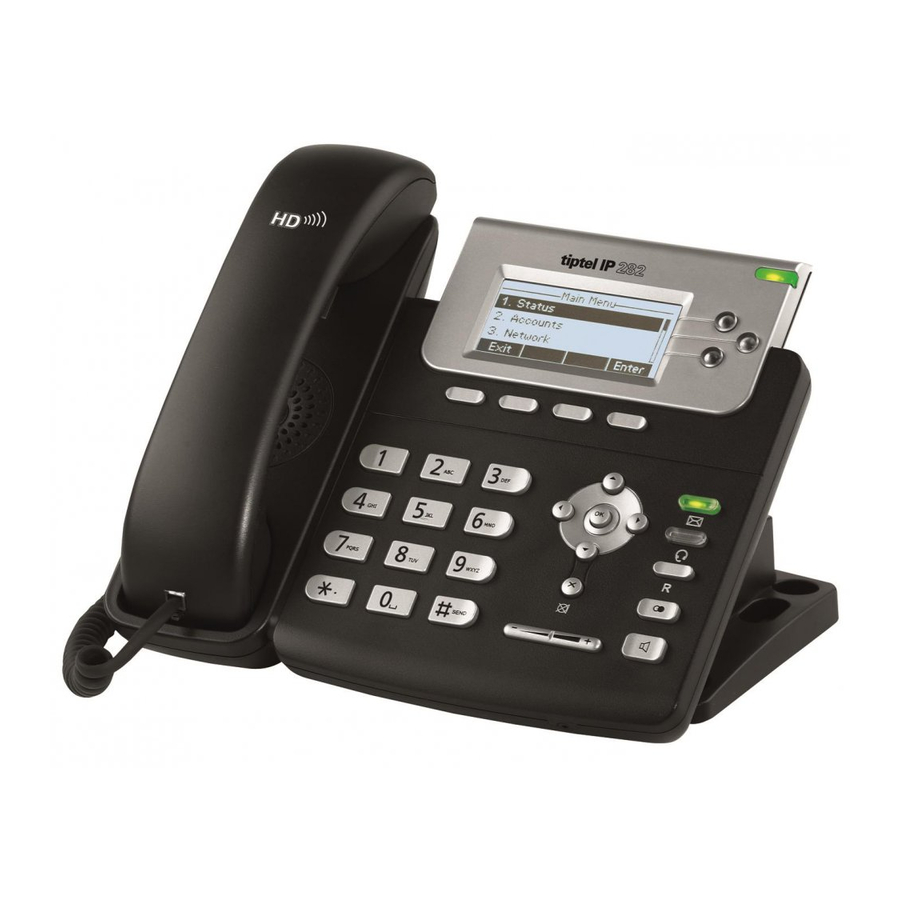
TIPTEL IP 280 Manual
Ip phone yealink sip-t20p
Hide thumbs
Also See for IP 280:
- Manual (58 pages) ,
- Auto provision manual (33 pages) ,
- Quick reference manual (20 pages)
Table of Contents
Advertisement
Quick Links
Advertisement
Table of Contents

Related Manuals for TIPTEL IP 280


Summary of Contents for TIPTEL IP 280
- Page 1 Manual (EN) tiptel IP 280 Yealink SIP-T20P tiptel...
-
Page 2: About This Guide
About This Guide Thank you for choosing this Enterprise IP Phone which is especially designed for power users in the office environment. It features fashion and sleek design, abundant telephony applications, broad interoperability with the popular 3 party VoIP products, fulfilling the VoIP deployment needs from enterprise and ITSP. -
Page 3: Table Of Contents
Tables of Contents Getting Started .................. - 1 - Packing List ..........................- 1 - Assembling the Phone ........................ - 2 - Configuration and Registration ....................- 4 - Configuring via Web Page ....................- 4 - Configuring via keypad ...................... - 5 - Overview .................... - Page 4 Dial Now .......................... - 32 - Area Code ........................- 33 - Block Out ......................... - 34 - Feature Synchronisation ....................- 35 - WatchDog ......................... - 36 - Action URL/URI ......................- 37 - Using the Basic Call Functions ............- 40 - Making a call ..........................
- Page 5 Zero-sp-touch ........................- 62 - System Log Export ......................- 63 - PCAP Trace Export ......................- 63 - 802.1X ..........................- 63 - DSS keys Configuration ......................- 64 - BLF ..........................- 64 - BLF List ........................... - 65 - Line ..........................
-
Page 6: Getting Started
Enterprise IP Phone Getting Started Getting Started Packing List The following components are included in your package: Enterprise IP Phone Phone Stand Power Adapter Handset & Handset Cord - 1 -... -
Page 7: Assembling The Phone
Enterprise IP Phone Getting Started Ethernet Cable Quick Installation Guide & Quick Reference CD Content Check this list before installation to ensure that you have received each item. If you are missing any items, contact your IP phone reseller. Assembling the Phone This section introduce how to assemble the phone with the components in the packing list:... - Page 8 Enterprise IP Phone Getting Started Stand attached 2) Connect Handset and Headset, as shown below: Note: Headset is not provided in the packing list. Please contact your distributor for more information. 3) Connect Network and Power There are two ways for network and power source connections. You can either connect the phone to the AC Power directly using the power adapter or to a PoE compliant switch or hub.
-
Page 9: Configuration And Registration
Enterprise IP Phone Getting Started The Internet Port can be also connected to Hub/Switch/IP PBX or other internet devices. The phone can also share the network connection with other network devices such as PC. Connect the phone’s PC port and computer’s Network Port together using an Ethernet cable, shown as below: Configuration and Registration If you are administrator, you need to do some simple configuration to make the phone... -
Page 10: Configuring Via Keypad
Enterprise IP Phone Getting Started Note: Using the wrong network parameters may result in inaccessibility of your phone and may also have an impact on your network performance. Please contact your network administrator. Account Settings The phone attempts to register to the SIP server using the account data provided by the automatic or manual initialization. -
Page 11: Overview
Enterprise IP Phone Using the Basic Phone Functions Overview Keypad Instruction You can check the following list which introduces the IP phone’s keypad in details: Power Indication LED It will show the power status, it will be on if the phone is powered, off if the phone is not powered,and blink when someone calls in or there is a call on mute. -
Page 12: Led Instruction
Enterprise IP Phone Using the Basic Phone Functions Audio Device Control Keys Use the audio device control keys to perform the following actions depending on your phone type: : Adjust the volume of the handset, headset, speaker and ring tone; :... -
Page 13: Icon Instruction
Enterprise IP Phone Using the Basic Phone Functions It is not active as BLF Table 3 Power Indication LED LED Status Description Steady green Power on Blinking green There is incoming call to the device, or there is a call on mute Power off Icon Instruction The IP Phone displays different kinds of icons on its LCD, you can refer to the following... -
Page 14: User Interface
Enterprise IP Phone Using the Basic Phone Functions User Interface There are two ways to customize specific options on your phones: Using keypad and display on the phone. Using Web user interface in an Internet browser from your PC; please refer to “Configuration and Registration”... - Page 15 Enterprise IP Phone Using the Basic Phone Functions --Network √ √ --Keypad Lock √ --Reset Factory √ --Set AES Key √ --Set admin PWD √ --Voice Upgrade Other Features √ --Messages √ --History √ √ --Directory Note: 1. The above table only indicates most of phone functions rather than all of them. Please refer to the relating parts for more details.
-
Page 16: Customizing Your Phone
Enterprise IP Phone Using the Basic Phone Functions Customizing Your Phone General Settings Phone Status You can view the status of your phone using the Phone interface or the Web interface. This option allows you to review: MAC; Firmware;... -
Page 17: Time And Date
Enterprise IP Phone Using the Basic Phone Functions To change the language via Phone interface: 1) Press MENU->Settings->Basic->Language. 2) Scroll through the list of available languages. 3) Press OK button when the desired language is highlighted. The language appears on the graphic display will be changed to the one you choose. 4) Press MENU key to return to the previous screen. -
Page 18: Keypad Lock
Enterprise IP Phone Using the Basic Phone Functions configuration file, If the table includes daylight saving time of your time zone, it will show the Fixed Type: By Date or By Week. And the daylight saving time is unchangeable, unless to update the AutoDST.xml via auto provision. Note: By default the time zone is +8 China(Beijing), Daylight Saving Time is Automatic. - Page 19 Enterprise IP Phone Using the Basic Phone Functions To enable keypad lock via Phone interface: 1) Press MENU->Settings->Advanced, enter the password, and then press OK button. 2) Choose Keypad Lock->OK. 3) Use the navigation key to highlight the one you want to lock. 4) Press OK button to active the change, or MENU to return to the previous screen.
-
Page 20: Audio Settings
Enterprise IP Phone Using the Basic Phone Functions Audio Settings Volume You can adjust the volume of handset/speaker/headset. To adjust the volume when you are not in an active call: 1) Press MENU->Settings->Basic. 2) Scroll to Phone Volume, and press OK button, highlight the one you want to adjust the volume, use the volume adjustment bar or navigation keys to adjust the volume. - Page 21 Enterprise IP Phone Using the Basic Phone Functions by clicking the Delete button. Note: The ring tone file of system can not be deleted. To upload the new Ring Tone via Web interface: 1) Choose Phone->Preference->Upload Ringtone. 2) Click Browse button to choose the specific ring tone file. 3) Click Upload button to upload the file.
-
Page 22: Codec Selection
Enterprise IP Phone Using the Basic Phone Functions Codec Selection The IP phone supports the following voice codecs: G.722, G.723_53, G.723_63, G.726-16, G.726-24, G.726-32, G.726-40, G.729, PCMU and PCMA You can enable/disable the desired codecs via Web interface. Please contact your System Administrator for more details about the codecs. -
Page 23: Contact Management
Enterprise IP Phone Using the Basic Phone Functions 2) Use the navigation keys to highlight the desired one in the Enable/Disable Codecs list, and press the to move to the other list. 3) Click Confirm button to save the change. Note: Codec Selection can be only set via Web interface. - Page 24 Enterprise IP Phone Using the Basic Phone Functions To add a contact via Phone interface: 1) Press MENU->Directory->Local Directory. 2) Choose a group, and press OK button. 3) Press Up/Down navigation key to ADD page, Press OK button to start adding a new contact, enter Name, phone number of the contact by the keypad.
-
Page 25: Import/Export Contact List
Enterprise IP Phone Using the Basic Phone Functions To search a contact via Phone interface: 1) Press the CONTACT hot key to enter the contact list. Press the digital number on the keypad, it will turn to the search interface automatically, and search the record in Contact. -
Page 26: Blacklist
Enterprise IP Phone Using the Basic Phone Functions 2) Browse the specific contact list file in .XML format or .csv format, and then click Import button. The imported contact lists will be shown in the directory. 3) Move the mouse to the icon , you will see the notes for parameters. -
Page 27: Other Settings
Enterprise IP Phone Using the Basic Phone Functions Other Settings Key as Send Users can set a specific button (“#” or “*”) to active as the send button. To set the send key via the IP phone interface: 1) Press MENU->Features->Key as Send->OK to enter the configuration page. 2) Press the Left/Right navigation keys to choose a button that you want to use as the send key: “#”, “*”, or disable this option. -
Page 28: Hot Line
Enterprise IP Phone Using the Basic Phone Functions Hot Line To set the hot line number via the IP phone interface: 1) Press MENU->Features->Hot Line->OK to enter the configuration page. 2) Enter the hot line number and set the HotLine Delay (for example, 20 seconds), then press the OK button to save the changes. -
Page 29: Anonymous Call
Enterprise IP Phone Using the Basic Phone Functions Anonymous call To set the anonymous call via the IP phone interface: 1) Press MENU->Features->Anonym Call->OK to enter the configuration page. 2) By the navigation keys, you can choose the Line ID. 3) Press the navigation keys to choose whether to enable the anonymous call function. -
Page 30: Auto Redial
Enterprise IP Phone Using the Basic Phone Functions the rejection anonymous call function for your IP phone automatically. Note: This configuration is only available for the current default account. 7) Press the OK button to save the changes. To set the anonymous call via the Web interface: 1) Choose Account->... -
Page 31: Auto Answer
Enterprise IP Phone Using the Basic Phone Functions seconds. 4) Press the navigation keys to choose and set the redial times. 5) Press OK button to save the changes. Note: If you enable the auto redial function, then without operations for 5 seconds in the auto redial interface, it will turn to the idle interface automatically. -
Page 32: Missed Call Log
Enterprise IP Phone Using the Basic Phone Functions 3) Use the navigation keys to enable or disable the auto answer function. The default is Disable. 4) Press the OK button to save the changes. To set Auto Answer via Web interface: 1) Choose Account->Basic->Auto Answer option. -
Page 33: Logo Customization
Enterprise IP Phone Using the Basic Phone Functions Logo Customization You can set text logo which shown in the idle screen 1) Choose Phone-> Features-> Use Logo via the Web interface, choose enable or disable in the pull-down menu. - 28 -... -
Page 34: Programmable Key
Enterprise IP Phone Using the Basic Phone Functions 2) If you choose enable, and then enter the text logo in the “Text Logo” field. 3) Click the Confirm button to save the change. Programmable Key The hot-key, navigation keys and function keys on the keypad are editable. Users can customize specific features for these keys according to their actual needs. -
Page 35: Live Dialpad
Enterprise IP Phone Using the Basic Phone Functions 2) Choose and customize specific features for these keys. 3) Click Confirm button to save the changes. Live Dialpad Defines whether to dial out the dialed number automatically. This function can only be set via the Web interface: 1) Choose Phone->Preference->Live Dialpad. -
Page 36: Replace Rule
Enterprise IP Phone Using the Basic Phone Functions Replace Rule A dial plan establishes the expected number and pattern of digits for a telephone number. This includes country codes, access codes, area codes and all combinations of digits dialed. For example if you set the Prefix as 0 and Replace as 0086 (Chinese country code), when you dial 05702000 out, the number will be replaced by 00865702000 automatically. -
Page 37: Dial Now
Enterprise IP Phone Using the Basic Phone Functions 2) Enter the desired Prefix, Replace and Account. 3) Press Add button to save the changes. 4) You can also delete a specific one from the dial plan list by pressing Del button. 5) You can select a record to modify, then click Edit button to submit. -
Page 38: Area Code
Enterprise IP Phone Using the Basic Phone Functions 2) Enter the number in Dial-now Rule and Account. 3) Press Add button to save the changes. 4) You can select a record to modify, then click Edit button to submit. 5) You can also delete a specific one from the dial plan list by pressing Del button. Note: 1. -
Page 39: Block Out
Enterprise IP Phone Using the Basic Phone Functions 2) Enter the Code and Account, set the Min Length and the Max Length option, and then click the Confirm button to save. Block Out The specific phone numbers can be forbidden to be call out from your IP phone. 1) Choose Phone->Dial Plan->Block Out. -
Page 40: Feature Synchronisation
Enterprise IP Phone Using the Basic Phone Functions Note: 1. In the Account field, you can enter 1,2,3…, “1” represents Account 1, “2” represents Account 2 ……, if the account box is empty, it mean this rule works for all accounts . Feature Synchronisation When enabled the synchronize function, configure the DND/FWD function on device or server, DND/FWD status on device and server will be in correspondence. -
Page 41: Watchdog
Enterprise IP Phone Using the Basic Phone Functions WatchDog When 'WatchDog' function is 'Enabled', phone will auto reboot after 10 seconds if some important process of phone crash. When 'Disable' the function , the phone will not reboot. Configure watchdog via web interface: Choose phone->... -
Page 42: Action Url/Uri
Enterprise IP Phone Using the Basic Phone Functions Action URL/URI Action URL: Record the operation of phone, send these corresponding information to server; Action URI: Remote control phone for corresponding operation. The operation can be recorded include: Setup Completed, Log On, Log Off, Register Failed, Off hook, On hook…etc. - Page 43 Enterprise IP Phone Using the Basic Phone Functions Action URI: Enter the “http://Phone ip/cgi-bin/ConfigManApp.com?key=xxx” in Browser address bar, the phone will realizing the corresponding function. If you not login the web with the user name and password, you will need to specify the user/password to confirm the operation.
- Page 44 Enterprise IP Phone Using the Basic Phone Functions Press Headset button: key=HEADSET Press RD button: key=RD Press navigation key: key=UP/ DOWN/ LEFT/ RIGHT To reboot the phone: key=Reboot To check the Auto provision: key=AutoP To enable DND: key=DNDOn To disable DND: key=DNDOff Dial out: http://phone IP/cgi-bin/ConfigManApp.com?number=NUMBER&outgoing_uri=URI Phone ip stand for the phone’s IP address.
-
Page 45: Using The Basic Call Functions
Enterprise IP Phone Using the Basic Phone Functions Using the Basic Call Functions Making a call Call Devices You can make a phone call via the following devices: 1) Pick up the handset, icon will be shown in the idle screen. 2) Press the Speaker button, icon will be showed in the idle screen. - Page 46 Enterprise IP Phone Using the Basic Phone Functions 2) Or choose Contact->Phone Call Info, enter the number in the Dial a Number, select the line from the Outgoing Identity list. Then click the dial button to call out. 3) Or choose Contact->Phone Call Info, click the number which you want to dial out from the call list, the phone will dial out by corresponding account.
-
Page 47: Password Dial
Enterprise IP Phone Using the Basic Phone Functions 4) You can click the Hangup button to end the call in the web page. Password dial When number entered is beginning with the password prefix, the following N numbers after the password prefix will be hidden as *, N stand for the value which you enter in the PswLength field. -
Page 48: Answering A Call
Enterprise IP Phone Using the Basic Phone Functions 1) Press the following hot keys: MENU->Features->Call Completion to enter the configuration page. 2) By the Left/Right navigation keys, choose whether to enable this option. 3) Press the OK to save your changes. Answering a call Answering an incoming call 1) If you are not on another phone, lift the handset using, or press the Speaker button... -
Page 49: Call Forward
Enterprise IP Phone Using the Basic Phone Functions Call Forward This feature allows you to forward an incoming call to another phone number e.g. a cell phone or voice mailbox. The following call forwarding events can be configured: Always: Incoming calls are immediately forwarded. ... -
Page 50: Intercom
Enterprise IP Phone Using the Basic Phone Functions Intercom Intercom mode is useful in an office environment as a quick access to connect to the operator or the secretary. To configure Intercom option via phone interface: 1) Press the following hot keys: MENU->Features->Intercom->OK to enter the configuration page. -
Page 51: During An Active Call
Enterprise IP Phone Using the Basic Phone Functions During an Active Call Mute This function allows you to mute the microphone of the active audio device during a call; you can not be heard by the other party. You can still hear all other parties while mute is enabled. -
Page 52: Call Transfer
Enterprise IP Phone Using the Basic Phone Functions To enable/disable Call Waiting via Web interface: Choose Phone->Features->Call Waiting to do the relating changes. You can also set whether to open the call waiting tone option in this page. Call Transfer You can customize your phone so that incoming calls are transferred directly to the third party such as another extension, mobile phone number, etc. -
Page 53: 3-Way Conference
Enterprise IP Phone Using the Basic Phone Functions 2) After C answered it, A and C can have a private conversation without B hearing it, then A press the TRAN button to complete the transfer. 3) A will be disconnected from the call. B can talk to C. To Semi-Attend Transfer via phone interface: 1) A and B is on an conversation, A press the TRAN button to put B on hold, then A can dial a new number C and press the OK or SEND button to call out. -
Page 54: Voicemail
Enterprise IP Phone Using the Basic Phone Functions To establish a conference: 1) Press the Conf hot key during an active call. 2) Dial the number to conference in, then press the Send hot key 3) When the call is answered, press the CONF button. 4) After starting a three way conference, press Conf button to enter Conference dialing interface and invite another party to participate in teleconference. - Page 55 Enterprise IP Phone Using the Basic Phone Functions Note: Please contact your system administrator for the connecting code. Different systems have different codes. Want to see amount of Voice mail via phone interface, must enable the Subscribe for MWI via the web interface at first. 1) Choose Account->Advanced->...
- Page 56 Enterprise IP Phone Using the Basic Phone Functions Before retrieving the new voicemail, please make sure that the connecting code has been set on the phone. - 51 -...
-
Page 57: Using The Advanced Phone Functions
Enterprise IP Phone Using the Advanced Phone Functions Using the Advanced Phone Functions Account Setting Please refer to the previous part “Configuration and Registration” for the basic account setting information. The following table lists the instruction of the field about the advanced Account Setting. -
Page 58: Dns-Srv
Enterprise IP Phone Using the Advanced Phone Functions If you make a call based on TLS and SRTP (Set the transport as TLS and the SRTP as On), the IP phone UI will display the connecting and ring back interface. If the reception also set the transport as TLS, then IP Phone UI will display the icon on both side. -
Page 59: Network Setting
Enterprise IP Phone Using the Advanced Phone Functions Network Setting PC Port Setting Please refer to the previous part “Configuration and Registration” for the basic Network WAN setting information. The following table lists the instructions of the field about the Network PC Port Setting. -
Page 60: Vlan Setting
Enterprise IP Phone Using the Advanced Phone Functions PC Port option, then press OK button to enter. 3) If you choose Bridge, it will return to the previous menu. 4) If you choose Router, you will be prompted to enter the IP, Subnet Mask, DHCP Server Disable/Enable. -
Page 61: Lldp
Enterprise IP Phone Using the Advanced Phone Functions LLDP The Link Layer Discovery Protocol (LLDP)is a vendor-neutral Layer 2 protocol that allows a network device to advertise its identity and capabilities on the local network. Enable LLDP function; the phone will go to switch to get related VLAN parameters automatically. -
Page 62: Https
Enterprise IP Phone Using the Advanced Phone Functions HTTPS This IP phone can support HTTPS (Hypertext Transfer Protocol over Secure Socket Layer). Adding SSL layer under HTTP, in short, it is a security version of HTTP. Users can set this transmission mode via web page. To configure HTTPS settings via Web interface: Go to Network->Advanced, choose WebServer option, in the pull-down menu of Type field, choose the transmission mode, and then click the Confirm button to save the... -
Page 63: Maintenance Tasks
Enterprise IP Phone Using the Advanced Phone Functions Note: For more details of the HTTPS, you can consult with your system administrator. IP phone also support Internet Protocol Version 6. Maintenance Tasks Administrator Mode The phone allows two modes to configure the phone: User Mode ... -
Page 64: Reboot
Enterprise IP Phone Using the Advanced Phone Functions Web interface. the advance settings of the phone such as Network, Account, Reset to Factory Settings via the Phone interface. The default administrator password is admin. Meanwhile the user name for Web interface access is admin. -
Page 65: Firmware Update
Enterprise IP Phone Using the Advanced Phone Functions 5) It will take a few minutes to reset, please do not power off during resetting, or it will cause flash memory error. To reset to factory via Web interface: 1) Choose Upgrade->Basic. 2) Click Reset button. -
Page 66: Decryption
Enterprise IP Phone Using the Advanced Phone Functions 1) Go to Menu->Settings->Advanced Settings-> Auto Provision. 2) Enter the URL, User Name and Password. 3) Click the Save hot key to save the changes. The parameters of the Autoprovision: Parameter Description Update Protocol The phone can be updated via TFTP, FTP or HTTP. -
Page 67: Zero-Sp-Touch
Enterprise IP Phone Using the Advanced Phone Functions Note: You can ask your system administrator for the decrypt password. Set AES Key via phone interface: 1) Go to MENU->Settings->Advanced->Set AES Key. 2) Enter the Common AES and the MAC-oriented option. 3) Press the OK button to save the changes. -
Page 68: System Log Export
Enterprise IP Phone Using the Advanced Phone Functions Enter into zero-sp-touch interface, first a countdown interface come into view, 1) Not any operation or press cancel hot key, will enter idle interface. 2) Press OK key, enter a network setting interface, press next key enter an AutoP setting interface, enter the corresponding contents;... -
Page 69: Dss Keys Configuration
Enterprise IP Phone Using the Advanced Phone Functions DSS keys Configuration The phone has 2 line keys which are able to set up to 28 functions per key. The following list shows the functions you can set on the DSS keys and provides a description for each function. -
Page 70: Blf List
Enterprise IP Phone Using the Advanced Phone Functions status (idle, ringing, or busy) of other SIP accounts. User can dial out on a BLF configured key. To assign the key as BLF: 1) Choose Phone->DSS Key->Line Key, choose one of the keys you want to make the assignment, there is a pull-down menu in the Type field, and choose BLF from the list. -
Page 71: Speed Dial
Enterprise IP Phone Using the Advanced Phone Functions Speed Dial You can configure the key as a simplified speed dial key. This key function allows you to easily access the most frequently dialed numbers. To assign the key as Speed Dial: 1) Choose Phone->DSS Key->... -
Page 72: Shared Line
Enterprise IP Phone Using the Advanced Phone Functions During a conversation, press this type of DSS key to start the recording process; if the other party hung up, your phone will turn to the idle status. Shared Line The Shared Line Appearances (SLA, which is also named as BLA) feature allows subscribers to share SIP lines and also provides status monitoring of the shared line. -
Page 73: Transfer
Enterprise IP Phone Using the Advanced Phone Functions 3) Press Confirm button to save the changes. Transfer able configure transfer perform Blind/Attended/Semi-Attended Transfer. To assign the key as Transfer: 1) Choose Phone->DSS Key-> Line Key, choose one of the keys you want to make the assignment, there is a pull-down menu in the Type field, choose Transfer from the list. -
Page 74: Call Return
Enterprise IP Phone Using the Advanced Phone Functions assignment, there is a pull-down menu in the Type field, choose Redial from the list. 2) Press Confirm button to save the changes. Call Return When the key is configured as Call Return key you are allowed to dial out the last phone call you received. -
Page 75: Group Listening
Enterprise IP Phone Using the Advanced Phone Functions Group Listening When the key is configured as Group Listening key, you are allowed to enable the Speakerphone and Handset/Headset mode at the same time. It is suitable for the group conversation which has more than one person at one side. You are able to speak and listen using handset/headset;... -
Page 76: Private Hold
Enterprise IP Phone Using the Advanced Phone Functions To assign the key as Public Hold: 1) Choose Phone->DSS Key->Line Key, choose one of the keys you want to make the assignment, there is a pull-down menu in the Type field, choose Public Hold from the list. -
Page 77: Record
Enterprise IP Phone Using the Advanced Phone Functions Record Call recording is a phone function to record the conversation in the process of dialogue. Using this feature, please pay attention to the maximum recording time and frequency in advance. Generally, it maybe a few minutes. To assign the key as Record: 1) Choose Phone->DSS Key->... -
Page 78: Local Group
Enterprise IP Phone Using the Advanced Phone Functions 3) You can also press X button to logout. 4) Press MENU hotkey to cancel the operation 5) When you status is Available, the calls will be directed to your phone. Or the status is unavailable, the calls will not be directed to your phone。... -
Page 79: Voice
Enterprise IP Phone Using the Advanced Phone Functions To edit the tone filed via Web interface: 1) Choose Phone->Tones. 2) Enter the frequency and time period(in ms) as the following format: Frequency /Time Period (for example 400/200). 3) Press Confirm button to save the changes, Cancel to cancel the changes. Note: Please contact your system administrator for more information about the frequency and time period parameters. -
Page 80: Ring
Enterprise IP Phone Using the Advanced Phone Functions 3) Press Confirm button to save the changes, Cancel to cancel the changes. Ring Users can group your contacts, and then set the ringing tone for each group. To edit the Ring option via Web interface: 1) Choose Phone->Ring. - Page 81 Enterprise IP Phone Using the Advanced Phone Functions 2) Internal Ringer Text: To set group name. For example, family. 3) Internal Ringer File: To choose a special ring tone for the group. 4) Click the Confirm button to save the changes. - 76 -...
-
Page 82: Trouble Shooting
Enterprise IP Phone Trouble Shooting Trouble Shooting I can not register to the server? 1) Check the IP address. If you set your WAN port in DHCP mode, please make sure that your DHCP server is on. 2) Check your gateway. 3) Check your DNS server. - Page 83 Enterprise IP Phone Trouble Shooting How to update the firmware? 1) Enter the webpage of your phone, go to Upgrade, then you can find the option” Select and Upgrade Firmware” at the bottom of the page. 2) Select the file to update, then click the Upgrade button. Note: Make sure the firmware you choose is provided by your service provider, or the device will probably crash after the update.
- Page 84 Tiptel.com GmbH Business Solutions Halskestraße 1 D - 40880 Ratingen Tel.: 0900 100 – 84 78 35* Vanity Tel.: 0900 100 – TIPTEL* *(1.49 euros/min. from Deutsche Telekom landlines, Internet: www.tiptel.de mobile network charges may vary) International: Internet: www.tiptel.com Tiptel GmbH...
Need help?
Do you have a question about the IP 280 and is the answer not in the manual?
Questions and answers