Table of Contents
Advertisement
Available languages
Available languages
ATTACH YOUR RECEIPT HERE
Serial Number ________________________________ Purchase Date _________________________________
Questions, problems, missing parts? Before returning to your retailer, call our
customer service department at 1-877-447-4768, 8:30 a.m. – 4:30 p.m. CST,
Monday – Friday or log on to customerservice@ghpgroupinc.com.
70-10-583
Charcoal Offset
Vertical Smoker
1
Heavy-Duty
& Grill
MODEL #DGSS1382VCS /
DGSS1382VCS-D
Français p. 26
Español p. 51
Rev. 9/21/16
Advertisement
Chapters
Table of Contents

Related Manuals for Dyna-Glo DGSS1382VCS


Summary of Contents for Dyna-Glo DGSS1382VCS
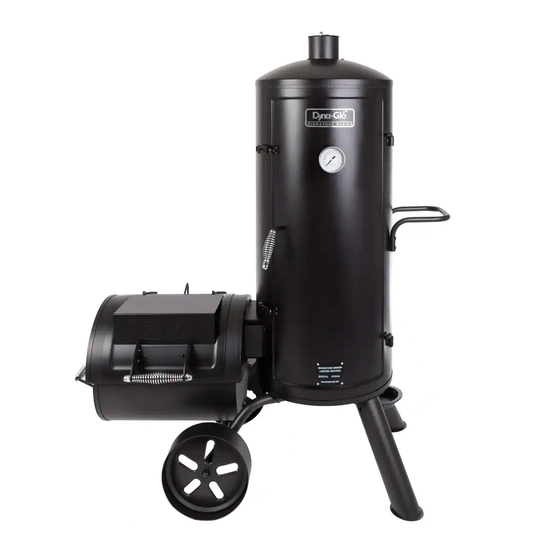
- Page 1 Heavy-Duty Charcoal Offset Vertical Smoker & Grill MODEL #DGSS1382VCS / DGSS1382VCS-D Français p. 26 Español p. 51 ATTACH YOUR RECEIPT HERE Serial Number ________________________________ Purchase Date _________________________________ Questions, problems, missing parts? Before returning to your retailer, call our customer service department at 1-877-447-4768, 8:30 a.m. – 4:30 p.m. CST, Monday –...
-
Page 2: Table Of Contents
TABLE OF CONTENTS Safety Information ........................2 Package Contents ........................4 Hardware Contents ........................5 Preparation ..........................5 Assembly Instructions ........................ 6 Operation Instructions ......................... 18 Tips On Smoking ......................... 20 Care and Maintenance ........................ 22 Warranty ............................23 Replacement Parts List ......................24 SAFETY INFORMATION Please read and understand this entire manual before attempting to assemble, operate or install the product. -
Page 3: Safety Information
SAFETY INFORMATION • DO NOT use this product in a manner other than its intended purpose. It is NOT intended for commercial use. It is NOT intended to be installed or used in or on a recreational vehicle and/or boats. •... -
Page 4: Package Contents
PACKAGE CONTENTS PART DESCRIPTION QUANTITY PART DESCRIPTION QUANTITY Smoker body Offset damper plate Temperature gauge with nut Offset coupling bracket Sausage hooks Charcoal grate Side access door Cooking grate - offset Cooking grate - smoker Side handle - access tray body Access tray Side handle - smoker body... -
Page 5: Hardware Contents
HARDWARE CONTENTS M6 x 45 M6 x 30 M6 x 12 M6 Nut M12 Nut M6 Lock Nut Bolt Bolt Bolt Qty. 4 Qty. 33 Qty. 9 Qty. 3 Qty. 2 Qty. 1 PREPARATION Before beginning assembly of product, make sure all parts are present. Compare parts with package contents list and hardware contents above. -
Page 6: Assembly Instructions
ASSEMBLY INSTRUCTIONS CAUTION: This unit is HEAVY! Do not attempt to stand the unit upright without assistance! Remove the preinstalled bolt and washer from the bottom door hinge on the smoker body (A). Unlatch the smoker door and remove the door by pulling up from hinges on smoker body (A). - Page 7 ASSEMBLY INSTRUCTIONS CAUTION: This unit is HEAVY! Do not attempt to lay the unit on its side without assistance! Attach the right front and right rear legs (M) using three M6 x 12 bolts (BB) per leg. Attach the left leg assembly (I) using three M6 x 45 bolts (CC).
- Page 8 ASSEMBLY INSTRUCTIONS Insert the edge of the offset lid bracket (Y) into the slotted opening on the offset top section (W). Attach using one M6 x 12 bolt (BB) and one M6 nut (DD). Hardware Used M6 x 12mm Bolt M6 Nut Attach the offset bottom section (U) to the top section (W) using six M6 x 12 bolts (BB).
- Page 9 ASSEMBLY INSTRUCTIONS Insert the offset firebox coupling (C1) through the opening on the top section of the offset (W) and attach with four M6 x 12 bolts (BB). Hardware Used M6 x 12mm Bolt Attach the offset coupling brackets (P) using four M6 x 12 bolts (BB).
- Page 10 ASSEMBLY INSTRUCTIONS CAUTION: This unit is HEAVY! Do not attempt to stand the unit upright without assistance! Attach the offset firebox to the smoker body (A) using four M6 x 12 bolts (BB). Hardware Used M6 x 12mm Bolt Attach the preinstalled offset support bracket on the left leg assembly (I) to the bottom section of the offset (U) using two M6 x 12 bolts (BB) and two M6 nuts (DD).
- Page 11 ASSEMBLY INSTRUCTIONS Rest the inner ring of the sausage hooks (C) on the bottom brackets of the smoke stack (Z). Insert the smoke stack (Z) up through the opening at the top of the smoker body (A) and secure with three M6 x 12 bolts (BB).
- Page 12 ASSEMBLY INSTRUCTIONS Hang the grease cup support (K) from the holes on each of the right legs (M). Place the grease cup (L) in the support (K). Install the smoker body door and reattach the preinstalled bolt and washer.
- Page 13 ASSEMBLY INSTRUCTIONS Attach the door handle assembly (B1) using the pre-installed flat washer, spring washer and M8 nut. Attach the temperature gauge (B) by inserting the probe through the threaded opening on the smoker body door and turning clockwise. NOTE: The alignment of the temperature gauge can be adjusted by turning the preinstalled nut clockwise (or counter-clockwise) prior to installing.
- Page 14 ASSEMBLY INSTRUCTIONS Attach the offset lid handle (V) to the offset lid (X) using the preinstalled bolts and nuts. Attach the offset lid (X) to the offset firebox using the preinstalled bolt and washer. Preinstalled bolt and washer...
- Page 15 ASSEMBLY INSTRUCTIONS Install the side access door (D) onto the smoker body (A). Attach the side handle (S) to the access tray (T) using two M6 x 12 bolts (BB) and two M6 nuts (DD). Hardware Used M6 x 12mm Bolt M6 Nut...
- Page 16 ASSEMBLY INSTRUCTIONS Attach the offset damper plate (O) to the access tray (T) using one M6 x 12 bolt (BB) and one M6 lock nut (FF). Hardware Used M6 x 12mm Bolt M6 Lock Nut Place the charcoal grate (Q) inside the access tray (T) and slide the tray into the offset smoker box.
- Page 17 ASSEMBLY INSTRUCTIONS Installing the Cooking Grates & Water Bowl Install the offset cooking grates (R) into the offset firebox. Place the water bowl support (G) on the bottom bracket inside the smoker body (A) and place the water bowl (J) on the water bowl support (G).
-
Page 18: Operation Instructions
OPERATING INSTRUCTIONS BEFORE FIRST USE Remove all hangings or plastic straps, if present. It is important to "season" the smoker & grill, before cooking food. Seasoning seals the paint and interior to enhance flavoring, durability and overall performance. To season your smoker and grill, simply use it as you normally would without adding food.. You will need to follow all of the lighting and operating procedures in the next few sections of this manual. - Page 19 OPERATING INSTRUCTIONS Lighting Instructions (Continued) Step 3 After 20-25 minutes, charcoal should be ready for cooking and/or adding woodchips. Refer to the next section before adding wood chips to pre-lit charcoal. DANGER: Closing the smoker body door and offset lid during the lighting procedure could trap fumes from the charcoal lighting fluid in the smoker boxes and may result in a flash- fire or explosion when door is opened, resulting in property loss, personal injury or death.
- Page 20 • Small wood chips work best inside the wood chip tray. • Use dry hardwoods such as hickory, pecan, apple, cherry or mesquite. • To produce more smoke and prevent fast burning, pre-soak the wood chips in a separate bowl of water for at least 30 minutes, or wrap the chips in perforated aluminum foil.
- Page 21 SUGGESTED SMOKING AND MEAT TEMPERATURES Smoking Temperatures Accurate smoking temperatures are critical for safely cooking food when meat probes are not available. Please understand that using the factory installed temperature gauge is an acceptable tool for smoking food; but it’s not always the ideal means of measuring the most accurate smoking temperature because internal smoker temperatures can vary between the top and bottom cooking grates.
-
Page 22: Care And Maintenance
CARE AND MAINTENANCE AFTER USE SAFETY AND MAINTENANCE WARNING • Use caution when lifting and moving the smoker to avoid strain injuries. Two people are recommended to lift or move the smoker. • DO NOT store the smoker near gasoline or other combustible liquids or where combustible vapors may be present. -
Page 23: Warranty
This warranty gives you specific legal rights, and you may have other rights that vary from state to state. GHP Group Inc. 6440 W. Howard Street Niles, IL, USA 60714-3302 Item name: Heavy-Duty Charcoal Offset Vertical Smoker Model #: DGSS1382VCS / DGSS1382VCS-D... -
Page 24: Replacement Parts List
Smoker body door (without Dyna Glo Offset charcoal grate 70-01-536 Offset coupling badge, door latch or temperature gauge) 70-01-544 bracket (1pc) 70-01-537 Dyna-Glo badge 70-01-525 Offset damper plate 70-01-538 Wheel - left / right (1pc) 70-01-516 Hardware pack 70-09-514 Instruction manual 70-10-583... - Page 25 REPLACEMENT PARTS LIST 70-10-583 Printed in China...
- Page 26 Fumoir vertical à charbon haute-capacité et gril décalé MODÈLE n DGSS1382VCS / DGSS1382VCS-D AGRAFEZ VOTRE FACTURE ICI Numéro de série ________________________________ Date d’achat _________________________________ Des questions, des problèmes, des pièces manquantes? Avant de retourner l’article au détaillant, appelez notre service à la clientèle au 1 877 447-4768, entre 8 h 30 et 16 h 30 (HNC), du lundi au vendredi, ou écrivez à...
- Page 27 TABLE DES MATIÈRES Informations relatives à la sécurité ....................28 Contenu de l’emballage ....................... 30 Quincaillerie fournie ........................31 Préparation ..........................31 Instructions d'assemblage ......................32 Instructions de fonctionnement ....................44 Conseils sur le fumage ........................ 46 Entretien et maintenance ......................48 Garantie ............................
-
Page 28: Informations Relatives À La Sécurité
INFORMATIONS RELATIVES À LA SÉCURITÉ • N’ENTREPOSEZ ET N’UTILISEZ PAS le produit dans un endroit accessible aux enfants ou aux animaux. Rangez-le dans un endroit sec et protégé. • NE LAISSEZ PAS l’appareil sans surveillance pendant qu’il est en fonction. •... -
Page 29: Contenu De L'emballage
CONTENU DE L’EMBALLAGE PIÈCE DESCRIPTION QUANTITÉ PIÈCE DESCRIPTION QUANTITÉ Bâti du fumoir Support de raccordement du foyer décalé Jauge de température avec écrou Grille à charbon Crochets à saucisses Grille de cuisson – foyer décalé Porte d’accès latérale Poignée latérale – tiroir d’accès Grille de cuisson –... -
Page 30: Quincaillerie Fournie
QUINCAILLERIE FOURNIE Boulon Boulon Boulon Écrou M6 Écrou M12 Écrou de M6 x 30 mm M6 x 12 mm M6 x 45 mm blocage M6 Qté 4 Qté 33 Qté 9 Qté 2 Qté 3 Qté 1 PRÉPARATION Avant de commencer l’assemblage du produit, assurez-vous que toutes les pièces sont présentes. -
Page 31: Instructions D'assemblage
INSTRUCTIONS D’ASSEMBLAGE MISE EN GARDE : Cet appareil est LOURD! N’essayez pas de placer le fumoir à la verticale sans aide! Retirez le boulon et la rondelle préinstallés sur la charnière de la porte inférieure du bâti du fumoir (A). Ouvrez la porte du fumoir et retirez-la en tirant vers le haut à... - Page 32 INSTRUCTIONS D’ASSEMBLAGE MISE EN GARDE : Cet appareil est LOURD! N’essayez pas de déposer le fumoir sur le côté sans aide! Fixez les pieds de droite avant et arrière (M) à l’aide de trois (3) boulons M6 x 12 mm (BB) par pied.
- Page 33 INSTRUCTIONS D’ASSEMBLAGE Insérez le côté du support du couvercle du foyer décalé (Y) dans l’ouverture sur la partie supérieure du foyer décalé (W). Fixez le support à l’aide d’un (1) boulon M6 x 12 mm (BB) et d'un (1) écrou M6 (DD). Matériel utilisé...
- Page 34 INSTRUCTIONS D’ASSEMBLAGE Insérez le raccordement du foyer décalé (C1) dans l’ouverture sur la partie supérieure du foyer décalé (W) et fixez-le à l’aide de quatre (4) boulons M6 x 12 mm (BB). Matériel utilisé Boulon M6 x 12 mm Fixez les supports de raccordement (P) à l’aide de quatre (4) boulons M6 x 12 mm (BB).
- Page 35 INSTRUCTIONS D’ASSEMBLAGE MISE EN GARDE : Cet appareil est LOURD! N’essayez pas de placer le fumoir à la verticale sans aide! Fixez le foyer décalé au bâti du fumoir (A) à l’aide de quatre (4) boulons M6 x 12 mm (BB). Matériel utilisé...
- Page 36 INSTRUCTIONS D’ASSEMBLAGE Posez le cercle intérieur des crochets à saucisses (C) sur les supports inférieurs de la cheminée (Z). Insérez la cheminée (Z) vers le haut par l’ouverture au sommet du bâti du fumoir (A) et fixez-la à l’aide de trois (3) boulons M6 x 12 mm (BB). Matériel utilisé...
- Page 37 INSTRUCTIONS D’ASSEMBLAGE Fixez le support du récupérateur de graisse (K) à l’aide des trous sur les deux pieds droits (M). Placez le récupérateur de graisse (L) dans le support (K). Installez la porte du bâti du fumoir et rattachez le boulon et la rondelle préinstallés.
- Page 38 INSTRUCTIONS D’ASSEMBLAGE Fixez l’assemblage de la poignée (B1) à l’aide de la rondelle plate, de la rondelle élastique et de l’écrou M8 préinstallés. Fixez la jauge de température (B) en insérant la sonde par l’ouverture filetée de la porte du bâti du fumoir et en tournant dans le sens horaire.
- Page 39 INSTRUCTIONS D’ASSEMBLAGE Fixez la poignée du couvercle du foyer décalé (V) au couvercle du foyer décalé (X) à l’aide des boulons et des rondelles préinstallés. Fixez le couvercle du foyer décalé (X) à la chambre de combustion du foyer décalé à l’aide du boulon et de la rondelle préinstallés.
- Page 40 INSTRUCTIONS D’ASSEMBLAGE Installez la porte d’accès latérale (D) sur le bâti du fumoir (A). Fixez la poignée latérale (S) au tiroir d’accès (T) à l’aide de deux (2) boulons M6 x 12 mm (BB) et de deux (2) écrous M6 (DD). Matériel utilisé...
- Page 41 INSTRUCTIONS D’ASSEMBLAGE Fixez le registre du foyer décalé (O) au tiroir d’accès (T) à l’aide d’un (1) boulon M6 x 12 mm (BB) et d’un (1) écrou de blocage M6 (FF). Matériel utilisé Boulon M6 x 12 mm Écrou de blocage M6 Placez la grille à...
- Page 42 INSTRUCTIONS D’ASSEMBLAGE Installation des grilles de cuisson et du réservoir d’eau Installez les grilles de cuisson du foyer décalé (R) dans la chambre de combustion du foyer décalé. Placez le support du réservoir d’eau (G) sur le support inférieur à l’intérieur du bâti du fumoir (A) et placez le réservoir d’eau (J) sur le support du réservoir d’eau (G).
-
Page 43: Instructions De Fonctionnement
INSTRUCTIONS DE FONCTIONNEMENT AVANT LA PREMIÈRE UTILISATION Retirez tous les emballages et toutes les attaches de plastique, le cas échéant. Il est important de « culotter » le fumoir et gril avant la première utilisation. Le culottage permet de sceller la peinture et l’intérieur de l’appareil pour améliorer le goût des aliments, en plus d’augmenter la durabilité... - Page 44 INSTRUCTIONS DE FONCTIONNEMENT Instructions d’allumage (suite) Étape 3 Après 20 à 25 minutes, les charbons devraient être prêts pour la cuisson ou pour l’ajout de copeaux de bois. Reportez-vous à la prochaine section avant d’ajouter des copeaux sur les charbons allumés. DANGER : La fermeture de la porte du fumoir et du couvercle du foyer décalé...
-
Page 45: Conseils Sur Le Fumage
CONSEILS SUR LE FUMAGE Le fumage d’aliments est différent des grillades. Le fumage se fait généralement lentement et à des températures plus basses que la cuisson. La fumée produite par le bois s’infuse d’elle-même dans la viande, ce qui lui confère ce délicieux goût de fumée. La cuisson normale, elle, se fait beaucoup plus rapidement et à... - Page 46 SUGGESTIONS SUR LES TEMPÉRATURES DE FUMAGE ET DE CUISSON DE LA VIANDE Températures de fumage Des températures de fumage précises sont essentielles pour faire cuire les aliments de manière sécuritaire si vous ne disposez pas d’une sonde thermique. Veuillez noter que la jauge de température préinstallée est un outil acceptable pour le fumage des aliments, mais que ce n’est pas toujours le moyen idéal pour mesurer la température exacte de fumage, car il peut y avoir une différence de température à...
-
Page 47: Entretien Et Maintenance
ENTRETIEN ET MAINTENANCE SÉCURITÉ ET ENTRETIEN APRÈS USAGE AVERTISSEMENT • Soyez prudent lorsque vous soulevez et déplacez le fumoir afin d’éviter les douleurs et les blessures. Il est conseillé de s’y prendre à deux pour le soulever ou le déplacer. •... -
Page 48: Garantie
GHP Group, Inc. 6440 W. Howard St. Niles, IL, États-Unis 60714-3302 Nom de l’article : Fumoir vertical à charbon haute-capacité et gril décalé de modèle : DGSS1382VCS/DGSS1382VCS-D... -
Page 49: Liste Des Pièces De Rechange
Grille de cuisson du foyer 70-01-524 décalé (1) 70-01-535 Porte du bâti du fumoir (sans Grille à charbon du foyer décalé insigne Dyna-Glo, loquet de la 70-01-536 porte ou jauge de température) 70-01-544 Support de raccordement du Insigne Dyna-Glo foyer décalé (1) - Page 50 LISTE DES PIÈCES DE RECHANGE 70-10-583 Imprimé en Chine...
- Page 51 Ahumador y parrilla vertical lateral a carbón de gran potencia MODELO N.º DGSS1382VCS/ DGSS1382VCS-D ADJUNTE SU RECIBO AQUÍ Número de serie ______________________________ Fecha de compra ________________________________ ¿Dudas, problemas, piezas faltantes? Antes de volver a la tienda, llame a nuestro Departamento de Atención al Cliente al 1-877-447-4768, de lunes a viernes de 8:30 a 16:30 (hora central estándar), o escriba a customerservice@ghpgroupinc.com.
- Page 52 CONTENIDO Información de seguridad ......................54 Contenido del paquete ........................ 56 Herramientas y tornillería ......................57 Preparación ..........................57 Instrucciones de ensamblaje ....................... 58 Instrucciones de funcionamiento ....................70 Consejos para ahumar ........................ 72 Cuidado y mantenimiento ......................74 Garantía ............................75 Lista de piezas de repuesto ......................
-
Page 53: Información De Seguridad
INFORMACIÓN DE SEGURIDAD • NO utilice ni guarde esta unidad en un área a la que podrían acceder niños o mascotas. Guarde esta unidad en un lugar seco y protegido. • NO deje desatendida la unidad mientras está en uso. •... -
Page 54: Contenido Del Paquete
CONTENIDO DEL PAQUETE PIEZA DESCRIPCIÓN CANTIDAD PIEZA DESCRIPCIÓN CANTIDAD Estructura del ahumador Abrazadera de acoplamiento del conjunto lateral Indicador de temperatura con tuerca Rejilla para carbón Ganchos para salchichas Rejilla para cocinar - conjunto lateral Puerta de acceso lateral Manija lateral - bandeja de acceso Rejilla para cocinar - estructura del ahumador Bandeja de acceso... -
Page 55: Herramientas Y Tornillería
HERRAMIENTAS Y TORNILLERÍA Perno Perno Perno Tuerca M6 Tuerca M12 Contratuerca M6 M6 × 30 M6 × 12 M6 × 45 Cant. 4 Cant. 33 Cant. 3 Cant. 9 Cant. 2 Cant. 1 PREPARACIÓN Antes de comenzar a ensamblar el producto, asegúrese de tener todas las piezas. Compare las piezas con la lista del contenido del paquete, y con las herramientas y tornillería que figuran más arriba. -
Page 56: Instrucciones De Ensamblaje
INSTRUCCIONES DE ENSAMBLAJE PRECAUCIÓN: esta unidad es PESADA. No intente colocar la unidad en posición vertical sin ayuda. Quite el perno y la arandela preinstalados de la bisagra inferior de la puerta de la estructura del ahumador (A). Destrabe la puerta del ahumador y tire hacia arriba para sacarla de las bisagras de la estructura del ahumador (A). - Page 57 INSTRUCCIONES DE ENSAMBLAJE PRECAUCIÓN: esta unidad es PESADA. No intente colocar la unidad de costado sin ayuda. Fije la pata frontal derecha y la pata trasera derecha (M) utilizando tres pernos M6 × 12 (BB) en cada pata. Fije el conjunto de patas izquierdas (I) utilizando tres pernos M6 ×...
- Page 58 INSTRUCCIONES DE ENSAMBLAJE Inserte el borde de la abrazadera de la tapa del conjunto lateral (Y) en la apertura ranurada de la sección superior del conjunto lateral (W). Fíjela utilizando un perno M6 × 12 (BB) y una tuerca M6 (DD). Herramientas y tornillería utilizadas Perno ×...
- Page 59 INSTRUCCIONES DE ENSAMBLAJE Inserte el acoplamiento de la cámara de combustión del conjunto lateral (C1) en la apertura de la sección superior del conjunto lateral (W) y fíjelo con cuatro pernos M6 × 12 (BB). Herramientas y tornillería utilizadas Perno ×...
- Page 60 INSTRUCCIONES DE ENSAMBLAJE PRECAUCIÓN: esta unidad es PESADA. No intente colocar la unidad en posición vertical sin ayuda. Fije la cámara de combustión del conjunto lateral a la estructura del ahumador (A) utilizando cuatro pernos M6 × 12 (BB). Herramientas y tornillería utilizadas Perno ×...
- Page 61 INSTRUCCIONES DE ENSAMBLAJE Apoye el aro interno de los ganchos para salchichas (C) en las abrazaderas inferiores de la chimenea (Z). Inserte la chimenea (Z) en la apertura de la parte superior de la estructura del ahumador (A) y fíjela con tres pernos M6 ×...
- Page 62 INSTRUCCIONES DE ENSAMBLAJE Cuelgue el soporte de la grasera (K) en los orificios de cada una de las patas derechas (M). Coloque la grasera (L) en el soporte (K). Instale la puerta de la estructura del ahumador y vuelva a colocar el perno y la arandela preinstalados.
- Page 63 INSTRUCCIONES DE ENSAMBLAJE Instale el conjunto de la manija de la puerta (B1) utilizando la arandela plana, la arandela de resorte y la tuerca M8 preinstaladas. Coloque el indicador de temperatura (B) insertando la sonda térmica en el orificio roscado de la puerta de la estructura del ahumador y girando en el sentido de las agujas del reloj.
- Page 64 INSTRUCCIONES DE ENSAMBLAJE Fije la manija de la tapa del conjunto lateral (V) a la tapa del conjunto lateral (X) utilizando los pernos y las tuercas preinstalados. Fije la tapa del conjunto lateral (X) a la cámara de combustión del conjunto lateral utilizando el perno y la tuerca preinstalados.
- Page 65 INSTRUCCIONES DE ENSAMBLAJE Instale la puerta de acceso lateral (D) en la estructura del ahumador (A). Fije la manija lateral (S) a la bandeja de acceso (T) utilizando dos pernos M6 × 12 (BB) y dos tuercas M6 (DD). Herramientas y tornillería utilizadas Perno ×...
- Page 66 INSTRUCCIONES DE ENSAMBLAJE Fije el plato regulador de tiro del conjunto lateral (O) a la bandeja de acceso (T) utilizando un perno M6 × 12 (BB) y una contratuerca M6 (FF). Herramientas y tornillería utilizadas Perno × 1 M6 × 12 mm Contratuerca ×...
- Page 67 INSTRUCCIONES DE ENSAMBLAJE Cómo instalar las rejillas para cocinar y el contenedor de agua Instale las rejillas para cocinar del conjunto lateral (R) en la cámara de combustión del conjunto lateral. Coloque el soporte del contenedor de agua (G) en la abrazadera inferior que se encuentra en el interior de la estructura del ahumador (A) e instale el contenedor (J) en el soporte (G).
-
Page 68: Instrucciones De Funcionamiento
INSTRUCCIONES DE FUNCIONAMIENTO ANTES DE UTILIZAR LA UNIDAD POR PRIMERA VEZ Quite todas las presillas o las fajas de plástico, si están presentes. Es importante "curar" el ahumador y parrilla antes de cocinar alimentos. Este proceso sella la pintura y el interior para mejorar el sabor, la durabilidad y el rendimiento en general. Para curar el ahumador y parrilla, simplemente utilícelo como lo haría normalmente pero sin agregar alimentos. - Page 69 INSTRUCCIONES DE FUNCIONAMIENTO Instrucciones de encendido (continuación) Paso 3 Después de 20 a 25 minutos, el carbón estará listo para cocinar y/o agregarle viruta de madera. Consulte la sección siguiente antes de agregar viruta de madera al carbón preencendido. PELIGRO: si la puerta de la estructura del ahumador y la tapa del conjunto lateral se cierran durante el procedimiento de encendido, el humo proveniente del líquido para encender carbón podría quedar atrapado en las estructuras del ahumador y se podría producir una combustión o explosión al abrir la puerta, lo que podría provocar...
-
Page 70: Consejos Para Ahumar
CONSEJOS PARA AHUMAR El proceso para ahumar alimentos es distinto del proceso para asar alimentos. En general, el proceso para ahumar se realiza lentamente y a una temperatura más baja que el proceso para asar. El humo producido por la madera penetra en la carne dándole ese exquisito sabor ahumado. El proceso para asar es un proceso de cocción mucho más rápido que se realiza a temperaturas más altas. - Page 71 TEMPERATURAS SUGERIDAS PARA AHUMAR Y PARA LA CARNE Temperaturas para ahumar Una temperatura precisa para ahumar es fundamental para cocinar los alimentos de forma segura cuando no se dispone de una sonda térmica para carne. Tenga en cuenta que el indicador de temperatura instalado de fábrica es una herramienta aceptable para ahumar alimentos, pero no siempre es el medio ideal para medir la temperatura más precisa para ahumar ya que las temperaturas internas del ahumador pueden variar entre la rejilla para cocinar superior y la...
-
Page 72: Cuidado Y Mantenimiento
CUIDADO Y MANTENIMIENTO SEGURIDAD Y MANTENIMIENTO DESPUÉS DEL USO ADVERTENCIA • Tenga precaución al levantar y mover el ahumador para evitar lesiones por esfuerzo. Se recomienda levantar o mover el ahumador entre dos personas. • NO guarde el ahumador cerca de gasolina u otros líquidos combustibles o donde podría haber vapores combustibles. -
Page 73: Garantía
Esta garantía otorga derechos legales específicos, y podría haber otros derechos aplicables según el estado. GHP Group Inc. 6440 W. Howard Street Niles, IL, EE. UU. 60714-3302 Nombre del artículo: Ahumador vertical a carbón de gran potencia con conjunto lateral N.º de modelo: DGSS1382VCS/DGSS1382VCS-D... -
Page 74: Lista De Piezas De Repuesto
(sin placa Dyna Glo, ni Abrazadera de acoplamiento del cerrojo de puerta ni indicador de conjunto lateral (1 pieza) 70-01-537 temperatura) 70-01-544 Plato regulador de tiro del Placa Dyna-Glo conjunto lateral 70-01-538 70-01-525 Rueda - izquierda/derecha Paquete de herramientas y tornillería (1 pieza) 70-01-516... - Page 75 LISTA DE PIEZAS DE REPUESTO 70-10-583 Impreso en China...
Need help?
Do you have a question about the DGSS1382VCS and is the answer not in the manual?
Questions and answers