Table of Contents
Advertisement
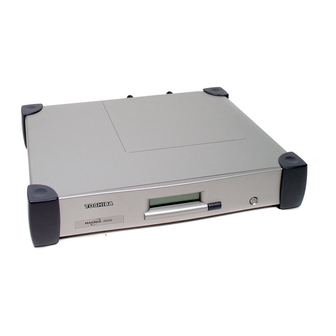
Toshiba Magnia
SG20 Appliance
Server User's Guide
If you need assistance, use one of the following:
❖
www.support.toshiba.com
View the latest support bulletins, download software upgrades, and view detailed
installation instructions.
❖
www.applianceservers.toshiba.com
View the latest SG20 information
❖
®
InTouch
Calling within the United States (800) 457-7777
Calling from outside the United States (949) 859-4273
TOSHIBA
Center
®
SV137-1002M4
1
Advertisement
Table of Contents

Related Manuals for Toshiba Magnia SG20


Summary of Contents for Toshiba Magnia SG20
- Page 1 ® Toshiba Magnia SG20 Appliance Server User’s Guide If you need assistance, use one of the following: ❖ www.support.toshiba.com View the latest support bulletins, download software upgrades, and view detailed installation instructions. ❖ www.applianceservers.toshiba.com View the latest SG20 information ❖...
-
Page 2: Fcc Notice
NOTE: Only peripherals complying with the FCC Class B limits may be attached to this device. Operation with non-compliant peripherals or peripherals not recommended by Toshiba is likely to result in interference to radio and TV reception. Shielded cables must be used between the external devices and the unit's printer port. - Page 3 1997 This product is carrying the CE-Mark in accordance with the related European Directives. Responsible for CE-Marking is Toshiba Europe, Hammfeldamm 8, 41460 Neuss, Germany. FCC Requirements The following information is pursuant to FCC 47 CFR, Part 68 and refers to internal modems.
-
Page 4: Type Of Service
FCC. In the event repairs are ever needed on your modem, they should be performed by Toshiba America Information Systems, Inc. or an authorized representative of Toshiba America Information Systems, Inc. - Page 5 This guide is copyrighted by Toshiba America Information Systems, Inc. with all rights reserved. Under the copyright laws, this guide cannot be reproduced in any form without the prior written permission of Toshiba. No patent liability is assumed, however, with respect to the use of the information contained herein.
-
Page 6: Important Safety Instructions
Red Hat Web site at http://www.redhat.com. The software installed on the Magnia SG20 is a modular operating system made up of hundreds of individual software components, each of which was written and copyrighted individually. Each component has its own applicable end user... - Page 7 All of the software and documentation developed or created by or for TOSHIBA are proprietary products of TOSHIBA and are protected by copyright laws, international treaty provisions, and other applicable laws.
- Page 8 PERFORMANCE OF THE SOFTWARE, AND AS TO THE ACCURACY AND COMPLETENESS OF THE DOCUMENTATION, IS WITH YOU. IN NO EVENT WILL TOSHIBA BE LIABLE TO YOU FOR DAMAGES, INCLUDING ANY GENERAL, SPECIAL, INCIDENTAL OR CONSEQUENTIAL DAMAGES ARISING OUT OF OR IN...
- Page 9 Trademarks Magnia is a registered trademark and InTouch is a service mark of Toshiba America Information Systems, Inc. and/or Toshiba Corporation. Apple and Macintosh are registered trademarks of Apple Computer, Inc. Ethernet is a registered trademark of Xerox, Inc. Microsoft, Outlook, Windows, and Windows NT are registered trademarks of Microsoft Corporation.
-
Page 10: Table Of Contents
Back of the Magnia SG20 ............... 25 Turning on the Magnia SG20..............26 Connecting the first client computer using the seven LAN ports....26 Connecting a printer to the Magnia SG20 (optional) ......... 27 Connecting to the Internet ................. 28 Before You Begin..................28 Configuring the first client computer............ - Page 11 Mapping drives using the Windows XP operating system ....57 Technical information on file sharing ..........57 Sharing a printer..................58 Connecting the printer to the Magnia SG20........58 Connecting a client computer to the network printer......58 Deleting print jobs from the print queue ........... 61 Dial-in access ....................
- Page 12 ISP Only ................... 98 Internet email (mirrored host)............99 Using Internet email ............... 100 Setting up the Magnia SG20 for local email ..........100 Setting up the Microsoft® Outlook® application ......101 How to modify your existing Outlook® Express client ....103...
- Page 13 Setting up the Magnia SG20 for Internet email ........105 Domain hosted email (email mirroring) .......... 105 Enabling Internet email for users ........... 106 Summary of email user accounts ..........107 Sending email through an ISP ............107 Client email setup ................... 108 Advanced topics ..................
- Page 14 Enabling the IPSec VPN Feature ........... 140 IPSec VPN Use ..................142 Client Configuration................ 143 User Accounts................144 Chapter 7: Managing the Server ............145 Managing user accounts ................. 145 Predefined accounts ..............145 System security modes ................146 Creating user accounts ..............148 Changing user accounts ..............
- Page 15 Hard drive status ................176 Fan status ..................177 Temperature status ................ 177 Voltage status................. 178 Software upgrades .................. 178 Viewing available upgrades............179 Selecting an upgrade to install ............179 Viewing installed upgrades ............180 Manual software upgrades ............. 180 Software upgrades auto-check............
- Page 16 Adding photos to the Digital Central photo album ........214 Scenario 1: Copying existing digital photos onto your Digital Central site....................215 Scenario 2: Copying photos from a digital camera to the Magnia SG20 with a personal computer as the interface ........217 Viewing photo albums ................218 Changing the photo album name ............
- Page 17 Alarm System Program for Stargate Compatible Controllers ....272 Chapter 13: If Something Goes Wrong ..........274 Problems when you turn on the Magnia SG20........274 Problems when you turn on a client computer ........275 Internet problems ..................276 Other system problems ................
- Page 18 Appendix A: Specifications............... 282 Basic overview ..................282 Operating systems supported ..............283 Appendix B: Manually Configuring Clients for the Magnia SG20 ..285 Manually configuring clients using the Windows 95, 98 and Windows Me operating system ..................285 Determining if your system has a network interface card (NIC)..285 Configuring the PCMCIA socket ............
- Page 19 Appendix E: Open Source License Information ....... 309 GNU GENERAL PUBLIC LICENSE............309 Preamble..................309 TERMS AND CONDITIONS FOR COPYING, DISTRIBUTION AND MODIFICATION ................310 NO WARRANTY ................311 END OF TERMS AND CONDITIONS..........312 DES / SSL Library LICENSE..............312 OpenSSL Library LICENSE ..............
-
Page 20: About This Guide
22. About this guide This guide introduces the features of the Magnia SG20 and explains how to set up, configure, and maintain your network. Most of this information is intended for the person who will be responsible for the Magnia SG20 and who will act as the network administrator. -
Page 21: Other Icons Used
Service options Toshiba offers a full line of warranty options and service programs. Refer to the warranty and service material included with the Magnia SG20 for more information, or go to our Web site at support.toshiba.com. Toshiba also offers accessories to enhance server performance. These range from extra cables to more complex items like an extra hard disk drive or a wireless device. -
Page 22: Chapter 1: Getting Started
What is the Magnia SG20? The Magnia SG20 is a device that allows you to quickly connect computers to form a single system through a built-in wired or wireless network. It provides all the basic networking capability you need to support small groups, a home office, or small business, including: file sharing, printer sharing, Internet gateway, and local intranet. -
Page 23: Unpacking The Magnia Sg20
Server Setup Wizard runs automatically after the Client Setup Wizard has finished.) Connect the rest of the client computers and run the Client Setup Wizard on each. Before you use the Magnia SG20, remember to register it with Toshiba. If you’re an experienced user, see Features on page 49. -
Page 24: You Will Also Need
Write the Magnia SG20 serial and part numbers on the convenient peel-off label located on the Quick Start card. Peel off the label and apply it to the side or base of the Magnia SG20. Avoid covering any ventilation holes. -
Page 25: Back Of The Magnia Sg20
The expansion port enables you to add a hub or switch to support a larger network with more client computers. ❖ The modem port allows the Magnia SG20 to dial out to the Internet, and a client computer to dial into the Magnia SG20. For more information about using the Magnia SG20 modem, see Stand-alone with modem connection on page 64. -
Page 26: Turning On The Magnia Sg20
Turning on the Magnia SG20 Place the Magnia SG20 where you can easily access the back panel. Connect the black power cable to the socket on the back of the Magnia SG20 and then to a wall outlet. Connecting the power cable The Magnia SG20 powers up in a few moments. -
Page 27: Connecting A Printer To The Magnia Sg20 (Optional)
A client connected to the Magnia SG20 Connecting a printer to the Magnia SG20 (optional) An important feature of the Magnia SG20 is that it allows all users on the network to share the same printer, rather than having a printer connected to each individual computer. -
Page 28: Connecting To The Internet
Internet Service Provider. Before You Begin The Magnia SG20 comes with three accounts already created and defined on the server. These accounts are defined for specific purposes. The first two of these accounts come from the factory with a default password of “toshiba.”... -
Page 29: Configuring The First Client Computer
❖ To set your home page for Internet Explorer to the Magnia SG20 intranet, select the General tab from the Tools menu and type http://myserver.loc in the box labeled Home Page. - Page 30 If it’s not on already, turn on the client computer. If it is on, close all other applications to avoid a potential loss of data. Insert the Magnia SG20 Setup CD into the CD-ROM drive on the client computer. The Setup CD menu appears.
- Page 31 Getting Started Configuring the first client computer Click Next. The setup wizard examines the system and briefly displays a setup screen. Sample Examining Your System screen Then the setup wizard displays the User account information screen. Sample User account information screen Enter your personal information.
- Page 32 Getting Started Configuring the first client computer Your password can be any combination of letters and numbers. Make sure it’s a name you will be able to remember, but not something like your birthday or nickname that others can easily guess. NOTE: The Administration password changes to match the first user’s password.
-
Page 33: Configuring The Magnia Sg20
Sample Server Setup Wizard Welcome screen If you need to run the Server Setup Wizard manually, simply use your web browser on a client connected to the Magnia SG20 local network, and use the following URL: http:// 192.169.1.1:8282/wizard. The setup wizard will ask you to set these options: ❖... -
Page 34: Security Modes
The Magnia SG20 supports two security modes: ❖ Ease-of-Use mode allows you to create user accounts on the Magnia SG20 at any time by running the Client Setup Wizard. All user accounts have access to basic server management (administrative) functions using the Administration Web site. -
Page 35: Magnia Sg20 Locale
LCD screen. Select this from the list of available languages in the drop-down box. Internet connection information You can configure your Magnia SG20 to access the Internet through your broadband or modem connection. To configure your Magnia SG20 to access the Internet through your broadband or dial-up connection, select Yes. - Page 36 Getting Started Configuring the Magnia SG20 ❖ User ID and password If you’re unsure how to configure your Internet connection, ask your Internet Service Provider (ISP) to help you. NOTE: The setup wizard automatically takes you through setting up the Magnia SG20 only once.
-
Page 37: Broadband Connection
Getting Started Configuring the Magnia SG20 Broadband connection For a broadband connection, the following screen appears. Sample ISP address type screen Select ISP address type. Determine whether your ISP uses a fixed IP address (provided by your ISP) or is set up to assign the addresses whenever your computer connects. - Page 38 Otherwise, leave these fields blank. Click Next to continue. If you selected DHCP on the ISP address type screen, the computer name screen appears. This screen assigns the Magnia SG20 a specific computer name that is used only when communicating with your ISP’s DHCP server.
-
Page 39: Dial-Up Connection
NOTE: Some phone-based ISPs require special software to access their networks. ® These ISPs include America Online , and any free ISP that requires advertisements to be downloaded and displayed on your client computer while connected. These ISPs cannot be used with the Magnia SG20. For a dial-up connection:... -
Page 40: Configuring Wireless Access
Next. Configuring wireless access The Magnia SG20 offers a built-in wireless access point option. This option enables you to use the server as a wireless access point for your local network. With this option, you can provide both wireless 11-Mbit and wired 100-Mbit local network access. -
Page 41: Determining If Wireless Access Point Is Installed
Configuring wireless features When the wireless access point option is installed in the Magnia SG20, wireless access should be possible using the configured defaults. However, it is recommended that you review the wireless configuration and modify it as necessary. - Page 42 This same frequency must also be specified in each wireless client’s configuration. Select the Enable Data Encryption check box to encrypt information sent between wireless clients and the Magnia SG20. Clear the check box to disable encryption. This feature is known as Wired Equivalent Privacy (WEP).
-
Page 43: Configuring Wired Equivalent Privacy (Wep) Keys
To use WEP encryption in your wireless network, all wireless client computers must have the encryption feature installed and enabled, and they must use the same encryption key as the Magnia SG20. This feature enables you to configure up to four keys, then select which key to enable. -
Page 44: Configuring Access Control
Getting Started Configuring wireless access Select the key you wish to enable at this time. Click Apply to save the changes. Configuring access control You can control wireless access to your network by specifying each wireless client’s MAC address. MAC addresses are 16-digit hexadecimal identification numbers assigned to networking devices, such as adapters, at the factory. -
Page 45: Using Ssl
Security Alert - Entering a secured Web site You will also be presented with a second security alert which indicates that the Magnia SG20 is not on your list of trusted certificate authorities. Security Alert - your Magnia SG20 is not on your trusted list... -
Page 46: Advanced Wireless Configuration
(ESSID) of “ANY.” If you clear this check box, the Magnia SG20 accepts connections from wireless clients with a network name of “ANY,” in addition to wireless clients with a network name that matches the configured local network name. -
Page 47: Connecting And Configuring Other Client Computers Using The Seven Lan Ports
Connect the other client computers, each to one of the LAN ports on the Magnia SG20. LAN ports An example of a typical local network The client computers connected to the Magnia SG20 can use different versions of ® the Windows operating system. You can also connect Macintosh computers to the Magnia SG20. -
Page 48: Ways To Use The Magnia Sg20
Using Your Preinstalled Intranet Site on page 196. The Magnia SG20 maintains an internal intranet for the exclusive use of the computers connected to the Magnia SG20. The intranet is not available to outside systems. HINT: Before using the Magnia SG20 or accessing any external Internet services, Toshiba recommends that you purchase a virus detection program. -
Page 49: Features
❖ Intranet service: You can customize the content of your preinstalled intranet Web pages, which are stored in the Magnia SG20. The pages include: Welcome page (a good place for your mission statement), Company News (your own electronic newsletter), Upcoming Events (an electronic bulletin board), Docs and Forms (special procedures), and Company Links (your favorite Web links). -
Page 50: What To Read Next
Internet quickly and easily. ❖ Email: The Magnia SG20 comes with local email services. Every user added to the system can exchange email with other local network users. You can also establish Internet email services, and have your domain’s email retrieved to the Magnia SG20, or clients can access an external email service directly through your server’s Internet... -
Page 51: Chapter 2 Using The Network
These computers are called “clients.” After your client computer has been connected to the Magnia SG20, it needs to be configured with the Magnia SG20 Setup CD. Your network administrator may do this for you. -
Page 52: Types Of Users
Using the Network Types of users only, you will not be logged in to the Magnia SG20 and, therefore, will not have use of its resources. ® ® ® The Windows NT , Windows 2000, and Windows XP operating systems have sophisticated security and user management features. -
Page 53: Placing Files On The Network
The Magnia SG20 can act as a central file server, allowing you to save files on the Magnia SG20 instead of your local computer. Saving files on your server can have several advantages: ❖... -
Page 54: Storing Files On The Server
To gain access to the files on the Magnia SG20, you must be logged in to your local client computer, and your login account must match the account established on the Magnia SG20. -
Page 55: Mapping Drives Using The Windows 95 And Windows 98 Operating System
These folders are mapped drives that point to an area on the Magnia SG20. Sample My Computer window To map drives to these areas without using the Magnia SG20 Setup CD, follow the instructions based on your operating system. Mapping drives using the Windows 95 and Windows 98 operating system Double-click the Network Neighborhood icon on the Desktop. -
Page 56: Mapping Drives Using The Windows Me Operating System
From the File menu, select Map Network Drive…. Select from the drop-down list the drive letter you wish to map to your personal folder on the Magnia SG20, select the Reconnect at logon check box, and click OK. Repeat steps 3-5 to map the folder labeled Public. -
Page 57: Mapping Drives Using The Windows Xp Operating System
The network administrator can set limits on how much disk space a single account can use. If your Magnia SG20 has a second hard disk drive, your network administrator can make its disk available for general public storage in addition to the private folders established with all accounts. -
Page 58: Sharing A Printer
Sharing a printer Sharing a printer Another important feature of the Magnia SG20 is that it allows all users to share a single network printer. In some cases, the network printer can replace individual printers. In other cases, the network printer is an additional higher-speed and higher-resolution device. - Page 59 ❖ For Network path or queue name, type \\Myserver\printer - If the name of your Magnia SG20 has been changed from the default “Myserver,” substitute the new name. Sample Add Printer Wizard screen ❖ For Manufacturer and Printer, select from the lists provided.
- Page 60 Using the Network Sharing a printer Click Start, Settings, then Control Panel. The Control Panel window opens. Sample Control Panel Double-click Printers. The Printers window opens, listing the network printer and any local printer connected to your computer. Sample Printers window Double-click the Add Printer icon, and select the Network printer option.
-
Page 61: Deleting Print Jobs From The Print Queue
Using the Network Sharing a printer Type the name of your Magnia SG20 (the default is “Myserver”) or use Browse to find the server and printer. The name of the shared network printer on the Magnia SG20 is “printer.” Sample Add Printer Wizard screen The Windows Add Printer Wizard continues with the printer driver installation process. -
Page 62: Dial-In Access
The selected print job(s) are removed from the printer queue. Dial-in access The Magnia SG20 has a built-in modem that allows you to log in to the network from remote locations (such as your home) over a phone line—provided your network administrator has enabled this option and granted your user name Dial-In Access privileges. -
Page 63: Chapter 3 Setting Up Your Local Area Network
145. Planning your network This section describes how to set up your Magnia SG20 for the first time. DEFINITION: A server is the central computer to which other computers connect so that they can share services, such as printing, hard disk space, and the Internet. -
Page 64: Network Topologies
300 feet, though the usable distance can be greatly reduced by walls and other interference caused by machinery or other electronic devices. For best results, the Magnia SG20 should be located in a central position as close to wireless client computers as practical. - Page 65 Broadband connection The Magnia SG20 can connect to broadband communications through the public Ethernet port. Using an RJ45 cable, connect the Magnia SG20’s public Ethernet port to a cable modem or Digital Subscriber Line (DSL) modem. Corporate environment In this topology, the Magnia SG20’s public Ethernet port is connected to a corporate LAN.
-
Page 66: Wireless Networking
SG20 and the network to the Internet without using cables. The Magnia SG20 can be purchased with a built-in wireless capability, so that the server acts as the wireless access point for your wireless network. If the Magnia SG20 contains the wireless access point option, simply configure it for use (see “Configuring Wireless... -
Page 67: More About Connecting Client Computers
Do not turn the unit back on. Contact an authorized Toshiba service provider immediately. Cleaning the Magnia SG20 If the Magnia SG20’s exterior case is dirty or stained, clean it with a soft cloth. If necessary, moisten the cloth with water. Never use harsh chemicals to clean the case. Power requirements... -
Page 68: Dial-In Access
304. Dial-in access The Magnia SG20 has a built-in modem that allows users to log in to the network from remote locations (such as their homes) over a phone line. If you would like to allow users to connect via modem, you must first connect the Magnia SG20 to a working phone line. -
Page 69: Communicating With The Magnia Sg20
Even with the Dial-In service enabled, you must grant dial-in access to each user name individually. By default no users can dial in. To allow a user to dial in to the Magnia SG20: Click the Admin icon on the client computer’s desktop to access the Administration Web site. -
Page 70: Exploring The Administration Web Site
Access to the Administration Web site is restricted to level 2 and 3 user accounts. When the Magnia SG20 is set up in Ease-of-Use mode (default), all accounts are at least Level 2. Some areas of the Administration Web site are restricted to Level 3 users. If you attempt to enter these areas, you will be prompted for a login password. -
Page 71: Turning On The Magnia Sg20
Shutting down the Magnia SG20 As a general rule, you can leave the Magnia SG20 running at all times. If you plan to unplug the unit, make sure the system is shut down properly. Always use the Power/ Shutdown button at the front of the unit, or the shutdown command in the Administration Web Site to turn off the Magnia SG20. -
Page 72: Viewing Lcd Information
Setting Up Your Local Area Network Communicating with the Magnia SG20 NOTE: When the Magnia SG20 is shut down, a small amount of power may still be supplied within the unit. This power preserves the last message on the LCD panel, “System Off, Push Power to Start.”... - Page 73 Setting Up Your Local Area Network Communicating with the Magnia SG20 From the Administration Web site, select the System tab, and click the LCD Panel tab. The LCD options screen appears. Sample System LCD options screen Select which options you want to display on the LCD and click Apply.
-
Page 74: Viewing General System Information And Status
The Magnia SG20 monitors hardware health indicators to identify potential problems. This important health information is available for you to view. To view the “health” (current operational status) of the Magnia SG20, select the Reports tab, and click the Health tab. -
Page 75: Connecting To An Existing Corporate Network
LAN performance. Use only the “public” port for LAN connection. Configure the Magnia SG20 to the corporate LAN option. If you do this when setting the server up for the first time, you can select this option through the Server Setup Wizard. - Page 76 Once you have set up access for the corporate LAN, all client computers attached to the Magnia SG20 will be able to use the LAN’s Internet access. To grant access to the Magnia SG20’s files and shared printer to client computers on the corporate LAN, you must turn off the appliance firewall.
- Page 77 Connecting to an existing corporate network Select the Firewall menu. Sample Firewall screen Select Firewall off, then click Apply. Computer systems on the corporate LAN can now access the Magnia SG20 as long as the users have corresponding accounts on the Magnia SG20.
-
Page 78: Chapter 4: Establishing An Internet Connection
Internet access line. While you may have several client computers accessing the Internet, it appears to your ISP as if there is only one computer connected. The Magnia SG20 takes care of routing Internet traffic to the correct client computer. -
Page 79: Types Of Internet Connections
Many businesses start with a traditional phone-based connection to the Internet. You can connect the Magnia SG20 to a phone line using its 56K modem port. When configuring your Magnia SG20 for a phone-based Internet connection, you will need information such as: ❖... - Page 80 ISPs cannot be used with the Magnia SG20. To configure your system for phone-based access to the Internet: Connect your phone line to the modem port at the back of the Magnia SG20. From a client computer, click the Admin icon to start the Administration Web site.
-
Page 81: Configuring For Cable-Based Internet Service
Internet (such as RealNetworks RealPlayer Once the Magnia SG20 connects to the Internet using a dial-up service, it will typically remain connected for 20 minutes after the last Internet access. If you wish to disconnect the phone sooner than this, you can do so manually. For more information, see... - Page 82 Default gateway (optional) ❖ The Magnia SG20 establishes a default computer name to be used with the public Ethernet port. Some cable ISPs require that you assign your computer a name that they specify. If your ISP does this, you will need the specific computer name in addition to the static IP information indicated above.
- Page 83 Sample Connection settings screen If these settings are correct, click Test. The Magnia SG20 will use the settings to connect to the Internet through the cable modem. It will then attempt to contact several well-known Internet sites. When the Magnia SG20 reports that this process is successful (which may take a minute or two), click Finish.
-
Page 84: Configuring For Dsl-Based Internet Service
IP information indicated above. To configure your system for DSL-based access to the Internet: Connect the DSL modem to the public Ethernet port at the back of the Magnia SG20 using a standard Ethernet (CAT5) cable. From a client computer, click the Admin icon to start the Administration Web site. - Page 85 You will need to determine whether your ISP requires PPPoE to connect to its network and, if so, obtain an account name and password. The Magnia SG20 will automatically assign a computer name. You can change this if your ISP requires a specific name for your computer.
-
Page 86: Client Configuration To Access The Internet
DSL connection will not be dropped unless your ISP disconnects it or you shut down the Magnia SG20. Selecting a timeout value tells the Magnia SG20 to disconnect from your ISP when there has been no Internet access for the specified time. -
Page 87: Dial-Out Modem Usage
Client configuration to access the Internet Dial-out modem usage The modem on the Magnia SG20 can be used for either dial-out access to the Internet through an ISP, or dial-in access to the local network. While you can configure the modem for use in both these ways, the modem cannot handle both incoming and outgoing connections at the same time. - Page 88 The modem dialed a number which did not answer. Logging in The Magnia SG20 is in the process of logging in to the ISP’s network. Failed to log in When the Magnia SG20 attempted to log in to the ISP’s network, the log in failed.
- Page 89 Client configuration to access the Internet Usually, you can let the Magnia SG20 manage the modem for you, and you do not need to manually intervene and either hang up or dial. However, if you wish to stop the modem from dialing out, or to terminate a current active connection, you can do so from the Administration Web site.
-
Page 90: Internet Performance Enhancements
Client configuration to access the Internet Internet performance enhancements The Magnia SG20 includes special caching software that helps improve Internet access performance. It does this by keeping copies of frequently accessed Web pages and graphics locally. Delivering Web content to your browser from this cache is much faster than downloading the content from the Internet each time. -
Page 91: Internet Content Filtering
Client configuration to access the Internet Internet content filtering The Magnia SG20 can also restrict access to specific Web sites, or to sites that contain certain phrases or words in their domain name. This feature can be useful when you wish to regulate access to areas of the Internet by users of your local network. - Page 92 Establishing an Internet Connection Client configuration to access the Internet Domain name filtering To block access to a specific domain, click the Change hyperlink next to the Domain filter rule section of the screen. This will present a new screen that allows you to edit the list of blocked domain names (initially empty).
-
Page 93: Internet Security And The Firewall
Internet security and the firewall The Magnia SG20 serves as a gateway between your local network (LAN) and the Internet. Whether through a broadband connection using the built-in Ethernet port, or through the built-in modem connection for dial-up Internet access, all your local network’s... -
Page 94: How The Firewall Works
Internet from within the organization while controlling access from the Internet to the Magnia SG20. The firewall works by refusing nearly all direct access to your Magnia SG20 from the Internet. No one may access any application, file, or resource within your firewall from the Internet, but any application (from the local network) may access the Internet and conduct bidirectional access transparently. -
Page 95: Changing The Firewall Settings
Turning off the firewall opens the system to any kind of network access through the broadband Ethernet port (and the modem when using a dial-up ISP). This means access to the Magnia SG20 through these ports will be regulated only by user account access privileges. - Page 96 To disable access, clear the check box. If you continue to experience problems with your VPN software on the client computer going through your Magnia SG20 appliance server to your VPN server, please call the Toshiba InTouch Center.
-
Page 97: Chapter 5: Setting Up Email Services
The Magnia SG20 has a built-in mail server capable of sending and receiving email between all the client computers and accounts on your local network, as well as to and from the Internet. The Magnia SG20 can act as the email gateway for your company’s connection to the Internet. -
Page 98: Isp Only
The Magnia SG20 is set up to support local email automatically. All accounts that are created on the system are capable of sending and receiving local email. To use the Magnia SG20 to host local email traffic, you do not need to change any server settings. -
Page 99: Internet Email (Mirrored Host)
107. Internet email (mirrored host) The Magnia SG20 email server is also capable of sending and receiving mail via an established mail server on the Internet. This is commonly used if you wish to establish your own domain on the Internet ( ) and have an Internet hosting company mycompany.com... -
Page 100: Using Internet Email
Setting up the Magnia SG20 for local email Sample Local email setup screen Because this is the way the system is configured when you first setup the Magnia SG20, there is no need to change these settings to use local email. However, if you had previously configured the server for Internet email, you can go to this screen to select local email only. -
Page 101: Setting Up The Microsoft® Outlook® Application
POP or SMTP addresses, user accounts and passwords. Please note that all accounts are set up with email addresses that use the Magnia SG20 user account name as the email address. For example, you could send local email to a user with the account name “jsmith”... - Page 102 Local email On the Internet E-mail Address screen, enter username@myserver.loc where username is the name of your user account on the Magnia SG20. User information In the Mail Logon screen, enter your user name and password as created on the Magnia SG20.
-
Page 103: How To Modify Your Existing Outlook® Express Client
Outlook Express configuration. ® If your Outlook Express Client has been setup to work directly with your ISP, you can take the following simple steps to redirect the client to use the Magnia SG20 email server. ® Start Outlook Express. - Page 104 Setting up Email Services Setting up the Magnia SG20 for local email In the next window, select the Mail tab, and click Properties. Sample Outlook Internet Accounts screen The email setting property window appears. Click Properties to modify your email settings.
-
Page 105: Setting Up The Magnia Sg20 For Internet Email
Change Account Name and Password to the values created on your Magnia SG20. NOTE: If the domain name of your Magnia SG20 is changed, your email setting must also be changed to use the new domain name. Sample Outlook My Old Mail setting Properties screen Click Apply and OK. -
Page 106: Enabling Internet Email For Users
Internet email. The ISP hosting your domain should provide this address. Enabling Internet email for users Once you have configured the Magnia SG20’s email server to send and receive Internet mail through your domain, you must configure each user account to access their corresponding account on your domain. -
Page 107: Summary Of Email User Accounts
Click Apply to save the updated information. Summary of email user accounts To see a summary of the accounts on the Magnia SG20 and how they are mapped to ISP/domain hosted Internet accounts: From a client computer, click the Admin icon to start the Administration Web site. -
Page 108: Client Email Setup
SG20 email configuration to your ISPs SMTP email server. This will allow mail for users local to the Magnia SG20 to stay local (it won’t go to the Internet and back), but will still send email destined for remote users through your ISP and on to the final user. - Page 109 Sample Internet Email Address screen For incoming mail POP3 and outgoing mail SMTP type mail.servername.loc where servername is the name of the ISP mail server. Your Magnia SG20 will direct all of your outgoing mail to your ISP. Sample E-mail Server Names screen NOTE: Some companies that host email domains don’t allow you to send email...
- Page 110 Setting up Email Services Client email setup User information In the Mail Logon screen, enter your user name and password as created on the Magnia SG20. This is all you need to send and receive email. Sample Internet Mail Logon screen Completing the setup In the next window, enter a friendly name that identifies the configuration.
-
Page 111: Advanced Topics
NOTE: If you have a broadband connection to your ISP , such as cable or DSL, skip this section. If you are using the modem in the Magnia SG20 to provide a phone-based connection to your ISP, the email clients in your network can initiate a dial-up connection every time they ask for new email. -
Page 112: Direct Email Delivery
60 minutes. Direct email delivery The Magnia SG20 is capable of delivering email directly to the target user. The configurations described earlier in this chapter all have the Magnia SG20 direct mail to another server (either the domain host’s email server or the ISP’s email server) for relaying to the final recipient. -
Page 113: When Internet Email Is Checked
SMTP access authentication. When Internet email is checked If the Magnia SG20 is set up for Internet email, it contacts the domain or ISP for incoming email whenever any user sends or receives email. Whenever any client checks incoming email, this will trigger a connection with the domain email site or ISP email servers to download all emails pending for any user on the system. -
Page 114: Chapter 6: Vpn Configuration And Usage
This chapter contains an introduction to the Virtual Private Network (VPN), how to use the VPN, and how the VPN interacts with Magnia SG20 features. The Magnia SG20 provides two types of VPNs. The PPTP VPN is designed to support roaming or distant client computers connected to the Magnia SG20 through the Internet. -
Page 115: Configuring The Pptp Vpn Software
SG20. Through tight interface and networking integration, the VPN provides easy access to all of the features of the Magnia SG20 server, as well as access to all systems on the local network. Since the VPN connection enables access inside the firewall, remote users appear to be connected to the server's LAN as if they were locally connected. - Page 116 VPN Configuration and Usage Configuring the PPTP VPN Software Select the Network tab and click on the VPN menu item. Check the PPTP VPN Access check box and click Apply to turn on the VPN feature. Sample Network tab screen Click the Configure hyperlink to configure the VPN service.
-
Page 117: Generating A Client Setup Diskette
The screen used to generate a client setup diskette displays. Generating a Client Setup Diskette Once your Magnia SG20 is set up to accept VPN connections from specified users, you need to configure the client computers, such as laptops or remote desktops, to access the server. -
Page 118: Using Vpn
118 for more information. Using VPN When a client computer is connected to the Magnia SG20 using VPN, the client is capable of accessing virtually all of the same features as a computer that is connected directly to the LAN. The following actions are available for all clients using VPN: ❖... -
Page 119: Configuring A Client Computer
IP address. Configuring a Client Computer External computers that connect to the Magnia SG20 server through the VPN are called "client" computers. Each client computer must be configured to connect with the server. -
Page 120: Running The Client Configuration Diskette
Connected to the Internet via a broadband or dial-up connection ❖ A computer that is not directly connected to the Magnia SG20 server. TECHNICAL NOTE: Installing on a client system running Window 95 may require you install the Dial Up Networking 1.3 Performance and Security Update. To verify... - Page 121 VPN Configuration and Usage Configuring a Client Computer Click Next to begin. The setup wizard examines your system for the proper settings and Internet connection. Sample Examining Your System screen When your settings are verified, the VPN Client Setup program installs and configures PPTP and RAS.
- Page 122 VPN Configuration and Usage Configuring a Client Computer After PPTP and RAS configuration are complete, the wizard will prompt you to restart the computer. Sample Computer Restart screen Remove the diskette before restarting. Click Restart Now to restart the computer. If no selection is made, the computer will restart automatically.
-
Page 123: Connecting To The Vpn
Sample Dial-up Networking icon on desktop To connect to the Magnia SG20 server from the client using VPN: Log on to the client computer using the same account information as you use with your Magnia SG20 server. -
Page 124: Disconnecting Vpn
This error is caused by a bug in Windows which may corrupt the Windows registry when a VPN adapter is configured manually. It may be resolved quickly by removing the VPN adapter from the client computer and running the Magnia SG20 VPN Client Setup program. - Page 125 VPN Configuration and Usage Connecting to the VPN Select Communications from the list labeled Components. Sample Add/Remove Programs dialog box, Windows Setup tab Scroll to the bottom of the Components list and find the component named Virtual Private Networking. If this item exists, the Dial-Up Networking 1.3 upgrade has already been installed on your computer.
- Page 126 VPN Configuration and Usage Connecting to the VPN Select Communications from the list labeled Components. Sample Add/Remove Programs dialog box, Windows Setup tab Click the Details… button to display the Communications dialog box. Sample Communications dialog box Select the component named Virtual Private Networking by clicking on the check box.
- Page 127 Configuring Network Settings Once you have properly installed the VPN adapter, the only remaining network setting that is required for your client computer to communicate with the Magnia SG20 using VPN is the workgroup name. WARNING: Once you complete the setup of your network settings, you will be required to restart your computer.
-
Page 128: Manually Configuring A Client Running Windows Nt
LCD of your Magnia SG20 by clicking the scroll button next to the LCD display. The public IP Address is labeled Public Address. Type the public IP Address of your Magnia SG20 in the field labeled Host name or IP Address. - Page 129 VPN Configuration and Usage Connecting to the VPN Select Settings>Control Panel to display the Windows Control Panel. Double-click the Networking icon. The Networking dialog box displays. Click on the tab labeled Protocols. Sample Networking dialog box Click the Add button. The Select Network Protocol dialog box displays.
- Page 130 VPN Configuration and Usage Connecting to the VPN From the Network Protocol list, select the item named Point To Point Tunneling Protocol, then click the OK button. A dialog box asking the Number of Virtual Private Networks displays. Sample Number of Virtual Private Networks dialog box The text box should have the number 1 in it.
- Page 131 Configuring Network Settings Once you have a properly installed the VPN adapter, the only remaining network setting that is required for your client computer to communicate with the Magnia SG20 using VPN is the workgroup name. WARNING: Once you complete the setup of your network settings, you will be required to restart your computer.
- Page 132 Click the New button. The New Phonebook Entry Wizard displays. In the text box labeled Name the new phonebook entry, type a name to identify the Magnia SG20 VPN phonebook entry, then click the Next button. Sample New Phonebook Entry Wizard...
- Page 133 VPN Configuration and Usage Connecting to the VPN When the Server page displays, check the box labeled I am calling the Internet, then click the Next button. Sample Server page...
- Page 134 (VPN1), then click the Next button. Sample Modem or Adapter page The Wizard now needs the public IP Address of your Magnia SG20. The public IP address may be viewed on the LCD of your Magnia SG20 by clicking the scroll button next to the LCD display.
-
Page 135: Manually Configuring A Client Running Windows 2000
Configuring Network Settings Once you have a properly installed the VPN adapter, the only remaining network setting that is required for your client computer to communicate with the Magnia SG20 using VPN is the workgroup name. WARNING: Once you complete the setup of your network settings, you will be required to restart your computer. - Page 136 Internet option, then click the Next button. Sample Network Connection Type screen The Wizard now needs the public IP Address of your Magnia SG20. The public IP address may be viewed on the LCD of your Magnia SG20 by clicking the scroll...
- Page 137 VPN Configuration and Usage Connecting to the VPN Type the public IP Address of your Magnia SG20 in the field labeled Host name of IP address, then click the Next button. Sample Destination Address screen Windows 2000 will need to know if you intend this connection to be used by all users or keep it for your own use.
-
Page 138: Manually Configuring A Client Running Windows Xp Virtual Private Networking Adapter
The New Connection Wizard appears. Click Next. The Network Connection Type page appears. Select Connect the network at my workplace, and click Next. Enter the IP address for your Magnia SG20 and click Next. Click Finish. -
Page 139: Interactions With Other Magnia Sg20 Server Features
Magnia SG20 uses a dial-out ISP connection. If you attempt to enable VPN on a Magnia SG20 configured to use a modem-based dial- out ISP, you will receive a message indicating that the VPN cannot be enabled with the current Internet connection. -
Page 140: Configuring The Ipsec Vpn Software
VPN using the same Windows account. Configuring the IPSec VPN Software If you have two Magnia SG20’s in different locations, and you wish to connect them, both need to be configured using the IPSec software configuration. Each server needs to know the IP address information concerning the remote server in order to complete the connection. - Page 141 VPN connection. This is read only information; you cannot change the IP information (it is picked up from your local IP address information). The bottom part of the screen is where you describe the Magnia SG20 to which you will be connecting. Complete the following fields: ❖...
-
Page 142: Ipsec Vpn Use
IPSec VPN Use Whenever an IPSec configuration is entered, a corresponding IPSec configuration must be entered on the other Magnia SG20. The shared key must be the same on both systems. You can add additional IPSec connection definitions, by returning to the IPSec VPN screen and clicking the Add button. -
Page 143: Client Configuration
Once the VPN connection is established between the two Magnia SG20s, any client on one Magnia SG20 private network can gain access to the other server’s private network. However, in order to browse another private network, or use computer names to reference the other server or clients, a client computer must be configured to include the other server’s IP address as a WINS server. -
Page 144: User Accounts
(or restrictions) are in place. In order for a user to access another Magnia SG20 (or clients connected to the Magnia SG20), there must be a matching user account on both server systems (with the... -
Page 145: Chapter 7 Managing The Server
Predefined accounts The Magnia SG20 comes with three accounts already created and defined on the server. These accounts are defined for specific purposes. The first two of these accounts come from the factory with a default password of “toshiba.” However, both accounts will have their password changed to the first account’s password when the system is first set up. -
Page 146: System Security Modes
System security modes When you set up the first account on the Magnia SG20, you also setup basic configurations for the server, including whether to use Ease-of-Use mode, or High Security mode. - Page 147 The local network security screen also allows you to specify whether you wish to require client computers to have a matching account on the Magnia SG20 in order to access its file and printer sharing features. In its default configuration, the Magnia SG20 requires all users to have an account on the server in order to access files or to use its printer.
-
Page 148: Creating User Accounts
Managing the Server System security modes Creating user accounts When you run the Client Setup Wizard, it creates a user account for the system you are installing. You can create other user accounts through the Administration Web site. From a client computer, click the Admin icon to start the Administration Web site. Select the System tab and click the Users menu item. -
Page 149: Deleting User Accounts
Take the time to back up important files in case of an emergency. One of the most important features of the Magnia SG20 is the number of backup options available and the ease with which you can back up your data. From the Administration... -
Page 150: Types Of Backup
❖ Internet location — The Magnia SG20 offers the ability to store backups off site at an Internet FTP location. To use this option, you must have an FTP site available, such as one provided by a commercial Internet based backup service, or through a corporate FTP site. - Page 151 (even though they are compressed to minimize their size). As you place more and more data on your Magnia SG20, the backup files can become quite large. Consequently, you may not wish to perform full backups every time.
- Page 152 Select Files hyperlink. This will take you to a screen that will allow you to view and select files and directories on your Magnia SG20 disk. You can backup files from a variety of directories: ❖...
- Page 153 ❖ Users — This directory contains all of the individual account directories for each Magnia SG20 user. You should back up some or all of this directory. Sample Selecting files for backup screen There are several types of icons you will see on the screen.
-
Page 154: Selecting Backup Location
Once you have established a custom list of files for a backup, this list can be used for subsequent backups. The Magnia SG20 will remember your list of files selected, and use this each time you do a backup until you change this list. -
Page 155: Selecting Internet Backup
Managing the Server Backing up your data Sample Client system list screen Click the local computer to use for the backup location. A red check will appear on the folder symbol to the left of the computer name. If the shared file on the desired computer requires an account and password to gain access, enter them in the spaces provided at the bottom of the screen. -
Page 156: Starting A Manual Backup
Managing the Server Backing up your data If you have access to an FTP site, you can select the Internet backup site as the location for your backups by going to the Administration Web site main backup screen and selecting Internet Backup as the location. Click Set Options to enter the URL of the FTP site, along with your account name and password. -
Page 157: Scheduling An Automatic Backup
Managing the Server Backing up your data Scheduling an automatic backup You can schedule backups to be run automatically using the settings you specify in the main backup configuration screen. Configurations for manual and automatic backups are stored separately. Configuring a manual backup will not effect your automatic backup configurations and establishing an automatic backup configuration will not disturb a configuration for a manual backup. - Page 158 Managing the Server Backing up your data ❖ To schedule backups to be performed once a day, click the Daily option. Complete the backup schedule by entering in the time you want the backup to begin. Example of daily backup option ❖...
-
Page 159: Canceling Automatic Backups
Managing the Server Backing up your data Canceling automatic backups If you have configured an automatic backup using this method, it will be run as scheduled until you delete the configuration and cancel the backups. To cancel automatic backups: From a client computer, click the Admin icon to start the Administration Web site. Select the System tab and click the Backup menu item. -
Page 160: Viewing Backup Status
Managing the Server Backing up your data Viewing backup status Backup status can be seen in several places on the system. The easiest and most obvious location is in the Administration Web site, which initially displays the summary report page. This summary report page will show when the last backup was performed. Sample View backup status screen To see more detail about the backup status, click the Backup hyperlink on this report page, or select the Backup menu item on the Reports tab. -
Page 161: Encrypting Backups
In order to secure your backup data, the Magnia SG20 offers the ability to encrypt the contents of a backup. This encryption is powerful, and is extremely difficult to reverse without your password. -
Page 162: Restoring Files From A Backup
Managing the Server Restoring files from a backup NOTE: Do not forget your password. If you forget your password, there is no way to retrieve the information in your encrypted backup archives. Write your password down and place it in a secure location. Restoring files from a backup Once you begin making regular backups, you may find circumstances when it would be useful to restore files from the backups. -
Page 163: Selecting Files To Restore
Managing the Server Restoring files from a backup Select the system from which the backup archives reside, entering an account and password if needed. (This selection is equivalent to the configuration you originally established when you specified where the backups should be placed). The following screen appears, displaying a list of backups. - Page 164 If it is not grayed out, you can restore system files from this backup archive. NOTE: Restoring system files deletes the current Magnia SG20 configuration and restores the configuration as of the time you executed the backup.
-
Page 165: Starting The Restore
Extracting Files Under Windows It is possible to extract individual files from a Magnia SG20 backup archive using tools available from third parties. This method allows you to access files from Magnia SG20 backup archives without using the Magnia SG20. This may be useful if you need to extract data files quickly when the server is not available. -
Page 166: Using The Second Disk Drive
Magnia SG20 software. Using the second disk drive The Magnia SG20 can be purchased with either one or two drives. These drives are the only user serviceable parts in the system. If you purchased a server with a single drive, you can purchase a second drive from Toshiba at a later time to upgrade your system. -
Page 167: Installing A Second Disk Drive
Installing a second disk drive If you originally purchased your Magnia SG20 with a single drive, you can purchase and add a second drive to the system. Because Magnia SG20 disk drives are pre-configured at the factory, you need only insert the disk drive in the primary or secondary disk drive bay. - Page 168 Managing the Server Using the second disk drive Slide back the top of the case. Removing the cover Locate the slot for the disk drive. Facing the unit from the front, the primary disk drive slot is on the right, and the secondary disk drive slot is on the left. If you are replacing a primary disk drive: ❖...
-
Page 169: Secondary Disk Drive Usage
Close the top of the case and secure it with the two thumbscrews. Plug in the power cable, reconnect the client computers, and turn on the Magnia SG20 and the client computers. If you added a second disk drive, the Magnia SG20 will recognize the drive. Configure the disk drive. ❖... - Page 170 Select the System tab and click the 2nd Disk menu item. If the second disk drive has been installed properly and is recognized, the following screen appears. Sample Configuring a second disk screen To configure the Magnia SG20 to perform snapshots every night, accept the defaults and click Apply.
- Page 171 ® To access the second disk drive, you can use the Windows Explorer to browse to the Magnia SG20, and locate the directory named “2ndDisk.” Files can be placed in this...
- Page 172 To install the second disk drive as the primary disk drive: Turn off the Magnia SG20 by pressing the Power/Shutdown button on the front of the unit, or by using the system shutdown feature of the Administration Web site, and...
- Page 173 Managing the Server Using the second disk drive Remove the top cover by unscrewing the two thumbscrews at the rear of the appliance and sliding the cover back. Removing the cover Release the secondary disk drive by loosening the thumbscrews, then remove the disk drive by sliding it back and lifting it out.
-
Page 174: Configuring A Shared Printer
Example of viewing second disk status - mirrored device Configuring a Shared Printer The Magnia SG20 will act as a print server for a local parallel printer or a networked attached printer. Configuring a printer in this way allows you to share a single printer for all client computers in your local network. -
Page 175: Viewing Server Status
(pending mail to be sent). ❖ Backup — This screen lists the most recent backups taken of the server. You can also view the system status information by displaying it on the Magnia SG20’s LCD screen. For more information, see Viewing LCD information... -
Page 176: Viewing Server Health Status
However, in the unlikely case that there is a problem, the Magnia SG20 contains a number of self- monitoring capabilities that allow the system to detect potential problems before they permanently damage the system. -
Page 177: Fan Status
LCD panel and in the Administration Web site. If a fan fails, it does not mean there is an immediate problem with your Magnia SG20 – if the room is cooled and the unit is properly ventilated, the server can continue operation for some time. -
Page 178: Voltage Status
Toshiba for service. Software upgrades The Magnia SG20 has a built in feature that allows you to stay on top of fixes and features released by Toshiba for your server. The Software Upgrades feature allows you to quickly identify software upgrade packages that can be applied to your server. It will track which packages have already been installed, as well as automatically notifying you when a new package is available. -
Page 179: Viewing Available Upgrades
This list of upgrades needs to be refreshed whenever you check it. To check the list of upgrades and identify any new upgrades available on the Toshiba upgrades Internet site, click Check for New Upgrades at the bottom of the screen. The list is updated with the latest upgrades, organized by category. -
Page 180: Viewing Installed Upgrades
Managing the Server Software upgrades Viewing installed upgrades You can view a report of Installed upgrades by going to the Administration Web site, clicking on the Reports tab, and selecting the Upgrades menu item. A list of software upgrade packages you have already installed will appear. You can also view this list from the Software Upgrades screen by clicking Advanced, and selecting the View upgrade report option. -
Page 181: Software Upgrades Auto-Check
The package will be installed. Software upgrades auto-check The Magnia SG20 software upgrades feature has the ability to automatically check for new upgrade packages. This system will automatically notify you via the LCD panel when a new upgrade becomes available. -
Page 182: Chapter 8 Advanced Networking Features
Advanced Networking Features The Magnia SG20 is designed to be easy to set up and use in most environments. It configures the system for network use in a way that will meet most requirements small business or home use. Some specific features are set up as the default and should not be changed under normal circumstances. -
Page 183: Changing The Appliance / Workgroup Name
Magnia SG20. Onging work may be interrupted, and data could be lost. To avoid this, reconfigure networking options only when the Magnia SG20 is not being actively used by client computers or for other system operations, such as backups. - Page 184 Apply button. When you change the appliance name using this method, both the server’s computer name and its domain name will be changed. The Magnia SG20 will be accessed by this new name when: ❖...
-
Page 185: Changing The Local Ip Addresses
Advanced Networking Features If necessary, changing the name of the workgroup assigned to the Magnia SG20 can be done using the same method as changing the Appliance Name (see section above). Using the same Identification page of the Advance local networking screen, you can change both the appliance name and the workgroup name. -
Page 186: Turning Off Network Address Translation
NOTE: Changing these settings may reset the networking connection between the server and your client. As a result, your client may no longer be connected to the Magnia SG20 after you click the Apply button, and the screen will not refresh to show the new settings. In this case: 1. - Page 187 IP address assigned to the server. This means the Magnia SG20 requires only a single address for communication with the ISP. When NAT is on, the local clients are not separately visible to the Internet – systems on the Internet (or a corporate LAN) can only see the Magnia SG20.
- Page 188 All these IP addresses must be filled in with appropriate values for the network. The default values set the Magnia SG20 as the server providing these services. These defaults can be retained unless there is a specific alternate server to be used for one of these services.
- Page 189 Configuring a Magnia SG20 as a Router It is possible to set up the Magnia SG20 as a router servicing a local subnet. All clients in that subnet look to the Magnia SG20 as their gateway to the corporate LAN. The clients and Magnia SG20 shares could be visible to the other systems in the corporate LAN.
-
Page 190: Resetting Default Networking Configuration
SNMP Agent Services The version of SNMP supported is SNMP v.2c. The Magnia SG20 server appliance has an SNMP Agent that will respond to configuration information queries. The SNMP Agent on the server appliance only supports “Get” requests from the NMC. “Set” requests are not supported. - Page 191 Advanced Networking Features for health conditions can be sent as SNMP traps. Generating traps is optional and is not required to query configuration information. When SNMP is enabled, port 161 (or a user-defined port) will automatically be opened in the server appliance’s firewall. When SNMP is disabled after being enabled, the port will automatically be closed.
-
Page 192: Configuring Snmp
Advanced Networking Features Configuring SNMP Once SNMP has been turned on, clicking on the Customize hyperlink will present you with a screen with configuration options for the SNMP service. Below is a description of each of the fields on this screen. Value Default Comments... - Page 193 After configuring all SNMP options, click the Apply button to save the changes. If the firewall is enabled when you save your changes, the configured port (161 by default) will be opened in the firewall. When the Magnia SG20 user interface has finished applying your changes, a pop-up message displays.
- Page 194 ❖ SNMP: information related to the SNMP implementation on the device Magnia SG20 specific SNMP values are described in more detail in the online readme file. A summary of the values is listed below: ❖ Current operational state ❖...
- Page 195 Advanced Networking Features ❖ CPU Temperature ❖ System Temperature ❖ HDD Full ❖ HDD SMART Status...
-
Page 196: Chapter 9 Using Your Preinstalled Intranet Site
Magnia SG20 Appliance Server. Three basic types of features combine to help you manage your work more efficiently. The preinstalled intranet site, stored on your Magnia SG20, contains a number of pages which let you: ❖... -
Page 197: Managing The Intranet Site
Using Your Preinstalled Intranet Site Managing the intranet site Each time you use the Magnia SG20 Setup CD to connect a client computer to your Magnia SG20, an icon labeled Intranet is created on the client computer’s desktop. This icon will launch the browser to display the preinstalled intranet. -
Page 198: Adding Your Company Logo
Using Your Preinstalled Intranet Site Managing the intranet site ❖ Documents and Forms ❖ Company Links ❖ Software Applications ❖ Office Supplies The rest of this chapter discusses how to manage these pages. If you want to develop your own intranet with a different set of pages, see Developing an intranet from scratch on page 210. -
Page 199: Choosing A Style And Color Scheme
Using Your Preinstalled Intranet Site Managing the intranet site Click OK. Your company logo will appear to the right just as it will on your preinstalled intranet. Choosing a style and color scheme Your preinstalled intranet can take on many appearances. Preview and select the style that best suits you on the Intranet tab’s Appearance page. -
Page 200: Adding A Welcome Message
Click OK. You can now view your preinstalled intranet’s new style! Click the Intranet desktop icon from a client computer that was setup using the Magnia SG20 Setup CD. Adding a welcome message You can provide your own welcome message on your preinstalled intranet’s homepage. -
Page 201: Managing News Items
Click OK. You now have a fully customized intranet homepage. To view it, click the Intranet desktop icon from a client computer that was setup using the Magnia SG20 Setup CD. Managing news items Your preinstalled intranet has a Company News page. This page enables you to keep network users informed about current developments, company policy and so on. - Page 202 You now have a news item that will appear on your intranet’s Company News page. To view it, click the Intranet desktop icon from a client computer that was setup using the Magnia SG20 Setup CD. Modifying a news item To modify an existing news item, open the Administration Web site, select the Intranet tab, then select News.
-
Page 203: Managing Events
Your preinstalled intranet has a button or link called Upcoming Events (or just Events for some styles). You can add, remove, and modify events on this page of your intranet. Start by going to the Events page under the Intranet tab of the Magnia SG20 Administration Web site. - Page 204 The notice of your event will appear on your intranet’s Events page. To view the event, click the Intranet desktop icon from a client computer that was set up using the Magnia SG20 Setup CD. Deleting or modifying an event To modify or delete an existing event, open the Administration Web site, select the Intranet tab, then select Event.
-
Page 205: Managing Documents And Forms
Your preinstalled intranet has a button or link called Docs & forms. It opens the Documents page, on which you can store copies of your company’s important documents and forms. Start by displaying the Documents page under the Intranet tab of the Magnia SG20 Administration Web site. Adding a document or form Click New. - Page 206 NOTE: No network users will be able to modify or delete the documents from the preinstalled intranet. Document attributes (name, etc.) can only be modified and the links deleted from the Documents page using the Magnia SG20 Administration Web site’s Intranet tab.
-
Page 207: Managing Company Links
Your preinstalled intranet has a button or link called Company Links. You can add, remove, and modify important Web site links using this page of your intranet. Start by going to the Links page under the Intranet tab of the Magnia SG20 Administration Web site. - Page 208 Web page. You can enter any URL that your browser can interpret (for example, or simply http://www.toshiba.com toshiba.com HINT: The easiest way to get the Internet address is to open a new browser window and browse to the Web page to which you want to create a link. Once you reach that page, highlight and copy the address from your browser’s address box and...
-
Page 209: Acquiring Useful Software Applications
Acquiring office supplies Your preinstalled intranet has a button or link called Office Supplies. This feature is coming soon. Toshiba is pursuing partnerships with office supply vendors to provide you with quick and easy access to great prices on office supplies. -
Page 210: Developing An Intranet From Scratch
Web site that the Magnia SG20 provides for just such a purpose. The “applianceadmin” account has complete read and write control over the source code for this Web site. Using Network Neighborhood, locate the intranet share under... -
Page 211: Chapter 10: Exploring Toshiba's Built-In Services
These services are designed to help you manage your small business more efficiently. Health Status Monitoring and maintenance One of the best ways to keep your Magnia SG20 continually up and running is with the Health Monitoring Service. Qualified administrators monitor your Magnia SG20 and address any health-alert conditions. -
Page 212: Upgrading Your Appliance
You can read the descriptions and then decide whether you need or want the upgrade. Types of software upgrades might include important fixes, valuable enhancements and services, and upgrades to keep your Magnia SG20 up to date with the latest technology. -
Page 213: Chapter 11 Using Your Digital Central Intranet Site
If you use the Magnia SG20 Setup CD, you’ll find a desktop icon titled “Digital Central” that will take you to the Digital Central intranet site. Without the desktop icon, you can access the Digital Central intranet site by opening your Web browser and specifying http:/ /192.168.1.1/digital/ as the address. -
Page 214: Creating Your Own Photo Albums
.jpeg/.jpg format). The process of placing pictures on the Magnia SG20 is simple. You copy images to the photo album in the same way as you copy images from your digital camera onto your personal computer. -
Page 215: Scenario 1: Copying Existing Digital Photos Onto Your Digital Central Site
SG20’s public folder dedicated for Digital Central use. A drive was automatically created for you if you used the Magnia SG20 Setup CD to configure your personal computer to connect to the Magnia SG20. If you set up your client computer manually and didn’t map... - Page 216 This mapped drive should appear in your file manager application with a label similar to: “Public on ‘Myserver’ G:” NOTE: If you changed the name of your Magnia SG20 from the default “Myserver” to something else, this mapped drive label will also have changed. In this example, we changed the name “Myserver”...
-
Page 217: Scenario 2: Copying Photos From A Digital Camera To The Magnia Sg20 With A Personal Computer As The Interface
Most digital cameras provide software allowing you to copy your photos from your camera to a drive on your computer. This example uses the software that comes with the Toshiba PDR-M70 digital camera. Other cameras will use different software. Please see your digital camera owner’s manual for details. -
Page 218: Viewing Photo Albums
If your digital camera software supports naming and placement of the new photo folder, change the default folder placement to the “multimedia\photos” folder on your mapped Magnia SG20 public drive. An example of how to copy photos from your camera to a drive on your computer You can now view this photo album within Digital Central from any connected computer or supported Pocket PC device on your network, or you can add more photo albums. -
Page 219: Changing The Photo Album Name
Photos are listed down the right side in alphabetical order. Sample Digital Central photo Changing the photo album name Digital Central uses the file system folder name on the Magnia SG20 for the photo album name. Therefore, change the folder name to change the photo album name. ®... -
Page 220: Removing Individual Photos From Albums Or Removing Albums Entirely
Like renaming photo albums, removing individual photos from a Digital Central photo album or removing entire photo albums requires use of the file manager application on a computer that is connected to the Magnia SG20: In the file manager application, go to the mapped drive containing the multimedia\photos subfolder. -
Page 221: Adding/Removing Digital Videos
To see the changes in Digital Central, click the Memories navigation button to refresh the photo album listings. If you removed a folder from the Magnia SG20 file system, the album will no longer appear on the Digital Central site. - Page 222 Sample video file in Digital Central To remove any digital video files from Digital Central: Use the file manager application to go to the mapped drive on the Magnia SG20 and locate the multimedia\movies folder. Right-click the file you wish to delete and select Delete.
-
Page 223: Viewing Digital Videos
® the appropriate media player installed. An example of a media player is Real Player, which is installed to view the videos that are preinstalled on the Magnia SG20. You can ® install Real Player from the Setup CD. Another example is Microsoft Windows Media Player, which was probably preinstalled by the computer manufacturer. - Page 224 These playlists can be permanently saved for playback later. Digital Central’s versatile digital music capability The Magnia SG20’s central, internal storage allows different playlists to be stored. The efficient network capabilities permit different playlists to be played on the network simultaneously.
-
Page 225: Creating Digital Music From Your Personal Music Collection
Once you have created or purchased your digital music, you need to copy it to a predefined folder on your Magnia SG20 so that your Digital Central site can access it. The drive containing this folder should be mapped to your personal computer during the Magnia SG20 Setup process. -
Page 226: Creating A Playlist
Select the subfolder multimedia\audio, right-click the mouse and select Paste. All music folders need to be in the ‘public\multimedia\audio’ folder in the Magnia SG20 Repeat this process for each album you wish to place in your Digital Central jukebox. - Page 227 Magnia SG20’s \multimedia\audio folder. An empty main area means there are no songs in your Magnia SG20’s ‘public\multimedia\audio’ folder If the main area displays one or more folders, there is music to choose from on your Magnia SG20.
- Page 228 Using your Digital Central Intranet site Using the digital music jukebox An example of Digital Central displaying the available digital music Enter the name of this playlist. This name will appear on all supported and connected devices. Select songs for your playlist by clicking the CD symbol next to the song Click Apply to save your playlist.
-
Page 229: Changing The Playlist Order
Using your Digital Central Intranet site Using the digital music jukebox Changing the playlist order The default play order of songs within a saved playlist is alphabetical. You may wish to modify your playlist to your own playlist order. To do this: Click the Music navigation button in Digital Central and select the playlist for which you wish to change the play order by clicking the check box on the left side of the playlist name. -
Page 230: Adding/Removing Songs From A Playlist
Using your Digital Central Intranet site Using the digital music jukebox Click Ok to confirm you want to change the playlist order. Adding/removing songs from a playlist Click the Music navigation button in Digital Central and select the playlist you wish to modify by clicking the check box on the left side of the playlist name. -
Page 231: Creating A Playlist To Match An Entire Album
Removing a song from a playlist NOTE: Removing songs from playlists doesn’t remove the actual songs from your Magnia SG20 \multimedia\audio folder. Creating a playlist to match an entire album You may want to play a digital album in its entirety as it exists on the original CD. Most “ripping”... -
Page 232: Randomizing A Playlist
Using your Digital Central Intranet site Using the digital music jukebox Save the playlist by clicking Apply. Clicking a folder name automatically selects all songs within the album/folder Select the newly created playlist by clicking the check box on the left side of the playlist name, and then click Edit Playlist. -
Page 233: Playing A Playlist From Your Personal Computer
Using your Digital Central Intranet site Using the digital music jukebox Select the playlist you wish to remove by clicking the check box on the left side of the playlist name. Click Delete. Removing a playlist Click Yes on the confirmation box that pops up. Playing a playlist from your personal computer You can play your digital music playlists from most devices that are connected to your network via either a wire or wireless connection. -
Page 234: Playing A Playlist On Your Home Stereo System
For example, the AudioTron player, or equivalent player, can be used to deliver .mp3 or .wma music files from your Magnia SG20 to your home stereo system. Before proceeding to configure your Turtle Beach player to communicate with your SG20... - Page 235 Using your Digital Central Intranet site Using the digital music jukebox second line reads “Configure DHCP.” Press the Navigation and Selection Dial to select this option. The first line on the LCD should read “Configure DHCP” and the second line should read “Disable/Enable.”...
- Page 236 The Interface to Change User Name and Password page appears. Sample AutoTron Change User Name and Password page Change the NT/2000/XP user name to applianceadmin. Change the password to the appropriate password for this SG20 administration account (the default “Toshiba” automatically changes to the password of the first...
-
Page 237: Playing A Playlist On A Pocket Pc Device
Using your Digital Central Intranet site Using the Monitoring System user connected to the SG20). After entering the password, click Save NT/2000 Setting. The unit is now configured to the SG20. To verify the connection, place .mp3 or .wma files in the public\multimedia\audio directory (refer to Using the digital music jukebox on page 223 for details). -
Page 238: Setting Up Your Monitoring System
Under “Currently Installed Devices” you should see the message “You have no devices configured.” Make sure that the camera is connected via an Ethernet cable to your Magnia SG20 but that the camera is not plugged into any power outlet. For the device type, click 2100 Camera>Camera. - Page 239 Using your Digital Central Intranet site Using the Monitoring System Enter the serial number of the Axis 2100 camera. This serial number should be present on the bottom of the camera and labeled Ser. Sample configuration for an Axis 2100 camera Click Apply to save.
- Page 240 Using your Digital Central Intranet site Using the Monitoring System Sample newly installed camera is now viewable You may now configure the camera for brightness, color, focus, etc. Configuring the Axis 2100 camera The Axis 2100 camera has manual focus capability as well as the ability to change brightness, color, compression ratio, and more.
-
Page 241: Adding More Cameras
Using your Digital Central Intranet site Using the Monitoring System The following administration page is provided by Axis. Use this page to configure the image, set the date/time of the camera, enable the date/time to be displayed on the actual video, etc. Please see the Axis manual for details. Sample Axis 2100 camera configuration page Adding more cameras Your Digital Central site can have up to four Axis 2100 cameras installed. - Page 242 Using your Digital Central Intranet site Using the Monitoring System Follow the installation instructions for the applicable camera setup described earlier in this chapter. An example of installing additional cameras Click the new thumbnail picture to view the second installed camera Setting up your Axis 2400 video server Make sure the video server’s power is turned off.
- Page 243 Using your Digital Central Intranet site Using the Monitoring System Select the Axis 2400 Video Server as the device type. Selecting the Axis 2400 video server in the Setup page Click Apply. Type in a name for the video server (this name is used for labeling purposes). Type in the serial number of the video server.
-
Page 244: General Recording
Using your Digital Central Intranet site Using the Monitoring System Unlike when individual Axis 2100 cameras are installed, the video server will display generic names for the cameras connected to it. In the following example, two cameras have been installed: Video server successfully installed with two cameras attached Note the generic “Camera 1,”... -
Page 245: Manual Recording
TECHNICAL NOTE: Recordings can consume a considerable amount of disk space on your Magnia SG20. As a precaution, recordings will not start if the disk is over 95% full. Recordings in progress will also monitor remaining disk space and will stop when the disk is approximately 95% full. - Page 246 Using your Digital Central Intranet site Using the Monitoring System path multimedia\monitoring\<camera name>\manual\, where <camera name> is the name of your camera. When you provide a recording name, the recording's folder in the manual folder will be named exactly the same as the name you provided. However, when you use the default file name in the format, "7/17/2002 6:24 AM", the folder under your appliance server's public share will look like multimedia\monitoring\<camera name>\manual\1026883492\.
-
Page 247: Scheduling And Managing Recordings
Using your Digital Central Intranet site Using the Monitoring System Another method of verifying a recording is active is to go to the Manage Recording page. From here you can manage both manual and scheduled recordings. See the next section for more detail. - Page 248 Using your Digital Central Intranet site Using the Monitoring System Select the duration. If you want to record 24 hours per day for every day, simply select 24 hours. If you want the recordings to occur from 8:00 a.m. to 5:00 p.m., select a duration of 9 hours and a start time of 08:00, etc.
-
Page 249: Viewing Recordings
Using your Digital Central Intranet site Using the Monitoring System Go to the active Scheduled Recording and click Stop Recording. Sample of canceling an active scheduled recording This will only cancel the current recording and the schedule will be resumed the next day. To permanently cancel a scheduled recording, please see the next section. -
Page 250: Using The Digital Central Recording Viewer
Using your Digital Central Intranet site Using the Monitoring System Select the Playback link under the Recordings label on the left side of the page. A list of all available recordings is displayed and grouped by the camera name. In the following example page, there are two manual recordings under the camera “Living Room”... - Page 251 Magnia SG20 file system. To access this file system, you need to be a valid user on the Magnia SG20 (which is created via the Setup CD, or can be created via the Magnia SG20 Administration Web site).
-
Page 252: Deleting A Recording From The Playback Listing
A renamed folder will not be automatically deleted from the system TECHNICAL NOTE: Recordings can consume a considerable amount of disk space on your Magnia SG20. As a precaution, recordings will not start if the disk is over 95% full. Recordings in progress will also monitor remaining disk space and will stop when the disk is approximately 95% full. -
Page 253: Connecting To Digital Central With A Pocket Pc Device
Digital Central site. In this way, you have mobile access within your home environment not only to the photo album, digital music jukebox, and monitoring cameras, but also to the Internet in general via your Magnia SG20’s Internet connection. -
Page 254: Accessing Digital Music With Your Pocket Pc
Using your Digital Central Intranet site Connecting to Digital Central with a Pocket PC device Tap the thumbnail image for the folder you wish to view. Photo albums are represented by thumbnail images Once in the folder, view any picture by tapping on its thumbnail image. To go back to the Pocket PC Digital Central main page, tap anywhere on the Digital Central caption at the top of the screen. -
Page 255: Viewing Your Monitoring Cameras Using Your Pocket Pc
Using your Digital Central Intranet site Connecting to Digital Central with a Pocket PC device Tap Manage Playlist. Play, edit, or remove a playlist via your Pocket PC Tap the playlist you wish to listen to. Tap Play. Windows Media Player will pop up and start to play your music. - Page 256 Using your Digital Central Intranet site Connecting to Digital Central with a Pocket PC device...
-
Page 257: Chapter 12 Home Automation Interface
Internet. In addition to acting as a central server for your computing needs, the Magnia SG20 can also provide a portal for you to access and control home automation devices such as lights, thermostats and security systems. -
Page 258: Setup/Configuration
SG20 is set up to communicate with the Home Automation controller. Typically, a professional installer would perform this installation and setup. Once the Home Automation system is installed and running, the Magnia SG20 can be connected to the controller, to allow activation and configuration of the Magnia SG20 Home Automation interface. -
Page 259: Connecting The Home Automation Controller
Ethernet port on the Magnia SG20. The serial server’s Ethernet cable should be connected to the Magnia SG20’s local network (one of the sockets in the built in Ethernet switch). -
Page 260: Configuring The Home Automation Controller
The serial server should be configured with a static IP address for connection to the Magnia SG20 local network. This address must be within the subnet range of the Magnia SG20 local network, but must be outside the local network’s DHCP range. With the default configuration, this could be any address from 192.168.1.241 through... -
Page 261: Configuring Lighting
Enter the IP address of the serial server in the text box. Make sure this is the address assigned earlier to your serial server using its configuration program. Click Apply. Once completed, you can configure the Magnia SG20 to recognize the specific devices you have connected to your home automation controller. Configuring Lighting Any X10 or Extended X10 device such as the supported Leviton lamp module typically controls lighting. - Page 262 X10 Address: This is an address that is derived from the house code and unit code of the X10 device. For example, if the device’s house code was “A”, and the unit code was “4”, its address in the Magnia SG20 will be A4. ❖...
-
Page 263: Configuring Audio/Video
Configuring Audio/Video The Magnia SG20 is capable of interfacing and controlling audio and video equipment that has been programmed in the home automation controller via an infrared (IR) extender such as the supported JDS Infrared Xpander. - Page 264 The Add New Audio/Video Device screen appears, which allows you to enter information for a new device. By completing this screen, you tell the Magnia SG20 about an A/V device with IR codes configured in your home automation controller. This includes: ❖...
-
Page 265: Security
Security Security The Magnia SG20 can interact with a home security system, such as the supported Caddox NX8E security controller. You can view current alarm system status, as well as turn the alarm system on and off through the Digital Central Home Automation interface. - Page 266 Click Add thermostat. The Add New Thermostat screen appears, which allows you to enter information for a new thermostat. By completing this screen, you tell the Magnia SG20 about a thermostat configured in your home automation controller. Information includes: ❖...
-
Page 267: Controlling Home Automation Devices
To view the state of the lights connected to your home automation controller, use a web browser on a client computer or PDA to access your Magnia SG20 Digital Central web site. Enter the following URL in your web browser: http://myserver/ digital. -
Page 268: Audio/Video
To control IR configured equipment, use a web browser on a client computer or PDA to access your Magnia SG20 Digital Central web site. The interface for controlling audio and video equipment via Digital Central was designed to replicate the use of a normal remote control as much as possible. - Page 269 Home Automation Interface Audio/Video ❖ To select a device, click on the device you wish to control. All the buttons on this interface will happen instantaneously upon your click (just like what happens when you click on a remote). For example, the power on, volume up or down, menu, and so on, will all invoke the respective command upon a click.
-
Page 270: Security
To turn on or off the chime (door open/closed) click the Chime button. Heat / Air Conditioning The Magnia SG20 Digital Central interface allows you to control your heating and air conditioning units that are controlled through a thermostat configured in your home automation controller. -
Page 271: Viewing Log Information
Home Automation Interface Viewing Log Information The heating and air conditioning interface provided on Digital Central act similar to the actual thermostat in your home. The main difference is that if you have multiple thermostats, you need to select which thermostat you wish to remotely control via the drop down list on the main heating and air screen. -
Page 272: Alarm System Program For Stargate Compatible Controllers
A special program is required for Stargate compatible controllers that enable them to report alarm system status. Without this program, the home security section of the Magnia SG20 Home Automation interface cannot function. This program can be loaded in to Stargate compatible controllers using the Windows Event Manager program provided with the controller. - Page 273 Home Automation Interface Alarm System Program for Stargate Compatible Controllers Partition ARMED [Partition 1] TRANSISTION Then (V: security) LOAD with 2 EVENT: armed home Partition ARMED & in Home Mode [Partition 1] TRANSISTION Then (V: security) LOAD with 3 EVENT: faulted Partition has alarm condition [Partition 1] TRANSISTION Then (V: security) LOAD with 1...
-
Page 274: Chapter 13: If Something Goes Wrong
The LCD display brightens, but does not display the “Magnia SG20” message. The initial power to the Magnia SG20 did not fully trigger the warming up process. You should unplug the Magnia SG20, and then plug it back in. If the problem repeats itself, use a pen or paperclip to push the reset button that resides inside the tiny reset hole on the back panel of the Magnia SG20. -
Page 275: Problems When You Turn On A Client Computer
A client computer reports that it cannot acquire a DHCP address. The Magnia SG20 may be turned off. It must be turned on and finished warming up before you turn on a client computer. You should check to see if the Magnia SG20 is powered on. -
Page 276: Internet Problems
The client computer displays a message indicating that it cannot reconnect to the Magnia SG20 or the server is unavailable. The Magnia SG20 may be turned off. It must be turned on before you turn on a client computer. I get a message about a missing shortcut. -
Page 277: Other System Problems
” instead of “http://myserver/” or “http://myserver.loc” and instead of using the desktop icon provided by the Magnia SG20 Setup CD. If this works, your server’s name may have been changed from “myserver.” To see what your server’s name is, browse to the Magnia SG20 Administration Web site using “http://192.168.1.1:8282/.”... - Page 278 If Something Goes Wrong Other system problems To change your screen area and font size in the operating system: Click Start, Settings, then Control Panel. The Control Panel window opens. The control panel window Double-click Display. The Display window opens. Click the Settings tab.
- Page 279 Will the Magnia SG20 work if the client computers are running Linux? The Magnia SG20 may work flawlessly, but Toshiba has not tested Linux as an operating system for the client computers. Moreover, Toshiba is unable to support customers using...
-
Page 280: Email Problems
25) for you (for example, AT&T). Remove information for SMTP from Remote Admin/System tab/E-mail and click Apply. By doing so, your Magnia SG20 becomes the primary server for sending emails. This technique works in many environments and ISPs. However, some ISPs will block SMTP traffic. -
Page 281: Toshiba Support Web Site
From a client computer, click the Admin icon to start the Administration Web site. Click the Services tab. Click Support on the menu bar to view the Support page. Click the Toshiba Support Web Site link, and follow the instructions that appear on the screen. Toshiba voice contact Before calling Toshiba, make sure you have: ❖... -
Page 282: Appendix A: Specifications
Basic overview Appendix A: Specifications This appendix describes the Magnia SG20 specifications at the time this user’s guide was published. The most current specifications are available on the Toshiba America Information Systems’ Web site at applianceserver.toshiba.com Basic overview ® Intel... -
Page 283: Operating Systems Supported
If you use this product for this purpose, please contact the manufacturer. Operating systems supported ® The server uses the Red Hat Linux operating system to control the overall environment. The Magnia SG20 provides easy and reliable compatibility with attached computers using all major operating systems, including: ® ❖ Windows NT ®... - Page 284 Operating systems supported ® ® ❖ Apple (Macintosh System 9 and above) TECHNICAL NOTE: These operating systems cannot replace the Linux operating system in the server. Linux components ❖ Based on Red Hat Linux distribution ❖ Linux kernel ❖ Gateway/proxy services ❖...
-
Page 285: Appendix B: Manually Configuring Clients For The Magnia Sg20
Manually Configuring Clients for the Magnia SG20 This section explains how to manually configure clients to run with the Magnia SG20. To configure the client using the Windows 95, 98 or Windows Me operating system, see Manually configuring clients using the Windows 95, 98 and Windows Me operating system on page 285. - Page 286 Manually configuring clients using the Windows 95, 98 and Windows Me operating system There are three ways to determine if the computer already has a NIC installed: ❖ Physical signs ❖ Desktop signs ❖ Control Panel signs Looking for physical signs Check for a PCI network adapter card (if using a desktop computer) or a network adapter PC Card in the PC Card slot of a notebook computer.
-
Page 287: Configuring The Pcmcia Socket
Manually configuring clients using the Windows 95, 98 and Windows Me operating system If Network Adapters does appear in the list of devices, double-click the words Network Adapters. If the computer is configured for networking through its modem, the Dial-Up Adapter should be listed. -
Page 288: Installing The Network Card Using Windows 95 Or 98 Operating Systems
Before restarting the computer, make sure that the Ethernet cable is properly connected to both the network adapter card and the Magnia SG20. After the computer restarts, you will be ready to continue with your client configuration network settings. -
Page 289: Installing The Nic Using The Windows Me Operating System
Before restarting the computer, make sure that the Ethernet cable is properly connected to both the network adapter card and the Magnia SG20. After the computer restarts, you will be ready to continue with your client configuration network settings. - Page 290 The Network Properties dialog box appears. Click the Configuration tab. In the list labeled The following network components are installed: click the TCP/IP item that is associated with the network adapter card you wish to use for connecting to the Magnia SG20, then click Properties.
-
Page 291: Configuring Internet Explorer To Connect To The Magnia Sg20
Click OK on the Network Properties dialog box to close it. Restart the computer. Configuring Internet Explorer to connect to the Magnia SG20 Although you may use any Internet browser to access your Magnia SG20, this section ® explains how to configure Microsoft Internet Explorer. -
Page 292: User Accounts
As the server for your local area network, the Magnia SG20 requires accounts with user names and passwords for each of your users. To log in to the Magnia SG20, you must first be logged in to your client computer as that same user. - Page 293 Using your current user name and password Use this procedure if you already have a user name and password that you wish to use when you log in to the Magnia SG20. If you haven’t already done so, restart the operating system.
-
Page 294: Adding Links To The Desktop
NOTE: The address http://192.168.1.1:8282/wizard may also be used. Adding links to the desktop For convenient access to the Magnia SG20 intranet and Administration Web site, you may add links to the desktop of the client computer. To do so: Click the right mouse button anywhere on the desktop to display the Desktop menu. -
Page 295: Manually Configuring Clients With Windows Nt 4.0, Windows 2000 And Windows Xp Operating Systems
NOTE: Be aware that an administrative user on the client computer may not be an administrator on the Magnia SG20. Both computers maintain their own user lists. This section explains how to configure clients with the Windows 95, Windows 98, or Windows Me operating systems to run with the Magnia SG20. - Page 296 Magnia SG20 at this time. If you have not overlooked an existing network adapter, you must purchase one that is compatible with your computer.
- Page 297 Before restarting the computer, make sure that the Ethernet cable is properly connected to both the network adapter card and the Magnia SG20. After the computer restarts, you will be ready to continue with your client configuration network settings.
-
Page 298: Networking Settings
Manually configuring clients with Windows NT 4.0, Windows 2000 and Windows XP operating systems Networking settings Once you have a properly installed network adapter card, you need to make additional network settings so that the client computer can communicate with the Magnia SG20. ® You may need your Windows operating system setup disk to complete this process. - Page 299 When the TCP/IP Properties dialog box appears, click the IP Address tab. From the drop-down Adapter list, select the adapter that you wish to use for connecting to the Magnia SG20. NOTE: If Specify IP Address is selected, and you have numbers in the IP Address box or the Subnet Mask box, write them down now.
-
Page 300: Configuring Internet Explorer To Connect To The Magnia Sg20
Click OK to close the Network Properties dialog box. Restart your computer. Configuring Internet Explorer to connect to the Magnia SG20 Although you may use any Internet browser to access your Magnia SG20, this section explains how to configure Internet Explorer. Determining the version of Internet Explorer The intranet and Administration Web sites on the Magnia SG20 require Internet Explorer version 4.0 or newer. -
Page 301: User Accounts
As the server for your local area network, the Magnia SG20 requires accounts with user names and passwords for each of your users. To log in to the Magnia SG20 as a specific user, you must first be logged on to your client computer as that same user. - Page 302 If this is not the first user, type the user name and password of the level 3 user you wish to log in to the Magnia SG20 as. Click New Account. If the user you are logged in as is not a level 3 user, the New Account button does not appear.
-
Page 303: Adding Links To The Desktop
If this is the first time any client computer has been configured to work with your Magnia SG20, you must now configure the Magnia SG20 itself. To do so, start Internet Explorer or your preferred Internet browser application. Type in the address http://myserver.loc:8282/wizard... -
Page 304: Appendix C: Configuring A Macintosh As A Client
Windows operating systems, Macintosh client computers already have the network adapter installed. To connect your Macintosh client to the Magnia SG20 is a simple task of setting some network configurations. Network settings To configure your Macintosh: From the Apple menu, select Control Panels, then select AppleTalk. -
Page 305: Internet Browser
As the server for your local area network, the Magnia SG20 requires accounts with user names and passwords for each of your users. To log in to the Magnia SG20 as a specific user, you must first be logged in to your client computer as that same user. - Page 306 When the Chooser dialog box appears, click Active for your AppleTalk option. Click AppleShare and in the Select-a-file-server list, select your Magnia SG20. If the name of your Magnia SG20 has been changed from the default Myserver, substitute the new name.
- Page 307 Configuring a Macintosh client When the Select the items you want to use: dialog box appears, click Public and the one listed with your user name. Click OK and close the Chooser dialog box.
-
Page 308: Appendix D: Privacy Statement For Magnia Sg20
For example, the “Register Now!” link in the Administration Web site passes both of these values so that the user is taken directly to the Magnia SG20 Internet product registration page and so the serial number can be pre-filled in the serial number field to help avoid registration errors. -
Page 309: Appendix E: Open Source License Information
GNU GENERAL PUBLIC LICENSE Appendix E: Open Source License Information GNU GENERAL PUBLIC LICENSE Version 2, June 1991 Copyright © 1989, 1991 Free Software Foundation, Inc. 59 Temple Place / Suite 330, Boston, MA 02111-1307, USA Everyone is permitted to copy and distribute verbatim copies of this license document, but changing it is not allowed. Preamble The licenses for most software are designed to take away your freedom to share and change it. -
Page 310: Terms And Conditions For Copying, Distribution And Modification
GNU GENERAL PUBLIC LICENSE TERMS AND CONDITIONS FOR COPYING, DISTRIBUTION AND MODIFICATION This License applies to any program or other work which contains a notice placed by the copyright holder saying it may be distributed under the terms of this General Public License. The “Program,” below, refers to any such program or work, and a “work based on the Program”... -
Page 311: No Warranty
GNU GENERAL PUBLIC LICENSE exception, the source code distributed need not include anything that is normally distributed (in either source or binary form) with the major components (compiler, kernel, and so on) of the operating system on which the executable runs, unless that component itself accompanies the executable. If distribution of executable or object code is made by offering access to copy from a designated place, then offering equivalent access to copy the source code from the same place counts as distribution of the source code, even though third parties are not compelled to copy the source along with the object code. -
Page 312: End Of Terms And Conditions
DES / SSL Library LICENSE TO, THE IMPLIED WARRANTIES OF MERCHANTABILITY AND FITNESS FOR A PARTICULAR PURPOSE. THE ENTIRE RISK AS TO THE QUALITY AND PERFORMANCE OF THE PROGRAM IS WITH YOU. SHOULD THE PROGRAM PROVE DEFECTIVE, YOU ASSUME THE COST OF ALL NECESSARY SERVICING, REPAIR OR CORRECTION. -
Page 313: Openssl Library License
OpenSSL Library LICENSE OpenSSL Library LICENSE Copyright (c) 1998-2000 The OpenSSL Project. All rights reserved. Redistribution and use in source and binary forms, with or without modification, are permitted provided that the following conditions are met: 1. Redistributions of source code must retain the above copyright notice, this list of conditions and the following disclaimer. - Page 314 Glossary TECHNICAL NOTE: Some features defined in this glossary may not be available on your computer. Acronyms Alternating current DHCP: Dynamic Host Configuration Protocol DNS: Domain Name Service Domain Name System DSL: Digital Subscriber Line ECC: Error-Correcting Code FTP: File Transfer Protocol HTML: HyperText Markup Language IMAP:...
- Page 315 A device that connects to a computer or network hub for the purpose of communicating with wireless-enabled computers. See also wireless communications Administration Web site: The Web site that is stored on the Magnia SG20 and accessed from a client computer. alternating current (AC): Electric current that reverses its direction at regular intervals.
- Page 316 CD-ROM (Compact Disc Read Only Memory): A high-capacity (approximately 600 MB) storage medium that uses laser optics instead of magnetic means for reading data. The system can read data from these discs, but cannot write data to the discs. client: In a network, a computer that accesses shared resources provided by the server. client: A computer connected to a server.
- Page 317 Ethernet: A local area network (LAN) standard for hardware, communications, and cabling. It links network nodes in a bus topology using coaxial cable, or in a star topology using fiber-optic cable or twisted-pair cable. Normally, all nodes share the total bandwidth, which is 10 Mbps (Ethernet), 100 Mbps (Fast Ethernet), or 1000 Mbps (Gigabit Ethernet).
- Page 318 Integrated Services Digital Network (ISDN): A worldwide communications network for delivering telephone and data services. It uses two types of communications channel: a B channel, which carries voice, graphics and data at 64 Kbps, and a D channel, which carries control information for signalling at 16 Kbps. A basic ISDN installation typically provides two B channels and one D channel.
- Page 319 network: A collection of interconnected, individually controlled computers, together with the hardware and software used to connect them. A network allows users to share data and peripheral devices such as printers, and to exchange electronic mail. network interface card: An expansion board you insert into a computer so the computer can be connected to a network.
- Page 320 Class B devices; Toshiba servers are Class A. reboot: See boot, restart. Remote Web Site: A Toshiba Web site used to configure the Magnia SG20 from a geographically remote location. RJ11 (Registered Jack 11): A modular telephone connector used on most telephone networks and direct-connect modems.
- Page 321 TCP/IP: A set of procedures (protocol) for connecting dissimilar systems. Topology: In a network, the pattern of interconnection between computers and servers; for example, the Magnia SG20 and its connected client computers are in a star configuration. Uninterruptible Power Supply (UPS): A device connected between a piece of electrical equipment, such as a computer system, and the AC power source to protect against transient power conditions and short-term power outages.
- Page 322 Instead, each client computer is capable of transmitting a radio signal, which is apprehended by an access point connected to the Magnia SG20. See also access point.
- Page 323 Administrative Web site monthly appliance server partial problems selecting power full archive files incremental assistance partial Toshiba Web site viewing automatic schedule backup status backup, canceling weekly email retrieval backup/restore and VPN broadband connection Axis 2100 camera Axis 2400 video server...
- Page 324 IP address client computer cables client computers cleaning the Magnia SG20 to the Internet client connecting a printer defined general Windows procedure local data backup connecting clients client computer connecting to the internet configuring connecting to the VPN configuring Internet access...
- Page 325 Digital Photo digital photos email digital video album and POP3 server digital videos and SMTP server direct email delivery and your ISP disabling the modem client setup disconnecting VPN direct delivery disk domain primary drive domain host second drive Internet view checking display...
- Page 326 file sharing health technical information remote monitoring files viewing information archiving Web site backup Health Monitoring Service extra storage help network high security, mode personal problems icons public other restoring safety sharing installing storing on the server a NIC viewing TCP/IP Windows installing a NIC for...
- Page 327 configuring client computers connecting to existing network configuring for cable first connection configuring for DSL manual configuration with Windows 95, 98 Internet data backup and Me Internet Explorer port configuring setting the first connection determining version identifying the version viewing information running LCD panel setting options...
- Page 328 manually configuring a VPN client running topology Windows NT using mapping drives network adapter Windows 2000 finding Windows 95 Windows 98 network card Windows Me see network adapter Windows NT network printer, connecting Microsoft Outlook, setup network settings mirrored host, Internet, email configuring modem determining...
- Page 329 domain host authentication restore files server, email selecting port running the client configuration diskettes for power problems safety icons requirements second power down disk drive power on view print jobs security deleting ease-of-use mode printer user add printer wizard types connecting security modes deleting print jobs...
- Page 330 SG20VPNSetup.exe shared Internet access TCP/IP, installing sharing telnet user, managing a printer temperature general Windows procedure status files Turtle Beach AudioTron digital music player printers, Windows 98 sharing files sharing printers shortcut upgrade problems appliance shutting down software SMTP manual and domain host authentication Web site server email...
- Page 331 VPN and account management wireless networking VPN and backup/restore features wizards VPN and modem connections add printer VPN Client Setup Wizard client setup warranty options Web site Toshiba view status backup email...
Need help?
Do you have a question about the Magnia SG20 and is the answer not in the manual?
Questions and answers