Table of Contents
Advertisement
Advertisement
Table of Contents

Related Manuals for biochrom Novaspec III Plus


Summary of Contents for biochrom Novaspec III Plus
- Page 1 Novaspec III Novaspec III 80-2120-40 5061-068 Rev 1.0...
-
Page 2: Table Of Contents
Table of Contents Essential Safety Notes ..............................4 Unpacking, Positioning, Installation ..........................4 Warranty and Repair ................................5 Technical Specifications ……………………………………………………………………………………………………………….6 Operation..……………………………………………………………………………………………………………………………….7 Introduction ………………………………………………………………………………………………………………….………7 Sample Handling Tips ..…………………………………………………………………………….………………………………7 Keypad and Display ..………………………………………………………………………………………………………………8 Software Style …………..………………………………………………………..…………………………………………………9 Parameters …….. …………………………………………………………………………………………………………………….10 Absorbance ………………..….……………………………..…………………………………………………………………….10 Transmission ……………………..………………………………………………………………………………………………..13 Concentration with a Factor …….………………………………………………………………………………………………..16 Concentration with a Standard .………………..………………………………………………………………………………..19 Rate …………………………………. - Page 3 Print Via Computer ………………………………………………………...………………………………………………………….36 Installation ………………………………………………………………………………………………………………………….36 Test Tube and Heated Cell Holder Installation……………………………………………………………………………………..37 Accessories ……………………...…………………………………………………………………………………………………….38 Cleaning and General Care of the Instrument ……….……………..…..…………………………………………………………38 External cleaning ……………………………….……………………………………………………………...………………….38 Changing cell holder or removal for cleaning ……………………………………….……………………..…………………..38 Icon Glossary ………………………………………………………………………………………………………………………….39 P a g e...
-
Page 4: Essential Safety Notes
Essential Safety Notes There are a number of warning labels and symbols on your instrument. These are there to inform you where potential danger exists or particular caution is required. Before commencing installation, please take time to familiarize yourself with these symbols and their meaning. Caution (refer to accompanying documents). -
Page 5: Warranty And Repair
Products failing within the first 30 days of end user operation are considered dead on arrival (DOA) and where appropriate a replacement will be given if a repair is not possible. In the instance of a DOA; Biochrom will incur shipping charges of returning the unit back to the facility. -
Page 6: Technical Specifications
Technical Specifications Wavelength range 325nm to 1100nm Monochromator Flat grating Wavelength calibration Automatic upon switch on Spectral bandwidth <7nm Wavelength accuracy ± 2nm Wavelength reproducibility ± 1nm Light sources Pulsed Tungsten halogen Detector CMOS array Photometric range - 0.300 to 2.500A, 0.3 to 199%T ±... -
Page 7: Operation
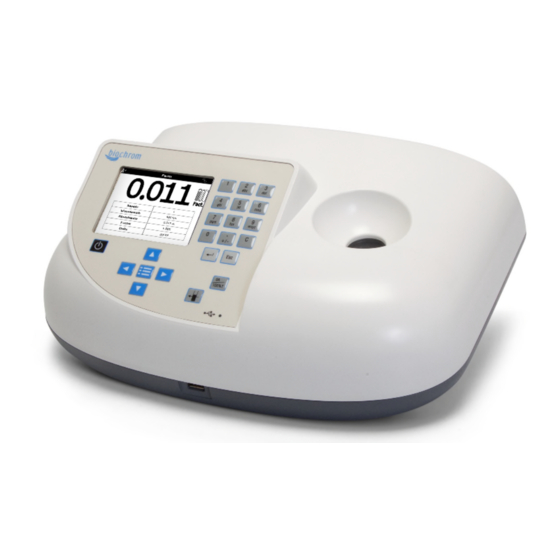
Operation Introduction Your spectrophotometer is a simple-to-use visible instrument. It has no moving parts, which is the basis of the rapid scanning operating system. It has been designed to meet the routine spectroscopy needs of customers requiring a compact instrument that is easy to use. The product is reliable and requires low maintenance. After it is turned on and calibrated the Novaspec III will show an absorbance measurement display. -
Page 8: Keypad And Display
Keypad and Display The back-lit liquid crystal display is very easy to navigate around using the alphanumeric entry and navigation arrow keys on the hard wearing, spill proof membrane keypad. Alphanumeric Keys Escape/Cancel OK Key On/Standby Set Reference Arrow Keys View Options Take a Measurement Action... -
Page 9: Software Style
Software Style The user interface is built around the options key . The instrument will open automatically to an application and you will use the options key to select different parameters. Keypad Number Description Allows you to run in different modes: Absorbance, Transmission, 1 Parameter Concentration with Factor, Concentration with Standard, Rate (Kinetics) -
Page 10: Parameters
Parameters Absorbance Step 1 Press the Options Key Step 2 Press 1 to set parameters. Step 3 If not already in Absorbance mode, use left or right arrow keys to select Absorbance mode. Press the down arrow key. Step 4 Use the left and right arrow keys to change the wavelength, or use the number keypad. - Page 11 Step 8 Insert reference sample, press Step 9 Insert sample, press Repeat Step 9 for all samples. Step 10 Press to see options For example: Press 3 to see a graph of the result, press 3 to return to the digital display. 11 | P a g e...
- Page 12 Options (select using key pad numbers) 1. Return to parameters screen (Step 2 above). 2. Export result via selected method. 3. Toggle between digital results screen and graph results screen. 4. Run standard – unavailable under this mode. 5. Go to Utilities Folder 6.
-
Page 13: Transmission
Transmission Step 1 Press the Options Key Step 2 Press 1 to set parameters. Step 3 If not already in Transmission mode, use the left and right arrow keys to choose Transmission mode. Press the down arrow key. Step 4 Use the left and right arrow keys to change the wavelength, or use the number keypad. - Page 14 Step 8 Insert reference sample, press Step 9 Insert sample, press Repeat Step 9 for all samples. Step 10 Press to see options. For example: Press 3 to see a graph of the result, press 3 to return to the digital display. 14 | P a g e...
- Page 15 Options (select using key pad numbers) 1. Return to parameters screen (Step 2 above). 2. Export result via selected method. 3. Toggle between digital results screen and graph results screen. 4. Run standard – unavailable under this mode. 5. Go to Utilities Folder 6.
-
Page 16: Concentration With A Factor
Concentration with a Factor Entering a known factor. Step 1 Press the Options Key Step 2 Press 1 to set parameters. Step 3 If not already in Conc. Factor mode, use left or right arrow keys to Conc Factor mode. Press the down arrow key. - Page 17 Press ok to save and exit the units selection. Step 7 If required, enter a sample name. This name followed by an incrementing sample number will be used for naming subsequent results. Press the down arrow key. Step 8 Set the sample option to yes, if you need to measure many different samples and assign different sample names.
- Page 18 Step 12 Press to see options For example: Press 3 to see a graph of the result, press 3 to return to the digital display. Options (select using key pad numbers) 1.Return to parameters screen (Step 2 above). 2.Print result via selected method. 3.Toggle between digital results screen and graph results screen.
-
Page 19: Concentration With A Standard
Concentration with a Standard Single point calibration curve with known standard and need to calculate a factor. Step 1 Press the Options Key Step 2 Press 1 to set parameters. Step 3 If not already in Conc. Standard mode use left or right arrow keys to Conc Standard mode. - Page 20 Press ok to save and exit the units selection. Step 7 If required enter a sample name. This name followed by an incrementing sample number will be used for naming subsequent results. Press the down arrow key. Step 8 Set this option to yes, if you need to measure many different samples and assign different sample names.
- Page 21 Step 13 Result is displayed digitally. Press to see options For example: Press 3 to see a graph of the result, press 3 to return to the digital display. Options (select using key pad numbers) 1.Return to parameters screen (Step 2 above). 2.Print result via selected method.
-
Page 22: Rate
Rate This application has a fixed 10 second interval. I twill keep collecting data until you manually stop it by pressing the C button. Step 1 Press the Options Key Step 2 Press 1 to set parameters. Step 3 Use the left and right arrow keys to choose Rate mode. - Page 23 Step 8 Insert reference sample, press Step 9 Insert sample, press . Data will keep collecting until manually stopped by pressing the C button. You can toggle between seeing the results digitally or in a graph form. Step 10 Press C to stop collecting data. Step 11 Press to see options...
- Page 24 Options (select using key pad numbers) 1.Return to parameters screen (Step 2 above). 2.Print result via selected method. 3.Toggle between digital results screen oandgraph results screen. 4.Run standard – unavailable under this mode. 5.Go to Utilities Folder 6.Go to Methods Folder 7.Save method –...
-
Page 25: Methods Folder
Methods Folder These folders are the storage locations for any user modified Applications (Methods) that are saved in the Options menu. There are 8 total folders and can store up to 9 methods per folder. In addition, if a USB memory stick has been inserted, it is possible to store on the memory stick. -
Page 26: Folder Names
Use the left and right arrow keys to save the method to a methods folder (1-8) or to a USB memory stick is a USB stock is inserted. Press the down arrow key. Name your method. Press to save your method or to cancel and return to the results screen. -
Page 27: Lock Folder
Lock Folder Press 2 to select Lock Folder. Press the down arrow key. Select which method folder to be locked using the left and right arrows. Press the down arrow key. Select a pass code using the keypad numbers or left and right arrows. -
Page 28: Delete A Method
Within a methods folder, press to display the following options: 1. Delete Method 2. Lock Method 3. Unlock Method Delete Method Press 1 to select delete method. Select the method to be deleted using the left and right arrows. Press to delete the method or to cancel and return to Methods folder. -
Page 29: Unlock Method
Unlock Method Press 3 to select unlock method. Select the method to be unlocked using the left and right arrows. Press the down arrow key. Enter the pass code using the keypad numbers or left and right arrows. Press to unlock the method or cancel to return to the Methods folder. -
Page 30: When Saving To A Usb Memory Stick
Saving Data onto a USB Memory Stick When a USB memory stick is inserted into the connector in front of the instrument an audible click will be heard as the stick is recognized. Whenever a USB stick is inserted, all data will automatically be saved to the USB memory stick. The format used is selected from the utilities menu under printer options. - Page 31 Data is stored on the USB memory stick under the following directory structure \Instrument serial no\PVC Double clicking on a file opens it into the PVC application from which it can be exported or saved. Full details on the use of PVC are covered in the PVC user manual 31 | P a g e...
-
Page 32: Utilities Folder
Utilities Folder Folder Keypad Description Number Set correct time and date Select preferred language and number format Export output options Select preferences including screen layout (themes), cell heater enable (where fitted) and automatic stanby mode enable Adjust screen contrast & brightness Serial number and software version 32 | P a g e... -
Page 33: Date And Time
1. Date and Time Enter the day using the keypad numbers or left and right arrows. Press the down arrow key. Select the month using the left and right arrow keys. Press the down arrow key. Enter the year month using the keypad or left and right arrow keys. -
Page 34: Export Data
3. Export Data Select whether auto-print is on or off using the left and right arrows. When auto-print is on the results are automatically printed after a measurement is taken. When it is off, printing has to be initiated manually. This can also be set using the Options key in each application or method. -
Page 35: Contrast
5. Contrast Ambient light and temperature can affect the display. This function can optimize the display for local conditions. Adjust the contrast using the left and right arrows. Press the down arrow key. Adjust the brightness using the left and right arrows. -
Page 36: Print Via Computer
Print Via Computer (PVC) This PC application running on a Windows computer can be used to transfer result data from an attached instrument. The result data transferred can be printed or stored in a variety of formats including Excel spreadsheet, graphical (EMF), comma delimited text (CSV), tab delimited text (TXT), rich text format (RTF) and PVC. -
Page 37: Test Tube And Heated Cell Holder Installation
Test Tube and Heated Cell Holder Installation Installation 1. Lay the instrument upside down on a soft surface. 2. Unscrew the two screws and remove the cuvette cell holder by tilting the holder to allow the cell ring to clear the baseplate. -
Page 38: Accessories
Accessories Description Catalog Number Heated cell holder 80-3007-13 Test tube holder 80-3007-12 Cleaning and General Care of the Instrument External cleaning Switch off the instrument and disconnect the power cord. Use a soft damp cloth. Clean all external surfaces. A mild liquid detergent may be used to remove stubborn marks. Changing cell holder or removal for cleaning This can be removed by undoing the appropriate screws on the bottom of the instrument. -
Page 39: Icon Glossary
Icon Glossary Status Bar Icons Meaning Measurement in progress (lamp lit). The icons are cycled through to indicate the lamp coming up to full brightness and then shown in reverse when the lamp is turned off. Heated cell holder at temperature. Heated cell holder fitted but not enabled. - Page 40 Preferences setup. Regional settings. Data export setup defines the settings for the “Print” output to PC and USB memory stick. Spectro Blocks game (only available if enabled in preferences). Sudoko game (only available if enabled in preferences). Method storage folder. Menu folder.
- Page 41 Cambridge, CB23 6DW, United Kingdom Telephone +44 (0) 1223 423 723 +44 (0) 1223 4220 164 Email support@hbiosci.com Website www.biochromspectros.com Biochrom US 84 October Hill Road Holliston, Massachusetts 01746 Telephone (508) 893 3999 Toll Free (800) 272 2775 (508) 429 5732 Email support@hbiosci.com...
Need help?
Do you have a question about the Novaspec III Plus and is the answer not in the manual?
Questions and answers