Grandstream Networks GWN7000 User Manual
Enterprise multi-wan gigabit vpn router
Hide thumbs
Also See for GWN7000:
- User manual (155 pages) ,
- Configuration manual (23 pages) ,
- Management & provisioning (23 pages)

Subscribe to Our Youtube Channel
Related Manuals for Grandstream Networks GWN7000


Summary of Contents for Grandstream Networks GWN7000
- Page 1 Grandstream Networks, Inc. GWN7000 Enterprise Multi-WAN Gigabit VPN Router User Manual...
- Page 2 Grandstream Networks, Inc. is not permitted. The latest electronic version of this guide is available for download here: http://www.grandstream.com/support Grandstream is a registered trademark and Grandstream logo is trademark of Grandstream Networks, Inc. in the United States, Europe and other countries. OPEN SOURCE LICENSES GWN7000 firmware contains third-party open source software.
-
Page 3: Table Of Contents
WELCOME ........................11 PRODUCT OVERVIEW ....................12 Technical Specifications ........................12 INSTALLATION ......................14 Equipment Packaging .......................... 14 Connect your GWN7000 ........................14 Safety Compliances ..........................15 Warranty ............................... 15 GETTING STARTED ..................... 16 LED Indicators ............................. 16 Use the WEB GUI ..........................16 Access WEB GUI .......................... - Page 4 Generate Server/Client Certificates ....................49 Create OpenVPN® Server ......................56 OpenVPN® Client configuration ......................60 L2TP/IPSEC Configuration ........................64 GWN7000 L2TP/IPSec Client Configuration ................64 PPTP CONFIGURATION ........................67 GWN7000 Client Configuration ....................67 FIREWALL ........................70 Basic Settings ............................70 General Settings ...........................
- Page 5 Upgrading Firmware ..........................88 Upgrading via WEB GUI ....................... 88 Provisioning and backup ........................89 Download Configuration ....................... 89 Configuration Server ........................89 Reset and reboot ..........................90 EXPERIENCING THE GWN7000 ENTERPRISE ROUTER ......... 91 P a g e GWN7000 User Manual...
- Page 6 Table 2: GWN7000 Equipment Packaging ....................14 Table 3: LED Indicators ..........................16 Table 4: Overview ............................20 Table 5: GWN7000 WEB GUI -> Router ->Port -> WAN Port (1,2) ............23 Table 6: 6in4 Tunnels ..........................24 Table 7: 6rd Tunnels ............................ 25 Table 8: aiccu Tunnels ..........................
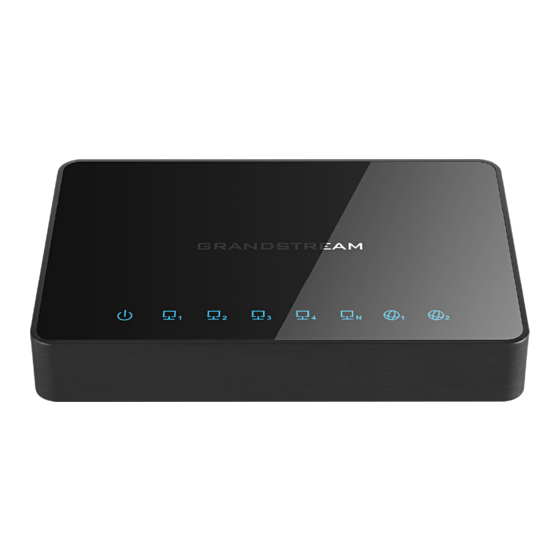
- Page 7 Table of Figures Figure 1: GWN7000 Front View ........................14 Figure 2: GWN7000 Back View ........................15 Figure 3: GWN7000 Web GUI Login Page ....................17 Figure 4: Change Password on first boot ....................18 Figure 5: Setup Wizard ..........................18 Figure 6: GWN7000 Web GUI Language ....................
- Page 8 Figure 49: Syslog ............................83 Figure 50: NAT table ........................... 84 Figure 51: Add a New File to Share ......................85 Figure 52: File Share Actions ........................85 Figure 53: Access File Share ........................86 P a g e GWN7000 User Manual...
-
Page 9: Document Purpose
DOCUMENT PURPOSE This document describes how to configure the GWN7000 to manage wired and wireless networks via an intuitive WebGUI. The intended audiences of this document are network administrators. Please visit to download the latest “GWN7000 User Manual”. http://www.grandstream.com/support This guide covers following topics: •... -
Page 10: Change Log
CHANGE LOG This section documents significant changes from previous versions of the GWN7000 user manuals. Only major new features or major document updates are listed here. Minor updates for corrections or editing are not documented here. Firmware Version 1.0.2.71 •... -
Page 11: Welcome
User Manual, could void your manufacturer warranty. Warning: Please do not use a different power adaptor with the GWN7000 as it may cause damage to the products and void the manufacturer warranty. -
Page 12: Product Overview
PRODUCT OVERVIEW Technical Specifications Table 1: GWN7000 Technical Specifications • Network Interfaces 2 x autosensing 10/100/1000 WAN Ports • 1 x autosensing 10/100/1000 configurable as LAN, WAN or VoIP port • 4 x autosensing 10/100/1000 LAN Ports • DHCP •... - Page 13 Humidity: 10% to 90% Non-condensing Unit Dimensions: 200 x 136 x 37mm; Unit Weight: 570g Physical Entire Package Dimensions: 324 x 163.5 x 54mm; Entire Package Weight: 930g • GWN7000 Enterprise Router Package Content • 12V/2A Power Adapter • Quick Installation Guide •...
-
Page 14: Installation
INSTALLATION Before deploying and configuring the GWN7000, the device needs to be properly powered up and connected to the network. This section describes detailed information on installation, connection and warranty policy of the GWN7000. Equipment Packaging Table 2: GWN7000 Equipment Packaging... -
Page 15: Safety Compliances
2. Connect the other end of the Ethernet cable(s) into a DSL modem or router(s). 3. Connect the 12V DC power adapter into the power jack on the back of the GWN7000. Insert the main plug of the power adapter into a surge-protected power outlet. -
Page 16: Getting Started
This section provides step-by-step instructions on how to read LED indicators and use Web GUI interface of the GWN7000. LED Indicators The front panel of the GWN7000 has LED indicators for power and interfaces activities, the table below describes the LED indicators status. Table 3: LED Indicators... -
Page 17: Figure 3: Gwn7000 Web Gui Login Page
Figure 3: GWN7000 Web GUI Login Page To access the Web GUI: Connect a computer to a LAN Port of the GWN7000. Ensure the device is properly powered up, and the Power, LAN port LEDs light up in green. Open a Web browser on the computer and enter the web GUI URL in the following format: https://192.168.1.1... -
Page 18: Web Gui Languages
Figure 5: Setup Wizard WEB GUI Languages Currently the GWN7000 series web GUI supports English and Simplified Chinese. To change default language, select the displayed language at the upper right of the web GUI either before or after logging in. -
Page 19: Web Gui Configuration
• Access Points: To add, pair and manage discovered access points. • Clients: Shows and manages the list of the clients connected to LAN ports of the GWN7000 and wireless clients connected via GWN76xx access points. • VPN: Configures OpenVPN® Client/Server, PPTP and L2TP/IPSec client tunnels. -
Page 20: Overview Page
GWN7000’s information presented in a Dashboard style for easy monitoring. Figure 8: Overview Page It is used to show the status of the GWN7000 for different items, please refer to the following table for each item:... -
Page 21: Save And Apply Changes
When clicking on "Save" button after configuring or changing any option on the web GUI pages. A message mentioning the number of changes will appear on the upper menu. Figure 9: Apply Changes Click on button to apply changes, or to undo the changes. P a g e GWN7000 User Manual... -
Page 22: Router Configuration
Status Status page displays Device Status to check MAC address, Part Number, Firmware related information and Uptime for the GWN7000; and WAN Status showing general information about WAN Ports such as uptime, current throughput, aggregate usage, and IP address. Router’s Status page can be accessed from Web GUI->Router->Status. -
Page 23: Ports Configuration
Ports Configuration Connect to GWN7000’s Web GUI from a computer connected to a LAN port and go to Router->Port page for Port configuration. WAN Ports Settings The GWN7000 has 2 WAN ports configured as DHCP clients by default. Each port can be connected with DSL modem or routers. -
Page 24: Tunnel
Alternate IPv6 DNS It is used to set an Alternate DNS server address (IPv6 address). If Preferred DNS is set, GWN7000 will use it in when the Preferred DNS fails. This option appears only when “Native IPv6” option is enabled. -
Page 25: Global Settings
This section specifies operating mode for multi-WAN that will be used for enabling/disabling Failover and Load Balancing on WAN ports, and banning MAC addresses. The following table shows the configuration parameters for Multi-WAN settings P a g e GWN7000 User Manual... -
Page 26: Port Mirroring
Port Mirroring With port mirroring enabled, the GWN7000 will send a copy of all network packets seen on one LAN port to another port, where the packet can be analyzed. Refer to the below table for the available fields to configure. -
Page 27: Table 11: Ipv4 Static Routes
Enter the Network/Host IP address on which to route the traffic to. Target Network/Host 2001:db8:3c4d:4::/64 Enter the Gateway’s IP address. Gateway fec0:470:28:5b2::1/64 Set the metric value. The valid range is 0-255. Default value is 1. Metric P a g e GWN7000 User Manual... -
Page 28: Qos
The GWN7000 offers the possibility to enable and configure QoS on both WAN and LAN interfaces, this will help to manage in more depth the network traffic to define priority and classify different services and protocols in a scheduled manner. -
Page 29: Table 13: Qos Basic
Define a Name for the traffic filter rule. Choose the Differentiated Services Code Point (DSCP) value from drop-down list. DSCP Default is 0. IP Source Address Specify the Source IP address from which the traffic filter rule will be applied. P a g e GWN7000 User Manual... -
Page 30: Table 15: Qos Policer
Specify the UDP Source port to which the policer rule will be applied. Choose the LAN group of the specified Source IP address. If no Source IP address has been defined, the rule will be applied to all members of that LAN Group Source group. P a g e GWN7000 User Manual... -
Page 31: Ddns
No-ip.pl • Myonlineportal.net Before configuring DDNS settings on the GWN7000, make sure first to create and confirm the DDNS account via supported providers. Following steps illustrates how to configure the DDNS settings on your GWN7000: Access to GWN7000 web GUI, and navigate to Router -> DDNS, and enable DDNS service. -
Page 32: Setting Up A Wireless Network
Once a GWN76xx is successfully connected and has an IP from the GWN7000 router, user can then pair it to the GWN7000 and associate it with a Network Group. -
Page 33: Table 16: Device Configuration
GWN7000’s Network, the following page will Click on appear. Figure 13: Discovered Devices 3. Click on Pair under Actions, to pair the discovered Access Point with the GWN7000. 4. The paired GWN76xx will appear Online, Click on to unpair it. - Page 34 • Active Spatial Streams: Choose active spatial stream. Available options: “Auto”, “1 stream”, “2 streams” and “3 streams” (For GWN7610). P a g e GWN7000 User Manual...
-
Page 35: Network Groups
If a GWN76xx is not being paired, or the pair icon is grey color, make sure that it is not being paired with another GWN7000 Router or GWN76xx Access Point acting as Master Controller, if yes, it needs to be unpaired first, or reset to factory default settings to make it available for pairing. -
Page 36: Table 17: Basic
Specifies the name for the network group. Network Group Name Select the WAN port membership. Or use Multi-WAN option if enabled WAN Membership under Router->Port->Global Settings Select the LAN port membership. LAN Membership P a g e GWN7000 User Manual... - Page 37 WINS server’s address. Please refer to the following link for DHCP options syntax: https://wiki.openwrt.org/doc/howto/dhcp.dnsmasq Enable this option, if you want the GWN7000 relays the DHCP requests from clients to another DHCP server(s). Once checked Click on DHCPv4 Relay Enabled add another DHCPv4 Relay Target, and to delete a DHCPv4 Relay Target.
-
Page 38: Table 18: Wi-Fi
If enabled, the default LAN Gateway’s MAC address must be specified under Gateway MAC Address field. The clients will not be able to discover, ping or access other wireless devices connected to GWN7000’s network groups and only access to the default gateway, which usually means Internet access. -
Page 39: Figure 17: Device Membership
Device Membership: Used to add or remove paired access points to the network group. Figure 17: Device Membership Click on to add the GWN76xx to the network group, or click on to remove it. P a g e GWN7000 User Manual... -
Page 40: Create An Ssid Under A Network Group
Check to select the desired Network, on which the selected APs will be added, as shown in the above figure. Create an SSID under a Network Group Under Network Group Page, click to edit a network group or create a new network group and go to Wi-Fi tab. P a g e GWN7000 User Manual... -
Page 41: Additional Ssid Under Same Network Group
] for Wi-Fi options. Table 18: Wi-Fi Additional SSID under Same Network Group GWN7000 provides the ability to create an additional SSID under the same group. To create an additional SSID go to Network Group->Additional SSID. P a g e... -
Page 42: Figure 20: Additional Ssid
Select one of the available network groups from Network Group Membership dropdown menu; this will create an additional SSID with the same Device Membership configured when creating the main network group. Figure 21: Additional SSID Created Click on to delete the additional SSID, or to edit it. P a g e GWN7000 User Manual... -
Page 43: Clients Configuration
Clients Connected clients to different network groups can be shown and managed from a single interface. Clients list can be accessed from GWN7000’s Web GUI -> Clients to perform different actions to wired and wireless clients. GWN7000 Enterprise Router with its DHCP server enabled on LAN ports level, will assign automatically an IP address to the devices connected to its LAN ports like a computer or GWN76xx access points and to wireless clients connected to paired GWN76xx access points. -
Page 44: Edit Ip And Name
Figure 23: Client's Status Edit IP and Name Configuration tab allowing to set a name for a client and set a static IP. Figure 24: Client's Configuration P a g e GWN7000 User Manual... -
Page 45: Block A Client
Client MAC list under Router->Port->Global Settings. Figure 25: Block a Client To unban a client, go to Router -> Port -> Global Settings. Click on to remove it from the banned list. Figure 26: Unban Client P a g e GWN7000 User Manual... -
Page 46: Vpn (Virtual Private Network)
VPN page can be accessed from the GWN7000 Web GUI -> VPN. OpenVPN® Server Configuration To use the GWN7000 as an OpenVPN® server, you will need to start creating OpenVPN® certificates and client certificates. Before generating server/client certificates, it is requested to generate first the Certificate Authority (CA), which will help to issue server/clients certificates. -
Page 47: Table 19: Ca Certificate
Choose the key length for generating the CA certificate. Following values are available: • 1024: 1024-bit keys are no longer sufficient to protect Key Length against attacks. • 2048: 2048-bit keys are a good minimum. (Recommended). P a g e GWN7000 User Manual... - Page 48 Email Address Example: “grandstream@gmail.com” 4. Click on button after completing all the fields for the CA certificate. button to export the CA to local computer. The CA file has extension “.crt”. 5. Click on P a g e GWN7000 User Manual...
-
Page 49: Generate Server/Client Certificates
Figure 28: CA Certificate Generate Server/Client Certificates Create both server and client certificates for encrypted communication between clients and GWN7000 acting as an OpenVPN® server. ❖ Creating Server Certificate To create server certificate, follow below steps: 1. Navigate to “System Settings -> Cert. Manager -> Certificates”. -
Page 50: Table 20: Server Certificate
Select CA certificate previously generated from the drop down list. CA Certificate Example: “CATest”. Choose the certificate type from the drop down list. It can be either Certificate Type a client or a server certificate. Choose “Server” to generate server certificate. P a g e GWN7000 User Manual... - Page 51 “.crt” format. Click on button to export the server key file in “. key” format. Click on P a g e GWN7000 User Manual...
-
Page 52: Figure 30: User Management
Notes: • The server certificates (.crt and .key) will be used by the GWN7000 when acting as a server. • The server certificates (.crt and .key) can be exported and used on another OpenVPN® server. - Page 53 2- Create Client Certificate a. Navigate under “System Settings -> Cert. Manager -> Certificates”. b. Click on button. The following window will pop up. c. Enter client certificate information based on below descriptions. P a g e GWN7000 User Manual...
-
Page 54: Table 21: Client Certificat
Enter the common name for the client certificate. It could be any name to identify this certificate. Common Name Example: “ClientCertificate”. Select the generated CA certificate from the drop down list. CA Certificate P a g e GWN7000 User Manual... - Page 55 Enter a city name. City Example: “Casablanca”. Enter the organization name. Organization Example: “GS”. Enter an email address. Email Address Example: “user@grandstream.com”. d. Click on after completing all the fields for the client certificate. P a g e GWN7000 User Manual...
-
Page 56: Create Openvpn® Server
“.key” format. Click on Click on to revoke the client certificate if no longer needed. The client certificates (“.crt” and “.key”) will be used by clients connected to the GWN7000 in order to establish TLS handshake. Notes: •... -
Page 57: Table 22: Openvpn® Server
Click on the checkbox in order to enable the OpenVPN® server Enable feature. VPN Name Enter a name for the OpenVPN® server. Server Mode Choose the server mode the OpenVPN® server will operate with. P a g e GWN7000 User Manual... - Page 58 Choose the Transport protocol from the dropdown list, either TCP or Protocol UDP. The default protocol is UDP. Select the interface used to connect the GWN7000 to the uplink, Interface either WAN1, WAN2 or All. Configure the listening port for OpenVPN® server.
- Page 59 Select a generated CA from the drop down list. Server Certificate Select a generated Server Certificate from the drop down list. Enter the network range that the GWN7000 will be serving from to the OpenVPN® client. IPv4 Tunnel Network Note: The network format should be the following 10.0.10.0/16.
-
Page 60: Openvpn® Client Configuration
Figure 33: OpenVPN® OpenVPN® Client configuration The GWN7000 act as both, an OpenVPN® client and server, once users and client certificate created, navigate under “VPN > OpenVPN® > Client” and follow steps below: 1. Click on and the following window will pop up. -
Page 61: Figure 34: Openvpn® Client
Figure 34: OpenVPN® Client P a g e GWN7000 User Manual... -
Page 62: Table 23: Openvpn® Client
Enter a name for the OpenVPN® client. Choose the Transport protocol from the dropdown list, either TCP or Protocol UDP. The default protocol is UDP. Select the interface used to connect the GWN7000 to the uplink, Interface either WAN1, WAN2 or All. Local Port Configure the listening port for OpenVPN®... - Page 63 IP address changes frequently. Click on “Upload” and select the “CA” certificate generated CA Certificate previously on this guide. Click on “Upload” and select the “Client Certificate” generated Client Certificate previously on this guide. P a g e GWN7000 User Manual...
-
Page 64: L2Tp/Ipsec Configuration
Rather, it relies on an encryption protocol that it passes within the tunnel to provide privacy. GWN7000 L2TP/IPSec Client Configuration To configure L2TP client on the GWN7000, navigate under “VPN -> L2TP/IPSec” and set the following: 1- Click on and the following window will pop up. -
Page 65: Table 24: L2Tp Configuration
Select which WAN port is connected to the uplink, either WAN1 or WAN Port WAN2. Enter the IP/Domain of the remote L2TP Server. Remote L2TP Server Username Enter the Username for authentication against the VPN Server. P a g e GWN7000 User Manual... - Page 66 Enter the port-forwarding rule to be used for the VPN. Port Trigger Rules Enter the port trigger rule to be used for the VPN. 2- Click after completing all the fields. 3- Click on top of the web GUI to apply changes. P a g e GWN7000 User Manual...
-
Page 67: Pptp Configuration
Internet. Point-to-Point Tunneling Protocol (PPTP) allows the creation of virtual private networks (VPNs), which tunnel TCP/IP traffic through the Internet. GWN7000 Client Configuration To configure PPTP client on the GWN7000, navigate under “VPN -> PPTP” and set the following: 1- Click on and the following window will pop up. -
Page 68: Table 25: Pptp Configuration
Enter a name for the PPTP client. Enter the IP/Domain of the remote PPTP Server. Remote PPTP Server Username Enter the Username for authentication against the VPN Server. Password Enter the Password for authentication against the VPN Server. P a g e GWN7000 User Manual... -
Page 69: Figure 39: Pptp Client
Port Trigger Rules Enter the port trigger rule to be used for the VPN. 2- Click after completing all the fields. 3- Click on top of the webGUI to apply changes. Figure 39: PPTP Client P a g e GWN7000 User Manual... -
Page 70: Firewall
SYN Flood Protection is used to avoid DOS attacks. SYN Flood Protection is enabled by default on GWN7000, you can edit the “SYN Flood Rate Limit”, “SYN Flood Burst Limit” and whether to drop or no the invalid packets as shown in the below screenshot Figure 40: Basic->General Settings... -
Page 71: Dmz
Set the destination IP address. Destination Port Set the Destination Port number. GWN7000 support DMZ, where it is possible to specify a LAN client to be put on the DMZ. • To add an IP into the DMZ, click on •... -
Page 72: Inter-Group Traffic Forwarding
Set the destination IP address. Inter-Group Traffic Forwarding GWN7000 offers the possibility to allow traffic between different groups and interfaces. Users can select to edit a source group and add to it other network groups and WAN interfaces to allow inter-group traffic between the selected members. -
Page 73: Upnp
GWN7000 supports UPnP that enables programs running on a host to configure automatically port forwarding. UPnP allows a program to make the GWN7000 to open necessary ports, without any intervention from the user, without making any check. UPnP settings can be accessed from GWN7000 WebGUI->Firewall->Basic->UPnP Settings. -
Page 74: Traffic Rules Settings
Traffic Rules Settings GWN7000 offers the possibility to fully control incoming/outgoing traffic for different protocols in customized scheduled times, and taking actions for specified rules such as Accept; Reject and Drop. Following actions are available to configure Input, output and forward rules for configured protocols •... -
Page 75: Firewall Advanced Settings
Treat Time Values as UTC Check to use UTC as time zone for the specified times, instead of using GWN7000’s local time. Instead of Local Time Select which action to perform for the given traffic rule, 3 options are Firewall Action available: Accept, Reject or Drop. -
Page 76: Snat
SNAT entry to be Schedule Start Date applied. Schedule End Date Click on icon to schedule an end date for this SNAT entry to end. P a g e GWN7000 User Manual... -
Page 77: Dnat
, 10 and 15 day monthly. Treat Time Values as UTC Check to use UTC as time zone for the specified times, instead of using GWN7000’s local time. Instead of Local Time DNAT Following actions are available for DNAT: •... - Page 78 Check to use UTC as time zone for the specified times, instead of using Treat Time Values as UTC GWN7000’s local time. Instead of Local Time Check to enable NAT Reflection for this DNAT entry to allow the access Enable NAT Reflection of a service via the public IP address from inside the local network.
-
Page 79: Maintenance And Troubleshooting
MAINTENANCE AND TROUBLESHOOTING GWN7000 offers multiple tools and options for maintenance and debugging to help further troubleshooting and monitoring the GWN7000 resources. Maintenance Maintenance page can be accessed from GWN7000 WebGUI-> System Settings-> Maintenance. Refer to below table for maintenance tabs and fields. -
Page 80: Debug
This section is used to capture packet traces from the GWN7000 interfaces (WAN ports and network groups) for troubleshooting purpose or monitoring... It is needed to plug an USB storage device to one of the USB ports on the back of the GWN7000. Click on to start capturing on a certain device plugged to the USB port. -
Page 81: Ping/Traceroute
Ping and Traceroute are useful debugging tools to verify reachability with other clients across the network (WAN or LAN). The GWN7000 offers both Ping and Traceroute tools for IPv4 and IPv6 protocols. To use these tools, go to GWN7000 WebGUI->System Settings->Debug and click on Ping/Traceroute. -
Page 82: Figure 47: Ip Ping
- IPv4 Traceroute for an IPv4 Traceroute to Target - IPv6 Traceroute for an IPv6 Traceroute to Target • Type in the destination’s IP address/domain name in Target field. • Click on Run. Figure 48: Traceroute P a g e GWN7000 User Manual... -
Page 83: Syslog
Syslog messages are also displayed in real time under Web GUI ->System Settings->Debug->Syslog. Figure 49: Syslog NAT Table NAT table is updated dynamically on GWN7000’s WebGUI, to check the NAT table go to System Settings->Debug->NAT Table. P a g e... -
Page 84: File Sharing
Figure 50: NAT table File Sharing The GWN7000 has 2 USB ports that can be also used for file sharing, to enable file sharing on devices plugged on the USB ports, go to System Settings -> File Sharing. Click on to share a directory and its contents on a device connected to one of the USB ports of the GWN7000, the following figure will pop up. -
Page 85: Table 35: Add A New File To Share
A device connected to one of the allowed network groups to the shared files can use the following path for access: \\GWN_Address\Share_Name\ Where GWN_Address is the GWN7000 IP address, and Share_Name is the Share Name created for the File Share. It is also possible to map a network drive on Windows, or use a Samba client on Linux machine. -
Page 86: Snmp (Pending)
GWN7000 supports SNMP (Simple Network Management Protocol) which is widely used in network management for network monitoring for collecting information about monitored devices. To configure SNMP settings, go to GWN7000 Web GUI -> System Settings-> SNMP, this page has two tabs: Basic and Advanced, refer to the below tables for each tab. -
Page 87: Table 37: Snmp Advanced Page
Set the Transport Type: UDPv4, UDPv6, TCPv4 or TCPv6. • Listening on Choose the IP Address from drop-down menu list. • Set the Port number on which the GWN7000 will listen on. Click on to add an SNMPv3 User: • Set the Username for authentication. -
Page 88: Upgrading And Provisioning
UPGRADING AND PROVISIONING Upgrading Firmware The GWN7000 can be upgraded to a new firmware version remotely or locally. This section describes how to upgrade your GWN7000. Upgrading via WEB GUI The GWN7000 can be upgraded via TFTP/HTTP/HTTPS by configuring the URL/IP Address for the TFTP/HTTP/HTTPS server and selecting a download method. -
Page 89: Provisioning And Backup
End users can also choose to download a free HTTP server from http://httpd.apache.org/ or use Microsoft IIS web server. Provisioning and backup The GWN7000 configuration can be backed up locally or via network. The backup file will be used to restore the configuration on GWN7000 when necessary. Download Configuration Download GWN7000... -
Page 90: Reset And Reboot
Used to reboot and reset the device to factory functions under Web GUI-> Router->Maintenance->Upgrade by clicking on button. Will restore all the online GWN76xx as well as well as the GWN7000 itself to factory settings. P a g e GWN7000 User Manual... -
Page 91: Experiencing The Gwn7000 Enterprise Router
Thank you again for purchasing Grandstream GWN7000 Enterprise Multi-WAN Gigabit VPN Router, it will be sure to bring convenience and color to both your business and personal life © 2002-2014 OpenVPN Technologies, Inc. - Page 92 P a g e GWN7000 User Manual...
Need help?
Do you have a question about the GWN7000 and is the answer not in the manual?
Questions and answers