
Subscribe to Our Youtube Channel
Related Manuals for Sartorius M3P


Summary of Contents for Sartorius M3P
- Page 1 Sartorius M3P, M3P-000V001 Electronic Microbalances Installation and Operating Instructions...
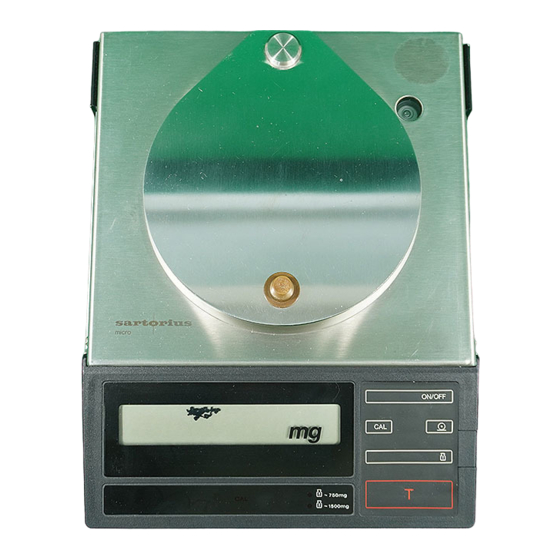
- Page 2 Weighing pan Menu access switch (for the balance operating program) Pan support Tare control Interior draft shield CAL key Interface Weight display Power receptacle Manufacturer’s label Level indicator Spacer Leveling foot Perforated filter pan holder (for large filter weighing pan) ON/OFF key Filter pan holder (for small filter weighing pan) Print key...
-
Page 3: Weighing Pan
M3P-000V001 Filter-Microbalance Weighing pan Menu access switch (for the balance operating program) Pan support Tare control Interior draft shield CAL key Interface Weight display Power receptacle Manufacturer’s label Level indicator Spacer Leveling foot Perforated filter pan holder (for large filter weighing pan) -
Page 4: Table Of Contents
Storage and Shipping Conditions Equipment Supplied Installation Instructions Ambient Conditions Connecting Electronic Devices (Peripherals) Startup Preparing the M3P for Operation Preparing the M3P-OOOV001 Filter Microbalance for Operation Connecting the Balance to Line Power Voltage Selection Safety Precautions Leveling the Balance using the Level Indicator... -
Page 5: About The Product (Warranty)
About the Product (Warranty) With this Sartorius Balance you have acquired a high-quality electronic weighing Instrument that will ease your daily work- load. Please read these Installation and operating instructions care- fully before operating your new balance. Pursuant to the German Directive for the Implementation of Regulations for Prevention of Accidents "Elektrische... -
Page 6: Storage And Shipping Conditions
Do not miss out on the benefits of our full warranty. Please complete the warranty card, indicating the date of Instal- lation, and return the card to your Sartorius dealer. Storage and Shipping Conditions Allowable storage temperature range: -40°C...+70°C -40°F... 158°F... -
Page 7: Equipment Supplied
2.8 in.) — 3 large filter weighing pans (for filter diameters from 70-100 mm or ~ 2.8-3.9 in.) The M3P kit of Standard accessories contains the following: 1 weighing pan 1 pan support 1 interior draft shield... -
Page 8: Installation Instructions
The components used in the balance are rated to at least class KSF according to DIN 40040. Your Sartorius Balance will provide accurate readouts even when it is exposed to unfavorable ambient conditions. You can adapt the balance to your requirements simply by changing the menu code settings in the balance operating pro- gram. -
Page 9: Startup
Use forceps to position the pan support (2) on the draft shield, and place the weighing pan (1) on the pan support. Preparing the M3P-OOOV001 Filter Microbalance for Opera- tion For weighing filters with diameters ranging up to 70 mm (~ 2.8 in.):... -
Page 10: Connecting The Balance To Line Power
Standard you use, please contact your Sartorius dealer. Important Note Only use original Sartorius power supplies identified by the Sar- torius label. Use of power supplies made by other manufactur- ers, even if these power supplies have a registered approval rating from a national testing laboratory, requires the consent of a certified Sartorius technician. -
Page 11: Voltage Selection
Voltage Selection You can select the voltage only if you use our portable power supply (69 70903) that has a European-type plug (rounded prongs). Safety Precautions The power supply rated to Class 2 (double insulated) can be plugged into a wall outlet without taking any additional safety precautions. -
Page 12: How To Operate The Balance
How to Operate the Balance General Directions for Working with the Balance Before you start weighing, please observe the following: After plugging your balance into a wall outlet using the power supply, make sure to allow for at least 2 hours' warmup. Working with a microbalance requires a steady hand and a smooth, uninterrupted technique. -
Page 13: Weight Display
Weight Display The weight display shows the following special messages for your information: BUSY The balance processor is still busy processing a function and will not accept any other commands to perform functions at this time. STANDBY The display has been turned off with the ON/OFF key (8) and the balance is now in the ready-to-operate mode so that it does not require warmup. -
Page 14: Self-Test, Weighing
Weighing Filters on the M3P-000V001 The M3P-000V001 filter microbalance comes with Standard fil- ter weighing pans with an effective diameter of 73 and 105 mm (2.9" and 4.1"), respectively, which can be used as loading space. -
Page 15: Taring, Weighing With A Tare Container
Taring If you wish to use a Container or if the weight display does not indicate 0.000 mg, press the tare control to zero the display. Weighing with a Tare Container* The balance has built-in motorized Substitution weights (tare weights) for application of about 750 mg or 1,500 mg (accuracy approx. -
Page 16: Below-Balance Weighing
Important Note The electronic weighing range is 1,500 mg. Press the key labeled again to return to the normal weigh- ing range from the one expanded by tare weight compensation. Both LEDs next to the symbols " ~ 750 mg" and " ~ 1500 mg"... -
Page 17: Calibration
Calibration Unload the pan and dose the weighing chamber. lf necessary, re level the balance using the level indicator as a guide. Internal Calibration: The internal calibration weight conforms to accuracy class E the International Organization of Legal Metrology (OIML). Select the weighing range of 0 to 1500 mg (both LEDs next to the Symbols "... -
Page 18: External Calibration
External Calibration: Unload the weighing pan. Select the 0 to 1500 mg weighing range (both LEDs next to the Symbols " ~ 750 mg" and " ~ 1500 mg" go out). As soon as you obtain a zero readout, press the tare control (12) for at least 3 seconds until the calibration weight readout appears in the weight display (14). -
Page 19: Balance Operating Program
Balance Operating Program The balance operating program lets you adapt your balance to various ambient conditions and application requirements. At the factory, we have set the codes for a Standard program which is protected by a locking function to prevent accidental changes. - Page 20 After you have accessed the menu of the operating program, the display will show a continuous sequence of numbers from 0- 5 for the "page" or first digit of the code, in addition to the Status code letter "L' or "C". When the first digit of the code you wish to check or change ap- pears, press the fare control (12).
-
Page 21: List Of The Programmable Menu Code Settings
List of the programmable Menu Code Settings C 1 3 1 Page line Word digit digit digit Code Ambient Conditions Code Data Output parameter Output upon external Very stable C 1 1 1 C 2 1 1 print command, Stable C 1 1 2 Unstable regardless of stability... -
Page 22: Troubleshooting Guide
Troubleshooting Guide Problem ... Causes ... Remedy No segments appear in the weight - No line current available - Check power supply display (14) - The power supply is not plugged - Plug in power supply Weight display only shows "L' or - The weighing system is still ar- (10) - Press the key labeled... -
Page 23: Transporting The Balance
Transporting the Balance To transport the balance, the weighing system must be arrested as described in the following. Transport Arrestment Before you unplug the balance from the power supply, turn off the balance using the ON/OFF key (8). The LEDs next to the symbols "... -
Page 24: Care And Maintenance
Lock the equipment in a secure place to ensure that it cannot be used for the time being. In this case, notify the Sartorius Technical Services Dept. or Di- vision. Only certified Sartorius service technicians who have the proper manuals are allowed to perform maintenance and repair work on the balance. -
Page 25: Accessories (Options)
Balance table YWT 01 Extension with 2 drawers for balance table 6802 Wall console 6804 Digital/analog converter YDA 01 Z IEC converter 7253 16 RS 422 converter 7253 19 Dust cover for MP3 6960 M150 Dust cover for M3P-000V001 6960 M151... -
Page 26: Interface
Interface See the "Interface Description for Sartorius Balances and Scales" enclosed. Interfacing Devices with the Balance (RS Interface) Make sure that the interface port is electrically connected to the protective grounding conductor of the balance housing. The ca- bling supplied as accessory components is shielded and electri- cally connected on both ends to the cases of the connectors. -
Page 27: Specifications
Specifications Model Electronic weighing range 500/1,000/1,510 (Poly Range) Maximum loading capacity approx. 3,000 Readability 0,001/0,002/0,005 (Poly Range) Tare range (by subtraction) approx. –3,000 Standard deviation ≤±0,001/0,002/0,003 (corrected for drift, typical*) ≤±0,002/0,004/0,005 Max. linearity Stabilization time (typical) Display update 0,1 – 0,8 (selectable) Adaption to ambient conditions By selection of 1 of 4 optimized filter levels and application requirements... - Page 28 Specifications Model M3P-000V001 Electronic weighing range 500/1,000/1,510 (Poly Range) Maximum loading capacity approx. 3,000 Readability 0,001/0,002/0,005 (Poly Range) Tare range (by subtraction) approx. –3,000 Standard deviation ≤±0,002/0,003/0,004 (corrected for drift, typical*) Max. linearity ≤±0,002/0,004/0,005 Stabilization time (typical) Display update 0,1 – 0,8 (selectable)
- Page 30 All rights reserved. No part of this publication may be printed or translated in any form or by any means without the prior written permission of Sartorius AG. Sartorius AG reserves the right to make change to the technology, features, specification and design of the equipment without notice.
Need help?
Do you have a question about the M3P and is the answer not in the manual?
Questions and answers