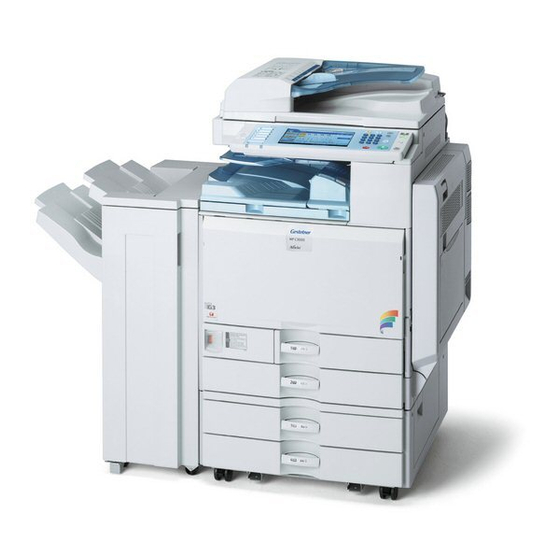
Mp c2500/c3000 series color multifunctional systems (6 pages)
Summary of Contents for Ricoh C3030
Page 1
Operating Instructions About This Machine Getting Started Entering Text Appendix Read this manual carefully before you use this machine and keep it handy for future reference. For safe and correct use, be sure to read the Safety Information in "About This Machine" before using the machine.
Page 3
Manuals for This Machine Refer to the manuals that are relevant to what you want to do with the machine. ❖ About This Machine Be sure to read the Safety Information in this manual before using the ma- chine. This manual provides an introduction to the functions of the machine. It also explains the control panel, preparation procedures for using the machine, how to enter text, and how to install the CD-ROMs provided.
Page 4
❖ Other manuals • PostScript3 Supplement • UNIX Supplement • Manuals for DeskTopBinder Lite • DeskTopBinder Lite Setup Guide • DeskTopBinder Introduction Guide • Auto Document Link Guide Note ❒ Manuals provided are specific to machine types. ❒ Adobe Acrobat Reader/Adobe Reader must be installed in order to view the manuals as PDF files.
What You Can Do with This Machine This section introduces the features of this machine. Note ❒ For details about options, see “Options”. Reference p.15 “Options” Copier, Facsimile, Printer, and Scanner Functions This machine provides copier, facsimile (optional), printer, and scanner func- tions.
Utilizing Stored Documents You can store files scanned by this machine, or files sent from other fax machine or computers, into the machine's hard disk. You can print and fax stored files as required. You can also change print settings and print multiple documents (Doc- ument Server).
Paperless Fax Transmission and Reception You can store received fax messages on the machine's hard disk, instead of print- ing them onto paper. Reception You can store received fax documents in electrical format without printing it onto paper. AMF004S • You can use DeskTopBinder (optional) or a Web Image Monitor to check, print, delete, retrieve, or download documents using your computer (Storing received documents).
Fax Transmission and Reception Through the Internet You can send fax documents via e-mail by specifying the recipient's e-mail ad- dress (Internet Fax Transmission). You can receive sent documents via Internet Fax, or from computers (Internet Fax Reception). You can send fax documents by specifying IP-fax destination using IP addresses (IP-Fax Transmission).
Using the Scanner in a Network Environment You can use a scanner over the network. AMF008S • You can send scan files to a specified destination using e-mail (Sending scan file by e-mail). See “Sending Scan Files by E-mail”, Scanner Reference. •...
Administrating the Machine/Protecting Documents (Security Functions) You can prevent information leakage by managing the machine and protecting documents. AMF009S • You can protect documents from unauthorized access and stop them from be- ing copied without permission. See Security Reference. • You can control the use of the machine, as well as prevent machine settings from being changed without authorization.
Monitoring the Machine Via Computer You can monitor machine status and change settings using a computer. AMF010S • Using SmartDeviceMonitor for Admin, SmartDeviceMonitor for Client, or a Web Image Monitor, you can use a computer to view the machine's status, such as to check on paper quantities, or misfeeds, etc.
Preventing an Unauthorized Copy You can print embedded pattern on paper to prevent them from being copied. AMG028S • Using the printer driver, you can embed a pattern in the printed document. If the document is copied on a machine with the Copy Data Security Unit (op- tional), protected pages are grayed out in the copy, preventing confidential information from being copied.
TABLE OF CONTENTS Manuals for This Machine ..................i What You Can Do with This Machine..............iii Copier, Facsimile, Printer, and Scanner Functions........... iii Utilizing Stored Documents..................iv Paperless Fax Transmission and Reception.............. v Fax Transmission and Reception Through the Internet ..........vi Using the Scanner in a Network Environment ............
Page 14
2. Entering Text Entering Text ......................31 Available Characters ....................31 Keys .........................31 How to Enter Text ....................32 3. Appendix Dos and Don'ts.....................35 Saving Color Copies ....................36 Software and Utilities Included on the CD-ROM ..........37 Viewing the contents of the CD-ROM ..............38 Printer Drivers for This Printer..................38 TWAIN Driver ......................40 LAN-Fax Driver ......................41...
Notice Notice To Wireless LAN Interface (optional) Users Notes to users It is strictly forbidden to use antenna(s) except designated. The antenna(s) of this device must not be co-located or operating in conjunc- tion with any other antenna or transmitter. This equipment complies with FCC RF radiation exposure limits set forth for an uncontrolled environment.
Page 16
Note to users in Canada Note: This Class B digital apparatus complies with Canadian ICES-003. Operation is subject to the following two conditions: (1) This device may not cause interference, and (2) this device must accept any interference, including interference that may cause undesired operation of the device.
Page 17
Remarque concernant les utilisateurs au Canada Avertissement: Cet appareil numérique de la classe B est conforme à la norme NMB-003 du Can- ada. L'utilisation de ce dispositif est autorisée seulement aux conditions suivantes: (1) il ne doit pas produire de brouillage et (2) l'utilisateur du dispositif doit être prêt à...
How to Read This Manual Symbols This manual uses the following symbols: Indicates important safety notes. Ignoring these notes could result in serious injury or death. Be sure to read these notes. They can be found in the “Safety Information” section of this manual. Indicates important safety notes.
Safety Information When using this machine, the following safety precautions should always be fol- lowed. Safety During Operation In this manual, the following important symbols are used: Indicates a potentially hazardous situation which, if instructions are not followed, could result in death or serious injury.
Page 20
R WARNING: • Disconnect the power plug (by pulling the plug, not the cable) if the power cable or plug becomes frayed or otherwise damaged. • To avoid hazardous electric shock or laser radiation exposure, do not remove any covers or screws other than those specified in this man- ual.
Page 21
R CAUTION: • Protect the machine from dampness or wet weather, such as rain and snow. • Before moving the machine, be sure to disconnect the power cord from the wall outlet. Damaged power cords are a fire and electric shock hazard. •...
Page 22
R CAUTION: • During operation, rollers for transporting the paper and originals revolve. A safety device is being installed so that the machine can be operated safely. But take care not to touch the machine during operation. An injury might oc- cur.
Positions of WARNING and CAUTION labels This machine has labels for RWARNING and RCAUTION at the positions shown below. For safety, please follow the instructions and handle the machine as indicated. AMF052S...
ENERGY STAR Program As an ENERGY STAR Partner, we have determined that this machine model meets the ENERGY STAR Guidelines for energy efficiency. The ENERGY STAR Guidelines intend to establish an international energy-saving system for developing and introducing energy-efficient office equipment to deal with environmental is- sues, such as global warming.
❖ Duplex Priority The ENERGY STAR Program recommends the duplex function. This function is less of a burden to the environment. For applicable machines, duplex func- tion (one-sided originals→ two-sided copies) can be selected preferentially when the Operation switch or {Clear Modes} key is pressed, or the machine re- sets automatically.
1. Getting Started This section describes how to start using this machine. Guide to Components This section introduces the names and functions of the components. AMG048S Auto Document Feeder (ADF) Internal Tray 1 (The illustration shows the ADF.) Copied, printed paper or fax messages are delivered here.
Page 28
Getting Started AMF014S Bypass Tray Extender Use when copying onto OHP transparen- Pull this extender out when loading cies, adhesive labels, translucent paper, sheets larger than A4L in the bypass postcards, and custom size paper. tray. Lower Right Cover Open this cover when a paper jam occurs. Reference p.17 “Control Panel”...
Guide to Components Options This section introduces the names and functions of main optional parts. External Options This section provides explanations about external options. AMG056S Internal Tray 2 500-sheet finisher If you select this as the output tray, cop- Using this, you can sort multiple copies ied paper will be delivered here face and staple them.
Page 30
Getting Started Internal Options This section describes the options that can be installed in the machine. • Fax unit Allows you to use the fax function. • Extra G3 Interface Unit This lets you add a G3 fax line. • PictBridge card This lets you directly print photographs taken with a PictBridge -compatible digital camera.
Control Panel Control Panel This illustration shows the control panel of the machine with options fully in- stalled. AMG047S {Program} key (copier, facsimile, Screen contrast knob and scanner mode) Adjusts display panel brightness. Press to register frequently used settings, Color circle or to recall registered settings.
Page 32
Getting Started {Login/Logout} key Function keys Press this to log in or log out. Press to display the operation screen of one of the following functions: copy, doc- {Simplified Display} key ument box, facsimile, printer, or scanner. Press this to switch to the Simplified Dis- The indicator of the selected function play.
Display Display The display panel shows machine status, error messages, and function menus. The function items displayed serve as selector keys. You can select or specify an item by lightly pressing them. When you select or specify an item on the display panel, it is highlighted like .
Page 34
Getting Started ❖ Simplified Display This illustration shows the copier function's simplified display. AMG057S [Key Color] Use this to intensify the screen contrast by changing the color of the keys. This does not work on the default screens of the respective function. Note ❒...
When the Authentication Screen is Displayed When the Authentication Screen is Displayed When Basic Authentication, Windows Authentication, LDAP Authentication, or Integration Server Authentication is enabled, the Authentication Screen appears on the screen. The machine only becomes operable after entering your own log- ging user name and logging password.
Getting Started User Code Authentication (Using a Printer Driver) When user authentication is set, specify the user code in the printer properties of the printer driver. For details, see the printer driver Help. Login (Using the Control Panel) Follow the procedure below to log on when Basic Authentication, Windows Au- thentication, LDAP Authentication, or Integration Server Authentication is set.
When the Authentication Screen is Displayed Log Off (Using the Control Panel) Follow the procedure below to log off when Basic Authentication, Windows Au- thentication, or LDAP Authentication is set. Press the {Login/Logout} key. AMG044S Press [Yes]. Login (Using a Printer Driver) When Basic Authentication, Windows Authentication, or LDAP Authentication is set, make encryption settings in the printer properties of the printer driver, and then specify a login user name and password.
Getting Started Login (Using Web Image Monitor) This section explains how to log onto the machine via Web Image Monitor. Click [Login]. Enter a login user name and password, and then click [Login]. Note ❒ For user code authentication, enter a user code in [User Name], and then click [OK].
Changing Modes Changing Modes Note ❒ You cannot switch modes in any of the following situations: • When scanning in a fax message for transmission • During immediate transmission • When accessing User Tools • During interrupt copying • During On hook dialing for fax transmission •...
Getting Started System Reset The machine returns automatically to its initial condition when the job is fin- ished, after a certain period of time has elapsed. This function is called “System Reset”. See “General Features”, General Settings Guide. You can change the System Reset time. See “Timer Settings”, General Settings Guide.
Turning On the Power Turning On the Power This section discusses how to turn on/off the power. ❖ Operation switch This machine has two power switches: Operation switch and main power switch. • Operation switch (right side of the control panel) Press to activate the machine.
Getting Started Turning On the Power Turn on the power as follows: Press the operation switch. The On indicator goes on. AMG045S Note ❒ If the power does not come on when the Operation switch is pressed, check the main power switch is on. If it is off, turn it on Turning Off the Power Turn off the power as follows: Make sure the exposure glass cover and the ADF is in the right position.
Turning On the Power Turning Off the Main Power Turn off the main power as follows: Important ❒ Do not turn off the main power switch when the On indicator is lit or blink- ing. Doing so may result in damage to the hard disk or memory. ❒...
Getting Started Saving Energy This machine has the following two energy saving functions. ❖ Energy Saver If you do not use the machine for a certain period after an operation, or when you press the {Energy Saver} key, the display disappears and the machine goes into Energy Saver mode.
2. Entering Text This section describes how to enter characters. Entering Text When you enter a character, it appears at the position of the cursor. If there is a character already at the cursor position, the entered character appears before that.
Entering Text Note ❒ When entering uppercase or lowercase letters continuously, use [Shift Lock] to lock the case. How to Enter Text This section explains text entry more specifically. Press [Shift] to switch between uppercase and lowercase. Press the letters you want to enter. Entering Symbols Press [Symbol Entry] to enter into the Symbols mode.
Page 47
Entering Text Selecting a User Text You can select and use a User Text that is registered in [Program / Change User Text]. For details about registering User Texts, see “General Features”, General Set- tings Guide. Press [User Text]. Select the User Text you want to use. Reference “General Features”...
3. Appendix This section describes Dos and Don'ts and copy paper. Dos and Don'ts The following items should be followed during use of this machine. R CAUTION: • Keep the machine away from flammable liquids, gases, and aerosols. A fire or an electric shock might occur.
Appendix ❒ Depending on the ambient temperature and humidity, steam may come from the exhaust vent behind the control panel during printing. This is water va- pour from the paper, not a sign of malfunction. ❒ If condensation forms inside the machine as a result of temperature change, the machine may not print properly.
Software and Utilities Included on the CD-ROM Software and Utilities Included on the CD- Three CD-ROMs come with this machine: “Printer Drivers and Utilities”, “Scan- ner/PostScript Drivers and Utilities”, and “Manuals”. PS Driver is stored in “Scanner/PostScript Drivers and Utilities”. In “Manuals”, manuals are stored in PDF format.
Appendix Viewing the contents of the CD-ROM Follow the procedure below to view the contents of the CD-ROMs. Insert the CD-ROM into the CD-ROM drive. The installer starts. Click [Browse This CD-ROM]. Explorer starts and displays the contents of the CD-ROM. Printer Drivers for This Printer Printing requires installation of a printer driver for your operating system.
Page 53
Software and Utilities Included on the CD-ROM The Adobe PostScript 3 printer drivers and PostScript Printer Description (PPD) files are included on the CD-ROM labeled “Printer Drivers and Utilities”. The PostScript Printer Description (PPD) files are included on the CD-ROM labeled “Printer Drivers and Utilities”.
Appendix TWAIN Driver This section describes the file path to and system requirements of the TWAIN driver. This driver is required to scan an original using a scanner. To use the machine as a network TWAIN scanner, this driver must be installed. ❖...
Software and Utilities Included on the CD-ROM LAN-Fax Driver This driver allows you to use LAN-Fax functions. ❖ File path The following folders are on the CD-ROM labeled “Scanner/PostScript Driv- ers and Utilities”: • LAN-Fax Driver for Windows 98/Me \DRIVERS\LAN-FAX\WIN9X_ME •...
Appendix DeskTopBinder Lite This section explains the file path and system requirements of DeskTopBinder Lite. DeskTopBinder is to be installed on the client computers for integration and management of various kinds of files such as scan files, files created with appli- cations, and existing scan files.
Software and Utilities Included on the CD-ROM SmartDeviceMonitor for Admin SmartDeviceMonitor for Admin is an application that uses TCP/IP and IPX/SPX to monitor network printers. It can monitor multiple network printers using IP address. We recommend that network administrators use this applica- tion.
Appendix DeskTopBinder-SmartDeviceMonitor for Client DeskTopBinder-SmartDeviceMonitor for Client allows you to manage and print various data such as files created with an application, images scanned with a scanner, and existing images as one document. ❖ File path DeskTopBinder-SmartDeviceMonitor for Client is stored in the following folder on the CD-ROM labeled “Printer Drivers and Utilities”: NETWORK\DEVMON\CLIENT\DISK1 ❖...
Installing the Operating Instructions Installing the Operating Instructions The supplied “Manuals” CD-ROM contains HTML-format manuals. Install the manuals you want to use. Important ❒ The system requirements for installing the manuals are as follows: • Operating System: Windows 95/98/Me, Windows 2000/XP, Windows Server 2003, or Windows NT4.0 •...
Appendix PDF Manuals The supplied CD-ROM contains PDF versions of the HTML user manuals. ❖ File path The PDF manuals are in the following folders on the CD-ROM: • About This Machine PDF MANUAL\US_ENG\INTRO • General Settings Guide PDF MANUAL\US_ENG\USERTOOL •...
Opening the Installed Operating Instructions Opening the Installed Operating Instructions This section explains how to open installed manuals. Opening from the Icon This section explains how to open a manual using its desktop icon. Double-click the icon on your desktop. The browser opens and the manual appears.
Appendix Opening from the CD-ROM This section explains how to open a manual from a supplied CD-ROM. Click [Read manuals]. Click the title of the manual you want to view. The browser opens, and then manual appears.
Copy Paper Copy Paper This section describes recommended paper sizes and types, unusable paper, and paper storage. Recommended Paper Sizes and Types The following limitations apply to each tray: Important ❒ If you use damp or curled paper, a staple clogging or paper jam may occur. ❖...
Page 64
Appendix ❖ Bypass Tray Paper type and Metric version Inch version Paper weight capacity Standard paper A3L, A4RL, A5RL, A6L, B4JISL, B5JISRL, B6JISL, 50 sheets 11” × 17”L, 8 ” × 11”RL, 8 ” × 14”L, 5 ” × 8 60-81g/m ”L, 12”...
Page 65
Copy Paper Note ❒ When you load paper in Paper Tray 1, 2, or 3 (LCT) or on the optional Lower Paper Trays, load it print side up. ❒ Load paper into the bypass tray with the print side up. ❒...
Appendix ❒ If you load paper of the same size in the same orientation in two or more trays, the machine automatically shifts to the other tray - except the bypass tray - when the first tray in use runs out of paper. This function is called “Auto Tray Switching”.
Copy Paper Paper Storage This section describes how to store paper. • When storing paper, the following precautions should always be followed: • Do not store paper where it will be exposed to direct sunlight. • Avoid storing paper in humid areas (humidity: 70% or less). •...
INDEX e-mail , vi 1000-sheet finisher , 15 Energy Saver , 30 500-sheet finisher , 15 Energy Saver key , 17 energy-saving , 11 ENERGY STAR Program , 11 Authentication Screen , 21 Entering Text , 31 Auto Document Feeder (ADF) , 13 Entry screen , 31 Auto Off , 30 Error indicator , 17...
Page 71
Operating Instructions General Settings Guide Connecting the Machine System Settings Copier / Document Server Features Facsimile Features Printer Features Scanner Features Registering Addresses and Users for Facsimile/Scanner Functions Other User Tools Appendix Read this manual carefully before you use this machine and keep it handy for future reference. For safe and correct use, be sure to read the Safety Information in "About This Machine"...
Page 72
Type 1: C2525/DSc525/LD425c/Aficio MP C2500 • Type 2: C3030/DSc530/LD430c/Aficio MP C3000 Certain types might not be available in some countries. For details, please contact your local dealer. Two kinds of size notation are employed in this manual. With this machine refer to the inch version.
Page 73
Manuals for This Machine Refer to the manuals that are relevant to what you want to do with the machine. ❖ About This Machine Be sure to read the Safety Information in this manual before using the ma- chine. This manual provides an introduction to the functions of the machine. It also explains the control panel, preparation procedures for using the machine, how to enter text, and how to install the CD-ROMs provided.
Page 74
❖ Other manuals • PostScript3 Supplement • UNIX Supplement • Manuals for DeskTopBinder Lite • DeskTopBinder Lite Setup Guide • DeskTopBinder Introduction Guide • Auto Document Link Guide Note ❒ Manuals provided are specific to machine types. ❒ Adobe Acrobat Reader/Adobe Reader must be installed in order to view the manuals as PDF files.
Page 75
TABLE OF CONTENTS Manuals for This Machine ..................i How to Read This Manual ..................1 Symbols ........................1 Display Panel......................2 Accessing User Tools (System Settings) ............3 Changing Default Settings ..................3 Quitting User Tools ....................4 Menu Protect......................4 1. Connecting the Machine Connecting to the Interfaces ................5 Connecting to the Ethernet Interface .................6 Connecting to the USB Interface................7 Connecting to the IEEE 1394 Interface..............8...
Page 76
3. Copier / Document Server Features General Features....................89 Reproduction Ratio....................94 Edit ........................98 Stamp ........................104 Background Numbering ..................104 Preset Stamp ......................105 User Stamp ......................108 Date Stamp ......................109 Page Numbering ....................111 Input/Output .......................114 Adjust Color Image ....................117 Settings for the Document Server..............118 4.
Page 77
Box Settings .......................168 Programming/Changing Personal Boxes ...............168 Deleting Personal Boxes..................171 Programming/Changing Information Boxes ............172 Deleting Information Boxes ..................175 Programming/Changing Transfer Boxes..............176 Deleting Transfer Boxes..................179 Printing the Box List ....................180 5. Printer Features Test Print ......................181 Printing the configuration page ................182 Interpreting the configuration page ................
Page 78
E-mail Destination....................231 Registering an E-mail Destination................231 Changing an E-mail Destination................233 Deleting an E-mail Destination................234 Registering Folders ...................235 Using SMB to Connect...................235 Using FTP to Connect....................241 Using NCP to Connect ...................246 Registering Names to a Group .................252 Registering a Group ....................252 Registering Names to a Group................253 Adding a Group to Another Group .................255 Displaying Names Registered in a Group ..............256...
How to Read This Manual Symbols This manual uses the following symbols: Indicates important safety notes. Ignoring these notes could result in serious injury or death. Be sure to read these notes. They can be found in the “Safety Information” section of About This Ma- chine.
Display Panel The display panel shows machine status, error messages, and function menus. The function items displayed serve as selector keys. You can select or specify an item by lightly pressing them. When you select or specify an item on the display panel, it is highlighted like .
Accessing User Tools (System Settings) This section is for Administrators in charge of this machine. User Tools allow you to change or set defaults. Note ❒ Operations for system settings differ from normal operations. Always quit User Tools when you have finished. ❒...
Select the user tool you want to change. Change settings by following instructions on the display, and then press [OK]. Note ❒ To cancel changes made to settings and return to the initial display, press the {User Tools/Counter} key. Reference p.47 “System Settings”...
1. Connecting the Machine This chapter describes how to connect the machine to the network and specify the network settings. Connecting to the Interfaces This section explains how to identify the machine’s interface and connect the machine according to the network environment. AMC004S IEEE 1394 ports (optional) IEEE 1284 port (optional)
Connecting the Machine Connecting to the Ethernet Interface Connect 10BASE-T or 100BASE-TX cable to the Ethernet interface. Important ❒ If the main power switch is on, turn it off. A ferrite core for the Ethernet cable is supplied with this machine. Make a loop in the cable about 15cm (5.9 inch) ( ) from the machine end of the ca- ble.
Connecting to the Interfaces Turn on the main power switch of the machine. AME005S Indicator (green) Lights up green when the machine is connected correctly to the network. Indicator (yellow) Lights up yellow when 100 BASE-TX is in operation. Goes off when 10 BASE-T is in operation.
Connecting the Machine Note ❒ This machine does not come with a USB interface cable. Make sure you purchase the appropriate cable for the machine and your computer. ❒ The USB2.0 interface board is supported by Windows 98SE / Me / 2000 / XP, Windows Server 2003, Mac OS X 10.3.3 or higher.
Connecting to the Interfaces Reference “Turning On the Power”, About This Machine “Preparing the Machine”, Printer Reference Connecting to the IEEE 1284 Interface Connect the IEEE 1284 interface cable to the IEEE 1284 interface board. Make sure the main power switch on the machine is off. If the main power switch is on, turn it off.
Connecting the Machine Connecting to the IEEE 802.11b (Wireless LAN) Interface Connect to the IEEE 802.11b (wireless LAN) interface. Note ❒ Check the settings of the IPv4 address and subnet mask of this machine. ❒ For details about how to set the IPv4 address and subnet mask from the con- trol panel of the machine, see “Interface Settings”.
Page 89
Connecting to the Interfaces Note ❒ Select [802.11 Ad-hoc Mode] mode when connecting Windows XP as a wireless LAN client using Windows XP standard driver or utilities, or when not using the infrastructure mode. ❒ For details about how to specify wireless LAN settings from the control panel on the machine, see “IEEE 802.11b”.
Page 90
Connecting the Machine ❖ When using in adhoc mode / 802.11 ad hoc mode ZGDH600J If the IEEE 802.11b interface unit If it is connected properly to the is functioning, the LED lights up in network, the LED is green when in orange.
Network Settings Network Settings This section describes the network settings you can change with User Tools (Sys- tem Settings). Make settings according to functions you want to use and the in- terface to be connected. Important ❒ These settings should be made by the system administrator, or with the ad- vice the system administrator.
Page 92
Connecting the Machine Menu User Tool Setting Requirements Interface Settings/Network Permit SNMPv3 Communication As required Interface Settings/Network Permit SSL/TLS Communication As required Interface Settings/Network Host Name As required Interface Settings/Network Machine Name As required Note ❒ IPv6 can be used only for the printer function. ❒...
Page 93
Network Settings IEEE 802.11b (wireless LAN) This section lists the settings required for using the printer or LAN-Fax function with IEEE 802.11b (wireless LAN). For details about how to specify the settings, see “Interface Settings”. Menu User Tool Setting Requirements Interface Settings/Network Machine IPv4 Address Neccessary Interface Settings/Network IPv4 Gateway Address...
Connecting the Machine Settings Required to Use Internet Fax This section lists the settings required for using Internet Fax. Ethernet This section lists the settings required for using Internet Fax. For details about how to specify the settings, see “Interface Settings” and “File Transfer”.
Page 95
Network Settings Note ❒ In [Effective Protocol], check that the protocol you want to use is set to [Active]. ❒ [LAN Type] is displayed when the wireless LAN interface board is installed. If both Ethernet and wireless LAN (IEEE 802.11b) are connected, the selected in- terface takes precedence.
Page 96
Connecting the Machine Menu User Tool Setting Requirements File Transfer Administrator's E-mail Address As required File Transfer E-mail Communication Port Neccessary File Transfer E-mail Reception Interval As required File Transfer Max. Reception E-mail Size As required File Transfer E-mail Storage in Server As required File Transfer Program / Change / Delete E-mail...
Page 97
Network Settings IEEE 802.11b (wireless LAN) This section lists the settings required for using Internet Fax with IEEE 802.11b (wireless LAN). For details about how to specify the settings, see “Interface Settings” and “File Transfer”. Menu User Tool Setting Requirements Interface Settings/Network Machine IPv4 Address Neccessary Interface Settings/Network IPv4 Gateway Address...
Connecting the Machine Note ❒ In [Effective Protocol], check that the protocol you want to use is set to [Active]. ❒ [IEEE 802.11b] and [LAN Type] are displayed when the wireless LAN interface board is installed. If both Ethernet and wireless LAN (IEEE 802.11b) are con- nected, the selected interface takes precedence.
Page 99
Network Settings Menu User Tool Setting Requirements Interface Settings/Network Permit SNMPv3 Communication As required Interface Settings/Network Host Name As required File Transfer SMTP Server Neccessary File Transfer SMTP Authentication As required File Transfer POP before SMTP As required File Transfer Reception Protocol As required File Transfer...
Page 100
Connecting the Machine IEEE 1394 (IPv4 over 1394) This section lists the settings required for sending e-mail with IEEE 1394 inter- face cable. For details about how to specify the settings, see “Interface Settings” and “File Transfer”. Menu User Tool Setting Requirements Interface Settings/IEEE 1394 IPv4 Address Neccessary...
Page 101
Network Settings IEEE 802.11b (wireless LAN) This section lists the settings required for sending e-mail with IEEE 802.11b (wireless LAN). For details about how to specify the settings, see “Interface Settings” and “File Transfer”. Menu User Tool Setting Requirements Interface Settings/Network Machine IPv4 Address Neccessary Interface Settings/Network IPv4 Gateway Address Neccessary...
Connecting the Machine Note ❒ In [Effective Protocol], check that the protocol you want to use is set to [Active]. ❒ [LAN Type] is displayed when the wireless LAN interface board is installed. If both ethernet and wireless LAN (IEEE 802.11b) are connected, the selected in- terface takes precedence.
Page 103
Network Settings Note ❒ In [Effective Protocol], check that the protocol you want to use is set to [Active]. ❒ [LAN Type] is displayed when the wireless LAN interface board is installed. If both ethernet and wireless LAN (IEEE 802.11b) are connected, the selected in- terface takes precedence.
Page 104
Connecting the Machine IEEE 802.11b (wireless LAN) This section lists the settings required for sending file with IEEE 802.11b (wire- less LAN). For details about how to specify the settings, see “Interface Settings” and “File Transfer”. Menu User Tool Setting Requirements Interface Settings/Network Machine IPv4 Address Neccessary Interface Settings/Network IPv4 Gateway Address...
Network Settings Settings Required to Use the Network Delivery Scanner This section lists the settings required for delivering data to network. Ethernet This section lists the settings required for delivering data to network with ether- net cable. For details about how to specify the settings, see “Interface Settings” and “File Transfer”.
Page 106
Connecting the Machine IEEE 1394 (IPv4 over 1394) This section lists the settings required for delivering data to network with IEEE 1394 interface cable. For details about how to specify the settings, see “Interface Settings” and “File Transfer”. Menu User Tool Setting Requirements Interface Settings/IEEE 1394 IPv4 Address Neccessary...
Page 107
Network Settings IEEE 802.11b (wireless LAN) This section lists the settings required for delivering data to network with IEEE 802.11b (wireless LAN). For details about how to specify the settings, see “Interface Settings” and “File Transfer”. Menu User Tool Setting Requirements Interface Settings/Network Machine IPv4 Address Neccessary...
Connecting the Machine Settings Required to Use Network TWAIN Scanner This section lists the settings required for using TWAIN Scanner under the net- work environment. Ethernet This section lists the settings required for using network TWAIN Scanner with Ethernet cable. For details about how to specify the settings, see “Interface Settings”.
Page 109
Network Settings IEEE 1394 (IPv4 over 1394) This section lists the settings required for using network TWAIN Scanner with IEEE 1394 interface cable. For details about how to specify the settings, see “Interface Settings” and “File Transfer”. Menu User Tool Setting Requirements Interface Settings/IEEE 1394 IPv4 Address Neccessary...
Connecting the Machine Menu User Tool Setting Requirements Interface Settings/Network Host Name As required Interface Settings/IEEE 802.11b Communication Mode Neccessary Interface Settings/IEEE 802.11b SSID Setting As required Interface Settings/IEEE 802.11b Channel As required Interface Settings/IEEE 802.11b Security Method As required Interface Settings/IEEE 802.11b Transmission Speed As required Note...
Page 111
Network Settings Note ❒ In [Effective Protocol], check that the protocol you want to use is set to [Active]. ❒ [LAN Type] is displayed when the wireless LAN interface board is installed. When both Ethernet and wireless LAN (IEEE 802.11b) are connected, the se- lected interface takes precedence.
Page 112
Connecting the Machine IEEE 802.11b (wireless LAN) This section lists the settings required for using Document Server function with IEEE 802.11b (wireless LAN). For details about how to specify the settings, see “Interface Settings”. Menu User Tool Setting Requirements Interface Settings/Network Machine IPv4 Address Neccessary Interface Settings/Network IPv4 Gateway Address As required...
Network Settings Using Utilities to Make Network Settings You can also specify network settings using utilities such as Web Image Monitor, SmartDeviceMonitor for Admin, and telnet. Note ❒ For details about using Web Image Monitor, see “Using Web Image Moni- tor”, Network Guide.
Page 114
Connecting the Machine ❖ [Network] → [Machine IPv6 Address] → [Manual Configuration Address] • Web Image Monitor:Can be used for specifying the setting. • SmartDeviceMonitor for Admin:Cannot be used for specifying the setting. • telnet:Can be used for specifying the setting. ❖...
Page 115
Network Settings ❖ [Network] → [WINS Configuration] → [On] → [Secondary WINS Server] • Web Image Monirot:Can be used for specifying the setting. • SmartDeviceMonitor for Admin:Cannot be used for specifying the setting. • telnet:Can be used for specifying the setting. ❖...
Page 116
Connecting the Machine ❖ [Network] → [NW Frame Type] → [Auto Select] • Web Image Monitor:Can be used for specifying the setting. • SmartDeviceMonitor for Admin:Cannot be used for specifying the setting. • telnet:Can be used for specifying the setting. ❖...
Page 117
Network Settings ❖ [Network] → [LAN Type] → [Ethernet] • Web Image Monitor:Can be used for specifying the setting. • SmartDeviceMonitor for Admin:Cannot be used for specifying the setting. • telnet:Can be used for specifying the setting. ❖ [Network] → [LAN Type] → [IEEE 802.11b] •...
Page 118
Connecting the Machine ❖ [IEEE 1394] → [IPv4 over 1394] • Web Image Monitor:Can be used for specifying the setting. • SmartDeviceMonitor for Admin:Cannot be used for specifying the setting. • telnet:Can be used for specifying the setting. ❖ [IEEE 1394] → [WINS Configuration] → [On] → [Primary WINS Server] •...
Page 119
Network Settings ❖ [IEEE 802.11b] → [Channel] • Web Image Monitor:Can be used for specifying the setting. • SmartDeviceMonitor for Admin:Cannot be used for specifying the setting. • telnet:Can be used for specifying the setting. ❖ [IEEE 802.11b] → [Security Method] •...
Page 120
Connecting the Machine ❖ [File Transfer] → [Administrator's E-mail Address] • Web Image Monitor:Can be used for specifying the setting. • SmartDeviceMonitor for Admin:Cannot be used for specifying the setting. • telnet:Cannot be used for specifying the setting. ❖ [File Transfer] → [E-mail Communication Port] •...
Page 121
Network Settings ❖ [File Transfer] → [Scanner Resend Interval Time] • Web Image Monitor:Cannot be used for specifying the setting. • SmartDeviceMonitor for Admin:Cannot be used for specifying the setting. • telnet:Cannot be used for specifying the setting. ❖ [File Transfer] → [Number of Scanner Resends] •...
Connecting the Machine Connecting the Machine to a Telephone Line and Telephone This section describes how to connect the machine to the telephone lines and se- lect the line type. Connecting the Telephone Line To connect the machine to a telephone line, use a snap-in modular type connector. R CAUTION: •...
Connecting the Machine to a Telephone Line and Telephone Selecting the Line Type Select the line type to which the machine is connected. There are two types: tone and pulse dial. Select the line type using “Administrator Tools”. Note ❒ This function is not available in some regions. Reference p.133 “Select Dial / Push Phone”...
2. System Settings This chapter describes user tools in the System Settings menu. General Features This section describes the user tools in the General Features menu under System Settings. ❖ Program / Change / Delete User Text You can register text phrases you often use when specifying settings, such as “.com”...
Page 126
System Settings ❖ Copy Count Display (copier/Document Server) The copy counter can be set to show the number of copies made (count up) or the number of copies yet to be made (count down). • Up • Down ❖ Function Priority Specify the mode to be displayed immediately after the operation switch is turned on, or when System Reset mode is turned on.
Page 127
General Features ❖ Output: Copier (copier) Specify a tray to which documents are delivered. AMC002S Finisher Shift Tray Finisher Upper Tray Finisher Upper Tray Finisher Shift Tray Finisher Shift Tray Internal Tray 1 Finisher Booklet Tray Internal Tray 2 • Internal Tray 1 •...
System Settings ❖ Output: Printer (printer) Specify a tray to which documents are delivered. The output trays set on the printer driver have priority over the output tray specified below. • Internal Tray 1 • Internal Tray 2 • Finisher Upper Tray •...
Tray Paper Settings Tray Paper Settings This section describes the user tools in the Tray Paper Settings menu under Sys- tem Settings. Important ❒ If the specified paper size differs from the actual size of the paper loaded in the paper tray, a misfeed might occur because the correct paper size was not detected.
Page 130
System Settings ❖ Tray Paper Size: Tray 2-4 Select the size of the paper loaded in the paper tray. ❖ The paper sizes you can set for tray 2 are as follows: ×14L”, “8 ×13L”, “8 ×11K”, “Auto Detect”, “11×17L”, “8 ×11L”, “8 ×14L”, “8 ×13L”, “8×13L”, “7...
Page 131
Tray Paper Settings ❖ Paper Type: Bypass Tray Sets the display so you can see what type of paper is loaded in the bypass tray. • Paper Type • No Display • Recycled Paper • Color Paper • Letterhead • Label Paper •...
Page 132
System Settings • Paper Thickness • Thin Paper • Normal (60-81g/m , 16-22lb.) • Middle Thick (82-105g/m , 22-28lb.)) • Thick 1 (106-169g/m , 28.5-44.9lb.) • Thick 2 (170-219g/m , 45-58lb.) • Copying Method in Duplex • 2 Sided Copy •...
Page 133
Tray Paper Settings ❖ Slip Sheet Tray Allows you to specify and display the paper tray that is inserting slip sheets. After selecting the paper tray, you can also specify the display timing and copy method for two-sided copying. • Tray to Program •...
System Settings Timer Settings This section describes the user tools in the Timer Settings menu under System Settings. ❖ Auto Off Timer After a specified period has passed, following job completion, the machine automatically turns off, in order to conserve energy. This function is called “Auto Off”.
Page 135
Timer Settings ❖ Facsimile Auto Reset Timer (facsimile) Specifies the time to elapse before the facsimile mode resets. The time can be set from 30 to 999 seconds, using the number keys. The default setting is 30 second(s). ❖ Printer Auto Reset Timer (printer) Specifies the time to elapse before the printer function resets.
System Settings Interface Settings This section describes the user tools in the Interface Settings menu under System Settings. Network This section describes the user tools in the Network menu under Interface Set- tings. ❖ Machine IPv4 Address Before using this machine in the network environment, you must specify the IPv4 address and subnet mask.
Page 137
Interface Settings ❖ IPv6 Stateless Address Autoconfiguration Specify IPv6 Stateless Address Autoconfiguration. • Active • Inactive ❖ DNS Configuration Make settings for the DNS server. When you select [Specify], enter the [DNS Server] IPv4 address as “xxx.xxx.xxx.xxx”(“x” indicates a number). •...
Page 138
System Settings ❖ NCP Delivery Protocol Select the protocol for NCP delivery. • IPX Priority • TCP / IP Priority • IPX Only • TCP/IP Only If you select “IPX Only” or “TCP/IP Only”, you cannot switch the protocol even if you cannot connect with it. If “NetWare” in [Effective Protocol] is set to “Inactive”, you can only use TCP/IP.
Page 139
Interface Settings ❖ LAN Type When you have installed the IEEE 802.11b interface unit, select the method of connection. • Ethernet • IEEE 802.11b [LAN Type] is displayed when wireless LAN board is installed. If Ethernet and IEEE 802.11b (wireless LAN) are both connected, the selected interface has priority.
System Settings Parallel Interface This section describes the user tools in the Parallel Interface menu under Inter- face Settings. [Parallel Interface] is displayed when this machine is installed with the IEEE 1284 interface board. ❖ Parallel Timing Sets the timing for the control signal of the parallel interface. •...
Interface Settings IEEE 1394 This section describes the user tools in the IEEE 1394 menu under Interface Set- tings. [IEEE 1394] is displayed when this machine is installed with the IEEE 1394 inter- face board. ❖ IPv4 Address Before using this machine in the network environment, you must specify the IPv4 address and subnet mask.
Page 142
System Settings ❖ WINS Configuration Specify the WINS server settings. If [On] is selected, specify the [WINS Server] IPv4 address as “xxx.xxx.xxx.xxx” (“xxx” indicates a number). If DHCP is in use, specify the [Scope ID]. Enter [Scope ID] using up to 31 characters. •...
Interface Settings IEEE 802.11b This section describes the user tools in the IEEE 802.11b menu under Interface Settings. [IEEE 802.11b] is displayed when this machine is installed with the wireless LAN interface board. Be sure to make all settings simultaneously. ❖...
System Settings ❖ Transmission Speed Specifies the communication speed of the IEEE 802.11b (wireless LAN). • Auto Select • 11Mbps Fixed • 5.5Mbps Fixed • 2Mbps Fixed • 1Mbps Fixed ❖ Restore Factory Defaults You can return the IEEE 802.11b (wireless LAN) settings to their defaults. •...
Page 145
Interface Settings Press the {Start} key. The configuration page is printed. Press [Exit]. Press the {User Tools/Counter} key. Note ❒ You can also exit by pressing [Exit] on the User Tools main menu.
System Settings File Transfer This section describes the user tools in the File Transfer menu under System Set- tings. ❖ Delivery Option Enables or disables sending stored or scanned documents to the ScanRouter delivery server. • On • Main Delivery Server IPv4 Address •...
Page 147
File Transfer • File to Deliver Specify whether all received fax documents or only received fax docu- ments that include delivery codes (ID or SUB/SEP codes) are sent to the ScanRouter delivery software. • File with Delivery Code • All Files •...
Page 148
System Settings ❖ SMTP Authentication Specify SMTP authentication (PLAIN, LOGIN, CRAMMD5, DIGEST-MD5). When sending e-mail to an SMTP server, you can enhance the SMTP server security level using authentication that requires entering the user name and password. If the SMTP server requires authentication, set [SMTP Authentication] to [On], and then specify the user name, password and encryption.
Page 149
File Transfer ❖ Reception Protocol Specify Reception Protocol for receiving Internet Fax. • POP3 • IMAP4 • SMTP ❖ POP3 / IMAP4 Settings Specify the POP3/IMAP4 server name for receiving Internet faxes. The specified POP3/IMAP4 server name is used for [POP before SMTP]. •...
Page 150
System Settings ❖ E-mail Communication Port Specify the port numbers for receiving Internet faxes. The specified POP3 port number is used for [POP before SMTP]. • POP3: 110 • IMAP4: 143 • SMTP: 25 Enter a port number between 1 and 65535 using the number keys, and then press the {q} key.
Page 151
File Transfer ❖ Program / Change / Delete E-mail Message You can program, change, or delete the e-mail message used when sending an Internet fax or scan file as an attachment. • Program/Change Press [System Settings]. Press [File Transfer]. Press [TNext]. Press [Program / Change / Delete E-mail Message].
Page 152
System Settings ❖ Auto Specify Sender Name Set whether or not to specify the name of the sender when sending e-mail. • On If you select [On], the specified e-mail address will appear in the “From:” box. If you do not specify the sender’s address, the administrator’s e-mail address will appear in the “From:”...
Administrator Tools Administrator Tools This section describes the user tools in the Administrator Tools menu under Sys- tem Settings. Administrator Tools are used by the administrator. To change these settings, contact the administrator. We recommend specifying Administrator Authentication before making Ad- ministrator Tools settings.
Page 154
System Settings ❖ Address Book: Program / Change / Delete Group Names registered in the Address Book can be added into a group. You can then easily manage the names registered in each group. • Program/Change You can register and change groups. •...
Page 155
Administrator Tools Press the name key to be move. You can select a name using the number keys. Press the name key in the place you want to move to. The user key is moved to the selected position, and the user key currently at the selected position is moved forward or backward.
Page 156
System Settings ❖ Print Address Book: Destination List You can print the destination list registered in the Address Book. • Print in Title 1 Order Prints the Address Book in Title 1 order. • Print in Title 2 Order Prints the Address Book in Title 2 order. •...
Page 157
Administrator Tools Enter the new name, and then press [OK]. Press [OK]. ❖ Address Book: Switch Title Specifies the title to select a name. • Title 1 • Title 2 • Title 3 ❖ Back Up / Restore Address Book You can back up the machine’s address book to external storage or restore the backup copy from the external storage.
Page 158
System Settings ❖ User Authentication Management • User Code Auth. Using User Code Authentication, you can limit the available functions and supervise their use. When using User Code Authentication, register the user code. Using the Printer PC Control function, you can obtain a log of prints cor- responding to the codes entered using the printer driver.
Page 159
Administrator Tools ❖ Auto Delete File in Document Server Specify whether documents stored in the Document Server will or will not be deleted after a specified period of time. • On: 3 day(s) • Off If you select [On], documents stored subsequently are deleted after the speci- fied period.
Page 160
System Settings ❖ LDAP Search Specify whether or not to use the LDAP server for searching. • On • Off If you select [Off], [Search LDAP] will not appear on the searching display. ❖ AOF (Always On) Specify whether or not to use Auto Off. •...
Administrator Tools Program / Change / Delete LDAP Server This section explains how to specify the LDAP server settings. To program/change the LDAP server Press [System Settings]. Press [Administrator Tools]. Press [Program / Change / Delete LDAP Server]. Check that [Program/Change] is selected. Select the LDAP server you want to program or change.
System Settings Programming the LDAP server This section explains how to specify the LDAP server settings. To enter an identification name Press [Change] under “Name”. Register a name for the LDAP server that will appear on the server selection screen of the LDAP search operation. Enter the server’s identification name.
Page 163
Administrator Tools To enter a port number Press [Change] under “Port No.”. Specify the port number for communicating with the LDAP server. Specify a port that is compliant with your environment. Enter the port number using the number keys, and then press the {#} key. When SSL is set to [On], the port number automatically changes to “636”.
Page 164
System Settings To enter the user name and password Press [TNext]. Press [Change] under “User Name”. When [On] or [High Security] is selected for the authentication setting, use the administrator account name and password. Do not enter the administrator account name and password when using authentication for each individual or each search.
Page 165
Administrator Tools To set search conditions Press [TNext] twice. Press [Change] for items you want to use as search conditions from the fol- lowing: [Name], [E-mail Address], [Fax Number], [Company Name], and [Depart- ment Name]. You can enter an attribute as a typical search keyword. Using the entered at- tribute, the function searches the LDAP server’s Address Book.
Page 166
System Settings Enter the key display, and then press [OK]. The registered “key display” appears as a keyword for searching LDAP. • Without key display registration • With key display registration The key does not appear on the search screen unless both “Attribute” and “Key Display”...
3. Copier / Document Server Features This chapter describes user tools in the Copier / Document Server Features menu. General Features This section describes the user tools in the General Features menu under Copier / Document Server Features. ❖ Auto Image Density Priority You can set whether Auto Image Density is “On”...
Page 168
Copier / Document Server Features ❖ Original Photo Type Priority When you select “Text / Photo” or “Photo” in “Original Type Priority”, you can change the settings of the selected original type. • Glossy Photo • Printed Photo • Copied Photo ❖...
Page 169
General Features ❖ Copy Orientation in Duplex Mode You can set the copy orientation when making two-sided copies. • Top to Top • Top to Bottom ❖ Max. Copy Quantity The maximum copy quantity can be set between 1 and 999. The default setting is 999 sheets.
Page 170
Copier / Document Server Features ❖ Customize: Copier Function Key You can assign up to six frequently-used functions to Copy Function keys. • Off • 2 originals → 2 Sided: Top to Top • 2 originals → 2 Sided: Top to Bottom •...
Page 171
General Features • 4 Holes Left • 4 Holes Top • Positive/Negative ❖ Customize: Document Server Storage key You can assign up to six frequently-used functions to Document Server Stor- age keys. • Off • 2 Sided original: Top to Top •...
Copier / Document Server Features Reproduction Ratio This section describes the user tools in the Reproduction Ratio menu under Cop- ier / Document Server Features. ❖ Shortcut R/E You can register up to three frequently used Reduce / Enlarge ratios other than the fixed Reduce / Enlarge ratio and have them shown on the initial dis- play.
Page 173
Reproduction Ratio ” → 11”×17” (200%) • 5 ”×8 • 400% • User R/E Ratio (25-400%) • Off Default: • F1: 73% • F2: 155% • F3: 93% ❖ Reproduction Ratio Specify the enlargement and reduction ratios that appear if [Reduce / Enlarge] is pressed on the copier screen.
Page 174
Copier / Document Server Features • Inch version • 25% • 11”×17” → 5 ”×8 ” (50%) • 11”×17” → 8 ”×11” (65%) • 11”×15” → 8 ”×11” (73%) ”×14” → 8 • 8 ”×11” (78%) • F → 8 ”×11”...
Page 175
Reproduction Ratio • Inch version • 400% • 200% • 155% • 129% • 121% • 93% • 85% • 78% • 73% • 65% • 50% • 25% ❖ Ratio for Create Margin You can set a Reduce / Enlarge ratio when registering Create Margin in a shortcut key.
Copier / Document Server Features Edit This section describes the user tools in the Edit menu under Copier / Document Server Features. Enter the width of the binding margin with the number keys as follows: • Metric version: 0–30 mm (in increments of 1 mm) •...
Page 177
Edit ❖ Back Margin: Top/Bottom Specify top and bottom margins on the back side of copies in Margin Adjust- ment mode. • Top • Bottom Default: • Metric version: Top/Bottom 0mm • Inch version: Top/Bottom 0.0” ❖ 1 Sided → 2 Sided Auto Margin: TtoT In 1 sided to 2 sided Duplex mode, you can specify the margins on the back side.
Page 178
Copier / Document Server Features ❖ Erase Center Width Specify the width of the erased center margins with this function. Default: • Metric version: 10 mm • Inch version: 0.4” ❖ Front Cover Copy in Combine You can make a combined copy on the front cover sheet when you select Front Cover mode.
Page 179
Edit ❖ Copy on Designating Page in Combine Specify whether to make a combined copy on the inserted slip sheets in Desig./Chapter mode. • Combine • Don not Combine ❖ Image Repeat Separation Line You can select a separation line and color using the Image Repeat function from: None, Solid, Broken A, Broken B, or Crop Marks.
Page 180
Copier / Document Server Features ❖ Double Copies Separation Line You can select a separation line using the Double Copies function from: None, Solid, Broken A, Broken B, or Crop Marks. • None • Solid • Broken A • Broken B •...
Page 181
Edit ❖ Separation Line in Combine You can select a separation line using the Combine function from: None, Sol- id, Broken A, Broken B, or Crop Marks. • None • Solid • Broken A • Broken B • Crop Marks Line color (Full Color): •...
Copier / Document Server Features Stamp This section describes the user tools in the Stamp menu under Copier / Docu- ment Server Features. Background Numbering This section describes the user tools in the Background Numbering menu under Stamp. ❖ Size You can set the size of the numbers.
Stamp Preset Stamp This section describes the user tools in the Preset Stamp menu under Stamp. ❖ Stamp Language You can select the language of the message printed in Stamp mode. • English • German • French • Italian • Spanish •...
Page 184
Copier / Document Server Features ❖ Stamp Format Specify how each of stamp is printed. • Stamp Position Specify where to print the stamp. • Top Left • Top Center • Top Right • Center Left • Center • Center Right •...
Page 185
Stamp • Density You can set the pattern used to print the stamp. • Normal The stamp is printed on the image. You cannot check which parts will overlap. • Lighter The image can be seen through the stamp. • Lightest The image appears even clearer than in the Lighter setting.
Copier / Document Server Features User Stamp This section describes the user tools in the User Stamp menu under Stamp. ❖ Program/Delete Stamp You can register, change, or delete these designs as user stamps. You can register up to four custom stamps with your favourite designs. ❖...
Stamp • Page to Stamp Sets whether to print the stamp on all pages or only the first page. • All Pages • 1st Page Only ❖ Stamp Color:1-4 Sets the colorregistered in User Stamp color (1 to 4). • Yellow •...
Page 188
Copier / Document Server Features ❖ Size You can set the Date Stamp size. • Auto • Large • Middle • Small ❖ Superimpose You can have the Date Stamp printed in white when it overlaps black parts of the image. •...
Stamp • Inch version: “Top Left”…T/B: 0.1”-5.7”, L/R: 0.1”-5.7” “Top Cnter”…T/B: 0.1”-5.7”, L/R: 2.8”-2.8” “Top Right”…T/B: 0.1”-5.7”, L/R: 0.1”-5.7” “Bottom Left”…T/B: 0.1”-5.7”, L/R: 0.1”-5.7” “Bttm Cnter”…T/B: 0.1”-5.7”, L/R: 2.8”-2.8” “Bottom Right”…T/B: 0.1”-5.7”, L/R: 0.1”-5.7” • Page to Stamp Sets whether to print the stamp on all pages or only the first page. •...
Page 190
Copier / Document Server Features ❖ Page Numbering in Combine You can set page numbering when using the Combine function and the Page Numbering function together. • Per Original • Per Copy ❖ Stamp Position on Designating Page You can select to print the page number onto slip sheets when using the Des- ignate function set to [Copy] and the Page Numbering function together.
Page 191
Stamp ❖ Stamp Color You can set the selected priority color when printing the date. • Yellow • Red • Cyan • Magenta • Green • Blue • Black ❖ Page Numbering Initial Letter You can select the page numbering initial letter between “P1, P2.../P.1, P.2...” and “S1, S2.../S.1, S.2...”.
Copier / Document Server Features Input/Output This section describes the user tools in the Input/Output menu under Copier / Document Server Features. ❖ Switch to Batch You can select to have Batch mode or SADF mode displayed when you press the [Special Original] key.
Page 193
Input/Output ❖ Select Stapling Position Specify which Top 2 staples or Bottom shown on the initial display with pri- ority. The optional 500-sheet finisher, 1000-sheet finisher, or booklet finisher is re- quired to use this function. • Top Slant/Left • Bottom Slant/Left •...
Page 194
Copier / Document Server Features ❖ Simplified Screen: Finishing Types You can select which key is displayed with higher priority for “Finishing Types” on the Simplified Screen. • Stack • Staple: Top • Staple: Slant • Staple: Bottom • Staple: Left 2 •...
Adjust Color Image Adjust Color Image This section describes the user tools in the Adjust Color Image menu under Cop- ier / Document Server Features. ❖ ADS Background (Full Color) “The background density is adjusted to skip the texture and copy. You can adjust the background density up to 5 levels when in Full Color.
Copier / Document Server Features Settings for the Document Server For details, see “System Settings”, and “Copier / Document Server Features”. ❖ Copier / Document Server Features Heading items Default General Features Document Server Storage key 2 Sided original: Top to Top 1 Sided →...
4. Facsimile Features This chapter describes user tools in the Facsimile Features menu. General Features This section describes the user tools in the General Features menu under Facsim- ile Features. ❖ Quick Operation Key (1-3) Frequently used functions programmed as Quick Operation keys are shown on the menu immediately after the power is turned on.
Page 198
Facsimile Features Up to three functions can be programmed to a Quick Operation keys. Functions that appear dimmed have already been set. ❖ Switch Title of Quick Dial Table Select the title to be shown on the destination list. • Title 1 •...
Page 199
General Features ❖ On Hook Mode Release Time Use this function to specify a time to cancel On Hook mode after you transmit using On Hook dialing. • 1 minute • 3 minutes • 5 minutes • 10 minutes Reference p.168 “Box Settings”...
Facsimile Features Scan Settings This section describes the user tools in the Scan Settings menu under Facsimile Features. ❖ Program / Change / Delete Scan Size You can program, change, or cancel frequently used scan sizes. For details about programming Scan Size, see “Program / Change / Delete Scan Size”.
Send Settings Send Settings This section describes the user tools in the Send Settings menu under Facsimile Features. ❖ Max. E-mail Size Specify to limit the size of e-mail messages that are transmitted, if receivers limit e-mail size, or you cannot send large size e-mail for some reason. When this function is set to on, transmission of e-mail that exceeds the set size is aborted.
Page 202
Facsimile Features ❖ Program / Change / Delete Standard Message Program standard messages to be printed at the top of the first page of the original of the opposite party. It is useful for personalizing messages such as sending greetings. You can program three standard messages.
Page 203
Send Settings ❖ Backup File TX Setting You can specify whether or not to send to a selected folder the backup of a file sent by Memory Transmission. By setting [Backup File TX Setting] to [On] and selecting the destination folder, you can automatically send to the selected folder the backup of a file sent by Memory Transmission using the machine’s control panel, Web Image Moni- tor, DeskTopBinder, or LAN-Fax.
Facsimile Features Reception Settings This section describes the user tools in the Reception Settings menu under Fac- simile Features. ❖ Switch Reception Mode Specify the method for receiving fax documents. • Manual Reception • Auto Reception ❖ Program Special Sender By programming particular receivers as Special Sender in advance, you can have Special Senders treated differently.
Page 205
Reception Settings ❖ Stored Reception File User Setting The administrator can be specified for managing documents stored on the machine after fax documents are received. To specify the administrator, enter the administrator user code for managing documents using Web Image Mon- itor or DeskTopBinder.
Page 206
Facsimile Features Press [On]. Press [Change], and then enter the sending e-mail address to be authorized. If you make a mistake, press [Backspace] or [Clear], and then enter again. Press [OK] twice. ❖ 2 Sided Print Specify whether or not received fax documents are to be printed on both sides of the paper.
Page 207
Reception Settings ❖ Print Reception Time Specify whether or not the received date, time, and file number are printed at the bottom of received fax documents. • On • Off ❖ Reception File Print Quantity Specify the number of copies to be printed for each fax document received. •...
Page 208
Facsimile Features Select the line type. Select a tray to deliver the received paper onto, and then press [OK]. If you want to specify another line type, repeat from step ❖ Folder Transfer Result Report You can set whether the Folder Transfer Result Report is transmitted to the specified e-mail address, when folders are programmed as the forwarding destinations to which documents are sent from all senders or Special Senders.
Page 209
Reception Settings ❖ Memory Lock Reception When you switch Memory Lock on, received documents are stored in mem- ory and not printed automatically. When a document is received in the Mem- ory Lock mode, the Confidential File indicator blinks. To print this document, enter the Memory Lock ID.
Facsimile Features Initial Settings This section describes the user tools in the Initial Settings menu under Facsimile Features. ❖ Parameter Setting User Parameters allow you to customize various settings to suit your needs. For details about Parameter Setting, see “Parameter Settings”. ❖...
Page 211
Initial Settings ❖ Program Memory Lock ID Program a Memory Lock ID to be entered before printing documents when the Memory Lock function is activated. Press [Facsimile Features]. Press [Initial Settings]. Press [Program Memory Lock ID]. Enter an ID using the number keys, and then press [OK]. A Memory Lock ID can be any four-digit number, except 0000.
Page 212
Facsimile Features ❖ Program Fax Information Program information to be shown on the display of the other machine and printed as a report. The following information can be programmed. • Fax Header • Own Name • Own Fax Number For details about how to program Fax Information, see “Registering Fax In- formation”...
Page 213
Initial Settings ❖ SIP Settings Set the SIP server's IPv4 address or host name, and SIP user name. If you select [On] using the User Parameters, you can use the SIP server. See “Parameter Settings” ( switch 34, bit 1). You can use alphanumeric symbols (lower and upper cases) and symbols (“;”, “?”, “:”, “&”, “=”, “+”, “$”, “,”, “-”, “_”, “...
Page 214
Facsimile Features Press [Change] for “Prefix”. Enter the Prefix using the number keys, and then press [OK]. To change the existing prefix, press [Clear], and then enter a new prefix. For documents sent using a gateway to G3 Fax, prefixes can be used. If the first several digits of IP-Fax number and the gateway- specific prefix are identical, documents can be transmitted using the registered digits of the gateway.
Reception File Setting Reception File Setting Specify whether received documents are to be saved on the hard disk or printed immediately without being saved. You can print stored documents repeatedly or download them as images to a computer using a Web Image Monitor or Desk- TopBinder.
Facsimile Features Note ❒ You can use “Parameter Settings” (switch 10, bit 5) to select whether or not to print stored received documents. See “Parameter Settings”. ❒ If [Store] is selected and a destination for notification is specified, notifica- tion of document reception can be sent to the specified e-mail address. ❒...
Program / Change / Delete Scan Size Program / Change / Delete Scan Size Program frequently used scan sizes. Important ❒ When programming or changing a scan size, it is recommended that you make a record of the new size. When you select a scan size to scan a custom size original, two custom sizes are available (Program Size 1 and Program Size 2).
Facsimile Features Select a vertical size, and then press [OK]. The displayed vertical size differs depending on the selected unit. When [mm] is selected, [Auto Detect], [210 mm (A4)], [257 mm (B4 JIS)], [297 mm (A3)], [216 mm (8 1/2)], and [279 mm (11)] are shown. When [inch] is selected, [Auto Detect], [8.3 inch (A4)], [10.1 inch (B4 JIS)], [11.7 inch (A3)], [8.5 inch], and [11.0 inch] are shown.
Registering Fax Information Registering Fax Information You can send information to the other party when transmitting or receiving a fax document. This information is shown on the display of the other machine and printed as a report. The following information can be sent. Important ❒...
Page 220
Facsimile Features Registering Fax Information Press [Facsimile Features]. Press [Initial Settings]. Press [Program Fax Information]. Select the Fax Information you want to register or change. Register the name and facsimile number. Press [Exit]. Registering a Fax Header Check that [Fax Header] is selected. Press [First Name] or [Second Name].
Page 221
Registering Fax Information Registering an Own Name Press [Own Name]. Press [Own Name]. Enter your own facsimile's number using the number keys, and then press [OK]. Registering Fax Header Press [Fax No.]. Select line type to program. The display differs depending on the optional units installed on the machine. Enter your own facsimile's number using the number keys, and then press [OK].
Facsimile Features Deleting Fax Information Press [Facsimile Features]. Press [Initial Settings]. Press [Program Fax Information]. Press [Fax Header], [Own Name], or [Own Fax Number] to delete. Press the item you want to delete. Press [Backspace] or [Delete All], and then press [OK]. When deleting your own facsimile's number, press [Clear] or the {Clear/Stop} key, and then press [OK].
Forwarding Forwarding Print documents received and forward to a specified End Receiver. This is useful if, for example, you are visiting another office and would like a copy of your doc- uments to be sent to that office. You can also specify a “folder” as the forwarding destination. Important ❒...
Facsimile Features Programming an End Receiver Important ❒ One end receiver can be registered for each special sender. To register two or more end receivers, use group destination. However, a maximum of 500 des- tinations can be specified in a group. Press [Facsimile Features].
Page 225
Forwarding Specify an End Receiver using the destination list, and then press [OK]. The receiver name is shown to the right of [Receiver]. Press the key on the left of the display to switch the destination between fax number, email address, IP-Fax destination, and folder. Set a folder destination in Address Book Management under Administrator Tools in the System Settings menu.
Facsimile Features Quitting the forwarding function Press [Facsimile Features]. Press [Reception Settings]. Press [Forwarding]. Press [Off], and then press [OK]. Press the {User Tools/Counter} key. Forwarding Mark You can print a Forwarding Mark on receiver's documents that have been for- warded.
Parameter Settings Parameter Settings User Parameters allow you to customize various settings to suit your needs. To change function settings, set the User Parameter Switches. ❖ Switches and Bits Each User Parameter has a set of switches, and each of the switches consist of eight bits, whose values are “0”...
Page 228
Facsimile Features Switch Bit Item Substitute the reception when the machine • 00: Ena- cannot print (because paper is jammed, all bled un- paper trays have run out of paper, toner is conditio empty, or all paper trays are out of order) nally (Free) •...
Page 229
Parameter Settings Switch Bit Item Long Document Transmission (Well Log) Reset when function changed 0, 1, 2 Selecting the available paper feed tray. 001: Tray 1 010: Tray 2 011: Tray 3 100: Tray 4 101: Large Capacity Tray (LCT) Whether or not to select the available paper feed tray.
Page 230
Facsimile Features Switch Bit Item 5,4,3,2 Reprinting time of stored documents in 0000: memory that could not be printed using 0 minutes LAN-Fax Driver 0001: 1 minutes 0010: 2 minutes 0011: 3 minutes 0100: 4 minutes 0101: 5 minutes 0110: 6 minutes 0111: 7 minutes...
Page 231
Parameter Settings Switch Bit Item Detect a dial tone before sending faxes when Not detect Detect (On) using the telephone line (LINE2) (Off) Detect a dial tone before sending faxes when Not detect Detect (On) using the telephone line (LINE3) (Off) Store documents that could not be transmit- ted in memory...
Page 232
Facsimile Features Switch Bit Item 7, 6, 5, Maximum number of redials when sending a 00000000: 4, 3, 2, backup file 1 time(s) 1, 0 00000001: 2 time(s) 00000010: 3 time(s) 11000000: 195 time(s) 11111111: 254 time(s) Whether to stop sending a backup file if the destination folder becomes full while the machine is sending or waiting to send a fax or the backup file...
Parameter Settings Changing the User Parameters This section describes how to set parameters. Important ❒ Access to some User Parameter Settings may require options, or other settings may need to be made beforehand. ❒ It is recommended that you print and keep a User Parameter list when you program or change a User Parameter.
Facsimile Features Special Senders to Treat Differently By programming particular senders in advance, you can set the following func- tion for each sender: • Authorized RX • Forwarding • Reception File Print Qty • Print 2 Sided • Memory Lock •...
Special Senders to Treat Differently Note ❒ You cannot program senders as Special Senders if they do not have Own Name or Own Fax Number programmed. ❒ The machine cannot differentiate between Polling Reception and Free Polling documents from Special Senders. ❒...
Facsimile Features Reception File Print Quantity Print the specified number of copies of documents received from programmed senders (Special Senders). If you do not program any Special Senders, the ma- chine prints the specified number of copies for all received documents Note ❒...
Special Senders to Treat Differently Memory Lock Store incoming documents from programmed senders (Special Senders) in memory without printing them. People without the Memory Lock ID cannot print the documents, and therefore this function is useful for receiving confiden- tial documents . If you do not program any senders, the machine receives fax document from all senders using Memory Lock reception.
Page 238
Facsimile Features Select the destination to program or change. Enter a destination name, and then press [OK]. Enter a destination name using Own Name or Own Fax Number. Press [Full Agreement] or [Partial Agreement]. Select the item you want to program. You must select only the item you want to program.
Facsimile Features Note ❒ Selecting [Same as Basic Settings] will result in the same setting made for “RX File Print Qty” of “Reception Settings”. ❒ If you make a mistake, press [Clear] or the {Clear/Stop} key before pressing [OK], and then try again. Forwarding Specify when programming a Special Sender.
Special Senders to Treat Differently ❒ Deleting a destination specified as a forward destination from the destina- tion list causes the settings of the forward destination to be deleted, so they must be registered again. When a destination is changed, a document is transmitted to the new destination.
Facsimile Features Programming Initial Set Up of a Special Sender Program the “Initial Set Up” of a Special Sender. You can also specify the Bypass Tray Paper Size. Press [Facsimile Features]. Press [Reception Settings]. Press [Program Special Sender]. Press [Initial Set Up]. Select the function you want to program.
Page 243
Special Senders to Treat Differently Press [On] or [Off], and then press [OK]. The illustration shows the “Authorized RX” display as an example. To programming Bypass Tray Paper Size, press [Bypass Tray Paper Size]. You can select a size from [Auto Detect], [Standard Size], or [Custom Size]. If you select [Auto Detect], proceed to steps If you select [Standard Size], proceed to steps If you select [Custom Size], proceed to steps...
Page 244
Facsimile Features Enter the vertical size of the paper using the number keys, and then press the {q} key. Specify a vertical size from 210 mm (8.3”) to 297 mm 11.6”). You cannot enter a size smaller than 210 mm or larger than 297 mm. Each time you press [mm] or [inch], the units switch between “mm”...
Special Senders to Treat Differently Deleting a Special Sender Use this function to delete “Initial Set Up” of a Special Sender. The Bypass Tray Paper Size can also be deleted. Press [Facsimile Features]. Press [Reception Settings]. Press [Program Special Sender]. Press [Delete], and then select the Special Sender you want to delete.
Facsimile Features Box Settings The following functions are for delivery and transfer of documents: • Personal Box • Information Box • Transfer Box ❖ SUB Code and SEP Code SUB Code and SEP Code are IDs consisting of up to 20 digits, and can include numbers, #, *, and spaces.
Page 247
Box Settings Select a box to program. When programming a new box, press [*Not Programmed]. To change a box already programmed, press it and proceed to step Press [Personal Box]. Enter a box name, and then press [OK]. Enter a SUB Code. To change the SUB Code, press [Clear] or the {Clear/Stop} key, and then try again.
Page 248
Facsimile Features Enter a password, and then press [OK]. If you make a mistake, press [Clear] or the {Clear/Stop} key before pressing [OK], and then try again. Re-enter the password, and then press [OK]. If you make a mistake, press [Clear] or the {Clear/Stop} key before pressing [OK], and then try again.
Box Settings Note ❒ When programming a password, a mark is displayed before the Box name. ❒ Specify a fax number, Internet Fax destination and IP-Fax destination as the transmission destination. ❒ The Fax Header is not printed on delivered documents. ❒...
Facsimile Features If the password is programmed, enter a password using the number keys, and then press [OK]. If you make a mistake, press [Clear] or the {Clear/Stop} key, and then try again. Press [Yes]. To cancel deleting a box, press [No]. The display returns to that of step Press [Exit].
Page 251
Box Settings Select the box to program. When programming a new box, press [*Not Programmed]. To change a box already programmed, press it, and then proceed to step . If a password is programmed, enter the password, press [OK], and then proceed to step Press [Information Box].
Page 252
Facsimile Features Enter a password, and then press [OK]. If you make a mistake, press [Clear] or the {Clear/Stop} key before pressing [OK], and then try again. Re-enter the password, and then press [OK]. If you make a mistake, press [Clear] or the {Clear/Stop} key before pressing [OK], and then try again.
Box Settings Deleting Information Boxes This section describes how to delete Information Boxes. Important ❒ If there are documents in the box, you cannnot delete the box. Press [Facsimile Features]. Press [General Features]. Press [Box Setting]. Press [Delete], and then select the box you want to delete. If the password is programmed, enter a password using the number keys, and then press [OK].
Facsimile Features Programming/Changing Transfer Boxes This section describes how to set up an Transfer Box. This function turns the machine into a fax relay station. Documents sent with a SUB Code that matches the SUB Code programmed as a Transfer Box are re- ceived, and then relayed to a programmed receiver.
Page 255
Box Settings Select the box to program. When programming a new box, press [*Not Programmed]. To change a box already programmed, press it, and then proceed to step Press [Transfer Box]. Enter a Box name, and then press [OK]. Enter a SUB Code. To change the SUB Code, press [Clear] or the {Clear/Stop} key, and then try again.
Page 256
Facsimile Features Specify End Receivers with destination keys, and then press [OK]. You can change the display to the fax destination, Internet fax destination, and IP-Fax destination using the key on the left side of the display. A reception station can also be registered as a group destination. In such a case, a maximum of 500 parties including End Receivers 1-5 can be specified in a group.
Box Settings Note ❒ After documents are transferred, Transfer Result Reports are not sent back to the sender. ❒ Specify the Internet fax destination and IP-Fax destination as a reception station. ❒ After documents are transferred, they are deleted. ❒ When this function is set to on, the machine prints out the received docu- ments it transfers and a Transfer Result Report after the transfer has fin- ished.
Facsimile Features If the password is programmed, enter a password using the number keys, and then press [OK]. If you make a mistake, press [Clear] or the {Clear/Stop} key, and then try again. Press [Yes]. To cancel deleting a special sender, press [No]. The display returns to that of step Press [Exit].
5. Printer Features This chapter describes user tools in the Printer Features menu. Test Print This section describes the user tools in the Test Print menu under Printer Fea- tures. ❖ Multiple Lists You can print the configuration page and error log. ❖...
Printer Features Printing the configuration page Press [Printer Features]. Press [Configuration Page] on the [List / Test Print]. The configuration page is printed. Press the {User Tools/Counter} key. Interpreting the configuration page ❖ System Reference • Unit Number Displays the serial number assigned to the board by its manufacturer. •...
Page 261
Test Print • Printer Language Displays the version number of the printer driver language. • Connection Equipment Displays the installed optional equipments. ❖ Paper Input Displays settings made under Tray Paper Settings menu. ❖ System Displays settings made under the System menu. ❖...
Printer Features Maintenance This section describes the user tools in the Maintenance menu under Printer Fea- tures. ❖ List / Test Print Lock You can Lock the [List/Test Print] menu. • On • Off ❖ Delete All Temporary Print Jobs You can delete all print jobs temporarily stored in the machine.
System System This section describes the user tools in the System menu under Printer Features. ❖ Print Errror Report Select this to have an error report printed when a printer or memory error oc- curs. • On • Off ❖ Auto Continue You can select this to enable Auto Continue.
Page 264
Printer Features ❖ Initial Print Job List You can set the desired type of print job list that appears on the screen when you press [Print Jobs]. • Complete List Displays the list of print jobs stored in the machine. •...
Page 265
System ❖ Printer Language Specify the printer language. • Auto • PCL • PS • PDF This menu appears only when the PostScript 3 unit is installed. ❖ Sub Paper Size You can enable the Auto Substitute Paper Size (A4, LT) feature. •...
Page 266
Printer Features ❖ Letterhead Setting You can rotate original images when printing. When printing, original images are always rotated by 180 degrees. Therefore, output might not be as expected when printing onto letterhead or preprinted paper requiring orientation. Using this function, you can specify image rota- tion.
Host Interface Host Interface This section describes the user tools in the Host Interface menu under Printer Features. ❖ I/O Buffer You can set the size of the I/O Buffer. Normally it is not necessary to change this setting. • 128KB •...
Printer Features PCL Menu This section describes the user tools in the PCL Menu under Printer Features. ❖ Orientation You can set the page orientation. • Portrait • Landscape ❖ Form Lines You can set the number of lines per page. •...
Page 269
PCL Menu ❖ Symbol Set Specify the set of print characters for the selected font. The available options are as follows: Roman-8, ISO L1, ISO L2, ISO L5, PC-8, PC-8 D/N, PC-850, PC-852, PC8-TK, Win L1, Win L2, Win L5, Desktop, PS Text, VN Intl, VN US, MS Publ, Math- 8, PS Math, VN Math, Pifont, Legal, ISO 4, ISO 6, ISO 11, ISO 15, ISO 17, ISO 21, ISO 60, ISO 69, Win 3.0 ❖...
Printer Features PS Menu This section describes the user tools in the PS Menu under Printer Features. This menu appears only when the optional PostScript 3 unit is installed. ❖ Data Format You can select a data format. • Binary Data •...
PDF Menu PDF Menu This section describes the user tools in the PDF Menu under Printer Features. ❖ Change PDF Password Set the password for the PDF file executing PDF Direct Print. • Current Password • New Password • Confirm New Password A password can be set using on the Web Image Monitor, but in this case the password information is sent through the network.
6. Scanner Features This chapter describes user tools in the Scanner Features menu. General Settings This section describes the user tools in the General Settings menu under Scanner Features. ❖ Switch Title of Quick Dial Table Select the title to be shown on the destination list. ❖...
Page 274
Scanner Features ❖ Print & Delete Scanner Journal Up to 100 transmission/delivery results can be checked on this machine. If the stored transmission/ delivery results reach 100, select whether to print the delivery journal. • Print and Delete All The transmission/delivery journal is printed automatically. The printed journal is deleted.
Scan Settings Scan Settings This section describes the user tools in the Scan Settings menu under Scanner Features. ❖ A.C.S. Sensitivity Level Sets the sensitivity level for judging colur/black and white for scanning orig- inals when [Scan Type] is set to [Auto Color Select]. ❖...
Page 276
Scanner Features ❖ Wait Time for Next Original(s): SADF When dividing originals and scanning them separately with the ADF to form a single file, select [Set Wait Time] or [Continuous Wait] for the waiting status. • Continuous Wait • Set Wait Time: 60sec. This setting is valid if [SADF] is specified for [Original Feed Type] when scan- ning.
Send Settings Send Settings This section describes the user tools in the Send Settings menu under Scanner Features. ❖ Compression (Black & White) Select whether or not to compress black and white scan files. • On • Off Compression reduces the time required for transferring the scan file. The actual time required for file transfer will vary depending on the file size and network load.
Page 278
Scanner Features ❖ Divide & Send E-mail This function is effective only when [On] is selected for [Max. E-mail Size]. Select whether or not an image exceeding the size specified in [Max. E-mail Size] should be divided and sent using more than one e-mail. •...
7. Registering Addresses and Users for Facsimile/Scanner Functions This chaper describes how to register destinations and users in the Address Book. Address Book Registering information such as the names of users and their e-mail addresses in the Address Book allows you to manage them easily. Important ❒...
Page 280
Registering Addresses and Users for Facsimile/Scanner Functions ❖ Protection You can set protection codes to stop sender's name from being used or folders from being accessed without authorization. ❖ Fax Dest. You can register fax numbers, line, fax header and select label insertion. When using IP-Fax, you can register the IP-Fax destination and select the pro- tocol.
Page 281
Address Book ❖ Folder You can register the protocol, path name and server name. • SMB • FTP • NCP ❖ Add to Group You can put registered e-mail and folder destinations into a group for easier management.
Registering Addresses and Users for Facsimile/Scanner Functions Note ❒ You can also use a Web Image Monitor to register names in the Address Book. With the SmartDeviceMonitor for Admin, you can register multiple names at the same time. ❒ Using [Address Management Tool] in SmartDeviceMonitor for Admin, you can backup Address Book data.
Address Book Sending scanned files to a shared folder directly After registering the path name, user name and password, you can connect to a shared folder simply by selecting the destination shown on the initial scanner display whenever sending files using the scanner function to a shared folder. To share the folder using Windows, select the SMB protocol.
Registering Addresses and Users for Facsimile/Scanner Functions Registering Names Register user information including their names. The user name is useful for selecting a destination when sending faxes or e-mail. You ca also use it as a folder destination. You can register up to 2000 names. Registering Names This section describes how to register names.
Registering Names Press [OK] twice. Press the {User Tools/Counter} key. Note ❒ The name can be used for documents in the Document Server. For details about the Document Server, see “Using the Document Server”, Copy/ Document Server Reference. ❒ The keys you can select are as follows: •...
Registering Addresses and Users for Facsimile/Scanner Functions To change the title, press the key for the classification you want to use from Select Title. Note ❒ You can search by the registered name, user code, fax number, folder name, e-mail address, or IP-Fax destination. Reference “Entering Text”, About This Machine To change a registration number...
Authentication Information Authentication Information Following describes the procedure for authenticating a user code. Important ❒ The functions associated with each user code are the same. If you change or delete user codes, management data and limits associated with that code be- come invalid.
Registering Addresses and Users for Facsimile/Scanner Functions Registering a User Code This section describes how to register a user code. Press [System Settings]. Press [Administrator Tools]. Press [Address Book Management]. Check that [Program/Change] is selected. Press the name whose code is to be registered, or enter the registered number using the number key.
Authentication Information Select the functions to be used with the user code from Available Func- tions. Press [OK]. Press [Exit]. Press the {User Tools/Counter} key. Note ❒ You can enter a one-to eightdigit user code. ❒ To register the name, see Registering Names”. Reference p.206 “Registering Names”...
Page 290
Registering Addresses and Users for Facsimile/Scanner Functions Check that [Program/Change] is selected. Select the user whose user code you want to change. Press the name key, or enter the registered number using the number keys. You can search by the registered name, user code, fax number, folder name, e-mail address, or IP-Fax destination.
Authentication Information Deleting a User Code This section describes how to delete a user code. Important ❒ After clearing the user code, the counter is automatically cleared. Press [System Settings]. Press [Administrator Tools]. Press [Address Book Management]. Press [Delete]. Select the name whose code is to be deleted. Press the name key, or enter the registered number using the number keys.
Registering Addresses and Users for Facsimile/Scanner Functions Note ❒ To delete a name from the Address Book entirely, see “Deleting a Regis- tered Name”. Reference p.208 “Deleting a Registered Name” Displaying the Counter for Each User This section describes how to display the counter for each user. Press [System Settings].
Authentication Information Printing the Counter for Each User This section describes how to print the counter for each user. Press [System Settings]. Press [Administrator Tools]. Press [Display / Clear / Print Counter per User]. Select a user code from the left side of the display. Press [Select All on the Page] to select all user codes on the page.
Registering Addresses and Users for Facsimile/Scanner Functions Press [Print]. Printing the Counter for All User This section describes how to print the counter for all user. Press [System Settings]. Press [Administrator Tools]. Press [Display / Clear / Print Counter per User]. Press [Print Counter List] under All Users.
Authentication Information Clearing the Number of Prints This section describes how to clear the counter. Press [System Settings]. Press [Administrator Tools]. Press [Display / Clear / Print Counter per User]. Select the user code to clear. To clear the number of prints made under a user code, Select the user code from the left side of the display.
Registering Addresses and Users for Facsimile/Scanner Functions Fax Destination Register a fax destination so you do not need to enter fax numbers each time, and can send documents that have been scanned in using the facsimile function. • It is easy to select the fax destination if you register “Name” and “Key Dis- play”...
Page 297
Fax Destination ❖ Label insertion Use label insertion to print information such as the destination name on the sheet printed out at the destination. Data is printed as follows: • Destination Name The destination name specified in [Fax Destination] is printed with “To” be- fore it at the top of the sheet.
Page 298
Registering Addresses and Users for Facsimile/Scanner Functions Fax Destination This section describes how to register a fax number. Registering a Fax Destination Press [System Settings]. Press [Administrator Tools]. Press [Address Book Management]. Check that [Program/Change] is selected. Select the name whose fax destination you want to register. Press the name key, or enter the registered number using the number keys.
Page 299
Fax Destination Note ❒ When a group is registered, you can also add this fax destination to the group. For details about regisering group, see “Registering Names to a Group”. ❒ To register the name, see Registering Names”. Reference p.206 “Registering Names” p.222 “Using a Fax Destination as a sender”...
Page 300
Registering Addresses and Users for Facsimile/Scanner Functions Press [OK]. Note ❒ To change the name, key display and title, see “Changing a Registered Name”. Reference p.207 “Changing a Registered Name” p.222 “To change the fax number” p.222 “To change the line” p.223 “To change the SUB Code”...
Page 301
Fax Destination To change the SUB Code Press [Adv. Features], and then press [SUB Code]. Press [Change] under TX SUB Code. Enter the new SUB Code, and then press [OK]. To change the password, press [Change] under Password (SID). Enter the new password, and then press [OK]. Press [OK].
Page 302
Registering Addresses and Users for Facsimile/Scanner Functions To set label insertion When Label Insertion is set to ON, the receiver's name and standard messages are printed on the fax message when it is received at the other end. Press [Change] under Label Insertion. Press [On].
Page 303
Fax Destination Press [Address Book Management]. Press [Delete]. Select the name whose fax destination you want to delete. Press the name key, or enter the registered number using the number keys. You can search by the registered name, user code, fax number, folder name, e-mail address, or IP-Fax destination.
Registering Addresses and Users for Facsimile/Scanner Functions IP-Fax Destination This section describes how to register a IP-Fax destination. Note ❒ For details about sending an IP-Fax, “Sending by IP-Fax”, Facsimile Refer- ence. Reference “Sending by IP-Fax”, Facsimile Reference Registering an IP-Fax Destination Press [System Settings].
Page 305
Fax Destination Enter the IP-Fax destination. Press [OK] twice. Note ❒ To register the name, see Registering Names”. Reference p.206 “Registering Names” p.210 “Registering a User Code” p.252 “Registering Names to a Group” “Entering Text”, About This Machine Changing a Registered IP-Fax Destination Press [System Settings].
Page 306
Registering Addresses and Users for Facsimile/Scanner Functions Press [Change] under ”Fax Destination”. Enter the new destination, and then press [OK]. Press [OK]. Press [OK]. Note ❒ To change the name, key display and title, see “Changing a Registered Name”. Reference p.207 “Changing a Registered Name”...
Page 307
Fax Destination To program the SUB Code Press [Adv. Features], and then press [SUB Code]. Press [Change] under TX SUB Code. Enter the SUB Code, and then press [OK]. To enter a password, press [Change] under Password (SID). Enter a password using the number keys, and then press [OK]. Press [OK].
Page 308
Registering Addresses and Users for Facsimile/Scanner Functions Deleting a Registered IP-Fax Destination If you delete a destination that is a specified delivery destination, messages to its registered Personal Box, for example, cannot be delivered. Be sure to check the settings in the fax function before deleting any destinations. Press [System Settings].
E-mail Destination E-mail Destination Register e-mail destinations so you do not need to enter an e-mail address every time, and can send scan files from scanner or fax function by email. • It is easy to select the e-mail destination if you register “Name” and “Key Dis- play”...
Page 310
Registering Addresses and Users for Facsimile/Scanner Functions Press [Change]. Enter the e-mail address. Press [OK]. Select [E-mail / Internet Fax Destination] or [Internet Fax Destination Only]. If you want to use internet fax, specify whether or not to use “ Send via SMTP Server”.
E-mail Destination Changing an E-mail Destination Press [System Settings]. Press [Administrator Tools]. Press [Address Book Management]. Check that [Program/Change] is selected. Select the name whose e-mail address you want to change. Press the name key, or enter the registered number using the number keys. You can search by the registered name, user code, fax number, folder name, e-mail address, or IP-Fax destination.
Registering Addresses and Users for Facsimile/Scanner Functions Using the e-mail address as the sender Press [Protection]. Press [Sender ] under [Use Name as]. Deleting an E-mail Destination Press [System Settings]. Press [Administrator Tools]. Press [Address Book Management]. Press [Delete]. Select the name whose e-mail address you want to delete. Press the name key, or enter the registered number using the number keys.
Registering Folders Registering Folders By registering a shared folder, you can send scan files to it directly. There are three types of protocol you can use: • SMB For sending files to shared Windows folders. • FTP Use when sending files to an FTP server. •...
Page 314
Registering Addresses and Users for Facsimile/Scanner Functions Press [Address Book Management]. Check that [Program/Change] is selected. Select the name whose folder you want to register. Press the name key, or enter the registered number using the number keys. Press [Auth. Info], and then press [Next]. Press [Specify Other Auth.
Page 315
Registering Folders Note ❒ To register the name, see Registering Names”. ❒ You can enter up to 64 characters for the user name. ❒ You can enter up to 64 characters for the password. ❒ You can enter a path using up to 128 characters. ❒...
Page 316
Registering Addresses and Users for Facsimile/Scanner Functions To locate the folder using Browse Network Press [Browse Network]. The client computers sharing the same network as the machine appear. Network display only lists client computers you are authorized to access. Select a client computer. Shared folders under it appear.
Page 317
Registering Folders Changing a Folder Press [System Settings]. Press [Administrator Tools]. Press [Address Book Management]. Check that [Program/Change] is selected. Select the name whose folder you want to change. Press the name key, or enter the registered number using the number keys. You can search by the registered name, user code, fax number, folder name, e-mail address, or IP-Fax destination.
Page 318
Registering Addresses and Users for Facsimile/Scanner Functions To change the protocol Press [FTP] or [NCP]. A confirmation message appears. Press [Yes]. Changing the protocol will clear all settings made under the previous proto- col. Enter each item again. Reference p.241 “Registering a Folder” Deleting a registered folder [System Settings].
Registering Folders Press [ Folder]. Press the protocol which is not currently selected. A confirmation message appears. Press [Yes]. Press [OK]. Press [Exit]. Note ❒ To delete the name, key display, and title, see “Deleting a Registered Name”. Reference p.208 “Deleting a Registered Name” Using FTP to Connect Note ❒...
Page 320
Registering Addresses and Users for Facsimile/Scanner Functions Select the name whose folder you want to register. You can search by the registered name, user code, fax number, folder name, e-mail address, or IP-Fax destination. Press [Auth. Info], and then press [Next]. Press [Specify Other Auth.
Page 321
Registering Folders Note ❒ To register the name, see Registering Names”. ❒ You can enter up to 64 characters for the user name. ❒ You can enter up to 64 characters for the password. ❒ You can enter a server name using up to 64 characters. ❒...
Page 322
Registering Addresses and Users for Facsimile/Scanner Functions Select the name whose folder you want to change, and then press [Folder]. Press the name key, or enter the registered number using the number keys. You can search by the registered name, user code, fax number, folder name, e-mail address, or IP-Fax destination.
Page 323
Registering Folders Changing items under FTP Press [Change] under Port No. Enter the new port number, and then press {q}. Press [Change] under Server Name. Enter the new server name, and then press [OK]. Press [Change] under “Path”. Enter the new path, and then press [OK]. Deleting a Folder Press [System Settings].
Registering Addresses and Users for Facsimile/Scanner Functions Note ❒ To delete a name entirely, see “Deleting a Registered Name”. Reference p.208 “Deleting a Registered Name” Using NCP to Connect Note ❒ To register a shared folder configured in Windows, see “Using SMB to Con- nect”...
Page 325
Registering Folders Enter the login user name, and then press [OK]. Press [Change] under Login Password. Enter the password, and then press [OK]. Enter the password again to confirm, and then press [OK]. Press [Folder]. Press [NCP]. Select “Connection Type”. If you want to specify a folder in an NDS tree, press [NDS].
Page 326
Registering Addresses and Users for Facsimile/Scanner Functions To locate the folder manually Press [Change] under Path. Enter the path where the folder is located. [OK]. Press [Connection Test] to check the path is set correctly. Press [Exit]. Note ❒ If you set “Connection Type” to [NDS], and if the NDS tree name is “tree”, the name of the context including the volume is “context”, the volume name is “volume”...
Page 327
Registering Folders Changing a registered folder Press [System Settings]. Press [Administrator Tools]. Press [Address Book Management]. Check that [Program/Change] is selected. Select the user of the registered folder you want to change. Press the name key, or enter the registered number using the number keys. You can search by the registered name, user code, fax number, folder name, e-mail address, or IP-Fax destination.
Page 328
Registering Addresses and Users for Facsimile/Scanner Functions To change the protocol Press [SMB], or [FTP]. A confirmation message appears. Press [Yes]. Changing the protocol will clear all settings made under the previous proto- col. Enter each item again. Reference p.235 “Registering a Folder” p.241 “Registering a Folder”...
Page 329
Registering Folders [Exit]. Note ❒ To delete a name entirely, see Deleting a Registered Name”. Reference p.208 “Deleting a Registered Name”...
Registering Addresses and Users for Facsimile/Scanner Functions Registering Names to a Group You can register names to a group to enable easy management of e-mail address- es and folders for each group. To add names to a group, the groups must be registered beforehand. Important ❒...
Registering Names to a Group Press [Change] under Group Name. Enter the group name, and then press [OK]. The Key Display name is set automatically. Press the title key under Select Title, if necessary. When you want to change the key display, press [Change] under Key Dis- play.
Page 332
Registering Addresses and Users for Facsimile/Scanner Functions Press [Administrator Tools]. Press [Address Book Management]. Check that [Program/Change] is selected. Select the name to register in a group. Press the name key, or enter the registered number using the number keys. You can search by the registered name, user code, fax number, folder name, e-mail address, or IP-Fax destination.
Registering Names to a Group Adding a Group to Another Group You can add a group to another group. Press [System Settings]. Press [Administrator Tools]. Press [Address Book: Program / Change / Delete Group]. Check that [Program/Change] is selected. Select the group that you want to put into another group. Press the group key, or enter the registered number using the number keys.
Registering Addresses and Users for Facsimile/Scanner Functions Select the group which you want to add to. The group key that you have selected becomes highlighted, and the group is added to it. Press [OK]. Displaying Names Registered in a Group You can check the names or groups registered in each group.
Registering Names to a Group Select the group where the members you want to check is egistered. You can search by the registered name, user code, fax number, folder name, e-mail address, or IP-Fax destination. Press [Programmed User/Group]. All the names registered will be displayed. Press [OK].
Registering Addresses and Users for Facsimile/Scanner Functions Select the group from which you want to remove the name. The group key that you have selected becomes highlighted, and the name is added to it. Press [OK]. Deleting a Group Within Atnother Group Press [System Settings].
Page 337
Registering Names to a Group Select the group that you want to delete from. Press the group key, or enter the registered number during the number keys. You can search by the registered name, user code, fax number, folder name, e-mail address, or IP-Fax destination.
Registering Addresses and Users for Facsimile/Scanner Functions Changing a Group Name Press [System Settings]. Press [Administrator Tools]. Press [Address Book: Program / Change / Delete Group]. Check that [Program/Change] is selected. Press the group key you want to change. You can search by the registered name, user code, fax number, folder name, e-mail address, or IP-Fax destination.
Registering Names to a Group Deleting a Goup Press [System Settings]. Press [Administrator Tools]. Press [Address Book: Program / Change / Delete Group]. Press [Delete]. Press [Yes]. Press a group key you want to delete. You can search by the registered name, user code, fax number, folder name, e-mail address, or IP-Fax destination.
Registering Addresses and Users for Facsimile/Scanner Functions Registering a Protection Code You can stop sender's names or folders being accessed by setting a protection code. You can use this function to protect the following: • Folders You can prevent unauthorized access to folders. •...
Page 341
Registering a Protection Code Press [Protection]. Press [Destination] or [Sender] under Use Name as. Both [Destination] and [Sender] can be selected at the same time. Press [Change] under Protection Code. Enter a protection code using the number keys, and then press {q}. Press [OK].
Registering Addresses and Users for Facsimile/Scanner Functions Registering a Protection Code to a Group User Press [System Settings]. Press [Administrator Tools]. Press [Address Book: Program / Change / Delete Group]. Check that [Program/Change] is selected. Press the group key you want to register or enter the registered number us- ing the number keys.
Registering SMTP and LDAP Authentication Registering SMTP and LDAP Authentication SMTP Authentication For each user registered in the Address Book, you can register a login user name and login password to be used when accessing an SMTP server. To use an SMTP server, you need to program it beforehand. Important ❒...
Page 344
Registering Addresses and Users for Facsimile/Scanner Functions Press [Change] under Login User Name. Enter the login user name, and then press [OK]. Press [Change] under Login Password. Enter the password, and then press [OK]. Enter the password again to confirm, and then press [OK]. [OK].
Registering SMTP and LDAP Authentication LDAP Authentication For each user registered in the Address Book, you can register a login user name and login password to be used when accessing an LDAP server. To use an LDAP server, you need to program it beforehand. For details, see “LDAP Server Settings”, Network Guide.
Page 346
Registering Addresses and Users for Facsimile/Scanner Functions Press [Change] under Login User Name. Enter the login user name, and then press [OK]. Press [Change] under Login Password. Enter the password, and then press [OK]. Enter the password again to confirm, and then press [OK]. Press [OK].
8. Other User Tools Initial settings allow you switch the language as well as checking the number of printed papers by displaying the counter. Maintenance This section describes the user tools in Maintenance. [Maintenance] allows correcting color drift and gradient. ❖...
Other User Tools Changing the Display Language You can change the language used on the display. English is set as default. Press [Español]. The language is changed to Spanish. Press [Salir]. The menu appears in Spanish.
Inquiry Inquiry The inquiry function lets you check the telephone numbers to contact for repairs, or ordering consumables such as toner. Be sure to contact your service engineer to verify the following: ❖ Consumables • Telephone No. to order • Toner •...
Page 350
Other User Tools Press the {Start} key. Inquiry information prints out. Press [Exit] twice.
Counter Counter Displaying the Total Counter You can display the total counter value used for all functions. Press [Counter]. To print a counter list, press [Print Counter List].Changing the Display Lan- guage Press the {Start} key. A counter list prints out.
9. Appendix Specifications for the Main Unit ❖ Configuration: Desktop ❖ Photosensitivity type: OPC drum ❖ Original scanning: One-dimensional solid scanning system through CCD ❖ Copy process: Dry electrostatic transfer system ❖ Development: Dry two-component magnetic brush development system ❖ Fusing: Oilless belt fusing ❖...
Page 354
Appendix ❖ Paper weight: • Paper Tray: 60-216g/m , 16-57lb. • Bypass: 60-253g/m , 16-67lb. • Duplex: 64-169g/m , 17-45lb. ❖ Non-reproduction area: • Leading edge: 4.5±1.5mm, 0.18”-0.06” • Trailing edge: 0.5-6.0mm, 0”-0.24” • Left edge: 0.5-4.0mm, 0”-0.16” • Right edge: 0.5-4.0mm, 0”-0.16” ❖...
Page 355
Specifications for the Main Unit • Reduction Metric version Inch version Zoom: From 25 to 400% in increments of 1% ❖ Maximum continuous copy run: 999 sheets ❖ Paper capacity: • Tray1,2: 550 sheets (80g/m , 20lb.) • Bypass tray: 100 sheets (80g/m , 20lb.) ❖...
Page 356
Appendix ❖ Noise emission: Sound power level: • Main unit only Type 1 Type 2 Stand-by less than 40 dB(A) less than 40 dB(A) Copying less than 65 dB(A) less than 65 dB(A) • Complete system Type 1 Type 2 Stand-by less than 40 dB(A) less than 40 dB(A)
Specifications for the Main Unit Auto Document Feeder Lower this over originals for copying. ❖ Mode: ADF mode, Batch mode, SADF mode, Mixed Size mode, Custom Size Origi- nals mode, Auto detect (A4, 8 ”×11”) ❖ Original size: L Vertical: 128-297mm, 5.1”-11.7” Hor- A3L-A5KL 11”×17”L-5 ”×8 izontal: 128-1260mm, 5.1”-49.6”...
Page 362
Appendix ❖ Large Capacity Tray • Paper size: A4K, 8 ”×11”K • Paper weight: 60-105g/m , 16-28lb. • Paper capacity: 2,000 sheets (80g/m , 20lb.) • Power consumption: Maximum 50W (power is supplied from the main unit) • Dimensions (W×D×H, option unit): 580×620×260mm, 22.9”×24.5”×10.3”...
Information about Installed Software Information about Installed Software expat • The software including controller, etc. (hereinafter “software”) installed on this product uses the expat under the conditions mentioned below. • The product manufacturer provides warranty and support to the software of the product including the expat, and the product manufacturer makes the in- itial developer and copyright holder of the expat, free from these obligations.
Appendix NetBSD 1. Copyright Notice of NetBSD For all users to use this product: This product contains NetBSD operating system: For the most part, the software constituting the NetBSD operating system is not in the public domain; its authors retain their copyright. The following text shows the copyright notice used for many of the NetBSD source code.
Page 365
Information about Installed Software 2.Authors Name List All product names mentioned herein are trademarks of their respective owners. The following notices are required to satisfy the license terms of the software that we have mentioned in this document: • This product includes software developed by the University of California, Berkeley and its contributors.
Information about Installed Software SASL CMU libsasl Tim Martin Rob Earhart Rob Siemborski Copyright (c) 2001 Carnegie Mellon University. All rights reserved. Redistribution and use in source and binary forms, with or without modifica- tion, are permitted provided that the following conditions are met: Redistributions of source code must retain the above copyright notice, this list of conditions and the following disclaimer.
Appendix Copyright (C) 1990-2, RSA Data Security, Inc. All rights reserved. License to copy and use this software is granted provided that it is identified as the “RSA Data Security, Inc. MD4 Message-Digest Algorithm” in all material mentioning or referencing this software or this function. License is also granted to make and use derivative works provided that such works are identified as “derived from the RSA Data Security, Inc.
Appendix Open SSL Copyright (c) 1998-2004 The OpenSSL Project. All rights reserved. Redistribution and use in source and binary forms, with or without modifica- tion, are permitted provided that the following conditions are met: 1. Redistributions of source code must retain the above copyright notice, this list of conditions and the following disclaimer.
Page 371
Information about Installed Software This product includes cryptographic software written by Eric Young (eay@cryptsoft.com). This product includes software written by Tim Hudson (tjh@cryptsoft.com). Original SSLeay License Copyright (C) 1995-1998 Eric Young (eay@cryptsoft.com) All rights reserved. This package is an SSL implementation written by Eric Young (eay@crypt- soft.com).
Page 372
Appendix IN NO EVENT UNLESS REQUIRED BY APPLICABLE LAW OR AGREED TO IN WRITING WILL ANY COPYRIGHT HOLDER, OR ANY OTHER PARTY WHO MAY MODIFY AND/OR REDISTRIBUTE THE PROGRAM AS PERMIT- TED ABOVE, BE LIABLE TO YOU FOR DAMAGES, INCLUDING ANY GEN- ERAL, SPECIAL, INCIDENTAL OR CONSEQUENTIAL DAMAGES ARISING OUT OF THE USE OR INABILITY TO USE THE PROGRAM (INCLUDING BUT NOT LIMITED TO LOSS OF DATA OR DATA BEING RENDERED INACCU-...
Page 373
Information about Installed Software 2. Redistributions in binary form must reproduce the above copyright notice, this list of conditions and the following disclaimer in the documentation and/or other materials provided with the distribution. 3. Neither the name of the University nor the names of its contributors may be used to endorse or promote products derived from this software without specif- ic prior written permission.
Page 374
Appendix THIS SOFTWARE IS PROVIDED BY THE AUTHOR ``AS IS'' AND ANY EX- PRESS OR IMPLIED WARRANTIES, INCLUDING, BUT NOT LIMITED TO, THE IMPLIED WARRANTIES OF MERCHANTABILITY AND FITNESS FOR A PARTICULAR PURPOSE ARE DISCLAIMED. IN NO EVENT SHALL THE AUTHOR BE LIABLE FOR ANY DIRECT, INDIRECT, INCIDENTAL, SPE- CIAL, EXEMPLARY, OR CONSEQUENTIAL DAMAGES (INCLUDING, BUT NOT LIMITED TO, PROCUREMENT OF SUBSTITUTE GOODS OR SERVICES;...
Information about Installed Software THIS SOFTWARE IS PROVIDED BY THE REGENTS AND CONTRIBUTORS ``AS IS'' AND ANY EXPRESS OR IMPLIED WARRANTIES, INCLUDING, BUT NOT LIMITED TO, THE IMPLIED WARRANTIES OF MERCHANTABILITY AND FITNESS FOR A PARTICULAR PURPOSE ARE DISCLAIMED. IN NO EVENT SHALL THE REGENTS OR CONTRIBUTORS BE LIABLE FOR ANY DIRECT, INDIRECT, INCIDENTAL, SPECIAL, EXEMPLARY, OR CONSE- QUENTIAL DAMAGES (INCLUDING, BUT NOT LIMITED TO, PROCURE-...
Page 376
Appendix THIS SOFTWARE IS PROVIDED BY THE OPENLDAP FOUNDATION AND ITS CONTRIBUTORS ``AS IS'' AND ANY EXPRESSED OR IMPLIED WAR- RANTIES, INCLUDING, BUT NOT LIMITED TO, THE IMPLIED WARRAN- TIES OF MERCHANTABILITY AND FITNESS FOR A PARTICULAR PURPOSE ARE DISCLAIMED. IN NO EVENT SHALL THE OPENLDAP FOUNDATION, ITS CONTRIBUTORS, OR THE AUTHOR(S) OR OWNER(S) OF THE SOFTWARE BE LIABLE FOR ANY DIRECT, INDIRECT, INCIDEN- TAL, SPECIAL, EXEMPLARY, OR CONSEQUENTIAL DAMAGES (INCLUD-...
INDEX 1 Sided → 2 Sided Auto Margin: TtoB Background Density of ADS (Full Color) 1 Sided → 2 Sided Auto Margin: TtoT Background Numbering Back Margin: Left/Right 2 Sided Print Back Margin: Top/Bottom 4 Color Graphic Mode Backup File TX Setting Back Up / Restore Address Book Bidirectional Communication About Address Book...
Page 378
Connecting to the Interface Deleting Fax Information Connecting to the USB Interface Deleting Information Boxes Copier/Document Server Auto Reset Timer Deleting Personal Boxes Copier / Document Server Features / Deleting Transfer Boxes Adjust Color Image Delivery Option Copier / Document Server Features / Edit Density (Background Numbering) Copier / Document Server Features / Destination List Display Priority 1...
Page 379
Facsimile Auto Reset Timer IEEE 1394 Facsimile Features / General Settings IEEE 802.11b Facsimile Features / Initial Settings Image Repeat Separation Line Facsimile Features / Reception Settings Initial Print Job List Facsimile Features / Scan Settings Initial Settings / Facsimile Features Input/Output / Copier / Facsimile Features / Send Settings Document Server Features...
Page 380
Machine IPv4 Address Page Numbering Page Numbering in Combine Machine IPv6 Address (Page Numbering) Machine Name Page Size Maintenance Panel Off Timer Maintenance / Printer Features Panel Tone Max. Copy Quantity Paper Display Max. E-mail Size Paper Tray Max. Reception E-mail Size Paper Tray Priority: Copier Memory Full Auto Scan Restart Paper Tray Priority: Facsimile...
Page 381
Program/Change Administrator Registering Names to a Group Program / Change / Delete E-mail Message Registering SMTP Authentication Registering user names Program / Change / Delete Gateway Program / Change / and destination names Delete LDAP Server Removing a Name from a Group Program / Change / Reproduction Ratio Delete Scan Size...
Page 382
Settings Required to Use Internet Fax / Stamp Color:1-4 (User Stamp) IEEE 802.11b (wireless LAN) Stamp Color (Background Numbering) Settings Required to Use Stamp Color (Date Stamp) Network TWAIN Scanner Stamp Color (Preset Stamp) Settings Required to Use Stamp / Copier / Network TWAIN Scanner / Ethernet Document Server Features Settings Required to Use Network TWAIN...
Page 383
Update Delivery Server Destination List User Authentication Management User Code User Stamp Using a Fax Destination as a sender Using SMB to Connect Using Utilities to Make Network Settings Wait Time for Next Orig.: Exposure Glass Wait Time for Next Original(s): SADF Warm Up Notice WINS Configuration WINS Configuration (IEEE 1394)
Page 385
In accordance with IEC 60417, this machine uses the following symbols for the main power switch: a means POWER ON. b means POWER OFF. c means STAND BY. Trademarks ® ® ® Microsoft , Windows and Windows NT are registered trademarks of Microsoft Corporation in the United States and/or other countries.
Page 386
Type for C2525/DSc525/LD425c/Aficio MP C2500 Type for C3030/DSc530/LD430c/Aficio MP C3000 EN USA B230-7857...
Page 387
Operating Instructions Troubleshooting When the Machine Does Not Operate as Wanted Troubleshooting When Using the Copy Function Troubleshooting When Using the Facsimile Function Troubleshooting When Using the Printer Function Troubleshooting When Using the Scanner Function Adding Paper, Toner and Staples Clearing Misfeeds Remarks Read this manual carefully before you use this machine and keep it handy for future reference.
Page 389
Manuals for This Machine Refer to the manuals that are relevant to what you want to do with the machine. ❖ About This Machine Be sure to read the Safety Information in this manual before using the ma- chine. This manual provides an introduction to the functions of the machine. It also explains the control panel, preparation procedures for using the machine, how to enter text, and how to install the CD-ROMs provided.
Page 390
❖ Other manuals • PostScript3 Supplement • UNIX Supplement • Manuals for DeskTopBinder Lite • DeskTopBinder Lite Setup Guide • DeskTopBinder Introduction Guide • Auto Document Link Guide Note ❒ Manuals provided are specific to machine types. ❒ Adobe Acrobat Reader/Adobe Reader must be installed in order to view the manuals as PDF files.
Page 391
TABLE OF CONTENTS Manuals for This Machine ..................i How to Read This Manual ..................1 Symbols ........................1 1. When the Machine Does Not Operate as Wanted Indicators........................ 3 Checking Machine Status and Settings............... 4 When an Indicator to the Right of a Function Key is Lit ........7 When You Have Problems Operating the Machine..........
Page 392
5. Troubleshooting When Using the Scanner Function When Scanning is Not Done as Expected ............65 When You Cannot Send Scanned Files ............. 66 When Stored Files Cannot be Accessed ..............66 When You Cannot Browse the Network to Send a Scanned File ......66 When the TWAIN Driver Cannot be Started ............66 When Stored Files Cannot be Edited...............67 When the Network Delivery Function Cannot be Used..........67...
Page 393
8. Remarks Where to Put Your Machine ................117 Machine Environment .................... 117 Moving........................118 Power Connection....................119 Access to the Machine ...................120 Maintaining Your Machine ................121 Cleaning the Exposure Glass.................121 Cleaning the Exposure Glass Cover ..............122 Cleaning the Auto Document Feeder..............122 Cleaning the Dustproof Glass ................123 INDEX.......................
How to Read This Manual Symbols This manual uses the following symbols: Indicates important safety notes. Ignoring these notes could result in serious injury or death. Be sure to read these notes. They can be found in the “Safety Information” section of About This Ma- chine.
1. When the Machine Does Not Operate as Wanted This section explains basic troubleshooting procedures that are applicable to all functions of this machine. Indicators This section explains Indicators displayed when the machine requires the user to remove misfed paper, add paper, or other perform other procedures. x: Misfeed indicator Appears when a misfeed occurs.
When the Machine Does Not Operate as Wanted Checking Machine Status and Settings You can check the machine's system status. ❖ Maintenance Info You can check the following items under [Maintenance Info]: • [Remaining Toner] Displays the amount of remaining toner. •...
Page 399
Checking Machine Status and Settings ❖ Machine Address Info You can check the following items under [Machine Address Info]: • [Fax No.] Displays the machine's fax number. • [H.323 Own Fax No.] Displays the machine's alias telephone number. • [SIP User Name] Displays the machine's SIP user name.
Page 400
When the Machine Does Not Operate as Wanted Press each tab and check its contents. After checking the information, press[Exit]. The previous screen returns. Note ❒ [Output Tray Full], [Original Misfeed], [Paper Misfeed], and [Cover Open] appear only when these errors occur. ❒...
When an Indicator to the Right of a Function Key is Lit When an Indicator to the Right of a Function Key is Lit When an indicator to the right of a function key lights up, press the correspond- ing function key. Then, follow the instructions displayed on the control panel. Problem Cause Solution...
When the Machine Does Not Operate as Wanted When You Have Problems Operating the Machine The following chart gives explanations of common problems and messages. If other messages appear, follow the instructions displayed. Problem Cause Solution This message appears when you Wait for the machine to get ready.
Page 403
When You Have Problems Operating the Machine Problem Cause Solution The main power indica- This occurs in the following cases: Close the exposure glass cover or tor continues blinking ADF, and check if the machine is • The exposure glass cover or and does not turn off communicating with a computer.
Page 404
When the Machine Does Not Operate as Wanted Problem Cause Solution An error message re- • When a misfeed message ap- Clear misfed paper, and then mains, even if misfed pears, it remains until you open and close the front cover. paper is removed.
Page 405
When You Have Problems Operating the Machine ❖ Document Server Problem Cause Solution The number of scanned pages ex- To store scanned pages as a file, “ Exceeded max. ceeds the capacity per file of the press [Store File]. Scanned data is number of pages Document Server.
When the Machine Does Not Operate as Wanted Problem Cause Solution You want to check print You can print a single copy with- Check print quality by printing quality before making a out specifying the setting again. out only the first set using the {Sample Copy} key.
When a Job is Not Performed When a Job is Not Performed If you cannot execute a function, it may be that the machine is being held up by another function. If you cannot execute a function, terminate any other functions currently active, and then try executing the function again.
Page 408
When the Machine Does Not Operate as Wanted Mode after you select Copy Facsimile Printer Mode before you select × × × $ $ | $ | | | | | $ $ $ $ $ $ | | | Copy Operations for Copying...
Page 409
When a Job is Not Performed Mode after you select Copy Facsimile Printer Mode before you select $ $ | $ | | | | | $ $ $ × × × | | | $ $ $ Document Server Operations for Document Server $ ×...
Page 410
When the Machine Does Not Operate as Wanted Note ❒ Stapling cannot be used at the same time for multiple functions. ❒ If the machine is capable of executing multiple functions simultaneously, specify which function should have priority in “Print Priority”. This setting is factory-preset to “Display mode”.
2. Troubleshooting When Using the Copy Function This section explains likely causes of and possible solutions for copier function problems. When a Message Appears This section explains the machine's main messages. If other messages appear, follow the instructions they contain. Important ❒...
Page 412
Troubleshooting When Using the Copy Function Message Cause Solution The number of sheets per set is Check the stapler capacity. See Stapling capaci- over the staple capacity. “Supplementary Informations”, ty exceeded. Copy/Document Server Refer- ence. The Staple function cannot be Select a paper size that can be Cannot staple used with paper size selected.
Page 413
When a Message Appears Message Cause Solution This user code is not allowed to If the message continues to be You do not have use the function selected. displayed and you cannot switch the privileges the screen, press the {Energy Sav- to use this er} key.
Troubleshooting When Using the Copy Function When You Cannot Make Clear Copies This section explains likely causes of and possible solutions for unclear copies. Problem Cause Solution Copies appear dirty. Image density is too high. Adjust the image density. See “Adjusting Copy Image Densi- ty”, Copy/Document Server Ref- erence.
Page 415
When You Cannot Make Clear Copies Problem Cause Solution Copies are too light. The paper is damp. Use paper that has been stored in the recommended temperature and humidity condition. See “Copy Paper”, About This Ma- chine. Parts of images are not The original is not set correctly.
Troubleshooting When Using the Copy Function When You Cannot Make Copies as Wanted This section explains likely causes of and possible solutions for unclear copies. ❖ Basic Problem Cause Solution Misfeeds occur frequently. The number of sheets loaded ex- Load paper only as high as the ceeds the capacity of the machine.
Page 417
When You Cannot Make Copies as Wanted Problem Cause Solution Staples are wrongly po- Originals are not set correctly. Check the correct position to sitioned. place the originals. See “Staple”, Copy/Document Server Refer- ence. You cannot combine Selected functions cannot be used Check the combination of func- several functions.
Page 418
Troubleshooting When Using the Copy Function Problem Cause Solution In Margin Adjustment You set a wide erased margin. Set a narrower margin with User mode, parts of the orig- Tools. You can set the width be- inal image are not cop- tween 0-30 mm (0”-1.2”).
When You Cannot Make Copies as Wanted ❖ Duplex Problem Cause Solution Cannot print in duplex You have loaded paper on the by- Remove paper loaded on the by- mode. pass tray. pass tray. Load paper in another tray. Cannot print in duplex You have loaded paper exceed- Change the paper.
Page 420
Troubleshooting When Using the Copy Function Note ❒ If you set [Memory Full Auto Scan Restart] in User Tools to [On], even if the mem- ory becomes full, the memory overflow message will not be displayed. The machine will make copies of the scanned originals first, then automatically proceed scanning and copying the remaining originals.
3. Troubleshooting When Using the Facsimile Function This chapter explains likely causes of and possible solutions for facsimile func- tion problems. Adjusting the Volume The following describes how to adjust the volume. You can change the volume of the following sounds that the machine makes. ❖...
Page 422
Troubleshooting When Using the Facsimile Function Check that [General Settings] screen appears. Press [Adjust Sound Volume]. Press [Lower] or [Louder] to adjust the volume, and then press [OK]. Press {User Tools/Counter} key. AMG041S The standby display appears.
Page 423
Adjusting the Volume Note ❒ You can adjust the On Hook volume when you press the [On Hook]. See “On Hook Dial”, Facsimile Reference. ❒ You can also adjust the volume of the handset ringer. See “Connecting the Telephone Line”, General Settings Guide. ❒...
Troubleshooting When Using the Facsimile Function When a Message Appears This section explains the machine's main messages. If other messages appear, follow their instructions. Message Cause Solution Original jammed during Memory Place originals that have not been Put original Transmission. scanned on the exposure glass or back, check it ADF again.
Page 425
When a Message Appears Message Cause Solution The destination list is being up- Wait until the message disap- Updating the dated from the network using pears. Do not switch off the pow- destination SmartDeviceMonitor for Admin er while this message is list...
Page 426
Troubleshooting When Using the Facsimile Function Message Cause Solution The name of the computer or Check whether the computer Cannot find the folder entered as the destination name and the folder name for the specified path. is wrong. destination are correct. Please check the settings.
Page 427
When a Message Appears Message Cause Solution Cannot find the DNS server, • Check that the DNS server Check whether SMTP Server or folder for for- IPv4 address is correctly pro- there are any warding. grammed using Web Image network prob- Monitor.
Page 428
Troubleshooting When Using the Facsimile Function Message Cause Solution E-mail transmission was refused • Check that the machine e-mail Check whether by SMTP authentication, POP be- address is correctly pro- there are any fore SMTP authentication or grammed from File Transfer network prob- login authentication of the com- under System Settings.
Page 429
When a Message Appears Message Cause Solution Cannot log on to the • Check that the user name and Check whether POP3/IMAP4 server. password of the E-mail Ac- there are any count are correctly pro- network prob- grammed using File Transfer lems.
Page 430
Troubleshooting When Using the Facsimile Function Message Cause Solution Cannot log on to the • Check that the user name and Check whether POP3/IMAP4 server. password of the E-mail Ac- there are any count are correctly pro- network prob- grammed from File Transfer lems.
When You Cannot Send or Receive Fax Messages as Wanted When You Cannot Send or Receive Fax Messages as Wanted This section explains likely causes of and possible solutions for transmission and reception-related problems. ❖ Transmission/Reception Problem Cause Solution Both transmission and The modular cord may be discon- Make sure that the modular cord receiving are impossi-...
Page 432
Troubleshooting When Using the Facsimile Function Problem Cause Solution To cancel a Memory If the original is being sent or if it is in standby, press {Clear/Stop} Transmission. key or [Check / Stop Transmission File]. See “Canceling a Transmis- sion”, Facsimile Reference. Press {Clear/Stop} key.
Page 433
When You Cannot Send or Receive Fax Messages as Wanted ❖ Printing Problem Cause Solution Print is slanted. The tray's side fences might not Check the side fences are locked. be locked. See p.83 “Changing the Paper Size”. Print is slanted. The paper is fed at a slant.
Page 434
Troubleshooting When Using the Facsimile Function Problem Cause Solution Background of received Image density is too high. Adjust scan density. See “Image images appears dirty. Density (Contrast)”, Facsimile Images from the back of Reference. the page appear. Printed or sent images The ADF, exposure glass or scan- Clean them.
When You Cannot Send or Receive Fax Messages as Wanted ❖ Others Problem Cause Solution All fax documents When about one hour passes af- If any documents have been lost stored in memory have ter power to the machine is for this reason, a Power Failure been lost.
Troubleshooting When Using the Facsimile Function If an Error Report is Printed An Error Report is printed if a document cannot be successfully sent or received. Possible causes include a problem with the machine or noise on the telephone line. If an error occurs during transmission, resend the original. If an error occurs during reception, ask the sender to resend the document.
Turning Off the Main Power / In the Event of Power Failure Turning Off the Main Power / In the Event of Power Failure This section explains the machine status when the power is turned off or if the power fails. R CAUTION: •...
Troubleshooting When Using the Facsimile Function When an Error Occurs Using Internet Fax This section explains reports that the machine sends if an Internet Fax error oc- curs. Error Mail Notification The machine sends the Error Mail Notification to the sender when it is unable to successfully receive a particular e-mail message.
4. Troubleshooting When Using the Printer Function This chapter explains likely causes of and possible solutions for printer function problems. When a Message Appears during Installation of the Printer Driver This section explains what to do if a message appears when installing the printer driver.
Troubleshooting When Using the Printer Function Windows 2000 The following describes the installation procedure on Windows 2000. On the [Start] menu, point to [Settings], and then click [Printers]. Double-click the Add Printer icon. Follow the instructions in Add Printer Wizard. If the CD-ROM drive is D, the source files of the printer driver are stored in the following location: •...
When a Message Appears during Installation of the Printer Driver Windows NT 4.0 The following describes the installation procedure on Windows NT 4.0. On the [Start] menu, point to [Settings], and then click [Printers]. Double-click the Add Printer icon. Follow the instructions in Add Printer Wizard. If the CD-ROM drive is D, the source files of the printer driver are stored in the following location: •...
Troubleshooting When Using the Printer Function If USB Connection Fails This section explains how to troubleshoot a problem related to USB connection. Problem Cause Solution The machine is not au- The USB cable is not connected Turn off the power of the ma- tomatically recognized.
When a Message appears When a Message appears This section describes the principal messages that appear on the panel display. If a message not described here appears, act according to the message. Reference Before turning the main power off, see “Turning On/Off the Power”, About This Machine.
Troubleshooting When Using the Printer Function Alert Messages This section describes the machine alert messages. Message Cause Solution • IEEE 802.11b interface unit Turn off the machine and check Cannot connect was not inserted when the the IEEE 802.11b interface unit is with the wireless machine was turned on, or it inserted correctly.
When a Message appears Message Cause Solution Maximum capacity of PCL 5c/6 Reduce the value of [Resolution] in Memory Overflow or PostScript 3 list display has the printer driver. Alternative- been exceeded. ly,select [Frame Priority] from [Memory Usage] in [System].If this message continues to appear af- ter taking these steps, decrease the number of files sent to the ma-...
Troubleshooting When Using the Printer Function When You Cannot Print Use the following procedures if printing does not start even after performing [Print]. Problem Cause Solution Printing does not start. The power is off. Check the cable is securely plugged into the power outlet and the machine.
Page 447
When You Cannot Print Problem Cause Solution Printing does not start. If the machine is operating in an Check access point settings when extended wireless LAN, the re- in the infrastructure mode. De- ceiver's MAC address may be pending on the access point, cli- preventing communication with ent access may be limited by the access point.
Page 448
Troubleshooting When Using the Printer Function Problem Cause Solution [List / Test Print] is disa- A mechanical error might have Contact your service representa- bled. occurred. tive. See “List/Test Print”, Gen- eral Settings Guide. Printing does not start The correct Communication Turn the main power off and when using the extend- mode is not set.
Other Printing Problems Other Printing Problems This section explains likely causes of and possible solutions for problems that can occur when printing from a computer. Problem Cause Solution Print is smudges. Settings for thick • PCL 5c/6 and PostScript 3 paper have not Select [Thick] in the [Type:] list on the [Paper] tab.
Page 450
Troubleshooting When Using the Printer Function Problem Cause Solution The printed im- With certain In the application, change the layout, character size, and age is different functions, such character settings. from the image as enlargement on the compu- and reduction, ter's display.
Page 451
Other Printing Problems Problem Cause Solution When D is blink- White lines ap- Add toner. See p.89 “Adding Toner”. pear. ing, toner is be- ginning to run out. When printing If the printer If you want to print accurately, set the printer driver to graphics, the out- driver is config- print without using the graphics command.
Page 452
Troubleshooting When Using the Printer Function Problem Cause Solution There is consid- Processing time If the data-in lamp is blinking, data has been received by erable delay be- depends on data the printer. Wait for a moment. tween the print volume.
Page 453
Other Printing Problems Problem Cause Solution Images are cut You may be us- Use the same size paper as that selected in the applica- off, or excess is ing paper small- tion. If you cannot load paper of the correct size, use the printed.
Page 454
Troubleshooting When Using the Printer Function Problem Cause Solution Duplex printing Duplex printing Change the Paper Type setting for the tray to [2 Sided is malfunction- cannot be done Copy] on the System Settings menu. See “System Set- ing. with a tray for tings”, General Settings Guide.
Page 455
Other Printing Problems Problem Cause Solution Images are not The correct print- If it is only one particular color that does not print, turn printed in the er driver settings off the machine's power, and then turn it back on. specified colors.
Page 456
Troubleshooting When Using the Printer Function Problem Cause Solution Printing by Blue- • A communi- • Remove the machine from close proximity with tooth is slow. cation error IEEE802.11b wireless LAN devices. might have • If there are active IEEE802.11b wireless LAN devices occurred.
When PictBridge Printing Does Not Work When PictBridge Printing Does Not Work This section explains likely causes and possible solutions for problems that can occur when PictBridge printing. Problem Cause Solution PictBridge is not availa- There is a problem with the USB Use the following procedure to ble.
Page 458
Troubleshooting When Using the Printer Function...
5. Troubleshooting When Using the Scanner Function This chapter explains likely causes of and possible solutions for scanner function problems. When Scanning is Not Done as Expected This section explains causes and remedies when scan results are not as expected. Problem Cause Solution...
Troubleshooting When Using the Scanner Function When You Cannot Send Scanned Files The following sections explain likely causes of and solutions for Network Deliv- ery and E-mail Sending-related problems. When Stored Files Cannot be Accessed This section explains likely causes of and possible solutions for job access-relat- ed problems.
When You Cannot Send Scanned Files When Stored Files Cannot be Edited This section explains likely causes of and possible solutions for the TWAIN driv- er failing to operate. Problem Cause Solution Stored files cannot be Limits have been imposed using Contact the administrator.
Troubleshooting When Using the Scanner Function When a Message is Displayed This section explains likely causes of and possible solutions for error messages that may appear on the machine's control panel. When a Message is Displayed on the Control Panel This section explains causes and remedies if an error message appears on the display of the control panel.
Page 463
When a Message is Displayed Message Cause Solution The number of files exceeded the Reduce the number of files and Exceeded max. maximum number possible. send them again. number of files which can be sent at the same time. Reduce the number of the selected files.
Page 464
Troubleshooting When Using the Scanner Function Message Cause Solution The specified group contains To select destinations for sending The specified some destinations for sending by by email, press [Select] for the group contains e-mail and some destinations for message displayed on the e-mail some destina- sending by Scan to Folder.
Page 465
When a Message is Displayed Message Cause Solution You cannot change the name of a Delete the password after cance- Selected file is file whose status is “Waiting” or ling delivery or completing edit- currently in that is being edited with Desk- ing.
Page 466
Troubleshooting When Using the Scanner Function Message Cause Solution While a file was being sent, a net- Try the operation once more. If Transmission has work error occurred and the file the message is still shown, the failed. To check could not be sent correctly.
Page 467
When a Message is Displayed Message Cause Solution The correct protect destination Make sure the protection code is Entered protec- code was not entered. correct, and then enter it again. tion code for See “Registering a Protection destination is Code”, General Settings Guide. incorrect.
Page 468
Troubleshooting When Using the Scanner Function Message Cause Solution Because of insufficient hard disk Try one of the following measures: Memory is full. space, the first page could not be Cannot scan. The • Wait for a while, and then re- scanned.
When a Message is Displayed When a Message is Displayed on the Client Computer This section explains likely causes of and possible solutions for the main error messages displayed on the client computer when using the TWAIN driver. Important ❒ If an error message that is not included in this section appears, turn off the main power switch of the machine, and then turn it on again.
Page 470
Troubleshooting When Using the Scanner Function Message Cause Solution • The machine's main power • Set the main power switch to Scanner is not switch is off. “On”. available. Check the scanner con- • The machine is not connected • Check whether the machine is to the network correctly.
Page 471
When a Message is Displayed Message Cause Solution Scanner memory is insufficient. • Reset the scan size. Insufficient memory. Reduce • Lower the resolution. the scanning ar- • Set with no compression. See TWAIN Driver help. The problem may be due to the following cause: •...
Page 472
Troubleshooting When Using the Scanner Function Message Cause Solution A communication error has oc- Check whether the client compu- Communication curred on the network. ter can use the TCP/IP protocol. error has oc- curred on the network. A function of the machine other Wait for a while and reconnect.
6. Adding Paper, Toner and Staples This chapter explains troubleshooting procedures that are applicable to all the machine's functions. Loading Paper This section explains what to do when paper runs out and needs reloading. R CAUTION: • When loading paper, take care not to trap or injure your fingers. Tray 1 and LCT use 8 ”×11”...
Page 474
Adding Paper, Toner and Staples Carefully pull out the paper tray until it stops. AMJ001S Square the paper and load it print side up. AMJ002S Carefully push the paper tray fully in. Note ❒ If you load a paper size that is not selected automatically, you will need to specify the paper size with the control panel.
Loading Paper Reference p.83 “Changing the Paper Size” p.86 “Changing to a Size That is Not Automatically Detected” Loading Paper into the Large Capacity Tray The following procedure explains loading paper into the LCT. Important ❒ LCT (optional) uses 8 ”×11”K paper exclusively.
Page 476
Adding Paper, Toner and Staples Orientation-Fixed Paper or Two-Sided Paper The following explains loading paper whose orientation and print side is speci- fied (letterhead paper). Orientation-fixed (top to bottom) or two-sided paper (for example, letterhead paper, punched paper, or copied paper) might not print correctly, depending on how the originals and paper are placed.
Changing the Paper Size Changing the Paper Size This section explains how to change a paper size. Procedures for changing the paper size differ depending on the tray (tray 1 or other optional paper tray units). Make sure you are following the appropriate procedure before you begin.
Page 478
Adding Paper, Toner and Staples Release the lock on the side fences. AMJ015S While pressing down the release lever, slide the side fences until they are aligned the paper size you want to load. AMJ016S Slide the end fence until it is aligned with the size of paper to you want to load.
Page 479
Changing the Paper Size Square the paper and load it print side up. AMJ002S Re-lock the side fences again. AMJ015S Carefully slide the paper tray fully in. Check the size on the display. Note ❒ If there is space between the side fence and paper, bring the side fence flush against the edge of the paper.
Page 480
Adding Paper, Toner and Staples Changing to a Size That is Not Automatically Detected If you load a paper size that is not selected automatically, you need to specify the paper size with the control panel. Important ❒ Following paper sizes that are not selected automatically. •...
Page 481
Changing the Paper Size Press [Tray Paper Settings] tab. Select the tray for which you want to change the paper settings. Press either of [Tray Paper Size: Tray 2] to [Tray Paper Size: Tray 4]. Select the loaded paper size and feed direction, and then press [OK]. The set paper size and feed direction is displayed.
Page 482
Adding Paper, Toner and Staples Press the {User Tools/Counter} key. AMG041S The initial display is shown. Note ❒ If you want to print on paper that is selected automatically after printing on a paper size that is not selected automatically, you must return the set- ting to “Auto Detect”.
Adding Toner Adding Toner This section explains adding and storing toner. R WARNING: • Do not store toner, used toner, or toner containers in a place with an open flame. The toner might ignite and cause burns or a fire. R CAUTION: •...
Adding Paper, Toner and Staples Note ❒ You can check name of the required toner name and the replacement proce- DAdd Toner dure using the “ ” screen. ❒ Press [System Status] to check contact number where you can order supplies. See p.4 “Checking Machine Status and Settings”.
Adding Toner Sending Fax Messages When Toner Has Run Out When the machine has run out of toner, the indicator on the display lights. Note that even if there is no toner left, you can still send fax documents. Important ❒...
Adding Paper, Toner and Staples Maintenance This section explains how to adjust the color registration and gradation by spec- ifying the settings in [Maintenance]. Adjusting the Color Registration When the machine is moved, the Fusing Unit is replaced, or after printing re- peatedly for some time, registration shifting might occur.
Page 487
Maintenance Press [Color Registration]. Press [OK]. Auto color registration takes about fifty seconds. When it is completed, the display returns to the color registration menu. When you have made all the settings, press the {User Tools/Counter} key. The initial display is shown.
Adding Paper, Toner and Staples Auto Color Calibration If a certain color is strong or the color of the copy differs from the original, adjust the yellow, magenta, cyan and black balance. Note ❒ If “DToner is almost empty.” is shown on the display panel, the test pattern cannot be printed.
Page 489
Maintenance ❒ When performing the auto color calibration from the printer function, se- lect test patterns from [600 × 600 dpi], [1800 × 600 dpi] and [1800 × 600 dpi] and then press [Start Printing]. ❒ The test pattern will be printed on an A4K, 8 ”×...
Adding Paper, Toner and Staples Adding Staples This section explains what to do when staples need replacing. Important ❒ Stapling failures or jams may occur if you use a staple cartridge other than that recommended. Refill the stapler according to the finisher type. (Check the type if you are un- sure.) For details about type of finisher, see “Options”, About This Machine.
Adding Paper, Toner and Staples Replacing the Stamp Cartridge If the transmission stamp becomes faint, replace the cartridge. Important ❒ This stamp cartridge is used for facsimile and scanner functions. ❒ Do not add ink to the cartridge by yourself. Neglecting this can cause ink leakage.
Page 495
Replacing the Stamp Cartridge Insert the new stamp cartridge. Insert the cartridge until the metal parts are no longer visible. new cartridge AMK006S Close the stamp cover. AMJ022S Close the ADF unit.
7. Clearing Misfeeds This chapter explains what to do when paper or originals misfeed (become jammed inside the machine). Removing Jammed Paper R CAUTION: • The fusing section of this machine might be very hot. Caution should be tak- en when removing misfed paper. R CAUTION: •...
Clearing Misfeeds Locating Jammed Paper If a misfeed happens, remove the misfed paper or original following the proce- dures stated on the sticker on the rear of main unit front cover. A misfeed has occurred in the place corresponding to the letter displayed on the control panel.
Removing Jammed Paper When the jammed paper is entirely removed, restore the machine to its original state. Note ❒ More than one misfeed may be indicated. When this happens, check all the areas indicated. Removing Jammed Paper The following procedure explains how to remove jammed papers. Important ❒...
Page 500
Clearing Misfeeds • When C is lit AMK009S • When D is lit AMK010S...
Page 501
Removing Jammed Paper • When P is lit AMK011S • When R is lit (when Booklet Finisher is installed) AMK012S...
Page 502
Clearing Misfeeds • When R is lit (when Booklet Finisher is installed) AMK013S • When R is lit (when Booklet Finisher is installed) AMK014S...
Page 503
Removing Jammed Paper • When R is lit (when 500-sheet Finisher is installed) AMK015S • When R is lit (when 1000-sheet Finisher is installed) AMK001S • When Y is lit AMK016S...
Page 504
Clearing Misfeeds • When Z is lit AMK017S Note ❒ Inside the finisher, or inside the front cover, there is a sticker explaining how to remove misfed paper. ❒ If a detailed removal instruction appears on the right of the screen, follow it. ❒...
Removing Jammed Staples Removing Jammed Staples This section explains how to remove jammed staples. Important ❒ Curled paper may cause staples to jam. To avoid this, turn copy paper over in the tray. ❒ When the finisher is installed, after removing jammed staples, staples will not be ejected the first few times you try to use the stapler.
Clearing Misfeeds Removing Punch Waste This section explains how to remove punch waste. Note ❒ While “ ” is displayed, you cannot use Hole Punch Receptacle is full. the Punch function. Booklet Finisher The following procedure explains how to remove punch wastes from the Book- let Finisher.
Page 509
Removing Punch Waste Reinstall the punch waste box. AMJ030S Close the front cover of the Booklet Finisher. “ ” disappears. Hole Punch Receptacle is full. Note ❒ If you do not reinstall the punch waste box in Step , the “ Hole Punch Re- ”...
8. Remarks This chapter describes how to maintain and operate the machine. Where to Put Your Machine This section provides precautions for installation, movement and disposal. Machine Environment Choose your machine's location carefully. Environmental conditions greatly affect its performance. Optimum Environmental Conditions The following describes precautions when moving the machine.
Remarks Environments to Avoid • Locations exposed to direct sunlight or other sources of strong light (more than 1,500 lux). • Locations directly exposed to cool air from an air conditioner or heated air from a heater. (Sudden temperature changes can cause condensation to form inside the machine.) •...
Where to Put Your Machine ❒ Keep the machine level and carry it carefully, taking care not to jolt or tip it. Rough handling may cause a malfunction or damage the hard disk or mem- ory, resulting in loss of stored files. ❒...
Remarks Access to the Machine Place the machine near the power source, providing the clearance areas shown. AAE004S Rear: 10 cm (4”) or more Front: 75 cm (29.6”) or more Right: 55 cm (22”) or more Left: 10 cm (4”) or more Note ❒...
Maintaining Your Machine Maintaining Your Machine If the exposure glass, exposure glass cover, or ADF belt is dirty, copy clarity may be reduced. Clean these parts if they are dirty. Important ❒ Do not use chemical cleaners or organic solvents, such as thinner or benzene. If such substances get inside the machine or melt plastic parts, a failure might occur.
Remarks Cleaning the Exposure Glass Cover The following procedure explains how to clean the exposure glass cover. Cleaning the Auto Document Feeder The following procedure explains how to clean the ADF. AMJ031S Clean 1 and 2.
Maintaining Your Machine Cleaning the Dustproof Glass The dustproof glass may require cleaning if white lines appear on the print side of the document. Important ❒ Do not insert the brush forcefully, or the machine might be damaged. AMK023S...
Page 518
Remarks ❖ Detaching the cleaning brush AMK024S To detach the cleaning brush, release the catch at the center of the cleaning brush, hold the catch to prevent it re-engaging, and then raise the cleaning brush grip. Note ❒ Insert the cleaning stick so that its rubber surface is pointing down.
INDEX Finisher , 114 1000-sheet Finisher , 99 , 113 500-sheet Finisher , 98 , 112 If an Error Report is Printed , 42 If USB Connection Fails , 48 Access to the Machine , 120 Indicators , 3 Adding Staples , 96 Inquiry , 4 Adding Toner , 89 Inserting Toner , 90...
Page 520
Reception , 37 When a Job is Not Performed , 13 Removing Jammed Paper , 103 , 105 When a Message Appears , 17 , 30 Removing Jammed Staples , 111 When a Message appears , 49 Replacing the Stamp Cartridge , 100 When a Message Appears during Installation of the Printer Driver , 45 Returning to the Previous Setting , 95...
Page 521
Operating Instructions Security Reference Getting Started Authentication and its Application Preventing Information Leaks Managing Access to the Machine Enhanced Network Security Specifying the Extended Security Functions Troubleshooting Appendix Read this manual carefully before you use this machine and keep it handy for future reference. For safe and correct use, be sure to read the Safety Information in "About This Machine"...
Page 523
Manuals for This Machine Refer to the manuals that are relevant to what you want to do with the machine. ❖ About This Machine Be sure to read the Safety Information in this manual before using the ma- chine. This manual provides an introduction to the functions of the machine. It also explains the control panel, preparation procedures for using the machine, how to enter text, and how to install the CD-ROMs provided.
Page 524
❖ Other manuals • PostScript3 Supplement • UNIX Supplement • Manuals for DeskTopBinder Lite • DeskTopBinder Lite Setup Guide • DeskTopBinder Introduction Guide • Auto Document Link Guide Note ❒ Manuals provided are specific to machine types. ❒ Adobe Acrobat Reader/Adobe Reader must be installed in order to view the manuals as PDF files.
Page 525
TABLE OF CONTENTS Manuals for This Machine ..................i How to Read This Manual ..................1 Symbols ........................1 1. Getting Started Enhanced Security....................3 Glossary ........................4 Setting Up the Machine....................5 Security Measures Provided by this Machine............. 7 Using Authentication and Managing Users ..............7 Preventing Information Leaks ..................7 Limiting and Controlling Access .................9 Enhanced Network Security..................10...
Page 526
3. Preventing Information Leaks Guarding Against Unauthorized Copying ............73 Unauthorized Copy Prevention ................74 Data Security for Copying ..................75 Printing Limitations....................76 Notice ........................77 Printing with Unauthorized Copy Prevention and Data Security for Copying...77 Printing a Confidential Document ..............80 Choosing a Locked Print file ..................80 Printing a Locked Print File ..................81 Deleting Locked Print Files ..................83 Changing Passwords of Locked Print Files..............84...
Page 527
5. Enhanced Network Security Preventing Unauthorized Access..............129 Enabling/Disabling Protocols .................129 Access Control .......................130 Specifying Network Security Level.................131 Encrypting Transmitted Passwords..............135 Driver Encryption Key .................... 135 Group Password for PDF files................137 IPP Authentication Password.................139 Protection Using Encryption ................140 SSL (Secure Sockets Layer) Encryption..............141 User Settings for SSL (Secure Sockets Layer) ............
Page 528
Network Administrator Settings ...............183 System Settings .....................183 Facsimile Features....................184 Scanner Features....................184 Settings via Web Image Monitor ................184 Settings via SmartDeviceMonitor for Admin............186 File Administrator Settings ................187 System Settings .....................187 Facsimile Features....................187 Printer Features .....................187 Settings via Web Image Monitor ................188 User Administrator Settings ................
How to Read This Manual Symbols This manual uses the following symbols: Indicates important safety notes. Ignoring these notes could result in serious injury or death. Be sure to read these notes. They can be found in the "Safety Information" section of About This Ma- chine.
1. Getting Started Enhanced Security This machine's security function can be enhanced through the management of the machine and its users using the improved authentication functions. By specifying access limits on the machine’s functions and the documents and data stored in the machine, you can prevent information leaks and unauthorized access.
Getting Started Glossary ❖ Administrator There are four types of administrator according to the administered function: machine administrator, network administrator, file administrator, and user administrator. We recommend only one person take each administrator role. You can spread the workload and limit unauthorized operation by a single administrator.
Enhanced Security Setting Up the Machine If you want higher security, make the following setting before using the ma- chine: Turn the machine on. Press the {User Tools/Counter} key. Press {System Settings}. Press {Interface Settings}. Specify IP Address. For details, see the General Settings Guide. Connect the machine to the network.
Page 534
Getting Started Enter the administrator’s user name and password. During steps , the administrator’s default account (user name: admin, password: blank) in unencrypted form will be vulnerable to network inter- ception, and this account may be used for breaking into the machine over the network.
Security Measures Provided by this Machine Security Measures Provided by this Machine Using Authentication and Managing Users ❖ Enabling Authentication To control administrators’ and users’ access to the machine, perform admin- istrator authentication and user authentication using login user names and login passwords.
Page 536
Getting Started Reference For details, see p.73 “Guarding Against Unauthorized Copying”. ❖ Printing confidential files Using the printer’s Locked Print, you can store files in the machine as confi- dential files and then print them. You can print a file using the machine’s con- trol panel and collect it on the spot to prevent others from seeing it.
Security Measures Provided by this Machine ❖ Managing Log Files You can improve data security by deleting log files stored in the machine. By transferring the log files, you can check the history data and identify unau- thorized access. To transfer the log data, the log collection server is required. Reference For details, see p.126 “Managing Log Files”.
Getting Started Enhanced Network Security ❖ Preventing Unauthorized Access You can limit IP addresses or disable ports to prevent unauthorized access over the network and protect the address book, stored files, and default set- tings. Reference For details, see p.129 “Preventing Unauthorized Access”. ❖...
2. Authentication and its Application Administrators and Users When controlling access using the authentication specified by an administrator, select the machine’s administrator, enable the authentication function, and then use the machine. The administrators manage access to the allocated functions, and users can use only the functions they are permitted to access.
Authentication and its Application ❖ User Administrator This is the administrator who manages personal information in the address book. A user administrator can register/delete users in the address book or change users’ personal information. Users registered in the address book can also change and delete their own in- formation.
The Management Function The Management Function The machine has an authentication function requiring a login user name and login password. By using the authentication function, you can specify access limits for individual users and groups of users. Using access limits, you can not only limit the machine’s available functions but also protect the machine settings and files and data stored in the machine.
Authentication and its Application About Administrator Authentication There are four types of administrator according to the administered function: user administrator, machine administrator, network administrator, and file ad- ministrator. AYJ002S User Administrator File Administrator This administrator manages personal in- This administrator manages permission formation in the address book.
The Management Function About User Authentication This machine has an authentication function to prevent unauthorized access. By using login user name and login password, you can specify access limits for individual users and groups of users. AYJ001S User Authentication A user performs normal operations on Using a login user name and password, the machine, such as copying and print- user authentication is performed.
Authentication and its Application Enabling Authentication To control administrators’ and users’ access to the machine, perform administra- tor or user authentication using login user names and passwords. To perform authentication, the authentication function must be enabled. To specify authen- tication, you need to register administrators. Reference For details, see p.20 “Registering the Administrator”.
Administrator Authentication Administrator Authentication Administrators are handled differently from the users registered in the address book. When registering an administrator, you cannot use a login user name al- ready registered in the address book. Windows Authentication, LDAP Authen- tication and Integration Server Authentication are not performed for an administrator, so an administrator can log on even if the server is unreachable because of a network problem.
Page 546
Authentication and its Application Note ❒ For details about logging on and logging off with administrator authentica- tion, see p.23 “Logging on Using Administrator Authentication”, p.26 “Log- ging off Using Administrator Authentication”. Press the {User Tools/Counter} key. Press [System Settings]. Press [Administrator Tools].
Page 547
Administrator Authentication Press the [User Management], [Machine Management], [Network Management], or [File Management] key to select which settings to manage. Set "Admin. Authentication" to [On]. [Available Settings] appears. Select the settings to manage from "Available Settings". The selected settings will be unavailable to users. [Available Settings] varies depending on the administrator.
Authentication and its Application Press [OK]. Press the {User Tools/Counter} key. Registering the Administrator If administrator authentication has been specified, it is recommended to assign each administrator role to a different person. By sharing the administrative work among different administrators, you can spread the workload and limit unauthorized operation by a single administra- tor.You can register up to four login user names (Administrators 1 to 4) to which you can grant administrator privileges.
Page 549
Administrator Authentication Press [Administrator Tools]. Press [Program / Change Administrator]. In the line for the administrator whose authority you want to specify, press [Administrator 1], [Administrator 2], [Administrator 3] or [Administrator 4], and then press [Change]. If you allocate each administrator’s authority to a different person, the screen appears as follows:...
Page 550
Authentication and its Application Press [Change] for the login user name. Enter the login user name, and then press [OK]. Press [Change] for the login password. Enter the login password, and then press [OK]. Follow the password policy to make the login password more secure. For details about the password policy, see p.157 “Password Policy”.
Administrator Authentication Enter the encryption password, and then press [OK]. If a password reentry screen appears, enter the encryption password, and then press [OK]. Press [OK] twice. You will be automatically logged off. Press the {User Tools/Counter} key. Logging on Using Administrator Authentication If administrator authentication has been specified, log on using an administra- tor’s user name and password.This section describes how to log on.
Page 552
Authentication and its Application Press [Enter] next to "Login User Name". Enter the login user name, and then press [OK]. Note ❒ When you log on to the machine for the first time as the administrator, en- ter "admin". Press [Enter] next to "Login Password". Note ❒...
Page 553
Administrator Authentication Enter the login password, and then press [OK]. Enter [Login]. " " appears, followed by the screen for Authenticating... Please wait. specifying the default.
Authentication and its Application Logging off Using Administrator Authentication If administrator authentication has been specified, be sure to log off after com- pleting settings. This section explains how to log off after completing settings. Press the {Login/Logout}key. AMG044S Press [Yes].
Administrator Authentication Changing the Administrator Change the administrator’s login user name and login password. You can also assign each administrator’s authority to the login user names "Administrator 1" to "Administrator 4" To combine the authorities of multiple administrators, as- sign multiple administrators to a single administrator. For example, to assign machine administrator authority and user administrator authority to [Administrator 1], press [Administrator 1] in the lines for the machine administrator and the user administrator.
Page 556
Authentication and its Application Press [Administrator Tools]. Press [Program / Change Administrator]. In the line for the administrator you want to change, press [Administrator 1], [Administrator 2], [Administrator 3] or [Administrator 4], and then press [Change]. Press [Change] for the setting you want to change, and re-enter the setting. Press [OK].
User Authentication User Authentication There are five types of user authentication method: user code authentication, ba- sic authentication, Windows authentication, Integration Server Authentication, and LDAP authentication. To use user authentication, select an authentication method on the control panel, and then make the required settings for the authen- tication.
Page 558
Authentication and its Application Specifying User Code Authentication This can be specified by the machine administrator. Press the {User Tools/Counter} key. Press [System Settings]. Press [Administrator Tools]. Press [User Authentication Management].
Page 559
User Authentication Select [User Code Auth.]. Note ❒ If you do not want to use user authentication management, select [Off]. Select which of the machine’s functions you want to limit. The selected settings will be unavailable to users. For details about Limiting Available Functions see p.124 “Limiting Available Functions”.
Page 560
Authentication and its Application Select the "Printer Job Authentication" level. Note ❒ If you select [Entire], you cannot print using a printer driver or a device that does not support authentication. To print under an environment that does not support authentication, select [Simple (All)]. ❒...
User Authentication Specify the range in which [Simple (Limitation)] is applied to Printer Job Au- thentication. You can specify the IPv4 address range to which this setting is applied, and whether or not to apply the setting to the parallel and USB interfaces. Press [Exit].
Page 562
Authentication and its Application Press [Administrator Tools]. Press [User Authentication Management]. Select [Basic Auth.]. Note ❒ If you do not want to use user authentication management, select [Off].
Page 563
User Authentication Select which of the machine’s functions you want to permit. The selected settings will be available to users. For details about Limiting Available Functions see p.124 “Limiting Available Functions”. Select the "Printer Job Authentication" level. Note ❒ If you select [Entire], you cannot print using a printer driver or a device that does not support authentication.
Page 564
Authentication and its Application Press [Simple (Limitation)] Press [Change]. Specify the range in which [Simple (Limitation)] is applied to Printer Job Au- thentication. You can specify the IPv4 address range to which this setting is applied, and whether or not to apply the setting to the parallel and USB interfaces. Press [Exit].
Page 565
User Authentication Authentication Information Stored in the Address Book This can be specified by the user administrator. If you have specified [User Authentication], you can specify access limits for indi- vidual users and groups of users. Specify the setting in the address book for each user.
Page 566
Authentication and its Application Select the user or group. Press [Auth. Info]. Press [Change] for [Login User Name]. Enter a login user name, and then press [OK]. Press [Change] for [Login Password].
Page 567
User Authentication Enter a login password, and then press [OK]. If a password reentry screen appears, enter the login password, and then press [OK]. Press [OK]. Press [Exit] twice. Press the {User Tools/Counter} key. Specifying Authentication Information to Log on The login user name and password specified in [User Authentication Management] can be used as the login information for "SMTP Authentication", "Folder Au- thentication", and "LDAP Authentication".
Page 568
Authentication and its Application Press [Address Book Management]. If the setting to be specified does not appear, press [TNext] to scroll down to other settings. Select the user or group. Press [Auth. Info]. Specify the login user name and password.
Page 569
User Authentication Select [Use Auth. Info at Login] in "SMTP Authentication". If the setting to be specified does not appear, press [TNext] to scroll down to other settings. Limitation ❒ When using [Use Auth. Info at Login] for "SMTP Authentication", "Folder Au- thentication", or "LDAP Authentication", a user name other than "other"...
Authentication and its Application Windows Authentication Specify this authentication when using the Windows domain controller to au- thenticate users who have their accounts on the directory server. Users cannot be authenticated if they do not have their accounts in the directory server. Under Windows authentication, you can specify the access limit for each group regis- tered in the directory server.
Page 571
User Authentication ❒ Users who are registered in multiple groups can use all the functions availa- ble to those groups. ❒ If you specify in the address book which functions are available to global group members, those settings have priority. ❒...
Page 572
Authentication and its Application Press [Administrator Tools]. Press [User Authentication Management]. Select [Windows Auth.]. Note ❒ If you do not want to use user authentication management, select [Off].
Page 573
User Authentication Press [Change] for "Domain Name", enter the name of the domain controller to be authenticated, and then press [OK]. Select the "Printer Job Authentication" level. Note ❒ If you select [Entire], you cannot print using a printer driver or a device that does not support authentication.
Page 574
Authentication and its Application Press [Simple (Limitation)] Press [Change]. Specify the range in which [Simple (Limitation)] is applied to Printer Job Au- thentication. You can specify the IPv4 address range to which this setting is applied, and whether or not to apply the setting to the parallel and USB interfaces. Press [Exit].
Page 575
User Authentication Press [On] for "SSL". If you do not use secure sockets layer (SSL) for authentication, press [Off]. If global groups have been registered under Windows server, you can limit the use of functions for each global group. You need to create global groups in the Windows server in advance and reg- ister in each group the users to be authenticated.
Page 576
Authentication and its Application Under "Group Name", press [Change], and then enter the group name. Press [OK]. Select which of the machine’s functions you want to permit. The selected settings will be available to users. For details about limiting available functions, see p.124 “Limiting Available Functions”.
User Authentication -Installing Internet Information Services (IIS) and Certificate services Specify this setting if you want the machine to automatically obtain e-mail ad- dresses registered in Active Directory. We recommended you install Internet Information Services (IIS) and Certificate services as the Windows components. Install the components, and then create the server certificate.
Authentication and its Application -If the fax number cannot be obtained If the fax number cannot be obtained during authentication, specify the setting as follows: Start [C:\WINNT\SYSTEM32\adminpak]. Start Setup Wizard. Select [Install all of the Administrator Tools], and then click [Next]. On the [Start] menu, select [Run].
Page 579
User Authentication ❖ Operational Requirements for LDAP Authentication To specify LDAP authentication, the following requirements must be met: • The Printer/Scanner unit must be installed. • The network configuration must allow the machine to detect the presence of the LDAP server. •...
Page 580
Authentication and its Application Specifying LDAP Authentication This can be specified by the machine administrator. Press the {User Tools/Counter} key. Press [System Settings]. Press [Administrator Tools]. Press [User Authentication Management].
Page 581
User Authentication Select [LDAP Auth.]. Note ❒ If you do not want to use user authentication management, select [Off]. Select the LDAP server to be used for LDAP authentication.
Page 582
Authentication and its Application Select the "Printer Job Authentication" level. You can specify the IPv4 address range to which this setting is applied, and whether or not to apply the setting to the parallel and USB interfaces. Note ❒ If you select [Entire], you cannot print using a printer driver or a device that does not support authentication.
Page 583
User Authentication Press [Change]. Specify the range in which [Simple (Limitation)] is applied to Printer Job Au- thentication. You can specify the IPv4 address range to which this setting is applied, and whether or not to apply the setting to the parallel and USB interfaces. Press [Exit].
Page 584
Authentication and its Application Press [Change] for "Login Name Attribute". Enter the login name attribute , and then press [OK]. Note ❒ You can use the Login Name Attribute as a search criterion to obtain infor- mation about an authenticated user. You can create a search filter based on the Login Name Attribute, select a user, and then retrieve the user infor- mation from the LDAP server so it is transferred to the machine’s address book.
User Authentication Enter the unique attribute and then press [OK]. Note ❒ Specify Unique Attribute on the machine to match the user information in the LDAP server with that in the machine. By doing this, if the Unique At- tribute of a user registered in the LDAP server matches that of a user reg- istered in the machine, the two instances are treated as referring to the same user.You can enter an attribute such as "serialNumber"...
Page 586
Authentication and its Application Note ❒ The built-in default administrator name is "Admin" on the Server and "ad- min" on the machine. Specifying Integration Server Authentication This can be specified by the machine administrator. This section explains how to specify the machine settings. For details, see the Authentication Manager manual.
Page 587
User Authentication Select [Integration Svr. Auth.]. Note ❒ If you do not wish to use User Authentication Management, select [Off]. Press [Change] for "Server Name". Specify the name of the server for external authentication. Enter the server name, and then press [OK]. Enter the IPv4 address or host name.
Page 588
Authentication and its Application In "Authentication Type", select the authentication system for external au- thentication. Select an available authentication system. Press [Change] for "Domain Name". Enter the domain name, and then press [OK]. Note ❒ You cannot specify a domain name under an authentication system that does not support domain login.
Page 589
User Authentication Press [OK] If you set "Authentication Type" to "Windows", you can use the global group. If you set "Authentication Type" to "Notes", you can use the Notes group. If you set "Authentication Type" to "Basic (Integration Server)", you can use the groups created using the Authentication Manager.
Page 590
Authentication and its Application Press [Simple (Limitation)] Press [Change]. Specify the range in which [Simple (Limitation)] is applied to Printer Job Au- thentication. You can specify the IPv4 address range to which this setting is applied, and whether or not to apply the setting to the parallel and USB interfaces. Press [Exit].
Page 591
User Authentication Press [On] for "SSL". To not use secure sockets layer (SSL) for authentication, press [Off]. Press the {User Tools/Counter} key. ❖ Printer Job Authentication Levels and Printer Job Types This section explains the relationship between printer job authentication lev- els and printer job types.
Page 592
Authentication and its Application ❖ [Printer Job Authentication] • [Entire] The machine authenticates all printer jobs and remote settings, and cancels jobs and settings that fail authentication. Printer Jobs: Job Reset Settings: Disabled • [Simple (All)] The machine authenticates printer jobs and remote settings that have au- thentication information, and cancels the jobs and settings that fail authen- tication.
Page 593
User Authentication When using the PostScript 3 printer driver, the printer job does not contain user code information. Neither personal authentication information nor user code information is added to the printer job. Note ❒ Type 5 also applies to recovery/parallel printing using an RPCS/PCL printer driver that does not support authentication.
Authentication and its Application If User Authentication is Specified When user authentication (User Code Authentication, Basic Authentication, Windows Authentication, LDAP Authentication, or Integration Server Authen- tication) is set, the authentication screen is displayed. Unless a valid user name and password are entered, operations are not possible with the machine. Log on to operate the machine, and log off when you are finished operations.
If User Authentication is Specified Login (Using the Control Panel) Follow the procedure below to log on when Basic Authentication, Windows Au- thentication, LDAP Authentication, or Integration Server Authentication is set. Press [Enter] for [Login User Name]. Enter a login user name, and then press [OK]. Press [Enter] for [Login Password].
Authentication and its Application Enter a login password, and then press [OK]. Press [Login]. When the user is authenticated, the screen for the function you are using ap- pears. Log Off (Using the Control Panel) Follow the procedure below to log off when Basic Authentication, Windows Au- thentication, or LDAP Authentication is set.
If User Authentication is Specified Login (Using a Printer Driver) When Basic Authentication, Windows Authentication, or LDAP Authentication is set, make encryption settings in the printer properties of a printer driver, and then specify a login user name and password. For details, see the printer driver Help.
Authentication and its Application Auto Logout This can be specified by the machine administrator. When using user authentication management, the machine automatically logs you off if you do not use the control panel within a given time. This feature is called "Auto Logout".
If User Authentication is Specified Select [On]. Note ❒ If you do not want to specify [Auto Logout Timer], select [Off]. Enter "60" to "999" (seconds) using the number keys, and then press [q]. Press [OK]. Press the {User Tools/Counter} key. Authentication using an external device If you authenticate using an external device, see the Kit manual.
3. Preventing Information Leaks Guarding Against Unauthorized Copying Using the printer driver, you can embed a pattern in the printed copy to discour- age or prevent unauthorized copying. If you enable data security for copying on the machine, printed copies of a doc- ument with data security for copying are grayed out to prevent unauthorized copying.
Preventing Information Leaks Unauthorized Copy Prevention Using the printer driver, you can embed mask and pattern (for instance, a warn- ing such as "No Copying") in the printed document. If the document is copied, scanned, or stored in a Document Server by a copier or multifunction printer, the embedded pattern appears clearly on the copy, dis- couraging unauthorized copying.
Guarding Against Unauthorized Copying Data Security for Copying Using the printer driver to enable data security for the copying function, you can print a document with an embedded pattern of hidden text. Such a document is called a data security for copying document. If a data security for copying document is copied or stored in the Document Server using a copier or multi-function printer with the Copy Data Security Unit, protected pages are grayed out in the copy, preventing confidential information...
Preventing Information Leaks Note ❒ You can also embed pattern in a document protected by data security for cop- ying. However, if such a document is copied or stored in the Document Serv- er using a copier or multi-function printer with the Copy Data Security Unit, the copy is grayed out, so the embedded pattern does not appear on the copy.
Guarding Against Unauthorized Copying Notice 1.The supplier does not guarantee that unauthorized copy prevention and data security for copying will always work. Depending on the paper, the model of copier or multi-function printer, and the copier or printer settings, unauthorized copy prevention and data security for copying may not work properly.
Page 606
Preventing Information Leaks Specifying Printer Settings for Data security for copying (Printer Driver Setting) If a document printed using this function is copied or stored in the Document Server by a copier or multi-function printer, the copy is grayed out. Using the printer driver, specify the printer settings for data security for copy- ing.
Page 607
Guarding Against Unauthorized Copying Press the {User Tools/Counter}key. Press [System Settings]. Press [Administrator Tools]. Press [Data Security for Copying]. If the setting you want to specify does not appear, press [TNext] to scroll down to other settings. Press[On]. If you do not want to specify [Data Security for Copying], select [Off]. Press[OK].
Preventing Information Leaks Printing a Confidential Document To use this function, Printer/Scanner unit must be installed. Depending on the location of the machine, it is difficult to prevent unauthorized persons from viewing prints lying in the machine’s output trays. When printing confidential documents, use the Locked Print function.
Printing a Confidential Document Reference For details, see the printer driver Help. Printing a Locked Print File Print Locked Print files using the control panel. Consult your administrator if you have forgotten your password. This can also be specified via Web Image Monitor. For details see the Web Image Monitor Help.
Page 610
Preventing Information Leaks Press [Print]. Enter the password for the stored file, and then press [OK]. Note ❒ Enter the password specified in step on p.80 “Choosing a Locked Print file”. Press [Yes].
Printing a Confidential Document Deleting Locked Print Files This can be specified by the file creator (owner). To delete Locked Print files, you must enter the password for the files. If the password has been forgotten, ask the file administrator to change the password. This can also be specified via Web Image Monitor.
Preventing Information Leaks Press [Delete]. Enter the password of the Locked Print file, and then press [OK]. Press [Yes]. Changing Passwords of Locked Print Files This can be specified by the file creator (owner) or file administrator. If the password has been forgotten, the file administrator change the password. This can also be specified via Web Image Monitor.
Page 613
Printing a Confidential Document Press [Change Password]. Enter the password for the stored file, and then press [OK]. The machine administrator does not need to enter the password. Enter the new password for the stored file, and then press [OK]. If a password reentry screen appears, enter the login password, and then press [OK].
Preventing Information Leaks Unlocking Locked Print Files If you specify "Enhance File Protection", the file will be locked and become inac- cessible if an invalid password is entered ten times. This section explains how to unlock files. Only the file administrator can unlock files. This can also be specified via Web Image Monitor.
Specifying Access Permission for Stored Files Specifying Access Permission for Stored Files You can specify who is allowed to access stored scan files and files stored in the Document Server. This can prevent activities such as printing or sending of stored files by unau- thorized users.
Preventing Information Leaks Assigning Users and Access Permission for Stored Files This can be specified by the file creator (owner) or file administrator. Specify the users and their access permissions for each stored file. By making this setting, only users granted access permission can access stored files.
Page 618
Preventing Information Leaks Select the users or groups you want to assign permission to. You can select more than one users. By pressing [All Users], you can select all the users. Press [Exit]. Select the user who you want to assign an access permission to, and then select the permission.
Specifying Access Permission for Stored Files Specifying Access Privileges for Files Stored using the Scanner and Fax Functions If user authentication is set for the scanner and fax functions, you can specify ac- cess privileges for made using these functions when storing them in the Docu- ment Server.
Page 620
Preventing Information Leaks Press [New Program]. Select the users or groups you want to assign permission to. You can select more than one users. By pressing [All Users], you can select all the users. Press [Exit]. Select the user who you want to assign an access permission to, and then se- lect the permission.
Page 621
Specifying Access Permission for Stored Files Press[Manage / Delete File]. Press [Change Access Priv.]. Press [Program/Change/Delete]. Press [New Program]. Select the users or groups you want to assign permission to. You can select more than one users. By pressing [All Users], you can select all the users. Press [Exit].
Preventing Information Leaks Assigning the User and the Access Permission for the User’s Stored Files This can be specified by the file creator (owner) or user administrator. Specify the users and their access permission to files stored by a particular user. Only those users granted access permission can access stored files.
Page 623
Specifying Access Permission for Stored Files Press [Address Book Management]. Select the user or group. Press [Protection].
Page 624
Preventing Information Leaks Under "Protect File(s)", press [Program/Change/Delete] for "Permissions for Users/Groups". If the setting to be specified does not appear, press [TNext] to scroll down to other settings. Press [New Program]. Select the users or groups to register. You can select more than one users. By pressing [All Users], you can select all the users.
Specifying Access Permission for Stored Files Select the user who you want to assign an access permission to, and then select the permission. Select the access permission from [Read-only], [Edit], [Edit / Delete], or [Full Control]. Press [Exit]. Press [OK]. Press [Exit].
Page 626
Preventing Information Leaks Press [File Management]. Press [Change Password]. Enter the password using the number keys. You can use 4 to 8 numbers as the password for the stored file. Press [OK]. Confirm the password by re-entering it using the number keys. Press [OK].
Specifying Access Permission for Stored Files Unlocking Files If you specify "Enhance File Protection", the file will be locked and become inac- cessible if an invalid password is entered ten times. This section explains how to unlock files. Only the file administrator can unlock files. For details about "Enhance File Protection", see p.151 “Changing the Extended Security Functions”.
Preventing Data Leaks Due to Unauthorized Transmission Preventing Data Leaks Due to Unauthorized Transmission If user authentication is specified, the user who has logged on will be designated as the sender to prevent data from being sent by an unauthorized person mas- querading as the user.
Page 630
Preventing Information Leaks Press the {User Tools/Counter} key. Press [System Settings]. Press [Administrator Tools]. Press [Extended Security]. Press [On] for "Restrict Use of Destinations".
Page 631
Preventing Data Leaks Due to Unauthorized Transmission Press [OK]. Press the {User Tools/Counter} key. Reference This can also be specified using Web Image Monitor or SmartDeviceMon- itor for Admin. For details, see the Help for each application.
Preventing Information Leaks Protecting the Address Book If user authentication is specified, the user who has logged on will be designated as the sender to prevent data from being sent by an unauthorized person mas- querading as the user. To protect the data from unauthorized reading, you can also encrypt the data in the address book.
Page 633
Protecting the Address Book Press [Address Book Management]. Select the user or group. Press [Protection]. Under "Protect Destination", press [Program/Change/Delete] for "Permissions for Users/Groups".
Page 634
Preventing Information Leaks Press [New Program]. Select the users or groups to register. You can select more than one users. By pressing [All Users], you can select all the users. Press [Exit]. Select the user who you want to assign an access permission to, and then select the permission.
Protecting the Address Book Encrypting the Data in the Address Book This can be specified by the user administrator. Encrypt the data in the address book. Reference See p.151 “Changing the Extended Security Functions”. Preparation For details about logging on and logging off with administrator authentica- tion, see p.23 “Logging on Using Administrator Authentication”, p.26 “Log- ging off Using Administrator Authentication”.
Page 636
Preventing Information Leaks Press [Extended Security]. Press [On] for "Encrypt Address Book". Press [Change] for [Encryption Key]. Enter the encryption key, and then press [OK]. Enter the encryption key using up to 32 alphanumeric characters. Press [Encrypt / Decrypt].
Page 637
Protecting the Address Book Press [Yes]. Do not switch the main power off during encryption, as doing so may corrupt the data. Encrypting the data in the address book may take a long time. The time it takes to encrypt the data in the address book depends on the number of registered users.
Preventing Information Leaks Deleting Data on the Hard Disk Hard Disk The machine’s hard disk lets you store data under the copy, printer, fax, scan- ner, and document server functions, as well as the address book and counters stored under each user code. Data Not Overwritten in the Hard Disk The machine’s memory lets you store fax numbers and data transmitted us- ing the fax function, and network TWAIN scanner.
Page 639
Deleting Data on the Hard Disk Reference For details, see the manual supplied with the DataOverwriteSecurity unit. "Auto Erase Memory Setting" This can be specified by the machine administrator. A document scanned in Copier, Fax, or Scanner mode, or print data sent from a printer driver is temporarily stored on the machine's hard disk.
Page 640
Preventing Information Leaks Press [Auto Erase Memory Setting]. If the setting to be specified does not appear, press [TNext] to scroll down to other settings. Press [On], and then select the method of erasing the data. Select the method of erasing the data from [NSA], [DoD], or [Random Numbers]. If you select [Random Numbers], proceed to step If you select [NSA] or [DoD], proceed to step Press [Change].
Page 641
Deleting Data on the Hard Disk Enter the number of times that you want to overwrite using the number keys, and then press [q]. Press [OK]. Auto Erase Memory is set. Important ❒ When Auto Erase Memory is set to "On", temporary data that remained on the hard disk when Auto Erase Memory was "Off"...
Page 642
Preventing Information Leaks Types of Data that Can or Cannot Be Overwritten The following table shows the types of data that can or cannot be overwritten by Auto Erase Memory. Data overwritten by Auto Copier • Copy jobs Erase Memory Printer •...
Page 643
Deleting Data on the Hard Disk "Erase All Memory" This can be specified by the machine administrator. You can erase all the data on the hard disk by writing over it. This is useful if you relocate or dispose of your machine. Preparation For details about logging on and logging off with administrator authentica- tion, see p.23 “Logging on Using Administrator Authentication”, p.26 “Log-...
Page 644
Preventing Information Leaks Press [Erase All Memory]. If the setting to be specified does not appear, press [TNext] to scroll down to other settings. Select the method of erasing the data. Select the method of erasing the data from [NSA], [DoD], or [Random Numbers]. If you select [Random Numbers], proceed to step If you select [NSA] or [DoD], proceed to step Press [Change].
Page 645
Deleting Data on the Hard Disk Enter the number of times that you want to overwrite using the number keys, and then press [q]. Press [OK]. Press [Yes]. When overwriting is completed, press [Exit], and then turn off the power. Reference Before turning the power off, see "Turning On the Power", About This Machine..
4. Managing Access to the Machine Preventing Modification of Machine Settings Administrator type determines which machine settings can be modified. Users cannot change the administrator settings. In [Admin. Authentication], [Available Set- tings], the administrator can select which settings users cannot specify. Register the administrators before using the machine.
Managing Access to the Machine Menu Protect The administrator can also limit users’ access permission to the machine’s set- tings. The machine’s System Settings menu and the printer’s regular menus can be locked so they cannot be changed. This function is also effective when man- agement is not based on user authentication.
Page 649
Menu Protect Select the menu protect level, and then press [OK]. Press the {User Tools/Counter} key. Fax Functions To specify [Menu Protect] in [Facsimile Features]: Under [System Settings], [Adminis- trator Tools], [Administrator Authentication Management], set [Machine Management], to [On]. Press the {User Tools/Counter} key. Press [Facsimile Features].
Page 650
Managing Access to the Machine Select the menu protect level, and then press [OK]. Press the {User Tools/Counter} key. Printer Functions To specify [Menu Protect] in [Printer Features], set [Machine Management] to [On] in [Administrator Authentication Management] in [Administrator Tools] in [System Settings]. Press the {User Tools/Counter} key.
Page 651
Menu Protect Press the {User Tools/Counter} key. Scanner Functions To specify [Menu Protect] in [Scanner Features], set [Machine Management] to [On] in [Administrator Authentication Management] in [Administrator Tools] in [System Settings]. Press the {User Tools/Counter} key. Press [Scanner Features]. Press [Initial Settings]. Press [Menu Protect].
Managing Access to the Machine Limiting Available Functions To prevent unauthorized operation, you can specify who is allowed to access each of the machine’s functions. ❖ Available Functions Specify the available functions from the copier, Document Server, fax, scan- ner, and printer functions. Copier [Full Color/Two Color/Single Color/Black &...
Page 653
Limiting Available Functions Press [Administrator Tools]. Press [Address Book Management]. Select the user. Press [Auth. Info]. In [Available Functions], select the functions you want to specify. If the setting to be specified does not appear, press [TNext] to scroll down to other settings.
Managing Access to the Machine Managing Log Files Log information To view the log, the log collection server is required. The following log information is stored in the machine’s memory and on its hard disk: • Job log Stores information about workflow related to user files, such as copying, printing, fax deliverly, and scan file delivery •...
Managing Log Files Press [Administrator Tools]. Press [Delete All Logs]. If the setting to be specified does not appear, press [TNext] to scroll down to other settings. A confirmation message appears. Press [Yes]. Press [Exit]. Press the {User Tools/Counter}key. Transfer Log Setting The machine administrator can select [On] from the log server only.
Page 656
Managing Access to the Machine Press [Administrator Tools]. Press [Transfer Log Setting]. If the setting to be specified does not appear, press [TNext] to scroll down to other settings. Press [Off]. Press [OK]. Press the {User Tools/Counter}key.
5. Enhanced Network Security Preventing Unauthorized Access You can limit IP addresses, disable ports and protocols, or use Web Image Mon- itor to specify the network security level to prevent unauthorized access over the network and protect the address book, stored files, and default settings. Enabling/Disabling Protocols This can be specified by the network administrator.
Enhanced Network Security Press [Effective Protocol]. Press [Invalid] for the protocol you want to disable. Press [OK]. Press the {User Tools/Counter} key. Reference Advanced network settings can be specified using Web Image Monitor. For details, see the Web Image Monitor Help. Access Control This can be specified by the network administrator.
Preventing Unauthorized Access Open a Web Image Monitor. Enter "http://(machine's-address)/" in the address bar to access the machine. Log onto the machine. The network administrator can log on using the appropriate login user name and login password. Click [Configuration], under [Security], click [Access Control]. The [Access Control] page appears.
Page 660
Enhanced Network Security Press [System Settings]. Press [Administrator Tools]. Press [Network Security Level]. If the setting you want to specify does not appear, press [TNext] to scroll down to other settings.
Page 661
Preventing Unauthorized Access Select the network security level. Select [Level 0], [Level 1], or [Level 2]. Press [OK]. Press [Exit]. Press the {User Tools/Counter}key. -Status of Functions under each Network Security Level ❍= Available — = Unavailable U = Port is open. | = Port is closed.
Page 662
Enhanced Network Security Function Network Security Level Level 0 Level 1 Level 2 ❍ ❍ ❍ TCP/IP TCP/IP HTTP Port 80 Port 443 Port 631 Port 7443/7444 Port 80 Port 631 Port 443 ❍ ❍ DIPRINT — ❍ ❍ — Port 21 Port 22 sftp...
Encrypting Transmitted Passwords Encrypting Transmitted Passwords Prevent login passwords, group passwords for PDF files, and IPP authentication passwords being revealed by encrypting them for transmission. Also, encrypt the login password for administrator authentication and user au- thentication. ❖ Driver Encryption Key Encrypt the password transmitted when specifying user authentication.
Encrypting Transmitted Passwords Enter the driver encryption key, and then press [OK]. Enter the driver encryption key using up to 32 alphanumeric characters. Note ❒ The network administrator must give users the driver encryption key specified on the machine so they can register it on their computers. Make sure to enter the same driver encryption key as that specified on the ma- chine.
Page 666
Enhanced Network Security Press [Printer Features]. Press [PDF Menu], and then press [PDF Group Password]. If the setting to be specified does not appear, press [TNext]. For [Current Password], press [Change]. Enter the password, and then press [OK]. Enter the group password for PDF files using up to 32 alphanumeric charac- ters.
Encrypting Transmitted Passwords IPP Authentication Password This can be specified by the network administrator. Specify the IPP authentication passwords for the machine using Web Image Monitor. By making this setting, you can encrypt IPP authentication passwords for trans- mission to prevent them from being analyzed. Note ❒...
Enhanced Network Security Protection Using Encryption When you access the machine using a Web Image Monitor or IPP, you can estab- lish encrypted communication using SSL. When you access the machine using an application such as SmartDeviceMonitor for Admin, you can establish en- crypted communication using SNMPv3 or SSL.
Protection Using Encryption SSL (Secure Sockets Layer) Encryption This can be specified by the network administrator. To protect the communication path and establish encrypted communication, create and install the server certificate. There are two ways of installing a server certificate: create and install a self-cer- tificate using the machine, or request a certificate from a certificate authority and install it.
Page 670
Enhanced Network Security Click [Configuration], under [Security], click [Device Certificate]. Click [Create]. Make the necessary settings. Reference For details about the displayed items and selectable items, see Web Image Monitor Help. Click [OK]. The setting is changed. Click [OK]. A security warning dialog box appears. Check the details, and then click [OK].
Page 671
Protection Using Encryption Click [OK]. [Requesting] appears for [Certificate Status] in the Certificates area. Log off from the machine. Apply to the certificate authority for the server certificate. The application procedure depends on the certificate authority. For details, contact the certificate authority. For the application, click the Web Image Monitor Details icon and use the in- formation that appears in Certificate Details.
Enhanced Network Security Log off from the machine. Enabling SSL After installing the server certificate in the machine, enable the SSL setting. This procedure is used for a self-signed certificate or a certificate issued by a cer- tificate authority. Open a Web Image Monitor. Enter "http://(machine's-address)/"...
Protection Using Encryption Install the certificate by following the Certificate Import Wizard instruc- tions. Note ❒ For details about how to install the certificate, see the Web Image Monitor Help. ❒ If a certificate issued by a certificate authority is installed in the printer, confirm the certificate store location with the certificate authority.
Page 674
Enhanced Network Security Press [System Settings]. Press [Interface Settings]. Press [Permit SSL / TLS Communication] If the setting to be specified does not appear, press [TNext] to scroll down to other settings.
Protection Using Encryption Select the encrypted communication mode. Select [Ciphertext Only], [Ciphertext Priority], or [Ciphertext / Clear Text] as the en- crypted communication mode. Press [OK]. Press the {User Tools/Counter} key. Note ❒ The SSL/TLS encrypted communication mode can also be specified using Web Image Monitor.
Page 676
Enhanced Network Security Press [Interface Settings]. Press [Permit SNMPv3 Communication]. If the setting to be specified does not appear, press [TNext] to scroll down to other settings. Press [Encryption Only]. Press [OK].
Page 677
Protection Using Encryption Press the {User Tools/Counter} key. Note ❒ To use SmartDeviceMonitor for Admin for encrypting the data for speci- fying settings, you need to specify the network administrator’s [Encryption Password] setting and [Encryption Key] in [SNMP Authentication Information] in SmartDeviceMonitor for Admin, in addition to specifying [Permit SNMPv3 Communication] on the machine.
6. Specifying the Extended Security Functions Changing the Extended Security Functions As well as providing basic security through user authentication and the machine access limits specified by the administrators, you can increase security by, for in- stance, encrypting transmitted data and data in the address book. If you need ex- tended security, specify the machine’s extended security functions before using the machine.
Page 680
Specifying the Extended Security Functions Press [Administrator Tools]. Press [Extended Security]. Press the setting you want to change, and change the setting. Press [OK]. Press the {User Tools/Counter} key.
Changing the Extended Security Functions Settings ❖ Driver Encryption Key This can be specified by the network administrator. Encrypt the password transmitted when specifying user authentication. The Driver Encryption Key must match the encryption key set on the machine. Reference See the printer driver Help.
Page 682
Specifying the Extended Security Functions ❖ Restrict Adding of User Destinations This can be specified by the user administrator. When "Restrict Use of Destinations" is set to [Off]. After entering a fax or scan- ner destination directly, you can register it in the address book by pressing [Program Dest.].
Page 683
Changing the Extended Security Functions ❖ Enhance File Protection This can be specified by the file administrator. By specifying a password, you can limit operations such as printing, deleting, and sending files, and can pre- vent unauthorized people from accessing the files. However, it is still possible for the password to be cracked.
Page 684
Specifying the Extended Security Functions ❖ Transfer to Fax Receiver This can be specified by the machine administrator. If you use [Forwarding] or [Transfer Request] under the fax function, files stored in the machine can be transferred or delivered. If you select [Prohibit] for this setting, stored files cannot be transferred by [For- warding] and [Transfer Request].
Page 685
Changing the Extended Security Functions ❖ Password Policy This can be specified by the user administrator. The password policy setting is effective only if [Basic Auth.] is specified. This setting lets you specify [Complexity Setting] and [Minimum Character No.] for the password.
Specifying the Extended Security Functions Other Security Functions This section explains settings for preventing information leaks, and functions that you can restrict to further increase security. Fax Function ❖ Not Displaying Destinations and Senders in Reports and Lists You can specify whether or not to display destinations and senders by click- ing [Facsimile Features], [Administrator Tools], [Parameter Setting] and specifying "Bit No.
Other Security Functions Scanner Function ❖ Print & Delete Scanner Journal To prevent personal information in the transmission/delivery history being printed automatically, set user authentication and the journal will not print automatically. Instead, items in the Print&Delete Scanner Journal are over- written one by one when the number of transmissions/deliveries exceeds 250.
Specifying the Extended Security Functions Limiting Machine Operation to Customers Only The machine can be set so that operation is impossible without administrator au- thentication. The machine can be set to prohibit operation without administrator authentica- tion and also prohibit remote registration in the address book by a service rep- resentative.
Page 689
Limiting Machine Operation to Customers Only Press [Administrator Tools]. Press [Service Mode Lock]. Press [On] and then [OK]. A confirmation message appears. Press [Yes]. Press the {User Tools/Counter} key.
Page 690
Specifying the Extended Security Functions Canceling Service Mode Lock For a customer engineer to carry out inspection or repair in service mode, the machine administrator must log onto the machine and cancel the service mode lock. Preparation For details about logging on and logging off with administrator authentica- tion, see p.23 “Logging on Using Administrator Authentication”, p.26 “Log- ging off Using Administrator Authentication”.
Page 691
Limiting Machine Operation to Customers Only Press [Off] and then press [OK]. Press the {User Tools/Counter} key. The customer engineer can switch to service mode.
Page 692
Specifying the Extended Security Functions...
7. Troubleshooting Authentication Does Not Work Properly This section explains what to do if a user cannot operate the machine because of a problem related to user authentication. Refer to this section if a user comes to you with such a problem. A Message Appears This section explains how to deal with problems if a message appears on the screen during user authentication.
Page 694
Troubleshooting Messages Causes Solutions The machine cannot connect Make sure the server's set- Failed to obtain URL. to the server or cannot estab- tings, such as the IP Address lish communication. and host name, are specified correctly on the machine. Make sure the host name of the UA Server is specified cor- rectly.
Authentication Does Not Work Properly Machine Cannot Be Operated If the following conditions arise while users are operating the machine, provide instructions on how to deal with them. Condition Cause Solution Cannot print using the printer User authentication has been Enter the login user name and driver or connect using the rejected.
Page 696
Troubleshooting Condition Cause Solution Cannot connect to the Scan- The ScanRouter delivery soft- Update to the latest version of Router delivery software. ware may not be supported by the ScanRouter delivery soft- the machine. ware. Cannot access the machine us- ScanRouter EX Professional V2 does not support user authen- ing ScanRouter EX Profes- tication.
8. Appendix Operations by the Supervisor The supervisor can delete an administrator’s password and specify a new one. If any of the administrators forget their passwords or if any of the administrators change, the supervisor can assign a new password. If logged on using the super- visor’s user name and password, you cannot use normal functions or specify de- faults.
Appendix Enter a login user name, and then press [OK]. Note ❒ When you assign the administrator for the first time, enter "supervisor". Press [Enter] for [Login Password]. Enter a login password, and then press [OK]. Note ❒ When you assign the administrator for the first time, proceed to step without pressing [Enter].
Appendix Press [Change] for the login user name. Enter the login user name, and then press [OK]. Press [Change] for the login password. Enter the login password, and then press [OK]. If a password reentry screen appears, enter the login password, and then press [OK].
Page 701
Operations by the Supervisor Press [Change] for the administrator you wish to reset. Press [Change] for the login password. Enter the login password, and then press [OK]. If a password reentry screen appears, enter the login password, and then press [OK]. Press [OK].
Appendix Machine Administrator Settings The machine administrator settings that can be specified are as follows: System Settings The following settings can be specified. ❖ General Features All the settings can be specified. ❖ Tray Paper Settings All the settings can be specified. ❖...
Page 703
Machine Administrator Settings • Default User Name / Password (Send) SMB User Name / SMB Password FTP User Name / FTP Password NCP User Name / NCP Password Password • Program / Change / Delete E-mail Message • Fax E-mail Account ❖...
Appendix • Erase All Memory • Transfer Log Setting • Data Security for Copying File Format Converter option must be installed. The DataOverwriteSecurity unit option must be installed. Maintenance The following settings can be specified. ❖ Auto Color Calibration ❖ Color Registration Copier / Document Server Features The following settings can be specified.
Machine Administrator Settings Facsimile Features The following settings can be specified. ❖ Gen. Settings All the settings can be specified ❖ Scan Settings All the settings can be specified ❖ Send Settings The following settings can be specified • Program / Change / Delete Standard Message •...
Appendix Printer Features The following settings can be specified. ❖ List / Test Print All the settings can be specified. ❖ Maintenance • Menu Protect • List / Test Print Lock • 4Color Graphic Mode ❖ System • Print Error Report •...
Machine Administrator Settings ❖ PS Menu All the settings can be specified. ❖ PDF Menu All the settings can be specified. The PostScript 3 unit option must be installed. Scanner Features The following settings can be specified. ❖ General Settings All the settings can be specified.
Appendix Settings via Web Image Monitor The following settings can be specified. ❖ Top Page • Reset Printer Job • Reset Device ❖ Device Settings • System Spool Printing Protect Printer Operation Panel Output Tray Paper Tray Priority Cover Sheet Tray Slip Sheet Tray •...
Page 709
Machine Administrator Settings ❖ Printer • System All the settings can be specified. • Host Interface All the settings can be specified. • PCL Settings All the settings can be specified. • PS Settings All the settings can be specified. •...
Appendix Settings via SmartDeviceMonitor for Admin The following settings can be specified. ❖ Device Information • Reset Device • Reset Current Job • Reset All Jobs ❖ User Management Tool The following settings can be specified. • User Page Count •...
Network Administrator Settings Network Administrator Settings The network administrator settings that can be specified are as follows: System Settings The following settings can be specified. ❖ Interface Settings • Network All the settings can be specified. • IEEE 1394 All the settings can be specified. •...
Appendix Facsimile Features The following settings can be specified. ❖ Send Settings • Max. E-mail Size ❖ Initial Settings • Enable H.323 • Enable SIP • H.323 Settings • SIP Settings • Program/Change/Delete Gateway Scanner Features The following settings can be specified. ❖...
Page 713
Network Administrator Settings • Administrator Authentication Management Network Administrator Authentication Available Settings for Network Administrator ❖ Fax • Send/Reception Settings Maximum E-mail Size • IP-Fax Settings All the settings can be specified. • IP-Fax Gateway Settings All the settings can be specified. ❖...
Appendix • SNMPv3 All the settings can be specified. • SSDP All the settings can be specified. • Bonjour All the settings can be specified. ❖ Webpage All the settings can be specified. ❖ Security • Network Security All the settings can be specified. •...
File Administrator Settings File Administrator Settings The file administrator settings that can be specified are as follows: System Settings The following settings can be specified. ❖ Administrator Tools • Administrator Authentication Management File Management • Program / Change Administrator File Administrator •...
Appendix Settings via Web Image Monitor The following settings can be specified. ❖ Top Page Reset Printer Job ❖ Document Server All the settings can be specified. ❖ Job • Printer Print Jobs The file administrator can select [Delete], [Delete Password], and [Unlock Job]. The file administrator cannot print files.
User Administrator Settings User Administrator Settings The user administrator settings that can be specified are as follows: System Settings The following settings can be specified. ❖ Administrator Tools • Administrator Authentication Management User Management • Program / Change Administrator User Administrator •...
Appendix Settings via Web Image Monitor The following settings can be specified. ❖ Address Book All the settings can be specified. ❖ Device Settings • Auto E-mail Notification All the settings can be specified. • Administrator Authentication Management File Administrator Authentication Available Settings for File Administrator •...
Document Server File Permissions Document Server File Permissions The authorities for using the files stored in Document Server are as follows: The authority designations in the list indicate users with the following authori- ties. • Read-only This is a user assigned "Read-only" authority. •...
Appendix The Privilege for User Account Settings in the Address Book The authorities for using the address book are as follows: The authority designations in the list indicate users with the following authori- ties. • Read-only This is a user assigned "Read-only" authority. •...
Page 721
The Privilege for User Account Settings in the Address Book Settings User User Ad- Registered Full ministra- User Control Read-only Edit Edit / De- lete ❍ Auth. Info User Code Login User ❍ ❍ Name Login ❍ ❍ Password SMTP ❍...
Page 722
Appendix Settings User User Ad- Registered Full ministra- User Control Read-only Edit Edit / De- lete E-mail E-mail ❍ ❍ ❍ ❍ ❍ Address Address Folder SMB/FT ❍ ❍ ❍ ❍ ❍ Destination P/NCP ❍ ❍ ❍ ❍ ❍ SMB: Path FTP: Port ❍...
User Settings User Settings If you have specified administrator authentication, the available functions and settings depend on the menu protect setting. The following settings can be specified by someone who is not an administrator. ❍ =You can view and change the setting. U =You can view the setting.
Page 724
Appendix Tab Names Settings Menu Protect Level 1 Level 2 ❍ ❍ Reproduction Ratio Shortcut R/E ❍ ❍ R/E Ratio ❍ ❍ R/E Ratio Priority ❍ ❍ Ratio for Create Margin ❍ ❍ Edit Font Margin: Left/Right ❍ ❍ Back Margin: Left/Right ❍...
User Settings Printer Functions The default for [Menu Protect] is [Level 2]. ❖ Normal Printer Screen Functions Menu Protect Level 1 Level 2 ❍ ❍ ❍ Print Jobs ❖ Printer Features Tab Names Settings Menu Protect Level 1 Level 2 ❍...
Page 728
Appendix Tab Names Settings Menu Protect Level 1 Level 2 ❍ Host Interface I/O Buffer ❍ I/O Timeout ❍ PCL Menu Orientation ❍ Form Lines ❍ Font Source ❍ Font Number ❍ Point Size ❍ Font Pitch ❍ Symbol Set ❍...
User Settings Scanner Features The default for [Menu Protect] is [Level 2]. Tab Names Settings Menu Protect Level 1 Level 2 ❍ ❍ Destination List Destination List Priority 1 Settings ❍ ❍ Destination List Priority 2 ❍ ❍ Select Title ❍...
Appendix Facsimile Features The default for [Menu Protect] is [Off]. Names Settings Menu Protect Level 1 Level 2 ❍ ❍ Environment Quick Operator Key 1-3 Settings ❍ ❍ Switch Title of Quick Dial Table ❍ ❍ Search Destination ❍ ❍ Adjust Sound Volume ❍...
Page 731
User Settings Names Settings Menu Protect Level 1 Level 2 ❍ Initial Settings Parameter Setting ❍ ❍ Parameter Setting:Print List ❍ Program Closed Network Code ❍ Program Memory Lock ID ❍ Internet Fax Settings ❍ Program Fax Information ❍ Enable H.323 ❍...
Appendix System Settings The settings available to the user depend on whether or not administrator au- thentication has been specified. If administrator authentication has been specified, the settings available to the user depend on whether or not "Available Settings" has been specified. Tab Names Settings Admin-...
Page 733
User Settings Tab Names Settings Admin- Administrator au- istrator thentication has authen- been specified. tication "Availa- "Availa- has not ble Set- ble Set- been tings" tings" speci- has not fied. been been speci- speci- fied. fied. ❍ ❍ Tray Paper Settings Paper Tray Priority: Copier ❍...
Page 734
Appendix Tab Names Settings Admin- Administrator au- istrator thentication has authen- been specified. tication "Availa- "Availa- has not ble Set- ble Set- been tings" tings" speci- has not fied. been been speci- speci- fied. fied. ❍ ❍ Inter- Network Machine IPv4 Address face ❍...
Page 735
User Settings Tab Names Settings Admin- Administrator au- istrator thentication has authen- been specified. tication "Availa- "Availa- has not ble Set- ble Set- been tings" tings" speci- has not fied. been been speci- speci- fied. fied. ❍ ❍ Inter- IEEE IP Address face 1394...
Page 736
Appendix Tab Names Settings Admin- Administrator au- istrator thentication has authen- been specified. tication "Availa- "Availa- has not ble Set- ble Set- been tings" tings" speci- has not fied. been been speci- speci- fied. fied. ❍ ❍ File Transfer Delivery Option ❍...
Page 737
User Settings Tab Names Settings Admin- Administrator au- istrator thentication has authen- been specified. tication "Availa- "Availa- has not ble Set- ble Set- been tings" tings" speci- has not fied. been been speci- speci- fied. fied. Administrator Tools Address Book Management Address Book: Program / Change / Delete Group Address Book: Program / Change / Delete Transfer Request...
Appendix The IEEE1394 interface board option must be installed. The IEEE802.11b interface unit option must be installed. File Format Converter option must be installed. The IEEE 1284 interface board option must be installed. The data overwrite security unit option must be installed. Web Image Monitor Setting ❖...
Page 739
User Settings Category Settings Admin- Administrator au- istrator thentication has authen- been specified. tication "Availa- "Availa- has not ble Set- ble Set- been tings" tings" speci- has not fied. been been speci- speci- fied. fied. ❍ ❍ Paper Paper Size ❍...
Page 740
Appendix Category Settings Admin- Administrator au- istrator thentication has authen- been specified. tication "Availa- "Availa- has not ble Set- ble Set- been tings" tings" speci- has not fied. been been speci- speci- fied. fied. ❍ ❍ E-mail Administrator E-mail Address ❍...
Page 741
User Settings Category Settings Admin- Administrator au- istrator thentication has authen- been specified. tication "Availa- "Availa- has not ble Set- ble Set- been tings" tings" speci- has not fied. been been speci- speci- fied. fied. ❍ ❍ E-mail Notification E-mail Address E-mail ❍...
Page 742
Appendix Category Settings Admin- Administrator au- istrator thentication has authen- been specified. tication "Availa- "Availa- has not ble Set- ble Set- been tings" tings" speci- has not fied. been been speci- speci- fied. fied. ❍ ❍ On-demand E- Notification Subject mail Notification ❍...
Page 743
User Settings Category Settings Admin- Administrator au- istrator thentication has authen- been specified. tication "Availa- "Availa- has not ble Set- ble Set- been tings" tings" speci- has not fied. been been speci- speci- fied. fied. ❍ ❍ User Authenti- User Authentication Management cation Manage- User Code Authentication - Printer Job Au- ❍...
Page 744
Appendix ❖ Printer The default for [Menu Protect] is [Level 2]. Category Settings Menu Protect Level 1 Level 2 ❍ System Print Error Report ❍ Auto Continue ❍ Memory Overflow ❍ Memory Usage ❍ Duplex ❍ Copies ❍ Blank Page Print ❍...
Page 745
User Settings Category Settings Menu Protect Level 1 Level 2 ❍ Duplex PS Settings ❍ Blank Page Print ❍ Data Format ❍ Resolution ❍ Resolution PDF Settings ❍ PDF Temporary Password ❍ PDF Fixed Password ❍ PDF Group Password The PostScript 3 unit option must be installed. ❖...
Page 747
User Settings Category Settings Menu Protect Level 1 Level 2 ❍ ❍ Parameter Settings Just Size Printing ❍ ❍ Convert to PDF When Transferring to Folder ❍ ❍ Journal ❍ ❍ Immediate Transmission Result Report ❍ ❍ Communication Result Report ❍...
Page 748
Appendix ❖ Interface The settings available to the user depend on whether or not administrator au- thentication has been specified. If administrator authentication has been specified, the settings available to the user depend on whether or not "Available Settings" has been specified. Category Settings Admin-...
Page 749
User Settings ❖ Network The settings available to the user depend on whether or not administrator au- thentication has been specified. If administrator authentication has been specified, the settings available to the user depend on whether or not "Available Settings" has been specified. Category Settings Admin-...
Page 750
Appendix Category Settings Admin- Administrator au- istrator thentication has authen- been specified. tication "Availa- "Availa- has not ble Set- ble Set- been tings" tings" speci- has not fied. been been speci- speci- fied. fied. ❍ ❍ IPv4 Host Name ❍ ❍...
Page 751
User Settings Category Settings Admin- Administrator au- istrator thentication has authen- been specified. tication "Availa- "Availa- has not ble Set- ble Set- been tings" tings" speci- has not fied. been been speci- speci- fied. fied. ❍ ❍ IPv6 IPv6 Address ❍...
Page 752
Appendix Category Settings Admin- Administrator au- istrator thentication has authen- been specified. tication "Availa- "Availa- has not ble Set- ble Set- been tings" tings" speci- has not fied. been been speci- speci- fied. fied. ❍ ❍ AppleTalk AppleTalk ❍ ❍ Printer Name ❍...
Functions That Require Options Functions That Require Options The following functions require certain options and additional functions. • Hard Disk overwrite erases function DataOverwriteSecurity unit • Data security for copying function Copy Data Security Unit • PDF Direct Print function PostScript unit...
Page 759
Operating Instructions Copy/Document Server Reference Placing Originals Copying Document Server Appendix Read this manual carefully before you use this machine and keep it handy for future reference. For safe and correct use, be sure to read the Safety Information in "About This Machine" before using the machine.
Page 760
Type 1: C2525/DSc525/LD425c/Aficio MP C2500 • Type 2: C3030/DSc530/LD430c/Aficio MP C3000 Certain types might not be available in some countries. For details, please contact your local dealer. Depending on which country you are in, certain units may be optional. For details, please contact your local dealer.
Page 761
Manuals for This Machine Refer to the manuals that are relevant to what you want to do with the machine. ❖ About This Machine Be sure to read the Safety Information in this manual before using the ma- chine. This manual provides an introduction to the functions of the machine. It also explains the control panel, preparation procedures for using the machine, how to enter text, and how to install the CD-ROMs provided.
Page 762
❖ Other manuals • PostScript3 Supplement • UNIX Supplement • Manuals for DeskTopBinder Lite • DeskTopBinder Lite Setup Guide • DeskTopBinder Introduction Guide • Auto Document Link Guide Note ❒ Manuals provided are specific to machine types. ❒ Adobe Acrobat Reader/Adobe Reader must be installed in order to view the manuals as PDF files.
Page 763
What You Can Do with This Machine <Color Functions/Color Adjustments> Color Copying You can switch the color copy mode depending on the type of originals used and the desired finish. See p.41 “Selecting a Color Mode”. ❖ Full Color Copy Copies using four colors: yellow, magenta, cyan and black.
Page 764
❖ Erase Specified Color See p.43 “Erase Color”. Copies by deleting a specific color in the original. AMF039S ❖ Color Background See p.44 “Color Background”. Copies by adding a color to the whole page. AMF040S...
Page 765
Stamping on Copies Copies with the date, page numbers, etc. The stamp color can be yellow, red, cy- an, magenta, green, blue, and black. AMF041S Printed inserts types: ❖ Background Numbering See p.106 “Background Numbering”. ❖ Preset Stamp See p.107 “Preset Stamp”. ❖...
Page 766
Adjusting Colors See p.48 “Color Adjustment”. ❖ Primary Colors AMA013S Colors can be created by combining the 3 primary colors: yellow, magenta and cyan. Black can be made by combining yellow, magenta and cyan, how- ever, as there might be some slight differences, “black” will be expressed us- ing a black toner.
Page 767
❖ Color Balance Adjusts the overall color tone of copies. See p.45 “Color Balance”. AMA015S Adjusting Images See p.49 “Image Adjustment”. ❖ Sharp/Soft Adjust the outline of the image. See p.50 “Adjusting the sharpness/softness”. AMA016S ❖ Contrast Adjust the shades of the image. See p.51 “Adjusting the contrast”.
Page 768
❖ Background Density Adjust the background density of the image. See p.51 “Adjusting the background density”. AMA018S ❖ Other Adjustments • Adjust U.C.R. See p.52 “Adjusting the U.C.R”. • Text/Photo Sensitivity See p.52 “Adjusting the Text/Photo sensitivity”. viii...
Page 769
What You Can Do with This Machine Functions differ depending on machine type and options. Reference See p.3 “Functions Requiring Optional Configurations”. Types of Duplex Copies ❖ 1 Sided 2 Pages → 2 Sided 1 Page See p.82 “Duplex”. ❖ 2 Sided 1 Page → 2 Sided 1 Page See p.82 “Duplex”.
Page 770
❖ 1 Sided 8 Pages → Combine 2 Sided 1 Page See p.88 “Two-Sided Combine”. GCSHVYAE 1 Front 2 Back ❖ 2 Sided 16 Pages → Combine 2 Sided 1 Page See p.88 “Two-Sided Combine”. GCSHVY5E 1 Front 2 Back ❖...
Page 771
❖ 2 Sided 4 Pages → Combine 2 Sided 1 Page See p.88 “Two-Sided Combine”. GCSHVY2E 1 Front 2 Back ❖ 2 Sided 8 Pages → Combine 2 Sided 1 Page See p.88 “Two-Sided Combine”. GCSHVY6E 1 Front 2 Back ❖...
❖ Front & Back Bound Originals → 2 Sided Pages See p.93 “Booklet/Magazine”. Copying Book Originals ❖ 1 Sided 4 Pages → Booklet See p.93 “Booklet/Magazine”. • Open to left GCBOOK0E • Open to right GCBOOK1E...
Page 773
❖ 2 Sided 2 Pages → Booklet See p.93 “Booklet/Magazine”. • Open to left GCAH010E • Open to right GCAH020E ❖ 1 Sided → Magazine See p.93 “Booklet/Magazine”. • Open to left GCBOOK3E • Open to right GCBOOK4E xiii...
Page 774
❖ 2 Sided → Magazine See p.93 “Booklet/Magazine”. • Open to left GCAH030E • Open to right GCAH040E Combining Multiple Pages onto a Single Page See p.86 “One-Sided Combine”. ❖ 1 Sided 2 Pages → Combine 1 Sided 1 Page GCSHVY7E...
Page 777
❖ Bound Originals → 2 Sided 1 Page See p.93 “Booklet/Magazine”. ❖ Front & Back Bound Originals → 2 Sided Pages See p.93 “Booklet/Magazine”. Copying 2-Sided Pages onto 1-Sided Pages See p.91 “Series Copies”. ❖ 2 Sided 1 Page → 1 Sided 2 Pages CP2B0200 Copying onto Thick Paper ❖...
Page 778
TABLE OF CONTENTS Manuals for This Machine ..................i What You Can Do with This Machine <Color Functions/Color Adjustments>..iii Color Copying ......................iii Stamping on Copies....................v Adjusting Colors ......................vi Adjusting Images...................... vii What You Can Do with This Machine..............ix Types of Duplex Copies ....................
Page 779
Copying from the Bypass Tray................34 When copying onto Regular Size Paper ..............36 When copying onto Custom Size Paper ..............37 When copying onto OHP Transparencies or Thin Paper .........38 When copying onto Thick Paper ................39 When Copying onto Envelopes................40 Color Functions ....................41 Selecting a Color Mode....................41 Convert Colors ......................
Page 780
Storing Data in the Document Server ..............137 Programs ......................139 Storing a Program ....................139 Changing a Stored Program ..................140 Deleting a Program ....................141 Recalling a Program....................141 Programming Defaults in Initial Display ..............142 3. Document Server Relationship between Document Server and Other Functions .....143 Document Server Display ..................
Notice Do not copy or print any item for which reproduction is prohibited by law. Copying or printing the following items is generally prohibited by local law: bank notes, revenue stamps, bonds, stock certificates, bank drafts, checks, pass- ports, driver's licenses. The preceding list is meant as a guide only and is not inclusive.
How to Read This Manual Note ❒ For proper use of this product, be sure to read About This Machine first. ❒ Supplementary information about the copier mode is described in “Supple- mentary Information”. Reference See p.167 “Supplementary Informations”. Symbols This manual uses the following symbols: Indicates important safety notes.
Display The function items displayed serve as selector keys. You can select or specify an item by lightly pressing them. When you select or specify an item on the display panel, it is highlighted like . Keys appearing as cannot be used. ❖...
Simplified Display This section explains how to use the “Simplified Display” and introduces its keys. You can view the simplified display from the Copier's initial screen by pressing the {Simplified Display} key. The simplified display contains main functions only. Enlarged characters and keys make for easier operation. AMG054S ❖...
User Tools Menu (Copier and Document Server Features) This section describes items that can be specified on the copier initial screen. Copier initial screen can be displayed by pressing the {User Tools/Counter} key. For details about how to set up these items, see General Settings Guide. ❖...
Page 787
❖ Reproduction Ratio Item Description Shortcut R / E You can register up to three frequently used Reduce/Enlarge ra- tios other than the fixed Reduce/Enlarge ratio and have them shown on the initial display. You can also change registered Re- duce/ Enlarge ratios.
Page 788
❖ Stamp Item Description Background Numbering Size You can set the size of the numbers. Density You can set the density of the numbers. Stamp Color You can set the color of the numbers. Preset Stamp Stamp Language You can select the language of the stamp. Stamp Priority You can select the stamp type given priority when [Preset Stamp] is pressed.
Page 789
Item Description Stamp Position:-1-,-2-... You can set the position where the stamp is printed. Stamp Position:P.1,P.2... You can set the position where the stamp is printed. Stamp Position:1,2... You can set the position where the stamp is printed. Stamp Position:1-1,1-2... You can set the position where the stamp is printed.
Page 790
❖ Adjust Color Image Item Description Background Density of The background density is adjusted to skip the texture and copy. ADS (Full Color) You can adjust the background density up to 5 levels when in Full Color. Color Sensitivity You can adjust the color specified to convert in “Color Convert” and the color specified for “Erase Color”, in 5 levels.
1. Placing Originals This chapter describes the types of originals you can set and how to place origi- nals. Originals This section describes the types of originals that can be placed, paper sizes that are automatically detected, and missing image area. Note ❒...
Placing Originals Non-compatible originals for the Auto Document Feeder Placing the following types of originals in the ADF can cause paper misfeeds or light & black lines or result in damage to the originals. Place these originals on the exposure glass instead. •...
Page 793
Originals ❖ Inch version 11” × 11” × 10” × 8” × Size A3L A4K 81/2” 81/2” 51/2” 81/2” 71/4 × × × × ” × 17” 15” 14” 10” Location 14” 11” 81/2” 13” 101/2 of the ”L original ×...
Placing Originals Sizes difficult to detect It is difficult for the machine to detect the sizes of the following originals, so se- lect the paper size manually: • Originals with indexes, tags, or other projecting parts • Transparent originals such as OHP transparencies or translucent paper •...
Placing Originals Placing Originals This section describes the procedure for placing originals on the exposure glass and in the ADF. Take care to place originals after any correction fluid and ink has completely dried. Not taking this precaution could cause marks on the exposure glass that will be copied onto paper.
Page 796
Placing Originals For example, to copy A3L or 11” × 17”L originals with the Staple function selected: AMG017S Press [Special Original]. Select the original orientation ( ), and then press [OK]. Note ❒ It is recommended to use this function together with the [Auto Paper Select] or [Auto Reduce / Enlarge] function.
Placing Originals Placing Originals on the Exposure Glass Place originals on the exposure glass. Important ❒ Do not lift the exposure glass cover or ADF forcefully. Otherwise, the cover of the ADF might open or be damaged. Lift the exposure glass cover or ADF. Be sure to lift the exposure glass cover or ADF by more than 30 degrees.
Page 798
Placing Originals Adjust the guide to the original size. Set the aligned originals face up into the ADF. Do not stack originals beyond the limit mark. The last page should be on the bottom. Be sure not to block the sensor or load the original untidily. Doing so may cause the machine to detect the size of the scanned image incorrectly or dis- play a paper misfeed message.
Placing Originals Batch mode In Batch mode, the machine copies an original of more than 50 pages as one doc- ument, even if it is placed on the ADF in parts. Press [Special Original]. Select [Batch] and then press [OK]. Place the first part of the original, and then press the {Start} key.
Placing Originals SADF mode In SADF mode, even when an original is placed page by page in the ADF, each page is automatically fed when placed. Important ❒ You should make a setting so that [SADF] will be displayed when you press [Special Original].
Placing Originals Mixed size mode When placing different size originals of the same width in the ADF at the same time, the machine automatically checks the size of the originals and makes cop- ies. Important ❒ When placing originals of different sizes in the ADF and making copies with- out using the Mixed size mode, paper might become jammed or parts of the original image might not be copied.
Placing Originals Original size Specify the size of the originals. Regular sizes Select the size of the originals from the regular sizes. Press [Special Original]. Press [Original Size] . Press [Regular Size]. Select the size of original, and then press [OK] . Place the original, and then press the {Start} key.
Page 803
Placing Originals Custom sizes When placing custom size originals in the ADF, specify the size of the originals. Important ❒ Paper that has a vertical length of 128–297 mm (5.1”-11.6”) and a horizontal length of 128–432 mm (5.1”-17”) can be placed with this function. Press [Special Original].
2. Copying This chapter describes the procedure for making copies in various modes. Basic Procedure This section describes the basic procedure for making copies. Important ❒ When User Code Authentication is set, enter your user code (up to eight dig- its) with the number keys so that the machine accepts copy jobs.
Copying Press the {Start} key. The machine starts copying. When placing originals on the exposure glass, press the {q} key after all originals are scanned. Copies are delivered face down. Note ❒ Always log off when you have finished using the machine to prevent un- authorized users from using the machine.
Basic Procedure Replace the originals that you were copying, and then press the {Start} key. Following message “ ”, replace the originals that you Reset n originals. were copying. Note ❒ The previous copy job settings are restored. Simply press the {Start} key to continue copying from where it left off.
Page 808
Copying Note ❒ You can switch the display to the current copy job by pressing [To Copying Screen]. You can switch the display to the preset job by pressing [To Reserv. Screen].
Job List Job List Jobs printed using Copy, Document Server, or Printer mode are temporarily stored in the machine, and then executed in order. The Job List function allows you to manage these jobs. For example, you can cancel incorrect job settings or print an urgent document.
Copying Job List screen This section explains displays and icons that appear in the Job List screen. The Job List screen varies depending on whether [Job Order] is selected with Print Priority for the System Settings. For details about the setting procedure, see “Print Priority”, General Settings Guide.
Job List Checking jobs in the print queue You can check the contents of jobs in the print queue. Press [Job List]. Select the job you want to check. Press [Details], and then check the contents. Press [Exit]. Changing the order of jobs You can change the order in which print jobs in the job list are served: Press [Job List].
Copying Press [OK]. Holding print jobs The machine holds jobs that are queued and currently printing. Press [Job List]. Select the job(s) to hold. Press [Suspend Printing]. Deleting jobs You can delete a job that is queued or currently printing. Press [Job List].
Job List Checking Job History You can view the history contents of printed jobs. Press [Job List]. Press [Job History]. A list of completed print jobs appears. Press [Details] to check the contents of the displayed jobs. Press [Exit].
Copying Copying from the Bypass Tray Use the bypass tray to copy onto OHP transparencies, adhesive labels, translu- cent paper, postcards and copy paper that cannot be loaded in the paper trays. Important ❒ When the duplex unit is attached, the default is [1 Sided → 2 Sided]. When cop- ying from the bypass tray, select [1 Sided] for copying in [Dup./Combine/Series] (for example [1 Sided →...
Page 815
Copying from the Bypass Tray Open the bypass tray. AMF023S Insert the paper face-down until you hear the beep, and then align the pa- per guide to the paper size. If the guides are not flush against the copy paper, images might be skewed or paper misfeeds might occur.
Copying When copying onto Regular Size Paper Makes copies onto regular size paper from the bypass tray. Open the bypass tray, and then align the paper guide to the paper size. Insert the paper face-down until you hear the beep. Press the {q} key.
Copying from the Bypass Tray When copying onto Custom Size Paper Makes copies onto custom size paper from the bypass tray. Open the bypass tray, and then align the paper guide to the paper size. Insert the paper face-down until you hear the beep. {q} key.
Copying When copying onto OHP Transparencies or Thin Paper When copying onto OHP transparencies or thin paper, select the type and size of paper. Important ❒ We recommend that you use specified OHP transparencies. ❒ OHP transparencies must be loaded face down in the tray with the notched corner of the sheet in the appropriate corner of the tray.
Copying from the Bypass Tray When copying onto Thick Paper When copying onto thick paper, select the type and size of paper. To prevent multiple sheets from being fed at once, fan paper before placing it on the tray. Open the bypass tray, and then align the paper guide to the paper size. Insert the paper face down until you hear the beep.
Copying When Copying onto Envelopes Open the bypass tray, and then insert the envelopes with the side you want to copy face down until the beeper sounds. Align the paper guide to the envelope side. Press the {q} key. Press [Select Thick Paper]. Select [Thick Paper 1], and then press [OK].
Color Functions Color Functions This section describes functions that are used for color copying. Selecting a Color Mode Select a color (or colors) that suits your originals and copying requirements. For color images, refer to “What You Can Do with This Machine <Color Func- tions/Color Adjustments>”.
Copying Convert Colors Copies by changing the Color in the original to a different Color. Important ❒ It is possible to specify up to 4 Colors. ❒ To use this function, [Full Color] must be selected. ❒ If any other Color mode is selected, you cannot select [Convert Color]. Press [Full Color].
Color Functions Selects the new Color to be converted. You can adjust the density of each Color in four steps. To select User Color, press [User Color], and then select the Color. After selecting all Colors to be converted, press [OK] three times. Place the originals, and then press the {Start} key.
Copying Note ❒ The width of the Color to be deleted can be adjusted in five levels. If the Color width is set to [Wider] and red has been specified, Colors, which are close to magenta or orange, will also be deleted. The Color width can be adjusted in User Tools.
Color Functions Color Balance Adjusts the overall Color tone when the overall copy is reddish or bluish. Press [Edit / Color]. Make sure that [Color] is selected before pressing [Adjust Color]. Make sure that [Color Balance] is selected. Adjust the Color balance by pressing [Lighter] or [Darker]. Press [OK] twice.
Copying Color Balance Program You can also store the Color balance setting as a Color balance program and re- call it when you want to use it. You can store up to three programs. Note ❒ If you want to change the registered settings, register them one more time. In this case, the previously registered contents will be changed.
Page 827
Color Functions Changing the registered contents Changes contents stored in Color balance programs. Press [Edit / Color]. Make sure that [Color] is selected before pressing [Adjust Color]. Make sure that [Color Balance] is selected before pressing [Program Color Bal- ance]. Select the program number ([1]-[3]) to be changed.
Copying Place the originals, and then press the {Start} key. Note ❒ After copying has been completed, pressing the {Clear Modes} key deletes the recalled contents. Deleting the registered contents Deletes contents stored in Color balance programs. Press [Edit / Color]. Make sure that [Color] is selected before pressing [Adjust Color].
Color Functions Select the Colors you want to adjust. You can select up to 3 Colors. Adjust the Color tastes using [←] or[→]. Refer to the Color circle on the control panel. Press [OK] twice. Note ❒ The adjusted settings will be deleted and the initial values will be reset, when Auto Clear has been performed, when the {Clear Modes} key has been pressed or when the power has been turned off.
Page 830
Copying Press [Edit / Color]. Make sure that [Color] is selected before pressing [Adjust Color]. Press [Copy Quality]. Adjusts the settings. Note ❒ [Sharp / Soft], [Contrast], and [Background Density] can each be adjusted, how- ever, their adjustments can affect the level of other adjustment functions. ❒...
Page 831
Color Functions Adjusting the contrast Adjusts the shades of an image. Adjust by pressing [Low] or [High]. Press [OK]. Adjusting the background density Adjusts the background density of an image. Adjust by pressing [Lighter] or [Darker]. Press [OK]. Note ❒ Adjustments should be made lightly when copying dark textured origi- nals, such as newspaper or recycled paper.
Page 832
Copying Adjusting the U.C.R Adjusts the amount of black toner to express vividly the black areas in an image. Adjust by pressing [Lighter] or [Darker]. Press [OK]. Adjusting the Text/Photo sensitivity Adjusts the standard level in judging the image in the text and photo part when using “Text / Photo”.
Color Functions User Color You can register User Colors made by adjusting the density of yellow, magenta, cyan, and black. You can also give a name to the Colors you register, and print out a list of user colors. You can create Colors by: •...
Page 834
Copying Press [Color], and then press [User Color]. Select the number ([1]-[15]) for the Color you want to register. Select the Color to be used as a base for registration from the basic and user colors. The density of each Color for the selected Color is displayed. To select User Color, press [User Color], and then select the Color.
Page 835
Color Functions Note ❒ It is also possible to specify density by pressing [Adjust with Number Keys] in step ❒ Selecting a user color key that is indicated by a solid line will change (over- write) the contents of that Color. Creating Colors by Directly Specifying the Density of Each Color with Number Keys Creates Colors by directly specifying the density of each Color using the number keys.
Page 836
Copying Deleting User colors Deletes user colors. Important ❒ You can not delete Colors registered in the program or user colors that are currently being used. Press [Edit / Color]. Press [Color], and then press [User Color]. Press [Delete]. Select the number of the user color (whose key is indicated by a solid line) you want to delete.
Copier Functions Copier Functions This section describes the copy functions. Adjusting Copy Image Density There are three types of adjustment available. ❖ Auto Image Density The machine automatically adjusts the image density by scanning the densi- ties of originals. Dark texture originals (such as newspaper or recycled paper) will be copied so that background will not be reproduced.
Page 838
Copying Manual image density You can adjust the density of the overall original in nine steps. [Auto Density] is selected, press [Auto Density] to cancel it. Press [W] or [V] to adjust the image density. The density indicator “{” moves. Combined auto and manual image density Adjusts the density of an image only for dark texture originals.
Copier Functions Selecting the Original Type Setting Select one of the following 6 types to match your originals: ❖ Text Select this mode when your originals contain only text (no pictures). ❖ Text/Photo Select [Text / Photo] when your originals contain photographs or pictures with text.
Copying Note ❒ See “Original Type Display” and “Adjust Color Image”, General Settings Guide. Selecting Copy Paper There are two ways to select copy paper: ❖ Auto Paper Select The machine selects a suitable size of copy paper automatically based on orig- inal size and reproduction ratio.
Page 841
Copier Functions Auto Paper Select The machine selects a suitable size of copy paper automatically based on the original size and the reproduction ratio. Make sure that Auto Paper Select is selected. Trays with a key mark ( ) will not be automatically selected. See “Paper Type”, General Settings Guide.
Page 842
Copying Note ❒ If the orientation in which your original is placed (K or L) is different from that of the paper you are copying onto, this function rotates the orig- inal image by 90° to fit it on the copy paper. GCROTA0E ❒...
Copier Functions Reference See p.34 “Copying from the Bypass Tray”. See p.66 “Auto Reduce/Enlarge”. See p.77 “Staple”. See p.80 “Punch”. Preset Reduce/Enlarge You can select a preset ratio for copying. ❖ Base Point The base point of Reduce/Enlarge differs depending on how the original is scanned.
Page 844
Copying Press [Reduce / Enlarge]. Select a ratio, and then press [OK]. Place your originals, and then press the {Start} key. Note ❒ To select a preset ratio on the initial display in step , press the shortcut reduce/enlarge key and go to step ❒...
Copier Functions Zoom You can change the reproduction ratio in increments of 1%. To select the ratio with [o] and [n] Select a ratio using [o] or [n]. Press [Reduce / Enlarge]. Select a preset ratio which is close to the desired ratio. Adjust the ratio with [o] or [n].
Copying To enter the ratio with the number keys Select a ratio using the number keys. Press [Reduce / Enlarge]. Press [Number keys]. Enter the desired ratio with the number keys, and then press {q} key. Press [OK] twice. Place your originals, and then press the {Start} key. Auto Reduce/Enlarge The machine can choose an appropriate reproduction ratio based on the paper and original sizes you select.
Page 847
Copier Functions ❖ Metric version Where original is placed Original size and orientation A3L, B4 JISL, A4KL, B5 JISKL, 8” × 13”L Exposure glass A3L, B4 JISL, A4KL, B5 JISKL, A5KL, 11 × 17L, ” × 11”KL, 8” × 13”L, 8KL, 16KKL ❖...
Copying Size Magnification This function calculates an enlargement or reduction ratio based on the lengths of the original and copy. Measure and specify the lengths of the original and copy by comparing “A” with “a”. Press [Reduce / Enlarge]. Press [Size Magnification]. Enter the length of the original with the number keys, and then press {q} key.
Copier Functions Directional Magnification (%) Specify the horizontal and vertical lengths of the original and copy image at dif- ferent reproduction ratio. Copies can be reduced or enlarged at different repro- duction ratios horizontally and vertically. CP2P01EE a: Horizontal ratio b: Vertical ratio To enter the ratio with the number keys Select a ratio using the number keys.
Page 850
Copying To specify a ration with [o] and [n] Select a ratio using [o] or [n]. Press [Reduce / Enlarge]. Press [Direct. Mag. %]. Press [[n] [o] keys]. Press [Horizontal]. Adjust the ratio using [n] or [o]. Pressing [n] or [o] changes the ratio in increments of 1%. Pressing and hold- ing down [n] or [o] changes it in increments of 10%.
Copier Functions Directional Size Magnification (mm) Specify the horizontal and vertical lengths of the original and copy image. Cop- ies can be reduced or enlarged at different reproduction ratios horizontally and vertically. CP2M01EE Horizontal original size: Amm Vertical original size: Bmm Horizontal copy size: amm Vertical copy size: bmm Measure and specify the lengths of the original and copy by comparing “A”...
Copying Enter the vertical size of the copy with the number keys, and then press {q} key. Press [OK] twice. Place the originals, and then press the {Start} key. Note ❒ To change a length in steps , press the key you wish to change and enter the new value.
Page 853
Copier Functions Press [Finishing]. Select [Sort] or [Rotate Sort], and then press [OK]. When a finisher is not installed: When the 500-sheet finisher is installed: When the 1000-sheet finisher is installed: When the booklet finisher is installed:...
Page 854
Copying Enter the number of copy sets using the number keys. Place your originals. When placing an original on the exposure glass, start with the first page to be copied. When placing an original in the ADF, set so the first page is on the top. When placing an original on the exposure glass or in the ADF using Batch mode, press the {q} key after all the originals have been scanned.
Page 855
Copier Functions Changing the Number of Sets You can change the number of copy sets during copying. Important ❒ This function can only be used when the Sort function is turned on. ” is displayed, press the {Clear/Stop} key. While “ Copying...
Copying Stack Copies can be assembled with each page placed. If a finisher is installed, each time the copies of one page are delivered, the next copy is shifted when delivered so you can separate each job by page. Important ❒...
Copier Functions Staple Each copy set can be stapled together. Important ❒ You cannot use the bypass tray with this function. ❖ Stapling position and original setting Place all the originals in the ADF in the orientation in which they can be read normally.
Page 858
Copying ❖ 1000-sheet finisher AMG020S ❖ Booklet finisher AMG019S This table shows the stapling positions, not the orientation of delivery. Left 2K and Top 2L are not available for larger than A4 size paper. Press [Finishing].
Page 859
Copier Functions Select one of the stapling positions. 500-sheet finisher 1000-sheet finisher Booklet finisher When you select a stapling position, Sort mode is automatically selected. Enter the number of copy sets using the number keys. Place your originals, and then press the {Start} key. Note ❒...
Copying Punch You can make punch holes in copies. ❖ 2 holes GCPNCH1E ❖ 3 holes GCPNCH3E ❖ 4 holes GCPNCH0E Important ❒ You cannot use the bypass tray with this function.
Page 861
Copier Functions ❖ Punch hole positions The relationship between the orientation in which you place the original and the punch hole positions is as follows: Original location Punch hole Exposur position glass AMG021S This table shows the punch hole positions, not the orientation of delivery. 2 hole left K and 2 hole top L are not available for larger than A4 size paper.
Copying Duplex There are two types of duplex. ❖ 1 Sided → 2 Sides Copies 2 one-sided pages on 1 two-sided page. ❖ 2 Sided → 2 Sided Copies 1 two-sided page on 1 two sided page.
Page 863
Copier Functions ❖ Original orientation and completed copies The resulting copy image will differ according to the orientation in which you place your originals (vertical or horizontal). The table shows the orientation of images on the front and back of copies, not the orientation of delivery.
Page 864
Copying Select [1 Sided → 2 Sided] or [2 Sided → 2 Sided]. Press [OK]. Place the originals, and then press the {Start} key. Note ❒ You cannot use the bypass tray with this function. ❒ The maximum paper weight that can be used with duplex copying is 64– 105 g/m (17-28 lb.).
Page 865
Copier Functions Originals and copy orientation You can select the orientation. • Top to Top Duplex1 • Top to Bottom Duplex2 Select orientation (original and copy), and then press [OK]. Note ❒ The default setting is [Top to Top]. You can change the default orientation with Copier Features in User Tools.
Copying One-Sided Combine Combine several pages onto one side of a sheet. There are six types of One-Sided Combine. ❖ 1 Sided 2 Pages → Combine 1 Side Copies 2 one-sided originals to one side of a sheet. GCSHVY7E ❖ 1 Sided 4 Pages → Combine 1 Side Copies 4 one-sided originals to one side of a sheet.
Page 867
Copier Functions Placing originals (originals placed in the ADF) • Originals read from left to right Combine5 • Originals read from top to bottom Combine6 Press [Dup./Combine/Series]. Press [Combine]. Select [1 Sided] or [2 Sided] for Original, and then press [Combine 1 Side] for Copy.
Copying Note ❒ You cannot use the bypass tray with this function. ❒ You can also select [1 sided → Comb 2 orig] or [1 sided → Comb 4 orig] directly by pressing the Copy Function Key in step . In that case, proceed to step ❒...
Page 869
Copier Functions ❖ 1 Sided 16 Pages → Combine 2 Side Copies 16 one-sided originals to one sheet with eight pages per side. GCSHVY5E Front Back ❖ 2 Sided 2 Pages → Combine 2 Side Copies 2 two-sided originals to one sheet with two pages per side. GCSHVY1E ❖...
Page 870
Copying ❖ 2 Sided 8 Pages → Combine 2 Side Copies 8 two-sided originals to one sheet with eight pages per side. GCSHVY6E Front Back Press [Dup./Combine/Series]. Press [Combine]. Select [1 Sided] or [2 Sided] for Original, and then press [Combine 2 Sides] for Copy.
Copier Functions Note ❒ You cannot use the bypass tray with this function. ❒ See “Erase Original Shadow in Combine”, “Copy Order in Combine”, “Separation Line in Combine”, General Settings Guide. Reference See p.85 “Originals and copy orientation”. Series Copies Separately copies the front and back of a two-sided original or the two facing pages of a bound original onto two sheets.
Page 872
Copying ❖ 2 Sided → 1 Sided You can make one-sided copies from two-sided originals. Press [Dup./Combine/Series]. Press [Series]. Select [2 Sided → 1 Sided] or [Book → 1 Sided], and then press [OK]. If you selected [2 Sided → 1 Sided], you can change the orientation. Place your original on the exposure glass, and then press the {Start} key.
Copier Functions Booklet/Magazine Copies two or more originals in page order. There are six types of Booklet/Magazine. Important ❒ The following table shows the paper sizes of two-sided original and two-sid- ed copy (when copying at a ratio of 100%): ❖...
Page 874
Copying • Open to right GCBOOK1E ❖ 2 Sided → Booklet Make two-sided originals to copies in page order for a folded booklet as shown. • Open to left GCAH010E • Open to right GCAH020E...
Page 875
Copier Functions ❖ 1 Sided → Magazine Copies two or more originals to make copies in page order when they are folded and stacked. • Open to left GCBOOK3E • Open to right GCBOOK4E ❖ 2 Sided → Magazine Copies two or more originals of two-sided to make copies in page order when they are folded and stacked.
Page 876
Copying • Open to right GCAH040E ❖ Book → 2 Sided Copies a two-page spread original onto one sheet with one page per side. You cannot use the bypass tray with “Book → 2 Sided” or “Front&Back → 2 Sided”. ❖...
Page 877
Copier Functions ❖ How to fold and unfold copies to make a booklet As shown below, fold a copy along the centerline, and open. GCBOOK2E Open to left Open to right ❖ How to fold and unfold copies to make a magazine As shown below, fold and stack copies to make a magazine, and open.
Page 878
Copying Press [Dup./Combine/Series]. Press [Book]. Select a book type separately for the original ([1 Sided] or [2 Sided]) and copy ([Booklet] or [Magazine]), or select a book type from [Book → 2 Sided] and [Front&Back → 2 Sided]. Select the paper. Press [OK].
Copier Functions Margin Adjustment Copies originals leaving a binding margin. Press [Edit / Color]. Press [Margin Adj.]. Set a binding margin for a front page. Press [←] and [→] when setting the left and right margins, and [↓] and [↑] when setting the top and bottom mar- gins.
Copying Erase This function erases the center and/or all four sides of the original image. This function has the following three types: ❖ Border This mode erases the edge margin of the original image. GCCENT2E ❖ Center This mode erases the center margin of the original image. GCCENT1E ❖...
Page 881
Copier Functions Note ❒ The relationship between the original orientation and the erased part is as fol- lows: L original K original Erased part 2-99 mm (0.1”-3.9”) ❒ The erase width is set to 10 mm (0.4 inch) as a default. You can change this setting with User Tools.
Page 882
Copying Set an erase border width with [n] or [o]. Pressing [n] or [o] changes the width in increments of 1 mm (0.1 inch). Pressing and holding down the relevant key changes the width in increments of 10 mm (0.4 inch). Press [OK] twice.
Page 883
Copier Functions Press the key for the border you want to change and set an erase width with [n] and [o]. Press [OK] twice. Place your originals, and then press the {Start} key. Center Erase This mode erases the center margin of the original image. Press [Edit / Color].
Page 884
Copying Center/Border Erase (same width) This mode erases both the center and edge margins of the original image. Press [Edit / Color]. Press [Erase]. Press [Erase Center / Border]. Press [Erase Center / Border]. Press [Same Width]. Press [Center], and then set the erase center width with [n] and [o]. Press [Border], and then set the erase border width with [n] and [o].
Page 885
Copier Functions Center/Border Erase (different width) This mode erases both the center and edge margins of the original image. Press [Edit / Color]. Press [Erase]. Press [Erase Center / Border]. Press [Erase Center / Border]. Press [Different Width ]. Press the key for the order you want to change and set an erase width with [n] and [o].
Copying Background Numbering Use this function to have numbers printed on the background of copies. If this function is used in conjunction with Sort, same numbers are printed on a depart- ment basis, helping you to keep track of confidential documents. Important ❒...
Copier Functions Preset Stamp Messages are stamped on copied. Important ❒ You cannot use the bypass tray with this function. ❒ Only one message can be stamped at a time. GCSTMP1E • The following eight messages are available for stamping: “COPY”, “URGENT”, “PRIORITY”, “For Your Info.”, “PRELIMINARY”, “For Internal Use Only”, “CONFIDENTIAL”, “DRAFT”...
Page 888
Copying Press [Edit / Color]. Press [Stamp]. Press [Preset Stamp]. Select the desired message. You can change the Stamp Color, position, size, and density of the stamp. Press [All Pages] or [1st Page Only] to select the print page. After you specify all desired settings, press [OK]. Press [OK] twice.
Copier Functions Changing the stamp Color Changes the stamp Color. Press [Stamp Color]. Select the stamp Color, and then press [OK]. Changing the stamp position, size and density Changes the stamp position, size and density. Press [Change]. Select the position for print, size, and density, and then press [OK]. User Stamp Copies a scanned image as a stamp.
Page 890
Copying ❖ Stamp position and original orientation The user stamp positions differ according to the orientation in which you place your originals. GCSTMP6E Press [Edit / Color]. Press [Stamp]. Press [User Stamp]. Select the stamp you require. You can change the stamp Color and position.
Page 891
Copier Functions Press [All Pages] or [1st Page Only] to select the print page. After making all settings, press [OK]. Press [OK]. Place your originals, and then press the {Start} key. Note ❒ When the Full Color Copy is selected, the full Color counter will advance to “1”.
Page 892
Copying To program the user stamp This function scans an image that is used as a user stamp. The range of stamp images for readability is 10–297 mm (0.4”-11.7”) high and 10–432 mm (0.4”-17.0”) wide. However, if the value exceeds the maximum value of the area (5,000 mm , 7.75 inch ), it is corrected within the range of the area au-...
Page 893
Copier Functions Place the original for user stamp on the exposure glass, and then press [Start Scanning]. The original will be scanned, and the stamp will be registered. Press [Exit]. Press [Exit]. The display returns to the Printer Configuration menu screen. Press [Exit].
Copying Press [Copier / Document Server Features]. Press [Stamp]. Press [User Stamp]. Press [Program / Delete Stamp]. Press [Delete], and then press the stamp number you want to delete. Select [Yes], and then press [Exit]. Press [Exit]. The display returns to the Copier/Document Server Features main menu. Press [Exit].
Page 895
Copier Functions ❖ Stamp position and original orientation The date stamp positions differ according to the orientation in which you place your originals. 1/21/2006 1/21/2006 AMG063S Important ❒ You cannot use the bypass tray with this function. Press [Edit / Color]. Press [Stamp].
Page 896
Copying Press [All Pages] or [1st Page Only] to select the print page. After all settings are complete, press [OK]. Press [OK]. Place your originals, and then press the {Start} key. Note ❒ You can change the Stamp Color, format and position of the date to be stamped.
Page 897
Copier Functions To change the date stamp position Changes the stamp position. Press [Change] under < Stamp Position >. Select the desired date stamp position, and then press [OK].
Copying Page Numbering Use this function to print page numbers on your copies. CP2G0100 There are six types of page numbering. • P1,P2,… • 1/5,2/5,… • -1-,-2-,… • P.1,P.2,… • 1, 2, … • 1-1,1-2,… ❖ Stamp position and original orientation The page stamp positions differ according to the orientation in which you place your originals.
Page 899
Copier Functions Press [Edit / Color]. Press [Stamp]. Press [Page Numbering]. Select the format. After you specify all desired settings, press [OK]. Press [OK]. Place the originals, and then press the {Start} key. Note ❒ You can specify the stamp Color, position, pages to be stamped, and num- bering.
Page 900
Copying Changing the stamp position Changes the stamp position. Press [Change] under < Stamp Position >. Select the desired position, and then press [OK]. Specifying the first printing page and start number (“P1,P2...”, “-1-,-2-...”, “P.1,P.2...”, “1,2...”) Below explains the example when “P1, P2 …” is selected. The steps are the same for other cases.
Page 901
Copier Functions Press [First Printing Number], enter the number of page from which to start numbering from with the number keys, and then press the {q} key. The example below shows when the first printing page is “2” and the start number is “3”.
Page 902
Copying Press [First Printing Number], enter the number of page from which to start numbering from with the number keys, and then press the {q} key. Press [Last Number], enter the number of page at which to stop numbering with the number keys, and then press the {q} key. Proceed to step when not changing.
Copier Functions Press [First Chapter No.], enter the chapter number from which to start num- bering with the number keys, and then press the {q} key. You can enter between 1 and 9999 for the chapter number from which to start numbering.
Page 904
Copying Whole Area Repeat Repeatedly copies the entire image. The number of repeated images depends on the original size, copy paper size, and reproduction ratio. For example, see the following table: ❖ Original: A5K/Copy paper: A4K or Original: A5L/Copy paper A4L, Original: ”...
Page 905
Copier Functions Place your original, and then press the {Start} key. Specified Area Repeat Repeatedly copies a specified portion of the image. Determine the location of the area's base point and its length and width. GCRE032E Set on the exposure glass Important ❒...
Copying Press [OK] twice. Place the original on the exposure glass, and then press the {Start} key. Double Copies One original image is copied twice on one copy as shown. Important ❒ You cannot use the bypass tray with this function. ❒...
Copier Functions Press [Edit / Color]. Press [Edit Image]. Press [Double Copies]. Press [OK]. Select the paper. Place your originals, and then press the {Start} key. Note ❒ See “Double Copies Separation Line”, General Settings Guide. Centering You can make copies with the image moved to the center of the copy paper. Important ❒...
Page 908
Copying GCCNTR0E Select the paper. Press [Edit / Color]. Press [Edit Image]. Press [Centering]. Press [OK]. Place your originals, and then press the {Start} key.
Copier Functions Positive/Negative Copies an image inverted. If your original is black and white, copy images are inverted. If your original is Color, the density, darkness and brightness of each Color will be reversed and inverted to complimentary Colors. Important ❒...
Copying Mirror Copies by reversing the image from left to right, as reflected in a mirror. GCMILL1J Press [Edit / Color]. Press [Edit Image]. Press [Mirror Image]. Press [OK]. Place the originals, and then press the {Start} key.
Copier Functions Covers Covers function includes Front Cover and Front/Back Covers. ❖ Front cover The first page of your originals is copied on specific paper sheet for covers, or a cover sheet is inserted before the first copy. • Copy •...
Copying Press [Cover/Slip Sheet]. Select [Copy] or [Blank] for the cover sheet, and then press [OK]. Select the paper tray that contains the sheet paper to copy the originals. Place your originals in the ADF,and then press the {Start} key. Note ❒...
Page 913
Copier Functions Press [Cover/Slip Sheet]. Press [Designate / Chapter]. Select [Designate: Copy] or [Designate: Blank]. Press the key to select the chapter number. To select pages 11 to 20 (chapter), press [11-20]. Enter the page location of the first page of the first chapter with the number keys, and then press the {q} key.
Copying Chapters The page locations you specify with this function will appear on the front of copy sheets. GCSHOWOJ Important ❒ Before selecting this function, press [Dup./Combine/Series] and select “1 Sided → 2 Sided” or “Combine”. ❒ This function can be used only when you use the Duplex (1 Sided→2 Sided) or Combine function.
Copier Functions Place the originals, and then press the {Start} key. Slip Sheets Every time an original page changes, a slip sheet is inserted. You can also print on the inserted slip sheet. Since a slip sheet is inserted for every page, you can protect printed surfaces. This function is useful in copying OHP transparencies.
Page 916
Copying Press [Cover/Slip Sheet]. Select [Copy] or [Blank], and then press [OK]. Select the paper tray containing the sheet paper to copy the originals. When using OHP transparencies, open the bypass tray. Place the originals, and then press the {Start} key. Note ❒...
Storing Data in the Document Server Storing Data in the Document Server The Document Server enables you to store documents in the memory and print them as you want. Important ❒ Data stored in the machine might be lost if some kind of failure occurs. The manufacturer shall not be responsible for any damage that might result from the loss of data.
Page 918
Copying Press the {Start} key. Originals are scanned and stored in memory. Note ❒ To stop scanning, press the {Clear/Stop} key. To resume a paused scanning job, press [Continue] in the confirmation display. To delete scanned images and cancel the job, press [Stop]. The originals placed in the ADF are deliv- ered.
Programs Programs You can store the frequently used copy job settings in the machine memory and recall them for future use. You can store up to 10 programs. Note ❒ You can select the standard mode or program No. 10 as the mode to be set when modes are cleared or reset, or immediately after the operation switch is turned on.
Copying Press the program number you want to store. Enter the program name with the letter keys on the display panel. You can enter up to 40 characters. Press [OK]. The screen returns to the program screen, showing the program number fol- lowed by the program name.
Programs Note ❒ When you want to check the contents of a program, recall the program. ❒ When it is overwritten, the previous program is deleted. Deleting a Program Erases the contents of program. Press the {Program} key. Press [Delete]. Press the program number you want to delete.
Copying Place the originals, and then press the {Start} key. Note ❒ Only programs with m against them contain a program in step Programming Defaults in Initial Display This section describes how to program defaults for the initial display when modes are cleared or reset, or immediately after the operation switch is turned.
3. Document Server Using the Document Server enables you to store documents being read with the copy feature on the hard disk of this machine. Thus you can print them later ap- plying necessary conditions. Relationship between Document Server and Other Functions State of the Document Server varies depending on the function used.
Document Server Document Server Display Following explains the screens and icons displayed in the Document Server function. ❖ Document Server initial display AMG064S This screen displays the opera- The function used for the storing tional status and messages. as well as the color mode is dis- played.
Relationship between Document Server and Other Functions Note ❒ All the stored documents may not be displayed depending on the security function specified. Simplified Display This section explains how to use the “Simplified Display” and introduces its keys. You can view the simplified display from the Document Server's initial screen by pressing the {Simplified Display} key.
Document Server Preview Display Following explains the preview display displaying procedure and the items dis- played on this screen. The Preview Display appears after scanning completes. You can also display stored documents on the preview display. For details, see “Displaying the List of Stored Files”, Scanner Reference.
Using the Document Server Using the Document Server Following describes how to use the Document Server. Storing Data Following describes the procedure for storing documents on the Document Server. Important ❒ Data stored in the machine might be lost if some kind of failure occurs. The manufacturer shall not be responsible for any damage resulting from loss of data.
Page 928
Document Server Press {Document Server} key. AMG043S Press [Scan Original]. Above operation sets up the user name, document name and password. When not changing a document name, the name will be automatically set. Set the original. Specify the original scanning conditions. Press {Start} key.
Page 929
Using the Document Server Note ❒ When interrupting the scan, press {Clear/Stop} key. Pressing [Continue] from the confirmation screen resumes the scan. Pressing [Stop] deletes the scanned images and the original on the automatic document feeder (ADF) will be ejected. ❒...
Page 930
Document Server To register or change a user name (When using a user name not registered to the Address Book) Following describes the procedure for registering or changing a user name to be attached to a stored document. Display the original scan screen. Select the user name and then press [OK].
Page 931
Using the Document Server To change a file name Following describes the procedure for changing a name to be attached to a stored document. Display the original scan screen. Press [File Name]. The document name change screen will appear. Press [Clear] to delete the document name to be automatically set. Enter document name and then press [OK].
Document Server To set or change a Password Following describes the procedure for setting or changing a password to be at- tached to a stored document. Display the original scan screen. Press [Password]. Enter the password from the numerical keypad and then press [OK]. You can use four to eight digits for specifying the password.
Using the Document Server Press [Change User Name], [Change File Name] or [Change Password]. From the respective change screens, enter the new user name, document name or password and then press [OK]. Press [OK]. Note ❒ Depending on the security setting, [Access Privileges] may appear instead of [User Name].
Document Server Press [Details]. Details of the document will be displayed. Note ❒ When you have selected two or more documents, you can view the infor- mation of the documents in the order of [U][T]. ❒ Pressing [Exit] restores the document selection screen. Searching for a Stored Document Following describes the procedure for searching a stored document from user name or document name.
Page 935
Using the Document Server To search by file name Following describes the procedure for searching a stored document from the document name. Press {Document Server} key. Press [File Name]. Enter the document name to be searched and then press [OK]. A document name that matches completely from the starting character will be searched and displayed on the document selection screen.
Document Server When the user name is not registered, press [Manual Entry] and then enter the user name from the input screen to be displayed. Then press [OK]. Press [OK]. A document name that matches completely from the starting character will be searched and displayed on the document selection screen.
Page 937
Using the Document Server Enter the number of print copies from the numerical keypad. Up to 999 copies are specifiable. Press {Start} key. Printing will be started. Note ❒ You can search the target document using, in step , [User Name] or [File Name] situated in the upper left side of the screen.
Page 938
Document Server ❒ When two or more documents are selected, pressing [U][T] allows you to confirm the user name, document name and printing order being designat- ed for deletion in step ❒ Pressing [Select File] restores the document selection screen. ❒...
Page 939
Using the Document Server Sample Print When print copies are massive, you can print a single copy in advance to check appropriateness of the printing order of the selected documents and the printing conditions. Important ❒ This feature is enabled when the sort function is selected in the printing con- ditions.
Page 940
Document Server Printing the First Page In order to confirm the print results, you can print the first page alone of the doc- ument selected from the document selection screen. When two or more documents are selected, the first page of the respective doc- uments is printed.
Page 941
Using the Document Server Press [Specified Page]. Specify the page to be printed from the numerical keypad and then press {q} key. Press {Start} key. Note ❒ You can search the target document using, in step , [User Name] or [File Name] situated in the upper left side of the screen.
Document Server Specify the printing start page from the numerical keypad and then press {q} key. Specify the printing end page from the numerical keypad and then press {q} key. Press {Start} key. Note ❒ You can search the target document using, in step , [User Name] or [File Name] situated in the upper left side of the screen.
Using the Document Server Note ❒ It deletes the stored documents at a time. See “Delete All Files in Document Server”, General Settings Guide. ❒ Using Web Image Monitor allows you to print a document stored in the Document Server from your PC. ❒...
Document Server Downloading Stored Documents Following describes the procedure for downloading a stored document to the PC by use of Web Image Monitor. Important ❒ When downloading a document stored with the copy feature, you must pre- pare the extended data conversion board. Start Web browser.
4. Appendix Following describes the copy machine's specifications and the function compat- ibility. Function Compatibility The combination chart given below shows which modes can be used together. Blank space: These modes can be used together. ×: These modes cannot be used together. The first mode selected will be the mode you are working in.
Page 946
Appendix When “2 Sided → 1Sided” is specified, the combination with the front cover or slip sheet (Designate) is ×. Combination of “Staple: Top” and “Punch: Left” is ×. Combination of “Staple: Left” and “Punch: Top” is ×. Combination of “Staple: Center” and “Punch: Left”/“Punch:Top” is ×. AMG070S...
Supplementary Informations Supplementary Informations Following describes the detailed specifications of the respective functions. ❖ Mixed Size mode • Since small originals may not be correctly aligned with the original guide, the copy image may be slanted. • You can place originals of two different sizes at a time. •...
Page 948
Appendix • Inch version 400% (Area ratio 16 times): - ” × 8 ”→11” × 17” 200% (Area ratio 4 times): 5 ” × 8 ” × 14” 155% (Area ratio 2 times): 5 ”→8 ” × 11”→11” × 17” 129%: 8 ”...
Page 949
Supplementary Informations ❖ Sort, Rotate Sort, Stack • Following shows the stackable paper sizes and the orientation. • Internal shift sort tray 12” × 18”L, A3L, B4L, A4KL, B5KL, A5KL, B6L, A6L, 11” × 17”L, ” × 14”L, 8 ” × 11”KL, 5 ”...
Page 950
Appendix • 1000-sheet finisher (On the Finisher shift tray, stack stapled paper) ” × 11”K: 10 to 50-feaf binging...100 to 20 copies, 2 to 9-leaf A4K, 8 binding...100 copies ” × 11”K: 10 to 50-feaf binging...50 to 10 copies, 2 to A4L, B5 JISL, 8 9-leaf binding...100 copies A3L, B4L, 11”...
Page 951
Supplementary Informations • When using the Staple function with [1 sided → Comb 2 orig], [1 sided → 2 sided:TtoB], [1 sided → 2 sided:TtoT], [Double Copies], select K paper for L original and L for K original. • When using the Staple function [Staple: Left 2] or [Staple: Top 2] with the Combine function [1 Sided →...
Page 952
Appendix • 1000-sheet finisher (Finisher shift tray) ” × 11”K: 10 to 50-feaf binging...100 to 20 copies, 2 to 9-leaf A4K, 8 ” × 11”K: 10 to 50-feaf bing- binding...100 copies A4L, B5 JISL, 8 ing...50 to 10 copies, 2 to 9-leaf binding...100 copies A3L, B4L, 11”...
Page 953
Supplementary Informations • Punchable paper sizes are as follows: • 2 and 4 holes type (2 holes) A3L, B4 JISL, A4LK, B5 JISKL, A5K, 11” × 17”L, 8 ” × 14”L, ” × 11”KL, 7 ” × 10 ” × 13”L, 8 ”...
Page 954
Appendix ❖ Combine • In this mode, the machine selects the reproduction ratio automatically. This reproduction ratio depends on copy paper sizes and the number of originals. • The reproduction ratios you can specify are 25-400%. If the machine is equipped with a Copy Data Security Unit, the range is from 50 to 400%.
Page 955
Supplementary Informations ❖ Image Repeat • Depending on the paper size, ratio, and orientation, parts of repeated im- ages may not be copied. ❖ Centering • Though the original is set to a different orientation from the paper loaded, the machine will not rotate the image by 90° (Rotate copy). ❖...
Page 956
Appendix ❖ Date Stamp • When using Combine mode, the date stamp is printed as follows: • With the Combine function 1/21/2006 AMG067S • With the Magazine or Booklet function 1/21/2006 1/21/2006 AMG068S ❖ Page Numbering • When page numbering is used with Combine mode, page numbers are printed as follows: •...
Page 957
Supplementary Informations • If you combine this function with the Duplex (Top to Top) function and se- lect [P1,P2...] or [1/5,2/5...], page numbers on the back are printed as follows: GCSTMPBE Front Back ❖ Front Cover, Front/Back Cover • If Blank mode is selected, the cover will not be counted as a copy. •...
Page 958
INDEX border erase Bypass tray 1 Sided 16 Pages → Combine 2 Side bypass tray 1 Sided 2 Pages → Combine 1 Side Bypass Tray Copy 1 Sided 4 Pages → Combine 1 Side 1 Sided 4 Pages → Combine 2 Side 1 Sided 8 Pages →...
Page 959
date Holding print jobs Date Stamp How to fold How to fold and unfold default copies to make a booklet Deleting a Document How to fold and unfold Deleting a Program copies to make a magazine Deleting jobs How to Read This Manual Deleting User colors How to unfold density...
Page 960
One-Sided Combine ratio onto 1-Sided Pages xvii Recalling a Program Option reflect Orientation Registering the adjusted Color balance Original Regular sizes Original Orientation Renaming a Color Original orientation Repeat original orientation repeat Original orientation and completed copies Reproduction Ratio Originals reverse Originals and copy orientation Rotate Sort...
Page 961
Text Text/Photo Text/Photo Sensitivity To change a file name To delete the user stamp To register or change a user name To search by file name To search by user name To set or change a Password Two-Sided Combine User Color User Stamp various sizes What You Can Do with This Machine...
Page 963
In accordance with IEC 60417, this machine uses the following symbols for the main power switch: a means POWER ON. b means POWER OFF. c means STAND BY. ® Acrobat is a registered trademark of Adobe Systems Incorporated. Other product names used herein are for identification purposes only and might be trademarks of their respective companies.
Page 964
Type for C2525/DSc525/LD425c/Aficio MP C2500 Type for C3030/DSc530/LD430c/Aficio MP C3000 EN USA B230-7607...
Need help?
Do you have a question about the C3030 and is the answer not in the manual?
Questions and answers