Table of Contents
Advertisement
Quick Links
Advertisement
Table of Contents

Subscribe to Our Youtube Channel
Related Manuals for Adesys Octalarm-IP


Summary of Contents for Adesys Octalarm-IP
- Page 1 Octalarm-IP alarm dialer Pincodes The Octalarm-IP is given the following two pincodes in the factory: Administrator: 1111 Installer: 9999 Replace these with codes of your own choice during installation or turn off the use of pincodes in option menu General.
- Page 2 Octalarm-IP 100410E...
- Page 3 Octalarm-IP 100104E...
-
Page 4: Table Of Contents
Sending test reports ..................35 What you should do if an alarm is activated (resetting) ........35 Reset with SMS to Octalarm-IP (only with GSM model) ........35 Requesting alarm status via SMS (only with GSM model) ........35 Switching the output with voice response ............36 Switching outputs with SMS (only with GSM model):.......... - Page 5 9- Logging in to the alarm via the internet ............37 10- Upgrade procedure via ACC connection............. 38 11- Installation and mounting ................39 Switching the Octalarm-IP on and off .............. 39 Recommendations ....................39 Alarm reporting by telephone using internet telephony (VoIP) ......39 Octalarm-IP in combination with an ADSL-modem .........
-
Page 6: 1- General
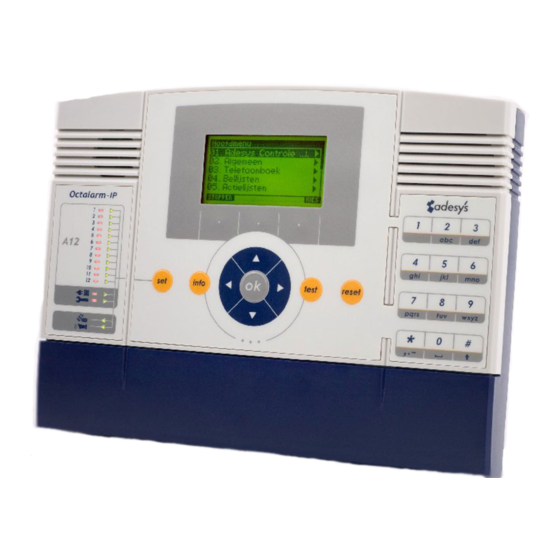
1- General The Octalarm-IP is an alarm system that detects malfunctions and calamities in both manned and unmanned installations and processes and forwards them via the telephone. There are various optical and acoustic options on site for reporting the malfunctions. - Page 7 • Ensure that the emergency power supply is monitored for any peripheral equipment that may be present. • When the Octalarm-IP has been set up to report via the internet, the Security DSL splitter or a separate overvoltage protection should be used to protect the internet modem if possible.
-
Page 8: 2- The Principle Of Telephone Alarms
Installer User Alarm contacts for the installation that is to be monitored are connected to the Octalarm-IP. Alarm notification is given via a telephone line, VoIP or GSM connection. This alarm process can be controlled and monitored via the internet. -
Page 9: Alarm Sequence Diagram
Forward report code or spoken message Reset by calling back set? Action Wait to be called back Called back on time? Report correctly reset? End of report procedure. If an input contact remains active, the report procedure will be started again. Octalarm-IP 100104E... -
Page 10: 3- Concepts And Terms
Roles have been introduced to the control structure because not everyone can have access to all the Octalarm-IP functions due to administration and safety reasons. Each Role has its own set of authorisations. This means that each Role gives access to specific set up functions. -
Page 11: About The Adesys Control Centre (Acc)
The ACC provides detailed management information concerning responses to alarms, state of the installation and the accessibility of the equipment for the end user. The installer gets a better diagnosis of the installation and control of the settings. The Octalarm-IP can also be set up via the internet. -
Page 12: How The Octalarm-Ip Works
How the Octalarm-IP works Input Action Call list Telephone book list When programming the alarms, data has to be entered in four of the Octalarm-IP’s basic components: • Telephone book • Call list • Action list • Inputs Telephone book... -
Page 13: Call List
Telephone Book can be grouped in a Call List. When, for example, the first receiver gives no response within a set time the Octalarm-IP will select the following receiver. Specific receivers can also be prioritised. You can find more information about compiling a Call List on page 23. -
Page 14: Action List
An Action List includes which Call Lists have to be used, whether the Octalarm-IP should give a local report and also which alternative Call Lists should be used during the night and at weekends for example. You can find more information about compiling Action Lists on page 24. -
Page 15: Inputs
Input can be allocated to a different Action list which makes it possible for a specific destination to receive the alarm depending on which input is activated. You can find more information about setting up the inputs on page 26. Octalarm-IP 100104E... -
Page 16: 4- Front Panel
The loudspeaker is located behind the grill on the right side of the front panel. It is used for any local alarms. 6 Test key This is used for testing: • the alarm inputs • local alarms • recorded messages. Octalarm-IP 100410E... - Page 17 Octalarm-IP via the ethernet. No extra 10 System malfunctions software is needed to do this. Use can These two LEDs indicate if reports of the use a standard web browser such as ®...
-
Page 18: 5- Programming
Internet Explorer or Mozilla Firefox browsers. If your Octalarm-IP is part of the corporate network you can program it using one of the computers on this network. If you connect your laptop directly, you should first start the dhcp software which can be downloaded free from Support on www.adesys.nl. Start your browser and enter the alarm’s IP address. -
Page 19: Quick Start Mode For Fast, Easy Set Up
If an alarm is activated the standard action list results in the following actions: • start the Octalarm-IP’s bell • turn on the external bell and flashing/rotating light • start the standard call list without delay • The standard Call List results in the following call actions: •... - Page 20 • etc. No reset reports are sent. N.B. Enter as many telephone numbers as possible so that there are sufficient reporting options. If the above-mentioned procedure is insufficient, choose complete so that all set up options are available. In the following chapter “Complete Set Up Procedure” (page 17) the quick start menus have a thicker outline.
-
Page 21: 6- Complete Procedure / Step Plan
Step 10 Specify how the alarm dialer has to deal with incoming and outgoing telephone lines. Step 11 When the alarm dialer has a number of line interfaces (PSTN, GSM), it can be specified which type of message should use which line interface. Octalarm-IP 100104E... -
Page 22: Preparations For Setting Up
Setting up with a PC or laptop: The alarm can also be set up using a PC or laptop as well as with the Octalarm-IP. This is a fast and easy to follow. Install the IP-Prog on the PC to do this. -
Page 23: Step 1: Settings Acc (Optional)
(only if the alarm is connected to the internet.) You will be offered the following menus when connecting the Octalarm-IP to the ACC. A number of the fields that have to be filled in depend on the choice that you have made previously. -
Page 24: Step 2: Setting Language, Location Name, Date And Time
Step 2: Setting language, location name, date and time 02.General You will be offered the following menus when entering data in the “General” menu: time hrs:min:secs date day-mnth-yr location (textt) location (voice message) standard/recorded options (F3) play record language English following Dutch German... -
Page 25: Step 3: Entering A Receiver In The Telephone Book
(PSTN) call back for confirmation pager telephone number pager exchange (PSTN) call back for confirmation yes call back time location code telephone number ARA alarm server Octalarm-IP 100104E... - Page 26 First choose a user/alarm receiver from the list or use the F5 Options function key to make a new one or remove an old one. By allocating a ‘role’ the receiver will be given specific authorisation. There are four possible roles: Only reset - For users that are only authorised for alarm procedures and can never change settings.
-
Page 27: Step 4: Compiling A Call List
It is possible to include a receiver a number of times in a Call List. This make it possible to alternate calls between receivers or have repeats for a specific receiver for example. So, based on the example on page 33, you could have two calls to John and then one to Sophie. Octalarm-IP 100104E... -
Page 28: Step 5: Compiling An Action List
Step 5: Compiling an Action List 05.Action Lists The following menus are offered when entering receivers in the Telephone Book: A number of the fields that have to be filled in depend on the choice that you have made previously. naam 1 + 3 local alarms... - Page 29 When somebody is available during the day to deal with any alarms on site, for example, it’s unnecessary to call receivers who are elsewhere. In such as case only the local alarm might be used, or the telephone number of the alarm receiver who is available. Octalarm-IP 100104E...
-
Page 30: Step 6: Configuring Inputs
Step 6: Configuring Inputs 06.Inputs The following menus are offered when configuring Inputs: A number of the fields that have to be filled in depend on the choice that you have made previously. name input type external reset Input contacts open when idle (NO) closed when idle (NC) active when... -
Page 31: Step 7: Configuring Outputs
ADSL splitter. See explanation on page 46. An Output can be set up to be switched remotely by an SMS switch. This is only possible with a GSM Octalarm model. Fuller explanation on page 36. Octalarm-IP 100104E... -
Page 32: Step 8: Settings For Alarm Reporting During System Malfunctions
Step 8: Settings for alarm reporting during system malfunctions 07.System Malfunctions You will be offered the following menus when setting up for dealing with system malfunctions: name active when seconds stable reset when seconds stable action list If status changes stop action list finish action list text when active... -
Page 33: Step 9: Settings For Local Alarm Reporting
More comprehensive information about the local alarm options can be found on page 46. Octalarm-IP 100104E... -
Page 34: Step 10: Setting Connections (Pstn, Gsm*, Ethernet)
Telephone Book is not recommended. When, for example, the telephone exchange is unexpectedly out of order and the Octalarm-IP has to fall back on a connection via the GSM module, a preselection nought will cause the GSM connection to fail. - Page 35 Ethernet (UTP) IP address assign automatically enter manually address subnet mask standard gateway preferred DNS server alternative DNS server (optional) set up via web port Octalarm-IP 100104E...
-
Page 36: Step 11: Setting Preferred Networks (Alarm Receivers)
How to deal with a number of line interfaces Suppose that you have an Octalarm-IP that has a PSTN and a GSM line interface. When, for example you have an SMS package but continue making expensive calls via GSM, you would prefer that SMS messages were sent via the GSM module and the telephone calls via the fixed line. -
Page 37: 7- Application Example
“assistant administrator”. Martin has to be able to reset the alarm if there are malfunctions but he never changes settings. He has the authorisation “Only reset”. The following diagram shows how the dialer should be set up. Octalarm-IP 100104E... - Page 38 The following steps have to be followed in order to make the settings illustrated above: • John, Sophie, Jack and Martin are entered in the Telephone Book. They are each given names, a call number and an authorisation • The Call Lists Works managers and Technical staff are drawn up. •...
-
Page 39: 8- Testing And Resetting
Requesting alarm status via SMS (only with GSM model) If an SMS with the text “status” is sent to the GSM Octalarm-IP model, an SMS will be sent back that offers a listing all active alarms. -
Page 40: Switching The Output With Voice Response
Switching the output with voice response Outputs on the Octalarm-IP can be set up for remote switching. This makes it possible to give the Octalarm-IP switch commands remotely with a (GSM-) telephone. Because of this it is possible to carry out a reset on the monitored technical installation for example. -
Page 41: 9- Logging In To The Alarm Via The Internet
9- Logging in to the alarm via the internet If the alarm is connected to the internet and the installer’s code and user password have been entered, a connection can be made with the Octalarm-IP. This is done as follows: As an installer on the PC Go to the ACC website: http://www.meldcentrale.nl... -
Page 42: 10- Upgrade Procedure Via Acc Connection
Step-by-step plan If the dialer is already connected to the Adesys Control Centre start at step 3. Connect the alarm to the ACC / Check if the dialer is connected to the ACC. Log in to the dialer. -
Page 43: 11- Installation And Mounting
VoIP modem. Measures to take when using VoIP • Connect the Octalarm-IP directly to the internet via the ethernet connection from the ADSL modem to make line testing possible. • Ensure that there is a monitored emergency power supply for the internet equipment so that it will continue to function if there is a power failure. -
Page 44: Octalarm-Ip In Combination With An Adsl-Modem
See the connection diagram below. Octalarm-IP in combination with an ADSL-modem Follow the diagram given below when the Octalarm-IP is connected in combination with an ADSL modem. Do not use a standard splitter with ADSL but a Security DSL splitter with built-... -
Page 45: Octalarm-Ip In Combination With Voip
Refer to page 35 of the manual concerning this. The Octalarm should be connected as follows: This set-up has overvoltage protection and an emergency power supply in accordance with the recommendations. Both are available from Adesys. Octalarm-IP 100104E... -
Page 46: Housing
Housing Opening The Octalarm’s inputs and outputs are located behind the operating panel. Simply slide up the operating panel to make connections: • Slide the operating panel up to the click stop (1). Do not use too much force when doing this. If the alarm dialer doesn’t slide open easily the operating panel may be jammed and it will then be necessary to find the cause of the jam first and sort it out. -
Page 47: Wall Mounting
• Hang the alarm dialer on the screw that’s already in the wall, then hold it vertically and mark the screw hole at the bottom left. • Remove the alarm dialer and drill a new hole. • Hang the Octalarm-IP on the first screw again, hold it vertical and screw in the second screw. Octalarm-IP 100104E... -
Page 48: Connecting Inputs
Connecting inputs All inputs should be activated by potential-free contacts. Alarm inputs Both Normally open and Normally closed contacts can be used. Connect the potential-free alarm contacts between the INPUT you have chosen and the GND clamp. -
Page 49: Connecting Via Sensorbus
They should therefore never be used in combination and old blocks should not be connected to the Octalarm-IP. All terminal blocks are coded from 1 to 12. The codes correspond to the alarm inputs that the terminal block will activate. -
Page 50: Connecting Outputs/Local Alarm
Outputs 1 and 2 Outputs 3 and 4 Output functions The outputs on the Octalarm-IP have a variable function. The options are identical for each output: • external buzzer – follows the internal buzzer • external flashing light – in contrast with the alarm buzzer the flashing light cannot be cut short with the reset key during an alarm situation. -
Page 51: Manufacturer's Settings For Outputs
If these functions are not utilised these outputs can also be used for remote switching for example. Relay output NO3 is set for controlling the Adesys Security DSL splitter as standard and NO4 is for remote switching with a telephone. -
Page 52: Connecting External Communications
N.B.: If the Octalarm-IP is installed via a telephone switchboard, it is important that the telephone switchboard has an emergency power supply that is monitored by the Octalarm-IP. This is available from Adesys. -
Page 53: Connecting Ethernet (Utp) And/Or Internet
Connecting ethernet (UTP) and/or internet Connect the Octalarm-IP to an ethernet wall socket using a cable with RJ-45 connectors or to a router. The alarm dialer will then wait until it is assigned an IP address by the DHCP server. -
Page 54: Positioning The Optional Gsm Module
• Turn the alarm dialer on again. (Do not carry out a software update now! That would permanently damage the alarm.) • Contact Adesys so that the type change can be carried out via the ACC. Further instructions will now be sent from Adesys. -
Page 55: Mains Failure And Battery
‘battery empty’ lamp will light and the message ‘battery malfunction’ will be shown on the display. The internal buzzer will be activated and a telephone report will also be made via the “battery empty” channel. The Octalarm always remains operational during the battery test. Octalarm-IP 100104E... -
Page 56: Changing The Battery
LED indication light has switched on. If you slide up the Octalarm-IP’s operating panel in relation to the bottom plate and then completely remove it (see page 37), you will see the battery on the right, above the mounting for the sensor. -
Page 57: 12- Error Reports And System Malfunctions
Battery malfunction: now due for replacement It is not possible to connect to the ACC. Causes: the ethernet ACC: cable is disconnected, no access to the internet or the ACC is temporarily unavailable Short-circuit in Sensorbus. Check cabling. Sensorbus: Octalarm-IP 100104E... -
Page 58: 13- Logbook
13- Logbook The Octalarm-IP has a comprehensive logbook. All events are recorded in this with their time and date. There are three ways to read the logbook: • On the alarm dialer itself • ® ® With a PC connected to the alarm dialer via Microsoft... -
Page 59: 14- Features And Technical Data
• Emergency power supply provided by internal NiMH battery with battery monitoring and trickle charger • Built-in alarm buzzer, connection for external alerts • Built-in overvoltage protection • Can be combined with the Adesys ARA (Alarm Registration and Processing System) reporting panel. Octalarm-IP 100104E... - Page 60 Service temperature: -5 to +50 degrees Celsius N.B.: The specifications of the Octalarm-IP are indicative and still subject to change. The supplied GSM module is suitable for 850, 900, 1800 and 1900 MHz (quad band). The default setting is for use with the European 900/1800 MHz network. When used in the US or in...
-
Page 61: 15- Summary Of All Settings
15- Summary of all settings 01.Adesys Control Centre (ACC) connection none connected installer’s code password 02.General time hrs:min:secs date day-mnth-yr location (textt) location (voice message) standard/recorded options (F3) play record language English following Dutch German French manage Use pincodes settings... - Page 62 03.Telephone Book name pincode (when used) role report to none report to send type of telephone telephone number messa message telephone number sms exchange (PSTN) call back for confirmation pager telephone number pager exchange (PSTN) call back for confirmation yes call back time location code telephone number ARA...
- Page 63 04.Call List name priority very high high average very low report to options (F3) remove following repeat if not accepted times repeat delay none 1 minute 2 minutes 5 minutes 10 minutes Octalarm-IP 100104E...
- Page 64 04.Action List name local alarms call list on activation when there is no no repeat reset continue repeat time repeating repeat times call list on reset time window block the report start blocking hrs:mins:s stop blocking hrs:mins:s weekend = nighttime mode use alternative call list start alt.
- Page 65 (F3) record alpha numeric message following on reset voice message on reset standard/recorded options play (F3) record following Octalarm-IP 100104E...
- Page 66 07.Outputs name output type external bell external flashing/rotating light ADSL splitter can be switched follow (bistable) text when on remotely text when off pulse (monostable) pulse time secs.
- Page 67 Octalarm-IP 100104E...
- Page 68 10.Connections PSTN answer automatically when waiting for reply auto-answer after rings confirmation always on reply auto-answer after rings outside line number wait for dailing tone check telephone line speech volume soft normal loud very loud use PIN answer automatically when waiting for confirmation reply auto-answer after rings always on...
- Page 69 11.Alarm Receivers telephone call preferred network options (F3) removed/add sequence following preferred network options (F3) removed/add sequence following pager messages preferred network options (F3) removed/add sequence following preferred network options (F3) removed/add sequence following Octalarm-IP 100104E...
-
Page 70: Index
Index Installer .......... 14, 22 Installer’s code ........ 18, 37 ACC 3, 7, 8, 13, 14, 17, 18, 19, 20, 32, 37, Installer’s rights ....... 18, 37 49, 53, 54, 55 Internet ..........55 Action list ....10, 11, 14, 23, 24, 25 IP address ........ - Page 71 Voice response system ....13, 36 34, 36 VoIP ..........39, 41 telephone exchange ......30 Terminal blocks ........45 Web browser ......13, 49, 55 Test key ..........12 Time ..... 9, 17, 20, 51, 52, 54, 55, 56 Octalarm-IP 100104E...
- Page 72 Adesys BV Molenweer 4, 2291 NR Postbus 60, 2290 AB Wateringen (NL) Tel.: +31 174 296389 Fax: +31 174 293807 E-mail: info@adesys.nl Website: www.adesys.nl...
Need help?
Do you have a question about the Octalarm-IP and is the answer not in the manual?
Questions and answers