
Related Manuals for Konica Minolta SRX-101A


Summary of Contents for Konica Minolta SRX-101A
- Page 1 MEDICAL FILM PROCESSOR Model SRX-101A SERVICE MANUAL CODE NO. 1051/1052 KONICA CORPORATION No. 26-2, Nishishinjuku 1-chome, Shinjuku-ku, Tokyo 163-0512, Japan...
-
Page 2: Table Of Contents
10. Wiring Diagram of Main Unit....................53 11. Circuit Board Diagram ......................55 12. Pre-Installation Instructions ....................63 13. Installation Instructions and Precautions ................70 14. Changing Processing Conditions ..................82 15. SRX-101A Customer Presentation Guide ................83 16. SRX-101A Light Shield Installation Manual................89 17. Installation Procedure ......................91... -
Page 3: I Precautions
PRECAUTIONS I PRECAUTIONS Before shipment from the factory, the procedure has already been inspected according to local safety regulations. However, the following precautions must be taken when servicing this equipment. a Before servicing, disconnect the automatic processor's power plug from is AC outlet. If it is absolutely necessary to repair the processor while the power is on, be sure to take precautions to avoid electrical shock and keep your fingers away from rollers, gears and other moving parts. -
Page 4: I Caution Labels
CAUTION LABEL I CAUTION LABELS 1. EXPLANATION OF CAUTION LABELS G Caution labels imply the degree of the risk which may arise from incorrect use of this product. G There are 3 degrees of caution labels, and each is used depending on the level of risk and damage caused by incorrect use and mishandling. - Page 5 SERVICE MANUAL...
-
Page 6: Specifications
SPECIFICATIONS 1. Specifications Model name : SRX-101A Film transport method : Continuous roller transport. Film type and sizes : Sheet film, 10 x 10 cm~ 35 x 43 cm(14 x 17 inch) sizes. Processing capacity Size 24 x 30 cm or 10 x 12 inch 35 x 43 cm(14 x 17 inch) Cycle 90sec. -
Page 7: Dimensions
DIMENSIONS 2. Dimensions 2-1. Main Unit and Support Main Unit Support (Optional) 2-2. 25 Liter Replenisher Tank (Standard Equipment) SERVICE MANUAL... -
Page 8: Name Of Parts
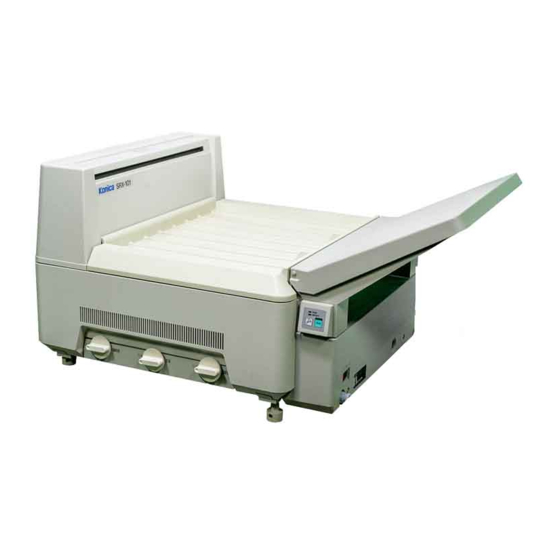
NAME OF PARTS 3. Name of Parts 3-1. Main Unit (Front View) ™Film Exit ™Right Side Panel ™Power Breaker ™Electrical Components Housing ™Power Cord ™Overflow Drainage Hose ™Developer Drainage Hose (yellow) ™Wash Water Drainage Hose ™Developer Supply Hose (larger diameter than other hoses) ™Binding Tape (yellow) ™Fixer Drainage Hose... - Page 9 Lights up when the RUN button is pressed. Will automatically go out if ™RUN Button Lamp no film has been inserted for 8 hours Indicates that the SRX-101A is after the READY lamp went on. Will electrically powered. light up again when the RUN button is pressed.
- Page 10 NAME OF PARTS RUN and READY Lamps ON-OFF Patterns Different ON-OFF patterns shown by the RUN and READY lamps on the control panel indicate different operating conditions. The following is a listing of all the possibilities and the conditions they indicate. ON-OFF Pattern Operating Condition Note...
- Page 11 NAME OF PARTS 3-5. Main Unit (Top View) ™Drive Shaft ™Developer Tank ™Wash Water Tank ™Fixer Tank ™Rack Handles ™Rack Handles ™Developing Rack ™Starter Solution Inlet ™Fix/Wash Rack SERVICE MANUAL...
- Page 12 NAME OF PARTS 3-6. Drying Unit ™ Dry Rack ™ Drying Heater Unit ™ Nozzle ™ Duct ™ ™ Dry Sensor Unit Overheat Switch ™ Recycle Duct ™ Dry Fan ™ Recycle Duct SERVICE MANUAL...
- Page 13 NAME OF PARTS 3-7. Film Transport 1) Rollers (1) Components Diagram SERVICE MANUAL...
- Page 14 "lower" rollers. (3) Capability The SRX-101A is capable of processing film ranging in size from 10 x 10 cm to 35 x 43cm (14x17 inch). The feed tray has an insertion slot that will feed film up to 17" in width.
- Page 15 NAME OF PARTS 2) Drive Mechanism (1) Components Diagram Timing Belt Timing Belt Drive Motor Gear Type Symbol Name Module No. of Teeth Note Parts No. Worm Gear 13003A Worm Gear (Right) 13004A Worm Gear (Left) Worm Gear 13007B Worm Wheel (Right) 13008B Worm Wheel (Left) Idler Gear...
- Page 16 NAME OF PARTS 3) Adjusting the Drive Timing Belt qRemove the Top Cover, the Right Side Panel and the Back Panel. Test the tension in the timing belt with a push-pull gauge at a point half way between the main drive shaft pulley and the drive motor pulley.
- Page 17 NAME OF PARTS 3-8. Solution Supply and Drainage Unit 1) Components Diagram (Bottom of the Main Unit) Developer Supply Unit Fixer Circulation Pump Fixer Supply Unit Developer Circulation Pump Electromagnetic Valve Wash Water Temperature Drainage Valve Control Tank Fixer Drainage Valve Developer Drainage Valve...
- Page 18 NAME OF PARTS 2) Piping Diagram Body Drainage Tank Electromagnetic Valve Developer Supply Pump Fixer Supply Fixer circulation Pump Pump Developer Supply Tank Fixer Supply Tank Fixer Drainage Wash Water Valve Drainage Valve Temperature Control Tank Developer Circulation Drain Outlet Pump Developer Drainage Valve...
- Page 19 NAME OF PARTS 3) Solution Temperature Control Tank (1) Components Diagram Temperature Control Tank From the Fixer Circulation Tank To the DEV Tank Thermometer Heater FIX Tank From the Developer Circulation Pump (2) Capabilities Developer temperature control is carried out by warming with a heater and by natural cooling.
- Page 20 NAME OF PARTS 3-9. Electrical Components Unit CPU Board(unified with Temperature Control) Motor Control Board Transformer(PT1) Terminal Block SSR(DRY) SSR(DEV) Circuit Protector CB 1 : 15A Switching Power source Noise Filter (F1) CB 3 : 15A Power Breaker (S1) SERVICE MANUAL...
- Page 21 NAME OF PARTS 3-9. Electrical Components Unit CPU Board(unified with Temperature Control) Switching Power Source Motor Control Board Transformer(PT1) Terminal Block SSR(DRY) Circuit Protector CB 1 : 15A SSR(DEV) Noise Filter (F1) Power Breaker (S1) SERVICE MANUAL...
- Page 22 NAME OF PARTS 3-10. Film Insertion Unit ※ A rib has been added to the processing tanks so that the Guide has been unified. Insertion Guide Moving Insertion Detector Contact Insertion Detector Feed Tray Control Panel Board SERVICE MANUAL...
-
Page 23: Time Chart
TIME CHART 4. Time Chart (In normal functioning) RUN Lamp 2min 15min READY Lamp READY Signal Drive Motor 30min Rapid Transfer DEV Circulation Pump FIX Circulation 13.3s 13.3s 3min Pump (11.1s) (11.1s) 53.3s DEV Supply Pump (44.4s) 23.3s 23.3s (19.4s) (19.4s) 46.7s FIX Supply Pump... - Page 24 5-1. Motor and Preset Temperature Errors In this SRX-101A, the motor error or the Temperature error will be indicated by the control panel lamps and an alarm buzzer. When such errors occur, use the following listing to correct these errors. The other errors will not displayed, so these errors have to be dealt with in the next sections.
-
Page 25: Troubleshooting
TROUBLE SHOOTING 5-2. TROUBLESHOOTING : FLOW CHARTS Problem Page Processor will not start up (RUN lamp will not come on) Developer circulation pump not operating. Fixer circulation pump not operating. Drying fans not operating. Electromagnetic valve not operating. Developer supply pimp not operating. Fixer supply pump not operating. -
Page 26: Processor Will Not Start Up (Run Lamp Will Not Come On)
TROUBLE SHOOTING 1. The processor will not start (RUN lamp will not come On.) Is the power supply voltage being Check to see if the facility's wiring, If all checks are OK, replace the supplied to the Noise Filter (NF1) the power cord plug and the power noise filter. -
Page 27: Developer Circulation Pump Not Operating
TROUBLE SHOOTING 2.The developer circulation pump (P1) is mot operating. If all checks are OK, repair any Are the other electrical loads Check the connection to connector wiring breaks and/or replace the functioning properly? JJ11 and the terminal voltage. pump. Is the CPU board fuse (F1) Replace the fuse on the CPU blown? -
Page 28: Fixer Circulation Pump Not Operating
TROUBLE SHOOTING 3.The fixer circulation pump (P2) is not operating. If all checks are OK, repair any Are the other electrical loads Check the connection of connector wiring breaks and/or replace the functioning properly? JJ10 and the terminal voltage. pump. Is the CPU board fuse (F1) Replace the fuse (F1) on the blown? -
Page 29: Drying Fans Not Operating
TROUBLE SHOOTING 4. The drying fans (FM1,FM2) are not operating. Check the connection at Are the other electrical loads If all checks are OK, repair any connectors JJ11 and check the functioning properly? wiring breaks or replace the fans. terminal voltage. Is AC100V being supplied to If all checks are OK, repair any Check the wiring from the... -
Page 30: Electromagnetic Valve Not Operating
TROUBLE SHOOTING 5. The electromagnetic valve (MV) is not operating. If all checks are OK, repair any Are the other electrical loads Check the connection at connector wiring breaks and/or replace the functioning properly? JJ6 and the terminal voltage. valve. Is the CPU board fuse (F1) Replace the fuse (F1) on the blown? -
Page 31: Developer Supply Pimp Not Operating
TROUBLE SHOOTING 6. The developer supply pump (P3) is not operating. If all checks are OK, repair any Are the other electrical loads Check the connection to connector wiring breaks and/or replace the functioning properly? JJ8 and the terminal voltage. pump. -
Page 32: Fixer Supply Pump Not Operating
TROUBLE SHOOTING 7. The fixer supply pump (P4) is not operating. If all checks are OK, repair any Are the other electrical loads Check the connection to connector wiring breaks and/or replace the functioning properly? JJ7 and the terminal voltage. pump. -
Page 33: Drive Motor Not Operating
TROUBLE SHOOTING 8. The drive motor (M1) is not operating. Check the wiring connecting JP24 Is AC 24V being supplied between If all checks are are OK, replace to the transformer's secondary JP24 #1 and #2. the transformer. side. Is the CPU board fuse (F1) blown? Replace the fuse. -
Page 34: Drive Motor Will Not Shut Off
TROUBLE SHOOTING 9. The drive motor (M1) will not stop. NOTE : Refer to the procedure Did you wait for 2 minutes after Wait for the required time. for temperature control pressing the RUN switch OFF? board adjustments. Check to see if the output If all checks are OK, replace Is at least 4.3V being supplied to voltage of the switching power... -
Page 35: Developer Temperature Too Low
TROUBLE SHOOTING NOTE : 10. Developer temperature is too low. After temperature setting adjustment, if improper temperature levels activates the temperature error function, all the electrical loads will be switched OFF. Adjust the temperature setting (See the circuit board check Is the temperature setting too low? using the temperature control procedures.) -
Page 36: Developer Temperature Too High
TROUBLE SHOOTING NOTE : After temperature setting adjustment, if improper temperature levels activates 11. Developer temperature is the temperature error function, all the electrical loads will be switched OFF. too high. Adjust the temperature setting Is the temperature setting too (See the circuit board check using the temperature control high? -
Page 37: Drying Temperature Too Low
TROUBLE SHOOTING NOTE : 12. Drying temperature is too low. After temperature setting adjustment, if improper temperature levels activates the temperature error function, all the electrical loads will be switched OFF. Adjust the temperature setting (See the circuit board check Is the temperature setting too low? using the temperature control procedures.) -
Page 38: Drying Temperature Too High
TROUBLE SHOOTING NOTE : After temperature setting adjustment, if improper temperature levels activates 13. Drying temperature is too the temperature error function, all the electrical loads will be switched OFF. high. Adjust the temperature setting Is the temperature setting too (See temperature control board using the temperature control high? -
Page 39: Supply Pumps Will Not Respond To Electrical Cycle Change
TROUBLE SHOOTING 14. Supply pumps (P3, P4) will not respond to frequency (DIPSW 1-2) setting change. Is DIP SW1-2 in the ON Set DIPSW1-2 to ON. position? REMINDER : In case of 50Hz, "in the OFF position." Replace the CPU board. NOTE: 15. -
Page 40: Ready Light Will Not Come On
TROUBLE SHOOTING 17. The READY lamp will not come ON. Has 15 minutes passed since Wait the required time. the RUN lamp came ON? Has initial wash water Wait the required time. supply been completed (about 2 minutes) (LED3 OFF)? Is the film entry detector ON Check if there is any film If all of the checks are OK,... -
Page 41: Film Insertion Alarm Will Not Sound
TROUBLE SHOOTING 19. The film insertion alarm will not sound. If all of the checks are OK, Is the film entry detector ON Check if there is any film replace the film entry (READY lamp OFF)? jammed at the detector unit. detector unit. -
Page 42: Processor Will Not Switch Over To The Standby Mode
TROUBLE SHOOTING 21. The dry heater will not switch off in the Standby Mode. Have you set the DIPSW Make the proper settings. properly? Replace the CPU board. REMINDER : 22. The processor will not Check to see if the drying heater is start out of the Standby functioning properly (See FLOW Mode. - Page 43 TROUBLE SHOOTING 5-3. Trouble Caused by the Film Processor TROUBLE CAUSE RESPONSE ADVICE To CUSTOMER The processed film • The processing tank rollers • Clean the rollers. • Remind about checking surface is coming out are dirty. and maintenance tasks. grimy.
- Page 44 TROUBLE SHOOTING PROBLEM CAUSE RESPONSE ADVICE To CUSTOMER (2)Bands across the film • Improper roller rotation. • Check the film transport • Remind about the periodical perpendicular to the mechanism. check and maintenance. direction of film transport. • Dirty rubber rollers. •...
- Page 45 TROUBLE SHOOTING TROUBLE CAUSE RESPONSE ADVICE To CUSTOMER Discoloration • The fixer solution temperature • Show the proper method for is too low. maintaining optimum fixer temperature. • The wash water temperature • Install a water heating device. is too low. •...
- Page 46 TROUBLE SHOOTING 5-4. Trouble Caused by Improper Film Handling PROBLEM SYMPTOM CAUSE RESPONSE Fogging • A certain portion of the film is • Improper light shielding of • Checking and repair. being blackened. stored film (due to torn (This is occurring in the same wrapping), a film casette spot on a large number and the other facilities.
- Page 47 TROUBLE SHOOTING PROBLEM SYMPTOM CAUSE RESPONSE Dry Pressure • Unevenness due to reduction • Pressure has been on the film • Checking and repair. in film sensitivity. before exposure by rough • Handle the film more carefully. (white-outs) handling, such as bending, jamming, or dropping.
- Page 48 TROUBLE SHOOTING 5-5. Service and Maintenance Schedule Task Monthly Quarterly Semiannually Yearly Wash Top Cover Underside Scrub DEV and FIX/WASH racks Clean the area around processing tanks Wash DEV, FIX and WASH tanks Replace developer and fixer Wash processing tank and racks with system cleaner Replace FIX side FIX/WASH roller springs Replace DEV roller and WASH side FIX/WASH roller springs Wash replenishment tanks and replenishment hoses...
-
Page 49: Cpu Board Dip Switches
CPU BOARD DIP SWITCHES 6. CPU Board DIP Switches REMINDER : Always set the DIP switches with the processor's power breaker OFF. DS–1 Replenish amount correction (4 types) Standby mode selection (3 types) Processing cycle time selection Frequency selection Mode selection DS1–... -
Page 50: Checking Circuit Boards Sensors And Electrical Loads
CHECKING CIRCUIT BOARDS, SENSORS AND ELECTRICAL LOADS 7. Checking Circuit Boards, Sensors and Electrical Loads REMINDER : After performing each check and related adjustment, switch the power breaker OFF, then back ON again. 7-1. Circuit Boards Board Circuit Check Points Correct Voltage Adjustment Point The VR at the side of the DC... - Page 51 CHECKING CIRCUIT BOARDS, SENSORS AND ELECTRICAL LOADS JP16 JP17 Fixed Resistance 1 Fixed Resistance 2 CH1 : DEV Temp. Sensor KΩ Fixed Resistance 1 Equivalent Temperature CH2 : DRY Temp. Sensor 1000 Ω Fixed Resistance 2 Equivalent Temperature SERVICE MANUAL...
- Page 52 CHECKING CIRCUIT BOARDS, SENSORS AND ELECTRICAL LOADS 7-3. Load Outputs and Control Panel Inputs Make sure that the power breaker is OFF. Set Dip switch (DS1-1) on the CPU board to the ON position. Select the desired processing cycle time by setting DIP switch (DS1-3,4) on the CPU board. Make sure that connector JP2 from the Control Panel is connected properly to JJ2 on the CPU Board.
- Page 53 CHECKING CIRCUIT BOARDS, SENSORS AND ELECTRICAL LOADS 7-4. Film Entry Sensor Input/Output q Make sure the power breaker is OFF. w Set all of the switches on DIP SW1 to OFF. e Make sure that connector JP3 from the film entry detection unit is connected to JJ3 on the CPU Board.
-
Page 54: Developer Temperature Correction
DEVELOPER TEMPERATURE CORRECTION 8. Developer Temperature Correction Perform the following adjustment procedure whenever there is any difference between the value of the DEV Temp. Setting Volume on the temperature control board and the actual developer solution temperature in the developing tank. Make sure that the Power Breaker is OFF and set the DEV Temperature Setting Volume to 34:. -
Page 55: Electrical Components Diagram
ELECTRICAL COMPONENTS DIAGRAM 9. Electrical Components Diagram CPU Board XTAL Motor Drive Control Motor Board Lamp (Control Panel Board) Alarm Switch INV. (Control Panel Board) Temperature Circulation Pumps Temperature Control Supply Pumps Sensor Electromagnetic Board (DEV, DRY) Valve Switching Power Reset Power Supply Circuit... - Page 56 ELECTRICAL COMPONENTS DIAGRAM 9. Electrical Components Diagram CPU Board XTAL Motor Drive Control Motor Board Lamp (Control Panel Board) Alarm Switch INV. (Control Panel Board) Temperature Circulation Pumps Temperature Control Supply Pumps Sensor Electromagnetic Board (DEV, DRY) Valve Switching Power Reset Power Supply Circuit...
- Page 57 10. Wiring Diagram of Main Unit (CE) SERVICE MANUAL...
- Page 58 10. Wiring Diagram of Main Unit(UL) SERVICE MANUAL...
-
Page 59: Wiring Diagram Of Main Unit
WIRING DIAGRAM OF MAIN UNIT Main Body Electric Circuit Parts List Symbol Name Manufacturer(UL/CE) Model(UL/CE) Remarks Switch Matsushita AJB201R Reed switch Japan AutomationCo. RS-9S Reed switch magnet Japan Automation Co. RS-9M Noise filter Nemic Ramda MAF-1220-33 Terminal block Osada OTB-525-14P-06-C CB1(CB3) Circuit protector W28XQ1A15... - Page 60 11. Circuit Board Diagram 11-1. CPU Board SERVICE MANUAL...
-
Page 61: Circuit Board Diagram
CIRCUIT BOARD DIAGRAM CPU Board Parts Lists (1) Symbol Name Manufacturer M o d e l Remarks μPD78C10AGF-3BE TMS27C512-15 SRX-101A Toshiba TC74HC573AF IC4, IC5 Toshiba TC74HC7240AF Power voltage IC Fujitsu MB3771PF-G-BND Toshiba TC74HC00AF 3 Point Regulator Toshiba TA7805S 3 Point Regulator... - Page 62 CIRCUIT BOARD DIAGRAM CPU Board Parts Lists (2) Symbol Name Manufacturer Model Remarks Tip Resistor Rohm MCR18EZH104F 1/8W 100Ω F Tip Resistor Rohm MCR18EZH121F 1/8W 120Ω F R24, R37 Tip Resistor Rohm MCR18EZH101F 1/8W 100Ω F C17, C18, C19, C20, C22, C23, C24 Ceramic tip capacitor Murata GRM42-6R104K50 0.1µF/50V...
- Page 63 CIRCUIT BOARD DIAGRAM CPU Board Parts Layout SERVICE MANUAL...
- Page 64 CIRCUIT BOARD DIAGRAM 11-2. Control Panel Board Circuit Diagram JJ28 LED 1 LED 3 LED 2 Ready Lamp LED 2 RUN Lamp LED 3 SW 4 RUN Button Replenish SW 5 Button KEY Board Parts List Symbol Name Manufacturer M o d e l Remarks S1, 2 Switch...
- Page 65 11-3. Motor Control Board SERVICE MANUAL...
- Page 66 CIRCUIT BOARD DIAGRAM Motor Control Board Parts List (1) Symbol Name Manufacturer M o d e l Remarks Toshiba TD62583AP μPC1246C Toshiba TC9192AP or Toshiba TC9192P Sharp IR3M02A μPC494C Toshiba TC4013BP or Motroller MC14013BCP Hitachi HD14052BP μPD4052BP Toshiba TC4052BP Hitachi HA17393 μPC393C μPC78M12AHF or NEC μPC78M12HF...
- Page 67 CIRCUIT BOARD DIAGRAM Motor Control Board Parts List (2) Symbol Name Manufacturer M o d e l Remarks Condenser Matsushita ECES1HU222EG 2,200μF/50V Nichicon LLK1H222MHSZ Condenser Nichicon UVZ1H100MAH 10μF/50V Nichicon UPC-1H100MA1HS C18, 23, 29 Condenser Nichicon ULB1E100MAA 10μF/25V Nichicon UVX1E100MAA Nippon Chemi-con SME25VB10 C19, 21 Condenser...
- Page 68 CIRCUIT BOARD DIAGRAM Motor Control Board Parts List (3) Symbol Name Manufacturer M o d e l Remarks Resistor Matsushita ERD-S2-TJ101 100Ω/1/4W Matsushita ERD25VJ101 R35, 38 Resistor Matsushita ERD-S2-TJ223 22kΩ/1/4W Matsushita ERD25VJ223 Resistor Matsushita ERD-S2-TJ684 680kΩ/1/4W Matsushita ERD25VJ684 Resistor Matsushita ERD-S2-TJ680 68Ω/1/4W Matsushita...
-
Page 69: Pre-Installation Instructions
PRE-INSTALLATION INSTRUCTIONS 12. Pre-Installation Instructions 12-1. Packaging Replenisher Tank Accessories Outer Crate Hoses Feed Tray Main Unit Packing Packing Seat Pallet External view (Total Weight : approx. 60kg.) Unit : mm 12-2. Contents Label Contents Quantity Remarks X-RAY FILM PROCESSING SRX–101A Main Unit SRX–101A Feed Tray 25R Replenisher Tank... - Page 70 PRE-INSTALLATION INSTRUCTIONS 12-3. Package Contents Verification Before installing the SRX-101A, make sure to check the main unit and accessory equipment for any missing parts or damage during transportation. (1) Check to see if the model name and numbers printed on the outside of the package correspond to what the customer ordered.
- Page 71 PRE-INSTALLATION INSTRUCTIONS 25R Replenisher Tank ID. NO. Parts Name Remarks Hose band Tyton. SNP–12–HSO Replenisher pipe (DEV) Replenisher pipe (FIX) Replenisher filter Filter cap Name plate(DEV) Stirring rod(DEV) (yellow) Floating lid Clamp Kitagawa Industrial Co. LTD. CKS-16-H Name plate(FIX) Replenisher tank Stirring rod (FIX) (red) SERVICE MANUAL...
- Page 72 PRE-INSTALLATION INSTRUCTIONS 25R Replenisher Tank SERVICE MANUAL...
- Page 73 PRE-INSTALLATION INSTRUCTIONS Set of Accessories ID.No. Parts Name Gear Idler gear Gear Idler gear Stopper Shaft support Coil spring Coil spring Rubber pad Bushing Packing Funnel Plastic beaker(Measuring cup) SERVICE MANUAL...
- Page 74 PRE-INSTALLATION INSTRUCTIONS Accessories SERVICE MANUAL...
-
Page 75: Installation Instructions And Precautions
Do not install the processor in high vibration areas or where it cannot be properly leveled. Place the SRX-101A at a height from the floor that fulfills both of the following conditions. a. The liquid surface inside the replenisher tank is below the full marks of the main unit processing tanks. - Page 76 INSTALLATION INSTRUCTIONS AND PRECAUTIONS 13-3. Connecting the Supply Hoses Connect the supply hoses to the 25 liter replenisher tank. Yellow • • • • • • • • • • • •DEV Supply Hose. Red • • • • • • • • • • • • • •FIX Supply Hose. Use SNP-12-HSO to clamp the hoses to the tank.
- Page 77 (product liability standard) extension cords. Sub-standard extension cords may cause the processor to overheat or smoke. To prevent electrocution accidents, properly ground the SRX-101A. To avoid the possibility of explosions or electrocution, do not attempt to ground the processor to any of the following objects.
- Page 78 Temperatures between 15: and 30:(59<and 86<) Humidity levels between 30%RH and 75%RH In order to maintain the above room conditions, the facility where the SRX-101A is located should be equipped with a ceiling mounted ventilation fan and a ventilation opening in the wall below the height of the processor.
- Page 79 13-7. Water Lines Connect a reducer bushing with a packing to the facility's water utility outlet. Connect the processor's water supply hose to the reducer bushing. Packing Facility Water SRX-101A Water Supply Hose Utility Outlet PF3/4 PF1/2 Acceptable Wash Water Temperature 5:~30:(41<~86<)
- Page 80 INSTALLATION INSTRUCTIONS AND PRECAUTIONS 13-10.Leveling the Main Unit Use a carpenter's level. Turn the adjustable legs supporting the main unit to balance the processor vertically and horizontally. If the carpenter's level is not available, fill the tanks with a solution up to the indicator mark, and check the level of the solution at 6 different points on the leveling lines which are located at right and left inner side of the DEV, FIX and WASH tank and adjust if necessary.
- Page 81 INSTALLATION INSTRUCTIONS AND PRECAUTIONS 13-11.Setting the Racks Make sure that there is no excess water remaining in the racks before setting them into the main unit. The racks have been designed so that the DEV rack is set first, then the FIX- WASH rack can be inserted.
- Page 82 INSTALLATION INSTRUCTIONS AND PRECAUTIONS DEV Rack Rack Rib Groove FIX/WASH Rack Rack Rib Groove 13-12. Mixing the Processing Chemicals When Using the 25 Liter Replenisher Tank, follow the direction that come with each pack of developer and fixer. CAUTION 1. The chemistry and starter fluid are dangerous to eyes, can cause skin irritation and damage clothing.
- Page 83 INSTALLATION INSTRUCTIONS AND PRECAUTIONS 13-13. Filling the Tanks a. Normal Procedure Remove the top cover of the main unit. Close all the drainage valves Open the facility's water utility valve. Plug in the power cord. G The RUN Button Lamp on the control panel will light up. NOTE : Do not press the RUN Button.
- Page 84 INSTALLATION INSTRUCTIONS AND PRECAUTIONS Full Marks (in each processing tank) b. Quick Procedure If you are in a hurry to fill the tanks, you can use the funnel provided to fill the tanks manually. Begin the following procedures with only the DEV rack set in place. Push the OFF side (™side) of the power breaker.
- Page 85 INSTALLATION INSTRUCTIONS AND PRECAUTIONS 13-15. Removing Trapped Air from the Supply Hoses Turn on the RUN Lamp and keep pushing READY button to activate the auto-fill function until the READY lamp's flashing pattern changes. Lift the supply hose up so that any trapped air will move towards the processor. Refer to the following diagram.
- Page 86 INSTALLATION INSTRUCTIONS AND PRECAUTIONS 13-16. Wash Basin Specifications Install a wash basin nearby the processor to keep it clean and to mix film processing solutions. The wash basin should be at least 700mm (2.3 ft) long, 500mm (1.64 ft) wide and 200mm (0.66 ft) deep.
-
Page 87: Changing Processing Conditions
SRX-101A will automatically switch over the standby mode, during which the drying heater will be switched OFF and ON at 5 minutes intervals. As soon as a sheet of film enters the processor, the SRX-101A will automatically switch from standby into the normal operation mode. -
Page 88: Srx-101A Customer Presentation Guide
SRX-101A CUSTOMER PRESENTATION GUIDE 15. SRX-101A Customer Presentation Guide After the SRX-101A has been installed, explain the following points to the customer. 15-1. First, during your presentation check each of the points outlined in the following flow chart. Self introduction 1 Introduce yourself. - Page 89 2 If you cannot answer a certain question on the spot, make clear to the customer when you can answer. Warranty 1 Remind the customer that the SRX-101A is guaranteed for a certain period from the date of installation. Conclusion 1 Make sure to thank the customer for taking the time to listen to your presentation.
- Page 90 (Always keep in mind ways to maintain the film processing conditions that the customer has become used to.) (3) Check beforehand the space where the SRX-101A is to be installed, as well as the operating environment (exhaust devices, temperature/humidity conditions, etc.) Also check to see if there is a suitable place for electrically grounding the main unit.
- Page 91 How to select the standby modes. c) How to supply replenisher and processing solution. d) Other procedures. Explain what film sizes and types are compatible with the SRX-101A. £ After the processing solution temperatures have reached their operational levels, run a £...
- Page 92 If no option will be used, make your presentation as concise and brief as possible. £ 15-7. Cleaning Explain all the points necessary in keeping the SRX-101A clean. Explain these points using the Operation Manual. £ Explain the differences between the way of cleaning the bakelite rollers that are required to be done everyday, once a week, once a month, and once every three months.
- Page 93 After installation and check have been completed, refer the customer to the clause in the warranty that says," The SRX-101A has been handled over to you on this date,.., installed and checked properly with all its components and parts in optimum working condition."...
-
Page 94: Srx-101A Light Shield Installation Manual
SRX-101A LIGHT SHIELD INSTALLATION MANUAL 16. SRX-101A Light Shield Installation Manual 16-1. Light Shield Kit Contents Check the contents against this list upon delivery. Parts Name ID.No. Remarks Foam packing(thickness 10mm) L=1000mm, cut at adequate length of light shield plate and wall. - Page 95 SRX-101A LIGHT SHIELD INSTALLATION MANUAL SERVICE MANUAL...
-
Page 96: Installation Procedure
2. Assemble the processor main unit stand before assembling the light shield. 3. Before installing the SRX-101A, make sure to position the main unit stand so that the replenisher tanks are easily accessible. The main stand has crossbars on three of its four sides. The side without a crossbar is the side providing easy access to the replenisher tanks for mixing new processing solutions. - Page 97 INSTALLATION PROCEDURE uCut a piece of Packing(D)[0thickness 10mm] into a strip of 530mm long. Attach it to the Lower Light Shield as shown in the diagram below. Attach 4 clip nuts at the top edge of the Lower light Shield, adjusting the position against the hole, fix the Lower Light Shield to the main unit stand with M6 x 20 pan-head screws, flat washers(φ6) and hexagonal nuts.
- Page 98 INSTALLATION PROCEDURE oCut a piece of Packing(A)[thickness 3mm] into a strip of 165mm long, and attach it to the Upper Light shield, and fix it to the light shield panel(right and left) using the speed nuts 4 pieces of M4 x 6 pan screws from the light room side.
- Page 99 Make sure you have about 20cm of play in the wire. !4 N ow bring the film insertion table up against the SRX-101A main unit, and string the connector end of the lead wire through the elongated hole in the main unit until the connector is hanging in front of the CPU board.
- Page 100 Cut a piece of Packing(D)[thickness 5mm] into a strip of 450mm long and attach it to the bottom of the electrical components housing. SRX-101A Electrical Components Unit Outer Cover Components Housing 450mm Strip of Packing(D) @0 A ttach the square-shaped Packing(F) to the left and right sides of the light shield panel.
- Page 101 Darkroom Side Packing(D) @3 L ower the insertion table side legs so that the SRX-101A is leveled. Taking special care of the unit's left and right side position, move the processor up against the partition, and then level the unit once again.
- Page 102 @7 O pen(fold up) the film insertion table cover and make sure that the magnetic catch is strong enough to hold it open while operating the SRX-101A. @8 P ut back the top cover and make sure that the light shield is functioning properly from the darkroom side.
- Page 103 • • • • • • 3 Pcs. eDial Plate (adhesive type, sticked backside.) • • • • • • 1 Pce. 2) Remove the covers from the main body of SRX-101A. (Fig. A) Internal Cover Outer Cover Be sure to install or detach with care and in parallel.
- Page 104 INSTALLATION PROCEDURE 4) Fix the knob plate with the three screws after removing a round plate. (Fig. C) 5) Connect the connector JP18 to the JJ18 on the CPU board and the earth (ground) wire. (Fig. C) JJ18 CPU Board Motor control board Fig.
- Page 105 Check the Jp1 on the CPU board if its pins 2-3 are selected. JP1-1, 2 are in short circuited. Fig. B 2) Start of SRX-101A Turn on the power switch, set the DEV temp. control knob at 34:, and turn on the RUN switch. 3) Actual temperature checking (Fig. F) qWait 5 minutes after READY lamp ON, then open the top cover.
- Page 106 INSTALLATION PROCEDURE 4)When the actual temperature is not between 33: and 35:, proceed the Knob position adjustment (Fig. G). qLoosen the set screw of the knob which locates just opposite of the pointer. Pay attention not to move the volume shaft. wSet the pointer at the measured temperature value.
- Page 107 1051 -55030A 1052 KONICA MEDICAL CORP. KONICA CANADA INC. KONICA EUROPE GMBH 411 Newark Pompton Turnpike, Wayne, NJ 07470, U.S.A. 1329 Meyerside Drive, Mississauga, Ontario Friedrich-Bergius-Str. Gewerbegebiet, TEL.973-633-1500 L5T 1C9, CANADA 85662 Hohenbrunn, GERMANY TEL.905-670-7722 TEL.8102-8040 KONICA FRANCE S.A. KONICA U.K. LTD. KONICA AUSTRALIA PTY.LTD.