Furuno FELCOM 15 Operator's Manual
Inmarsat-c mobile earth station
Hide thumbs
Also See for FELCOM 15:
- Service manual (228 pages) ,
- Operator's manual (228 pages) ,
- Installation manual (51 pages)
Table of Contents
Advertisement
Quick Links
Advertisement
Table of Contents

Related Manuals for Furuno FELCOM 15


Summary of Contents for Furuno FELCOM 15
- Page 1 INMARSAT-C MOBILE EARTH STATION FELCOM 15 MODEL...
- Page 2 SAFETY INSTRUCTIONS WARNING WARNING Any repair work must be done by a Do not open the equipment. licensed radio technician. Hazardous voltage which can cause electrical shock, burn Improper repair work can cause electrical or serious injury exists inside shock or fire. the equipment.
- Page 3 (This page intentionally left blank.)
-
Page 4: Table Of Contents
TABLE OF CONTENTS FOREWORD......................vii SYSTEM CONFIGURATION ................ix PROGRAM NUMBER ................... x INMARSAT C SYSTEM..................1 Introduction ........................1 Inmarsat C System Configuration ..................2 Communications Network ....................4 Peripheral Equipment.......................5 1. OPERATIONAL OVERVIEW .................1-1 Terminal Unit ....................... 1-1 1.1.1 Turning the power on/off ................1-1 1.1.2 DISTRESS button.................. - Page 5 TABLE OF CONTENTS LES List ......................2-18 2.6.1 Adding stations to the LES list..............2-18 2.6.2 Editing the LES list .................. 2-20 2.6.3 Printing the LES list................. 2-21 Station List ......................2-22 2.7.1 Adding stations to the station list ............. 2-22 2.7.2 Editing the station list ................
- Page 6 TABLE OF CONTENTS Receiving ......................4-20 4.2.1 When a message is received ..............4-20 4.2.2 Setting the receive alarm ................ 4-21 4.2.3 Displaying receive messages ..............4-21 4.2.4 Printing receive messages..............4-23 4.2.5 Saving receive messages to a floppy disk ..........4-23 4.2.6 Automatically saving receive messages to the hard disk ......
- Page 7 TABLE OF CONTENTS Performance Verification (PV) Test ..............8-4 8.4.1 PV test sequence ..................8-4 8.4.2 PV test procedure ..................8-5 8.4.3 Results of PV test..................8-6 System Status Monitor..................8-7 Replacing the Battery ..................8-8 Error Messages ....................8-9 APPENDIX A DATA TABLES ..............
-
Page 8: Foreword
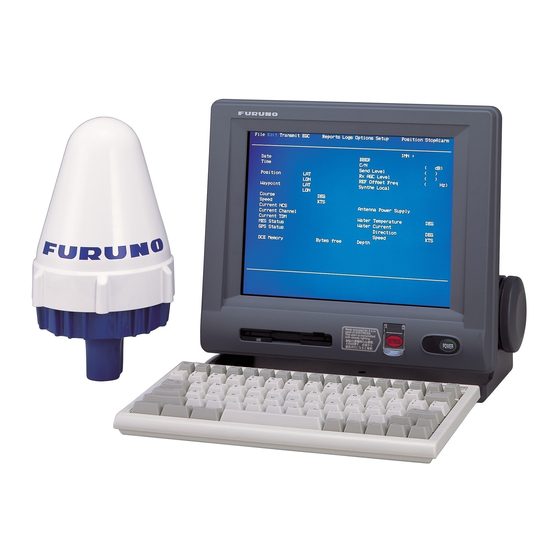
Introduction FURUNO Electric Company thanks you for considering and purchasing the FELCOM 15 Inmarsat C Mobile Earth Station. We are confident you will discover why the FURUNO name has become synonymous with quality and reliability. Mainly consisting of an antenna unit and a terminal unit, the FELCOM 15... - Page 9 FOREWORD Features • E-mail facility. (To transmit E-mail, register with an LES provider which provides e-mail services. E-mail charges are calculated separately.) • Built-in Enhanced Group Call (EGC) receiver permits operation as EGC-only receiver. • Terminal unit accepts a wide variety of peripheral equipment: Distress Message Controller (DMC), Incoming Indicator, PC, navigator, etc.
-
Page 10: System Configuration
SYSTEM CONFIGURATION ANTENNA UNIT IC-115 DGPS SHIP'S MAINS EGC Printer 100/115/220/230 VAC PP-505 1φ, 50/60 Hz TERMINAL UNIT IC-215 Personal AC Power Supply Computer PR-240 (PC/AT compatibility) 24 VDC Battery GPS receiver OP16-24 Shipboard LAN (Ethernet) SHIP'S MAINS Printer 12/24 VDC* PP-510 Distress Alert/ Received Call Unit... -
Page 11: Program Number
PROGRAM NUMBER PROGRAM NUMBER... -
Page 12: Inmarsat C System
INMARSAT C SYSTEM Introduction The Inmarsat C system provides worldwide telex and data transmission and reception of written information to owners of an Inmarsat C transceiver or a terrestrial telex network via satellite. Communication mode is store-and-forward telex, which means all information sent are first stored at a LES and then delivered to designated party. -
Page 13: Inmarsat C System Configuration
INMARSAT C SYSTEM Inmarsat C System Configuration Same as left Same as left Same as left Satellite 0.0 m 0.0 m 0.0 m -/+: To set option -/+: To set option -/+: To set option AOR-West AOR-East OCC: Operation Control Center SCC: Satellite Control Center NCS: Network Coordination Station MES: Mobile Earth Station... - Page 14 INMARSAT C SYSTEM...
-
Page 15: Communications Network
INMARSAT C SYSTEM Communications Network The illustration below shows the Inmarsat C communications network. Network NCS/NCS Signaling Link Coordination Station (NCS) NCS/LES NCS Common Channel Signaling Link Mobile Earth Station (MES) MES Signaling Data Channel Data Terminal Communications Equipment (DTE) Data Circuit Network Land Earth... -
Page 16: Peripheral Equipment
(For further details see paragraph 6.2.) Distress Message Controller (DMC-5) The optional DMC-5 provides for transmission and monitoring of the distress alert. For further details, refer to the operator’s manual of the DMC-5. Inmarsat C FELCOM 15 Distress Message Controller DMC-5 Distress message controller system... - Page 17 INMARSAT C SYSTEM (This page intentionally left blank.)
-
Page 18: Operational Overview
OPERATIONAL OVERVIEW Terminal Unit The terminal unit is the heart of the FELCOM system, transmitting and receiving messages and alerting you with status messages. POWER Floppy disk switch drive DISTRESS button Terminal unit IC-215 1.1.1 Turning the power on/off Press the [POWER] switch to turn the terminal unit on/off. 1.1.2 DISTRESS button Use the DISTRESS button to transmit the distress alert (to all ships) when there... -
Page 19: Audio Alarm
1. OPERATIONAL OVERVIEW 1.1.5 Audio alarm The audio alarm sounds and the terminal unit displays which alarm is sounding as below. • EGC distress or urgent message is received. (To silence the alarm, press the function key [F10].) • During the interval between the transmission of the distress alert (by own vessel) and the receiving of the distress acknowledge signal from LES. -
Page 20: Keyboard
1. OPERATIONAL OVERVIEW Keyboard The FELCOM is almost 100% keyboard controlled. Operation is simplified by the use of menus which you access by pressing function keys, numbered F1-F10 at the top of the keyboard. The figure below shows keyboard layout. Insert Delete Prt Sc... - Page 21 1. OPERATIONAL OVERVIEW Chooses upper or lower case letters. Press and hold Shift down the key to get upper case letters. Note that only upper case letters are used in telex. Executes the shortcut key operation when combined with an alphabet key. See paragraph 1.3.2. Inserts a space.
-
Page 22: Shortcut Keys
1. OPERATIONAL OVERVIEW 1.3.2 Shortcut keys The FELCOM provides the keyboard shortcuts shown below for commonly used functions. Shortcut keys Shortcut key Operation ALT+N Same as NEW in File menu ALT+O Same as OPEN in File menu ALT+Q Same as CLOSE in File menu ALT+D Same as DELETE in File menu ALT+S... -
Page 23: Choosing Menu, Menu Options
1. OPERATIONAL OVERVIEW 1.4.1 Choosing menu, menu options Press appropriate function key to choose a menu. For example, press the function key [F1] key to choose the File menu. File Edit Transmit Reports Logs Options Setup Position StopAlarm File 1. New ALT-N 2. -
Page 24: Sample Menu Operation
1. OPERATIONAL OVERVIEW 1.4.3 Sample menu operation For example, you want to display a transmitted message. All operations begin from the standby display. File Edit Transmit Reports Logs Options Setup Position StopAlarm 4431***** Date 02-02-25 BBER Time 01:32 (UTC) OK ( 36dB) Send level OK ( 0) Position... -
Page 25: Display Indications
1. OPERATIONAL OVERVIEW Display Indications The display is divided in three sections: 1) The menu area 2) The working area 3) The operating status area File Edit Transmit Reports Logs Options Setup Position StopAlarm 1) Function Menu 2) WORKING AREA 3) Operating Status (10) - Page 26 1. OPERATIONAL OVERVIEW (3) Terminal unit status Idle Idle (awaiting receiving, awaiting transmitting) Idle (pending) Awaiting reply from LES Sending Sending Receiving Receiving Login Logging in with NCS Logout Logging out with NCS Distress Alert When own vessel is transmitting the distress alert Data Report Sending data report Testing...
-
Page 27: Error Messages And Alerts
1. OPERATIONAL OVERVIEW (7) Logging status LOGOUT Logged out with ocean region LOGIN Logged in with ocean region LOGIN (blinking) Logging in with ocean region (8) Other information No display No receive message in memory, or printer is operating. REC. MESSAGE EXISTS Displayed when a routine message has (blinking) not been printed, or a confidential message is received. -
Page 28: Silencing The Audio Alarm
1. OPERATIONAL OVERVIEW Silencing the Audio Alarm Some error messages and alerts are accompanied by the audio alarm. This alarm can be silenced, in most instances, by pressing any key. If the alarm cannot be silenced in that manner, go to the Setup menu (see the paragraph below) to silence it. - Page 29 1. OPERATIONAL OVERVIEW 5. Press the [↓] key to choose OFF. Note: To silence the audio alarm given to an EGC distress or urgent message from the Distress Alert Unit (IC-305), follow the above procedure. DO NOT press the DISTRESS button on the IC-305 to silence the alarm;...
-
Page 30: System Initialization
SYSTEM INITIALIZATION This chapter provides the information necessary for initializing the FELCOM. Once the equipment is initialized, you need do no more than press a few keys to get fully automatic transmission and reception. Inmarsat assigns each MES an Inmarsat Mobile Number (IMN). The IMN has already been entered into the FELCOM, during installation. -
Page 31: System Setup
2. SYSTEM INITIALIZATION 2.1.2 System setup The System Setup menu provides for input of date, time, operating mode, and port function. 1. Press the function key [F8] to choose the Setup menu. File Edit Transmit Reports Logs Options Setup Position StopAlarm Setup 1. - Page 32 2. SYSTEM INITIALIZATION 7. Press the [Enter] key to open the options window. Setup System Setup System Date & Time 01:53 02-02-25 (YY-MM-DD) Preferred NCS INMARSAT-C Auto AOR (WEST) MES Operation Mode AOR (EAST) Nav Port DTE1 Active Port DTE1 Message Output Port 9.
- Page 33 2. SYSTEM INITIALIZATION 16. Choose the navigator which is interfaced to the FELCOM. No navigator interfaced OFF: Choose this setting to use external navigator. The FELCOM EXT: automatically chooses ship’s position information in the order of GPS, Loran C, and DECCA . Use the GPS receiver board (option) built in the terminal unit.
- Page 34 2. SYSTEM INITIALIZATION Setup System Setup System Date & Time 01:53 02-02-25 (YY-MM-DD) Preferred NCS MES Operation Mode INMARSAT-C Nav Port Active Port Message Output Port 9. Configuration EGC Output Port INT+EXT System setup menu, EGC output port options window 28.
-
Page 35: Terminal Setup
2. SYSTEM INITIALIZATION Terminal Setup The Terminal Setup menu provides for selection of date display format, currency unit, screensaver on/off and window color (color display only). 1. Press the function key [F8] to choose the Setup menu. 2. Press the [4] key to display the Terminal Setup screen. Terminal Setup Date Disp. - Page 36 2. SYSTEM INITIALIZATION c) Use the [↓] or [↑] key to choose the item to adjust and then press the [Enter] key. BASE WINDOW: Standby display RCV Message Display: Communications memory display EGC Message Display: Communications display EDIT1 – EDIT 2: Editor screens SUB MENU1 –...
-
Page 37: Login And Logout
2. SYSTEM INITIALIZATION Login and Logout Each time the terminal unit is turned on, register your vessel with the Inmarsat C system to enable communications between your vessel and an LES. This is called login. The first time you login you must do it manually; thereafter the NCS does it for you automatically, even when you move to another ocean region. - Page 38 2. SYSTEM INITIALIZATION Note: The terminal unit must be “idle” to login. (“Current State: IDLE” appears at the bottom of the screen.) When it is not idle, “Terminal Unit is not IDLE now. Cannot start login.” appears. Press any key to return to the standby display.
-
Page 39: Logout
2. SYSTEM INITIALIZATION 2.3.2 Logout 1. Press the function key [F7] to display the Options menu. 2. Press the [2] key to display the logout screen. Note: The terminal unit must be “idle” to logout. When it is not idle, “Terminal Unit is not IDLE now. -
Page 40: Egc Settings
2. SYSTEM INITIALIZATION 4. When logout is completed, “Successful logout” appears. “Current State” then returns to IDLE. 5. Turn off the FELCOM. EGC Settings 2.4.1 What is the EGC (Enhanced Group Call) service? The EGC service enables EGC information providers to send SafetyNET FleetNET messages via an LES to a specific groups of ships, or to all ships within a defined geographical area. -
Page 41: Egc Setup
2. SYSTEM INITIALIZATION 2.4.2 EGC setup The FELCOM receives EGC messages directed to its present position and Navarea without further programming. The EGC Setup screen lets you choose additional areas for which to receive messages and also the Navtex station and type of message for Coastal Warning (NAVTEX Re-broadcast). - Page 42 2. SYSTEM INITIALIZATION 5. Press the [Enter] key to close the additional position entry window. 6. Press the [↓] key to choose Navarea. 7. Press the [Enter] key to open the Navarea entry window. Setup EGC Setup Receive EGC Area Additional Position Navarea Fixed Area...
- Page 43 2. SYSTEM INITIALIZATION 11. Press the [Enter] key to open the waypoint entry window. Setup EGC Setup Receive EGC Area Additional Position Navarea Fixed Area Waypoint (from NAV Equipment) OFF ON NAVTEX Station Code Type of Message (Can't reject other report) Ice reports OMEGA messages Meteo.
-
Page 44: Adding Egc Channels
2. SYSTEM INITIALIZATION 19. Press the [Esc] key to open the Update window. Setup EGC Setup Receive EGC Area Additional Position Navarea Fixed Area Waypoint (from NAV Equipment) NAVTEX Station Code Type of Message (Can't reject other report) Ice reports OMEGA messages Meteo. -
Page 45: Saving, Printing Egc Messages Automatically
2. SYSTEM INITIALIZATION 6. Press the [Enter] key to open the EGC channel list entry screen. Setup Configuration EGC Channel List ENT: set ESC: quit 11080* 12580* 10840* 11088* EGC channel list entry screen 7. Enter EGC channel frequency code. The EGC channel frequency code range is 8000-14000. -
Page 46: Adding Ncs Channels
2. SYSTEM INITIALIZATION Automatically printing EGC messages 1. Press the function key [F8] to display the Setup menu. 2. Press the [6] key to display the Auto mode setup menu. 3. Choose Auto EGC Message Print and then press the [Enter] key. 4. -
Page 47: Les List
2. SYSTEM INITIALIZATION Setup Configuration NCS Channel List ENT: set ESC: quit AOR (WEST) AOR (EAST) FREQ FREQ FREQ FREQ 11080* 12580* 12580* 10840* Update NCS channel list, update window 14. Yes is selected; press the [Enter] key to register input. Note: If the ID or frequency entered is invalid the message "Input Error: NCS ID"... - Page 48 2. SYSTEM INITIALIZATION 2. Press the [A] key to display the Configuration menu. Setup Configuration 1. Station List 2. LES List 3. EGC Channel List 4. NCS Channel List 5. E-Mail Service List 8. Network Setup 9. Directories A. Configuration B.
-
Page 49: Editing The Les List
2. SYSTEM INITIALIZATION 6. Press the [Enter] key to open the text entry window. Name Remarks : Charge (YEN/256bit) TELEX *****.** *****.** E-Mail *****.** CSDN *****.** PSDN *****.** X400 *****.** DNID *****.** SPEC *****.** Erase the Name to delete this LES. LES list, text window 7. -
Page 50: Printing The Les List
2. SYSTEM INITIALIZATION 2.6.3 Printing the LES list 1. Press [F8], [A] and [2] to display the LES list. 2. While pressing and holding down the [Ctrl] key, press the [P] key to print the LES list. LES List ( Printed at 02-02-25 02:33 ) +++++ AOR (WEST) ++++ Name LES ID... -
Page 51: Station List
Options Setup Position StopAlarm Setup Configuration Station List Station Group Name Type Code, ID / Address E-Mail abc@ furuno.co.jp E-Mail xyz@ furuno.co.jp Seagull TELEX 463609999 Page Up, Page Down: Move Ctrl+P: print Sort (Ctrl+G: Group, Ctrl+N: Station Name, Ctrl+T: Type) Sample station list 4. - Page 52 2. SYSTEM INITIALIZATION 14. Press the [Enter] key to open the destination type window. TELEX E-Mail CSDN PSDN X400 DNID SPEC TELEX (Prefixed) (Prefixed) PSDN (Prefixed) X400 (Prefixed) DNID (Prefixed) SPEC (Prefixed) Options window for “destination type” TELEX: Telex communication Facsimile service FAX: - to an office facsimile machine...
- Page 53 2. SYSTEM INITIALIZATION 20. Press the [Enter] key to close the prefix code window. 21. Press the [↓] key to choose Country Code. 22. For ship-to-shore telex, enter international telex country code; ship-to-ship telex, enter ocean region. A list of international telex country codes appears in the Appendix.
-
Page 54: Editing The Station List
Options Setup Position StopAlarm Setup Configuration Station List Station Group Name Type Code, ID / Address E-Mail abc@ furuno.co.jp E-Mail xyz@ furuno.co.jp Seagull TELEX 463609999 Page Up, Page Down: Move Ctrl+P: print Sort (Ctrl+G: Group, Ctrl+N: Station Name, Ctrl+T: Type) Station list 2. -
Page 55: Entering Own Ship's Position
2. SYSTEM INITIALIZATION Entering Own Ship’s Position When there is no position data, set Nav Port in the System Setup menu to “OFF,” as explained in paragraph 2.1.2, and then enter ship’s position manually as follows: 1. Press the function key [F9] to display the Position menu. File Edit Transmit... -
Page 56: Setting Directories
2. SYSTEM INITIALIZATION Setting Directories You can designate the directory where to save incoming and outgoing messages as follows: 1. Press the function key [F8] to display the Setup menu. 2. Press the [9] key to display the Directories menu. 3. -
Page 57: E-Mail Service List
2. SYSTEM INITIALIZATION 2.10 E-mail Service List The E-mail service list provides for e-mail set up. The procedure below shows you how to add e-mail service stations to the list. 1. Press the function key [F8] to display the Setup menu. 2. - Page 58 2. SYSTEM INITIALIZATION 5. Press the [Enter] key to open the service station name entry window. Setup Configuration E-Mail Service List 1. Station List Station Name AOR.W AOR.E POR 2. LES List 3. EGC Channel List Comsat 4. NCS Channel List PTT Telecom 5.
-
Page 59: E-Mail Setup
2. SYSTEM INITIALIZATION 2.11 E-mail Setup Choose the LES where to forward e-mail. Also, you will need to register with the LES to get e-mail services. 1. Press the function key [F8] to display the Setup menu. 2. Press the [7] key to choose E-mail Setup. Setup E-Mail Setup Station Name... -
Page 60: Network Setup
2. SYSTEM INITIALIZATION 2.12 Network Setup If the equipment is interfaced with a LAN system onboard the ship, set it up as follows: 1. Press the function key [F8] to display the Setup menu. 2. Press the [8] key to choose Network Setup. File Edit Transmit... - Page 61 Delivery Keyword.” The string between the keyboard and carriage return is delivered to shipboard mail address. For example, a message carries the string /Local Addr/ smith@ship.furuno.com. If the auto delivery keyword is “Local Addr” the mail is delivered to smith@ship.furuno.com.
-
Page 62: Automatic Mode Setup
2. SYSTEM INITIALIZATION 2.13 Automatic Mode Setup The Auto Mode Setup menu mainly lets you choose which EGC messages to save and print automatically. You may also disable or enable the routine message receive alarm from this menu. 1. Press the function key [F8] to show the Setup menu. 2. -
Page 63: 2.14 Saving, Loading System Settings
2. SYSTEM INITIALIZATION 2.14 Saving, Loading System Settings You can save system settings to a floppy disk and load them into the terminal unit. This is useful for having a backup copy of system settings. 2.14.1 Saving system settings to a floppy disk 1. -
Page 64: File Operations
FILE OPERATIONS This chapter describes how to prepare, edit, save and print files (messages). Preparing Files There are two types of files: routine and confidential. Files can be assigned a file name and saved to a floppy disk for later use. A message may contain maximum 124Ξ254 characters (32 Kbytes). -
Page 65: Preparing A Confidential File
3. FILE OPERATIONS 3.1.2 Preparing a confidential file If communicating with another FELCOM, you can prepare a confidential message by entering “S???-addressee code(-password):” in the first line of the message text. You can also receive confidential messages containing this header from a land subscriber or any MES which uses the FELCOM. There are two types of confidential messages: message with addressee code and message with both addressee code and password. -
Page 66: Editor Menu Setup
3. FILE OPERATIONS 3.1.3 Editor menu setup The Editor menu sets the parameters of the text editor. 1. Press the function key [F8] to display the Setup menu. 2. Press the [3] key to display the Editor Setup menu. File Edit Transmit Reports... -
Page 67: Working With Text
<[1] UNTITLED1> 0001 WE ARE CONFIDENT THAT YOU WILL ENJOY MANY YEARS OF OPERATION WITH 0002 THIS INMARSAT STANDARD C MOBILE EARTH STATION CONGRATULATIONS 0003 CONGRATULATIONS ON YOUR CHOICE OF FURUNO FELCOM ---- * ---------+---------+---------+---------+---------+---------+---------< ASCII 173 Char. [ Line 3 Col. - Page 68 [F2] and then the [3] (Paste) key. Copying and pasting text 1. Choose the text you want to copy. <[1] UNTITLED1> 0001 THE FURUNO FELCOM INMARSAT STANDARD C MOBILE EARTH STATION, A 0002 SATELLITE COMMUNICATIONS UNIT PACKAGE FOR VIRTUALLY EVERY VESSEL.
- Page 69 5. Press the function key [F2] followed by the [3] key. The text is placed at the cursor location. <[1] UNTITLED1> 0001 THE FURUNO FELCOM INMARSAT STANDARD C MOBILE EARTH STATION, A 0002 SATELLITE COMMUNICATIONS UNIT PACKAGE FOR VIRTUALLY EVERY VESSEL. 0003 UNIT ---- * ---------+---------+---------+---------+---------+---------+---------<...
-
Page 70: Saving Files
3. FILE OPERATIONS Saving Files 3.2.1 Formatting a floppy disk To save a message to a floppy disk the disk must first be formatted. Formatting prepares the disk so that information can be written to its surface. 1. Insert a blank floppy disk into the disk drive. 2. - Page 71 Reports Logs Options Setup Position StopAlarm File <[1] UNTITLED1> Save 0001|THE FURUNO FELCOM 12 INMARSAT STANDARD C MOBILE EARTH STATION, A 1. New ALT-N 0002|SATELLITE COMMUNICATIONS UNIT PACKAGE FOR VIRTUALLY EVERY VESSEL. 2. Open ALT-O Filename Size Date & Time 3.
- Page 72 NT THAT YOU WILL ENJOY MANY YEARS OF OPERATION WITH 2. Open ALT-O STANDARD C MOBILE EARTH STATION FELCOM 3. Close ALT-Q S ON YOUR CHOICE IF FURUNO FELCOM . 4. Save ALT-S 5. Delete ALT-D 6. Rename Save this message? 7.
-
Page 73: Opening Files
Open 1. New ALT-N SEIZOU 2. Open ALT-O 3. Close ALT-Q THE FURUNO FELCOM INMARSAT STANDARD C MOBILE EARTH STATION, A 4. Save ALT-S SATELLITE COMMUNICATIONS UNIT PACKAGE FOR VIRTUALLY EVERY VESSEL. UNIT 5. Delete ALT-D 6. Rename 7. Print ALT-P 8. -
Page 74: Switching Between Files
[B:\SEIZOUSE 2. Open ALT-O STANDARD C MOBILE EARTH STATION FELCOM Filename Size Date & Time 3. Close ALT-Q S ON YOUR CHOICE IF FURUNO FELCOM . ABC281 . 02-02-25 20:54 4. Save ALT-S COIEKI . 02-02-25 02:13 5. Delete ALT-D COMTEST. -
Page 75: Saving A File Under A New Name
NT THAT YOU WILL ENJOY MANY YEARS OF OPERATION WITH 2. Open ALT-O STANDARD C MOBILE EARTH STATION FELCOM 3. Close ALT-Q S ON YOUR CHOICE IF FURUNO FELCOM . 4. Save ALT-S 5. Delete ALT-D 6. Rename Save this message? 7. -
Page 76: Printing Files On Floppy Disks
[B:\SEIZOUSE 2. Open ALT-O STANDARD C MOBILE EARTH STATION FELCOM Filename Size Date & Time 3. Close ALT-Q S ON YOUR CHOICE IF FURUNO FELCOM. ABC281 . 02-02-25 20:54 4. Save ALT-S COIEKI 02-02-25 02:13 5. Delete ALT-D COMTEST . -
Page 77: Combining Files
3. FILE OPERATIONS Combining Files In the procedure below we’ll combine file A and B. 1. Open file A. 2. Open file B. 3. Place the cursor at the beginning of the file. While pressing and holding down the [Shift] key, press the [↓] key to highlight the entire file. (You can also choose a portion of the file.) 4. -
Page 78: Mime (Multipurpose Internet Mail Extensions)
3. FILE OPERATIONS 4. Press the [Enter] key. The prompt “OK to delete file?” appears. File Delete 1. New ALT-N [B:\ABC28 2. Open ALT-O Filename Size Date & Time 3. Close ALT-Q ABC28 02-01-10 20:53 4. Save ALT-S ABC281 . 02-01-10 20:54 COIEKI . -
Page 79: Renaming Files
3. FILE OPERATIONS Renaming Files Do the following to rename a file. 1. Press the function key [F1]. 2. Press the [6] key. File Rename 1. New ALT-N [B:\ABC28 2. Open ALT-O Filename Size Date & Time 3. Close ALT-Q Test .txt 02-01-10 20:53... -
Page 80: Inmarsat C Communications
INMARSAT C COMMUNICATIONS This chapter explains how to transmit and receive. Before conducting any communications, be sure to login with the NCS in your area, following the instructions in paragraph 2.3.1. To transmit e-mail, register with the LES provider which provides e-mail services. E-mail charges are calculated separately. -
Page 81: Transmitting A Prepared File
4. INMARSAT C COMMUNICATIONS Message, subscriber, destination type and code s i l l i a l i a a l i l i a l i a a l i a l i l i a l i a 4.1.2 Transmitting a prepared file This section explains how to transmit a prepared file. - Page 82 4. INMARSAT C COMMUNICATIONS File Edit Transmit Reports Logs Options Setup Position StopAlarm Transmit <[1] UNTITLED1> Transmit Message 1. Transmit Message 2. Cancel Priority Normal 3. Request Delivery Status Message File Message now being edited Size Station Name Cost ********.**(YEN) Destination Type TELEX Prefix Code...
- Page 83 4. INMARSAT C COMMUNICATIONS Destination type: TELEX (1) Press the [↓] key to choose Prefix Code. (2) Press the [Enter] key to open the window for prefix code entry. (3) Key in prefix code in two digits. Note that some services may not be available depending on LES.
- Page 84 4. INMARSAT C COMMUNICATIONS (9) Press the [↓] key to choose Station ID. (10) Press the [Enter] key to open the window for station ID entry. Transmit <[1] UNTITLED1> 1. Transmit Message Transmit Message 2. Cancel Priority Normal 3. Request Delivery Status Message File Message now being edited Size...
- Page 85 4. INMARSAT C COMMUNICATIONS Destination type: E-mail (1) Press the [↓] key to choose Address. (2) Press the [Enter] key to open the window for address entry. Transmit <[1] UNTITLED1> Transmit Message 1. Transmit Message 2. Cancel Priority Normal 3. Request Delivery Status Message File Message now being edited Size...
- Page 86 4. INMARSAT C COMMUNICATIONS Transmit <[1] UNTITLED1> Transmit Message 1. Transmit Message 2. Cancel Priority Normal 3. Request Delivery Status Message File Message now being edited Size Station Name Cost ********.**(YEN) Destination Type E-Mail Prefix Code Select File Country/Ocean Code Station ID Modem Type Address...
- Page 87 4. INMARSAT C COMMUNICATIONS 5. Press the [↓] key to choose Option. 6. Press the [Enter] key to open the options window. Transmit <[1] UNTITLED1> Transmit Message 1. Transmit Message 2. Cancel Priority Normal 3. Request Delivery Status Message File Message now being edited Size Station Name...
-
Page 88: Transmitting A File Stored On Floppy Disk (Multiple Address)
4. INMARSAT C COMMUNICATIONS 22. Press the [Enter] key to open the Start window. 23.Press the [Enter] key to send the message to the message buffer. (To escape, choose “No” and press the [Enter] key.) The message “Message is entered in sending Buffer.”... - Page 89 4. INMARSAT C COMMUNICATIONS File Edit Transmit Reports Logs Options Setup Position StopAlarm Transmit 1. Transmit Message 2. Cancel 3. Request Delivery Status Transmit menu 4. Press the [1] key to choose Transmit Message. File Edit Transmit Reports Logs Options Setup Position StopAlarm...
- Page 90 Position Station Na RxIF AGC Level OK (135) Station Group Name Type Code, ID / Address Destination TELEX REF Offset Freq OK ( 0Hz) FURUNO TELEX Waypoint Country Synthe 1st local FRNINMBTSTS TELEX 343199999 Station 65-2111 3rd local Course Modem...
- Page 91 97-08-04 BBER Time 01:32 (UTC) Priority Normal Message File SEISETU.TXT Send level Size Position Station Name FURUNO Cost ********.** (YEN) RxIF AGC Level Destination Type TELEX REF Offset Freq Waypoint Prefix Code Synthe 1st local Country/Ocean Code 3rd local Course...
-
Page 92: Canceling Transmission
Position StopAlarm Transmit <[1] UNTITLED1> 1. Transmit Message !!!!! Location error !!!!! 2. Cancel Cancel Message File Station Priority Send Status Delivery FURUNO Perth Normal Waiting FELCOM FUSA SANTAPAULA Normal Sending Cancel ---- * ---------+---------+---------+---------+---------+---------+---------< ASCII 25 Char. [ Line 2 Col. -
Page 93: Confirming Delivery Status (Message Status List)
2. Cancel 3. Request Delivery Status Transmit menu 2. Press the [3] key to display the Request Delivery Status list. Request Delivery Status Message File Station Priority Send Status Delivery FURUNO Yamaguchi Normal Waiting FURUNO Yamaguchi Normal Sending ASDFASDF Normal... - Page 94 4. INMARSAT C COMMUNICATIONS Message status list description Message number No.: Message File: File name. For no file name, “edit msg. 00X” appears (X = number from 001-999). Name of remote party (recipient) Station: The LES which received the message. LES: Normal or distress Priority:...
-
Page 95: Manually Requesting Delivery Status
1. Press the function key [F3]. 2. Press the [3] key to display the Request Delivery Status list. Request Delivery Status Message File Station Priority Send Status Delivery FURUNO Perth Normal 02-02-25 16:10 edit msg.002 FURUNO Perth Normal Request delivery status display 3. -
Page 96: Accessing The 2-Digit Code Services
4. INMARSAT C COMMUNICATIONS 4.1.7 Accessing the 2-digit code services A range of special safety and general maritime services, known as the 2-digit code services, may be transmitted. The list on the next page shows the 2-digit code services available. To access a 2-digit code service do the following: 1. - Page 97 4. INMARSAT C COMMUNICATIONS Maritime safety service 2-digit code i t i i t i t i s General utility 2-digit code i t i e l i c i f l l a 12. Press the [↓] key to choose LES ID. 13.
-
Page 98: Inserting The Destinations Of A Fax Terminal
4. INMARSAT C COMMUNICATIONS 4.1.8 Inserting the destinations of a fax terminal You can send a text message to a Group 3 type fax terminal which is connected to the international PSTN (telephone) land line, provided the LES selected supports fax delivery. 1. -
Page 99: Receiving
4. INMARSAT C COMMUNICATIONS Receiving 4.2.1 When a message is received Each time the FELCOM receives a message it automatically registers, saves, prints (except messages with passwords) and files the message. 1) received alarm When a message is received, the audio alarm sounds. Silence the audio alarm by pressing the function key [F10]. -
Page 100: Setting The Receive Alarm
4. INMARSAT C COMMUNICATIONS 4.2.2 Setting the receive alarm An audio alarm may be set to sound when a routine or confidential message is received. The factory setting is OFF. 1. Press the function key [F8] to display the Setup menu. 2. - Page 101 View Window. 4. Press the [Enter] key for routine messages and messages with addressee code (no password). Display Receive Message <R0971123.002-> FROM FURUNO TO FRONTIER THE QUICK BROWN FOX JUMPS OVER LAZY DOG. ABCDEFGHIJKLMNOPQRSTUVWXYZ. 1234567890...
-
Page 102: Printing Receive Messages
4. INMARSAT C COMMUNICATIONS 4.2.4 Printing receive messages 1. Follow steps 1 thru 6 in “4.2.3 Displaying receive messages”. 2. While pressing and holding down the [Ctrl] key, press the [P] key to print Receive Message (SECRET) Appears only for confidential messages Message No. -
Page 103: Automatically Saving Receive Messages To The Hard Disk
4. INMARSAT C COMMUNICATIONS 4.2.6 Automatically saving receive messages to the hard disk Receive messages are automatically assigned a file name. See paragraph 4.2.1 1. Press the function key [F8]. 2. Press the [6] key to display the Auto Mode Setup menu. Auto Mode Setup Auto Log Print Receive Alarm... -
Page 104: Deleting Receive Messages
4. INMARSAT C COMMUNICATIONS 4.2.7 Deleting receive messages 1. Press the function key [F6]. 2. Press the [2] key to display receive message list. Delete Message Message No. Priority Size Addressee Rec date & Time Status R0971106.001 Perth Normal 32767 02-02-04 16:10 Saved R0971105.002... -
Page 105: Display Log
2. Press the [4] key to display the Display Log. Display Log Message No. Type Date Time Station Size Cond T0971110.001 TELEX 02-02-25 19:10 FURUNO 12345 Success R0971110.001 TELEX 02-02-25 19:25 PSTN Fail PSDN E-mail (etc.) 50 (max) Ctrl+P: print Sample display log 3. -
Page 106: Automatic Printing Of Display Log
4. INMARSAT C COMMUNICATIONS 4.3.2 Automatic printing of display log The Display Log can be automatically printed every 24 hours as follows: 1. Press the function key [F8] to display the Setup menu. 2. Press the [6] key to display the Auto Mode Setup menu. Auto Mode Setup Auto Log Print Receive Alarm... -
Page 107: Egc Messages
4. INMARSAT C COMMUNICATIONS EGC Messages EGC messages are automatically received, printed and saved to the terminal unit. The memory capacity for EGC message is 32k bytes. When the EGC message memory is full, the oldest EGC message is automatically deleted. 4.4.1 Displaying and reprinting EGC messages 1. -
Page 108: Displaying Egc Closed Network Id (Enid)
Options Setup Position StopAlarm 1. Display EGC Message EGC Network ID List 2. EGC Network ID ENT: Activate SPACE: Inhibit Ctrl+P: Print ESC: Quit Mark '*' means activation 00001 FURUNO 00002 FURUNO 04001 FURUNO 04002 FURUNO 04003 FURUNO 04005 FURUNO... -
Page 109: Receiving Egc Distress Or Urgent Message
4. INMARSAT C COMMUNICATIONS 4.4.3 Receiving EGC distress or urgent message When the FELCOM receives an EGC distress or an urgent message, the audio alarm sounds from the terminal unit and the Distress Alert/Received Call Unit IC-305 and the Distress Message Controller DMC-5. To silence the alarm do the following: FELCOM: Function key [F10] (StopAlarm) -
Page 110: Data Reporting And Polling
DATA REPORTING AND POLLING This chapter provides the information necessary for data reporting and polling reception. Data reporting provides automatic data transmission at regular intervals from your ship to your home office. When your ship receives a polling command from your home office, it automatically transmits polling data to your home office. -
Page 111: Setting A Data Report
5. DATA REPORTING AND POLLING 5.1.1 Setting a data report 1. Press the function key [F5] to display the Position Reports menu. Position Reports 1. Data Report 2. Message Report 3. Data Network ID Position reports menu 2. Press the [Enter] or [1] key to display Data Report menu. 3. - Page 112 5. DATA REPORTING AND POLLING 19. Do one of the following depending on the selection you made at step 17. • “Regular Interval” selected at step 17: (1) Press the [↓] key to choose Interval Time. (2) Press the [Enter] key to open the window for interval time entry. (2) Key in the interval time.
-
Page 113: Setting A Message Report
5. DATA REPORTING AND POLLING 5.1.2 Setting a message report 1. Press the function key [F5] to display the Position Reports menu. Position Reports 1. Data Report 2. Message Report 3. Data Network ID Position reports menu 2. Press the [2] key to display the Message Report menu. 3. - Page 114 5. DATA REPORTING AND POLLING 22. Press the [Enter] key to close the options window. 23. Do one of the following depending on the selection you made at step 21. • “Regular Interval” selected at step 21: (1) Press the [↓] to choose Interval Time. (2) Press the [Enter] key to open the window for interval time entry.
-
Page 115: Polling
5. DATA REPORTING AND POLLING Polling When the FELCOM receives a polling command from your home office it automatically transmits data to your home office. The data are position, speed, bearing and other data sent from a navigator or an interface unit. A polling command from your home office can also activate a data report or message report if the corresponding setting is completed on the FELCOM. - Page 116 For example, you transmit polling command to MES of PIN code 12345678 via Yamaguchi station (Pacific Ocean: 203). Then, that MES transmits position, speed, bearing, water temperature, current and depth to telex number 720-5644325. P???/12345678/TELEX/203/720/5644325/: Mobile earth station transmit position, speed and bearing to e-mail address, for example, abc@furuno.co.jp. P???/12345678/EMAIL/203/abc@furuno.co.jp:...
-
Page 117: Polling Reception
5. DATA REPORTING AND POLLING 5.2.3 Polling reception No operator intervention is required during polling reception. The Printer PP-510 prints the status of polling reception and transmits data in response to polling request as shown below. Receive Message Message No. : R0990907.002 Message Ref. -
Page 118: Dnid (Data Network Identification)
5. DATA REPORTING AND POLLING DNID (Data Network Identification) When you make a contract with an information provider, DNIDs are downloaded from the information provider to your FELCOM via an LES. Up to 64 DNIDs can be downloaded to the FELCOM. 5.3.1 Displaying DNID 1. -
Page 119: Enabling/Disabling Dnid
5. DATA REPORTING AND POLLING 5.3.2 Enabling/Disabling DNID DNID can be enabled or disabled as follows: 1. Use the [↑] or [↓] key to choose desired DNID from the data network ID list . 2. Press the [Enter] key to enable the DNID. (* appears.) Press the [Enter] key to disable the DNID. -
Page 120: Distress Operations
DISTRESS OPERATIONS Preparing the Distress Alert This procedure shows you how to update the distress alert. If time, position, course and speed shown on the standby display are correct, skip those items in the procedure. 1. Press the function key [F8] to display the Setup menu. 2. - Page 121 6. DISTRESS OPERATIONS 15.Press the [Esc] key to show the Update window. Setup Distress Alert Setup LES ID 303 (YAMAGUCHI) Update Time 06:23 02-02-25 (YY-MM-DD) Position 30:00N LON 140:00E Protocol Maritime Nature Grounding Course Speed 0 KTS Update Distress Alert updated. Press any key to escape.
-
Page 122: Transmitting The Distress Alert
6. DISTRESS OPERATIONS Transmitting the Distress Alert Do the following when a life-endangering situation arises on your vessel. 1. Open the cover of the DISTRESS button on the terminal unit or the Distress Alert Unit IC-305. 2. Press the DISTRESS button until the lamp in the button flashes and the audio alarm sounds. -
Page 123: Testing The Distress Button
6. DISTRESS OPERATIONS Testing the Distress Button The DISTRESS button on the terminal unit and the IC-305 may be tested as below without transmitting the distress signal. 1. Press the function key [F7] to display the Options menu. 2. Press the [6] key to display the Test menu. Test 1. -
Page 124: Distress Communications
6. DISTRESS OPERATIONS Distress Communications The distress alert provides the minimum distress reporting requirements: own vessel’s ID, speed, course, L/L position and nature of distress. After receiving the distress alert acknowledgment and you are not pressed for time, you may send detailed information as follows: 1. - Page 125 6. DISTRESS OPERATIONS 11. Press the [Enter] key to close the LES list. 12. Press the [↓] key to place the cursor on TRANSMIT. 13. Press the [Enter] key. The display should look similar to the illustration below. Transmit <[1] UNTITLED1> Transmit Message 1.
-
Page 126: Other Functions
OTHER FUNCTIONS This chapter describes how to abort operation, scan NCS and choose EGC and NCS channels. Aborting an Operation You can abort transmission, receiving or scanning as follows: 1. Press the function key [F7] to display the Options menu. Options 1. -
Page 127: Scanning Ncs
7. OTHER FUNCTIONS Scanning NCS The terminal unit automatically tunes itself to the NCS selected on the System Setup menu. You can, however, tune to another NCS which has a stronger signal. Scanning is possible only when the terminal unit is IDLE and FELCOM is set to operate as an Inmarsat C station. -
Page 128: Choosing Egc Receiving Channel
7. OTHER FUNCTIONS Choosing EGC Receiving Channel EGC channel can be selected when the terminal unit is set to operate as an EGC-only receiver. This procedure is shown for reference; currently there is only one EGC channel per NCS. 1. Press the function key [F8] to display the Setup menu. 2. -
Page 129: Choosing Ncs Channel
7. OTHER FUNCTIONS Choosing NCS Channel NCS channel can be selected as shown in the procedure below. Currently, each satellite transmits one global beam. In the future, the satellites will transmit multiple spot beams, namely, the NCS will have multiple channels. 1. -
Page 130: Maintenance
MAINTENANCE This chapter provides the information necessary for the maintenance and checking of the FELCOM. Safety Information WARNING Do not open the cover of the equipment. This equipment uses high voltage electricity which can shock, burn, or cause serious injury. Only qualified personnel should work inside the equipment. -
Page 131: General Checking And Maintenance
8. MAINTENANCE General Checking and Maintenance Turn off the power before conducting any maintenance procedures other than the cleaning of the terminal unit. Cleaning the terminal unit The terminal unit and its LCD can be cleaned with a soft, dry cloth. DO NOT use chemical cleaners. -
Page 132: Diagnostics
8. MAINTENANCE Diagnostics The system is equipped with diagnostic tests which check it for proper operation. 8.3.1 Self test at power on The terminal unit performs the ROM sum test and RAM read and write test when turned on. If the test results are normal the equipment goes into normal operation. -
Page 133: Performance Verification (Pv) Test
8. MAINTENANCE Performance Verification (PV) Test After the FELCOM is installed, the installer usually confirms that it is functioning properly, by logging in and conducting the PV test. The PV test consists of the message reception test, message transmission test and distress alert test. The results of the test appear on the PV test result display. -
Page 134: Pv Test Procedure
8. MAINTENANCE 8.4.2 PV test procedure 1. Confirm that the terminal unit is in idle condition and logged in. 2. Press the function key [F7] to display the Options menu. 3. Press the [6] key to choose Test. 4. Press the [1] key to choose PV Test. Options Test 1. -
Page 135: Results Of Pv Test
8. MAINTENANCE 8.4.3 Results of PV test 1. At the standby display, press the function key [F7] to display the Options menu. 2. Press the [6] key to display the Test menu. Options Test 1. Login 2. Logout 1. PV Test 3. -
Page 136: System Status Monitor
ACK: Acquired; Almanac data acquired IMP: Impossible; cannot receive GPS signal INT: Interrupted; object interfering reception of GPS signal ALM: Receiving the almanac 2D, 3D: Position-fixing method by 2 or 3 dimension * = Indications shown for FURUNO GPS navigator. -
Page 137: Replacing The Battery
8. MAINTENANCE Memory remaining in terminal unit DCE Memory: Bulletin Board Error Rate (%) BBER: Check of circuit status with LES, receiving circuit in C/N: antenna unit, RF CON Board and CPU Board (DEMOD section). OK appears for figure greater than 31. -
Page 138: Error Messages
8. MAINTENANCE Error Messages This section shows the error messages which may appear on the screen and the means to restore normal operation. If normal operation cannot be restored, contact your dealer to request repair. n i l n i l t s i , l l n i l... - Page 139 8. MAINTENANCE v i l v i l r i f v i l e l i v i l v i l e l i c i t . y l e l i c i t . y l n i l n i l l i a...
- Page 140 8. MAINTENANCE e l i l l u y l l c i t . y l . y l . r i l l a i r r l i a . r i Turn on the f l l terminal unit.
- Page 141 8. MAINTENANCE . y l d i l d i l 8-12...
-
Page 142: Appendix A Data Tables
APPENDIX A DATA TABLES Menu Tree F1: File 1. New 2. Open 3. Close 4. Save 5. Delete 6. Rename 7. Print 2HD (1.44MB) 8. Format Disk 2DD (720kB) 9. MIME (Decode) F2: Edit 1. Cut 2. Copy 3. Paste 4. - Page 143 APPENDIX A DATA TABLES F3: Transmit Priority Normal 1. Transmit Message Distress Select File Message File Select Station Station Group Destination Type TELEX Name E-Mail CSDN PSDN X400 DNID SPEC TELEX (Prefixed) FAX (Prefixed) PSDN (Prefixed) X400 (Prefixed) DNID (Prefixed) SPEC (Prefixed) Prefix Code (Prefix selected) 2 digits...
- Page 144 APPENDIX A DATA TABLES F4: EGC 1. Display EGC Message 2. EGC Network ID F5: Reports 1. Data Report 1. Data Report 1 Status Report Length Destination DNID LES ID Member No. Activation Regular Interval Daily Interval Time 00:01~99:59 (Regular Interval selected) Report Times 1~999 No Limit...
- Page 145 APPENDIX A DATA TABLES Modem Type (FAX or FAX Prefixed selected) T30 FAX V21 V.21 300bps Duplex V22 V.22 1200bps Duplex V22B V.22bis 2400bps Duplex V23 V.23 600/1200bps V26B V.26bis 2400/1200bps V26T V.26ter 2400bps Duplex V27T V.27ter 4800bps/2400bps V32 V.32 9600bps Duplex other Address 60 digits max.
- Page 146 APPENDIX A DATA TABLES F7: Options 1. Login 2. Logout 3. Abort 4. Select NCS AOR (WEST) AOR (EAST) 5. Ocean Region Auto West-Atlantic East-Atlantic Pacific Indian 6. Test 1. PV Test 2. PV Test Results 3. Self Test 4. Distress Alert Button Test F8: Setup 1.
- Page 147 APPENDIX A DATA TABLES MES Operation Mode INMARSAT-C Nav Port Active Port Output Port Message Output Port INT+EXT AUTO EGC Output Port INT+EXT Network Setup Network IP address Subnet mask DHCP Host name Domain name Mail Geteway Attach Delivery Server IP Address Auto Delivery Keyword Save/Load...
- Page 148 APPENDIX A DATA TABLES Currency Unit OTHER 4 characters (Max): Currency unit input Screen Saver Window Base Window Window Color Rcv Message EGC Message EDIT 1 EDIT 2 EDIT 3 EDIT 4 SUBMENU 1 SUBMENU 2 SUBMENU 3 SUBMENU 4 Messaage Fore Color L_WHITE...
- Page 149 APPENDIX A DATA TABLES 5. EGC Setup Additional Position 1 point Navarea 9max Fixed Area Waypoint (from NAV Equipment) Station Code Ice reports Meteo. forecasts Pilot service DECCA messages LORAN messages OMEGA messages SATNAV messages Other navaid msg QRU (no message) 6.
- Page 150 APPENDIX A DATA TABLES 7. E-mail Setup Network 8. Network Setup IP Address Subnet Mask DHCP Host Name Domain Name Mail Gateway Attach BASE64 UUENODE B INARY Local Delivery Server Server IP Fixed Address Auto Auto Delivery Keyword Message Directory 9.
- Page 151 APPENDIX A DATA TABLES 2. LES List (44x4) Name Remarks 3. EGC Channel List 20max 4. NCS Channel List 20x4max 5. E-mail Service List Service Station Name 19 characters max. (16max) Service ID 9 characters max. LES ID (AORW) 3 digits LES ID (AORE) 3 digits LES ID (POR)
-
Page 152: International Telex/Telephone Country Code List
APPENDIX A DATA TABLES International Telex/Telephone Country Code List Telephone Telex Country Area and Country Remarks for Telex Code Country Code Code Afghanistan Alaska Albania Algeria American Samoa American Virgin Is. Telex calls to former WUI subscribers, insert the figure "9"... - Page 153 APPENDIX A DATA TABLES Telephone Telex Country Area and Country Remarks for Telex Code Country Code Code Cambodia Kampuchea Rep. Cameroon Canada Disregard the figure "0" at head of subscriber number. Canary Is. Destination code is the same as for Spain. Cape Verde Cayman Is.
- Page 154 APPENDIX A DATA TABLES Telephone Telex Country Area and Country Remarks for Telex Code Country Code Code Falkland Is. (Malvinas) Faroe Is. Fiji Finland France French Guiana French Polynesia Gabon Gambia Georgia Germany (Fed, Rep. of) formerly East Germany formerly West Germany Ghana Gibraltar Greece...
- Page 155 APPENDIX A DATA TABLES Telephone Telex Country Area and Country Remarks for Telex Code Country Code Code Jamaica Japan KDD (for 5 digits) Jordan Kazakhstan Kenya Kiribati Subscriber numbers are 770XX Korea (Demo, People's (899) Rep. of) Korea (Rep. of) Kuwait Kyrgyzstan Latvia (formerly USSR)
- Page 156 APPENDIX A DATA TABLES Telephone Telex Country Area and Country Remarks for Telex Code Country Code Code Montserrat Morocco Mozambique Myanmar (formerly Burma) Namibia Nauru Nepal Netherlands Netherlands Antilles New Caledonia New Zealand Nicaragua Niger 2XXXX other numbers are for Semi-automatic calls. Nigeria Niue Is.
- Page 157 APPENDIX A DATA TABLES Telephone Telex Country Area and Country Remarks for Telex Code Country Code Code Reunion Subscriber numbers are 916XXX Romania Disregard the figure "0" at head of subscriber number. Russian Federation Rwanda Saipan San Marino Sao Tome & Principe Manual calls Saudi Arabia Senegal...
- Page 158 APPENDIX A DATA TABLES Telephone Telex Country Area and Country Remarks for Telex Code Country Code Code Turks & Caicos Is. Tuvalu U. A. E. Abu Dhabi 2XXXX, 3XXXX, 5XXXX Ajman 695XX Dubai 4XXXX Fujairah 8XXXX Ras Al Khaimah 9XXXX Sharjah 68XXX Umm Al Qaiwain...
- Page 159 APPENDIX A DATA TABLES Telephone Telex Country Area and Country Remarks for Telex Code Country Code Code Zaire Telex calls to places other than Kinshasa Subscriber beginning with 2XXXX can be made as Semi-automatic calls. Zambia Zanzibar Zimbabwe Telephone Telex Ocean Ocean Area Remarks Ocean Region...
-
Page 160: Les List
APPENDIX A DATA TABLES LES List AOR West AOR East Arvi Aussaguel Beijing Blaavand Boumehen Fucino Goonhilly Jeddah Jeddah Kumsan Netely Nonthaburi Odessa Perth Psary Raisting Santa Paula Sentosa Sintra Southbury Tangua Thermopylae Umm al Aish Xantic Xantic Xantic Xantic/Yamaguchi Yamaguchi/Xantic 003 APA-19... -
Page 161: International Telex Abbreviations
APPENDIX A DATA TABLES International Telex Abbreviations . f f r i f l l o a l i s t i s ’ e l l l l a t i s APA-20... -
Page 162: Glossary Of Acronyms
APPENDIX A DATA TABLES Glossary of Acronyms c i t c i t l l u l l u t f i i r r y t i c t i l l a y l l t i s i f i l y t i i t i... - Page 163 APPENDIX A DATA TABLES International Telegraphy Alphabet FIGURES LETTERS FIGURES LETTERS BELL CARRIAGE RETURN LINE FEED LETTERS FIGURES SPACE BLANK APA-22...
-
Page 164: Error Messages And Alerts
APPENDIX A DATA TABLES Error Messages and Alerts A file by that name already exists on FD. This message appears when you attempt to copy a file from the internal memory to a floppy disk and a file by that name already exists on the disk. Cannot use this LES. - Page 165 APPENDIX A DATA TABLES DCE Error : No response from DCE!! This message appears when you try to display the PV test results and there was no response from the terminal unit because it is off or its interconnection cable is disconnected or damaged. Distress Message updated.
- Page 166 APPENDIX A DATA TABLES Message Send failed. Could no send message because of satellite malfunction, etc. Message Send pending. All circuits occupied at LES. Message Send rejected. This alert appears when the LES rejects a message because of unpaid subscriber’s fee or other reasons. No response from terminal unit! This message will appear if the terminal unit is turned off or its interconnection cable is disconnected or damaged.
-
Page 167: Les Id List
APPENDIX A DATA TABLES LES ID List y l l t s i n i j t s l APA-26... -
Page 168: Appendix B Technical Data
APPENDIX B TECHNICAL DATA Digital Interface (IEC 61162-1 Edition 2) 1. Data sentences Input sentences BWC - Bearing and distance to waypoint - great circle $--BWC, hhmmss.ss, llll.ll, a yyyyy.yy, a, x.x, T, x.x, M, x.x, N, c--c, a*hh<CR><LF> Checksum Mode indicator (see note 1) Waypoint ID*... - Page 169 APPENDIX B TECHNICAL DATA BWR - Bearing and distance to waypoint - rhumb line APB-2...
- Page 170 APPENDIX B TECHNICAL DATA DBT - Depth below transducer $--DBT,x.x,f,x.x,M,x.x,F*hh<CR><LF> | | | | | | | | | | | +--------- 4 | | | | +--+----------- 3 | | +--+----------------- 2 +--+----------------------- 1 1. Water depth, feet 2. Water depth, m 3.
- Page 171 APPENDIX B TECHNICAL DATA GLL - Geographic position - latitude/longitude $--GLL,llll.lll,a,yyyyy.yyy,a,hhmmss.ss,A,a*hh<CR><LF> | | | | | +------- 6 | +--------- 5 +----------- 4 +---------------- 3 +------+----------------------- 2 +---+----------------------------------- 1 1. Latitude, N/S 2. Longitude, E/W 3. UTC of position 4. Status: A=data valid, V=data invalid 5.
- Page 172 APPENDIX B TECHNICAL DATA RMA - Recommended minimum specific LORAN-C data $--RMA,A,llll.lll,a,yyyyy.yy,a,x.x,x.x,x.x,x.x,x.x,a,a*hh<CR><LF> | | | | | +------- 10 | +--------- 9 | +---+----------- 8 +------------------ 7 +---------------------- 6 +-------------------------- 5 | +------------------------------ 4 +----+--------------------------------- 3 +---+-------------------------------------------- 2 +------------------------------------------------------- 1 1.
- Page 173 APPENDIX B TECHNICAL DATA RMB - Recommended minimum navigation information $--RMB,A,x.x,a,c--c,c--c,llll.lll,a,yyyyy.yyy,a,x.x,x.x,x.x,A,a*hh<CR><LF> | | | | | +--- 13 | +----- 12 | +------- 11 | +---------- 10 +-------------- 9 | +------------------ 8 +-----+--------------------- 7 +----+--------------------------------- 6 +--------------------------------------------- 5 | | +-------------------------------------------------- 4 | +------------------------------------------------------ 3 | +--------------------------------------------------------- 2 +------------------------------------------------------------ 1...
- Page 174 APPENDIX B TECHNICAL DATA RMC - Recommended minimum specific GPS/TRANSIT data $--RMC,hhmmss.ss,A,llll.lll,a,yyyyy.yyy,a,x.x,x.x,xxxxxx,x.x,a,a*hh<CR><LF> | | | | | | | +--- 10 | | +----- 9 +--+------- 8 +--------------- 7 | +--------------------- 6 | +------------------------- 5 +---+---------------------------- 4 +---+---------------------------------------- 3 +--------------------------------------------------- 2 +---------------------------------------------------------- 1 1.
- Page 175 APPENDIX B TECHNICAL DATA VTG - Course over ground and ground speed $--VTG,x.x,T,x.x,M,x.x,N,x.x,K,a*hh<CR><LF> | | | | | | | +------- 6 | | +--------- 5 +--+----------- 4 | | +--+----------------- 3 | | +--+----------------------- 2 +--+----------------------------- 1 1. Course over ground, degrees true 2.
- Page 176 APPENDIX B TECHNICAL DATA Output sentences GGA, GLL, RMC, VTG – see Input sentences GSV - GNSS satellites in view $--GSV,x,x,xx,xx,xx,xxx,xx..,xx,xx,xxx,xx*hh<CR><LF | +--------- 10 | +--+--+---+----------- 9 | +-----+------------------------ 8 +--------------------------------- 7 | +------------------------------------- 6 +---------------------------------------- 5 | +------------------------------------------- 4 | | +---------------------------------------------- 3 | +------------------------------------------------- 2 +--------------------------------------------------- 1...
- Page 177 APPENDIX B TECHNICAL DATA 2. Schematic diagrams APB-10...
-
Page 178: Index
INDEX Error messages ..........8-9 Aborting............7-1 Error messages and alerts ......23 Audio alarm silencing ............ 1-11 Files Auto mode setup...........2-33 combining ..........3-14 deleting ............. 3-14 Battery replacement........8-8 MIME ............3-15 opening............. 3-10 printing ............3-13 Data reporting renaming........... 3-16 data report...........5-2 saving ............ - Page 179 INDEX Menu tree ...........APA-1 Message logs ..........4-27 Saving Messages file under new name .........3-12 preparation of confidential......3-1 files .............3-8 preparation of routine........3-1 receive messages........4-23 Messages (receive) Search and replace.........3-6 printing ............4-22 Shortcut key ............1-5 Messages (received) Station list deleting .............4-25 adding stations..........2-22 saving............4-24 editing stations..........2-25...