Sign In
Upload
Manuals
Brands
Waters Manuals
Measuring Instruments
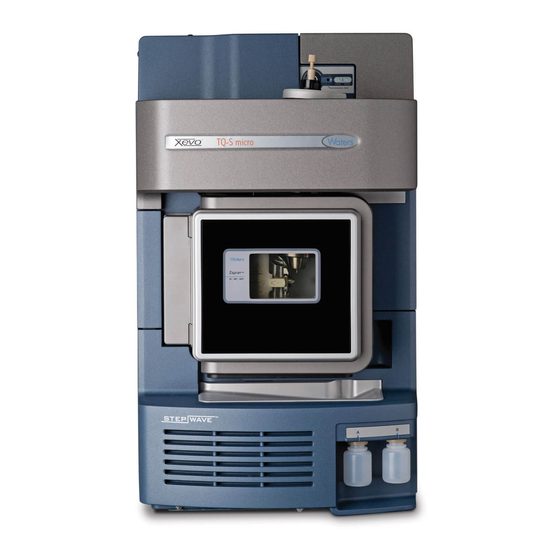
Xevo TQ-S micro
Waters Xevo TQ-S micro Manuals
Manuals and User Guides for Waters Xevo TQ-S micro. We have
2
Waters Xevo TQ-S micro manuals available for free PDF download: Overview And Maintenance Manual, Knowledge Base
Waters Xevo TQ-S micro Overview And Maintenance Manual (264 pages)
Brand:
Waters
| Category:
Measuring Instruments
| Size: 4 MB
Table of Contents
Copyright Notice
3
Trademarks
3
Customer Comments
4
Safety Considerations
4
Safety Hazard Symbol Notice
5
Considerations Specific to the Xevo TQ-S Micro
5
FCC Radiation Emissions Notice
9
Electrical Power Safety Notice
9
Equipment Misuse Notice
9
Operating this Instrument
10
Applicable Symbols
10
Audience and Purpose
12
Intended Use of the Xevo TQ-S Micro
12
Calibrating
12
Quality Control
12
EMC Considerations
13
Canada Spectrum Management Emissions Notice
13
ISM Classification: ISM Group 1 Class a
13
EC Authorized Representative
14
Table of Contents
15
1 Specifications and Operating Modes
23
Uses and Compatibility
24
ACQUITY Xevo TQ-S Micro UPLC/MS Systems
26
Software and Data System
29
Ionization Techniques and Source Probes
31
Electrospray Ionization (ESI)
31
Combined ESI and APCI (Esci)
31
Atmospheric Pressure Chemical Ionization (APCI)
31
Dual-Mode APPI/APCI Source
31
Nanoflow Source
32
Atmospheric Solids Analysis Probe (ASAP)
33
Atmospheric Pressure Gas Chromatography (APGC)
33
Ionkey Source
33
Intellistart Fluidics System
34
Functionality
34
System Operation
35
Ion Optics
36
MS Operating Modes
36
MS/MS Operating Modes
38
Product (Daughter) Ion Mode
39
Precursor (Parent) Ion Mode
40
Multiple Reaction Monitoring Mode
40
Constant Neutral Loss Mode
42
Sample Inlet
43
Leak Sensors
43
Vacuum System
43
Rear Panel Connections
44
2 Preparing for Operation
45
Starting the Mass Spectrometer
46
Verifying the Instrument's State of Readiness
49
Monitoring the Instrument Leds
49
Tuning and Calibration Information
49
Running the Instrument at Different Flow Rates
50
Preparing the Intellistart Fluidics System
51
Installing the Reservoir Bottles
51
Purging the Infusion Pump
53
Rebooting the Instrument
53
Leaving the Mass Spectrometer Ready for Operation
54
Emergency Shutdown of the Mass Spectrometer
54
3 Changing the Mode of Operation
55
ESI Mode
56
Installing the ESI Probe
56
Removing the ESI Probe
59
Esci Mode
60
Optimizing the ESI Probe for Esci Operation
60
APCI Mode
60
Installing the Ionsabre II Probe
61
Removing the Ionsabre II Probe
64
Combined APPI/APCI Source
65
APPI Operation
65
APCI Operation
66
Dual-Mode Operation
67
The Combined APPI/APCI Source Components
68
Installing the Combined APPI/APCI Source
70
Removing the Ionsabre II Probe and APPI/APCI Source Enclosure
71
Nanoflow Source
72
Installing the Nanoflow Source
73
Fitting a Borosilicate Glass Capillary (Nanovial)
76
Positioning the Borosilicate Glass Capillary Tip
79
Ionkey Source
80
Installing the Ionkey Source
80
Installing Ionkey Source Software
85
Installing the Camera in the Ionkey Source
86
Removing the Ionkey Source
86
4 Maintenance Procedures
89
Maintenance Schedule
91
Spare Parts
93
Troubleshooting with Connections INSIGHT
94
Safety and Handling
95
Preparing the Instrument for Operations on or Inside Its Source
97
Removing and Refitting the Source Enclosure
98
Removing the Source Enclosure from the Instrument
98
Fitting the Source Enclosure to the Instrument
100
Installing and Removing the Corona Pin
101
Installing the Corona Pin in the Source
101
Removing the Corona Pin from the Source
103
Operating the Source Isolation Valve
104
Removing O-Rings and Seals
107
Cleaning the Instrument Case
108
Emptying the Exhaust Trap Bottle
108
Gas Ballasting the Roughing Pump
110
Checking the Roughing Pump Oil Level
112
Adding Oil to the Roughing Pump
113
Cleaning the Source Components
114
Cleaning the Sampling Cone Assembly
115
Removing the Sampling Cone Assembly from the Source
115
Disassembling the Sampling Cone Assembly
117
Cleaning the Sample Cone and Cone Gas Nozzle
120
Assembling the Sampling Cone Assembly
122
Fitting the Sampling Cone Assembly to the Source
123
Cleaning the Ion Block Assembly
125
Removing the Ion Block Assembly from the Source Assembly
125
Disassembling the Source Ion Block Assembly
127
Cleaning the Ion Block Components
132
Assembling the Source Ion Block Assembly
133
Fitting the Ion Block Assembly to the Source Assembly
135
Cleaning the Ion Guide Assembly
135
Removing the Pumping Block Assembly and Ion Guide Assembly from the Instrument
136
Removing the Ion Guide Assembly and Differential Aperture from the Pumping Block Assembly
137
Removing the Differential Aperture Support and the Differential Aperture from the Ion Guide Assembly
138
Cleaning the Differential Aperture
140
Cleaning the Ion Guide Assembly
141
Fitting the Differential Aperture and the Differential Aperture Support Onto the Ion Guide Assembly
143
Fitting the Ion Guide Assembly and Differential Aperture Onto the Pumping Block Assembly
144
Fitting the Pumping Block Assembly and Ion Guide Assembly Onto the Instrument
145
Replacing the ESI Probe Tip and Gasket
146
Replacing the Probe Tip and Gasket
146
Replacing the ESI Probe Capillary
150
Cleaning the Ionsabre II Probe Tip
166
Replacing the Ionsabre II Probe Sample Capillary
167
Removing the Existing Capillary
167
Installing the New Capillary
169
Cleaning or Replacing the Corona Pin
172
Replacing the Ionsabre II Probe Heater
174
Removing the Ionsabre II Probe Heater
174
Fitting the New Ionsabre II Probe Heater
176
Replacing the Ion Block Source Heater
177
Replacing the Source Assembly Seals
180
Removing the Probe Adjuster Assembly Probe and Source Enclosure Seals
181
Fitting the New Source Enclosure and Probe Adjuster Assembly Seals
183
Replacing the Air Filter
184
Replacing the Roughing Pump Oil
187
Replacing the Roughing Pump's Oil Demister Element
190
APPI/APCI Source-Changing the UV Lamp Bulb
195
APPI/APCI Source-Cleaning the Lamp Window
196
APPI/APCI Source-Replacing the APPI Lamp Drive Seals
198
Removing the APPI Lamp Drive Assembly Seals
198
Fitting the New APPI Lamp Drive Assembly O-Rings
204
Replacing the Fluidic Lines of the Ionkey Source
206
Removing a Fluidic Line
207
Installing a Fluidic Line
210
Cleaning the Ionkey Source and Connectors
211
Replacing the Instrument's Fuses
214
A Safety Advisories
215
Warning Symbols
216
Specific Warnings
217
Notices
220
Prohibition Symbol
220
Warnings that Apply to All Waters Instruments and Devices
221
Warnings that Address the Replacing of Fuses
226
Electrical and Handling Symbols
227
Electrical Symbols
227
Handling Symbols
228
B External Connections
231
External Wiring and Vacuum Connections
232
Connecting the Oil-Filled Roughing Pump
233
Connecting Electric Cables to the Oil-Filled Roughing Pump
237
Connecting the Edwards Oil-Free Roughing Pump
238
Connecting Electric Cables to the Edwards Oil-Free Roughing Pump
241
Connecting to the Nitrogen Gas Supply
242
Connecting to the Collision Cell Gas Supply
243
Connecting the Nitrogen Exhaust Line
244
Connecting the Liquid Waste Line
246
Connecting the Workstation
249
Connecting Ethernet Cables
250
I/O Signal Connectors
251
Signal Connections
252
Connecting to the Power Supply
255
C Materials of Construction and Compliant Solvents
257
Preventing Contamination
258
Items Exposed to Solvent
258
Solvents Used to Prepare Mobile Phases
259
D Plumbing the Intellistart Fluidics System
261
Preventing Contamination
262
The Selector Valve
262
Plumbing Schematic
263
Tubing and Connection Specifications
264
Advertisement
Waters Xevo TQ-S micro Knowledge Base (2 pages)
Brand:
Waters
| Category:
Laboratory Equipment
| Size: 0 MB
Table of Contents
Symptoms
1
Environment
1
Cause
1
FIX or WORKAROUND
1
Additional Information
2
Advertisement
Related Products
Waters Xevo TQ-XS Mass
Waters Xevo TQ-S cronos
Waters Xevo TQ-XS IVD
Waters Xevo TQ-S
Waters Xevo TQ MS
Waters Xevo TQD
Waters Xevo TQD IVD
Waters Xevo TQ-GC
Waters Xevo TQ-S micro IVD
Waters 2410
Waters Categories
Laboratory Equipment
Security Sensors
Measuring Instruments
Control Unit
Water Pump
More Waters Manuals
Login
Sign In
OR
Sign in with Facebook
Sign in with Google
Upload manual
Upload from disk
Upload from URL