Sign In
Upload
Manuals
Brands
SMC Networks Manuals
Controller
ClimateWorx FieldServer ProtoNode FPC-N34
SMC Networks ClimateWorx FieldServer ProtoNode FPC-N34 Manuals
Manuals and User Guides for SMC Networks ClimateWorx FieldServer ProtoNode FPC-N34. We have
2
SMC Networks ClimateWorx FieldServer ProtoNode FPC-N34 manuals available for free PDF download: Manual, Startup Manual
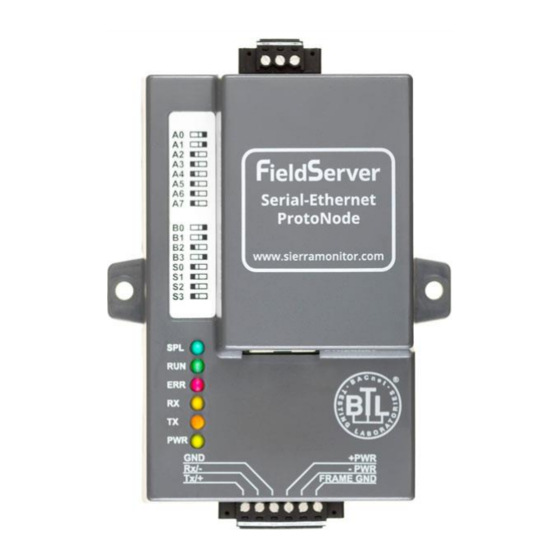
SMC Networks ClimateWorx FieldServer ProtoNode FPC-N34 Manual (50 pages)
Brand:
SMC Networks
| Category:
Gateway
| Size: 2 MB
Table of Contents
Table of Contents
5
Introduction
7
Protonode Gateway
7
Setup for Protonode
8
Record Identification Data
8
Point Count Capacity and Registers Per Device
8
Figure 1: Protonode Part Numbers
8
Figure 2: Supported Point Count Capacity
8
Figure 3: Registers Per Device
8
Configuring Device Communications
9
Set COM Setting on All of the Devices Connected to the Protonode
9
Set Modbus RTU Node-ID for each Device Attached to the Protonode
9
Figure 4: Modbus RTU COM Settings
9
Selecting the Desired Field Protocol and Enabling Auto-Discovery
10
Selecting Desired Field Protocol
10
Figure 5: S Bank DIP Switches
10
Enabling Auto-Discovery
11
Figure 6: S3 DIP Switch Setting for Auto Discovering Devices
11
BMS Network Settings: MAC Address, Device Instance and Baud Rate
12
Bacnet MS/TP (FPC-N34): Setting the MAC Address for BMS Network
12
Figure 7: MAC Address DIP Switches
12
Bacnet MS/TP and Bacnet/Ip (FPC-N34): Setting the Device Instance
13
Metasys N2 or Modbus TCP/IP (FPC-N34): Setting the Node-ID
13
Bacnet MS/TP (FPC-N34): Setting the Baud Rate for BMS Network
14
Figure 8: BMS Baud Rate DIP Switches
14
Figure 9: BMS Baud Rate
14
Interfacing Protonode to Devices
15
Protonode FPC-N34 and FPC-N35 Showing Connection Ports
15
Figure 10: Protonode FPC-N34 (Upper) and Protonode FPC-N35 (Lower)
15
Device Connections to Protonode
16
Connecting NURO Modbus RTU Boilers to the Protonode's RS-485
16
Connecting LOVE Modbus RTU Boilers to the Protonode's RS-485
16
Connecting ENVI Modbus RTU Boilers to the Protonode's RS-485
16
Figure 11: Wiring Diagram for Modbus RTU RS-485 Connections to the Protonode's RS-485 Port
16
Biasing the Modbus RS-485 Device Network
17
Figure 12: Modbus RS-485 Biasing Switch on the Protonode N34 (Left) and Protonode N35 (Right)
17
End of Line Termination Switch for the Modbus RS-485 Device Network
18
Figure 13: Modbus RS-485 End-Of-Line Termination Switch on the Protonode N34 (Left) and
18
Bacnet MS/TP or Metasys N2 (FPC-N34): Wiring Field Port to RS-485 BMS Network
19
Lonworks (FPC-N35): Wiring Field Port to Lonworks Network
19
Figure 14: Connection from Protonode to RS-485 Field Network
19
Figure 15: RS-485 BMS Network EOL Switch
19
Figure 16: Lonworks Terminal
19
Power-Up Protonode
20
Figure 17: Required Current Draw for the Protonode
20
Figure 18: Power Connections
20
Auto-Discovery: after Completion - Turn off to Save Configuration
21
Figure 19: S3 DIP Switch Setting for Auto Discovering Devices
21
Bacnet/Ip or Modbus TCP/IP: Change the Protonode IP Address
22
Connect the PC to Protonode Via the Ethernet Port
22
Bacnet/Ip and Modbus TCP/IP: Setting IP Address for Field Network
23
Figure 20: Web Configurator Screen
23
Figure 21: Changing IP Address Via Web GUI
24
Bacnet MS/TP and Bacnet/Ip: Setting Node_Offset to Assign Specific Device Instances
25
Figure 22: Web Configurator Screen with Active Profiles
25
How to Start the Installation Over: Clearing Profiles
26
Lonworks (FPC-N35): Commissioning Protonode on a Lonworks Network
27
Commissioning Protonode FPC-N35 on a Lonworks Network
27
Instructions to Download XIF File from Protonode FPC-N35 Using Browser
27
Figure 23: Lonworks Service Pin Location
27
Figure 24: Sample of Fserver.xif File Generated
28
CAS Bacnet Explorer for Validating Protonode in the Field
29
Downloading the cas Explorer and Requesting an Activation Key
29
Figure 25: Downloading the cas Explorer
29
Figure 26: Requesting cas Activation Key
29
CAS Bacnet Setup
30
CAS Bacnet MS/TP Setup
30
CAS Bacnet Bacnet/Ip Setup
30
Appendix A. Troubleshooting
31
Appendix A.1. Lost or Incorrect IP Address
31
Figure 27: Ethernet Port Location
31
Appendix A.2. Viewing Diagnostic Information
32
Figure 28: Error Messages Screen
32
Appendix A.3. Check Wiring and Settings
33
Appendix A.4. Take Diagnostic Capture with the Fieldserver Utilities
33
Figure 29: Ethernet Port Location
33
Appendix A.5. Update Firmware
36
Appendix A.6. Bacnet: Setting Network_Number for more than One Protonode on Subnet
36
Figure 30: Web Configurator - Setting Network Number for Bacnet
36
Appendix A.7. LED Diagnostics for Communications between Protonode and Devices
37
Appendix A.8. Passwords
37
Figure 31: Diagnostic Leds
37
Appendix B. Vendor Information
38
Appendix B.1. ENVI Modbus RTU Mappings to Bacnet, Metasys N2, Modbus TCP/IP and Lonworks38 Appendix B.2. LOVE Modbus RTU Mappings to Bacnet, Metasys N2, Modbus TCP/IP and Lonworks
41
Appendix B.3. NURO Modbus RTU Mappings to Bacnet, Metasys N2, Modbus TCP/IP and Lonworks
43
Appendix C. "A" Bank DIP Switch Settings
46
Appendix C.1. "A" Bank DIP Switch Settings
46
Appendix D. Reference
49
Appendix D.1. Specifications
49
Appendix D.1.1. Compliance with UL Regulations
49
Figure 32: Specifications
49
Appendix E. Limited 2 Year Warranty
50
Advertisement
SMC Networks ClimateWorx FieldServer ProtoNode FPC-N34 Startup Manual (46 pages)
For Interfacing ClimateWorx Products: M52 Controller, To Building Automation Systems: BACnet MS/TP, BACnet/IP, BACnet Ethernet, Modbus TCP/IP, Metasys N2 and LonWorks
Brand:
SMC Networks
| Category:
Controller
| Size: 4 MB
Table of Contents
Table of Contents
4
Certifications
6
BTL Mark - Bacnet Testing Laboratory
6
Lonmark Certification
6
Introduction
7
Protonode Gateway
7
Setup for Protonode
8
Record Identification Data
8
Point Count Capacity and Registers Per Device
8
Figure 1: Protonode Part Numbers
8
Figure 2: Supported Point Count Capacity
8
Figure 3: Registers Per Device
8
Configuring Device Communications
9
3.3.1 Input COM Settings on All Devices Connected to the Protonode
9
3.3.2 Set Modbus Node-ID for each Device Attached to the Protonode
9
Figure 4: COM Settings
9
Selecting the Desired Field Protocol
10
Figure 5: S Bank DIP Switches
10
BMS Network Settings: MAC Address, Device Instance and Baud Rate
11
3.5.1 Bacnet MS/TP (FPC-N34): Setting the MAC Address for BMS Network
11
Figure 6: MAC Address DIP Switches
11
3.5.2 Bacnet MS/TP (FPC-N34): Setting the Baud Rate for BMS Network
12
Baud Rate DIP Switch Selection
12
Figure 7: Baud Rate DIP Switches
12
Figure 8: BMS Baud Rate
12
Interfacing Protonode to Devices
13
Protonode FPC-N34 and FPC-N35 Showing Connection Ports
13
Figure 9: Protonode FPC-N34 (Upper) and Protonode FPC-N35 (Lower)
13
Device Connections to Protonode
14
Figure 10: RS-485 and Power Connections
14
4.2.1 Biasing the Modbus RS-485 Device Network
15
Figure 11: Modbus RS-485 Biasing Switch on the Protonode N34 (Left) and Protonode N35 (Right)
15
4.2.2 End of Line Termination Switch for the Modbus RS -485 Device Network
16
Figure 12: Modbus RS-485 End-Of-Line Termination Switch on the Protonode N34 (Left) and
16
Bacnet MS/TP or Metasys N2 (FPC-N34): Wiring Field Port to RS-485 Network
17
Lonworks (FPC-N35): Wiring Lonworks Devices to the Lonworks Terminal
17
Figure 13: Connection from Protonode to RS-485 Field Network
17
Figure 14: RS-485 BMS Network EOL Switch
17
Figure 15: Lonworks Terminal
17
Power-Up Protonode
18
Figure 16: Required Current Draw for the Protonode
18
Figure 17: Power Connections
18
Use Protonode Web Configurator to Setup the Gateway
19
Connect the PC to Protonode Via the Ethernet Port
19
Connecting to Protonode Web Configurator
20
Selecting Profiles for Devices Connected to Protonode
20
Figure 18: Web Configurator Showing No Active Profiles
20
Figure 19: Web Configurator Showing Active Profile Additions
21
Bacnet/Ip and Modbus TCP/IP: Setting IP Address for Field Network
22
Figure 20: Web Configurator Screen with Active Profiles
22
Figure 21: Changing IP Address Via Web GUI
23
Bacnet MS/TP and Bacnet/Ip: Setting Node_Offset to Assign Specific Device Instances
24
Figure 22: Web Configurator Screen
24
How to Start the Installation Over: Clearing Profiles
25
Lonworks (FPC-N35): Commissioning Protonode on a Lonworks Network
26
Commissioning Protonode FPC-N35 on a Lonworks Network
26
8.1.1 Instructions to Download XIF File from Protonode FPC -N35 Using Browser
26
Figure 23: Lonworks Service Pin Location
26
Figure 24: Sample of Fserver.xif File Generated
27
Bacnet Explorer
28
Figure 25: Bacnet Explorer on a Bacnet Network
28
Appendix A. Troubleshooting
29
Appendix A.1. Lost or Incorrect IP Address
29
Figure 26: Ethernet Port Location
29
Appendix A.2. Viewing Diagnostic Information
30
Figure 27: Error Messages Screen
30
Appendix A.3. Check Wiring and Settings
31
Appendix A.4. LED Diagnostics for Communications between Protonode and Devices
32
Figure 28: Diagnostic Leds
32
Appendix A.5. Take Diagnostic Capture with the Fieldserver Toolbox
33
Figure 29: Ethernet Port Location
33
Appendix A.6. Update Firmware
36
Appendix A.7. Bacnet: Setting Network_Number for more than One Protonode on Subnet
36
Figure 30: Web Configurator - Setting Network Number for Bacnet
36
Appendix A.8. Securing Protonode with Passwords
37
Appendix B. Vendor Information - Climateworx
38
Appendix B.1. M52 Controller Modbus RTU Mappings to Bacnet, Metasys N2, Modbus TCP/IP and Lonworks
38
Appendix C. "A" Bank DIP Switch Settings
42
Appendix C.1. "A" Bank DIP Switch Settings
42
Appendix D. Reference
45
Appendix D.1. Specifications
45
Appendix D.1.1. Compliance with UL Regulations
45
Figure 31: Specifications
45
Appendix E. Limited 2 Year Warranty
46
Advertisement
Related Products
SMC Networks ClimateWorx FieldServer ProtoNode FPC-N35
SMC Networks FC3W5 Series
SMC Networks FC3W504
SMC Networks FC3W520
SMC Networks ProtoCessor FPC-ED2
SMC Networks Lochinvar FPC-N54-1998
SMC Networks FPC-ED4
SMC Networks FPC-ED4-1564
SMC Networks Sierra Monitor ProtoNode FPC N54 Series
SMC Networks Sierra Monitor ProtoNode FPC-N54-1797
SMC Networks Categories
Switch
Control Unit
Controller
Industrial Equipment
Network Router
More SMC Networks Manuals
Login
Sign In
OR
Sign in with Facebook
Sign in with Google
Upload manual
Upload from disk
Upload from URL