Sign In
Upload
Manuals
Brands
Qlogic Manuals
Switch
SANbox 5602
Qlogic SANbox 5602 Manuals
Manuals and User Guides for Qlogic SANbox 5602. We have
9
Qlogic SANbox 5602 manuals available for free PDF download: User Manual, Installation Manual, Manuallines, Supplementary Manual
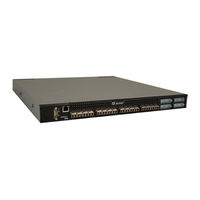
Qlogic SANbox 5602 User Manual (324 pages)
Switch Management, Firmware Version 5.0
Brand:
Qlogic
| Category:
Switch
| Size: 2 MB
Table of Contents
Document Revision History
2
Table of Contents
3
Introduction
13
Intended Audience
13
Related Materials
13
JDOM License
13
Technical Support
14
Availability
15
Training
15
Contact Information
15
Using Sansurfer Switch Manager
17
2.1 Workstation Requirements
18
Using Sansurfer Switch Manager Workstation Requirements
18
Installing the Management Application
18
Sansurfer Switch Manager
19
Sansurfer Management Suite
20
SMS Installation for Windows
20
SMS Installation for Linux
22
SMS Installation for Solaris
24
Starting Sansurfer Switch Manager
26
Figure
27
Initial Startup Dialog
27
2-2 Sansurfer Switch Manager Window
28
2-1 Initial Startup Dialog
28
Sansurfer Switch Manager Window
28
Exiting Sansurfer Switch Manager
28
Save Default Fabric View File Dialog
28
2-3 Save Default Fabric View File Dialog
29
Uninstalling Sansurfer Switch Manager
29
Load Default Fabric File Dialog
29
SMS Uninstall
30
Standalone Uninstall
31
Changing the Encryption Key for the Default Fabric View File
31
Saving and Opening Fabric View Files
32
Setting Sansurfer Switch Manager Preferences
32
2-4 Load Default Fabric File Dialog
33
Preferences Dialog – Sansurfer Switch Manager
33
Using Online Help
34
Viewing Software Version and Copyright Information
34
2-5 Preferences Dialog - Sansurfer Switch Manager
35
Sansurfer Switch Manager User Interface
35
Sansurfer Switch Manager Display Elements
35
Menu Bars
36
Topology Display Menu
36
Faceplate Display Menu
37
Shortcut Keys
37
Tool Bar
38
Fabric Tree
39
Graphic Window
40
Data Window and Tabs
40
Working Status Indicator
40
Using the Topology Display
41
Switch and Link Status
41
Working with Switches and Links
42
Selecting Switches and Links
42
Arranging Switches in the Display
42
Opening the Faceplate and Topology Display Popup Menus
43
Topology Data Windows
43
Using the Faceplate Display
44
Port Views and Status
44
Working with Ports
45
Selecting Ports
45
Opening the Faceplate Popup Menu
45
Faceplate Data Windows
46
RADIUS Servers
47
Managing Fabrics RADIUS Servers
47
2-11 Faceplate Display
48
2-10 Topology Display
48
2-9 Fabric Tree
48
3.1 RADIUS Servers
48
Adding a RADIUS Server
48
Add Radius Server
48
3-1 Add Radius Server
50
Removing a RADIUS Server
50
Remove Radius Server
50
Edit Radius Server Information
51
Editing RADIUS Server Information
51
Modify Authentication Order - Radius Server Information
52
Modifying Authentication Order RADIUS Server Information
52
Securing a Fabric
53
Connection Security
53
User Account Security
54
Security Consistency Checklist
54
Device Security
55
Edit Security Dialog
56
Creating a Security Set
57
Create Security Group Dialog
58
Creating a Security Group
59
Create a Security Group Member Dialog
60
Create Security Group Member Dialog
60
Creating a Security Group Member
61
Editing the Security Configuration on a Switch
62
Viewing Properties of a Security Set, Group, or Member
63
Using the Security Config Dialog
63
Archiving a Security Configuration to a File
64
Activating a Security Set
64
Deactivating a Security Set
64
Configured Security Data Window
65
Active Security Data Window
65
Fabric Services
65
Enabling SNMP Configuration
66
Enabling In-Band Management
66
Tracking Fabric Firmware and Software Versions
66
Saving a Version Snapshot
66
3-6 Create Security Group Dialog
67
Viewing and Comparing Version Snapshots
67
Exporting Version Snapshots to a File
67
Fabric Version Snapshot Analysis Dialog
67
3-8 Security Config Dialog
67
3-7 Create a Security Group Member Dialog
67
3-9 Fabric Version Snapshot Analysis Dialog
68
Managing the Fabric Database
68
Adding a Fabric
68
Add a New Fabric Dialog
68
Removing a Fabric
69
Opening a Fabric View File
69
Saving a Fabric View File
70
Rediscovering a Fabric
70
Deleting Switches and Links
70
Adding a New Switch to a Fabric
71
Replacing a Failed Switch
72
Displaying Fabric Information
73
Fabric Status
73
3-10 Add a New Fabric Dialog
75
Displaying the Event Browser
75
Events Browser
75
3-11 Events Browser
77
Filtering the Event Browser
77
Filter Events Dialog
77
Sorting the Event Browser
78
Saving the Event Browser to a File
78
Devices Data Window
79
Active Zone Set Data Window
80
3-13 Active Zone Set Data Window
81
3-12 Filter Events Dialog
81
Link Data Window
81
Working with Device Information and Nicknames
81
Displaying Detailed Device Information
81
Detailed Devices Display Dialog
81
Exporting Device Information to a File
82
Managing Device Port Nicknames
82
Creating a Nickname
82
Editing a Nickname
83
Deleting a Nickname
83
Exporting Nicknames to a File
83
Importing a Nicknames File
84
Zoning a Fabric
84
Zoning Concepts
84
Soft Zones
85
Access Control List Hard Zones
86
Aliases
86
Zone Sets
86
Zoning Database
87
Using the Zoning Wizard
88
Managing the Zoning Database
88
3-14 Detailed Devices Display Dialog
89
Editing the Zoning Database
89
Edit Zoning Dialog
89
3-15 Edit Zoning Dialog
92
Zoning Config Dialog
92
Configuring the Zoning Database
92
Interop Auto Save
92
Default Visibility
93
Discard Inactive
93
Saving the Zoning Database to a File
93
Restoring the Zoning Database from a File
93
Restoring the Default Zoning Database
94
Removing All Zoning Definitions
94
Managing Zone Sets
95
Creating a Zone Set
95
Activating and Deactivating a Zone Set
96
Copying a Zone to a Zone Set
96
Removing a Zone from a Zone Set or from All Zone Sets
97
Removing a Zone Set
97
Managing Zones
98
Creating a Zone in a Zone Set
99
Adding Zone Members
100
Renaming a Zone or a Zone Set
101
Removing a Zone Member
101
Removing a Zone from a Zone Set
101
Removing a Zone from All Zone Sets
101
Changing Zone Types
102
Managing Aliases
102
Creating an Alias
102
Adding a Member to an Alias
103
Removing an Alias from All Zones
103
Merging Fabrics and Zoning
104
Zone Merge Failure
104
Zone Merge Failure Recovery
104
Managing Switches
105
Managing User Accounts
105
3-16 Zoning Config Dialog
107
Creating User Accounts
107
User Account Administration Dialog – Add Account
107
4-1 User Account Administration Dialog - Add Account
108
Removing a User Account
108
User Account Administration Dialog – Remove Account
108
4-2 User Account Administration Dialog - Remove Account
109
Changing a User Account Password
109
User Account Administration Dialog – Change Password
109
4-3 User Account Administration Dialog - Change Password
110
Modifying a User Account
110
User Account Administration Dialog - Modify Account
110
Displaying Switch Information
111
Faceplate Display - Switch Information
111
Devices Data Window
112
Switch Data Window
112
Port Statistics Data Window
116
Port Information Data Window
116
Configured Zonesets Data Window
117
Configuring Port Threshold Alarms
118
Port Threshold Alarm Configuration Dialog
118
Paging a Switch
119
Port Threshold Alarm Example
119
Setting the Date/Time and Enabling NTP Client
120
Resetting a Switch
120
Configuring a Switch
122
Using the Configuration Wizard
122
Switch Properties
123
Symbolic Name
123
Switch Properties Dialog
123
Switch Administrative States
124
Domain ID and Domain ID Lock
125
Fabric Device Management Interface
125
Broadcast Support
126
In-Band Management
126
Advanced Switch Properties
127
Interop Mode for Zoning
127
Advanced Switch Properties Dialog
127
Legacy Port Address Format
128
Timeout Values
128
System Services Dialog
129
Security Consistency Checklist Dialog
130
Network Properties
131
Network Properties Dialog
131
IP Configuration
132
Remote Logging
133
NTP Client
133
SNMP Properties
134
SNMP Properties Dialog
134
SNMP Configuration
135
SNMP Trap Configuration
136
Managing Switch Stacks
137
Switch Stacks
137
Syslog
139
Select Source Dialog
139
Syslog Dialog
139
Archiving a Switch
140
Restoring a Switch
141
Restore Dialogs - Full and Selective
141
Restoring the Factory Default Configuration
143
Downloading a Support File
145
Upgrading the Switch Using License Keys
145
Installing Firmware
146
Features License Key Dialog
146
Add License Key Dialog
146
Displaying Hardware Status
148
Hardware Status Leds
148
Managing Ports
149
Displaying Port Information
149
Faceplate Display - Port Information
149
Monitoring Port Status
150
Displaying Port Types
150
Displaying Port Operational States
151
Displaying Port Speeds
151
Displaying Transceiver Media Status
152
Port Transceiver Media View
152
Port Statistics Data Window Entries
153
Port Statistics Data Window
153
Port Information Data Window Entries
156
Port Information Data Window
156
Configuring Ports
158
Port Properties Dialog
158
Changing Port Administrative States
159
Changing Port Speeds
160
Changing Port Types
161
I/O Stream Guard
161
Device Scan
162
Changing Port Symbolic Name
162
Using the Extended Credits Wizard
162
Resetting a Port
163
Designate Donor Ports
163
Testing Ports
164
Port Loopback Test Dialog
164
Graphing Port Performance
166
Fabric View Graphs
166
Starting Sansurfer Performance Viewer
167
Exiting Sansurfer Performance Viewer
167
Save Default Performance View File Dialog
168
Load Default View File Dialog
168
Saving and Opening Performance View Files
169
Changing the Default Performance View File Encryption Key
169
Setting Sansurfer Performance Viewer Preferences
170
Setting the Polling Frequency
170
Preferences - Sansurfer Performance Viewer
170
Displaying Graphs for a Switch
171
Displaying Graphs for a Stack
171
Arranging Graphs in the Display
172
Customizing Graphs
172
Default Graph Options Dialog
172
Setting Global Graph Type
174
Rescaling a Selected Graph
174
Printing Graphs
174
Saving Graph Statistics to a File
174
A.1 Logging on to a Switch
175
Command Line Interface
175
Advertisement
Qlogic SANbox 5602 Installation Manual (272 pages)
Fibre Channel Switch
Brand:
Qlogic
| Category:
Switch
| Size: 4 MB
Table of Contents
Installation Guide
1
Sanbox 5602 Fibre Channel Switch
1
Document Revision History
2
Table of Contents
3
Introduction
11
Intended Audience
11
Related Materials
12
New in this Release
12
Safety Notices
13
Sicherheitshinweise
13
Notes Informatives Relatives À la Sécurité
13
Communications Statements
14
Federal Communications Commission (FCC) Class a Statement
14
Canadian Department of Communications Class a Compliance Statement
14
Avis de Conformité Aux Normes du Ministère des Communications du Canada
15
CE Statement
15
VCCI Class a Statement
16
Laser Safety Information
16
Electrostatic Discharge Sensitivity (ESDS) Precautions
16
Accessible Parts
17
Pièces Accessibles
17
Zugängliche Teile
17
General Public License
18
Preamble
18
Terms and Conditions for Copying, Distribution and Modification
19
How to Apply These Terms to Your New Programs
23
Technical Support
25
Availability
25
Training
25
Contact Information
25
General Description Chassis Controls and Leds
28
Chassis Controls and Leds
28
Maintenance Button
28
Resetting a Switch
28
Placing the Switch in Maintenance Mode
29
Chassis Leds
29
Input Power LED (Green)
30
Heartbeat LED (Green)
30
System Fault LED (Amber)
30
Fibre Channel Ports
31
Port Leds
32
Port Logged-In LED (Green)
32
Port Activity LED (Green)
32
Transceivers
33
Port Types
33
Ethernet Port
34
Serial Port
35
Power Supplies and Fans
36
Switch Management
37
Sansurfer Switch Manager
37
Sansurfer Switch Manager Web Applet
37
Command Line Interface
38
Sansurfer Switch Manager Application Programming Interface
38
Simple Network Management Protocol
38
File Transfer Protocol
38
Planning
39
Devices
39
Device Access
40
Soft Zones
41
Access Control List Hard Zones
41
Performance
42
Distance
42
Bandwidth
43
Latency
43
Feature Licensing
44
Multiple Chassis Fabrics
44
Optimizing Device Performance
45
Domain ID, Principal Priority, and Domain ID Lock
46
Stacking
47
Common Topologies
49
Cascade Topology
49
Mesh Topology
50
Multistage Topology
51
Switch Services
52
Fabric Security
53
Connection Security
54
Device Security
55
Security Example: Switches and Hbas
56
Security Example: RADIUS Server
59
Security Example: Host Authentication
63
User Account Security
65
Fabric Management
66
Installation
67
Site Requirements
67
Fabric Management Workstation
67
Switch Power Requirements
68
Environmental Conditions
68
Installing a Switch
68
Mount the Switch
69
Install Transceivers
70
Connect the Workstation to the Switch
72
Configure the Workstation
73
Setting the Workstation IP Address for Ethernet Connections
73
Configuring the Workstation Serial Port
74
Install the Management Application
75
Sansurfer Switch Manager
75
Sansurfer Management Suite
77
Sms Installation for Windows
77
Sms Installation for Linux
79
Sms Installation for Solaris
81
Start Sansurfer Switch Manager
82
Connect the Switch to AC Power
84
Configure the Switch
86
Cable Devices to the Switch
88
Install Firmware
88
Using Sansurfer Switch Manager to Install Firmware
89
Using the CLI to Install Firmware
90
Upgrading the Sanbox 5602 Switch
91
Powering down a Switch
91
5.1 Chassis Diagnostics
94
Diagnostics/Troubleshooting Chassis Diagnostics
94
Input Power LED Is Extinguished
94
System Fault LED Is Illuminated
94
Power-On Self Test Diagnostics
95
Heartbeat LED Blink Patterns
95
Internal Firmware Failure Blink Pattern
96
System Error Blink Pattern
96
Configuration File System Error Blink Pattern
96
Over Temperature Blink Pattern
98
Logged-In LED Indications
99
E_Port Isolation
100
Excessive Port Errors
101
Power Supply Diagnostics
103
Recovering a Switch
104
Maintenance - Exit
105
Maintenance - Image Unpack
105
Maintenance - Reset Network Config
106
Maintenance - Reset User Accounts to Default
106
Maintenance - Copy Log Files
106
Maintenance - Remove Switch Config
106
Maintenance - Remake Filesystem
106
Maintenance - Reset Switch
107
Maintenance - Update Boot Loader
107
Section 6 Yremoval/Replacement
110
SFP Transceiver Removal and Replacement
110
Power Supply Removal and Replacement
110
Appendix A Specifications
113
Fabric Specifications
113
Maintainability
115
Fabric Management
115
Dimensions
115
Electrical
116
Environmental
116
Regulatory Certifications
117
Appendix B Command Line Interface
119
Logging on to a Switch
119
User Accounts
120
Working with Switch Configurations
120
Modifying a Configuration
121
Backing up and Restoring Switch Configurations
122
Commands
124
Admin Command
126
Alias Command
127
Alias Command
128
CIM Command
129
Cimlistener Command
130
Cimsubscription Command
130
Config Command
134
Create Command
137
Date Command
140
Feature Command
141
Firmware Install Command
142
Group Command
143
Hardreset Command
151
Help Command
152
History Command
153
Hotreset Command
154
Image Command
155
Lip Command
158
Passwd Command
159
Ping Command
160
Ps Command
161
Quit Command
162
Reset Command
163
Security Command
171
Securityset Command
175
Set Command
177
Set Config Command
177
Set Log Command
193
Set Port Command
197
Set Setup Command
199
Show Command
209
Show Config Command
224
Show Log Command
228
Show Perf Command
231
Show Setup Command
234
Shutdown Command
238
Test Command
239
Uptime Command
242
User Command
243
Whoami Command
246
Zone Command
250
Zoneset Command
251
Zoning Command
253
Qlogic SANbox 5602 Installation Manual (228 pages)
Fibre Channel Switch
Brand:
Qlogic
| Category:
Switch
| Size: 4 MB
Table of Contents
Installation Guide
1
Sanbox 5602 Fibre Channel Switch
1
Document Revision History
2
Table of Contents
3
Introduction
11
Intended Audience
11
Related Materials
12
Safety Notices
13
Sicherheitshinweise
13
Notes Informatives Relatives À la Sécurité
13
Communications Statements
14
Federal Communications Commission (FCC) Class a Statement
14
Canadian Department of Communications Class a Compliance Statement
14
Avis de Conformité Aux Normes du Ministère des Communications du Canada
15
CE Statement
15
VCCI Class a Statement
16
Laser Safety Information
16
Electrostatic Discharge Sensitivity (ESDS) Precautions
16
Accessible Parts
17
Pièces Accessibles
17
Zugängliche Teile
17
General Public License
18
Preamble
18
Terms and Conditions for Copying, Distribution and Modification
19
How to Apply These Terms to Your New Programs
23
Technical Support
25
Availability
25
Training
25
Contact Information
25
Sanbox 5602 Fibre Channel Switch
27
General Description Chassis Controls and Leds
28
Chassis Controls and Leds
28
Maintenance Button
28
Resetting a Switch
28
Placing the Switch in Maintenance Mode
29
Chassis Leds
29
Input Power LED (Green)
30
Heartbeat LED (Green)
30
System Fault LED (Amber)
30
Fibre Channel Ports
31
Port Leds
32
Port Logged-In LED (Green)
32
Port Activity LED (Green)
32
Transceivers
33
Port Types
33
Ethernet Port
34
Serial Port
35
Serial Port Pin Identification
35
Power Supplies and Fans
36
Switch Management
37
Sansurfer Switch Manager
37
Sansurfer Switch Manager Web Applet
37
Command Line Interface
38
Sansurfer Switch Manager Application Programming Interface
38
Simple Network Management Protocol
38
File Transfer Protocol
38
Planning
39
Devices
39
2-1 Serial Port Pin Identification
40
Table
40
Device Access
40
Zoning Database Limits
40
Soft Zones
41
Access Control List Hard Zones
41
Performance
42
Distance
42
Bandwidth
43
Latency
43
Port Licensing
44
Multiple Chassis Fabrics
44
Optimizing Device Performance
45
Domain ID, Principal Priority, and Domain ID Lock
46
Stacking
47
Common Topologies
49
Cascade Topology
49
Mesh Topology
50
Multistage Topology
51
Fabric Security
52
User Account Security
52
Fabric Services
52
Fabric Management
53
3-2 Port-To-Port Latency
55
3-1 Zoning Database Limits
55
Installation
55
Site Requirements
55
Fabric Management Workstation
55
Switch Power Requirements
55
Management Workstation Requirements
55
Environmental Conditions
56
Installing a Switch
56
Sanbox 5602 Fibre Channel Switch
56
Mount the Switch
57
Install Transceivers
58
Connect the Workstation to the Switch
60
Configure the Workstation
61
Setting the Workstation IP Address for Ethernet Connections
61
Configuring the Workstation Serial Port
62
Install the Management Application
63
Sansurfer Switch Manager
63
Sansurfer Management Suite
65
Sms Installation for Linux
67
Sms Installation for Solaris
69
Start Sansurfer Switch Manager
70
Connect the Switch to AC Power
72
Configure the Switch
74
Cable Devices to the Switch
76
Install Firmware
76
Using Sansurfer Switch Manager to Install Firmware
77
Using the CLI to Install Firmware
77
Upgrading the Sanbox 5602 Switch
79
Powering down a Switch
79
Diagnostics/Troubleshooting Chassis Diagnostics
82
Input Power LED Is Extinguished
82
System Fault LED Is Illuminated
82
Power-On Self Test Diagnostics
83
Heartbeat LED Blink Patterns
83
Internal Firmware Failure Blink Pattern
84
System Error Blink Pattern
84
Configuration File System Error Blink Pattern
84
Over Temperature Blink Pattern
86
Logged-In LED Indications
87
E_Port Isolation
88
Excessive Port Errors
89
Power Supply Diagnostics
91
Recovering a Switch
91
Maintenance - Exit
93
Maintenance - Image Unpack
93
Maintenance - Reset Network Config
93
Maintenance - Reset User Accounts to Default
94
Maintenance - Copy Log Files
94
Maintenance - Remove Switch Config
94
Maintenance - Remake Filesystem
94
Maintenance - Reset Switch
94
Maintenance - Update Boot Loader
94
5.1 Chassis Diagnostics
82
Removal/Replacment SFP Transceiver Removal and Replacement
96
SFP Transceiver Removal and Replacement
96
Power Supply Removal and Replacement
96
Appendix A Specifications
99
A.1 Fabric Specifications
99
Fabric Specifications
100
Maintainability
101
Fabric Management
101
Dimensions
101
A.2 Maintainability
101
A.3 Fabric Management
101
A.4 Dimensions
101
Electrical
102
Environmental
102
A.5 Electrical
102
A.6 Environmental
102
Regulatory Certifications
103
A.7 Regulatory Certifications
103
Appendix B Command Line Interface
105
Logging on to a Switch
105
B.1 Logging on to a Switch
105
User Accounts
106
B.2 User Accounts
106
Working with Switch Configurations
106
Modifying a Configuration
107
B.3.1 Modifying a Configuration
107
Backing up and Restoring Switch Configurations
108
Commands
111
B.4 Commands
111
B-1 Command-Line Completion
111
B-2 Commands Listed by Authority Level
112
Admin Command
113
Alias Command
114
Alias Command
115
Config Command
116
Create Support Command
119
Date Command
121
Feature Command
122
Firmware Install Command
123
Hardreset Command
124
Help Command
125
History Command
126
Hotreset Command
127
Image Command
128
Lip Command
131
Passwd Command
132
Ping Command
133
Ps Command
134
Quit Command
135
Reset Command
136
B-3 Switch Configuration Defaults
137
B-4 Port Configuration Defaults
138
B-5 Port Threshold Alarm Configuration Defaults
139
B-6 Zoning Configuration Defaults
139
B-7 SNMP Configuration Defaults
140
B-8 System Configuration Defaults
140
Set Command
141
Set Config Command
143
B-9 Set Config Port Parameters
143
B-10 Set Config Switch Parameters
146
B-11 Set Config Threshold Parameters
149
B-12 Set Config Zoning Parameters
150
Set Log Command
156
Set Port Command
159
Set Setup Command
161
B-13 SNMP Configuration Settings
161
B-14 System Configuration Settings
162
Show Command
166
B-15 Show Port Parameters
168
B-16 Switch Operational Parameters
171
Show Config Command
181
Show Log Command
185
Show Perf Command
188
Show Setup Command
191
Shutdown Command
194
Test Command
195
Uptime Command
198
User Command
199
Advertisement
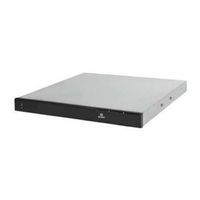
Qlogic SANbox 5602 Installation Manual (128 pages)
SANbox 5600 Series Fibre Channel Switch
Brand:
Qlogic
| Category:
Switch
| Size: 4 MB
Table of Contents
Document Revision History
2
Table of Contents
3
Introduction
9
Intended Audience
9
Table
10
Related Materials
10
New in this Release
10
Sanbox 5600 Series Fibre Channel Switch
10
Safety Notices
11
Sicherheitshinweise
11
Notes Informatives Relatives à la Sécurité
11
Advertencias de Seguridad
11
Communications Statements
12
Avis de Conformité aux Normes du Ministère des Communications du Canada
12
Canadian Department of Communications Class a Compliance Statement
12
Federal Communications Commission (FCC) Class a Statement
12
CE Statement
13
VCCI Class a Statement
14
Laser Safety Information
14
Electrostatic Discharge Sensitivity (ESDS) Precautions
15
Accessible Parts
15
Pièces Accessibles
15
Zugängliche Teile
15
General Public License
16
Preamble
16
Terms and Conditions for Copying, Distribution and Modification
17
How to Apply These Terms to Your New Programs
21
Qfsapp Program License
23
Technical Support
24
Availability
24
Training
24
Contact Information
25
General Description
27
Fibre Channel Ports
27
Chassis Controls and Leds
28
Input Power LED (Green)
28
Chassis Leds and Controls
28
Heartbeat LED (Green)
29
Maintenance Button
29
Placing the Switch in Maintenance Mode
29
Resetting a Switch
29
System Fault LED (Amber)
29
Fibre Channel Ports
30
Port Activity LED (Green)
31
Port Leds
31
Port Logged-In LED (Green)
31
Port Types
32
Transceivers
32
Ethernet Port
33
Serial Port
34
Table
34
Serial Port and Pin Identification
34
Serial Port Pin Identification
34
Power Supplies and Fans
35
Model 5602 Switch Power Supplies
35
Switch Management
36
Quicktools Web Applet
36
Application Programming Interface
37
Command Line Interface
37
Enterprise Fabric Suite 2007
37
File Transfer Protocols
38
Simple Network Management Protocol
38
Storage Management Initiative-Specification (SMI-S)
38
Planning
39
Devices
39
Device Access
40
Zoning Database Limits
40
Distance
41
Performance
41
Bandwidth
42
Extended Credit Distances and Cable Lengths
42
Feature Licensing
43
Latency
43
Port-To-Port Latency
43
Multiple Chassis Fabrics
44
Optimizing Device Performance
44
Domain ID, Principal Priority, and Domain ID Lock
45
Stacking
46
Three-Switch Stack
46
Two-Switch Stack
46
Five Switch Stack
47
Common Topologies
48
Four-Switch Stack
47
Six Switch Stack
48
Cascade Topology
49
Mesh Topology
50
Multistage Topology
51
Switch Services
52
Internet Protocol Support
53
Security
53
IP Security
54
User Account Security
54
Connection Security
55
Port Binding
55
Device Security
56
Security Example: Host Authentication
57
Security Example: RADIUS Server
57
Security Example: Switches and Hbas with Authentication
57
Security Example: Switches and Hbas
57
Security Example: RADIUS Server
60
Security Example: Management Server
63
Fabric Management
65
Installation
67
Site Requirements
67
Environmental Conditions
68
Fabric Management Workstation
68
Switch Power Requirements
68
Management Workstation Requirements
68
Installing a Switch
69
Mount the Switch
70
Mounting the Model 5600 Switch in a Rack Without Rails
71
Install Transceivers
72
Mounting the Model 5600 Switch in a Rack with a Rail Kit
72
Installing XPAK Switch Stacking Cables
73
Configure the Workstation
74
Configuring the Workstation IP Address for Ethernet Connections
74
Configuring the Workstation Serial Port
75
Connect the Switch to AC Power
76
Connect the Workstation to the Switch
79
Removing XPAK Port Covers
73
Workstation Cable Connections
79
CLI Switch Configuration
80
Configure the Switch
80
Quicktools Switch Configuration
80
Cable Devices to the Switch
81
Installing Firmware
82
One-Step Firmware Installation
83
Using Quicktools to Install Firmware
83
Using the CLI to Install Firmware
83
Custom Firmware Installation
85
Adding a Switch to an Existing Fabric
86
Installing Feature License Keys
87
Diagnostics/Troubleshooting
89
Chassis Diagnostics
89
Chassis Leds
89
Input Power LED Is Extinguished
90
System Fault LED Is Illuminated
90
Heartbeat LED Blink Patterns
91
Power-On Self Test Diagnostics
91
Fatal POST Error Blink Pattern
92
Internal Firmware Failure Blink Pattern
92
Configuration File System Error Blink Pattern
93
Over Temperature Blink Pattern
94
Logged-In LED Indications
95
E_Port Isolation
96
Excessive Port Errors
97
Transceiver Diagnostics
99
Power Supply Diagnostics
100
Model 5602 Switch Power Supply Leds
100
Recovering a Switch Using Maintenance Mode
101
Exiting the Maintenance Menu (Option 0)
102
Unpacking a Firmware Image File in Maintenance Mode (Option 1)
102
Copying Log Files in Maintenance Mode (Option 4)
103
Removing the Switch Configuration in Maintenance Mode (Option 5)
103
Resetting the Network Configuration in Maintenance Mode (Option 2)
103
Resetting User Accounts in Maintenance Mode (Option 3)
103
Remaking the File System in Maintenance Mode (Option 6)
104
Resetting the Switch in Maintenance Mode (Option 7)
104
Updating the Boot Loader in Maintenance Mode (Option 8)
104
Removal/Replacement
105
Power Supply Removal and Replacement
106
Transceiver Removal and Replacement
106
Power Supply Installation
107
Specifications
109
Power Supply Removal
107
Fabric Specifications
109
Fabric Specifications
110
Fabric Management
112
Maintainability
112
Fabric Management Specifications
112
Dimensions
113
Electrical
113
Power Cord Specifications
113
Maintainability Specifications
112
A-4 Dimensional Specifications
113
A-6 Availalbe Power Cords
113
Environmental
115
Availalbe Power Cords
113
Dimensional Specifications
113
Electrical Specifications
113
Environmental Specifications
115
Regulatory Certifications
116
Cascade-With-A-Loop Topology
117
Qlogic SANbox 5602 Installation Manual (8 pages)
FIBRE CHANNEL SWITCH
Brand:
Qlogic
| Category:
Switch
| Size: 1 MB
Table of Contents
Quick Start Guide
1
Installation Instructions
3
Step 1. Verify the Package Contents
3
Step 2. Mount the Switch
3
Step 3. Stack Switches
4
Step 4. Install Sfps
4
Step 5. Apply Power to the Switch
5
Step 6. Verify Workstation Requirements
5
Step 7. Install the Sansurfer Switch Manager Application
5
Step 9. Run the Configuration Wizard
6
Step 8. Obtain Network Configuration
6
Step 10. Connect Devices and Switches
6
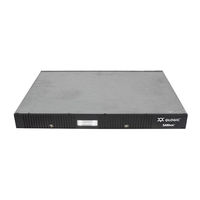
Qlogic SANbox 5602 Manuallines (11 pages)
Qlogic SANbox 5200: Supplementary Guide
Brand:
Qlogic
| Category:
Switch
| Size: 0 MB
Qlogic SANbox 5602 Supplementary Manual (2 pages)
Qlogic SANbox 5200: Supplementary Guide
Brand:
Qlogic
| Category:
Switch
| Size: 0 MB
Qlogic SANbox 5602 Supplementary Manual (2 pages)
Qlogic SANbox 5602: Supplementary Guide
Brand:
Qlogic
| Category:
Switch
| Size: 0 MB
Qlogic SANbox 5602 Supplementary Manual (1 page)
Qlogic SANbox 5602: Supplementary Guide
Brand:
Qlogic
| Category:
Switch
| Size: 0 MB
Advertisement
Related Products
Qlogic SANbox 5802V
Qlogic SANbox 5800V Series
Qlogic SANbox 5000 Series
Qlogic SANbox 5602 Fibre Channel
Qlogic SANbox 1400 Series
Qlogic SANbox 5200 Series
Qlogic SANbox 5600 Series
Qlogic SANbox 6140
Qlogic SANbox 6142
Qlogic SANbox 9200
Qlogic Categories
Switch
Adapter
Host Adapter
Network Router
Software
More Qlogic Manuals
Login
Sign In
OR
Sign in with Facebook
Sign in with Google
Upload manual
Upload from disk
Upload from URL