Sign In
Upload
Manuals
Brands
Qlogic Manuals
Switch
SANbox 1400 Series
Qlogic SANbox 1400 Series Manuals
Manuals and User Guides for Qlogic SANbox 1400 Series. We have
6
Qlogic SANbox 1400 Series manuals available for free PDF download: User Manual, Installation Manual, Supplementary Manual, Quick Start Manual, Specifications
Qlogic SANbox 1400 Series User Manual (278 pages)
Brand:
Qlogic
| Category:
Switch
| Size: 1 MB
Table of Contents
Document Revision History
2
Table of Contents
3
Introduction
13
Intended Audience
13
Related Materials
13
JDOM License
14
Technical Support
15
Availability
15
Training
15
Contact Information
16
Using Sansurfer Switch Manager Workstation Requirements
18
Installing the Management Application
18
Sansurfer Switch Manager
19
Sansurfer Management Suite
20
SMS Installation for Windows
20
SMS Installation for Linux
22
SMS Installation for Solaris
24
Starting Sansurfer Switch Manager
26
Figure
27
Initial Startup Dialog
27
Sansurfer Switch Manager Window
28
Exiting Sansurfer Switch Manager
29
Save Default Fabric View File Dialog
29
Load Default Fabric File Dialog
30
Uninstalling Sansurfer Switch Manager
31
SMS Uninstall
31
Standalone Uninstall
32
Changing the Encryption Key for the Default Fabric View File
33
Saving and Opening Fabric View Files
33
Setting Sansurfer Switch Manager Preferences
34
Using Online Help
35
Viewing Software Version and Copyright Information
35
Preferences Dialog – Sansurfer Switch Manager
35
Sansurfer Switch Manager User Interface
36
Sansurfer Switch Manager Display Elements
36
Menu Bars
37
Topology Display Menu
37
Faceplate Display Menu
38
Shortcut Keys
38
Tool Bar
39
Tool Bar Buttons
39
Fabric Tree
40
Data Window and Tabs
41
Graphic Window
41
Working Status Indicator
41
Using the Topology Display
42
Selecting Switches and Links
43
Switch and Link Status
43
Working with Switches and Links
43
Arranging Switches in the Display
44
Opening the Faceplate and Topology Display Popup Menus
44
Topology Data Windows
45
Using the Faceplate Display
46
Port Views and Status
46
Opening the Faceplate Popup Menu
47
Selecting Ports
47
Working with Ports
47
Faceplate Data Windows
48
Managing Fabrics
49
Fabric Security
49
User Account Security
49
Fabric Services
50
Enabling In-Band Management
50
Enabling SNMP Configuration
50
Security Consistency Checklist
51
Tracking Fabric Firmware and Software Versions
51
Saving a Version Snapshot
51
Viewing and Comparing Version Snapshots
52
Exporting Version Snapshots to a File
52
Managing the Fabric Database
52
Fabric Version Snapshot Analysis Dialog
52
Adding a Fabric
53
Add a New Fabric Dialog
53
Removing a Fabric
54
Opening a Fabric View File
54
Saving a Fabric View File
54
Rediscovering a Fabric
54
Deleting Switches and Links
55
Adding a New Switch to a Fabric
55
Replacing a Failed Switch
56
Displaying Fabric Information
57
Fabric Status
57
Table
58
Topology Display Switch and Status Icons
58
Displaying the Event Browser
59
Events Browser
59
Severity Levels
60
Filtering the Event Browser
61
Filter Events Dialog
61
Sorting the Event Browser
62
Saving the Event Browser to a File
62
Devices Data Window
63
Devices Data Window Entries
63
Active Zone Set Data Window
64
Link Data Window
65
Working with Device Information and Nicknames
65
Displaying Detailed Device Information
65
Detailed Devices Display Dialog
65
Exporting Device Information to a File
66
Managing Device Port Nicknames
66
Creating a Nickname
66
Deleting a Nickname
67
Editing a Nickname
67
Exporting Nicknames to a File
67
Importing a Nicknames File
68
Zoning a Fabric
68
Zoning Concepts
68
Zones
69
Aliases
70
Zone Sets
70
Zoning Database
71
Using the Zoning Wizard
72
Managing the Zoning Database
72
Editing the Zoning Database
73
Edit Zoning Dialog
73
Edit Zoning Dialog Tool Bar Buttons and Icons
75
Configuring the Zoning Database
76
Zoning Config Dialog
76
Saving the Zoning Database to a File
77
Restoring the Zoning Database from a File
77
Restoring the Default Zoning Database
78
Removing All Zoning Definitions
78
Managing Zone Sets
79
Creating a Zone Set
79
Activating and Deactivating a Zone Set
80
Copying a Zone to a Zone Set
80
Removing a Zone from a Zone Set or from All Zone Sets
80
Managing Zones
81
Removing a Zone Set
81
Creating a Zone in a Zone Set
82
Adding Zone Members
83
Removing a Zone from a Zone Set
84
Removing a Zone from All Zone Sets
84
Removing a Zone Member
84
Renaming a Zone or a Zone Set
84
Changing Zone Types
85
Creating an Alias
85
Managing Aliases
85
Adding a Member to an Alias
86
Removing an Alias from All Zones
86
Merging Fabrics and Zoning
87
Zone Merge Failure
87
Zone Merge Failure Recovery
88
Managing Switches
89
Managing User Accounts
90
Factory User Accounts
90
Creating User Accounts
91
User Account Administration Dialog – Add Account
91
Removing a User Account
92
User Account Administration Dialog – Remove Account
92
Changing a User Account Password
93
User Account Administration Dialog – Change Password
93
Modifying a User Account
94
User Account Administration Dialog - Modify Account
94
Displaying Switch Information
95
Faceplate Display - Switch Information
95
Devices Data Window
96
Switch Data Window
96
Switch Data Window Entries
96
Port Statistics Data Window
99
Port Information Data Window
99
Configured Zonesets Data Window
100
Configuring Port Threshold Alarms
101
Port Threshold Alarm Configuration Dialog
101
Paging a Switch
102
Port Threshold Alarm Example
102
Setting the Date/Time and Enabling NTP Client
103
Resetting a Switch
103
Switch Resets
104
Configuring a Switch
105
Using the Configuration Wizard
105
Switch Properties
106
Switch Properties Dialog
106
Symbolic Name
106
Switch Administrative States
107
Domain ID and Domain ID Lock
108
Fabric Device Management Interface
108
Broadcast Support
109
In-Band Management
109
Advanced Switch Properties
110
Advanced Switch Properties Dialog
110
Timeout Values
111
Interop Mode for Zoning
112
Legacy Port Address Format
112
Network Properties
113
Network Properties Dialog
113
IP Configuration
114
NTP Client
115
Remote Logging
115
SNMP Properties
116
SNMP Properties Dialog
116
SNMP Configuration
117
SNMP Configuration Parameters
117
SNMP Trap Configuration
118
SNMP Trap Configuration Parameters
118
Archiving a Switch
119
Restoring a Switch
120
Restore Dialogs – Full and Selective
120
Restoring the Factory Default Configuration
122
Factory Default Configuration Settings
122
Downloading a Support File
123
Installing Firmware
124
Displaying Hardware Status
125
Hardware Status Leds
125
Managing Ports
127
Displaying Port Information
127
Faceplate Display – Port Information
127
Monitoring Port Status
128
Displaying Port Types
128
Displaying Port Operational States
129
Displaying Port Speeds
129
Displaying Transceiver Media Status
130
Port Statistics Data Window
130
Port Transceiver Media View
130
Port Statistics Data Window Entries
131
Port Information Data Window
133
Port Information Data Window Entries
133
Configuring Ports
136
Port Properties Dialog
136
Changing Port Administrative States
137
State Description
137
Changing Port Speeds
138
Changing Port Types
139
F_Port Fabric Port - Supports a Single Public Device (N_Port)
139
Fl_Port Fabric Loop Port - Self Discovers a Single Device (N_Port) or a Loop of up to 126 Public Devices (Nl_Port)
139
G_Port Generic Port - Self Discovers as an F_Port or an E_Port
139
Gl_Port Generic Loop Port - Self Discovers as an F_Port, Fl_Port, or an E_Port
139
Gl_Port Is the Default Port Type. a Single Device on a Public Loop will Attempt to Configure as an F_Port First, then if that Fails, as an Fl_Port
139
I/O Stream Guard
140
Device Scan
140
Changing Port Symbolic Name
140
Using the Extended Credits Wizard
141
Designate Donor Ports
141
Resetting a Port
142
Testing Ports
142
Port Loopback Test Dialog
142
Graphing Port Performance
144
Performance View Graphs
144
Starting Sansurfer Performance View
145
Exiting Sansurfer Performance View
146
Save Default Performance View File Dialog
146
Saving and Opening Performance View Files
147
Load Default View File Dialog
147
Changing the Default Performance View File Encryption Key
148
Setting Sansurfer Performance View Preferences
148
Setting the Polling Frequency
149
Displaying Graphs for a Switch
149
Arranging Graphs in the Display
150
Customizing Graphs
150
Default Graph Options Dialog
151
Setting Global Graph Type
152
Rescaling a Selected Graph
152
Printing Graphs
153
Saving Graph Statistics to a File
153
Appendix A Command Line Interface
155
Logging on to a Switch
155
User Accounts
155
Working with Switch Configurations
155
A.1 Logging on to a Switch
155
A.2 User Accounts
156
A.3 Working with Switch Configurations
156
A.3.1 Modifying a Configuration
157
Modifying a Configuration
157
Backing up and Restoring Switch Configurations
158
Commands
160
A-1 Command-Line Completion
160
A.4 Commands
160
A-2 Commands Listed by Authority Level
161
Admin Command
162
Alias Command
163
Config Command
165
Create Support Command
168
Date Command
170
Feature Command
171
Firmware Install Command
172
Hardreset Command
173
Help Command
174
History Command
175
Hotreset Command
176
Image Command
177
Lip Command
180
Passwd Command
181
Ping Command
182
Ps Command
183
Quit Command
184
Reset Command
185
A-3 Switch Configuration Defaults
186
A-4 Port Configuration Defaults
187
A-5 Port Threshold Alarm Configuration Defaults
188
A-6 Zoning Configuration Defaults
189
A-7 SNMP Configuration Defaults
189
A-8 System Configuration Defaults
190
Set Command
191
Set Config Command
194
A-9 Set Config Port Parameters
194
A-10 Set Config Switch Parameters
197
A-11 Set Config Threshold Parameters
199
A-12 Set Config Zoning Parameters
200
Set Log Command
205
Set Port Command
209
Set Setup Command
211
A-13 SNMP Configuration Settings
211
A-14 System Configuration Settings
212
Show Command
216
A-15 Show Port Parameters
219
A-16 Switch Operational Parameters
222
Show Config Command
231
Show Log Command
235
Show Perf Command
239
Show Setup Command
241
Shutdown Command
244
Test Command
245
Uptime Command
248
User Command
249
Whoami Command
252
Zone Command
253
Zoneset Command
257
Zoning Command
260
A-17 Zoning Database Limits
261
Advertisement
Qlogic SANbox 1400 Series Installation Manual (214 pages)
Fibre Channel Switch
Brand:
Qlogic
| Category:
Switch
| Size: 1 MB
Table of Contents
Installation Guide
1
Document Revision History
2
Table of Contents
3
Introduction
9
Intended Audience
9
Related Materials
10
Safety Notices
11
Sicherheitshinweise
11
Notes Informatives Relatives à la Sécurité
11
Communications Statements
12
Federal Communications Commission (FCC) Class a Statement
12
Canadian Department of Communications Class a Compliance Statement
12
Avis de Conformité aux Normes du Ministère des Communications du Canada
13
CE Statement
13
VCCI Class a Statement
14
Laser Safety Information
14
Electrostatic Discharge Sensitivity (ESDS) Precautions
14
Accessible Parts
15
Pièces Accessibles
15
Zugängliche Teile
15
General Public License
16
Preamble
16
Terms and Conditions for Copying, Distribution and Modification
17
How to Apply These Terms to Your New Programs
22
Technical Support
24
Availability
24
Training
24
Contact Information
25
General Description Chassis Controls and Leds
28
Maintenance Button
28
Resetting a Switch
28
Placing the Switch in Maintenance Mode
29
Chassis Leds
29
Input Power LED (Green)
29
Heartbeat LED (Green)
30
System Fault LED (Amber)
30
Figure
29
Fibre Channel Ports
30
Port Leds
31
Port Activity LED (Green)
31
Port Logged-In LED (Green)
31
Transceivers
32
Port Types
32
Ethernet Port
33
Power Supply
34
Switch Management
35
Sansurfer Switch Manager
35
Sansurfer Switch Manager Web Applet
35
Command Line Interface
36
File Transfer Protocol
36
Sansurfer Switch Manager Application Programming Interface
36
Simple Network Management Protocol
36
Power Supply and Fan
34
Planning
37
Devices
37
Table
38
Device Access
38
Zoning Database Limits
38
Soft Zones
39
Access Control List Hard Zones
39
Performance
40
Distance
40
Bandwidth
41
Latency
41
Port-To-Port Latency
41
Multiple Chassis Fabrics
42
Optimizing Device Performance
42
Domain ID, Principal Priority, and Domain ID Lock
43
Fabric Security
44
Fabric Services
44
User Account Security
44
Fabric Management
45
Installation
47
Site Requirements
47
Fabric Management Workstation
47
Management Workstation Requirements
47
Switch Power Requirements
48
Environmental Conditions
48
Installing a Switch
48
Mount the Switch
49
Install Transceivers
50
Connect the Workstation to the Switch
51
Workstation Cable Connections
51
Configure the Workstation
52
Install the Management Application
53
Sansurfer Switch Manager
53
Sansurfer Management Suite
55
Sms Installation for Linux
57
Sms Installation for Solaris
59
Start Sansurfer Switch Manager
61
Connect the Switch to AC Power
62
Configure the Switch
64
Configuration Wizard Parameters
64
Cable Devices to the Switch
65
Install Firmware
66
Using Sansurfer Switch Manager to Install Firmware
67
Using the CLI to Install Firmware
68
Diagnostics/Troubleshooting
69
Chassis Diagnostics
69
Chassis Leds
69
Input Power LED Is Extinguished
70
System Fault LED Is Illuminated
70
Power-On Self Test Diagnostics
71
Heartbeat LED Blink Patterns
71
Configuration File System Error Blink Pattern
72
Internal Firmware Failure Blink Pattern
72
System Error Blink Pattern
72
Over Temperature Blink Pattern
75
E_Port Isolation
76
Logged-In LED Indications
76
Excessive Port Errors
78
Recovering a Switch
79
Maintenance - Exit
80
Maintenance - Image Unpack
81
Maintenance - Reset Network Config
81
Maintenance - Reset User Accounts to Default
81
Maintenance - Copy Log Files
82
Maintenance - Remake Filesystem
82
Maintenance - Remove Switch Config
82
Maintenance - Reset Switch
82
Maintenance - Update Boot Loader
82
Fabric Specifications
83
A.1 Fabric Specifications
83
Maintainability
84
A.2 Maintainability
84
Fabric Management
85
Dimensions
85
Electrical
85
A.3 Fabric Management
85
A.4 Dimensions
85
A.5 Electrical
85
Environmental
86
A.6 Environmental
86
Regulatory Certifications
87
A.7 Regulatory Certifications
87
Appendix A Specifications
83
Appendix B Command Line Interface
89
Logging on to a Switch
89
User Accounts
89
B.1 Logging on to a Switch
89
B.2 User Accounts
90
Working with Switch Configurations
90
Modifying a Configuration
91
B.3.1 Modifying a Configuration
91
Backing up and Restoring Switch Configurations
92
Commands
94
Command-Line Completion
94
B-1 Command-Line Completion
94
B.4 Commands
94
Commands Listed by Authority Level
95
Admin Command
96
Alias Command
97
Config Command
99
Create Support Command
102
Date Command
104
Feature Command
105
Firmware Install Command
106
Hardreset Command
107
Help Command
108
History Command
109
Hotreset Command
110
Image Command
111
Lip Command
114
Passwd Command
115
Ping Command
116
Ps Command
117
Quit Command
118
Reset Command
119
Switch Configuration Defaults
120
Port Configuration Defaults
121
Port Threshold Alarm Configuration Defaults
122
Zoning Configuration Defaults
123
SNMP Configuration Defaults
123
System Configuration Defaults
124
Set Command
125
B-9 Set Config Port Parameters
128
Set Config Command
128
Set Config Port Parameters
129
Set Config Switch Parameters
131
Set Config Threshold Parameters
133
Set Config Zoning Parameters
134
Set Log Command
139
Set Port Command
143
Set Setup Command
145
SNMP Configuration Settings
145
System Configuration Settings
146
Show Command
150
Show Port Parameters
153
Switch Operational Parameters
156
Show Config Command
165
Show Log Command
169
Show Perf Command
173
Show Setup Command
175
Shutdown Command
178
Test Command
179
Uptime Command
182
User Command
183
Whoami Command
186
Zone Command
187
Zoneset Command
191
Zoneset Command
192
Zoning Command
194
Zoning Database Limits
195
Qlogic SANbox 1400 Series Supplementary Manual (12 pages)
Qlogic SANbox 1400: Supplementary Guide
Brand:
Qlogic
| Category:
Switch
| Size: 1 MB
Table of Contents
Table of Contents
2
I N T R O D U C T I O N
3
ESG Lab Review
4
T in N G C O N N E C T I V I T y T O T H E E D G E
5
D a T Ta a S E R V I C E S I N T H E S T to O R a G E N E T W O R K
7
S C a L a B L E H I G H S P E E D C L U S T E R I N G
9
S T to O R a G E R O U T I N G a N D E X T E N S I Io O N
10
E S G L a B V I E W
11
Appendix
12
Advertisement
Qlogic SANbox 1400 Series Quick Start Manual (8 pages)
FIBRE CHANNEL SWITCH
Brand:
Qlogic
| Category:
Switch
| Size: 0 MB
Table of Contents
Quick Start Guide
1
Installation Instructions
3
Step 1. Verify the Package Contents
3
Step 2. Mount the Switch
3
Step 3. Install Sfps
3
Step 4. Apply Power to the Switch
4
Step 5. Verify Workstation Requirements
4
Step 6. Install the Sansurfer Switch Manager Application
4
Step 7. Obtain Network Configuration
4
Step 8. Run the Configuration Wizard
5
Step 9. Connect Devices and Switches
5
Qlogic SANbox 1400 Series Supplementary Manual (2 pages)
Qlogic SANbox 1400: Supplementary Guide
Brand:
Qlogic
| Category:
Switch
| Size: 0 MB
Table of Contents
End Data Truancy at School District
1
Challenge
1
Solution
1
Result
1
JUHD Gets a Real-World Storage Education
2
Students’ Data Achieves a Perfect Attendance Record
2
Uninterrupted Information Access Broadens the Curriculum
2
The HDS Plug-And-Play SAN Kit Makes Storage a Snap
2
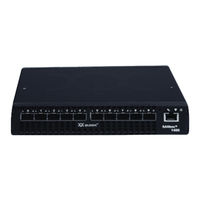
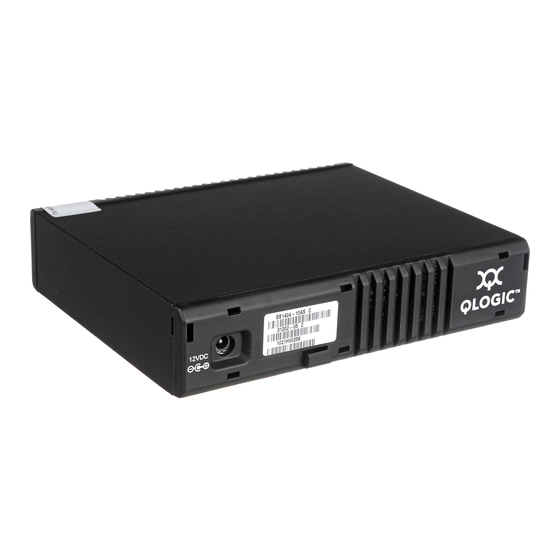
Qlogic SANbox 1400 Series Specifications (2 pages)
10 Ports, 2Gbps Fibre Channel Switch
Brand:
Qlogic
| Category:
Switch
| Size: 0 MB
Advertisement
Related Products
Qlogic SANbox 5200 Series
Qlogic SANbox 5600 Series
Qlogic SANbox2 SANbox2-64
Qlogic SANbox2-16 Fibre Channel
Qlogic SANbox2-8c
Qlogic SANbox-16STD Installer's/
Qlogic SANbox-16HA Installer's/
Qlogic SANbox 9000 Series
Qlogic SANbox 9000
Qlogic SilverStorm 9000 Series
Qlogic Categories
Switch
Adapter
Host Adapter
Network Router
Software
More Qlogic Manuals
Login
Sign In
OR
Sign in with Facebook
Sign in with Google
Upload manual
Upload from disk
Upload from URL