
Related Manuals for Qlogic SANbox 5602 Fibre Channel


Summary of Contents for Qlogic SANbox 5602 Fibre Channel
-
Page 1: Sanbox 5602 Fibre Channel Switch
S i m p l i f y SANbox 5602 Fibre Channel Switch Installation Guide Firmware Version 4.2 59096-00 A Page i... -
Page 2: Document Revision History
QLogic Corporation reserves the right to change product specifications at any time without notice. Applications described in this document for any of these products are for illustrative purposes only. QLogic Corporation makes no representation nor warranty that such applications are suitable for the specified use without further testing or modification. -
Page 3: Table Of Contents
Table of Contents Section 1 Introduction Intended Audience ..................... 1-1 Related Materials ....................1-2 Safety Notices ....................1-3 Sicherheitshinweise.................... 1-3 Notes informatives relatives à la sécurité............1-3 Communications Statements................1-4 1.6.1 Federal Communications Commission (FCC) Class A Statement .... 1-4 1.6.2 Canadian Department of Communications Class A Compliance Statement ................ - Page 4 SANbox 5602 Fibre Channel Switch Installation Guide Section 2 General Description Chassis Controls and LEDs ................2-2 2.1.1 Maintenance Button................... 2-2 2.1.1.1 Resetting a Switch ................2-2 2.1.1.2 Placing the Switch in Maintenance Mode ......... 2-3 2.1.2 Chassis LEDs .................... 2-3 2.1.2.1 Input Power LED (Green) ..............
- Page 5 SANbox 5602 Fibre Channel Switch Installation Guide Multiple Chassis Fabrics ..................3-6 3.5.1 Optimizing Device Performance ..............3-7 3.5.2 Domain ID, Principal Priority, and Domain ID Lock ........3-8 3.5.3 Stacking ..................... 3-9 3.5.4 Common Topologies................3-11 3.5.4.1 Cascade Topology ................3-11 3.5.4.2 Mesh Topology ................
- Page 6 SANbox 5602 Fibre Channel Switch Installation Guide Section 5 Diagnostics/Troubleshooting Chassis Diagnostics ................... 5-1 5.1.1 Input Power LED Is Extinguished .............. 5-2 5.1.2 System Fault LED Is Illuminated ............... 5-2 Power-On Self Test Diagnostics................. 5-3 5.2.1 Heartbeat LED Blink Patterns..............5-3 5.2.1.1 Internal Firmware Failure Blink Pattern ..........
- Page 7 SANbox 5602 Fibre Channel Switch Installation Guide Appendix B Command Line Interface Logging On to a Switch ..................B-1 User Accounts ....................B-2 Working with Switch Configurations ..............B-2 B.3.1 Modifying a Configuration................B-3 B.3.2 Backing up and Restoring Switch Configurations........B-4 Commands ......................B-7 Admin Command..................B-9 Alias Command ..................B-10 Config Command..................B-12 Create Support Command...............B-15...
- Page 8 SANbox 5602 Fibre Channel Switch Installation Guide Whoami Command..................B-98 Zone Command..................B-99 Zoneset Command ................B-103 Zoning Command ..................B-105 Glossary Index Figures Figure Page SANbox 5602 Fibre Channel Switch................2-1 Chassis Controls and LEDS................... 2-2 Chassis LEDs......................... 2-3 Fibre Channel Ports ....................... 2-5 Port LEDs........................
- Page 9 SANbox 5602 Fibre Channel Switch Installation Guide Tables Table Page Serial Port Pin Identification ................... 2-9 Zoning Database Limits ....................3-2 Port-to-Port Latency ....................... 3-5 Management Workstation Requirements............... 4-1 Command-Line Completion ...................B-7 Commands Listed by Authority Level................B-8 Switch Configuration Defaults ..................B-33 Port Configuration Defaults ..................B-34 Port Threshold Alarm Configuration Defaults...............B-35 Zoning Configuration Defaults..................B-35...
- Page 10 SANbox 5602 Fibre Channel Switch Installation Guide Notes Page x 59096-00 A...
-
Page 11: Introduction
Section 1 Introduction This manual describes the features and installation of the SANbox® 5602 Fibre Channel switch, firmware version 4.2. This manual is organized as follows: Section 1 describes the intended audience, related materials, safety notices, communications statements, laser safety information, electrostatic discharge sensitivity precautions, accessible parts, general program license, and technical support. -
Page 12: Related Materials
The following manuals and materials are referenced in the text and/or provide additional information. SANbox 5602 Switch Management User’s Guide, publication number 59097-00. QLogic Switch Interoperability Guide v3.0. This PDF document can be downloaded at http://www.qlogic.com/interopguide/info.asp#inter. Fibre Channel-Arbitrated Loop (FC-AL-2) Rev. 6.8. Fibre Channel-10-bit Interface Rev. 2.3. -
Page 13: Safety Notices
1 – Introduction Safety Notices Safety Notices A Warning notice indicates the presence of a hazard that has the potential of causing personal injury. 4-3, 4-18, A Caution notice indicates the presence of a hazard that has the potential of causing damage to the equipment. -
Page 14: Communications Statements
1 – Introduction Communications Statements Communications Statements The following statements apply to this product. The statements for other products intended for use with this product appear in their accompanying manuals. 1.6.1 Federal Communications Commission (FCC) Class A Statement This equipment has been tested and found to comply with the limits for a Class A digital device, pursuant to Part 15 of the FCC Rules. -
Page 15: Avis De Conformité Aux Normes Du Ministère Des Communications Du Canada
1 – Introduction Communications Statements 1.6.3 Avis de conformité aux normes du ministère des Communications du Canada Cet équipement ne dépasse pas les limites de Classe A d'émission de bruits radioélectriques por les appareils numériques, telles que prescrites par le Réglement sur le brouillage radioélectrique établi par le ministère des Communications du Canada. -
Page 16: Vcci Class A Statement
1 – Introduction Laser Safety Information 1.6.5 VCCI Class A Statement This is a Class A product based on the standard of the Voluntary Control Council For Interference by Information Technology Equipment (VCCI). If this equipment is used in a domestic environment, radio disturbance may arise. When such trouble occurs, the user may be required to take corrective actions. -
Page 17: Accessible Parts
1 – Introduction Accessible Parts Accessible Parts The Field Replaceable Units (FRUs) for the SANbox 5602 switch are the following: Power supplies Small Form-Factor Pluggable (SFP) optical transceivers XPAK optical transceivers 1.10 Pièces Accessibles Les pièces remplaçables, Field Replaceable Units (FRU), du commutateur SANbox 5602 Fibre Channel Switch sont les suivantes: Alimentations de courant Interfaces aux media d’interconnexion appelés SFP transceivers. -
Page 18: General Public License
1.12 General Public License QLogic® Fibre Channel switches are powered by the Linux operating system. A machine-readable copy of the Linux source code is available upon written request to the following address. A nominal fee will be charged for reproduction, shipping, and handling costs in accordance with the General Public License. -
Page 19: Terms And Conditions For Copying, Distribution And Modification
1 – Introduction General Public License We protect your rights with two steps: (1) copyright the software, and (2) offer you this license which gives you legal permission to copy, distribute and/or modify the software. Also, for each author's protection and ours, we want to make certain that everyone understands that there is no warranty for this free software. - Page 20 1 – Introduction General Public License modifications or work under the terms of Section 1 above, provided that you also meet all of these conditions: You must cause the modified files to carry prominent notices stating that you changed the files and the date of any change. You must cause any work that you distribute or publish, that in whole or in part contains or is derived from the Program or any part thereof, to be licensed as a whole at no charge to all third parties under the terms...
- Page 21 1 – Introduction General Public License Accompany it with a written offer, valid for at least three years, to give any third party, for a charge no more than your cost of physically performing source distribution, a complete machine-readable copy of the corresponding source code, to be distributed under the terms of Sections 1 and 2 above on a medium customarily used for software interchange;...
- Page 22 1 – Introduction General Public License rights granted herein. You are not responsible for enforcing compliance by third parties to this License. If, as a consequence of a court judgment or allegation of patent infringement or for any other reason (not limited to patent issues), conditions are imposed on you (whether by court order, agreement or otherwise) that contradict the conditions of this License, they do not excuse you from the conditions of this License.
-
Page 23: How To Apply These Terms To Your New Programs
1 – Introduction General Public License License, you may choose any version ever published by the Free Software Foundation. If you wish to incorporate parts of the Program into other free programs whose distribution conditions are different, write to the author to ask for permission. - Page 24 1 – Introduction General Public License one line to give the program's name and an idea of what it does. Copyright (C) yyyy name of author This program is free software; you can redistribute it and/or modify it under the terms of the GNU General Public License as published by the Free Software Foundation;...
-
Page 25: Technical Support
1.13.1 Availability QLogic Technical Support is available from 7:00 AM to 7:00 PM Central Standard Time, Monday through Friday, excluding QLogic-observed holidays. 1.13.2 Training QLogic offers certification training for the technical professional for both the SANblade™... - Page 26 1 – Introduction Technical Support Notes 1-16 59096-00 A...
-
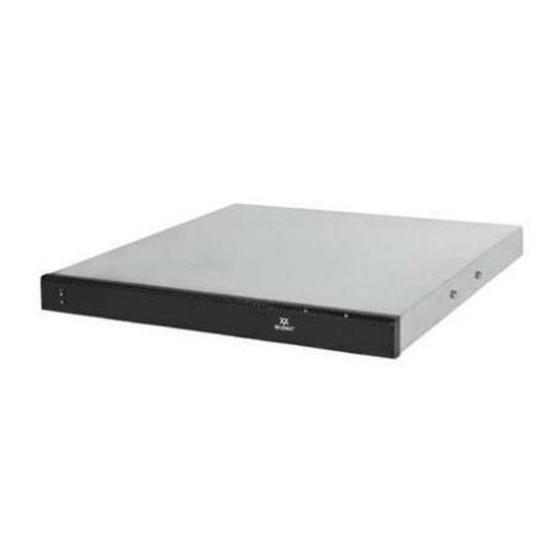
Page 27: Sanbox 5602 Fibre Channel Switch
Section 2 General Description This section describes the features and capabilities of the SANbox 5602 Fibre Channel switch. The following topics are described: Chassis Controls and LEDs Fibre Channel Ports Ethernet Port Serial Port Power Supplies and Fans Switch Management Fabrics are managed with the SANsurfer Switch Manager™... -
Page 28: General Description Chassis Controls And Leds
2 – General Description Chassis Controls and LEDs Chassis Controls and LEDs The Maintenance button shown in Figure 2-2 is the only chassis control and is used to reset a switch or to recover a disabled switch. The chassis LEDs provide information about the switch’s operational status. -
Page 29: Placing The Switch In Maintenance Mode
2 – General Description Chassis Controls and LEDs 2.1.1.2 Placing the Switch in Maintenance Mode To place the switch in maintenance mode, do the following: Isolate the switch from the fabric. Press and hold the Maintenance button with a pointed tool. When the Heartbeat LED alone is illuminated, release the button. -
Page 30: Input Power Led (Green)
2 – General Description Chassis Controls and LEDs 2.1.2.1 Input Power LED (Green) The Input Power LED indicates the voltage status at the switch logic circuitry. During normal operation, this LED illuminates to indicate that the switch logic circuitry is receiving the proper DC voltages. When the switch is in maintenance mode, this LED is extinguished. -
Page 31: Fibre Channel Ports
2 – General Description Fibre Channel Ports Fibre Channel Ports The SANbox 5602 switch has 16 Fibre Channel 1-Gbps/2-Gbps ports and 4 Fibre Channel 10-Gbps ports. Ports are numbered 0–19 as shown in Figure 2-4. Each of the 1-Gbps/2-Gbps ports is served by a Small Form-Factor Pluggable (SFP) optical transceiver and is capable of 1-Gbps or 2-Gbps transmission, or with optional licensing, 4-Gbps. -
Page 32: Port Leds
2 – General Description Fibre Channel Ports 2.2.1 Port LEDs Each port has its own Logged-In LED (L) and Activity LED (A) as shown in Figure 2-5. Logged-In Activity LED Logged-In Activity LED LED (Green) (Green) LED (Green) (Green) 1-Gbps/2-Gbps Ports 10-Gbps Ports Figure 2-5. -
Page 33: Transceivers
2 – General Description Fibre Channel Ports 2.2.2 Transceivers The SANbox 5602 switch supports SFP optical transceivers for the 1-Gbps/2-Gbps ports and XPAK optical transceivers for the 10-Gbps ports. A transceiver converts electrical signals to and from optical laser signals to transmit and receive data. -
Page 34: Ethernet Port
2 – General Description Ethernet Port Ethernet Port The Ethernet port shown in Figure 2-6 is an RJ-45 connector that provides a connection to a management workstation through a 10/100 Base-T Ethernet cable. A management workstation can be a Windows®, Solaris™, or a Linux® workstation that is used to configure and manage the switch fabric. -
Page 35: Serial Port
2 – General Description Serial Port Serial Port The SANbox 5602 switch is equipped with an RS-232 serial port for maintenance purposes. The serial port location is shown in Figure 2-7. You can manage the switch through the serial port using the CLI. Serial Port Figure 2-7. -
Page 36: Power Supplies And Fans
2 – General Description Power Supplies and Fans Power Supplies and Fans The power supplies convert standard 110 or 230 VAC to DC voltages for the various switch circuits. Each power supply has an AC power receptacle and two status LEDs as shown in Figure 2-8: The Power Supply Status LED (green) illuminates to indicate that the power... -
Page 37: Switch Management
2 – General Description Switch Management Switch Management The switch supports the following management tools: SANsurfer Switch Manager SANsurfer Switch Manager Web Applet Command Line Interface SANsurfer Switch Manager Application Programming Interface Simple Network Management Protocol File Transfer Protocol 2.6.1 SANsurfer Switch Manager SANsurfer Switch Manager is a workstation-based Java®... -
Page 38: Command Line Interface
SANsurfer Switch Manager Application Programming Interface The SANsurfer Switch Manager API enables an application provider to build a management application for QLogic switches. The library is implemented in ANSI standard C, relying only on standard POSIX run-time libraries (except for the Windows NT build). -
Page 39: Planning
Section 3 Planning Consider the following when planning a fabric: Devices Device Access Performance Port Licensing Multiple Chassis Fabrics Fabric Security Fabric Management Devices When planning a fabric, consider the number of public devices and the anticipated demand. This will determine the number of ports that are needed and in turn the number of switches. -
Page 40: Device Access
3 – Planning Device Access Device Access Consider device access needs within the fabric. Access is controlled by the use of zones and zone sets. Some zoning strategies include the following: Group devices by operating system. Separate devices that have no need to communicate with other devices in the fabric or have classified data. -
Page 41: Soft Zones
3 – Planning Device Access 3.2.1 Soft Zones Soft zoning divides the fabric for purposes of controlling device discovery. Devices in the same soft zone automatically discover and communicate freely with all other members of the same zone. The soft zone boundary is not secure; traffic across soft zones can occur if addressed correctly. -
Page 42: Performance
3 – Planning Performance Performance The SANbox 5602 switch supports class 2 and class 3 Fibre Channel service at transmission rates of 1-, 2-, 4-, or 10-Gbps with a maximum frame size of 2148 bytes. A 1-Gbps/2-Gbps port adapts its transmission speed to match that of the device to which it is connected prior to login when the connected device powers up. -
Page 43: Bandwidth
3 – Planning Performance You can configure recipient and donor ports using the SANsurfer Switch Manager application or the Set Config command. Refer to “Set Config Command” on page B-39 for more information. 3.3.2 Bandwidth Bandwidth is a measure of the volume of data that can be transmitted at a given transmission rate. -
Page 44: Port Licensing
3 – Planning Port Licensing Port Licensing The SANbox 5602 switch can come from the factory as an 8-, 12-, 16-, or 20-port switch, enabling ports 0–7, 0–11, 0–15, or 0–19 respectively. Ports 16–19 are 10-Gbps ports. You can upgrade the SANbox 5602 switch to enable additional ports up to the 20-port maximum. -
Page 45: Optimizing Device Performance
3 – Planning Multiple Chassis Fabrics 3.5.1 Optimizing Device Performance When choosing a topology for a multiple chassis fabric, you should also consider the locality of your server and storage devices and the performance requirements of your application. Storage applications such as video distribution, medical record storage/retrieval or real-time data acquisition can have specific latency or bandwidth requirements. -
Page 46: Domain Id, Principal Priority, And Domain Id Lock
3 – Planning Multiple Chassis Fabrics 3.5.2 Domain ID, Principal Priority, and Domain ID Lock The following switch configuration settings affect multiple chassis fabrics: Domain ID Principal priority Domain ID lock The domain ID is a unique number from 1–239 that identifies each switch in a fabric. -
Page 47: Stacking
3 – Planning Multiple Chassis Fabrics 3.5.3 Stacking You can connect up to four 20-port SANbox 5602 switches together through the 10-Gbps ports, thus preserving the user ports for devices. This is called stacking. The following 2-, 3-, and 4-switch stacking configurations are recommended for best performance and redundancy. - Page 48 3 – Planning Multiple Chassis Fabrics A four-switch stack uses three 3-inch and three 9-inch XPAK switch stacking cables as shown in Figure 3-3. 64 1-Gbps/2-Gbps ports are available for devices. Figure 3-3. Four-Switch Stack 3-10 59096-00 A...
-
Page 49: Common Topologies
3 – Planning Multiple Chassis Fabrics 3.5.4 Common Topologies The SANbox 5602 switch supports the following topologies using the 1-Gbps/2-Gbps Fibre Channel ports: Cascade Mesh Multistage® 3.5.4.1 Cascade Topology A cascade topology describes a fabric in which the switches are connected in series. -
Page 50: Mesh Topology
3 – Planning Multiple Chassis Fabrics 3.5.4.2 Mesh Topology A mesh topology describes a fabric in which each chassis has at least one port directly connected to each other chassis in the fabric. Using 16-port SANbox 5602 switches the mesh fabric shown in Figure 3-5 has the following characteristics: Each link contributes up to 425 MB of bandwidth between switches, 850 MB... -
Page 51: Multistage Topology
3 – Planning Multiple Chassis Fabrics 3.5.4.3 Multistage Topology A Multistage topology describes a fabric in which two or more edge switches connect to one or more core switches. Using 16-port SANbox 5602 switches, the Multistage fabric shown in Figure 3-6 has the following characteristics: Each link contributes up to 425 MB of bandwidth between chassis. -
Page 52: Fabric Security
3 – Planning Fabric Security Fabric Security Fabric security consists of the following: User Account Security Fabric Services 3.6.1 User Account Security User account security consists of the administration of account names, passwords, expiration date, and authority level. If an account has Admin authority, all management tasks can be performed by that account in both SANsurfer Switch Manager™... -
Page 53: Fabric Management
3 – Planning Fabric Management Fabric Management The SANsurfer Switch Manager application and CLI execute on a management workstation that provides for the configuration, control, and maintenance of multiple fabrics. Supported platforms include Windows, Solaris, and Linux. The application can be installed and executed on the workstation, or you can run the SANsurfer Switch Manager web applet that is resident on the switch. - Page 54 3 – Planning Fabric Management Notes 3-16 59096-00 A...
-
Page 55: Installation
Section 4 Installation This section describes how to install and configure the SANbox 5602 switch. It also describes how to load new firmware and how to recover a disabled switch. Site Requirements Consider the following items when installing a SANbox 5602 switch: Fabric Management Workstation Switch Power Requirements Environmental Conditions... -
Page 56: Environmental Conditions
4 – Installation Installing a Switch 4.1.3 Environmental Conditions Consider the factors that affect the climate in your facility such as equipment heat dissipation and ventilation. The switch requires the following operating conditions: Operating temperature range: 5 – 40°C (41 – 104°F) Relative humidity: 15 –... -
Page 57: Mount The Switch
Adhesive rubber feet are provided for surface mounts. Without the rubber feet, the switch occupies 1U of space in an EIA rack. Rack mounting requires a QLogic rail kit (part number SB5602-RACKKIT) . WARNING!! Mount switches in the rack so that the weight is distributed evenly. -
Page 58: Install Transceivers
4 – Installation Installing a Switch CAUTION! If the switch is mounted in a closed or multi-unit rack assembly, make sure that the operating temperature inside the rack enclosure does not exceed the maximum rated ambient temperature. Refer to “Environmental” on page A-4. - Page 59 4 – Installation Installing a Switch If you are using the 10-Gbps ports, remove the port covers by the cover tabs using your fingers or pliers as shown in Figure 4-2. Figure 4-2. Removing 10-Gbps Port Covers To install XPAK switch stacking cables, position the cable connectors with the circuit board toward the mid line of the respective switch faceplates as shown in Figure 4-3.
-
Page 60: Connect The Workstation To The Switch
4 – Installation Installing a Switch 4.2.3 Connect the Workstation to the Switch You can manage the switch using SANsurfer Switch Manager or the command line interface. SANsurfer Switch Manager requires an Ethernet connection to the switch. The command line interface can use an Ethernet connection or a serial connection. -
Page 61: Configure The Workstation
4 – Installation Installing a Switch 4.2.4 Configure the Workstation If you plan to use the command line interface to configure and manage the switch, you must configure the workstation. This involves setting the workstation IP address for Ethernet connections, or configuring the workstation serial port. If you plan to use SANsurfer Switch Manager to manage the switch, the Configuration Wizard manages the workstation IP address for you –... -
Page 62: Configuring The Workstation Serial Port
4 – Installation Installing a Switch 4.2.4.2 Configuring the Workstation Serial Port To configure the worksation serial port, do the following: Connect a null modem F/F DB9 cable from a COM port on the management workstation to the RS-232 serial port on the switch. Configure the workstation serial port according to your platform: For Windows: Open the HyperTerminal application. -
Page 63: Install The Management Application
You can manage the switch using SANsurfer Switch Manager as a standalone application or as a part of SANsurfer Management Suite™. SANsurfer Management Suite is QLogic’s integrated fabric management application, managing both HBAs and switches. If your switch was shipped with a SANsurfer Switch Manager Disk, refer to “SANsurfer Switch Manager”... - Page 64 4 – Installation Installing a Switch For a Linux workstation: If a file browser does not open, double-click the CD-ROM icon to open the browser. Double click the Switch_Manager folder, then double click the Linux folder. If there is no CD-ROM icon, do the following: Open an xterm or other terminal window.
-
Page 65: Sansurfer Management Suite
4 – Installation Installing a Switch 4.2.5.2 SANsurfer Management Suite The following instructions describe how to install SANsurfer Management Suite and upgrade SANsurfer Switch Manager. You can install SANsurfer Management Suite (SMS) on a Windows, Linux, or Solaris workstation. Choose the instructions for your workstation: SMS Installation for Windows SMS Installation for Linux... - Page 66 When prompted for the location in which to create the program icons, click the In an Existing Group radio button, then specify the same group that was used for the SMS installation. The default SMS group is "QLogic Management Suite". Click the Next button.
-
Page 67: Sms Installation For Linux
4 – Installation Installing a Switch 4.2.5.2.2 SMS Installation for Linux Close all programs currently running, and insert the SANsurfer Management Suite Installation Disk into the management workstation CD-ROM drive. If a file browser dialog opens showing icons for the contents of the CD-ROM, double-click the Start_Here.htm file to open the SANsurfer Management Suite start page. - Page 68 About ... and make note of the release version number. Close SANsurfer Management Suite. To ensure that you are using the most recent version of SANsurfer Switch Manager, visit the QLogic support web page and go to Drivers, Software and Manuals.
-
Page 69: Sms Installation For Solaris
4 – Installation Installing a Switch 4.2.5.2.3 SMS Installation for Solaris To install the SANsurfer Switch Manager application on Solaris from the SANsurfer Management Suite CD-ROM, do the following: Insert the SANsurfer Management Suite Disk into the management workstation CD-ROM drive. If the SANsurfer Management Suite start page does not open in your default browser, do the following: Right-click the Workspace Menu. -
Page 70: Start Sansurfer Switch Manager
4 – Installation Installing a Switch To ensure that you are using the most recent version of SANsurfer Switch Manager, visit the QLogic support web page and go to Drivers, Software and Manuals. Select your switch model from the pull-down menu. Locate the description for SANsurfer Switch Manager for Linux under "Management Software". - Page 71 4 – Installation Installing a Switch To start SANsurfer Switch Manager as a standalone application, do the following. Start the SANsurfer Switch Manager using one of the following methods: For Windows, double-click the SANsurfer Switch Manager shortcut, or select SANsurfer Switch Manager from Start menu, depending on how you installed the SANsurfer Switch Manager application.
-
Page 72: Connect The Switch To Ac Power
4 – Installation Installing a Switch 4.2.7 Connect the Switch to AC Power WARNING!! This product is supplied with a 3-wire power cable and plug for the user’s safety. Use this power cable in conjunction with a properly grounded outlet to avoid electrical shock. An electrical outlet that is not correctly wired could place hazardous voltage on metal parts of the switch chassis. - Page 73 4 – Installation Installing a Switch WARNUNG!! Dieses Produkt wird mit einem 3-adrigen Netzkabel mit Stecker geliefert. Dieses Kabel erfüllt die Sicherheitsanforderungen und sollte an einer vorschriftsmäßigen Schukosteckdose angeschlossen werden, um die Gefahr eines elektrischen Schlages zu vermeiden.Elektrosteckdosen, die nicht richtig verdrahtet sind, können gefährliche Hochspannung an den Metallteilen des switch-Gehäuses verursachen.
-
Page 74: Configure The Switch
4 – Installation Installing a Switch The Heartbeat LED indicates the results of the POST. The POST tests the condition of firmware, memories, data-paths, and switch logic circuitry. If the Heartbeat LED blinks steadily about once per second, the POST was successful, and you can continue with the installation process. - Page 75 4 – Installation Installing a Switch To configure the switch using the command line interface, do the following: Open a command window according to the type of workstation and connection: Ethernet (all platforms): Open a Telnet session with the default switch IP address and log in to the switch with default account name and password (admin/password).
-
Page 76: Cable Devices To The Switch
4 – Installation Install Firmware 4.2.9 Cable Devices to the Switch Connect cables to the SFP transceivers and their corresponding devices, and then energize the devices. Device host bus adapters can have SFP (or SFF) transceivers or GigaBit Interface Converters (GBIC). LC-type duplex fiber optic cable connectors are designed for SFP transceivers, while SC-type connectors are designed for GBICs. -
Page 77: Using Sansurfer Switch Manager To Install Firmware
4 – Installation Install Firmware 4.3.1 Using SANsurfer Switch Manager to Install Firmware To install firmware using SANsurfer Switch Manager, do the following: Select a switch in the topology display and double-click to open the Faceplate display. Open the Switch menu and select Load Firmware. In the Firmware Upload window, click the Select button to browse and select the firmware file to be uploaded. - Page 78 4 – Installation Install Firmware Enter your account name on the remote host and the IP address of the remote host. When prompted for the source file name, enter the path for the firmware image file. User Account : johndoe IP Address : 10.20.20.200 Source Filename : 4.0.2.00.04_mpc When prompted to install the new firmware, enter Yes to continue or No to...
-
Page 79: Upgrading The Sanbox 5602 Switch
4 – Installation Upgrading the SANbox 5602 Switch Upgrading the SANbox 5602 Switch The SANbox 5602 product can come from the factory as an 8-, 12-, 16-, or 20-port switch capable of 1-, 2-, and 10-Gbps port speeds. Ports 0–15 are capable of 1-Gbps/2-Gbps;... - Page 80 4 – Installation Powering Down a Switch Notes 4-26 59096-00 A...
- Page 81 Section 5 Diagnostics/Troubleshooting Diagnostic information about the switch is available through the chassis LEDs and the port LEDs. Diagnostic information is also available through the SANsurfer Switch Manager and CLI event logs and error displays. This section describes the following types of diagnostics: Chassis Diagnostics describes the Input Power LED and System Fault LED indications.
-
Page 82: Diagnostics/Troubleshooting Chassis Diagnostics
5 – Diagnostics/Troubleshooting Chassis Diagnostics 5.1.1 Input Power LED Is Extinguished The Input Power LED illuminates to indicate that the switch logic circuitry is receiving proper voltages. If the Input Power LED is extinguished, do the following: Inspect the power cords and connectors. Is the cord unplugged? Is the cord or connector damaged? Yes - Make necessary corrections or repairs. -
Page 83: Power-On Self Test Diagnostics
5 – Diagnostics/Troubleshooting Power-On Self Test Diagnostics Power-On Self Test Diagnostics The switch performs a series of tests as part of its power-up procedure. The POST diagnostic program performs the following tests: Checksum tests on the boot firmware in PROM and the switch firmware in flash memory Internal data loopback test on all ports Access and integrity test on the ASIC... -
Page 84: Internal Firmware Failure Blink Pattern
5 – Diagnostics/Troubleshooting Power-On Self Test Diagnostics 5.2.1.1 Internal Firmware Failure Blink Pattern An internal firmware failure blink pattern is 2 blinks followed by a two second pause. The 2-blink error pattern indicates that the firmware has failed, and that the switch must be reset. - Page 85 5 – Diagnostics/Troubleshooting Power-On Self Test Diagnostics Place the switch in maintenance mode. Press and hold the Maintenance button for 2–7 seconds. Refer to “Recovering a Switch” on page 5-11 more information about placing the switch in maintenance mode. Establish a Telnet session using the default IP address 10.0.0.1. telnet 10.0.0.1 Enter the account name (prom) and password (prom), and press the Enter key.
-
Page 86: Over Temperature Blink Pattern
5 – Diagnostics/Troubleshooting Power-On Self Test Diagnostics Establish communications with the switch using Telnet. Enter one of the following on the command line: telnet xxx.xxx.xxx.xxx telnet switchname where xxx.xxx.xxx.xxx is the switch IP address and switchname is the switch name associated with the IP address. A Telnet window opens prompting you for a login. -
Page 87: Logged-In Led Indications
5 – Diagnostics/Troubleshooting Power-On Self Test Diagnostics Observe the air flow direction from both power supplies. Are they the same? Yes - Continue. No - Determine the proper air flow direction for the switch. Replace the power supply with the incorrect air flow direction with another having the correct air flow direction. -
Page 88: E_Port Isolation
5 – Diagnostics/Troubleshooting Power-On Self Test Diagnostics 5.2.2.1 E_Port Isolation A Logged-In LED error indication is often the result of E_Port isolation. An isolated E_Port is indicated by a red link in the SANsurfer Switch Manager topology display. E_Port isolation can be caused by the following: FL_Port is connected to another switch Conflicting domain IDs Conflicting timeout values... -
Page 89: Excessive Port Errors
5 – Diagnostics/Troubleshooting Power-On Self Test Diagnostics Display the active zone set on each switch using the Zoning Active command or the Active Zoneset tab of the SANsurfer Switch Manager topology display. Compare the zone membership between the two active zone sets. - Page 90 5 – Diagnostics/Troubleshooting Power-On Self Test Diagnostics Review the event browser to determine if excessive port errors are responsible for disabling the port. Look for a message that mentions one of the monitored error types indicating that the port has been disabled, then do the following: Examine the alarm configuration for the associated error using the Show Config Threshold command or the SANsurfer Switch Manager application.
-
Page 91: Power Supply Diagnostics
5 – Diagnostics/Troubleshooting Power Supply Diagnostics Power Supply Diagnostics A power supply has a Status LED (Green) and a Fault LED (Amber) as shown in Figure 5-3. Under normal operating conditions, the Power Supply Status LED is illuminated and the Power Supply Fault LED is extinguished. Power Supply Fault LED Power Supply... - Page 92 5 – Diagnostics/Troubleshooting Recovering a Switch In these specific cases, you can recover the switch using maintenance mode. Maintenance mode temporarily returns the switch IP address to 10.0.0.1 and provides opportunities to do the following: Unpack a firmware image file Restore the network configuration parameters to the default values Remove all user accounts and restore the Admin account name password to the default.
-
Page 93: Maintenance - Exit
5 – Diagnostics/Troubleshooting Recovering a Switch 5.4.1 Maintenance – Exit This option closes the current login session. To log in again, enter the maintenance mode account name and password (prom, prom). To return to normal operation, momentarily press and release the Maintenance button or power cycle the switch. -
Page 94: Maintenance - Reset User Accounts To Default
5 – Diagnostics/Troubleshooting Recovering a Switch 5.4.4 Maintenance – Reset User Accounts to Default This option restores the password for the Admin account name to the default (password) and removes all other user accounts from the switch. 5.4.5 Maintenance – Copy Log Files This option copies all log file buffers to a file on the switch named logfile. - Page 95 Section 6 Removal/Replacment This section describes the removal and replacement procedures for the following field replaceable units (FRU): SFP transceivers Power supplies The switch is equipped with a battery that powers the non-volatile memory. This memory stores the switch configuration. The battery is not a field replaceable unit. WARNING!! Danger of explosion if battery is incorrectly replaced.
-
Page 96: Removal/Replacment Sfp Transceiver Removal And Replacement
6 – Removal/Replacment SFP Transceiver Removal and Replacement SFP Transceiver Removal and Replacement The SFP transceivers can be removed and replaced while the switch is operating without damaging the switch or the transceiver. However, transmission on the affected port will be interrupted until the transceiver installed. To remove a transceiver, gently press the transceiver into the port to release the tension, then pull on the release tab or lever and remove the transceiver. - Page 97 6 – Removal/Replacment Power Supply Removal and Replacement To remove a power supply, unplug the power supply and loosen the two knurled fasteners with a cross-head screw driver as shown in Figure 6-1. Grasp the power supply handle and pull firmly to disengage the modular connector. Slide the power supply out of its bay.
- Page 98 6 – Removal/Replacment Power Supply Removal and Replacement Notes 59096-00 A...
-
Page 99: Appendix A Specifications
Appendix A Specifications This appendix contains the specifications for the SANbox 5602 Fibre Channel switch. Refer to Section 2 General Description for the location of all connections, switches, controls, and components. Fabric Specifications Fibre Channel Protocols ....FC-PH Rev. 4.3 FC-PH-2 FC-PH-3 FC-AL Rev 4.6... -
Page 100: Fabric Specifications
A – Specifications Fabric Specifications Number of Fibre Channel Ports ..Variable and can be upgraded in the following configurations: 8 1-Gbps/2-Gbps FC ports 12 1-Gbps/2-Gbps FC ports 16 1-Gbps/2-Gbps FC ports 16 1-Gbps/2-Gbps FC ports plus 10-Gbps FC ports Scalability........ -
Page 101: Maintainability
A – Specifications Maintainability Maintainability Diagnostics ........Power-On Self Test (POST) tests all functional components except SFP transceivers. Port tests include online, internal, and external tests. User Interface ......... LED indicators Field Replaceable Units Power supplies (model 5202 only) Fabric Management Management Methods .... -
Page 102: Electrical
A – Specifications Electrical Electrical Operating voltage ......90 to 240 VAC; 50 to 60 Hz Power source loading (maximum) .. 1 A at 120 VAC 0.5 A at 240 VAC Heat Output (maximum) ....100 watts Circuit Protection ......Internally fused Environmental Temperature Operating ........ -
Page 103: Regulatory Certifications
A – Specifications Regulatory Certifications Regulatory Certifications Safety Standards ......UL60950:2000 CSA 22.2 No. 60950-00 (Canada) EN60950:2000 (EC) CB Scheme-IEC 60950:1999 Emissions Standards ...... FCC Part 15B Class A ICES-03 Issue 3 VCCI Class A ITE CISPR 22, Class A EN 55022, Class A Voltage Fluctuations ....... - Page 104 A – Specifications Regulatory Certifications Notes 59096-00 A...
-
Page 105: Logging On To A Switch
Appendix B Command Line Interface The command line interface (CLI) enables you to perform a variety of fabric and switch management tasks through an Ethernet or a serial port connection. This section describes the following: Logging On to a Switch User Accounts Working with Switch Configurations Commands... -
Page 106: User Accounts
B – Command Line Interface User Accounts User Accounts Switches come from the factory with the following user account already defined: Account name: admin Password: password Authority: Admin This user account provides full access to the switch and its configuration. After planning your fabric management needs and creating your own user accounts, consider changing the password for this account. -
Page 107: Modifying A Configuration
B – Command Line Interface Working with Switch Configurations B.3.1 Modifying a Configuration A switch supports up to 10 configurations including the default configuration. Each switch configuration contains switch, port, port threshold alarm, and zoning configuration components. The Show Switch command displays the name of the active configuration. A configuration name can have up to 31 characters excluding the pound symbol (#), semicolon (;), and comma (,). -
Page 108: Backing Up And Restoring Switch Configurations
B – Command Line Interface Working with Switch Configurations The Config Save command saves the changes you made during the Config Edit session. In this case, changes to the configuration named Default are being saved to a new configuration named config_10132003. However, the new configuration does not take effect until you activate it with the Config Activate command as shown: SANbox (admin-config)#>... - Page 109 B – Command Line Interface Working with Switch Configurations You use FTP to download the configdata file to your workstation for safe keeping and to upload the file back to the switch for the restore function. To download the configdata file, open an FTP session on the switch and login with the account name images and password images.
- Page 110 B – Command Line Interface Working with Switch Configurations The restore process replaces all configuration information on the switch and afterwards the switch is automatically reset. If the restore process changes the IP address, all management sessions are terminated. Use the Set Setup System command to return the IP configuration to the values you want.
-
Page 111: Commands
B – Command Line Interface Commands Commands The command syntax is as follows: command keyword keyword [value] keyword [value1] [value2] The Command is followed by one or more keywords. Consider the following rules and conventions: Commands and keywords are case insensitive. Required keyword values appear in standard font: [value]. -
Page 112: B-2 Commands Listed By Authority Level
B – Command Line Interface Commands The command set performs monitoring and configuration tasks. Commands related to monitoring tasks are available to all account names. Commands related to configuration tasks are available only within an admin session. An account must have Admin authority to enter the Admin Start command, which opens an admin session. -
Page 113: Admin Command
B – Command Line Interface Admin Command Admin Command Opens and closes an Admin session. The Admin session provides commands that change the fabric and switch configurations. Only one Admin session can be open on the switch at any time. An inactive Admin session will time out after a period of time which can be changed using the Set Setup System command. -
Page 114: Alias Command
B – Command Line Interface Alias Command Alias Command Creates a named set of ports/devices. Aliases make it easier to assign a set of ports/devices to many zones. An alias can not have a zone or another alias as a member. -
Page 115: Alias Command
B – Command Line Interface Alias Command members [alias] Displays all members of the alias given by [alias]. This keyword does not require an admin session. remove [alias] [member_list] Removes the ports/devices given by [member_list] from the alias given by [alias]. Use a <space>... -
Page 116: Config Command
B – Command Line Interface Config Command Config Command Manages the Fibre Channel configurations on a switch. For information about setting the port and switch configurations, refer to the “Set Config Command” on page B-39. Authority Admin session for all keywords except List Syntax config activate [config_name]... - Page 117 B – Command Line Interface Config Command restore Restores configuration settings to an out-of-band switch from a backup file named configdata, which must be first uploaded on the switch using FTP. You create the backup file using the Config Backup command. Use FTP to load the backup file on a switch, then enter the Config Restore command.
- Page 118 B – Command Line Interface Config Command The following is an example of how to create a backup file (configdata) and download the file to the workstation. SANbox #> admin start SANbox (admin) #> config backup SANbox (admin) #> admin end SANbox #>...
-
Page 119: Create Support Command
B – Command Line Interface Create Support Command Create Support Command Assembles all log files and switch memory data into a core dump file (dump_support.tgz zip) and prompts you to send it to a remote host. This file is useful to technical support personnel for troubleshooting switch problems. Use this command when directed by your authorized maintenance provider. - Page 120 B – Command Line Interface Create Support Command Examples The following is an example of the Create Support command: SANbox (admin) #> create support Log Msg: [day month date time UTC 2004][C][8400.003B][Switch][Creating the support file - this will take several seconds] FTP the dump support file to another machine? (y/n): y Enter IP Address of remote computer: 10.20.33.130 Login name: johndoe...
-
Page 121: Date Command
B – Command Line Interface Date Command Date Command This command displays or sets the system date and time. To set the date and time the information string must be provided in this format: MMDDhhmmCCYY. The new date and time takes effect immediately. Network Time Protocol (NTP) must be disabled to set the time with the Date command. -
Page 122: Feature Command
B – Command Line Interface Feature Command Feature Command Adds license key features to the switch and displays the license key feature log. To order a license key contact your switch distributor or your authorized reseller. Upgrading a switch is not disruptive, nor does it require a switch reset. Authority Admin session for Add keyword only Syntax... -
Page 123: Firmware Install Command
B – Command Line Interface Firmware Install Command Firmware Install Command Downloads firmware from a remote host to the switch, installs the firmware, then resets the switch (without a power-on self test) to activate the firmware. If possible, a non-disruptive activation is performed. The command prompts you for the following: IP address of the remote host An account name and password on the remote host... -
Page 124: Hardreset Command
B – Command Line Interface Hardreset Command Hardreset Command Resets the switch and performs a power-on self test. This reset disrupts traffic, activates the pending firmware, and clears the alarm log. To save the alarm log before resetting, refer to the “Set Log Command”... -
Page 125: Help Command
B – Command Line Interface Help Command Help Command Displays a brief description of the specified command, its keywords, and usage. Authority None Syntax help [command] [keyword] Keywords [command] Displays a summary of the command given by [command] and its keywords. If you omit [command], the system displays all available commands. -
Page 126: History Command
B – Command Line Interface History Command History Command Displays a numbered list of the previously entered commands from which you can re-execute selected commands. Authority None Syntax history Notes Use the History command to provide context for the ! command: Enter ![command_string] to re-execute the most recent command that matches [command_string]. -
Page 127: Hotreset Command
B – Command Line Interface Hotreset Command Hotreset Command Resets the switch for the purpose of activating the pending firmware without disrupting traffic. This command terminates all management sessions, saves all configuration information, and clears the event log. After the pending firmware is activated, the configuration is recovered. -
Page 128: Image Command
B – Command Line Interface Image Command Image Command Manages and installs switch firmware. Authority Admin session Syntax image cleanup fetch [account_name] [ip_address] [file_source] [file_destination] install list unpack [file] Keywords cleanup Removes all firmware image files from the switch. All firmware image files are removed automatically each time the switch is reset. - Page 129 B – Command Line Interface Image Command Move to the folder or directory on the workstation that contains the new firmware image file. Establish communications with the switch using the File Transfer Protocol (FTP). Enter one of the following on the command line: >ftp xxx.xxx.xxx.xxx >ftp switchname where xxx.xxx.xxx.xxx is the switch IP address, and switchname is the...
- Page 130 B – Command Line Interface Image Command Wait for the unpack to complete. image unpack command result: Passed A message will prompt you to reset the switch to activate the firmware. Resetting the switch is disruptive. Use the Hotreset command to attempt a non-disruptive activation.
-
Page 131: Lip Command
B – Command Line Interface Lip Command Lip Command Reinitializes the specified loop port. Authority Admin session Syntax lip [port_number] Keywords [port_number] The number of the port to be reinitialized. Ports are numbered beginning with 0. Examples The following is an example of the Lip command: SANbox (admin) #>... -
Page 132: Passwd Command
B – Command Line Interface Passwd Command Passwd Command Changes a user account’s password. Authority Admin account name and an admin session to change another account’s password; You can change you own password without an Admin session. Syntax passwd [account_name] Keywords [account_name] The user account name. -
Page 133: Ping Command
B – Command Line Interface Ping Command Ping Command Initiates an attempt to communicate with another switch over an Ethernet network and reports the result. Authority None Syntax ping ip_address Keywords ip_address The IP address of the switch to query. Examples The following is an example of a successful Ping command: SANbox #>... -
Page 134: Ps Command
B – Command Line Interface Ps Command Ps Command Displays current system process information. Authority None Syntax Examples The following is an example of the Ps command: SANbox #> ps PPID %CPU TIME ELAPSED COMMAND 0.0 00:00:00 3-01:18:35 cns 0.0 00:00:01 3-01:18:35 ens 0.0 00:00:21 3-01:18:35 dlog... -
Page 135: Quit Command
B – Command Line Interface Quit Command Quit Command Closes the Telnet session. Authority None Syntax quit, exit, or logout Notes You can also enter Control-D to close the Telnet session. 59096-00 A B-31... -
Page 136: Reset Command
B – Command Line Interface Reset Command Reset Command Resets the switch configuration parameters. If you omit the keyword, the default is Reset Switch. Authority Admin session Syntax reset config [config_name] factory port [port_number] snmp switch (default) system zoning Keywords config [config_name] Resets the configuration given by [config_name] to the factory default values for switch, port, port threshold alarm, and zoning configuration. -
Page 137: B-3 Switch Configuration Defaults
B – Command Line Interface Reset Command Clears the event log. To save the event log before resetting, refer to the “Set Log Command” on page B-52. To reset the switch with a power-on self test, refer to the “Hardreset Command” on page B-20. -
Page 138: B-4 Port Configuration Defaults
B – Command Line Interface Reset Command Table B-4. Port Configuration Defaults 1-Gbps/2-Gbps Port Parameter 10-Gbps Port Defaults Defaults Admin State Online Online Link Speed Auto 10-Gbps Port Type Symbolic Name Portn, where n is the 10G-n, where n is the port number port number ALFairness... -
Page 139: B-5 Port Threshold Alarm Configuration Defaults
B – Command Line Interface Reset Command Table B-5. Port Threshold Alarm Configuration Defaults Parameter Default ThresholdMonitoringEnabled False CRCErrorsMonitoringEnabled True RisingTrigger FallingTrigger SampleWindow True DecodeErrorsMonitoringEnabled RisingTrigger FallingTrigger SampleWindow ISLMonitoringEnabled True RisingTrigger FallingTrigger SampleWindow LoginMonitoringEnabled True RisingTrigger FallingTrigger SampleWindow LogoutMonitoringEnabled True RisingTrigger FallingTrigger SampleWindow... -
Page 140: B-7 Snmp Configuration Defaults
B – Command Line Interface Reset Command Table B-7. SNMP Configuration Defaults Parameter Default SNMPEnabled True Contact <syscontact undefined> Location <sysLocation undefined> Description SANbox 5602 FC Switch Trap [1-5] Address Trap 1: 10.0.0.254; Traps 2–5: 0.0.0.0 Trap [1-5] Port Trap [1-5] Severity Warning Trap [1-5] Version Trap [1-5] Enabled... -
Page 141: Set Command
B – Command Line Interface Set Command Set Command Sets a variety of switch parameters. Authority Admin session for all keywords except Alarm, Beacon, and Pagebreak which are available without an Admin session. Syntax alarm [option] beacon [state] config [option] log [option] pagebreak [state] port [option]... - Page 142 B – Command Line Interface Set Command pagebreak [state] Specifies how much information is displayed on the screen at a time according to the value given by [state]. This keyword does not require an admin session. [state] can be one of the following: Limits the display of information to 20 lines at a time.
-
Page 143: Set Config Command
B – Command Line Interface Set Config Command Set Config Command Sets switch, port, port threshold alarm, and zoning configuration parameters. The changes you make with this command are not retained when you reset or power cycle the switch unless you save them using the Config Save command. Refer to “Config Command”... - Page 144 B – Command Line Interface Set Config Command Table B-9. Set Config Port Parameters (Continued) Parameter Description PortType Port type: 1-Gbps/2-Gbps Ports: GL, G, F, FL, Donor. The default is GL. 10-Gbps Ports: G SymbolicPortName Descriptive name for the port. The name can be up to 32 characters excluding #, semicolon (;), and comma (,).
- Page 145 B – Command Line Interface Set Config Command Table B-9. Set Config Port Parameters (Continued) Parameter Description AutoPerfTuning Automatic performance tuning for FL_Ports only. The default is True. If AutoPerfTuning is enabled (True) and the port is an FL_Port, MFSEnable is automatically enabled. LCFEnable and VIEnable are overridden to False.
-
Page 146: B-10 Set Config Switch Parameters
Auto – Suppresses the reception of RSCN messages under the following conditions: 1) The port is connected to an initiator device with a QLogic HBA, 2) The DeviceScanEnable parameter is enabled. Auto is the default. PDISCPingEnable Enables (True) or disables (False) the transmission of... - Page 147 B – Command Line Interface Set Config Command Table B-10. Set Config Switch Parameters (Continued) Parameter Description FDMIEnabled Fabric Device Monitoring Interface. Enables (True) or disables (False) the monitoring of target and initiator device information. FDMIEntries The number of device entries to maintain in the FDMI database.
- Page 148 B – Command Line Interface Set Config Command Table B-10. Set Config Switch Parameters (Continued) Parameter Description InteropMode Propagates just the active zone set throughout the fabric (True, compliant) or the entire zoning database (False, non-compliant). The default is True. LegacyAddressFormat Available only when the InteropMode parameter is False, this parameter...
-
Page 149: B-11 Set Config Threshold Parameters
B – Command Line Interface Set Config Command threshold Initiates a configuration session by which to generate and log alarms for selected events. The system displays each event, its triggers, and sampling window one line at a time and prompts you for a value. For each parameter, enter a new value or press the Enter key to accept the current value shown in brackets. -
Page 150: B-12 Set Config Zoning Parameters
B – Command Line Interface Set Config Command zoning Initiates an editing session in which to change switch zoning attributes. The system displays each parameter one line at a time and prompts you for a value. For each parameter, enter a new value or press the Enter key to accept the current value shown in brackets. - Page 151 B – Command Line Interface Set Config Command Examples The following is an example of the Set Config Port command: SANbox #> admin start SANbox (admin) #> config edit SANbox (admin-config) #> set config port 1 A list of attributes with formatting and current values will follow. Enter a new value or simply press the ENTER key to accept the current value.
- Page 152 B – Command Line Interface Set Config Command The following is an example of the Set Config Port command for a 10-Gbps port: SANbox #> admin start SANbox (admin) #> config edit SANbox (admin-config) #> set config port 16 A list of attributes with formatting and current values will follow. Enter a new value or simply press the ENTER key to accept the current value.
- Page 153 B – Command Line Interface Set Config Command The following is an example of the Set Config Switch command: SANbox #> admin start SANbox (admin) #> config edit SANbox (admin-config) #> set config switch A list of attributes with formatting and default values will follow. Enter a new value or simply press the ENTER key to accept the current value.
- Page 154 B – Command Line Interface Set Config Command The following is an example of the Set Config Threshold command: SANbox #> admin start SANbox (admin) #> config edit SANbox (admin-config) #> set config threshold A list of attributes with formatting and current values will follow. Enter a new value or simply press the ENTER key to accept the current value.
- Page 155 B – Command Line Interface Set Config Command The following is an example of the Set Config Zoning command. SANbox #> admin start SANbox (admin) #> config edit SANbox (admin-config) #> set config zoning A list of attributes with formatting and current values will follow. Enter a new value or simply press the ENTER key to accept the current value.
-
Page 156: Set Log Command
B – Command Line Interface Set Log Command Set Log Command Specifies the events to record in the event log and display on the screen. You determine what events to record in the switch event log using the Component, Level, and Port keywords. You determine what events are automatically displayed on the screen using the Display keyword. - Page 157 B – Command Line Interface Set Log Command None Monitor none of the component events. Other Monitors other miscellaneous events. Port Monitors all port events. SNMP Monitors all SNMP events. Switch Monitors switch management events. Zoning Monitors zoning conflict events. display [filter] Specifies the log events to automatically display on the screen according to the event severity levels given by [filter].
- Page 158 B – Command Line Interface Set Log Command Info Monitors informative, warning, and critical events. The informative level describes routine events associated with a normal fabric. This is the default severity level. None Monitors none of the severity levels. port [port_list] Specifies one or more ports to monitor for events.
-
Page 159: Set Port Command
B – Command Line Interface Set Port Command Set Port Command Sets port state and speed for the specified port temporarily until the next switch reset or new configuration activation. This command also clears port counters. Authority Admin session except for the Clear keyword. Syntax set port [port_number] bypass [alpa]... - Page 160 B – Command Line Interface Set Port Command Offline Places the port offline. This prevents the port from receiving signal and accepting a device login. Diagnostics Prepares the port for testing. This prepares the port for testing and prevents the port from accepting a device login. Down Disables the port by removing power from the port lasers.
-
Page 161: Set Setup Command
B – Command Line Interface Set Setup Command Set Setup Command Changes SNMP and system configuration settings. The switch maintains one SNMP configuration and one system configuration. Authority Admin session Syntax set setup snmp system Keywords snmp Prompts you in a line-by-line fashion to change SNMP configuration settings. Table B-13 describes the SNMP fields. -
Page 162: B-14 System Configuration Settings
B – Command Line Interface Set Setup Command Table B-13. SNMP Configuration Settings (Continued) Entry Description ReadCommunity Read community password that authorizes an SNMP agent to read information from the switch. This is a write-only field. The value on the switch and the SNMP management server must be the same. - Page 163 B – Command Line Interface Set Setup Command Table B-14. System Configuration Settings (Continued) Entry Description Eth0NetworkMask Ethernet subnet mask address. Eth0GatewayAddress Ethernet IP address gateway. AdminTimeout Amount of time in minutes the switch waits before terminating an idle Admin session. Zero (0) disables the time out threshold.
- Page 164 B – Command Line Interface Set Setup Command Examples The following is an example of the Set Setup SNMP command: SANbox #> admin start SANbox (admin) #> set setup snmp A list of attributes with formatting and current values will follow. Enter a new value or simply press the ENTER key to accept the current value.
- Page 165 B – Command Line Interface Set Setup Command The following is an example of the Set Setup System command: SANbox (admin) #> set setup system A list of attributes with formatting and current values will follow. Enter a new value or simply press the ENTER key to accept the current value. If you wish to terminate this process before reaching the end of the list press 'q' or 'Q' and the ENTER key to do so.
-
Page 166: Show Command
B – Command Line Interface Show Command Show Command Displays fabric, switch, and port operational information. Authority None Syntax show about alarm [option] broadcast chassis config [option] domains donor fabric fdmi [port_wwn] interface log [option] lsdb mem [count] ns [option] pagebreak perf [option] port [port_number]... - Page 167 B – Command Line Interface Show Command chassis Displays chassis component status and temperature. config [option] Displays switch, port, and zoning configuration attributes. Refer to the “Show Config Command” on page B-77. domains Displays list of each domain and its worldwide name in the fabric. donor Displays list of current donor configuration for all ports.
-
Page 168: B-15 Show Port Parameters
B – Command Line Interface Show Command ns [option] Displays name server information for the specified [option]. If you omit [option], name server information for the local domain ID is displayed. [option] can have the following values: Displays name server information for all switches and ports. [domain_id] Displays name server information for the switch given by [domain_id]. - Page 169 B – Command Line Interface Show Command Table B-15. Show Port Parameters (Continued) Entry Description EpConnects Number of times an E_Port connected through ISL negotiation. FBusy Number of times the switch sent a F_BSY because Class 2 frame could not be delivered within ED_TOV time. Number of class 2 and class 3 fabric busy (F_BSY) frames generated by this port in response to incoming frames.
- Page 170 B – Command Line Interface Show Command Table B-15. Show Port Parameters (Continued) Entry Description PrimSeqErrors Primitive sequence errors detected. RxLinkResets Number of link reset primitives received from an attached device. RxOfflineSeq Number of offline sequences received. An OLS is issued for link initialization, a Receive &...
-
Page 171: B-16 Switch Operational Parameters
B – Command Line Interface Show Command support Executes a series of commands that display a complete description of the switch, its configuration, and operation. The display can be captured from the screen and used for diagnosing problems. This keyword is intended for use at the request of your authorized maintenance provider. - Page 172 B – Command Line Interface Show Command Table B-16. Switch Operational Parameters (Continued) Parameter Description LogLevel Event severity level used to record events in the event log MaxPorts Number of ports available on the switch NumberOfResets Number of times the switch has been reset over its service life ReasonForLastReset Action that caused the last reset...
- Page 173 B – Command Line Interface Show Command Examples The following is an example of the Show Chassis command: SANbox #> show chassis Chassis Information ------------------- BoardTemp (1) - Degrees Celsius FanStatus (1) Good FanStatus (2) Good FanDirection (1) BackToFront FanDirection (2) BackToFront PowerSupplyStatus (1) Good...
- Page 174 The following is an example of the Show FDMI WWN command: SANbox #> show fdmi 21:00:00:e0:8b:09:3b:17 FDMI Information ---------------- Manufacturer QLogic Corporation SerialNumber [04202 Model QLA2342 ModelDescription QLogic QLA2342 PCI Fibre Channel Adapter PortID 610000 NodeWWN 20:00:00:e0:8b:07:aa:bc HardwareVersion FC5010409-10 DriverVersion 8.2.3.10 Beta 2 (W2K VI) OptionRomVersion 1.21 FirmwareVersion 03.02.13.
- Page 175 B – Command Line Interface Show Command The following is an example of the Show NS (local domain) command: SANbox #> show ns Seq Domain Port Port Type COS PortWWN NodeWWN --- ------ ------ ---- --- ------- ------- 19 (0x13) 1301e1 NL 21:00:00:20:37:73:13:69 20:00:00:20:37:73:13:69 19 (0x13) 1301e2 NL 21:00:00:20:37:73:12:9b 20:00:00:20:37:73:12:9b...
- Page 176 B – Command Line Interface Show Command The following is an example of the Show Interface command: SANbox #> show interface eth0 Link encap:Ethernet HWaddr 00:C0:DD:00:BD:ED inet addr:10.20.68.107 Bcast:10.20.68.255 Mask:255.255.255.0 UP BROADCAST RUNNING MULTICAST MTU:1500 Metric:1 RX packets:4712 errors:0 dropped:0 overruns:0 frame:0 TX packets:3000 errors:0 dropped:0 overruns:0 carrier:0 collisions:0 txqueuelen:100 RX bytes:415313 (405.5 Kb)
- Page 177 B – Command Line Interface Show Command The following is an example of the Show Port command: SANbox #> show port 1 Port Number: 1 ------------ AdminState Online OperationalState Online AsicNumber PerfTuningMode Normal AsicPort PortID 0e0800 ConfigType PortWWN 20:08:00:c0:dd:03:d5:94 DiagStatus Passed RunningType EpConnState...
- Page 178 B – Command Line Interface Show Command The following is an example of the Show Switch command: SANbox #> show switch Switch Information ------------------ SymbolicName sw .108 SwitchWWN 100000c0dd00bc56 SwitchType SANbox 5602 BootVersion Vx.x.x.x-0 (day month date time year) CreditPool DomainID 19 (0x13) FirstPortAddress...
- Page 179 B – Command Line Interface Show Command The following is an example of the Show Topology command for port 1: SANbox #> show topology 1 Local Link Information ---------------------- PortNumber 1 PortID 650100 PortWWN 20:01:00:c0:dd:00:91:11 PortType Remote Link Information ----------------------- Device 0 NodeWWN 50:80:02:00:00:06:d5:38 PortType NL...
- Page 180 B – Command Line Interface Show Command The following is an example of the Show Version command: SANbox #> show version ***************************************************** Command Line Interface SHell (CLISH) ***************************************************** SystemDescription SANbox 5602 FC Switch Eth0NetworkAddress 10.20.11.192 (use 'set setup system' to update) MACAddress 00:c0:dd:00:71:ee WorldWideName...
-
Page 181: Show Config Command
B – Command Line Interface Show Config Command Show Config Command Displays switch, port, alarm threshold, and zoning for the current configuration. Authority None Syntax show config port [port_number] switch threshold zoning Keywords port [port_number] Displays configuration parameters for the port number given by [port_number]. Ports are numbered beginning with 0. - Page 182 B – Command Line Interface Show Config Command This an example of the Show Config Port command for a 10-Gbps port: SANbox #> show config port 16 Configuration Name: default ------------------- Port Number: 16 ------------ AdminState Online LinkSpeed 10Gb/s PortType SymbolicName 10G-16 DeviceScanEnabled...
- Page 183 B – Command Line Interface Show Config Command The following is an example of the Show Config Threshold command: SANbox #> show config threshold Configuration Name: default ------------ Threshold Configuration Information ----------------------------------- ThresholdMonitoringEnabled False CRCErrorsMonitoringEnabled True RisingTrigger FallingTrigger SampleWindow DecodeErrorsMonitoringEnabled True RisingTrigger FallingTrigger SampleWindow...
- Page 184 B – Command Line Interface Show Config Command The following is an example of the Show Config Zoning command: SANbox #> show config zoning Configuration Name: default ------------------- Zoning Configuration Information -------------------------------- InteropAutoSave True DefaultVisibility B-80 59096-00 A...
-
Page 185: Show Log Command
B – Command Line Interface Show Log Command Show Log Command Displays the contents of the log or the parameters used to create and display entries in the log. The log contains a maximum of 1200 entries. When the log reaches its entry capacity, subsequent entries overwrite the existing entries, beginning with the oldest. - Page 186 B – Command Line Interface Show Log Command Zoning Monitors zoning conflict events. display [filter] Displays log events on the screen according to the component or severity level filter given by [filter]. [filter] can be one of the following: Info Displays all informative events.
- Page 187 B – Command Line Interface Show Log Command Examples The following is an example of the Show Log Component command: SANbox #> show log component Current settings for log ------------------------ FilterComponent NameServer MgmtServer Zoning Switch Blade Port Eport Snmp The following is an example of the Show Log Level command: SANbox #>...
-
Page 188: Show Perf Command
B – Command Line Interface Show Perf Command Show Perf Command Displays port performance in frames/second and bytes/second. If you omit the keyword, the command displays data transmitted (out), data received (in), and total data transmitted and received in frames/second and bytes per second. Authority None Syntax... - Page 189 B – Command Line Interface Show Perf Command errors [port_number] Displays continuous error counts for the port group (0–15 or 16–19) that includes [port_number]. If you omit [port_number], ports 0–15 are displayed. Type “q” and press the Enter key to stop the display. Examples The following is an example of the Show Perf command: SANbox #>...
- Page 190 B – Command Line Interface Show Perf Command The following is an example of the Show Perf Byte command: SANbox #> show perf byte Displaying bytes/sec (total)... (Press any key to stop display) -------------------------------------------------------------------------------- 137M 58K 137M 136M 58K 136M 135M 58K 135M 137M 58K...
-
Page 191: Show Setup Command
Displays the current SNMP settings. system Displays the current system settings. Examples The following is an example of the Show Setup Mfg command: SANbox #> show setup mfg Manufacturing Information ------------------------- BrandName QLogic BuildDate Unknown PartNumber SANbox 5602 SerialNumber FAM0331000011 LicensedPorts MACAddress... - Page 192 B – Command Line Interface Show Setup Command The following is an example of the Show Setup Snmp command: SANbox #> show setup snmp SNMP Information ---------------- SNMPEnabled True Contact <sysContact undefined> Location N_107 System Test Lab Description SANbox 5602 FC Switch Trap1Address 10.0.0.254 Trap1Port...
- Page 193 B – Command Line Interface Show Setup Command The following is an example of the Show Setup System command: SANbox #> show setup system System Information ------------------ Eth0NetworkDiscovery Static Eth0NetworkAddress 10.20.11.32 Eth0NetworkMask 255.255.252.0 Eth0GatewayAddress 10.20.8.254 AdminTimeout InactivityTimeout LocalLogEnabled True RemoteLogEnabled False RemoteLogHostAddress 10.0.0.254...
-
Page 194: Shutdown Command
B – Command Line Interface Shutdown Command Shutdown Command Terminates all data transfers on the switch at convenient points and closes the Telnet session. Always power cycle the switch after entering this command. Authority Admin session Syntax shutdown Notes Always use this command to perform an orderly shut down before removing power from the switch. -
Page 195: Test Command
B – Command Line Interface Test Command Test Command Tests ports using internal (SerDes level), external (transceiver), and online loopback tests. Internal and external tests require that the port be placed in diagnostic mode. Refer to the “Set Command” on page B-37 for information about changing the port administrative state. - Page 196 B – Command Line Interface Test Command Examples To run an internal or external port test, do the following: To start an admin session, enter the following command and press the Enter key. admin start Place the port in Diagnostics mode, enter the following command (x = port number) and press the Enter key.
- Page 197 B – Command Line Interface Test Command A series of test parameters are displayed on the screen. Press the Enter key to accept each default parameter value, or type a new value for each parameter and press the Enter key. The TestLength parameter is the number of frames sent, the FrameSize (256 byte maximum in some cases) parameter is the number of bytes in each frame, and the DataPattern parameter is the pattern in the payload.
-
Page 198: Uptime Command
B – Command Line Interface Uptime Command Uptime Command Displays the elapsed up time since the switch was last reset and reset method. A hot reset or non-disruptive firmware activation does not reset the elapsed up time reported by this command. Authority None Syntax... -
Page 199: User Command
B – Command Line Interface User Command User Command Administers and displays user accounts. Authority Admin account name and an Admin session. The Accounts and List keywords are available to all account names without an Admin session. Syntax user accounts delete [account_name] edit list... - Page 200 B – Command Line Interface User Command Examples The following is an example of the User Accounts command: SANbox (admin) #> user accounts Current list of user accounts ----------------------------- images (admin authority = False, never expires) admin (admin authority = True , never expires) chuckca (admin authority = False, expires in <...
-
Page 201: Ethernet Port
B – Command Line Interface User Command The following is an example of the User Delete command: SANbox (admin) #> user del user3 The user account will be deleted. Please confirm (y/n): [n] y The following is an example of the User List command: SANbox (admin) #>... -
Page 202: Whoami Command
B – Command Line Interface Whoami Command Whoami Command Displays the account name, session number, and switch domain ID for the Telnet session. Authority None Syntax whoami Examples The following is an example of the Whoami command: SANbox #> whoami User name : admin@session2 Switch name... -
Page 203: Zone Command
B – Command Line Interface Zone Command Zone Command Manages zones and zone membership on a switch. Authority Admin session and a Zoning Edit session. Refer to the “Zoning Command” on page B-105 for information about starting a Zoning Edit session. The List, Members, and Zonesets keywords are available without an Admin session. - Page 204 B – Command Line Interface Zone Command list Displays a list of all zones and the zone sets of which they are components. This keyword does not require an Admin session. members [zone] Displays all members of the zone given by [zone]. This keyword does not require an Admin session.
- Page 205 B – Command Line Interface Zone Command Examples The following is an example of the Zone List command: SANbox #> zone list Zone ZoneSet ------------------- wwn_b0241f zone_set_1 wwn_23bd31 zone_set_1 wwn_221416 zone_set_1 wwn_2215c3 zone_set_1 wwn_0160ed zone_set_1 wwn_c001b0 zone_set_1 wwn_401248 zone_set_1 wwn_02402f zone_set_1 wwn_22412f zone_set_1...
- Page 206 B – Command Line Interface Zone Command The following is an example of the Zone Zonesets command: SANbox #> zone zonesets zone1 Current List of ZoneSets for Zone: zone1 ---------------------------------- zone_set_1 B-102 59096-00 A...
-
Page 207: Zoneset Command
B – Command Line Interface Zoneset Command Zoneset Command Manages zone sets and component zones across the fabric. Authority Admin session and a Zoning Edit session. Refer to the “Zoning Command” on page B-105 for information about starting a Zoning Edit session. The Active, List, and Zones keywords are available without an Admin session. - Page 208 B – Command Line Interface Zoneset Command list Displays a list of all zone sets. This keyword does not require an Admin session. remove [zone_set] [zone_list] Removes a list of zones given by [zone_list] from the zone set given by [zone_set].
- Page 209 B – Command Line Interface Zoning Command Zoning Command Opens a Zoning Edit session in which to create and manage zone sets and zones. Refer to the “Zone Command” on page B-99 and the “Zoneset Command” on page B-103. Authority Admin session except for the Active, History, Limits, and List keywords.
-
Page 210: B-17 Zoning Database Limits
B – Command Line Interface Zoning Command limits Displays the number of zone sets, zones, aliases, members per zone, members per alias, and total members in the zoning database. This keyword also displays the switch zoning database limits, excluding the active zone set, which are described in Table B-17. -
Page 211: Zoning Command
B – Command Line Interface Zoning Command Examples The following is an example of the Zoning Edit command: SANbox #> admin start SANbox (admin) #> zoning edit SANbox (admin-zoning) #> SANbox (admin-zoning) #> zoning cancel Zoning edit mode will be canceled. Please confirm (y/n): [n] SANbox (admin) #>... - Page 212 B – Command Line Interface Zoning Command The following is an example of the Zoning List command: SANbox #> zoning list Active ZoneSet Information ZoneSet Zone ZoneMember -------------------------------- wwn_b0241f 50:06:04:82:bf:d2:18:c2 50:06:04:82:bf:d2:18:d2 21:00:00:e0:8b:02:41:2f wwn_23bd31 50:06:04:82:bf:d2:18:c2 50:06:04:82:bf:d2:18:d2 10:00:00:00:c9:23:bd:31 wwn_221416 50:06:04:82:bf:d2:18:c2 50:06:04:82:bf:d2:18:d2 10:00:00:00:c9:22:14:16 wwn_2215c3 50:06:04:82:bf:d2:18:c2 50:06:04:82:bf:d2:18:d2...
- Page 213 B – Command Line Interface Zoning Command wwn_221416 50:06:04:82:bf:d2:18:c2 50:06:04:82:bf:d2:18:d2 10:00:00:00:c9:22:14:16 wwn_2215c3 50:06:04:82:bf:d2:18:c2 50:06:04:82:bf:d2:18:d2 10:00:00:00:c9:22:15: 59096-00 A B-109...
- Page 214 B – Command Line Interface Zoning Command Notes B-110 59096-00 A...
-
Page 215: Cascade-With-A-Loop Topology
Glossary Access Control List Zone Arbitrated Loop Access Control List zoning divides the A Fibre Channel topology where ports use fabric for purposes of controlling discovery arbitration to establish a point-to-point and inbound traffic. circuit. Active Zone Set Arbitrated Loop Physical Address (AL_PA) The zone set that defines the current A unique one-byte value assigned during zoning for the fabric. - Page 216 SANbox 5602 Fibre Channel Switch Installation Guide Class 2 Service Fabric Database A service which multiplexes frames at The set of fabrics that have been opened frame boundaries to or from one or more during a SANsurfer Switch Manager N_Ports wit h acknowledgment provided. session.
-
Page 217: Mesh Topology
SANbox 5602 Fibre Channel Switch Installation Guide Frame Data unit consisting of a start-of-frame Loop Initialization Primitive sequence (SOF) delimiter, header, data payload, CRC, and an end-of-frame (EOF) Logged-In LED delimiter. A port LED that indicates device login or loop initialization status. Field Replaceable Unit Maintenance Button Formerly known as the Force PROM... - Page 218 SANbox 5602 Fibre Channel Switch Installation Guide NL_Port SNMP Node Loop Port. A Fibre Channel device Simple Network Management Protocol port that supports arbitrated loop protocol. Soft Zone N_Port Soft zoning divides the fabric for purposes Node Port. A Fibre Channel device port in of controlling discovery.
- Page 219 SANbox 5602 Fibre Channel Switch Installation Guide XPAK A specification authored by a consortium of companies to govern the development of small form factor 10 Gigabit modules. Zone A set of ports or devices grouped together to control the exchange of information. Zone Set A set of zones grouped together.
- Page 220 SANbox 5602 Fibre Channel Switch Installation Guide Notes Glossary-6 59096-00 A...
- Page 221 Index Numerics 10/100 Base-T straight cable 4-6 bandwidth 3-5, A-2 10-Gbps port 2-5 beacon B-37 boot loader 5-14 broadcast B-62 browser 4-1 access 3-2 buffer credit 3-4, A-2 Access Control List zone 3-3 account name display B-98 factory B-2 cable ftp 5-5 10/100 Base-T 4-6 maintenance mode 5-12...
- Page 222 SANbox 5602 Fibre Channel Switch Installation Guide configuration Ethernet activate B-12 direct connection 4-6 backup B-12 indirect connection 4-6 copy B-12 port 2-8 delete B-12 event logging edit B-12 by component B-52, B-81 file 5-5 by port B-54, B-82 file system error 2-2, 5-4, 5-6 by severity level B-82 list B-12 display B-81...
- Page 223 SANbox 5602 Fibre Channel Switch Installation Guide firmware inactivity timeout B-59 failure 5-4 inband management 3-14 image file B-24 Input Power LED 5-2 install with CLI 4-23, B-19 installation 4-2 install with SANsurfer Switch Manager 4-23 internal list image files B-24 firmware failure 5-4 non-disruptive activation 4-22, B-23 test B-91...
- Page 224 SANbox 5602 Fibre Channel Switch Installation Guide maintenance exit 5-13 page break B-38 interface A-3 Passwd command B-28 menu 5-12 password mode 2-2, 2-3, 5-3, 5-12 change B-28 Maintenance button 2-2, 2-3, 5-12 factory B-2 management file reset 5-14 application 4-9 maintenance mode 5-12 workstation 2-8, 4-6 restore default 5-14...
- Page 225 SANbox 5602 Fibre Channel Switch Installation Guide POST - See Power On Self Test SANsurfer Switch Manager power API 2-12 consumption A-4 description 2-11 down switch 4-25 Linux installation 4-10 requirements 4-1 Solaris installation 4-10 source loading A-4 start 4-16 supply 2-10, 6-2 web applet 2-11, B-59 power on self test...
- Page 226 SANbox 5602 Fibre Channel Switch Installation Guide switch user administrative state B-38 account 3-14, B-2 configuration 4-20, B-42 interface A-3 configuration display B-77 logged in B-68 hard reset B-20 User command B-95 management 2-11 manufacturer information B-87 operational information B-67 vibration A-4 power down 4-25 Virtual Interface preference routing B-41...
- Page 227 SANbox 5602 Fibre Channel Switch Installation Guide zone set activate B-103 active B-105 add member zone B-103 copy B-103 create B-103 deactivate B-33, B-103 delete B-103 delete member zone B-104 display B-104 display active B-103 display members B-104 display zones B-100 rename B-104 zone set definition 3-2 Zoneset command B-103...
- Page 228 Index – Index Notes Index-8 59096-00 A...
Need help?
Do you have a question about the SANbox 5602 Fibre Channel and is the answer not in the manual?
Questions and answers