Sign In
Upload
Manuals
Brands
Miele Manuals
Coffee Maker
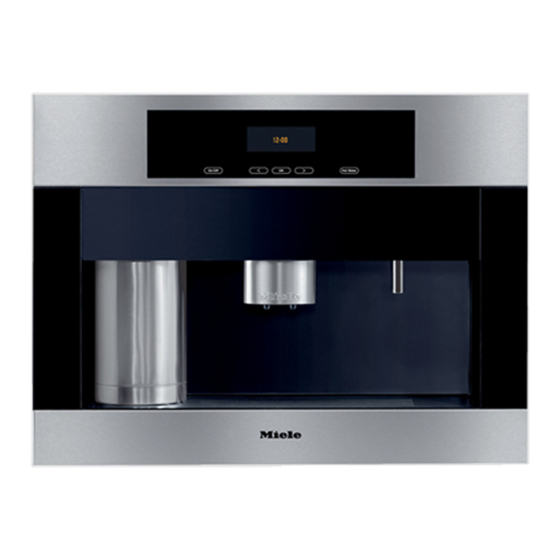
CVA 4062
Miele CVA 4062 Manuals
Manuals and User Guides for Miele CVA 4062. We have
5
Miele CVA 4062 manuals available for free PDF download: Technical Information, Operating And Installation Instructions, Installation Instructions Manual, Product Dimensions
Miele CVA 4062 Technical Information (118 pages)
Coffee Systems CVA 406 series
Brand:
Miele
| Category:
Coffee Maker
| Size: 2.78 MB
Table of Contents
2
Table of Contents
8
General
8
Risk of Burning or Scalding
8
Warning and Safety Instructions
9
Figure A-1: Compression Fitting
9
Plumbing Information
9
Touch Current Measurement
10
B Modification History
11
Technical Data
10
Before the First Use
10
Cleaning in the Dishwasher
13
Table C-1: Technical Data
14
D Component Layouts
14
Figure D-1: Front View of Appliance
14
Front View
15
Figure D-2: Interior View of Appliance
15
Interior View
16
Electrical Components
16
Cva 4062, Cva 4068
16
Figure D-3: CVA 4062, CVA 4068 Component Layout
17
Cva 4066
17
Figure D-4: CVA 4066 Component Layout
18
Housing
19
Service
19
Removing the Appliance From a Cabinet
19
Figure 010-1: Removing the Appliance From a Cabinet
20
Installation
20
Installation Procedure
20
Figure 010-2: CVA 4066 Plumbing
21
Figure 010-3: CVA Feet Adjustment
21
Figure 010-4: CVA Mounting Locations
22
Adjusting the Door Hinges
22
Figure 010-5: Door Hinge Adjustment
23
Exterior Side Panels
24
Door Inner Panel
25
Coffee/Hot-Water Dispenser
26
Fault Repair
26
Coffee or Espresso Too Cold
26
Milk Froth Unsatisfactory or Sputtering
26
Figure 021-1: Dispenser Height Adjustment
26
Function
26
Adjusting the Dispenser Height
28
Door Outer Panel, Control/Display Electronic
29
Fault Repair
29
Diagnostic Support Cannot Establish a Connection
30
Remotevision Infocontrol: Incorrect Language Set
30
Remotevision Infocontrol: Time of Day Setting Varies
30
Remotevision Infocontrol: Buzzer Inoperative
30
Remotevision Infocontrol: Data Transfer Interference
30
Remotevision Infocontrol: Mobile Receiver Display Faulty
30
Machine Runs Automatically and Chirps When the Door Is Opened
31
Figure 025-2: Right and Central Covers
31
Figure 025-3: Hose and Wire Connections
32
Figure 025-4: Main Dispenser Retaining Screws
32
Figure 025-5: Control/Display Electronic Cover and Power Electronic Connection
33
Dispenser Present Switch (S87/6) Removal
33
Dispensing Area Light (1H3, 2H3) Removal
33
Door Removal
33
Figure 025-6: Control/Display Electronic Connections
34
Figure 025-7: Door Hinge Screws
29
Function
29
Optical Interface (MDU)
29
Control/Display Electronic EPWZ (N5)
29
Touch Controls
35
Drive, Brew Unit
36
Function
36
Brew Unit Control
36
Microswitch Locations
36
Electronic Grind Amount Compensation
36
Figure 030-1: Brew Unit Microswitches
37
Figure 030-2: Brew Unit Switching Cam, Ground Quantity Compensation Microswitch
37
Figure 030-3: Measurable Volume Areas 1, 2 and 3
37
Table 030-1: Switch Cam Settings
38
Brew Unit Drive, Home Position
38
Figure 030-4: Selectable Volume Areas 1, 2 and 3
38
Figure 030-5: Home Position, Rear View
38
Figure 030-6: Home Position, Front View
39
Brew Unit Drive, Compressing Position (Brew Position)
39
Brew Unit Drive, Drain Position
39
Figure 030-7: Compressing Position, Rear View
39
Figure 030-8: Compressing Position, Front View
40
Fault Repair
40
Coffee Grounds Next to the Brew Unit
40
Figure 030-9: Drain Position, Rear View
40
Figure 030-10: Drain Position, Front View
41
Service
41
Brew Unit Drive (M26) Removal
41
Figure 030-11: Service Door Screws
42
Figure 030-12: Service Door Open
42
Figure 030-13: Brew Unit Removal
43
Removing the Grind Amount Compensation Microswitch (S51/4)
43
Removing the Brew Unit Position Microswitches (S60/1, S60/2)
43
Figure 030-14: Brew Unit Drive Retaining Screws
45
Grinder
46
Function
46
Adjusting the Grinder Setting
46
Filling Ground Coffee
46
Service
46
Grinder (M25) Removal
46
Figure 040-1: Grinder Adjustment
47
Figure 040-3: Service Door Screws
47
Figure 040-4: Service Door Open
48
Figure 040-5: Bean Container Guide Retaining Screws
48
Figure 040-6: Adjustment Lever Handle
49
Figure 040-7: Grinder Retaining Screws
50
Flow-Thru Heaters
51
Function
51
Steam System
51
Service
51
Removing the Coffee/Hot Water Heater (2R1)
51
Figure 050-1: Service Door Screws
52
Figure 050-2: Service Door Open, Showing Heaters
52
Figure 050-3: Coffee/Hot Water Heater
53
Removing the Temperature Limiter, Fuse, Temperature Sensor From the Coffee/Hot-Water Heater
53
Figure 050-4: Temperature-Regulating Components On Coffee/Hot Water Heater
53
Figure 050-5: Temperature-Regulating Components On Coffee/Hot Water Heater
54
Removing the Steam Heater (1R1)
54
Figure 050-6: Service Door Screws
54
Figure 050-7: Service Door Open, Showing Heaters
55
Figure 050-8: Steam Heater and Bracket
55
Figure 050-9: Temperature-Regulating Components On Steam Heater
56
Removing the Temperature Limiter, Temperature Sensor, Fuse From the Steam Heater
56
Figure 050-10: Temperature-Regulating Components On Steam Heater
57
Pumps, Solenoids, Flow Meters
58
Function
58
Water Paths
58
Overview
58
Figure 051-1: CVA Water Path - Overview
59
Water Path - Coffee
59
Water Path - Hot Water
59
Figure 051-2: Coffee Water Path
60
Water Path - Hot Milk
60
Figure 051-3: Hot-Water Path
60
Figure 051-4: Hot-Milk Path
61
Water Path - Milk Froth
61
Figure 051-5: Milk Froth Path
62
Service
62
Hot-Water Solenoid (Y61) Removal
62
Figure 051-6: Support Plate Retaining Screws
63
Figure 051-7: Rinsing and Hot-Water Solenoids
63
Figure 051-8: Hot-Water Solenoid
64
Rinsing Solenoid (Y62) Removal
64
Figure 051-9: Support Plate Retaining Screws
65
Figure 051-10: Rinsing and Hot-Water Solenoids
65
Figure 051-11: Rinsing Solenoid
66
Coffee/Hot Water Pump (2M7) Removal
66
Figure 051-12: Service Door Screws
66
Figure 051-13: Service Door Open
67
Figure 051-14: Coffee/Hot Water and Steam Pumps
68
Steam Pump (1M7) Removal
68
Figure 051-15: Coffee/Hot Water Pump
69
Flow Meter (B3/4) Removal
69
Figure 051-16: Steam Pump
70
Figure 051-17: Flow Meter
70
Figure 051-18: Flow Meter (1) and Plastic Support (2)
71
Decompression Vessel Removal
71
Ceramic Valve Removal
71
Figure 051-19: Decompression Vessel and Ceramic Valve
72
Figure 051-20: Ceramic Valve, Removed From Machine
73
Containers, Drip Tray, Accessories
74
Technical Information 2 Function
74
Water Tank
74
Filling the Water Tank
74
Manually Filling the Water Tank
74
Figure 060-1: Pull Door Open
74
Figure 060-2: Pull Water Tank Out
75
Automatically Filling the Water Tank (CVA 4066 Models Only)
75
Filling the Beans Container
75
Figure 060-3: Setting Water Fill to Automatic, Step 1
75
Figure 060-4: Setting Water Fill to Automatic, Step 2
75
Figure 060-5: Beans Container
76
Fault Repair
76
Milk Container Not Registered As Empty
76
Milk Container Present but Not Registering
76
Service
76
Rinsing the Milk Pipework
76
Cleaning the Milk Pipework
77
Cleaning the Stainless-Steel Milk Container
77
Descaling the Appliance
78
Electronic Modules
79
Fault Repair
79
F1 -- Coffee/Hot Water NTC (2R30) Short-Circuited
79
F2 -- Coffee/Hot Water NTC (2R30) Open-Circuited
80
F3 -- Steam NTC (1R30) Short-Circuited
80
F4 -- Steam NTC (1R30) Open-Circuited
81
F10 -- No Water Intake
81
F17 -- Insufficient Water Intake
82
F28 -- Too Much Ground Coffee in Brew Unit
83
F41 -- EEPROM Faulty/Data Fault
83
F42 -- Line Frequency Not Registered
83
F47 -- No Communication Between Control and Power Electronics
83
F73 -- Brew Unit Fault
83
Figure 070-1: Brew Unit Positioning Microswitches
84
F74 -- Ceramic Valve Fault
84
Figure 070-2: Brew Unit Guide
85
F76 -- Fault During Pressing in Brew Unit
85
F77 -- Ceramic Valve Initialization Fault
85
F80 -- Coffee/Hot Water Heater (2R1) Not Heating
85
F81 -- Steam Heater (1R1) Not Heating
86
F82 -- Coffee/Hot Water Heater (2R1) Overheating
86
F83 -- Steam Heater (1R1) Overheating
86
F94 -- Water Intake Fault
87
Replace Drip Tray" Message, Even Though Drip Tray Is Inserted
87
Empty Drip Tray" Message, Even Though Drip Tray Is Not Full
88
X Servings Until Descaling" Shown in Display
88
Empty Waste Container" Message, but Waste Container Is Not Full
88
Clean Brew Unit" Message Not Displayed
88
Table 070-2: "X Servings Until Descaling" Versus Water Hardness
89
Descaling Is Interrupted
89
Fit Jets in Central Spout" Message Displayed
89
Fit Cover Over Central Spout" Message Displayed
79
Function
79
Machine Response After Power Supply Interruption
79
Software Ids
89
Service
89
Customer Programming Mode
93
Service Programming Mode
93
Table 070-3: Customer Programming Settings
94
Table 070-4: Service Programming Settings
95
Service Mode
99
Table 070-5: Service Mode
100
Power Electronic EPL (N4) Removal
100
Figure 070-3: Power Electronic Retaining Screws
100
Table 070-6: Brew Unit Positions
101
Water Intake (CVA 4066 Only)
102
Function
102
Plumbed Water Line (CVA 4066 Only)
102
Safety Concept for Water Intake
102
Service
102
Water Inlet Filter Removal
103
Water Inlet Valve (1Y63, 2Y63) Removal
103
Figure 080-1: Brass Elbow Location
103
Figure 080-2: Service Door Retaining Screws
104
Figure 080-3: Water Inlet Valves
105
Some Cvas May Experience a Power Electronic TRIAC Failure
105
Technical Service Bulletins
106
CVA & French Roast Coffee
106
The Display Clock On Models CVA 4062 and CVA 4066 May Change Time Unexpectedly
107
CVA 4062 & CVA 4066 Milk Pipework Conversion
107
CVA Water Tank Cleaning
114
CVA Door Hose Replacement
115
CVA 406X Hot Milk Temperatures
115
CVA Replacement Coffee Grinders
116
Understanding CVA 40Xx Temperature Fuses
117
CVA 406X & MDU Updates
Advertisement
Miele CVA 4062 Operating And Installation Instructions (76 pages)
Coffee System
Brand:
Miele
| Category:
Coffee Maker
| Size: 1.06 MB
Table of Contents
2
Table of Contents
4
Important Safety Instructions
5
Technical Safety
8
Guide to the Coffee System
10
Included Accessories
11
First Steps to Use
11
Touch Controls
11
Display
11
Before the First Use
13
Filling Water, Beans or Ground Coffee
13
Filling the Water Tank
14
Filling the Bean Container
14
Filling Ground Coffee
15
Preparing Drinks
15
Turning On
15
Pre-Warming Cups
16
Adjusting Main Dispenser Height
16
Coffee and Espresso Prepared From Coffee Beans
17
Coffee and Espresso Prepared From Ground Coffee
18
Beverages with Milk
20
User Profile Beverages
21
Adjusting the Coffee Grinder
22
Settings
22
Language
23
Time of Day
24
Timer
25
Coffee Jug (Dispensing Several Servings, One Directly After Another)
26
Amount of Coffee
26
Pre-Brewing
27
Temperature
27
Automatic Rinsing
28
Steam System
28
Lighting: Adjusting the Brightness
29
Lighting: Setting the Switch-Off Time
29
Info (Displaying No. of Drinks)
30
System Lock
30
Water Hardness
31
Display
32
Tone Options
32
Showroom Program
33
Restoring Factory Default Settings
34
Setting the Serving Sizes
37
User Profiles
37
Selecting a User Profile
38
Creating a User Profile
38
Changing a User Profile
39
Deleting a User Profile
40
Cleaning and Care
40
Quick Guide
41
Rinsing the System
42
Milk Pipework
46
Main Dispenser
47
Water Tank
47
Waste Unit
48
Drip Tray
48
Drip Tray Cover
49
Bean Container
49
Main Dispenser Connector
50
Brew Unit
53
Descaling the Appliance
55
Frequently Asked Questions
65
After Sales Service
67
Installation Instructions
68
Caring for the Environment
69
Electrical Connection
70
Installation
72
Adjusting the Door Hinges
Miele CVA 4062 Installation Instructions Manual (10 pages)
Built-in coffee machines
Brand:
Miele
| Category:
Coffee Maker
| Size: 0.37 MB
Table of Contents
2
Important Safety Instructions
2
Proper Use
3
Technical Safety
6
Electrical Connection
7
Installation Options
9
Adjusting the Door Hinges
Advertisement
Miele CVA 4062 Installation Instructions Manual (7 pages)
Brand:
Miele
| Category:
Coffee Maker
| Size: 0.97 MB
Miele CVA 4062 Product Dimensions (2 pages)
Product and Cut-out Dimensions Built-in Coffee System
Brand:
Miele
| Category:
Coffee Maker
| Size: 0.02 MB
Share and save
Advertisement
Related Products
Miele CVA 4075
Miele COFFEE SYSTEM CVA 4068
Miele CVA 4070 EN-CA
Miele CVA 4075 EN-CA
Miele CVA 4066
Miele CVA 4060
Miele CVA 4080
Miele CVA 4085
Miele CVA2662SS
Miele CVA 2650 CVA 2650
Miele Categories
Dishwasher
Washer
Oven
Ventilation Hood
Dryer
More Miele Manuals
Login
Sign In
OR
Sign in with Facebook
Sign in with Google
Upload manual
Upload from disk
Upload from URL