Sign In
Upload
Manuals
Brands
Keithley Manuals
Multimeter
2701
Keithley 2701 Manuals
Manuals and User Guides for Keithley 2701. We have
5
Keithley 2701 manuals available for free PDF download: User Manual, Service Manual, Instruction Manual, Quick Start Manual
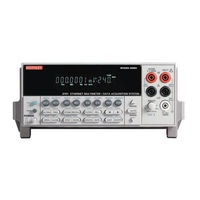
Keithley 2701 User Manual (506 pages)
Ethernet-Based DMM/Data Acquisition System
Brand:
Keithley
| Category:
Measuring Instruments
| Size: 5 MB
Table of Contents
Table of Contents
7
Getting Started
25
General Information
26
Warranty Information
26
Contact Information
26
Safety Symbols and Terms
27
Inspection
27
Battery
28
Options and Accessories
28
Model 2701 Features
31
Plug-In Switching Modules
32
Pseudocards
32
Identifying Installed Switching Modules
32
Getting Started
32
Table 1-1 Model 77Xx Series Switching Modules
33
Front and Rear Panel Familiarization
35
Front Panel Summary
35
Rear Panel Summary
38
Figure 1-2 Model 2701 Rear Panel
38
Power-Up
40
Line Power Connection
40
Line Frequency
41
Setting Line Voltage and Replacing Fuse
41
Figure 1-3 Power Module
41
Power-Up Sequence
42
Table 1-2 Fuse Ratings
42
Keyclick
44
Display
44
Status and Error Messages
44
Remote Programming - Display
44
Table 1-3 Display Commands
45
Defaults and User Setups
46
Saving and Restoring Setups
46
Table 1-4 Default Settings
49
Remote Programming - Default and User Setups
51
Remote Programming Information
52
Quick Start Exercises
53
Basic DMM Measurements - Front Panel Inputs
54
Table 1-6 Exercise 1—Measure AC Volts - Store Readings in Buffer
55
Closing and Opening Channels - System Channel Operation
56
Figure 1-6 Front Panel Keys to Close and Open System Channels
58
Table 1-7 Exercise 2 — Close and Open Channels (System Channel Operation)
59
Simple Scanning
60
Figure 1-7 Simple Scan Operation
61
Table 1-8 Exercise 3 — Simple Scanning
62
Trigger and Return Readings - Remote Programming
63
Figure 1-8 Exercise 4 — Trigger and Return a Single Reading
64
Figure 1-9 Exercise 5 — Trigger and Return Multiple Readings
65
Closing and Opening Switching Module Channels
67
Close/Open Overview
68
Switching Module Installation and Connections
70
Module Installation
70
Connections
71
Pseudocards
72
Channel Assignments
72
System Channel Operation
73
2-Wire Functions
74
4-Wire Functions (Paired Channels)
75
Controlling the System Channel
76
Figure 2-4 System Channel Operation — Specifying Measurement Channel to Close
77
Figure 2-5 System Channel Operation — Opening All Channels in Mainframe
78
Table 2-1 System Channel Control Commands
79
Non-Amp and Non-Measure Switching Modules
80
Multiple Channel Operation
82
Controlling Multiple Channels
83
Figure 2-6 Multiple Channel Operation — Specifying a Channel to Close
84
Figure 2-7 Multiple Channel Operation — Opening One or All Channels
85
Table 2-2 Multiple Channel Control Commands
86
Multiple Channel Operation Anomalies
88
Dual Independent Multiplexers
90
Figure 2-8 Dual Multiplexer Configuration (Model 7700)
91
Figure 2-9 Dual Multiplexer Application Connections
93
Figure 2-10 Testing DUT
94
Identifying Installed Modules and Viewing Closed Channels
96
CARD Menu
96
Figure 2-11 CARD Menu Tree
97
Switching Module Queries (Remote Operation)
98
Relay Closure Count
100
Reading Relay Closure Count
101
Setting Count Update Interval
101
Model 7700 Switching Module
102
Switching Module Capabilities
102
Schematic Diagram
103
Figure 2-12 Model 7700 Simplified Schematic
104
Basic DMM Operation
105
DMM Measurement Capabilities
106
High Energy Circuit Safety Precautions
107
Performance Considerations
108
Warm-Up
108
Autozero
108
LSYNC (Line Cycle Synchronization)
109
Remote Programming - Autozero and LSYNC
110
Channel List Parameter (<Clist>)
111
Voltage Measurements (DCV and ACV)
112
DCV Input Divider
112
Connections
112
Figure 3-2 DCV and ACV Connections Using Front Panel Inputs
113
Figure 3-3 DCV and ACV Connections Using Model 7700 Switching Module
114
Volts Measurement Procedure
115
AC Voltage Measurements and Crest Factor
116
Figure 3-4 ACV Measurements - Sine Waves
117
Figure 3-5 ACV Measurements - Square, Pulse, and Sawtooth Waves
118
Low Level Considerations
119
Current Measurements (DCI and ACI)
121
Connections
121
Amps Measurement Procedure
122
AMPS Fuse Replacement (Front Panel AMPS Input)
123
Resistance Measurements (Ω2 and Ω4)
124
Connections
124
Figure 3-8 Ω2 and Ω4 Connections for Front Panel Inputs
125
Figure 3-9 Ω2 and Ω4 Connections for Model 7700 Switching Module
126
Standard Resistance Measurements
127
Offset-Compensated Ohms
128
Measurement Methods
129
Figure 3-12 Open Ohms Test Lead Detection
135
4-Wire Common-Side (CSID) Ohms Measurements (7701 Module)
136
Temperature Measurements
137
Thermocouples
137
Thermistors
140
4-Wire Rtds
141
Connections
142
Figure 3-14 Thermocouple Connections
143
Table 3-2 Color Codes — Thermocouple Wires
144
Figure 3-15 Thermistor Connections
145
Temperature Measurement Configuration
146
Table 3-5 RTD Parameters
148
Temperature Measurement Procedure
149
Frequency and Period Measurements
150
Trigger Level
150
Gate Time
150
Connections
151
Frequency and Period Measurement Procedure
152
Continuity Testing
152
Connections
153
Continuity Testing Procedure
154
Remote Programming for Basic Measurements
155
Basic Measurement Commands
155
Table 3-7 Basic Measurement Commands
156
Basic Measurement Programming Examples
161
Measurement Queries
162
Fetch
162
Read
163
Measure[:<Function>]
164
[:Sense[1]]:Data:fresh
164
[:Sense[1]]:Data[:Latest]
165
Examples
165
Range, Digits, Rate, Bandwidth, and Filter Range
167
Measurement Ranges and Maximum Readings
168
Range
168
Manual Ranging
169
Auto Ranging
169
Scanning
169
4 Range, Digits, Rate, Bandwidth, and Filter
170
Remote Programming - Range
170
Table 4-2 Range Commands
170
Digits
172
Scanning
172
Remote Programming - Digits
172
Table 4-3 Digits Commands
173
Rate and Bandwidth
174
Rate
174
Table 4-4 Rate and Bandwidth Settings
175
Bandwidth
176
Scanning
176
Remote Programming - Rate and Bandwidth
177
Table 4-5 Rate and Bandwidth Commands
177
Filter
180
Filter Characteristics
180
Figure 4-2 Moving and Repeating Filters
181
Figure 4-3 Filter Window
183
Figure 4-4 Filter Configuration Flow Chart
185
Remote Programming - Filter
186
Table 4-6 Filter Commands
186
Relative, Math, Ratio, Channel Average, and Db Relative
189
Basic Operation
190
Relative
190
5 Relative, Math, Ratio, Channel Average, and Db
192
Remote Programming - Rel
192
Table 5-1 Rel Commands
192
Math
195
MX+B
196
Percent
197
Reciprocal (1/X)
198
Basic Operation
199
Remote Programming - Math
200
Table 5-2 Math Commands
200
Ratio and Channel Average
203
Basic Operation
204
Remote Programming - Ratio and Channel Average
206
Remote Programming - Db
208
Table 5-4 Db Commands
209
Buffer
211
Buffer Overview
212
Front Panel Buffer
212
Auto Clear
212
Timestamps
214
Storing Readings
215
Recalling Readings
216
Buffer Statistics
217
Remote Programming - Buffer
218
Buffer Commands
218
6 Buffer
219
Table 6-1 Buffer Commands
219
Programming Example
225
Scanning
227
Scanning Fundamentals
228
Channel Assignments
229
Sequential and Non-Sequential Scans
229
Scan Process
230
Trigger Models
230
Figure 7-1 Trigger Model with STEP Function
231
Figure 7-2 Trigger Model with SCAN Function
232
Scan Configuration
237
Scan Reset
239
Simple Scan
239
Advanced Scan
240
Setting Delay
244
Monitor Channel
244
Auto Channel Configuration
246
Saving Setup
247
Auto Scan
247
Scan Operation
247
Basic Scan
248
Manual/External Trigger Scan
249
Monitor Scan (Analog Trigger)
250
Remote Programming - Scanning
252
Trigger Model
252
Channel Setup
253
Buffer
253
Scanning Commands
253
Table 7-1 Scanning Commands
254
Scanning Programming Example
258
7 Scanning
254
Scanning Examples
258
External Trigger Scan
258
Figure 7-4 External Trigger Scan Example
259
Table 7-2 External Trigger Scan Example
260
Monitor Scan
261
Figure 7-5 Monitor Scan Example
262
Table 7-3 Monitor Scan Example
263
Triggering
265
Trigger Model
266
Idle
266
Control Source and Event Detection
267
Delay (Auto or Manual)
267
Table 8-1 Auto Delay Settings
268
Device Action
269
Output Trigger
269
8 Triggering
268
Reading Hold (Autosettle)
270
Hold Example
270
8 Triggering
271
External Triggering
271
Figure 8-3 TRIG LINK Pinout
271
Digital I/O
272
External Trigger
272
Voltmeter Complete
273
External Triggering Example
274
Figure 8-6 DUT Test System
274
Figure 8-7 Trigger Link Connections
275
Figure 8-8 Operation Model for Triggering Example
276
External Triggering with BNC Connections
277
Remote Programming - Triggering
278
Trigger Model (Remote Operation)
278
Figure 8-10 Trigger Model (Remote Operation)
279
Trigger Model Operation
280
Triggering Commands
281
Programming Example
282
Limits and Digital I/O
283
9 Limits and Digital I/O
284
Limits
284
Figure 9-1 Default Limits
284
Basic Limits Operation
286
Scanning
286
Digital I/O
287
Digital Input (Trigger Link Input)
287
Figure 9-2 Digital I/O Port
287
Digital Outputs
288
Figure 9-4 Controlling Externally Powered Relays
291
Setting Digital Output
292
Figure 9-5 NAND Gate Control
292
Scanning
293
Table 9-1 OUTPUT Menu
293
9 Limits and Digital I/O
293
Remote Programing - Limits and Digital Output
294
Limits and Digital Output Commands
294
Limits and Digital Outputs Programming Example
296
Application - Sorting Resistors
296
Limits
296
Figure 9-6 Setup to Test 100Ω Resistors
297
Figure 9-7 Limits to Sort 100Ω Resistors (1%, 5%, and >5%)
298
Digital Outputs
299
Remote Operations
301
Operation Enhancements
302
Pseudocards
302
Autozero
302
Db Calculation
302
Separate Function Setups
303
DCV Input Divider
303
Multiple Channel Operation
303
System Commands
303
Interface
303
Password
304
Battery
305
Miscellaneous System Commands
306
Table 10-1 System Commands
306
10 Remote Operations
306
Ethernet Setup
307
Ethernet Standards
307
Typical Ethernet Systems
307
Figure 10-2 Small LAN System Using a Hub
308
Figure 10-3 Isolated LAN System Using Two Nics (Network Interface Cards)
309
Figure 10-4 Enterprise-Wide or Internet Network System
309
Ethernet Connections
310
Figure 10-6 Model 2701 Ethernet Connector
311
Ethernet Settings
312
Figure 10-7 Flowchart to VIEW Ethernet Settings
313
Figure 10-8 Flowchart to SET Ethernet
314
Table 10-2 System Commands for Ethernet
315
10 Remote Operations
309
Internal Web Page
316
Opening the Web Page
316
Figure 10-9 2701 Internal Web Page
318
Figure 10-10 Web Page Control Panel
319
Front Panel Aspects of Ethernet Operation
320
Error and Status Messages
320
Status Indicators
320
LOCAL Key
320
Programming Syntax
321
Command Words
321
Query Commands
323
Case Sensitivity
323
Long-Form and Short-Form Versions
323
Short-Form Rules
324
Program Messages
324
Response Messages
327
Message Exchange Protocol
327
RS-232 Interface Operation
328
Sending and Receiving Data
328
Baud Rate
328
Signal Handshaking (Flow Control)
329
Terminator
330
Selecting and Configuring RS-232 Interface
330
Table 10-3 System Commands to Configure RS-232
331
RS-232 Connections
332
Figure 10-11 RS-232 Interface Connector
332
Error Messages
333
Table 10-5 PC Serial Port Pinout
333
Status Structure
335
Overview
336
Status Byte and SRQ
336
Status Register Sets
336
Queues
336
Figure 11-1 Model 2701 Status Register Structure
337
Clearing Registers and Queues
338
11 Status Structure
339
Programming and Reading Registers
339
Programming Enable Registers
339
Figure 11-2 16-Bit Status Register
339
Reading Registers
341
Status Byte and Service Request (SRQ)
342
Status Byte Register
342
Service Request Enable Register
343
Status Byte and Service Request Commands
344
Status Register Sets
344
Register Bit Descriptions
345
Figure 11-4 Standard Event Status
345
Figure 11-5 Operation Event Status
347
Figure 11-6 Measurement Event Status
349
Condition Registers
351
Event Registers
352
Event Enable Registers
352
Table 11-6 Event Enable Registers Commands
353
Queues
356
Output Queue
356
Error Queue
356
Table 11-7 Error Queue Commands
357
Common Commands
359
12 Common Commands
360
Table 12-1 Common Commands and Queries
360
SCPI Signal Oriented Measurement Commands
367
Table 13-1 Signal Oriented Measurement Command Summary
368
Configure:<Function> [<Rang>], [<Res>], [<Clist>]
370
Fetch
372
Read
373
Measure:<Function>? [<Rang>], [<Res>], [<Clist>]
374
Format and Miscellaneous System Commands
377
Format Commands
378
Format:elements <Item List
378
Figure 14-1 ASCII Data Format
379
14 Format and Miscellaneous System Commands
379
Miscellaneous System Commands
380
System:preset
380
System:version
380
System:key <Nrf
380
System:beeper[:State] <B
381
Figure 14-2 Key-Press Codes
381
SCPI Reference Tables
383
Reference Tables
384
15 SCPI Reference Tables
385
Table 15-1 Calculate Command Summary
385
Table 15-2 Display Command Summary
387
Table 15-4 Route Command Summary
388
Table 15-5 Sense Command Summary
398
Table 15-6 Status Command Summary
401
Table 15-7 System Command Summary
402
Table 15-8 Trace Command Summary
407
Table 15-9 Trigger Command Summary
408
Table 15-10 UNIT Command Summary
409
Specifications
411
Accuracy Calculations
417
Calculating DC Characteristics Accuracy
417
Calculating AC Characteristics Accuracy
417
Calculating Dbm Characteristics Accuracy
418
Calculating Db Characteristics Accuracy
419
Additional Derating Factors
419
Optimizing Measurement Accuracy
420
DC Voltage, DC Current, and Resistance
420
AC Voltage and AC Current
420
Temperature
420
Optimizing Measurement Speed
420
Model 7700 Connection Guide
421
Card Configuration - Schematic
422
B Model 7700 Connection Guide
423
Figure B-1 Simplified Schematic for Model 7700
423
Connections and Wiring
424
Screw Terminals
424
Figure B-2 Screw Terminal Access
425
Figure B-3 Model 7700 Screw Terminal Channel Designations
425
Wiring Procedure
426
Figure B-4 Wire Dressing
427
Typical Connections
428
Figure B-5 Thermocouple Connections
428
Figure B-6 Ω2-Wire and Thermistor Connections
428
Figure B-7 Ω4-Wire and RTD Connections
429
Figure B-8 Current Connections (AC or DC)
429
Connection Log
430
Table B-1 Connection Log Model 7700
431
Status and Error Messages
433
Advertisement
Keithley 2701 Service Manual (168 pages)
Ethernet-Based DMM / Data Acquisition System
Brand:
Keithley
| Category:
Multimeter
| Size: 3 MB
Table of Contents
Service Manual
3
Table of Contents
7
1 Performance Verification
15
Introduction
16
Verification Test Requirements
17
Environmental Conditions
17
Warm-Up Period
17
Line Power
17
Recommended Test Equipment
18
Table 1-1 Recommended Verification Equipment
18
Verification Limits
19
Example Reading Limit Calculation
19
Calculating Resistance Reading Limits
19
Restoring Factory Defaults
19
Performing the Verification Test Procedures
20
Verification Test Summary
20
Test Considerations
21
Model 2701 Verification
22
Verifying DC Voltage
22
Figure 1-1 Connections for Model 2701 DC Volts Verification
22
Table 1-2 DCV Reading Limits
23
Verifying AC Voltage
24
Figure 1-2 Connections for Model 2701 AC Volts Verification
24
Table 1-3 ACV Reading Limits
25
Verifying DC Current
26
Figure 1-3 Connections for Model 2701 DC Current Verification
26
Table 1-4 DCI Limits
26
Verifying AC Current
27
Figure 1-4 Connections for Model 2701 AC Current Verification
27
Table 1-5 ACI Limits
27
Verifying Resistance
28
Table 1-6 Limits for Resistance Verification
29
Verifying Temperature
30
Verifying Frequency
32
Model 7700 Verification
32
Verifying DC Voltage
32
Figure 1-7 Connections for Model 2701 Frequency Verification
32
Figure 1-8 Connections for Model 7700 DC Volts Verification
33
Table 1-9 Plug-In Module DCV Reading Limits
33
Verifying AC Voltage
34
Performance Verification
34
Figure 1-9 Connections for Model 7700 AC Volts Verification
34
Table 1-10 Plug-In Module ACV Reading Limits
35
Verifying DC Current
36
Figure 1-10 Connections for Model 7700 DC Current Verification
36
Table 1-11 Plug-In Module DCI Limits
37
Figure 1-11 Connections for Model 7700 AC Current Verification
38
Verifying AC Current
38
Table 1-12 Plug-In Module ACI Limits
38
Verifying Resistance
39
Table 1-13 Limits for Plug-In Module Resistance Verification
40
Verifying Temperature
42
Table 1-14 Model 7700 Thermocouple Temperature Verification Reading Limits
43
Figure 1-14 Connections for Model 7700 Thermocouple Temperature Verification
43
Verifying Frequency
45
Figure 1-15 Connections for Model 7700 Frequency Verification
45
Verifying Ratio and Average
46
Figure 1-16 Connections for Model 7700 Ratio and Average Verification
46
2 Calibration
47
Introduction
48
Environmental Conditions
48
Warm-Up Period
48
Line Power
48
Calibration Considerations
49
Calibration Code
50
Front Panel Calibration Code
50
Remote Calibration Code
50
Comprehensive Calibration
51
Calibration Cycle
51
Recommended Equipment
51
Table 2-1 Recommended Equipment for Comprehensive Calibration
51
Aborting Calibration
52
Front Panel Calibration
52
Figure 2-1 Low Thermal Short Connections
53
Table 2-2 Comprehensive Calibration Procedures
53
Figure 2-2 Connections for DC Volts and Ohms Calibration
54
Table 2-3 DC Volts Calibration Summary
55
Table 2-4 Ohms Calibration Summary
55
Figure 2-3 Connections for DC and AC Amps Calibration
56
Table 2-5 DC Current Calibration Summary
56
Figure 2-4 Connections for AC Volts Calibration
57
Table 2-6 AC Voltage Calibration Summary
57
Table 2-7 AC Current Calibration Summary
58
Remote Calibration
59
Table 2-8 DC Voltage Calibration Programming Steps
61
Table 2-9 Resistance Calibration Programming Steps
61
Table 2-10 DC Current Calibration Programming Steps
62
Table 2-11 AC Voltage Calibration Programming Steps
63
Table 2-12 AC Current Calibration Programming Steps
64
Programming Calibration Dates
64
Saving Calibration Constants
64
Manufacturing Calibration
65
Recommended Test Equipment
65
Calibration Card Preparation
65
Unlocking Manufacturing Calibration
65
Table 2-13 Recommended Equipment for Manufacturing Calibration
65
Measuring Function Generator Signal Amplitude
66
Front Panel Manufacturing Calibration
66
Figure 2-5 Function Generator Connections for Manufacturing Calibration
66
Remote Manufacturing Calibration
67
Model 7700 Calibration
68
Recommended Test Equipment
68
Calibration Card Connections
68
Table 2-14 Recommended Equipment for Model 7700 Calibration
68
3 Routine Maintenance
70
Introduction
71
Setting the Line Voltage and Replacing the Line Fuse
71
Figure 3-1 Power Module
72
Table 3-1 Power Line Fuse
72
Replacing the Front Terminal AMPS Fuse
73
Replacing Model 7700 Plug-In Module Amps Fuses
74
Replacing Non-Volatile RAM Battery
75
Plug-In Module Relay Closure Count
76
Closure Count Commands
76
Reading Relay Closure Count
76
Resetting Relay Closure Count
77
Setting Count Update Interval
77
4 Troubleshooting
78
Introduction
79
Repair Considerations
79
Power-On Self-Tests
80
RAM and EPROM Tests
80
Flash Memory Tests
80
Table 4-1 Flash Memory Failure Modes
80
Front Panel Tests
81
KEY Test
81
DISP Test
81
Principles of Operation
82
Power Supply
82
Figure 4-1 Power Supply Block Diagram
82
Display Board
83
Table 4-2 Power Supply Components
83
Figure 4-2 Digital Circuitry Block Diagram
84
Digital Circuitry
85
Rs-232 Interface
86
Module Slot Control
86
Analog Circuitry
87
Figure 4-3 Analog Circuitry Block Diagram
88
Figure 4-4 Ohms Open-Lead Sense Detection Block Diagram
89
Scanner Card Signals
89
Troubleshooting
90
Display Board Checks
90
Power Supply Checks
90
Table 4-4 Power Supply Checks
90
Digital Circuitry Checks
91
Analog Signal Switching States
91
Table 4-5 Digital Circuitry Checks
91
Table 4-8
92
Table 4-10
93
Table 4-12 ACA Signal Switching
94
Table 4-13 DCV Signal Multiplexing and Gain
94
Table 4-14 ACV and ACA Signal Multiplexing and Gain
94
Table 4-16 Ω2 Signal Multiplexing and Gain
95
Table 4-17 Ω4 Signal Multiplexing and Gain
95
Table 4-15 DCA Signal Multiplexing and Gain
95
Table 4-18 Switching Device Locations
96
5 Disassembly
97
Introduction
98
Handling and Cleaning
98
Handling PC Boards
98
Solder Repairs
98
Static Sensitive Devices
99
Assembly Drawings
99
Disassembly Procedures
100
Case Cover Removal
100
Motherboard Removal
100
Card Cage Removal
101
Front Panel Disassembly
101
Removing Power Components
102
Power Transformer Removal
102
Power Module Removal
102
Instrument Reassembly
103
Input Terminal Wire Connections
103
Power Module Wire Connections
103
Table 5-1 Input Terminal Wire Colors
103
Table 5-2 Power Module Wire Colors
103
6 Replaceable Parts
111
Introduction
112
Parts Lists
112
Ordering Information
112
Factory Service
112
Component Layouts
112
Table 4-6 Table
113
Table 6-1 Model 2701 Motherboard Parts List
113
Table 4-16 Table
121
Table 4-7 Table
121
Table 6-2 Model 2701 Display Board Parts List
121
Table 6-3 Model 2701 Backplane Board Parts List
121
Table 6-4 Model 2701 Miscellaneous Parts List
122
Table 6-5 Model 7700 Parts List
123
Specifications
131
DC Volts
133
DC Current
133
Ac Current
134
Accuracy Calculations
136
Calculating DC Characteristics Accuracy
136
Calculating AC Characteristics Accuracy
136
Calculating Dbm Characteristics Accuracy
137
Calculating Db Characteristics Accuracy
138
Additional Derating Factors
138
Optimizing Measurement Accuracy
139
DC Voltage, DC Current, and Resistance
139
AC Voltage and AC Current
139
Temperature
139
Optimizing Measurement Speed
139
Keithley 2701 Service Manual (135 pages)
Ethernet-Based DMM / Data Acquisition System
Brand:
Keithley
| Category:
Multimeter
| Size: 12 MB
Table of Contents
Service Manual
1
Safety Precautions
3
Table of Contents
5
Performance Verification
9
Introduction
9
Verification Test Requirements
10
Environmental Conditions
10
Warm-Up Period
10
Line Power
10
Recommended Test Equipment
11
Verification Limits
11
Example Reading Limit Calculation
12
Calculating Resistance Reading Limits
12
Restoring Factory Defaults
12
Performing the Verification Test Procedures
13
Verification Test Summary
13
Test Considerations
14
Model 2701 Verification
14
Verifying DC Voltage
15
Verifying AC Voltage
17
Verifying DC Current
18
Verifying AC Current
19
Verifying Resistance
20
Verifying Temperature
22
Verifying Frequency
24
Model 7700 Verification
24
Verifying DC Voltage
25
Verifying AC Voltage
27
Verifying DC Current
28
Verifying AC Current
29
Verifying Resistance
30
Verifying Temperature
32
Verifying Frequency
35
Verifying Ratio and Average
36
Calibration
37
Introduction
37
Environmental Conditions
37
Warm-Up Period
38
Line Power
38
Calibration Considerations
39
Calibration Code
39
Front Panel Calibration Code
40
Remote Calibration Code
40
Comprehensive Calibration
40
Calibration Cycle
41
Recommended Equipment
41
Aborting Calibration
41
Front Panel Calibration
42
Front Panel Short and Open Calibration
43
Remote Calibration
49
Short and Open Calibration
50
Programming Calibration Dates
54
Saving Calibration Constants
54
Locking out Calibration
54
Manufacturing Calibration
54
Recommended Test Equipment
55
Calibration Card Preparation
55
Unlocking Manufacturing Calibration
55
Measuring Function Generator Signal Amplitude
55
Front Panel Manufacturing Calibration
56
Remote Manufacturing Calibration
57
Model 7700 Calibration
57
Recommended Test Equipment
58
Calibration Card Connections
58
Model 7700 Calibration
58
Routine Maintenance
60
Introduction
60
Setting the Line Voltage and Replacing the Line Fuse
60
Replacing the Front Terminal AMPS Fuse
63
Replacing Model 7700 Plug-In Module Amps Fuses
64
Replacing Non-Volatile RAM Battery
65
Plug-In Module Relay Closure Count
66
Closure Count Commands
66
Reading Relay Closure Count
67
Resetting Relay Closure Count
67
Setting Count Update Interval
68
Troubleshooting
70
Repair Considerations
70
Power-On Self-Tests
70
RAM and EPROM Tests
70
Flash Memory Tests
71
Front Panel Tests
71
KEY Test
71
DISP Test
72
Principles of Operation
72
Power Supply
73
Display Board
74
Digital Circuitry
76
Real Time Clock
77
Analog Circuitry
77
Circuit Troubleshooting
81
Display Board Checks
81
Power Supply Checks
81
Digital Circuitry Checks
82
Analog Signal Switching States
83
Disassembly
87
Introduction
87
Handling and Cleaning
87
Handling PC Boards
87
Solder Repairs
88
Static Sensitive Devices
88
Assembly Drawings
89
Disassembly Procedures
89
Case Cover Removal
89
Motherboard Removal
90
Card Cage Removal
90
Front Panel Disassembly
91
Removing Power Components
91
Instrument Reassembly
92
Input Terminal Wire Connections
93
Power Module Wire Connections
93
Replaceable Parts
101
Introduction
101
Ordering Information
101
Factory Service
101
Component Layouts
102
Accuracy Calculations
109
Introduction
109
Calculating DC Characteristics Accuracy
109
Calculating AC Characteristics Accuracy
110
Calculating Dbm Characteristics Accuracy
110
Calculating Db Characteristics Accuracy
111
Additional Derating Factors
112
Optimizing Measurement Accuracy
112
DC Voltage, DC Current, and Resistance
112
AC Voltage and AC Current
112
Temperature
112
Optimizing Measurement Speed
112
Temperature
113
Advertisement
Keithley 2701 Instruction Manual (61 pages)
Ethernet-Based DMM / Data Acquisition System Instrument Networking
Brand:
Keithley
| Category:
Measuring Instruments
| Size: 1 MB
Table of Contents
Safety Precautions
3
Table of Contents
5
1 Introduction
8
General Information
9
Software
10
Contact Information
10
Features of the Ethernet Interface
10
Introduction
11
Figure 1-1 Model 2701 Rear Panel
11
2 Network Connection
13
Overview
14
Component Specifications
14
Direct Connection
15
Procedure
15
Figure 2-1 PC to Single Model 2701
15
Hub Connection
16
Figure 2-2 Hub to Model 2701
16
Procedure
17
Dual Interface Card Connection
18
Procedure
18
Figure 2-3 Dual NIC to Model 2701
19
Corporate Network Connection
20
3 Configuring TCP/IP Addresses
21
Communication Protocol
22
IS/IT Department
22
Direct Connection (Isolated Network)
24
Address Restrictions
24
Selecting an Address
25
Figure 3-1 IP Address Byte Location Sample
26
Changing Model 2701 TCP/IP Addresses
27
Front Panel
27
Check or Set TCP/IP Address over Ethernet
28
Figure 3-2 Internal Web Page
29
Configuring a Network Interface Card (NIC)
30
Configuration in Windows 98/ME
31
Configuration in Windows NT4
32
Configuration in Windows 2000
33
Configuration in Windows XP
34
Troubleshooting
35
4 Software and Drivers
37
Keithley Integra Series Software Architecture
38
Figure 4-1 Software Overview
38
Built-In Web Diagnostic Tool (Free)
39
Provided Software
40
Testpoint Runtime Start-Up Software Package
40
KE2700 VISA Based IVI Instrument Driver
42
Additional Software Applications
44
Excelinx-1A
44
Figure 4-3 Excelinx-1A
44
Testpoint Application Development Package
45
Provided Software and Driver Installation
46
Installation and Configuration
46
Figure 4-4 Keithley Configuration Wizard Window
47
Figure 4-5 Select Operation Window
48
Figure 4-7 Select IP Address Window
49
Figure 4-10 Summary Window
50
Figure 4-9 Assign Instrument Name Window
50
Figure 4-11 Advanced Configuration Window—Select Instrument
52
Figure 4-12 Attribute Setting
53
Keithley 2701 Quick Start Manual (52 pages)
Brand:
Keithley
| Category:
Data Loggers
| Size: 1 MB
Table of Contents
Table of Contents
9
Getting Started
10
Introduction
10
Measure and Switching Capabilities
10
Front and Rear Panels (Mainframe)
12
Power-Up
15
Edit Keys
15
Factory Defaults
16
Communication Interfaces
16
Start-Up Software
18
Trigger and Return Readings
18
Front Panel Input Connections
19
Basic Measurements
21
Measure Volts, Amps and Ohms
21
Measure Temperature
23
Measure Frequency and Period
25
Testing Continuity
26
Optimizing Performance
27
Warm-Up
27
Display Resolution (Digits)
27
Measurement Speed (Rate)
28
Filter
29
Line Cycle Synchronization (Lsync)
31
Autozero
32
Math Operations
32
Relative (Rel)
33
Math MX+B
34
Percent
35
Reciprocal (1/X)
35
Ratio and Channel Average
36
Buffer
38
Storing and Recalling Readings
38
Storing Readings
38
Recalling Readings (and Statistics)
38
Model 7700 Switching Module
41
Input Connections and Measurements
42
2-Wire Measurements
43
Channel Assignments
45
Closing and Opening Channels
46
Simple Scanning
48
Advertisement
Related Products
Keithley 2700
Keithley 2002
Keithley 2100
Keithley 2000
Keithley 2010
Keithley 2015
Keithley 2015P
Keithley 2110-100
Keithley 2110-120-GPIB
Keithley 2110-100-GPIB
Keithley Categories
Measuring Instruments
Multimeter
Test Equipment
Power Supply
Switch
More Keithley Manuals
Login
Sign In
OR
Sign in with Facebook
Sign in with Google
Upload manual
Upload from disk
Upload from URL