Sign In
Upload
Manuals
Brands
FLIR Manuals
DVR
Digimerge D33084T
FLIR Digimerge D33084T Manuals
Manuals and User Guides for FLIR Digimerge D33084T. We have
1
FLIR Digimerge D33084T manual available for free PDF download: Instruction Manual
FLIR Digimerge D33084T Instruction Manual (131 pages)
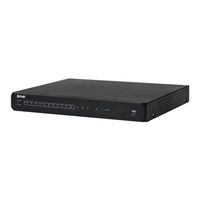
Digital Video Surveillance Recorder 4/8/16 960H Real-time View & Record CMS Mobile Apps HDMI
Brand:
FLIR
| Category:
DVR
| Size: 10.63 MB
Table of Contents
Table of Contents
7
Getting Started
13
Front Panel
14
Rear Panel
15
D3304 (4-Channel)
15
D3308 (8-Channel)
15
D3316 (16-Channel)
16
D3216 (16-Channel)
17
Basic Setup
18
Step 1: Connect the BNC Cameras
18
Step 2: Connect the Mouse
18
Step 3: Connect the Ethernet Cable
18
Step 4: Connect the Monitor
19
Step 5: Connect the Power Adapter and Power on the DVR
19
Default System Password & Port Numbers
20
Quick Access to System Information
20
Mouse Control
21
Remote Control
22
Using the On-Screen Display
23
Using the Menu Bar
24
Menu Bar Icons
24
Using the Virtual Keyboard and Mini-Keyboard
25
Using the Zoom Mode
26
Using Picture in Picture (PIP) Mode
27
Setting the Date and Time
28
Configuring Daylight Savings Time (DST)
29
Using a NTP Server to Set Your System Time
30
Recording
31
Event Recording
31
Recording Audio
31
Playback and Backup
32
Playing Back Recorded Video
32
Using Playback Controls
34
Finding Events in the Playback Bar
34
Controlling the Time Range of the Playback Bar
35
Using Zoom in Playback Mode
35
Using Video Clip Backup
36
Backing up Video
37
Viewing Backed up Video
38
Converting Backed up Video to AVI Files
38
Managing Passwords
40
Enabling and Changing Passwords
40
Adding Users
41
Using the Main Menu
43
Display
44
Configuring Custom Channel Names
44
Changing the Position of the Channel Name
44
Adjusting Camera Color Settings
44
Enabling Covert Recording
44
Configuring the Time and Recording Time Display
45
Configuring Sequence Time
45
Changing the Video-Out Resolution
45
Restoring the System's Resolution if You See a Blank Screen
45
Adjusting Menu Transparency
45
Adjusting the Video Margin
46
Adding Privacy Zones
46
Creating a Custom Split-Screen Display
47
Record
48
Configuring Pre-Recording Settings
48
Configuring Backup File Duration (Pack Duration)
48
Configuring the Recording Schedule (Continuous, Motion, Alarm)
48
Enabling Audio Recording
49
Configuring Recording Quality, Resolution, and Video Frame Rate
49
Search
50
Searching for Video on the System
50
Backing up Video Files
51
Using the Event Search
51
Using the Log Search
52
Network
53
Configuring Network Type: DHCP & Static IP
53
Enabling Auto Port Forwarding
53
Changing the Dvr's Client and HTTP Port
53
Adjusting Remote Connectivity Streaming Rates
54
Setting up Email Notification
54
Configuring DDNS Settings
55
Alarm
55
Configuring Motion Detection
55
Configuring Alarm Settings
56
Device
57
Configuring Hard Drive Settings
57
Formatting USB Flash Drives
57
Formatting Esata Backup Drives
57
System
58
Changing Date Format
58
Changing Time Format
58
Changing the System Language
58
Changing Video Output - NTSC & PAL
59
Configuring Menu Time out and Auto Logout
59
Adding Users & Changing the Admin Password
59
Viewing System Information
59
Advanced
59
Configuring the "Auto Reboot" Feature
59
Upgrading the System Firmware
60
Restoring to Factory Default Settings
60
Restarting or Shutting down the DVR
61
Configuring System Warnings
61
Saving Your System Configuration to a USB Flash Drive
61
Loading a System Configuration from a USB Flash Drive
62
Setting up Your DVR for Remote Connectivity
63
System Requirements
63
Accessing Your DVR Within a Local Network (LAN)
64
Step 1 of 3: Connect Your DVR to the Local Area Network
64
Step 2 of 3: Obtain the Dvr's Local IP Address
64
Step 3 of 3: Connect to the Dvr's Local IP Address
65
To Connect Using the Dvr's Local IP Address on a PC
65
To Connect to the Dvr's Local IP Address on a Mac
65
Accessing Your DVR Remotely over the Internet
66
Step 1 of 4: Port Forwarding
67
Step 2 of 4: Create a DDNS Account
67
Step 3 of 4: Enable DDNS on the DVR
68
Step 4 of 4: Connect to the DDNS Address
69
To Connect to the DDNS Address Using the Client Software on PC
69
To Connect to the DDNS Address Using Safari on Mac
69
Remote Viewing Interface
70
Logging into the System
71
Changing Viewing Modes
72
Taking Screen Shots
72
Recording Video
73
Showing / Hiding Channels
73
Adjusting Sub-Menu Options
74
Changing the Save Directory of Screenshots or Recorded Video
74
Changing the Format of Recorded Video (PC Only)
75
Configuring PTZ Settings
75
Video Playback
77
Video Playback Controls
78
Configuring Display Settings
78
Configuring Privacy Zone Settings
79
Configuring Recording Parameters
80
Configuring the Recording Schedule
80
Configuring System Recording Quality
81
Configuring Basic Network Settings
82
Configuring the System Substream
82
Configuring Email Notification Settings
83
Configuring DDNS Settings
84
Configuring Motion Detection Settings
84
Configuring Your System to "Beep" During Motion
85
Configuring Alarm Notifications
86
Configuring Hard Drive Recording Mode
87
Configuring PTZ Parameters
87
Configuring the System Time and Date
88
Changing the System's Menu Time out
88
Configuring System User Accounts
89
Viewing System Information
90
Upgrading System Firmware
90
Restoring Default Settings
91
Configuring Event Settings
91
Configuring Auto-Reboot
92
FLIR Player: Playing Backed up Video on PC
93
Installing FLIR Player
93
Running FLIR Player
93
FLIR Player Interface Overview
94
About the Advanced Config Menu
94
FLIR Mac Player: Viewing Backed up Video on Mac
95
FLIR Player Mac Interface
95
Loading Individual Video Files
96
Loading Multiple Video Files
96
Remote Viewing on Internet Explorer
97
Mobile Apps: Accessing Your DVR Using a Mobile Device
99
Compatible Devices and Platforms
99
Before You Begin
99
Iphone / Ipad
100
System Requirements
100
Prerequisites
100
Connecting to Your System Using Digi Summit
100
Digi Summit Interface
102
Using Remote Playback Mode on Iphone/Ipad
103
Viewing Screenshots
104
Viewing Manual Recordings
105
Using Device Manager to Manage Dvr's
106
Android
106
System Requirements
106
Prerequisites
106
Connecting to Your System Using Digi Summit
106
Digi Summit Interface
108
Using Remote Playback Mode on Android
110
Viewing Screenshots
111
Viewing Manual Recordings
113
Using Device Manager to Manage Dvr's
113
Appendix A: System Specifications
115
Appendix B: Connecting a PTZ Camera
116
Configuring PTZ Settings
116
Using the PTZ Menu (Local DVR)
117
PTZ Presets and PTZ Cruise
118
Setting PTZ Presets
118
Selecting PTZ Presets
118
Deleting PTZ Presets
118
Starting / Stopping PTZ Cruise
118
Appendix C: Connecting Additional External Monitors
119
Customizing the Channel Arrangement on the External Monitor
119
Main and Spot Video Outputs (D3316 Only)
121
Configuring the Spot Monitor for Full-Screen or Split-Screen (D3316 Only)
121
Appendix D: Recording Audio
123
Appendix E: Replacing the Hard Drive
124
Removing the Hard Drive
124
Installing the Hard Drive
125
Formatting the Hard Drive
127
Troubleshooting
128
Troubleshooting Remote Connections
130
Advertisement
Advertisement
Related Products
FLIR D3300 Series
FLIR D3332
FLIR D3304
FLIR D3308
FLIR D3316
FLIR D3312
FLIR D3200 Series
FLIR D3216
FLIR DNR73212
FLIR DNR86424
FLIR Categories
Thermal cameras
Security Camera
Measuring Instruments
Digital Camera
IP Camera
More FLIR Manuals
Login
Sign In
OR
Sign in with Facebook
Sign in with Google
Upload manual
Upload from disk
Upload from URL