Sign In
Upload
Manuals
Brands
FLIR Manuals
DVR
D3332
FLIR D3332 Manuals
Manuals and User Guides for FLIR D3332. We have
2
FLIR D3332 manuals available for free PDF download: Instruction Manual
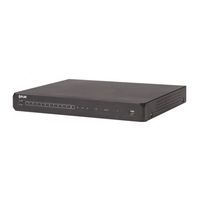
FLIR D3332 Instruction Manual (196 pages)
D3300/D3200 SERIES;
Brand:
FLIR
| Category:
DVR
| Size: 6 MB
Table of Contents
Table of Contents
5
1 Important Safeguards
11
General Precautions
11
Installation
11
Service
13
Use
13
2 Features
14
3 Getting Started
15
4 Front Panel
16
4/8/12/16-Channel
16
D3332 (32-Channel)
17
5 Rear Panel
19
D3304 (4-Channel)
19
D3308 (8-Channel)
19
D3312 (12-Channel)
19
D3316 (16-Channel)
20
D3216 (16-Channel)
20
D3332 (32-Channel)
21
6 Basic Setup
22
Step 1: Connect the BNC Cameras
22
Step 2: Connect the Mouse
22
Step 3: Connect the Ethernet Cable
22
Step 4: Connect the Monitor
22
Step 5: Connect the Power Adapter and Power on the DVR
23
Default System Password & Port Numbers
23
Quick Access to System Information
23
7 Mouse Control
24
8 Remote Control
25
Setting the Remote Control ID
26
9 Using the On-Screen Display
28
Using the Menu Bar
28
Using the Virtual Keyboard and Mini-Keyboard
30
Using the Zoom Mode
30
Using Picture in Picture (PIP) Mode
31
10 Setting the Date and Time
33
Configuring Daylight Savings Time (DST)
33
Using a NTP Server to Set Your System Time
34
11 Recording
36
Event Recording
36
Recording Audio
36
12 Playback and Backup
37
Playing Back Recorded Video
37
Using Playback Controls
38
Finding Events in the Playback Bar
40
Controlling the Time Range of the Playback Bar
40
Using Zoom in Playback Mode
41
Using Video Clip Backup
42
Backing up Video
43
Viewing Backed up Video
44
Converting Backed up Video to AVI Files
44
13 Managing Passwords
46
Enabling and Changing Passwords
46
Adding Users
47
14 Using the Main Menu
49
Display
49
Configuring Custom Channel Names
49
Changing the Position of the Channel Name
50
Adjusting Camera Color Settings
50
Enabling Covert Recording
51
Configuring the Time and Recording Time Display
51
Configuring Sequence Time
51
Changing the Video-Out Resolution
51
Restoring the System's Resolution if You See a Blank Screen
52
Adjusting Menu Transparency
52
Adjusting the Video Margin
52
Adding Privacy Zones
53
Creating a Custom Split-Screen Display
54
Record
55
Configuring Pre-Recording Settings
55
Configuring Backup File Duration (Pack Duration)
56
Configuring the Recording Schedule (Continuous, Motion, Alarm)
56
Enabling Audio Recording
57
Configuring Recording Quality, Resolution, and Video Frame Rate
58
Search
58
Searching for Video on the System
59
Backing up Video Files
60
Using the Event Search
61
Using the Log Search
62
Network
63
Configuring Network Type: DHCP & Static IP
63
Enabling Auto Port Forwarding
64
Changing the Dvr's Client and HTTP Port
64
Adjusting Remote Connectivity Streaming Rates
64
Setting up Email Notification
65
Configuring DDNS Settings
66
Alarm
67
Configuring Motion Detection
67
Configuring Alarm Settings
68
Device
69
Configuring Hard Drive Settings
69
Formatting USB Flash Drive
70
Formatting Esata Backup Drives
70
System
71
Changing Date Format
71
Changing Time Format
71
Changing the System Language
72
Changing Video Output - NTSC & PAL
72
Configuring Menu Time out and Auto Logout
72
Adding Users & Changing the Admin Password
72
Viewing System Information
72
Advanced
72
Upgrading the System Firmware
72
Restoring to Factory Default Settings
73
Restarting or Shutting down the DVR
74
Configuring System Warnings
75
Saving Your System Configuration to a USB Flash Drive
76
Loading a System Configuration from a USB Flash Drive
76
15 Setting up Your DVR for Remote Connectivity
78
System Requirements
78
Accessing Your DVR Within a Local Network (LAN)
79
Step 1 of 3: Connect Your DVR to the Local Area Network
79
Step 2 of 3: Obtain the Dvr's Local IP Address
80
Step 3 of 3: Connect to the Dvr's Local IP Address
80
Accessing Your DVR Remotely over the Internet
82
Step 1 of 4: Port Forwarding
82
Step 2 of 4: Create a DDNS Account
82
Step 3 of 4: Enable DDNS on the DVR
83
Step 4 of 4: Connect to the DDNS Address
84
16 Remote Viewing Interface
86
Changing Viewing Modes
87
Taking Screen Shots
87
Recording Video
87
Showing / Hiding Channels
87
Adjusting Sub-Menu Options
88
Changing the Save Directory of Screenshots or Recorded Video
88
Changing the Format of Recorded Video (PC Only)
88
Configuring PTZ Settings
89
Video Playback
90
Video Playback Controls
92
Configuring Display Settings
93
Configuring Privacy Zone Settings
93
Configuring Recording Parameters
95
Configuring the Recording Schedule
95
Configuring System Recording Quality
96
Configuring Basic Network Settings
97
Configuring the System Substream
97
Configuring Email Notification Settings
98
Configuring DDNS Settings
99
Configuring Motion Detection Settings
99
Configuring Your System to "Beep" During Motion
100
Configuring Alarm Notifications
101
Configuring Hard Drive Recording Mode
102
Configuring PTZ Parameters
102
Configuring the System Time and Date
103
Changing the System's Menu Time out
104
Configuring System User Accounts
104
Viewing System Information
105
Upgrading System Firmware
105
Restoring Default Settings
106
Configuring Event Settings
107
17 Cms-D3 Central Management Software
108
System Requirements
108
Installing CMS-D3
108
Adding Dvrs
109
Adding a DVR from the Local Area Network (LAN)
109
Adding a DVR Using a DDNS Address
113
Control Panel
115
Main View
116
Using Multiple Windows or Monitors
118
Using Sequence Mode
119
Using PTZ Controls
120
PTZ Controls
120
Using PTZ Presets
121
Using PTZ Cruise
121
Remote Playback
121
Remote Playback Controls
123
Downloading Video Files
124
Group Device Management
125
Modifying Dvrs
126
Deleting Dvrs
127
Remotely Configuring Dvrs
127
Creating Camera Groups
127
Modifying Camera Groups
127
Deleting Camera Groups
128
Local Log Search
128
Backing up Logs
129
Account Management
129
Enabling Passwords for the Admin Account
130
Adding User Accounts
130
Modifying User Accounts
131
Deleting User Accounts
131
Using File Management
132
Video Player
133
Video Player Controls
134
System Configuration
134
General
134
File
135
Alarm Sound
135
18 FLIR Player: Playing Backed up Video on PC
137
Installing FLIR Player
137
Running FLIR Player
137
FLIR Player Interface Overview
138
19 FLIR Mac Player: Viewing Backed up Video on Mac
140
FLIR Mac Player Interface
140
Loading Individual Video Files
141
Loading Multiple Video Files
141
20 Remote Viewing on Internet Explorer
142
21 Mobile Apps: Accessing Your DVR Using a Mobile Device
144
Compatible Devices and Platforms
144
Before You Begin
144
Iphone
144
System Requirements
144
Prerequisites
144
Connecting to Your System Using Digi Summit
145
Digi Summit Interface
147
Using Remote Playback Mode on Iphone
149
Viewing Screenshots
151
Viewing Manual Recordings
151
Using Device Manager to Manage Dvr's
152
Ipad
153
System Requirements
153
Prerequisites
153
Connecting to Your System Using Digi Summithd
153
Digi Summit Interface
154
Using Remote Playback Mode on Ipad
156
Viewing Screenshots
158
Viewing Manual Recordings
158
Using Device Manager to Manage Dvr's
159
Managing Favorites
160
Android
160
System Requirements
160
Prerequisites
160
Connecting to Your System Using Digi Summit
160
Digi Summit Interface
163
Using Remote Playback Mode on Android
165
Viewing Screenshots
167
Viewing Manual Recordings
168
Using Device Manager to Manage Dvr's
169
22 System Specifications
171
System
171
Inputs/Outputs
171
Display
171
Recording
172
Playback
172
Storage & Backup
172
Network
173
General
173
23 Connecting a PTZ Camera
174
Configuring PTZ Settings
174
Using the PTZ Menu (Local DVR)
175
PTZ Presets and PTZ Cruise
176
Setting PTZ Presets
176
Selecting PTZ Presets
177
Deleting PTZ Presets
177
Starting / Stopping PTZ Cruise
177
24 Connecting Additional External Monitors
178
Customizing the Channel Arrangement on the External Monitor
178
Main and Spot Video Outputs (D3316/D3332 Only)
179
Configuring the Spot Monitor for Full-Screen or Split-Screen
180
25 Recording Audio
182
26 Replacing the Hard Drive
183
Removing the Hard Drive
183
Installing the Hard Drive
184
Installing Hard Drives (D3332)
186
Formatting the Hard Drive
189
27 Troubleshooting
190
Troubleshooting Remote Connections
191
28 Notices
193
FCC/IC Notice
193
Modification
193
Rohs
193
Advertisement
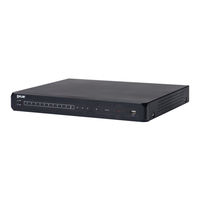
FLIR D3332 Instruction Manual (177 pages)
Digital Video Surveillance Recorder 4/8/16/32 960H Real-time View & Record CMS Mobile Apps HDMI
Brand:
FLIR
| Category:
DVR
| Size: 15 MB
Table of Contents
Important Safeguards
3
General Precautions
3
Table of Contents
7
Getting Started
13
Front Panel (4/8/16-Channel)
14
D3332 (32-Channel)
15
Rear Panel
16
D3304 (4-Channel)
16
D3308 (8-Channel)
16
D3316 (16-Channel)
17
D3216 (16-Channel)
18
D3332 (32-Channel)
19
Basic Setup
20
Step 1: Connect the BNC Cameras
20
Step 2: Connect the Mouse
20
Step 3: Connect the Ethernet Cable
20
Step 4: Connect the Monitor
21
Step 5: Connect the Power Adapter and Power on the DVR
21
Default System Password & Port Numbers
21
Quick Access to System Information
22
Mouse Control
23
Remote Control
24
Setting the Remote Control ID (D3332/D3316 Only)
25
Using the On-Screen Display
26
Using the Menu Bar
27
Menu Bar Icons
27
Using the Virtual Keyboard and Mini-Keyboard
28
Using the Zoom Mode
29
Using Picture in Picture (PIP) Mode
30
Setting the Date and Time
31
Configuring Daylight Savings Time (DST)
32
Using a NTP Server to Set Your System Time
33
Recording
34
Event Recording
34
Recording Audio
34
Playback and Backup
35
Playing Back Recorded Video
35
Using Playback Controls
37
Finding Events in the Playback Bar
37
Controlling the Time Range of the Playback Bar
38
Using Zoom in Playback Mode
38
Using Video Clip Backup
39
Backing up Video
40
Viewing Backed up Video
41
Converting Backed up Video to AVI Files
41
Managing Passwords
43
Enabling and Changing Passwords
43
Adding Users
44
Using the Main Menu
46
Display
47
Configuring Custom Channel Names
47
Changing the Position of the Channel Name
47
Adjusting Camera Color Settings
47
Enabling Covert Recording
47
Configuring the Time and Recording Time Display
48
Configuring Sequence Time
48
Changing the Video-Out Resolution
48
Restoring the System's Resolution if You See a Blank Screen
48
Adjusting Menu Transparency
48
Adjusting the Video Margin
49
Adding Privacy Zones
49
Creating a Custom Split-Screen Display
50
Record
51
Configuring Pre-Recording Settings
51
Configuring Backup File Duration (Pack Duration)
51
Configuring the Recording Schedule (Continuous, Motion, Alarm)
51
Enabling Audio Recording
52
Configuring Recording Quality, Resolution, and Video Frame Rate
52
Search
53
Searching for Video on the System
53
Backing up Video Files
54
Using the Event Search
54
Using the Log Search
55
Network
55
Configuring Network Type: DHCP & Static IP
55
Enabling Auto Port Forwarding
56
Changing the Dvr's Client and HTTP Port
56
Adjusting Remote Connectivity Streaming Rates
56
Setting up Email Notification
57
Configuring DDNS Settings
57
Alarm
58
Configuring Motion Detection
58
Configuring Alarm Settings
58
Device
59
Configuring Hard Drive Settings
59
Formatting USB Flash Drives
60
Formatting Esata Backup Drives
60
System
60
Changing Date Format
60
Changing Time Format
61
Changing the System Language
61
Changing Video Output - NTSC & PAL
61
Configuring Menu Time out and Auto Logout
61
Adding Users & Changing the Admin Password
61
Viewing System Information
61
Advanced
61
Configuring the "Auto Reboot" Feature
61
Upgrading the System Firmware
62
Restoring to Factory Default Settings
62
Restarting or Shutting down the DVR
63
Configuring System Warnings
63
Saving Your System Configuration to a USB Flash Drive
64
Loading a System Configuration from a USB Flash Drive
64
Setting up Your DVR for Remote Connectivity
65
System Requirements
65
Accessing Your DVR Within a Local Network (LAN)
66
Step 1 of 3: Connect Your DVR to the Local Area Network
66
Step 2 of 3: Obtain the Dvr's Local IP Address
66
Step 3 of 3: Connect to the Dvr's Local IP Address
67
To Connect Using the Dvr's Local IP Address on a PC
67
To Connect to the Dvr's Local IP Address on a Mac
67
Accessing Your DVR Remotely over the Internet
68
Step 1 of 4: Port Forwarding
69
Step 2 of 4: Create a DDNS Account
69
Step 3 of 4: Enable DDNS on the DVR
70
User Name
70
Step 4 of 4: Connect to the DDNS Address
71
To Connect to the DDNS Address Using the Client Software on PC
71
To Connect to the DDNS Address Using Safari on Mac
71
Remote Viewing Interface
72
Changing Viewing Modes
73
Taking Screen Shots
73
Recording Video
74
Showing / Hiding Channels
75
Adjusting Sub-Menu Options
75
Changing the Save Directory of Screenshots or Recorded Video
76
Changing the Format of Recorded Video (PC Only)
76
Configuring PTZ Settings
77
Video Playback
79
Video Playback Controls
80
Configuring Display Settings
80
Configuring Privacy Zone Settings
81
Configuring Recording Parameters
82
Configuring the Recording Schedule
82
Configuring System Recording Quality
83
Configuring Basic Network Settings
83
Configuring the System Substream
84
Configuring Email Notification Settings
85
Configuring DDNS Settings
86
Configuring Motion Detection Settings
86
Configuring Your System to "Beep" During Motion
87
Configuring Alarm Notifications
88
Configuring Hard Drive Recording Mode
89
Configuring PTZ Parameters
89
Configuring the System Time and Date
90
Changing the System's Menu Time out
90
Configuring System User Accounts
90
Viewing System Information
92
Upgrading System Firmware
92
Restoring Default Settings
93
Configuring Event Settings
93
Configuring Auto-Reboot
94
CMS-D3 Central Management Software
95
System Requirements
95
Installing CMS-D3
96
Adding Dvrs
96
Adding a DVR from the Local Area Network (LAN)
96
Adding a DVR Using a DDNS Address
99
Control Panel
102
Main View
103
Using Multiple Windows or Monitors
105
Using Sequence Mode
106
Using PTZ Controls
107
Ptz Controls
108
Using Ptz Presets
108
Remote Playback
109
Remote Playback Controls
111
Downloading Video Files
112
Group Device Management
112
Modifying Dvrs
113
Deleting Dvrs
113
Remotely Configuring Dvrs
114
Creating Camera Groups
114
Modifying Camera Groups
115
Deleting Camera Groups
115
Local Log Search
115
Backing up Logs
116
Account Management
117
Enabling Passwords for the Admin Account
117
Adding User Accounts
118
Modifying User Accounts
118
Deleting User Accounts
119
Using File Management
119
Video Player
120
Opening Backup or Downloaded Video Files
120
Video Player Controls
121
System Configuration
122
General
122
File
123
Alarm Sound
123
FLIR Player: Playing Backed up Video on PC
124
Installing FLIR Player
124
Running FLIR Player
124
FLIR Player Interface Overview
125
About the Advanced Config Menu
125
FLIR Mac Player: Viewing Backed up Video on Mac
126
FLIR Mac Player Interface
126
Loading Individual Video Files
127
Loading Multiple Video Files
127
Remote Viewing on Internet Explorer
128
Mobile Apps: Accessing Your DVR Using a Mobile Device
130
Compatible Devices and Platforms
130
Before You Begin
130
Iphone
130
System Requirements
130
Prerequisites
131
Connecting to Your System Using Digi Summit
131
Digi Summit Interface
133
Using Remote Playback Mode on Iphone
135
Viewing Screenshots
137
Viewing Manual Recordings
137
Using Device Manager to Manage Dvr's
138
Ipad
139
System Requirements
139
Prerequisites
139
Connecting to Your System Using Digi Summithd
139
Digi Summit Interface
141
Using Remote Playback Mode on Ipad
142
Viewing Screenshots
144
Viewing Manual Recordings
145
Using Device Manager to Manage Dvr's
146
Managing Favorites
147
Android
147
System Requirements
147
Prerequisites
147
Connecting to Your System Using Digi Summit
147
Digi Summit Interface
149
Using Remote Playback Mode on Android
151
Viewing Screenshots
153
Viewing Manual Recordings
154
Using Device Manager to Manage Dvr's
154
Appendix A: System Specifications
156
Appendix B: Connecting a PTZ Camera
159
Configuring PTZ Settings
159
Using the PTZ Menu (Local DVR)
160
PTZ Presets and PTZ Cruise
161
Setting PTZ Presets
161
Selecting PTZ Presets
161
Deleting PTZ Presets
161
Starting / Stopping PTZ Cruise
161
Appendix C: Connecting Additional External Monitors
162
Customizing the Channel Arrangement on the External Monitor
162
Main and Spot Video Outputs (D3316/D3332 Only)
164
Configuring the Spot Monitor for Full-Screen or Split-Screen
164
Appendix D: Recording Audio
166
Appendix E: Replacing the Hard Drive
167
Removing the Hard Drive
167
Installing the Hard Drive
168
Installing Hard Drives (D3332)
170
Formatting the Hard Drive
173
Troubleshooting
174
Troubleshooting Remote Connections
176
Need Help
177
Advertisement
Related Products
FLIR D3300 Series
FLIR D3200 Series
FLIR D3304
FLIR D3308
FLIR D3316
FLIR D3216
FLIR D3312
FLIR Digimerge D33084T
FLIR DNR7166
FLIR Lorex DV700FS Series
FLIR Categories
Thermal cameras
Security Camera
Measuring Instruments
Digital Camera
IP Camera
More FLIR Manuals
Login
Sign In
OR
Sign in with Facebook
Sign in with Google
Upload manual
Upload from disk
Upload from URL