Sign In
Upload
Manuals
Brands
Brother Manuals
Sewing Machine
HL-L8350CDWT
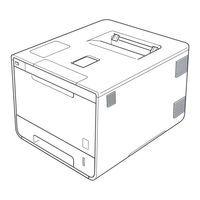
Brother HL-L8350CDWT Manuals
Manuals and User Guides for Brother HL-L8350CDWT. We have
6
Brother HL-L8350CDWT manuals available for free PDF download: Technical Reference Manual, Service Manual, Operation Manual, User Manual, Quick Start Manual, Quick Setup Manual
Brother HL-L8350CDWT Technical Reference Manual (517 pages)
Brand:
Brother
| Category:
Printer
| Size: 2.26 MB
Table of Contents
Table of Contents
5
About the Manual
16
Chapter 1 Introduction
17
About the Manual
17
Areas of Use
18
Font Development
19
Chapter 2 Pcl
21
Command List
21
Introduction
22
Command List
26
Introduction
29
Controlling the Printer
30
Control Codes
30
Escape Sequences
31
Line Termination
31
Display Functions Mode
32
End-Of-Line Wrap
32
Environments
33
Factory Default Environment
33
Macro Overlay Environment
33
Modified Print Environment
33
User Default Environment
33
Job Control
34
Commands
34
Page Size
34
Media Type Selection
39
Output Tray
40
Paper Source
41
Left Long-Edge Offset Registration
45
Top Offset Registration
45
Job Separation Command
46
Paper Side Selection
46
Reset
46
Simplex/Duplex Printing
46
Change Emulation Mode
48
Exit Current Emulation Mode
48
Printer Self Test
48
Reset to Factory Default Settings
48
Reset to User Settings
48
The Page
50
HP-GL/2 Graphics Window
50
Logical Page
50
Physical Page
50
Printable Area
50
Text Area
50
Portrait
51
Landscape
53
Coordinates
55
Setting the Left and Right Margins
55
Unit of Measure
55
Units
55
Resetting the Horizontal Margins
56
Setting the Top Margin
56
Setting the Horizontal Motion Index (HMI)
57
Setting the Vertical Motion Index (VMI)
57
Setting Line Spacing
58
Text Length
58
Page Length
59
Perforation Skip
59
Positioning the Cursor
60
Vertical Positioning
60
Horizontal Position
61
Positioning the Cursor Using Control Codes
62
Using the Cursor Position Stack
62
Half Line Feed
63
Logical
63
Text Direction
63
Using Fonts
65
Introduction
65
Bitmap Fonts
65
Font Types
65
Scalable Fonts
65
Bound Fonts
67
Card/Cartridge Fonts
67
Downloadable Fonts
67
Font Sources
67
Internal Fonts
67
Primary and Secondary Fonts
67
Specifying the Primary Font
67
Specifying the Secondary Font
67
Unbound Fonts
67
Selecting the Default Fonts
68
Switching between the Primary and Secondary Fonts
68
Criteria for Font Selection
69
Height
69
Pitch
69
Style
69
Symbol Collections
69
Symbol Set
69
Type of Character Spacing
69
Stroke Weight
70
Typeface
70
Font Selection Commands
71
Define Symbol Set
71
Symbol Set ID Code Command
71
User-Defined Symbol Sets
71
Selecting the Symbol Set
73
Symbol Set Control Command
73
Selecting the Pitch
75
Selecting the Type of Character Spacing
75
Scaling the Scalable Fonts Vertically or Horizontally
76
Selecting the Height
76
Selecting the Style
76
Selecting the Stroke Weight
77
Selecting the Typeface
77
Font Orientation
78
Esc&D#D (27)(38)(100)#(68) <1Bh><26H><64H>#<44H
79
Transparent Print Data
79
Downloadable Font Manipulation
80
Font ID
80
Operations on Downloaded Fonts
80
Selecting a Downloaded Font
80
Creating Downloadable Fonts
81
Downloading
81
Sending the Font Descriptor
81
Unicode Symbol Index Character Complement Bits
92
Sending a Character Code
93
Sending a Character Descriptor and Data
93
Using Graphics
99
Source, Pattern and Destination
99
Set Source Transparency
99
Set Pattern Transparency
100
Set Area Fill Identity
101
Set Pattern Reference Point
102
User-Defined Pattern Command
102
Set Pattern Type
103
User-Defined Pattern Control
103
Plotting Rectangles
105
Cursor Position
105
Draw Filled Rectangle
105
Set Rectangle Height
105
Set Rectangle Width
105
Raster Graphics
107
Positioning the Cursor
107
Set High Resolution Control
107
Set Raster Image Orientation
107
Set Raster Resolution
107
Set Compression Mode
108
Set Raster Area Height
108
Set Raster Area Width
108
Set Raster Y-Offset
108
Compress Transfer Graphics
114
End Raster Transfer
114
Send Raster Data
114
Start Raster Transfer
114
Horizontal 1200-Dpi Image Format Mode (Raster Graphic Mode 1027)
116
Vector Graphics
118
Enter HP-GL/2 Mode
118
The Picture Frame
119
Set Picture Frame Anchor Point
119
Set Picture Frame Horizontal Size
119
Set Picture Frame Vertical Size
119
Specify Horizontal Plot Size
119
Specify Vertical Plot Size
119
The Default Picture Frame
119
Macros
120
The Purpose of a Macro
120
Macro ID
120
Defining a Macro
121
End Macro Definition
121
Running a Macro
122
Call Macro
122
Disable Macro for Overlay
122
Enable Macro for Overlay
122
Execute Macro
122
Handling Macros
123
Delete All Macros
123
Delete All Macros from the Storage Device
123
Delete All Temporary Macros
123
Delete Macro
123
Delete Macro from the Storage Device
123
Make Macro Permanent
123
Make Macro Temporary
123
Save Macro into the Storage Device
123
Appletalk Configuration
124
Execute Data
124
MIO Video I/O Port Control
125
Status Readback
126
Introduction
126
Memory Status Request
126
Entity Status
126
Status Response
126
Status Response Syntax
127
Set Status Readback Location Type
127
Set Status Readback Location Unit
127
Entity Status Response
128
Font Response
128
Inquire Status Readback Entity
128
Bitmap Fonts
129
Bound Scalable Fonts
129
Download Fonts
129
Location Type 1 (Currently Selected) Font
129
Unbound Scalable Fonts
129
Font Extended Response
130
Macro Response
131
Use-Defined Pattern Response
131
Symbol Set Response
131
Entity Error Codes
132
Free Space Command
132
Echo Command
133
Index
134
Flush All Pages Command
133
Font Cache
133
Memory Error Response
133
Memory Status Response
133
Chapter 3 Pcl5C
138
Chapter 5 Pjl Printer Job Language
138
Introduction
138
Introduction
139
Color Modes
140
Using Simple Color Mode - Set Simple Color
140
Using PCL Color Mode - Set PCL Color Setting
141
Using HP-GL/2 Color Mode
145
Color Palettes
146
Set Color to Palette
146
Push/Pop Palette
147
Select Color
147
Color Graphics
148
Set Destination Raster Height
148
Set Destination Raster Width
148
Start Raster Transfer
148
Enter HP-GL/2 Mode
149
Send Raster Data by Plane
149
Set Scale Algorithm
149
Enhance Output
150
Set Monochrome Mode
150
Set Render Algorithm
150
Download Dither Matrix
151
Set Gamma Correction
151
User-Defined Pattern Command
151
IN (Initialize Set Instruction) Command
152
PC (Pen Color) Command
152
Chapter 2 Pcl Printer Control Language
152
Hp-Gl/2
152
NP (Number of Pens) Command
153
CR (Color Range) Command
153
Index
154
Chapter 4 Hp-Gl/2
156
Introduction
156
Command List
158
Introduction
160
Terminology
161
Picture Frame
161
Anchor Point
161
Graphics Window
161
Hard Clip Limits
161
Soft Clip Limits
161
Graphics Units
161
User Units
161
Current Units
161
Pens
161
Absolute and Relative Plotting
162
Fills
162
Command Syntax
163
Mnemonic
163
Parameters
163
Separators
163
Terminator
163
The Hp-Gl Graphics Window
164
Units
164
The Scaling Points P1 and P2
164
Scaling
164
Transformation
164
Preparing to Print Graphic Images
165
Setting up the Graphics Window
165
Using Existing Image Plots
165
Printing an Image
165
Entering HP-GL/2 Mode
165
Quitting HP-GL/2 Mode
165
Commands
166
Initialize Commands
166
Plot Area and Unit Setting Instructions
168
Pen Control and Plot Instructions
172
The Polygon Group
179
Plot Function Instructions
184
Index
185
Character Plot Instructions
192
Introduction
193
Index
206
Chapter 5 Pjl
209
Introduction
211
About PJL
211
In Case of Using PJL with a Non-PJL Printer
212
Other Printer Languages
212
PCL Jobs
212
Postscript Jobs
212
PJL Syntax and Format
213
Alphanumeric Variables
214
Invalid Commands
214
Numeric Variables
214
Strings
214
Syntax Errors
214
Syntax Warning and Semantic Warning
214
Variables
214
How to Use Pjl
215
Overview
215
PJL Job Requirement
215
Command Group
216
Kernel Commands
217
EXECUTE Command
217
Introduction
217
UEL Command
217
COMMENT Command
218
ENTER Command
218
Context Switching
219
Explicit Switching
219
Implicit Switching
219
Printer Language Switching
219
Job Separation Commands
220
Introduction
220
JOB Command
220
EOJ Command
221
Environment Commands
222
Introduction
222
Print Environment
222
PJL Reset Conditions
223
Remember These Points about Environments
223
L5102Dw/L5100Dn(T)/5590Dn/L5200Dw(T)/L5202Dw/L6200Dw(T)/L6202Dw/L6250Dn/L6250Dw/L6300 Dw(T)/L6400Dw(T)/L6402Dw
225
Variables
225
1660E/2060/2400C/2400Ce/3400Cn/2600Cn/3450Cn/2700Cn/4040Cn/4050Cdn/4070Cdw/3040Cn/3045 CN/3070CW/3075CW
256
Default Command
261
Initialize Command
261
Reset Command
262
Set Command
262
Status Readback Commands
264
Basic Format of Status Readback Responses
264
Introduction
264
Synchronization with the Printer
264
Inquire Command
265
DINQUIRE Command
266
ECHO Command
267
INFO Command
268
CONFIG Category
270
ID Category
270
MEMORY Category
272
STATUS Category
273
VARIABLES Category
273
USTATUS Category
275
USTATUS Command
276
Device Variable
277
JOB Variables
278
PAGE Variable
279
TIMED Variable
279
JOB Recovery
280
USTATUSOFF Command
280
Device Attendance Commands
281
Introduction
281
RDYMSG Command
281
OPMSG Command
282
STMSG Command
282
Index
284
Chapter 6 Epson Fx
285
Chapter 6 Epson Fx-850
286
Command List
287
Introduction
289
Emulation Details
290
Ignored Commands
290
Resolution
290
Terminology
291
Conventions
291
Syntax
291
Control Codes
292
Escape Sequence
292
The Control Panel
292
Commands
293
Basic Printer Operations
293
Page Set up
297
Line Spacing
299
Using Tabs
300
Using Standard Characters
301
Using Customized Characters
307
Index
312
Chapter 7 Ibm Proprinter Xl
313
Chapter 7 Ibm Proprinter Xl
314
Command List
314
Command List
315
Introduction
317
Emulation Details
318
Character Set Selection
318
Control Codes
318
Controlling the Printer
318
Escape Sequences
318
Ignored Commands
318
Resolution
318
Notation Used in this Emulation Description
319
Data Conventions
319
Syntax
319
Commands
320
Basic Printer Operation
320
Page Format
323
Index
333
Chapter 8 Bar Code Control
334
Chapter 8 Bar Code Control
335
Chapter 4 Hp-Gl/2 Graphics Language
335
Introduction
335
Introduction
336
Print Bar Codes or Expanded Characters
337
Bar Code Mode
338
Bar Code Style, Expanded Character Shading, Line Block Drawing & Box Drawing Shading
338
Definition of Parameters
338
Bar Code Human Readable Line on or off
340
Bar Code Scaling (Width Only)
340
Bar Code, Expanded Character Unit, Line Block Drawing & Box Drawing Units
340
Quiet Zone
340
Bar Code & Expanded Character Offset in the Y-Axis
341
Bar Code, Expanded Character, Line, Block Drawing & Box Drawing Height
341
Bar Code, Expanded Character, Line, Block Drawing & Box Drawing Offset in the X-Axis
341
Expanded Character Rotation
341
Expanded Character, Line Block Drawing & Box Drawing Width
341
Bar Code Data Start
342
Box Drawing
343
Expanded Character Data Start
343
Line Block Drawing
343
Table of Code(EAN) 128 Set C
344
Example Program Listings
345
Chapter 9 Hp-Gl Graphics Language
346
Chapter 9 Hp-Gl
347
Command List
347
Command List
348
Introduction
349
Coordinate System
349
Coordinate System and Printing Area
349
Font Selection
349
HP-GL Syntax
349
Printing Area
350
Commands
351
Initialization and Default Setting Instructions
351
Plot Area and Unit Setting Instructions
352
Pen Control and Plot Instructions
353
The Polygon Group
358
Plot Function Instructions
363
Character Plot Instructions
365
Dual Context Extensions
371
Index
372
Chapter 10 Carbon Copy Function
373
Chapter 10 Carbon Copy Function
374
Outline
375
Outline of the Function
375
Specifications
376
Explanation of each Function
376
Additional Macro Setting
376
Carbon Copy Mode Setting
376
Paper Tray Selection Setting
376
Setting of the Number of Copies
376
How to Set each Function
377
Setting on the Control Panel
377
Setting on the Control Panel
378
Setting with the PJL Command
379
Setting with the PJL Command
380
Example
381
Setting on the Control Panel
381
Setting with the PJL Command
381
Detailed Information
382
Details on the Specifications
382
About the Duplex Setting
382
About the Reprint Function
382
About the Spool Data
382
About the USER DEFINED SIZE Paper
382
About Tray Selection
382
Usable Emulation
382
Limited Items
382
About the Page Break of the Print Data
382
Appendix A Comparison List
383
Appendix A Comparison List
384
Pcl5 (Paper Size)
385
(Tray: if Pjl Traycommand Is Special.)
394
Pcl5(Others)
397
Typeface Selection (PCL)
411
Ibm Proprinter Xl
417
Bar Code
419
Hp-Gl
420
Pjl
422
General PJL Environment Variables
428
Appendix B Flash/Pcmcia Card Commands
472
Table of Contents
473
Introduction
474
How to Read the Card Commands Specification
475
Commands
475
Available Devices
475
Description
475
Error
475
Commands
476
Select Storage Device Command
476
(For HL-2060/2400C/2400Ce/3400Cn/2460/3260N/7050/2600Cn/3450Cn/6050/6050D/ 6050DN Only)
476
Format Command
477
Logical Format
477
Physical Format
477
Save Data Command
478
Save Specified Type
478
Data
479
Execute Data
479
Save Data
479
Font
480
Save Primary Font
480
Save Secondary Font
480
Delete All Download Fonts
481
Delete Download Font with Specified ID
481
Save Download Font with Specified ID
482
Macro
483
Delete All Macros
483
Delete Macro with Specified ID
483
Save Image (Fixed Printing Location)
484
Save Macro with Specified ID
484
Save Image (Printing Location Not Fixed)
485
Copy Card (for HL-1660E/2060/2400C/2400Ce/3400Cn/2460/3260N/7050/2600Cn/ 3450CN Only)
486
Use Card Commands from Pcl
487
Execute Macros
487
Use Download Fonts
488
Use Card Commands from Postscript
489
Appendix Chbp Mode Commands
490
Advertisement
Show specifications
General
Type
printer
Color
white
Paper
Tray Capacity
750
Paper Size
letter, legal, executive, folio, a4, a5, b6
Paper Handling
letter, legal, executive, folio, a4, a5, b6
Print
Color Print Speed
32 pages per minute
Mono Print Speed
32 pages per minute
Print Resolution Mono
up to 2400 x 600
Print Resolution Color
up to 2400 x 600
Maximum Number of Pages Per Month
up to 60,000
Ink and Cartridges
Cartridges
tn331bk/tn331c/tn331m/tn331y
Number Of Cartridges
4
Memory
Internal Memory
yes
Memory Card
no
Wireless Connectivity
Network
wired, wireless
Connectivity
usb
OS Compatibility
none
Smart Technologies
Mobile Devices Connection
no
Dimensions
Height
16.1 inches
Width
19.5 inches
Net Weight
61.4 pounds
Brother HL-L8350CDWT Operation Manual (280 pages)
Embroidery Machine
Brand:
Brother
| Category:
Sewing Machine
| Size: 21.35 MB
Table of Contents
Introduction
3
Important Safety Instructions
3
License Agreement
8
Warning Labels
9
Machine Structure and Features
10
Six-Needle Machine Embroidering
10
Differences with Single-Needle Machines
11
Other Features
12
Available Features
13
Manual Structure
14
Read before Use
14
Read When Additional Information Is Required
14
Searching for Information
14
Table of Contents
15
Getting Ready
21
Names of Machine Parts and Their Functions
22
Front View
22
Right-Side/Rear View
23
Operation Panel
23
Accessories
24
Included Accessories
24
Optional Accessories
25
Setting up the Machine
26
Setup and Transporting Precautions
26
Setup Location
27
Setting up the Machine
28
Adjusting the Operation Panel Position
29
Preparing the Thread Guide Assembly
30
Positioning the Spool Stand
31
Attaching the Embroidery Frame Holder
31
Embroidering Tutorial
33
Operating Precautions
34
Power Supply Precautions
34
Needle Precautions
35
Checking the Needle
35
Bobbin Precautions
35
Upper Thread Recommendations
36
Fabric Recommendations
36
Display Recommendations
36
Basic Procedures
37
Installing the Bobbin
38
Removing the Bobbin Case
38
Installing the Bobbin Case
39
Turning on the Machine
40
Understanding the Screens
41
Screen Overview
42
Selecting an Embroidery Pattern
44
Selecting an Embroidery Pattern
45
Editing the Embroidery Pattern
46
Continuing to the Embroidering Settings Screen
46
Specifying Embroidering Setting
47
Previewing the Image
48
Checking a Preview Image
48
Hooping the Fabric in the Embroidery Frame
49
Attaching the Embroidery Frame to the Machine
51
Attaching the Embroidery Frame
51
Checking the Embroidery Area
53
Temporarily Stopping to Check the Area
53
Continuing to the Embroidering Screen
54
10. Upper Threading
55
Checking the Needle Bars and Thread Colors
55
Upper Threading
57
Threading the Needle
61
11. Sewing the Embroidery
65
Starting Embroidering
65
Stopping Embroidering
67
12. Checking the Thread Tension
69
13. Removing the Embroidery Frame and Fabric
70
Removing the Embroidery Frame
70
Removing the Fabric
70
14. Turning off the Machine
71
Screen Quick Reference Guide
72
Key Displays
72
Common Screen Controls
72
Understanding the Pattern Type Selection Screen
73
Understanding the Pattern List Screen
74
Understanding the Pattern Editing Screen
75
Understanding the Embroidering Settings Screen
77
Understanding the Embroidering Screen
79
When You Have a Question, this May Help You
81
Technical Terms
81
Patterns
81
Embroidering
81
USB Connectivity
82
Other Basic Procedures
87
Changing the Needle
88
Replacing the Needle
88
Correctly Using the Embroidery Frames
90
Embroidery Frame Types and Applications
90
Attaching Iron-On Stabilizer (Backing) to Fabric
92
Hooping the Fabric
93
Hooping the Fabric in the Extra-Large and Large Embroidery Frames
93
Using the Embroidery Sheet
94
Large/Small Pieces of Fabric
95
Embroidery Frame Position and Movement
96
Changing the Embroidering Position
98
Adjusting the Angle
99
Switching the Thread Colors on the Screen
102
Embroidering a Pattern Containing Seven or more Colors
103
Checking if Thread Spool Changes Are Necessary
103
Changing the Thread Spools with Designs of Seven or more Colors
105
Change Thread Spools Message
105
Easily Changing the Thread Spools
106
If the Thread Breaks or the Bobbin Thread Runs out While Embroidering
107
If the Upper Thread Breaks
107
If the Bobbin Thread Breaks or Runs out
108
Embroidering from the Beginning or Middle of the Pattern
110
Resume Embroidering after Turning off the Machine
112
Adjusting the Thread Tension
114
Adjusting the Tension of the Bobbin Thread
114
Adjusting the Tension of the Upper Thread
115
Embroidering Settings
117
Basting Embroidery
118
Creating an Appliqué Piece
119
Using a Frame Pattern for the Outline
122
Automatic Lock Stitch Setting
124
Starting/Ending Position Settings
125
Repeatedly Sewing a Pattern Along a Diagonal
126
Embroidering Linked Characters
127
Maximum Sewing Speed Setting
129
Setting the Machine to Stop at Color Changes
130
Stopping the Machine at the Next Color Change
130
Specifying Pause Locations before Embroidering
130
Temporary Needle Bar Setting
132
Uninterrupted Embroidering (Using a Single Color)
133
Reserved Needle Bar Settings
134
Selecting/Editing/Saving Patterns
137
Precautions
138
Concerning Embroidery Data
138
Concerning Optional Embroidery Cards
140
Concerning USB Media
141
Selecting an Embroidery Pattern
142
General Pattern Selection
142
Embroidery Patterns
143
Frame Patterns
143
Monogram and Frame Designs
144
Alphabet Patterns
147
Floral Alphabet Patterns
150
Renaissance Alphabet Patterns
151
Appliqué Alphabet
152
Greek Alphabet Patterns
153
Embroidery Patterns Stored in the Machine Memory
153
Embroidery Cards (Optional)
154
Computer (USB)
158
USB Media
162
Editing the Embroidery Pattern (Pattern Editing Screen)
164
Combining Patterns
164
Selecting the Pattern to be Edited
165
Moving a Pattern
165
Flipping a Pattern Horizontally
166
Changing the Size of a Pattern
166
Rotating a Pattern
168
Changing the Text Arrangement of a Character
169
Changing the Character Spacing
169
Separating Combined Character Patterns
170
Trimming the Threads between Characters
171
Changing the Thread Density (Only for some Character and Frame Patterns)
172
Specifying Multi-Color Text
172
Changing the Colors of the Pattern
173
Designing Repeated Patterns
174
Creating a Custom Thread Table
178
Choosing a Color from the Custom Thread Table
181
Duplicating a Pattern
182
Deleting a Pattern
182
Editing the Embroidery Pattern (Embroidering Settings Screen)
183
Rotating the Entire Pattern
183
Editing a Combined Pattern
184
Saving Embroidery Patterns
189
Machine's Memory
189
If the Embroidery Pattern Cannot be Saved
189
USB Media
191
Computer (USB)
192
Basic Settings and Help Feature
195
Using the Settings Key
196
Understanding the Settings Screen
196
Changing the Display Guides
198
Changing the Thread Color Information
199
Specifying the Thumbnail Size
200
Changing the Background Colors of the Embroidery Patterns or Thumbnails
201
Specifying Jumpstitch Trimming / "DST" Jump Codes for Trimming
201
Deleting Short Stitches
203
Specifying the Remaining Length of Thread
203
Changing the Screen Saver Settings
203
Turning "ON" or "OFF" the Sewing Light
205
Changing the Speaker Volume
206
Specifying Thread Sensor
206
Changing the Pointer Shape When a USB Mouse Is Used
207
Changing the Units of Measurements
207
Changing the Language
207
Using the Machine Operations Guide Key
208
Appendix
211
Appliqué Sewing
212
Sewing Appliqué Patterns
212
Using a Frame Pattern to Create Appliqués (1)
213
Using a Frame Pattern to Create Appliqués (2)
214
Sewing Large-Size (Split) Embroidery Patterns
216
Helpful Tips for the Operation of the Machine
219
Checking the Thread Tension of Built-In Patterns
219
Sewing a Pattern Aligned with a Mark on the Fabric
220
The Pattern
221
Color Thread Table
222
Colors of Tajima (.Dst) Embroidery Data
222
Creating Beautiful Embroidery
223
Threads
223
Stabilizers (Backing)
223
Hooping Techniques
224
Fabric/Stabilizer Compatibility Chart
225
Optional Accessories
226
Attaching an Optional Embroidery Frame for Industrial Embroidery Machines
226
Using the Optional Cap Frame
227
Cap Frame and Its Accessories
227
Types of Caps
228
Fabric Precautions
229
Preparing to Use the Cap Frame
229
Attaching the Cap Frame
234
Installing the Embroidery Frame Holder
239
Additional Digitizing Information
240
Using the Optional Bobbin Winder
242
Precautions
242
Optional Bobbin Winder and Its Accessories
242
Setting up the Optional Bobbin Winder
243
Connecting the AC Adapter
243
Winding the Bobbin
244
Maintenance
247
Cleaning the LCD
247
Cleaning the Machine Surface
247
Cleaning the Hook
247
Cleaning Around the Needle Plate
248
Cleaning the Bobbin Case
249
Cleaning the Thread Paths of the Upper Threads
250
Oiling the Machine
252
About the Maintenance Message
253
Troubleshooting
254
On-Screen Troubleshooting
254
Troubleshooting
255
Error Messages
263
Usb Media
268
If the Machine Does Not Respond When a Key Is Pressed
271
Specifications
272
Embroidery Machine Specifications
272
Upgrading Your Machine's Software
273
Upgrade Procedure Using USB Media
273
Upgrade Procedure Using Computer
274
Index
275
Brother HL-L8350CDWT Service Manual (391 pages)
Color Laser Printer
Brand:
Brother
| Category:
Printer
| Size: 20.33 MB
Table of Contents
Table of Contents
4
Safety Information
11
General
16
Network Connectivity
18
Service Information
18
Supplies
19
Chapter 2 Error Indication and Troubleshooting
21
Introduction
21
Precautions
21
Checks before Commencing Troubleshooting
23
Overview
25
Cross-Section Drawing
25
Paper Feeding
26
Operation of each Part
27
Block Diagram
28
Main Components
29
Error Indications
30
Error Codes
30
Error Message
41
Troubleshooting
61
Error Cause and Remedy
61
Troubleshooting for Paper Feeding Problems
105
No Paper Feeding from Paper Tray 1
105
No Paper Feeding from the LT Paper Tray Unit
106
No Paper Feeding from MP Tray
107
Multiple Sheets of Paper Are Fed
108
Paper Becomes Wrinkled
108
Paper Is Fed at an Angle
108
Paper Curls
109
Advertisement
Brother HL-L8350CDWT User Manual (223 pages)
Brand:
Brother
| Category:
Printer
| Size: 14.91 MB
Table of Contents
Symbols and Conventions Used in the Documentation
3
Using the Documentation
3
Accessing Brother Utilities (Windows)
4
Table of Contents
5
1 Printing Methods
8
About this Machine
8
Front View and Back View
8
Acceptable Paper and Other Print Media
9
Recommended Paper and Print Media
9
Paper Type and Size
9
Handling and Using Special Paper
11
Unprintable Area When Printing from a Computer
14
Loading Paper
15
Loading Paper and Print Media
15
Loading Paper in the Standard Paper Tray and the Optional Lower Tray
15
Loading Paper in the Multi-Purpose Tray (MP Tray)
19
2 Sided Printing
27
Guidelines for Printing on both Sides of the Paper
27
Automatic 2-Sided Printing
28
Manual 2-Sided Printing
30
Printing from a USB Flash Drive or Digital Camera Supporting Mass Storage
31
Creating a PRN File for Direct Printing
32
Printing Directly from the USB Flash Drive or Digital Camera Supporting Mass Storage
33
Output Color
34
Paper Size
34
Driver and Software
36
Printer Driver
36
Printing a Document
37
Printer Driver Settings
38
Windows
39
Accessing the Printer Driver Settings
39
Features in the Windows Printer Driver
40
Basic Tab
40
Print Quality
42
Settings Dialog Box
43
Print Preview
47
Advanced Tab
48
Watermark Settings
49
User Authentication
53
Color Calibration
54
Print Profiles Tab
57
Device Settings Tab
59
Support
60
BR-Script 3 Printer Driver Features (Postscript 3™ Language Emulation)
62
Advanced Options
65
Uninstalling the Printer Driver
70
Status Monitor
71
Troubleshooting
72
Macintosh
73
Features in the Printer Driver (Macintosh)
73
Choosing Page Setup Options
73
Choosing Printing Options
75
Color Settings
81
Features in the BR-Script3 Printer Driver (Postscript 3™ Language Emulation)
83
Printer Features
84
Removing the Printer Driver
88
Status Monitor
89
Software
91
Software for Networks
91
3 General Information
92
Control Panel
92
Control Panel Overview
92
LED Indications
94
Machine Status Messages
94
Settings Table
95
Drum Unit
97
General Setup
99
Network Reset
103
Wired Status
103
Color Correction
108
Entering Text for Wireless Settings
110
Printing Secure Documents
111
Secure Documents
111
How to Print Secure Documents
111
Security Features
112
Setting Lock
112
Secure Function Lock 3.0
113
Ipsec
114
Ecology Features
115
Toner Save
115
Sleep Time
115
Deep Sleep Mode
115
Auto Power off
116
Quiet Mode Feature
117
Turning Quiet Mode On/Off
117
Color Correction
118
Color Calibration
118
Color Registration
119
Auto Correction
119
4 Options
120
Lower Tray (LT-320CL)
121
So-DIMM
122
SO-DIMM Types
122
Installing Extra Memory
123
5 Routine Maintenance
125
Replacing Supplies
125
Replacing the Toner Cartridges
129
Replacing the Drum Unit
135
Replacing the Belt Unit
142
Resetting the Belt Counter
147
Replacing the Waste Toner Box
148
Cleaning and Checking the Machine
155
Cleaning the Outside of the Machine
155
Cleaning the Inside of the Machine
157
Cleaning the Corona Wires
161
Cleaning the Drum Unit
164
Cleaning the Paper Pick-Up Roller
171
Replacing Periodic Maintenance Parts
172
Packing and Shipping the Machine
173
6 Troubleshooting
177
Identifying the Problem
177
Error and Maintenance Messages
178
Jam 2-Sided
179
Jam Inside
179
Paper Jams
183
If You Are Having Difficulty with Your Machine
195
Improving the Print Quality
199
Machine Information
207
Checking the Serial Number
207
Default Settings
207
Brother HL-L8350CDWT Quick Start Manual (7 pages)
How to Replace the Drum Unit
Brand:
Brother
| Category:
All in One Printer
| Size: 5.47 MB
Brother HL-L8350CDWT Quick Setup Manual (2 pages)
Brand:
Brother
| Category:
All in One Printer
| Size: 2.23 MB
Advertisement
Related Products
Brother HE-240
Brother HS-3000
Brother HE-8000
Brother HS-2000
Brother HE-120PKG
Brother HM-8180
Brother HAK 100
Brother Homelock 1034D
Brother HL-L8350CDW
Brother HL-L8360CDW
Brother Categories
Sewing Machine
All in One Printer
Printer
Label Maker
Fax Machine
More Brother Manuals
Login
Sign In
OR
Sign in with Facebook
Sign in with Google
Upload manual
Upload from disk
Upload from URL