Sign In
Upload
Manuals
Brands
3ware Manuals
Computer Hardware
9590SE Series
3ware 9590SE Series Manuals
Manuals and User Guides for 3ware 9590SE Series. We have
8
3ware 9590SE Series manuals available for free PDF download: User Manual, Manual, Cli Manual, Quick Install Manual, User Manual Addendum
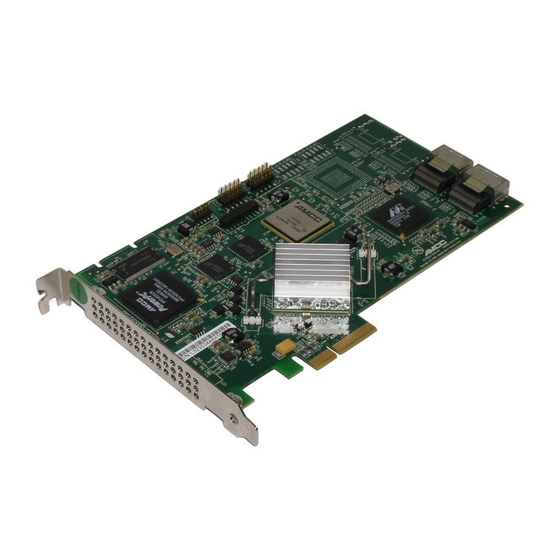
3ware 9590SE Series User Manual (302 pages)
Serial ATA RAID Controller
Brand:
3ware
| Category:
Computer Hardware
| Size: 8 MB
Table of Contents
Table of Contents
3
About this User Guide
7
How this User Guide Is Organized
7
Conventions
9
Screenshots
9
Using the 3Ware HTML Bookshelf
9
Chapter 1. Introducing the 3Ware® SATA RAID Controller
11
What's New with 9650SE Models
11
System Requirements
12
Drive Requirements
13
Operating System
13
Understanding RAID Concepts and Levels
14
RAID Concepts
14
Available RAID Configurations
15
Determining What RAID Level to Use
21
3Ware Tools for Configuration and Management
23
Monitoring, Maintenance, and Troubleshooting Features
24
Chapter 2. Getting Started with Your 3Ware RAID Controller
26
Chapter 3. First-Time RAID Configuration Using 3BM
30
Basic Steps for Creating a Unit
30
Specifying a Hot Spare
38
Leaving Individual Drives as Jbods
38
Checking the Motherboard Boot Sequence
39
What Next
39
Chapter 4. Driver Installation
40
Driver Installation under Windows
41
Materials Required
41
Creating a 3Ware Driver Diskette
42
Installing the 3Ware Driver and Windows on a New Unit
42
Installing the Driver on a System that Boots from a Different Device
43
Making Units Managed by a 3Ware Controller Available to Windows
48
Driver Installation under Linux
49
Obtaining 3Ware Linux Drivers
50
Driver Installation under Red hat Linux or Fedora Core 5
51
Driver Installation under Suse Linux
57
Compiling a 3Ware Driver for Linux
60
Driver Installation under Freebsd
60
Obtaining 3Ware Freebsd Drivers
61
Installing the Driver under Freebsd
61
Chapter 5. 3Ware BIOS Manager 2 (3BM 2) Introduction
67
Starting 3BM 2
67
Exiting the 3BM Configuration Utility
69
Working in the 3BM Screens
70
Adjusting BIOS Loading Settings
73
Displaying Controller Information
75
Getting Help While Using 3BM
75
Chapter 6. 3DM 2 (3Ware Disk Manager) Introduction
76
Browser Requirements for 3DM
77
Installing 3DM
78
Starting 3DM and Logging in
78
Logging in to the 3DM Web Application
78
Starting the 3DM Daemon under Linux and Freebsd
80
Starting the 3DM Process under Microsoft Windows
80
Viewing 3DM Remotely Using a Web Browser
81
Working with the 3DM Screens
81
3DM Menus
82
Viewing Information about Different Controllers
84
Refreshing the Screen
84
3DM Screens and What They're Used for
84
Setting up 3DM Preferences
86
Setting and Changing 3DM Passwords
87
Managing E-Mail Event Notification
87
Enabling and Disabling Remote Access
88
Setting the Incoming Port
89
Setting the Frequency of Page Refreshes
89
Chapter 7 Configuring Your Controller
90
Viewing Information about a Controller
90
About Controller Policies
92
Viewing Controller Policies
93
Setting the Auto Rebuild Policy
95
Using Auto-Carving for Multi LUN Support
96
Setting the Size of Volumes Created with Auto-Carving
98
Enabling and Setting up Staggered Spin-Up
99
Exporting JBOD Disks
100
Configuring Units
101
Chapter 8. Configuring Units
101
Configuring a New Unit
101
Configuration Options When Creating a Unit
102
Creating a Unit through 3DM
104
Boot Volume Size
104
Creating a Unit through 3BM
107
Ordering Units in 3BM
110
Partitioning, Formatting, and Mounting Units
111
Creating a Hot Spare
113
Specifying a Hot Spare through 3DM
114
Specifying a Hot Spare through 3BM
114
Naming a Unit
115
Setting Unit Policies
116
Enabling and Disabling the Unit Write Cache
118
Setting Auto Verify for a Unit
119
Setting Continue on Source Error During Rebuild
120
Enabling and Disabling Queuing for a Unit
121
Setting the Storsave Profile for a Unit
122
Changing an Existing Configuration by Migrating
125
RAID Level Migration (RLM) Overview
126
Changing RAID Level
127
Expanding Unit Capacity
128
Informing the Operating System of Changed Configuration
129
Deleting a Unit
130
Deleting a Unit through 3DM
131
Deleting a Unit through 3BM
132
Removing a Unit
133
Removing a Unit through 3DM
134
Removing a Unit through 3BM
135
Moving a Unit from One Controller to Another
136
Moving Units from an 8000 Controller to a 9000 Controller
136
Moving Legacy JBOD Units to a 9000 Controller
137
Moving Units from a 9500S to a 9550SX, 9590SE, or 9650SE Controller
138
Adding a Drive
139
Removing a Drive
140
Rescanning the Controller
141
Maintaining Units
143
Chapter 9. Maintaining Units
143
Checking Unit and Drive Status through 3DM
143
Enclosure LED Status Indicators
145
Unit Statuses
145
Drive Statuses
147
About Degraded Units
147
About Inoperable Units
148
Alarms, Errors, and Other Events
148
Viewing Alarms, Errors, and Other Events
148
Using the Alert Utility under Windows
149
Downloading an Error Log
151
Viewing SMART Data about a Drive
151
Background Tasks
152
About Initialization
153
About Verification
156
Starting a Verify Manually
158
Rebuilding Units
160
Cancelling a Rebuild and Restarting It with a Different Drive
164
Setting Background Task Rate
165
Background Task Prioritization
166
Scheduling Background Tasks
166
Viewing Current Task Schedules
167
Turning on or off Use of a Task Schedule
168
Removing a Task Schedule
169
Adding a New Task Schedule Slot
169
Selecting Self-Tests to be Performed
170
Locating a Drive by Blinking Its LED
171
Chapter 10. Maintaining Your Controller
173
Determining the Current Version of Your 3Ware Driver
173
Updating the Firmware and Driver
174
Downloading the Driver and Firmware
175
Updating the Firmware through 3DM 2
176
Updating the 3Ware Driver and Firmware under Windows
177
Using the Update Utility with Multiple Controllers
181
Updating the 3Ware Driver under Windows XP
182
Updating the 3Ware Driver under Red hat or Fedora Core
188
Updating the 3Ware Driver under Suse
189
Updating the 3Ware Driver under Freebsd
191
Updating the Firmware under Linux and Freebsd
192
Viewing Battery Information
193
Testing Battery Capacity
193
Chapter 11. 3DM 2 Reference
196
Controller Summary Page
197
Controller Details Page
198
Unit Information Page
199
Unit Details Page
200
Drive Information Page
202
Drive Details Window
203
Controller Settings Page
205
Update Firmware
208
Scheduling Page
209
Maintenance Page
212
Unit Information
214
Drive Information
214
Alarms Page
220
Battery Backup Page
221
Enclosure Summary Page
223
Enclosure Details Page
224
3DM 2 Settings Page
225
Remote Access
227
Chapter 12. Troubleshooting
228
Web Resources
228
Before Contacting Customer Support
229
Basic Troubleshooting: Check this First
229
Command Logging
230
Problems and Solutions
230
Enclosure-Related Problems
231
Hardware Installation Problems
231
Software Installation Problems
232
Problems in 3DM and 3BM
233
Error and Notification Messages
234
Advertisement
3Ware 9590SE Series User Manual (272 pages)
Serial ATA RAID Controller
Brand:
3Ware
| Category:
Controller
| Size: 6 MB
Table of Contents
Table of Contents
3
About this User Guide
7
How this User Guide Is Organized
7
Conventions
9
Screenshots
9
Using the 3Ware HTML Bookshelf
9
Chapter 1. Introducing the 3Ware® SATA RAID Controller
11
What's New with 9650SE Models
11
System Requirements
12
Operating System
13
Other Requirements
13
Understanding RAID Concepts and Levels
13
RAID Concepts
14
Available RAID Configurations
15
Hot Spare
19
Determining What RAID Level to Use
20
Using Drive Capacity Efficiently
21
Support for over 2 Terabytes
22
3Ware Tools for Configuration and Management
22
Monitoring, Maintenance, and Troubleshooting Features
23
Chapter 2. Getting Started with Your 3Ware RAID Controller
26
Initial Settings for Policies and Background Tasks
28
Chapter 3. First-Time RAID Configuration Using 3BM
30
Basic Steps for Creating a Unit
30
Specifying a Hot Spare
38
Leaving Individual Drives as Jbods
38
Checking the Motherboard Boot Sequence
39
What Next
39
Chapter 4. Driver Installation
40
Driver Installation under Windows
41
Materials Required
41
Creating a 3Ware Driver Diskette
42
Installing the 3Ware Driver and Windows on a New Unit
42
Installing the Driver on a System that Boots from a Different Device
43
Making Units Managed by a 3Ware Controller Available to Windows
48
Driver Installation under Linux
49
Be Sure to Use the Correct Drivers
50
Obtaining 3Ware Linux Drivers
50
Creating a Red hat Linux Driver Diskette
51
Driver Installation under Red hat Linux or Fedora Core 5
51
Different Device
54
Creating a Suse Linux Driver Diskette
57
Driver Installation under Suse Linux
57
Compiling a 3Ware Driver for Linux
60
Driver Installation under Freebsd
60
Installing the Driver under Freebsd
61
Obtaining 3Ware Freebsd Drivers
61
Chapter 5. 3Ware BIOS Manager 2 (3BM 2) Introduction
67
Starting 3BM 2
67
Exiting the 3BM Configuration Utility
69
Working in the 3BM Screens
70
Adjusting BIOS Loading Settings
73
Displaying Controller Information
75
Getting Help While Using 3BM
75
3DM 2 (3Ware Disk Manager) Introduction
76
Browser Requirements for 3DM
77
Installing 3DM
77
Chapter 6. 3DM 2 (3Ware Disk Manager) Introduction
78
Installing 3DM on a Microsoft Windows System
78
Installing 3DM for Linux or Freebsd
81
Uninstalling 3DM under Microsoft Windows
81
Starting 3DM and Logging in
83
Logging in to the 3DM Web Application
84
Starting the 3DM Daemon under Linux and Freebsd
85
Starting the 3DM Process under Microsoft Windows
86
Viewing 3DM Remotely Using a Web Browser
86
Uninstalling 3DM under Linux or Freebsd
83
Working with the 3DM Screens
87
3DM Menus
88
3DM Screens and What They're Used for
89
Refreshing the Screen
89
Viewing Information about Different Controllers
89
Setting up 3DM Preferences
91
Managing E-Mail Event Notification
92
Setting and Changing 3DM Passwords
92
Enabling and Disabling Remote Access
93
Setting the Frequency of Page Refreshes
94
Setting the Incoming Port
94
Chapter 7 Configuring Your Controller
95
Viewing Information about a Controller
95
About Controller Policies
97
Viewing Controller Policies
99
Setting the Auto Rebuild Policy
100
Using Auto-Carving for Multi LUN Support
101
Setting the Size of Volumes Created with Auto-Carving
103
Enabling and Setting up Staggered Spin-Up
104
Exporting JBOD Disks
105
Chapter 8. Configuring Units
106
Configuring Units
106
Configuring a New Unit
106
Configuration Options When Creating a Unit
107
Boot Volume Size
109
Creating a Unit through 3DM
109
Creating a Unit through 3BM
112
Ordering Units in 3BM
115
Partitioning, Formatting, and Mounting Units
116
Creating a Hot Spare
118
Specifying a Hot Spare through 3BM
119
Specifying a Hot Spare through 3DM
119
Naming a Unit
120
Setting Unit Policies
121
Enabling and Disabling the Unit Write Cache
123
Setting Auto Verify for a Unit
124
Setting Continue on Source Error During Rebuild
125
Enabling and Disabling Queuing for a Unit
126
Setting the Storsave Profile for a Unit
127
Setting the Storsave Profile through 3BM
129
Setting the Storsave Profile through 3DM
129
Changing an Existing Configuration by Migrating
130
RAID Level Migration (RLM) Overview
131
Changing RAID Level
132
Expanding Unit Capacity
133
Informing the Operating System of Changed Configuration
134
Deleting a Unit
135
Deleting a Unit through 3DM
136
Deleting a Unit through 3BM
137
Removing a Unit
138
Removing a Unit through 3DM
139
Removing a Unit through 3BM
140
Moving a Unit from One Controller to Another
141
Moving Units from an 8000 Controller to a 9000 Controller
141
Moving Legacy JBOD Units to a 9000 Controller
142
Moving Units from a 9500S to a 9550SX, 9590SE, or 9650SE Controller
143
Adding a Drive
144
Removing a Drive
145
Rescanning the Controller
146
Chapter 9. Maintaining Units
148
Maintaining Units
148
Checking Unit and Drive Status through 3DM
148
Enclosure LED Status Indicators
150
Unit Statuses
150
About Degraded Units
152
Drive Statuses
152
About Inoperable Units
153
Alarms, Errors, and Other Events
153
Viewing Alarms, Errors, and Other Events
153
Using the Alert Utility under Windows
154
Downloading an Error Log
156
Viewing SMART Data about a Drive
156
Background Tasks
157
About Initialization
158
Initialization of Different RAID Types
159
About Verification
161
Starting a Verify Manually
163
Rebuilding Units
165
Rebuilding a Unit through 3DM
166
Rebuilding Units through 3BM
167
Cancelling a Rebuild and Restarting It with a Different Drive
169
Setting Background Task Rate
170
Background Task Prioritization
171
Scheduling Background Tasks
171
Viewing Current Task Schedules
172
Turning on or off Use of a Task Schedule
173
Adding a New Task Schedule Slot
174
Removing a Task Schedule
174
Selecting Self-Tests to be Performed
175
Locating a Drive by Blinking Its LED
176
Chapter 10. Maintaining Your Controller
178
Determining the Current Version of Your 3Ware Driver
178
Updating the Driver and Firmware
179
Updating the 3Ware Driver and Firmware under Windows
180
Using the Update Utility with Multiple Controllers
185
Updating the 3Ware Driver under Windows XP
186
Updating the 3Ware Driver under Red hat or Fedora Core
191
Updating the 3Ware Driver under Suse
193
Updating the 3Ware Driver under Freebsd
194
Updating the Firmware under Linux and Freebsd
195
Viewing Battery Information
196
Testing Battery Capacity
197
Chapter 11. 3DM 2 Reference
199
Controller Summary Page
200
Controller Details Page
201
Unit Information Page
202
Unit Details Page
203
Drive Information Page
205
Drive Details Window
206
SMART Data
207
Controller Settings Page
207
Background Task Rate
208
Scheduling Page
211
Maintenance Page
214
Unit Maintenance
215
Drive Information
216
Unit Information
216
Alarms Page
222
Battery Backup Page
223
Enclosure Summary Page
225
Enclosure Details Page
226
3DM 2 Settings Page
227
Email Notification
227
Page Refresh
228
Http Settings
229
Remote Access
229
Chapter 12. Troubleshooting
230
Web Resources
230
Before Contacting Customer Support
231
Command Logging
231
Problems and Solutions
232
Hardware Installation
232
Software Installation
232
Problems in 3DM
233
Error and Notification Messages
234
3Ware 9590SE Series User Manual (272 pages)
Serial ATA RAID Controller 9000 series
Brand:
3Ware
| Category:
Controller
| Size: 3 MB
Table of Contents
Table of Contents
3
About this Guide
7
How this Guide Is Organized
7
Conventions
9
Chapter 1. Introducing the 3Ware® 9000 Series Controller
11
Product Models and Features
11
What's New with 9550SX and 9590SE Models
12
System Requirements
13
Understanding RAID Concepts and Levels
15
Available RAID Configurations
16
Hot Spare
19
Determining What RAID Level to Use
19
Support for over 2 Terabytes
21
3Ware Tools for Configuration and Management
22
3BM (3Ware BIOS Manager)
22
3DM 2 (3Ware Disk Manager)
22
3Ware CLI (Command Line Interface)
23
Monitoring, Maintenance, and Troubleshooting Features
23
Chapter 2. Getting Started with Your 3Ware RAID Controller
25
Chapter 3. First-Time RAID Configuration Using 3BM
29
Basic Steps for Creating a Unit
29
Specifying a Hot Spare
37
Leaving Individual Drives as Jbods
37
Checking the Motherboard Boot Sequence
38
What Next
38
Chapter 4. Driver Installation
39
Driver Installation under Windows
40
Materials Required
40
Creating a 3Ware Driver Diskette
41
Installing the 3Ware Driver and Windows on a New Unit
41
Installing the Driver on a System that Boots from a Different Device
42
Making Units Managed by a 3Ware Controller Available to Windows
47
Driver Installation under Linux
48
Obtaining 3Ware Linux Drivers
49
Be Sure to Use the Correct Drivers
49
Driver Installation under Red hat Linux or Fedora Core 4
50
Creating a Red hat Linux Driver Diskette
50
Driver Installation under Suse Linux
55
Creating a Suse Linux Driver Diskette
55
Compiling a 3Ware Driver for Linux
58
Driver Installation under Freebsd
59
Obtaining 3Ware Freebsd Drivers
59
Installing the Driver under Freebsd
60
Chapter 5. 3Ware BIOS Manager 2 (3BM 2)
65
Starting 3BM 2
65
Exiting the 3BM Configuration Utility
67
Working in the 3BM Screens
68
Adjusting BIOS Loading Settings
71
Displaying Controller Information
73
Getting Help While Using 3BM
73
Chapter 6. 3Ware Disk Manager (3DM 2)
75
Browser Requirements for 3DM
76
Setting up Mozilla
76
Installing 3DM
77
Installing 3DM on a Microsoft Windows System
77
Uninstalling 3DM under Microsoft Windows
80
Installing 3DM for Linux or Freebsd
80
Uninstalling 3DM under Linux or Freebsd
82
Starting 3DM and Logging in
83
Starting 3DM under Linux
83
Starting 3DM under Microsoft Windows
83
Viewing 3DM Remotely Via a Standard Web Browser
84
Logging in
85
Working with the 3DM Screens
86
3DM Menus
87
Viewing Information about Different Controllers in 3DM
88
Refreshing the Screen
88
3DM Screens and What They're Used for
88
Setting up 3DM Preferences
90
Setting and Changing 3DM Passwords
90
Managing E-Mail Event Notification
91
Enabling and Disabling Remote Access
92
Setting the Incoming Port
93
Setting the Frequency of Page Refreshes
93
3DM 2 Reference
94
Controller Summary Page
94
Controller Details Page
96
Unit Information Page
97
Unit Details Page
99
Drive Information Page
100
Drive Details Window
102
SMART Data
103
Controller Settings Page
103
Background Task Rate
104
Unit Names
106
Scheduling Page
108
Maintenance Page
110
Unit Maintenance
112
Alarms Page
119
Battery Backup Page
120
3DM 2 Settings Page
122
Email Notification
123
Remote Access
124
Http Settings
124
Page Refresh
124
Chapter 7. Configuring Your Controller
125
Viewing Information about Individual Controllers
125
Viewing and Seting Controller Policies
127
Viewing Controller Policies
128
Setting the Auto-Rebuild Policy
130
Using Auto-Carving for Multi LUN Support
131
Setting the Size of Volumes Created with Auto-Carving
133
Enabling and Setting up Staggered Spin-Up
134
Exporting JBOD Disks
135
Disabling Write Cache on Unit Degrade
136
Chapter 8. Configuring Units
137
Configuring a New Unit
138
Configuration Options When Creating a Unit
138
Boot Volume Size
140
Creating a Unit through 3DM
140
Creating a Unit through 3BM
143
Ordering Units in 3BM
147
Partitioning and Formatting Units
147
Creating a Hot Spare
149
Specifying a Hot Spare through 3DM
150
Specifying a Hot Spare through 3BM
150
Naming a Unit
151
Setting Unit Policies
152
Enabling and Disabling the Unit Write Cache
153
Setting Auto-Verify for a Unit
155
Setting Continue on Source Error During Rebuild
156
Enabling and Disabling Queuing for a Unit
157
Setting the Storsave Profile for a Unit
159
Setting the Storsave Profile through 3Dm
160
Setting the Storsave Profile through 3BM
161
Changing an Existing Configuration
161
RAID Level Migration (RLM) Overview
162
Changing RAID Level
163
Expanding Unit Capacity
164
Informing the Operating System of Changed Configuration
165
Deleting a Unit
167
Deleting a Unit through 3DM
167
Deleting a Unit through 3BM
169
Removing a Unit
171
Removing a Unit through 3DM
171
Removing a Unit through 3BM
172
Moving a Unit from One Controller to Another
173
Unlocking Drives Configured on a 9500S Controller
174
Moving Units from an 8000 Controller to a 9000 Controller
174
Moving Legacy JBOD Units to a 9000 Controller
176
Moving Units from a 9500S to a 9550SX or 9590SE Controller
176
Adding a Drive through 3DM
178
Removing a Drive
179
Rescanning the Controller
181
Advertisement
3ware 9590SE Series Manual (150 pages)
SAS/SATA RAID Controller
Brand:
3ware
| Category:
Controller
| Size: 1 MB
Table of Contents
Raid Controller
1
Copyright Notice
2
Table of Contents
4
About this CLI Guide
9
Chapter 1 Introduction to the 3Ware Command Line Interface
10
Features of the CLI
11
Supported Operating Systems
11
Installing the 3Ware CLI
11
Installing the 3Ware CLI on Windows
12
Installing the 3Ware CLI on Linux, Freebsd, and Opensolaris
13
Working with 3Ware CLI
15
Using the Command Interface Interactively
15
Using a Single Command with Output
16
Using an Input File to Execute a Script
16
Outputting the CLI to a Text File
17
Conventions
17
Understanding RAID Levels and Concepts
18
RAID Concepts
18
Available RAID Configurations
19
Determining What RAID Level to Use
25
Using Drive Capacity Efficiently
26
Support for over 2 Terabytes
27
Chapter 2 CLI Syntax Reference
28
Common Tasks Mapped to CLI Commands
28
Terminology
32
Syntax Overview
33
Shell Object Commands
34
Focus Object
35
Commit
35
Flush
36
Rescan
36
Show
36
Show Alarms [Reverse]
37
Show Events [Reverse]
37
Show Aens [Reverse]
37
Show Diag
37
Show Rebuild
37
Show Selftest
38
Show Ver
39
Show Verify
39
Update Fw=Filename_With_Path [Force]
40
Controller Object Commands
41
CX Show
41
CX Show Attribute [Attribute
45
CX Show Achip
45
CX Show Allunitstatus
45
CX Show Autocarve
45
CX Show Autorebuild
46
CX Show Bios
46
CX Show Carvesize
47
CX Show Ctlbus
47
CX Show Driver
47
CX Show Dpmstat [Type=Inst|Ra|Ext]
47
CX Show Drivestatus
50
CX Show Exportjbod
51
CX Show Firmware
51
CX Show Memory
51
CX Show Model
52
CX Show Monitor
52
CX Show Numdrives
52
CX Show Numports
52
CX Show Numunits
53
CX Show Ondegrade
53
CX Show Pcb
53
CX Show Pchip
53
CX Show Serial
53
CX Show Spinup
54
CX Show Stagger
54
CX Show Unitstatus
54
CX Show All
55
CX Show Alarms [Reverse]
56
CX Show Events [Reverse]
56
CX Show Aens [Reverse]
57
CX Show Diag
57
CX Show Phy
57
CX Show Rebuild
58
CX Show Rebuildmode
60
CX Show Rebuildrate
61
CX Show Selftest
62
CX Show Verify
63
CX Show Verifymode
64
CX Show Verifyrate
65
9
65
Balance
65
Rdcachebasic] [Autoverify] [Noqpolicy] [Ignoreecc] [Name=String]
66
[Storsave=<Protect|Balance|Perform>] [Rapidrecovery=All|Rebuild|Disable]
66
[V0=N|Vol=A:b:C:D]
66
CX Rescan [Noscan]
72
CX Commit
72
CX Flush
72
CX Update Fw=Filename_With_Path [Force]
72
CX Add Rebuild=DDD:hh:duration
74
CX Add Verify=DDD:hh:duration
75
CX Add Selftest=DDD:hh
76
CX del Rebuild=Slot_Id
77
CX del Verify=Slot_Id
77
CX del Selftest=Slot_Id
77
CX Set Dpmstat=On|Off
78
CX Set Rebuild=Enable|Disable|1
78
CX Set Rebuildmode=<Adaptive|Lowlatency
79
CX Set Rebuildrate=<1
80
CX Set Verify=Enable|Disable|1
80
CX Set Verify=Advanced|Basic|1
81
CX Set Verify=Basic [Pref=DDD:hh]
81
CX Set Verifymode=<Adaptive|Lowlatency
82
CX Set Verifyrate=<1
83
CX Set Selftest=Enable|Disable [Task=Udma|Smart]
84
CX Set Exportjbod=On|Off
84
CX Set Ondegrade=Cacheoff|Follow
85
CX Set Spinup=Nn
85
CX Set Stagger=Nn
85
CX Set Autocarve=On|Off
85
CX Set Carvesize=[1024
86
CX Set Autorebuild=On|Off
86
/CX Set Autodetect=On|Off Disk=<P:-P>|All
87
CX Start Mediascan
88
CX Stop Mediascan
88
Unit Object Commands
89
CX/Ux Show
90
CX/Ux Show Attribute [Attribute
92
CX/Ux Show Autoverify
92
CX/Ux Show Cache
92
CX/Ux Show Wrcache
92
CX/Ux Show Rdcache
93
CX/Ux Show Identify
93
CX/Ux Show Ignoreecc
93
CX/Ux Show Initializestatus
93
CX/Ux Show Name
93
CX/Ux Show Qpolicy
94
CX/Ux Show Rapidrecovery
94
CX/Ux Show Rebuildstatus
94
CX/Ux Show Serial
95
CX/Ux Show Status
95
CX/Ux Show Storsave
95
CX/Ux Show Verifystatus
95
CX/Ux Show Volumes
96
CX/Ux Show All
96
CX/Ux Remove [Noscan] [Quiet]
97
CX/Ux del [Noscan] [Quiet]
97
CX/Ux Start Rebuild Disk=<P:-P
98
CX/Ux Start Verify
98
CX/Ux Pause Rebuild
100
CX/Ux Resume Rebuild
100
CX/Ux Stop Verify
100
CX/Ux Flush
100
CX/Ux Set Autoverify=On|Off
100
CX/Ux Set Cache=On|Off [Quiet]
102
CX/Ux Set Wrcache=On|Off [Quiet]
102
CX/Ux Set Rdcache=Basic|Intelligent|Off
102
CX/Ux Set Identify=On|Off
103
CX/Ux Set Ignoreecc=On|Off
104
CX/Ux Set Name=String
104
CX/Ux Set Qpolicy=On|Off
104
CX/Ux Set Rapidrecovery All|Rebuild|Disable [Quiet]
105
CX/Ux Set Storsave=Protect|Balance|Perform [Quiet]
105
9
105
CX/Ux Migrate Type=Raidtype [Disk=P:-P]
107
[Autoverify]
107
Port Object Commands
114
CX/Px Show
114
CX/Px Show Attribute [Attribute
115
CX/Px Show Capacity
115
CX/Px Show Driveinfo
115
CX/Px Show Firmware
116
CX/Px Show Identify
116
CX/Px Show Lspeed
116
CX/Px Show Model
117
CX/Px Show Ncq
117
CX/Px Show Serial
117
CX/Px Show Smart
117
CX/Px Show Status
118
CX/Px Show All
118
CX/Px Show Dpmstat Type=Inst|Ra|Lct|Histdata|Ext
120
CX/Px Remove [Noscan] [Quiet]
122
CX/Px Set Identify=On|Off
123
CX/Px Set Dpmstat=Clear [Type=Ra|Lct|Ext]
123
Phy Object Commands
125
CX/Phyx Show
125
CX/Phyx Set Link=Auto|1.5|3.0
125
BBU Object Commands
126
CX/Bbu Show
126
CX/Bbu Show Attribute [Attribute
127
CX/Bbu Show Batinst
127
CX/Bbu Show Bootloader
127
CX/Bbu Show Cap
127
CX/Bbu Show Fw
127
CX/Bbu Show Lasttest
127
CX/Bbu Show Pcb
127
CX/Bbu Show Serial
128
CX/Bbu Show Status
128
CX/Bbu Show Temp
129
CX/Bbu Show Volt
129
CX/Bbu Show All
129
CX/Bbu Test [Quiet]
130
CX/Bbu Enable
130
CX/Bbu Disable [Quiet]
130
Enclosure Object and Element Commands
131
CX/Ex Show
132
CX/Ex Show Attribute [Attribute
133
CX/Ex Show Controllers
133
CX/Ex/ Show Diag=Helptext
133
CX/Ex Show Slots
134
CX/Ex Show Fans
134
CX/Ex Show Temp
135
CX/Ex Show Pwrs
135
CX/Ex Show Alarms
136
CX/Ex Show All
136
CX/Ex/Slotx Show
136
CX/Ex/Slotx Show Identify
137
CX/Ex/Slotx Set Identify=On|Off
137
CX/Ex/Fanx Show
138
CX/Ex/Fanx Show Identify
138
CX/Ex/Fanx Set Identify=On|Off
138
CX/Ex/Fanx Set Speed=<0
138
CX/Ex/Pwrsx Show
139
CX/Ex/Pwrsx Show Identify
139
CX/Ex/Pwrsx Set Identify=On|Off
140
CX/Ex/Tempx Show
140
CX/Ex/Tempx Show Identify
140
CX/Ex/Tempx Set Identify=On|Off
141
CX/Ex/Almx Show
141
CX/Ex/Almx Set Alarm=Mute|Unmute|Off
141
Help Commands
142
Help with Specific Commands
142
Help with Attributes
144
Help
144
Help Show
145
Help Flush
145
Help Rescan
145
Help Update
146
Help Commit
146
Help Focus
146
Help /CX
146
Help /CX/Phyx
146
Help /CX/Ux
146
Help /CX/Px
146
Help /CX/Bbu
147
Help /CX/Ex
147
Help /CX/Ex/Slotx
147
Help /CX/Ex/Fanx
147
Help /CX/Ex/Tempx
147
Help /CX/Ex/Pwrsx
147
Help /CX/Ex/Almx
148
Command Logging
148
Location of the Log File
148
Disabling and Enabling Command Logging
149
Return Code
150
3ware 9590SE Series Manual (135 pages)
SAS/SATA RAID Controller
Brand:
3ware
| Category:
Controller
| Size: 0 MB
Table of Contents
Raid Controller
1
Table of Contents
3
About this CLI Guide
8
Chapter 1 Introduction to the 3Ware Command Line Interface
9
Features of the CLI
10
Supported Operating Systems
10
Installing the 3Ware CLI
10
Installing the 3Ware CLI on Windows
11
Installing the 3Ware CLI on Linux and Freebsd
12
Working with 3Ware CLI
13
Using the Command Interface Interactively
14
Using a Single Command with Output
14
Using an Input File to Execute a Script
15
Outputting the CLI to a Text File
15
Conventions
16
Understanding RAID Levels and Concepts
16
RAID Concepts
17
Available RAID Configurations
18
Determining What RAID Level to Use
24
Using Drive Capacity Efficiently
25
Support for over 2 Terabytes
26
Chapter 2 CLI Syntax Reference
27
Common Tasks Mapped to CLI Commands
27
Terminology
30
Syntax Overview
31
Shell Object Commands
33
Focus Object
33
Commit
34
Flush
34
Rescan
34
Show
34
Show Alarms [Reverse]
35
Show Diag
35
Show Rebuild
36
Show Selftest
36
Show Ver
37
Show Verify
37
Update Fw=Filename_With_Path [Force]
38
Controller Object Commands
39
CX Show
39
CX Show Attribute [Attribute
42
CX Show Achip
42
CX Show Allunitstatus
43
CX Show Autocarve
43
CX Show Autorebuild
43
CX Show Bios
44
CX Show Carvesize
44
CX Show Ctlbus
44
CX Show Driver
44
CX Show Dpmstat [Type=Inst|Ra|Ext]
45
CX Show Drivestatus
48
CX Show Exportjbod
49
CX Show Firmware
49
CX Show Memory
50
CX Show Model
50
CX Show Monitor
50
CX Show Numdrives
50
CX Show Numports
51
CX Show Numunits
51
CX Show Ondegrade
51
CX Show Pcb
51
CX Show Pchip
51
CX Show Serial
52
CX Show Spinup
52
CX Show Stagger
52
CX Show Unitstatus
52
CX Show All
53
CX Show Alarms [Reverse]
54
CX Show Diag
55
CX Show Phy
55
CX Show Rebuild
56
Version
56
P3 OK U0
57
P5 OK
57
P6 NOT-PRESENT
57
P0 NOT-PRESENT
57
CX Show Selftest
58
P6 NOT-PRESENT
58
CX Show Verify
59
[Rapidrecovery=All|Rebuild|Disable] [V0=N|Vol=A:b:C:D]
61
CX Rescan [Noscan]
66
CX Commit
67
CX Flush
67
CX Update Fw=Filename_With_Path [Force]
67
CX Add Rebuild=DDD:hh:duration
69
CX Add Verify=DDD:hh:duration
70
CX Add Selftest=DDD:hh
71
CX del Rebuild=Slot_Id
72
CX del Verify=Slot_Id
72
CX del Selftest=Slot_Id
72
CX Set Dpmstat=On|Off
73
CX Set Rebuild=Enable|Disable|1
73
CX Set Verify=Enable|Disable|1
74
CX Set Verify=Advanced|Basic|1
74
CX Set Verify=Basic [Pref=DDD:hh]
74
CX Set Selftest=Enable|Disable [Task=Udma|Smart]
76
CX Set Exportjbod=On|Off
76
CX Set Ondegrade=Cacheoff|Follow
76
CX Set Spinup=Nn
77
CX Set Stagger=Nn
77
CX Set Autocarve=On|Off
77
CX Set Carvesize=[1024
78
CX Set Autorebuild=On|Off
78
/CX Set Autodetect=On|Off Disk=<P:-P>|All
79
CX Start Mediascan
80
CX Stop Mediascan
80
Unit Object Commands
81
CX/Ux Show
82
CX/Ux Show Attribute [Attribute
84
CX/Ux Show Autoverify
84
CX/Ux Show Cache
84
CX/Ux Show Identify
84
CX/Ux Show Ignoreecc
85
CX/Ux Show Initializestatus
85
CX/Ux Show Name
85
CX/Ux Show Qpolicy
85
CX/Ux Show Rapidrecovery
86
CX/Ux Show Rebuildstatus
86
CX/Ux Show Serial
86
CX/Ux Show Status
87
CX/Ux Show Storsave
87
CX/Ux Show Verifystatus
87
CX/Ux Show Volumes
87
CX/Ux Show All
88
CX/Ux Remove [Noscan] [Quiet]
89
CX/Ux del [Noscan] [Quiet]
89
CX/Ux Start Rebuild Disk=P<P:-P
90
CX/Ux Start Verify
90
CX/Ux Pause Rebuild
91
CX/Ux Resume Rebuild
92
CX/Ux Stop Verify
92
CX/Ux Flush
92
CX/Ux Set Autoverify=On|Off
92
CX/Ux Set Cache=On|Off [Quiet]
93
CX/Ux Set Identify=On|Off
94
CX/Ux Set Ignoreecc=On|Off
94
CX/Ux Set Name=String
95
CX/Ux Set Qpolicy=On|Off
95
CX/Ux Set Rapidrecovery All|Rebuild|Disable [Quiet]
95
CX/Ux Set Storsave=Protect|Balance|Perform [Quiet]
96
9
96
CX/Ux Migrate Type=Raidtype [Disk=P:-P]
97
[Autoverify]
97
Port Object Commands
104
CX/Px Show
104
CX/Px Show Attribute [Attribute
105
CX/Px Show Capacity
105
CX/Px Show Driveinfo
105
CX/Px Show Firmware
106
CX/Px Show Identify
106
CX/Px Show Lspeed
106
CX/Px Show Model
106
CX/Px Show Ncq
107
CX/Px Show Serial
107
CX/Px Show Smart
107
CX/Px Show Status
108
CX/Px Show All
108
CX/Px Show Dpmstat Type=Inst|Ra|Lct|Histdata|Ext
109
CX/Px Remove [Noscan] [Quiet]
112
CX/Px Set Identify=On|Off
112
CX/Px Set Dpmstat=Clear [Type=Ra|Lct|Ext]
113
Phy Object Commands
114
CX/Phyx Show
114
CX/Phyx Set Link=Auto|1.5|3.0
114
BBU Object Commands
115
CX/Bbu Show
115
CX/Bbu Show Attribute [Attribute
116
CX/Bbu Show Batinst
116
CX/Bbu Show Bootloader
116
CX/Bbu Show Cap
116
CX/Bbu Show Fw
116
CX/Bbu Show Lasttest
116
CX/Bbu Show Pcb
116
CX/Bbu Show Serial
117
CX/Bbu Show Status
117
CX/Bbu Show Temp
118
CX/Bbu Show Volt
118
CX/Bbu Show All
118
CX/Bbu Test [Quiet]
119
CX/Bbu Enable
119
CX/Bbu Disable [Quiet]
119
Enclosure Object and Element Commands
120
CX/Ex Show
121
CX/Ex Show Attribute [Attribute
122
CX/Ex Show Controllers
122
CX/Ex/ Show Diag=Helptext
122
CX/Ex Show Slots
122
CX/Ex Show Fans
123
CX/Ex Show Temp
123
CX/Ex Show Pwrs
124
CX/Ex Show All
124
CX/Ex/Slotx Show
124
CX/Ex/Slotx Show Identify
125
CX/Ex/Slotx Set Identify=On|Off
125
CX/Ex/Fanx Show
125
CX/Ex/Fanx Show Identify
126
CX/Ex/Fanx Set Identify=On|Off
126
CX/Ex/Pwrsx Show
126
CX/Ex/Pwrsx Show Identify
127
CX/Ex/Pwrsx Set Identify=On|Off
127
CX/Ex/Tempx Show
127
CX/Ex/Tempx Show Identify
128
CX/Ex/Tempx Set Identify=On|Off
128
Help Commands
128
Help with Specific Commands
129
Help with Attributes
130
Help
131
Help Show
131
Help Flush
131
Help Rescan
132
Help Update
132
Help Commit
132
Help Focus
132
Help /CX
132
Help /CX/Phyx
132
Help /CX/Ux
132
Help /CX/Px
133
Help /CX/Bbu
133
Help /CX/Ex
133
Help /CX/Ex/Slotx
133
Help /CX/Ex/Fanx
133
Help /CX/Ex/Tempx
133
Help /CX/Ex/Pwrsx
134
Command Logging
134
Return Code
135
3Ware 9590SE Series Cli Manual (103 pages)
Serial ATA RAID Controller
Brand:
3Ware
| Category:
Computer Hardware
| Size: 0 MB
Table of Contents
Raid Controller
1
Table of Contents
3
About this CLI Guide
7
Chapter 1 Introduction to the 3Ware Command Line Interface
8
Features of the CLI
8
Supported Operating Systems
9
Terminology
9
Installing the 3Ware CLI
10
Installing the 3Ware CLI on Mac os X
10
Installing the 3Ware CLI on Windows
10
Installing the 3Ware CLI on Linux and Freebsd
12
Working with 3Ware CLI
13
Using the Command Interface Interactively
13
Using a Single Command with Output
14
Using an Input File to Execute a Script
14
Outputting the CLI to a Text File
15
Conventions
15
Understanding RAID Levels and Concepts
16
RAID Concepts
16
Available RAID Configurations
17
Determining What RAID Level to Use
23
Chapter 2 CLI Syntax Reference
26
Common Tasks Mapped to CLI Commands
26
Syntax Overview
28
Shell Object Commands
30
Focus Object
30
Show
31
Show Ver
32
Show Alarms [Reverse]
32
Show Diag
32
Show Rebuild
32
Show Verify
33
Show Selftest
34
Flush
34
Rescan
34
Commit
34
Update Fw=Filename_With_Path [Force]
34
Controller Object Commands
35
CX Show
35
CX Commit
36
CX Flush
36
CX Show Attribute [Attribute
37
CX Show Driver
38
CX Show Model
38
CX Show Firmware
38
CX Show Bios
38
CX Show Monitor
38
CX Show Serial
39
CX Show Pcb
39
CX Show Pchip
39
CX Show Autocarve
42
CX Show Autorebuild
43
Group=<3|4|5|6|7|8|9|10|11|12>] [Nocache] [Autoverify] [Noqpolicy][Ignoreecc Name=String] [Storsave=<Protect|Balance|Perform>]
43
CX Show All
45
CX Rescan [Noscan]
49
CX Update Fw=Filename_With_Path [Force]
50
CX Show Alarms [Reverse]
51
CX Show Diag
52
CX Show Rebuild
52
CX Show Verify
54
CX Show Selftest
55
CX Add Rebuild=DDD:hh:duration
56
CX Add Verify=DDD:hh:duration
57
CX Add Selftest=DDD:hh
58
CX del Rebuild=Slot_Id
59
CX del Verify=Slot_Id
59
CX del Selftest=Slot_Id
59
CX Set Rebuild=Enable|Disable|1
59
CX Set Verify=Enable|Disable|1
60
CX Set Selftest=Enable|Disable [Task=Udma|Smart]
60
CX Set Exportjbod=On|Off
61
CX Set Ondegrade=Cacheoff|Follow
61
CX Set Spinup=Nn
61
CX Set Stagger=Nn
62
CX Set Autocarve=On|Off
62
CX Set Carvesize=[1024
62
CX Set Autorebuild=On|Off
63
CX Set Autodetect=On|Off Disk=<P:-P>|All
63
CX Start Mediascan
64
CX Stop Mediascan
65
Unit Object Commands
65
CX/Ux Show
66
CX/Ux Show Attribute [Attribute
67
CX/Ux Show Status
67
CX/Ux Show Rebuildstatus
67
CX/Ux Show Verifystatus
67
CX/Ux Show Initializestatus
68
CX/Ux Show Name
68
CX/Ux Show Serial
68
CX/Ux Show Qpolicy
68
CX/Ux Show Storsave
69
CX/Ux Show Identify
69
CX/Ux Show Autoverify
69
CX/Ux Show Cache
69
CX/Ux Show Ignoreecc
70
CX/Ux Show Volumes
70
CX/Ux Show All
70
CX/Ux Remove [Noscan] [Quiet]
71
CX/Ux del [Noscan] [Quiet]
72
CX/Ux Start Rebuild Disk=P<P:-P
72
CX/Ux Start Verify
73
CX/Ux Pause Rebuild
73
CX/Ux Resume Rebuild
73
CX/Ux Stop Verify
74
CX/Ux Flush
74
CX/Ux Set Autoverify=On|Off
74
CX/Ux Set Cache=On|Off [Quiet]
74
CX/Ux Set Identify=On|Off
75
CX/Ux Set Ignoreecc=On|Off
75
CX/Ux Set Name=String
76
CX/Ux Set Qpolicy=On|Off
76
CX/Ux Set Storsave=Protect|Balance|Perform [Quiet]
76
CX/Ux Migrate Type=Raidtype [Disk=P:-P]
78
Port Object Commands
83
CX/Px Show
83
CX/Px Show Attribute [Attribute
83
CX/Px Show Status
84
CX/Px Show Model
84
CX/Px Show Serial
84
CX/Px Show Firmware
84
CX/Px Show Identify
84
CX/Px Show Ncq
85
CX/Px Show Lspeed
85
CX/Px Show Capacity
85
CX/Px Show Smart
85
CX/Ux Migrate Type=Raidtype [Disk=P:-P Group=3|4|5|6|7|8|9|10|11|12] [Stripe=Stripe] [Noscan] [Nocache] [Autoverify]
85
CX/Px Show All
86
CX/Px Remove [Noscan] [Quiet]
87
CX/Px Set Identify=On|Off
87
BBU Object Commands
88
CX/Bbu Show
88
CX/Bbu Show Attribute [Attribute
89
CX/Bbu Show Status
89
CX/Bbu Show Batinst
90
CX/Bbu Show Lasttest
90
CX/Bbu Show Volt
90
CX/Bbu Show Temp
90
CX/Bbu Show Cap
90
CX/Bbu Show Serial
91
CX/Bbu Show Fw
91
CX/Bbu Show Pcb
91
CX/Bbu Show Bootloader
91
CX/Bbu Show All
91
CX/Bbu Test [Quiet]
92
CX/Bbu Enable
92
CX/Bbu Disable [Quiet]
92
Enclosure Object Commands
93
Ex Show
93
Ex Show Attribute [Attribute
94
Ex Show Controllers
94
Ex Show Slots
95
Ex Show Fans
95
Ex Show Temp
95
Ex Show All
95
Ex/Slotx Show
96
Ex/Slotx Show Identify
96
Ex/Slotx Set Identify=On|Off
96
Ex/Fanx Show
97
Ex/Tempx Show
97
Help Commands
97
Help with Specific Commands
97
Help with Attributes
99
Help
99
Help Show
100
Help Flush
100
Help Rescan
100
Help Update
100
Help Commit
100
Help Focus
101
Help /CX
101
Help /CX/Ux
101
Help /CX/Px
101
Help /CX/Bbu
101
Help /Ex
101
Help /Ex/Slotx
101
Help /Ex/Fanx
102
Help /Ex/Tempx
102
Command Logging
102
Return Code
102
3ware 9590SE Series Quick Install Manual (36 pages)
Serial ATA RAID Controller
Brand:
3ware
| Category:
Controller
| Size: 5 MB
Table of Contents
Table of Contents
3
Chapter 1. Installing an AMCC 3Ware 9590SE RAID Controller
5
Before You Begin
6
Contents of Package
6
Other Documentation
6
Installation Considerations
7
What You Need: Tools and Equipment
9
Safety Factors
9
Personal Safety
9
Protecting Equipment and Data
10
9590SE RAID Controller Cards
12
Multilane Cables
14
Installing a 9590SE RAID Controller
16
To Connect the Multilane Cables to the Controller
16
To Install the Controller in the Computer
17
To Connect the Multilane Cables to the Drives or Backplane
19
Connecting Drive Activity LED Indicators
20
Additional Details about the LED Status Connectors
22
Finishing up
24
Check Installation and Close the Case
24
Configure Your RAID Arrays
24
Chapter 2. Installing the Battery Backup Unit
25
Tools and Equipment Required
26
Installation Overview
26
Installation Instructions
27
Replacing the Battery
32
Appendix: Technical Support
35
3ware 9590SE Series User Manual Addendum (1 page)
SATA RAID Controller Version 9.4.3
Brand:
3ware
| Category:
Controller
| Size: 0 MB
Table of Contents
Support for the AMCC 3Ware® I2C Multiplexer
1
Improved Enclosure Support
1
Terminology Changes in 3DM, 3BM, and CLI
1
Controller Phy Summary Page in 3DM
1
Additional Information for 3DM and 3BM Changes
1
Installation Guide for 3Ware RAID Controller
1
Using the AMCC 3Ware® I2C Multiplexer
1
Updated User Manual Information
1
Advertisement
Related Products
3Ware 9500S-8 - Escalade RAID Controller
3ware 9650SE-4LPML
3ware 9650SE-8LPML
3ware 9650SE-4LPMLE
3ware 9650SE-16ML
3ware 9650SE-12ML
3ware 9650SE-24M8
3ware 9650SE-2LPML
3ware 9550SX Series
3Ware 9590SE-8ML
3ware Categories
Controller
Computer Hardware
Storage
Network Card
Enclosure
More 3ware Manuals
Login
Sign In
OR
Sign in with Facebook
Sign in with Google
Upload manual
Upload from disk
Upload from URL