Table of Contents
Advertisement
Quick Links
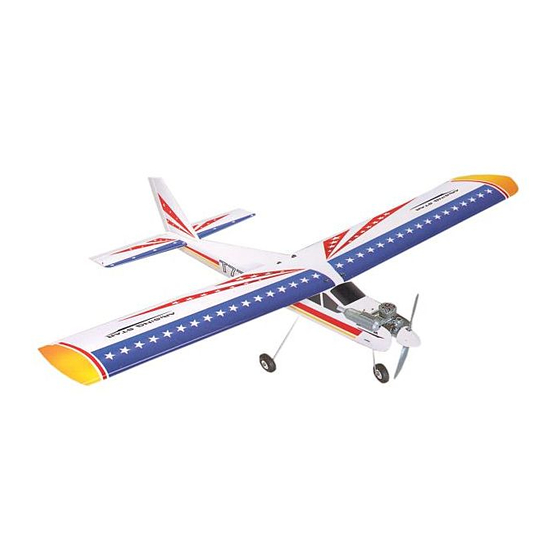
Arising Star
Hand-made Almost Ready to Fly R/C Model Aircraft.
Specifications:
Wingspan _________________________ 63 in, 160cm.
Wing area ________________ 645 sq. in, 41.6 sq. dm.
Approximate flying weight _________ 5-6 lbs, 2.3-2.7kg.
Recommended engine size __ .40-.46 cu. in 2-stroke.
Recommended R/C ________ 4 channel with 4 servos.
Flying skill level ________________________ Beginner.
Kit features.
•
Ready-made—minimal assembly & finishing required.
•
Ready-covered—including decals, trim & covering.
•
Factory-installed pushrod.
•
Factory-installed engine mount.
•
Comprehensive hardware pack including wheels, tank, spats, undercarriage, spinner.
•
Photo-illustrated step-by-step Assembly Manual.
ASSEMBLY MANUAL
.50 cu. in 4-stroke.
Instruction Manual
Additional items required.
Engine.
4 Channel or greater Radio Control system.
Glues.
Tools.
Starting Equipment.
Made in Vietnam.
Advertisement
Table of Contents

Related Manuals for Seagull Models Arising Star


Summary of Contents for Seagull Models Arising Star
-
Page 1: Instruction Manual
Arising Star Instruction Manual Hand-made Almost Ready to Fly R/C Model Aircraft. ASSEMBLY MANUAL Specifications: Additional items required. Wingspan _________________________ 63 in, 160cm. Engine. Wing area ________________ 645 sq. in, 41.6 sq. dm. 4 Channel or greater Radio Control system. -
Page 2: Fuselage Assembly
Instruction Manual. INTRODUCTION. Thank you for choosing the Arising Star ARTF by SEAGULL MODELS. The Arising Star was designed from the ground up with the beginner flyer in mind. It is a High-wing aeroplane which is easy to fly and quick to assemble. The airframe is conventionally built using balsa, plywood and veneer to make it stronger than the average ARTF, yet the design allows the aeroplane to be kept light. -
Page 3: Wing Assembly
This will ensure proper 1) Test fit the wing tube into each wing half. assembly as the Arising Star is The brace should slide in easily up to the made from natural materials and centreline that you drew.If not, use 220 grit... - Page 4 Arising Star. Instruction Manual. Epoxy. Masking tape. Epoxy attach. Once the epoxy has cured, trial fit both wing halves together. The centre ribs should fit together flush with no gaps. If gaps do exist, use 220 grit sandpaper and sand down Glue attached.
-
Page 5: Installing The Aileron Servo
Arising Star. Instruction Manual. 4) Remove the mount, and using a mod- eling knife, carefully remove the covering from inside the outline you drew. 5) Using 6 Minute Epoxy, glue the servo mount into place. Remove any excess epoxy using a paper towel and rubbing alcohol. Use Servo mount. -
Page 6: Installing The Main Gear Wires
Arising Star. Instruction Manual. Remove covering. C/A glue fix. 2) Using the two landing gear straps as a guide, mark the locations of the four 3mm x 12mm mounting screws onto the fuselage sur- face. 3) The landing gear wire is held in place using two nylon landing gear straps and four 3mm x 12mm wood screws. -
Page 7: Nose Gear Installation
Arising Star. Instruction Manual. NOSE GEAR INSTALLATION. FUEL TANK. INSTALLING THE STOPPER ASSEMBLY. 1) Using a modeling knife, carefully cut off the rear portion of one of the two nylon tubes leaving 1/2” protruding from the rear of the stopper. This will be the fuel pick up tube. -
Page 8: Installing The Fuel Tank
Arising Star. Instruction Manual. When the stopper assembly is installed in the INSTALLING THE FUEL TANK. tank, the top of the vent tube should rest just below the top surface of the tank. It should Pushrod wire. not touch the top of the tank. -
Page 9: Mounting The Engine
Arising Star. Instruction Manual. 4) Remove the engine. Using an drill bit, Balsa wood not included. drill the mounting holes through the engine mount at the four locations marked. 2.5mm. Fuel tank. Vent tube. 3mm X 25mm. 5) Bolt the engine to the engine mount using the four machine screws. -
Page 10: Installing The Spinner
Arising Star. Instruction Manual. INSTALLING THE FUSELAGE SERVOS. INSTALLING THE SPINNER. Install the spinner backplate, propeller and spinner cone. The spinner cone is held in place using two 3mm x 12mm wood screws. Rudder servo. The propeller should not touch any part of the spinner cone. -
Page 11: Vertical Stabilizer Installation
Arising Star. Instruction Manual. and to the stabilizer mounting platform sides in the fuselage. Slide the stabilizer in place and realign. Double check all of your mea- surements once more before the epoxy cures. Hold the stabilizer in place with T-pins or mask- ing tape and remove any excess epoxy using a paper towel and rubbing alcohol. -
Page 12: Control Horn Installation
Arising Star. Instruction Manual. 5) When you are sure that everything is 2) While holding the vertical stabilizer aligned correctly, mix up a generous amount of firmly in place, use a pen and draw a line on 30 Minute Epoxy. Apply a thin layer to the mount-... -
Page 13: Pushrod Installation
Arising Star. Instruction Manual. 3) Using a 1.5mm drill bit and the control 2) Thread two nylon clevises onto the horns as a guide, drill the mounting holes threaded wires at least 10 turns. Attach the through the elevator halves. -
Page 14: Installing The Nose Gear Wheel
Arising Star. Instruction Manual. 2) Install the rubber grommets and brass set screws. The wheels should spin free and collets onto the throttle servo. Test fit the servo not bind in any way. If they do bind, loosen the into the aileron servo mount. - Page 15 The cen- ter of gravity is located 2.5” to 3” back from the leading edge of the wing, at the fuselage sides. Balance the Arising Star with the fuel tank empty. 2) Mount the wing to the fuselage. Using ATTACHMENT WING-FUSELAGE.
-
Page 16: Control Throws
3/8” down flying. Rudder: 1/2” right 1/2” left 2) Check every bolt and every glue joint AEROBATIC FLYING in the Arising Star to ensure that everything is tight and well bonded. Ailerons: 1/2” up 1/2” down Elevator: 5/8” up 5/8” down...
Need help?
Do you have a question about the Arising Star and is the answer not in the manual?
Questions and answers