
Related Manuals for DuraLabel LabPRO


Summary of Contents for DuraLabel LabPRO
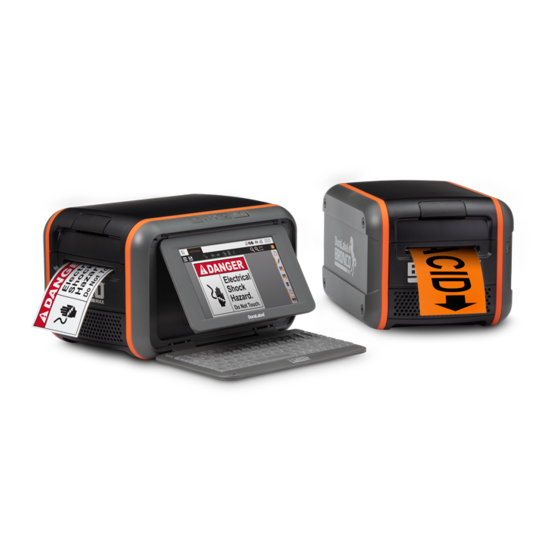
- Page 1 LabPRO User’s Guide Graphic Products, Inc. 1-800-788-5572 503-644-5572 Local: www.DuraLabel.com www.GraphicProducts.com info GraphicProducts.com E-mail:...
- Page 2 ©2008-2011 Graphic Products, Inc. All Rights Reserved...
-
Page 3: Warranty
WARRANTY Graphic Products DuraLabel printers are warrantied to be free from defects in materials or workmanship for a period of five years from the date of purchase. Within this period, Graphic Products, Inc. will, at its sole option, repair or replace any components which fail in normal use. -
Page 4: Getting Started
Vista and 7 Memory: 128 MB RAM Additional Requirements: IT Administration Privileges Supplies The ribbon and various print media for the DuraLabel LabPRO have been optimized ® for compatibility and print quality. Only authorized supplies from Graphic Products will print correctly in the DuraLabel LabPRO. -
Page 5: Table Of Contents
INTRODUCTION Welcome... ® And congratulations on the purchase of your new DuraLabel LabPRO Thermal Transfer Printer! We've included this guide to get you printing as quickly as possible. In this guide you'll find information on setting up your printer, configuring your software, and creating custom labels. -
Page 6: Load Printer
LOAD PRINTER Printer Ribbon Parts Rear Spring-Loaded Hub Rear Hub (for Flange-side of Spindle) for Ribbon Supply Spindle for Ribbon Supply Spindle Front Spring-Loaded Hub Front Hub (for Flange-side of Spindle) for Ribbon Rewind Spindle for Ribbon Rewind Spindle (with paper core) Flange of Ribbon Spindles insert on the right side, when facing the front of the Printer. -
Page 7: Load Ribbon
IMPORTANT! Always turn OFF the printer when loading supplies. Always wait at least 5 seconds before turning ON the power. The ribbon and various print media for the DuraLabel LabPRO have been optimized for ® compatibility and print quality. Only authorized supplies from Graphic Products will print correctly in the DuraLabel LabPRO. - Page 8 4. Apply the provided paper core onto the front Ribbon Rewind Spindle. 5. Skip to Step 6, section Load Ribbon Continued. (See page 7, section “Load Ribbon Continued”) To Load 2.5" ribbon supply 2. With the flange of the spindle on the right side, apply 2.5" Ribbon Supply to the Front Ribbon Spindle with the Ribbon Supply leader extended over the top and towards the back.
- Page 9 Load Ribbon Continued - For All Ribbon Supply Sizes The ribbon loading process is the same for all sizes of ribbon for Steps 6 - 12 of section “Load Ribbon Continued”. Pages 7-9, Fig. 6, 7, 8, 11, 12, 13, & 14 illustrate 4.3" ribbon supply.
- Page 10 8. Open the Printer Cover by pulling forward the Printer Cover Release Levers on the sides of the printer. Fig. 10 Printer Release Lever being pulled forward 9. Grab the Ribbon Supply leader that is hanging down. Fig. 11 Ribbon Supply (4.3") being pulled down and underneath 10.
- Page 11 11. Tape the entire width of the end of the Ribbon Supply leader to the paper core of the Ribbon Rewind Spindle. Fig. 13 Ribbon Supply (4.3") taped to Ribbon Rewind Spindle 12. Roll the Ribbon Rewind Spindle (top side of spindle moving away from you) to secure the Ribbon Supply and eliminate wrinkles, fingerprints or flaws.
-
Page 12: Printer Inside Parts
Printer Inside Parts Fig. 1 Inside of Printer with Ribbon Mechanism open in an upright position 1. Supply Loading Diagram 2. Label Supply Roll 3. Label Roll Mounts 4. Fixing Tabs 5. Tefl on Bar (white) 6. Adjustable Label Guides (turquoise) 7. -
Page 13: Load Label Stock
Load Label Stock IMPORTANT! Always turn OFF the printer when loading supplies. Always wait at least 5 seconds before turning ON the power. Turn printer power OFF first! 1. With the Ribbon Mechanism still in upright position. Load Label Stock onto Label Supply Spindle and center it using the Fixing Tabs on each end to secure supply. - Page 14 3. Lead the Label Stock underneath the white Teflon Bar, over the black Platen Roller and through the Printed Label Opening, leaving at least 1/2" of supply extended out. Fig. 4 Label Stock loaded correctly with printable surface faced up and liner faced down 4.
- Page 15 5. Close the Printer Cover by slowly lifting back then gently down until it latches closed as described in the latch diagram located on the back, right side of the printer. Fig. 6 Fig. 7 Diagram located on back, right side of Printer Cover closed with Ribbon Printer, when the Printer Cover is open Mechanism Cover open...
-
Page 16: Tape Guide Install Instructions
1/2" label stock and shrink tube sizes 3/8" and smaller. Larger vinyl and shrink tube are adequately held in place by the Adjustable Label Guides. 1. Load shrink tube or 1/2" label stock into the DuraLabel LabPRO and thread it ®... - Page 17 3. When facing the front of the printer, hold the Tape Guide in hand with the smooth, flat-side facing up and the cut-out opening oriented on the left side. NOTE: Move the Adjustable Label Guides inwards, leaving about a 2″ gap for easy installation. Cut-out opening Fig.
- Page 18 5. Align the labeling supply to fit underneath and in the grooved section of the Tape Guide. This allows for optimal alignment and smooth dispensing. Fig. 5 Tape Guide not completely pressed down with shrink tube aligned under grooved section of Tape Guide 6.
-
Page 19: Connect Printer
USB Cable connected to the computer, Mobile Print Station™ 150 Plus, laptop, or whichever operating system the DuraLabel is connected to. Identify the USB Cable with a label and wrap the cord out of the way until next use. -
Page 20: Install Using Usb Cable
QuickStart Guide for instructions. A Found New Hardware dialog box may appear. If so, select No, not this time. Insert the DuraLabel LabPRO CD into the CD-ROM drive. Select Install the ® software automatically and click Next. (This step may run automatically.) - Page 21 When prompted to continue, click Continue Anyway. A dialog box will appear showing the progress of the files being copied. It will close after copying is complete. A Found New Hardware Wizard dialog box will appear after completion. Click Finish to exit and close the screen.
-
Page 22: Install Using Parallel Cable
DuraLabel LabPRO setup screen. A “DuraLabel LabPRO Driver Setup” dialog ® box will appear, click Next to begin installation. Click I Agree to the Windows Printer Driver License Agreement. Click Install to accept the default directory, “C:\LabPRO” -20-... - Page 23 Select either Local or Network for your printer driver. If you select Local, make sure the “Automatically detect and install my Plug and Play printer,” is unchecked. Check Use the following port, and select LPT1 and click Next. Select Graphic Products DuraLabel LabPRO and click Next. ® -21-...
- Page 24 If you had previous Seagull Scientific drivers installed, press Cancel then reload the cd and refer to the inside cover of the QuickStart Guide for instructions on how to “Upgrade Drivers”. Keep existing printer name as Graphic Products DuraLabel LabPRO and select Yes ®...
- Page 25 Make sure your settings are correct. If so select Finish, otherwise select Back and change to the correct settings. If prompted to continue, click Continue Anyway. A dialog box will appear regarding Completing the DuraLabel LabPRO Driver Setup, ® click Finish.
-
Page 26: Configure Driver
>> Printers. This will bring up the Printers folder. Right-click on the Graphic Products DuraLabel LabPRO and select Printing ® Preferences from the drop-down menu. This will bring up the DuraLabel LabPRO ® Printing Preferences. Click on the Page Setup Tab. Select either Landscape or Portrait to match the orientation of the label document. -
Page 27: Continuous Vinyl Printing Instructions
Continuous Vinyl Printing Instructions To set the cutter, select the Stock Tab. Set the Media Settings “Type” to Continuous. In order for the automatic cutter to cut after each label, under Media Handling next to “Post-Print Action,” select Cut and then next to “Occurrence”... -
Page 28: Black Mark Label Instructions
Black Mark Label Instructions Black Mark Calibration In order to print labels with black marks, the label stock needs to be calibrated. To do so, with the printer power OFF, hold the FEED button down while turning ON the printer. Release the FEED button while it blinks green-amber. The LED color will flash as follows: red (5 blinks) amber (5 blinks) then green and amber will blink alternately. -
Page 29: Cut Labels In Intervals
Your driver is now set up and you are ready to create your labels! NOTE In certain situations, you may need to change the print settings to optimize the DuraLabel ® LabPRO for printing with certain ribbons or a specialty tape supply. Generally, higher speeds require higher densities. -
Page 30: Label Creation
RTK software was installed. The examples in this tutorial were tested with Microsoft Word 2000. Some variations may occur with different versions of Word, or with different word processors, but the basic principles will be the same. The DuraLabel LabPRO is ®... -
Page 31: Use Templates
Now, when you want to use a template, just open Microsoft Word. Select Open then browse the DLP Templates and Symbols folder. There are a variety of templates for you to choose from, all of which are setup to print correctly on the DuraLabel ®... - Page 32 To Change the Automatic Cutter Setting: You can change the automatic cutter settings without going back into the printer driver. Go to File >> Print , then click on the Properties button next to DuraLabel LabPRO. ® Choose the Stock tab.
-
Page 33: Change Page Setup
Change Page Setup Click on the File menu, then the Page Setup selection. Now click the Margins tab. Set all of your margins and edges to 0. This will allow you to print on the entire area of your tape. Set the orientation to desired layout. Depending on your operating system, the orientation may be on another Tab. -
Page 34: Orientation
Orientation Create the label with the width and height of the Label. If the width of the label is the width of the tape installed in the printer, then set the orientation to Portrait. If the height of the label is the width of the tape installed in the printer, set the orientation to Landscape. -
Page 35: Label Design
LABEL DESIGN Text Working with text for label creation is only slightly different from working with text in a normal document. In a document, text can be treated as a whole: formatting, layout and design can be universal. With a label, each section of text has to be handled separately. - Page 36 Format the text inside the box to any size and style, then position the box for the desired layout. Initially, the text box will have a border around it. To get rid of the border, double-click the text box. When you do this, the Format Text Box dialog will appear.
-
Page 37: Graphics
Black and white will give you the best contrast, and the best printing output. Actual print color depends on the ribbon and vinyl loaded in the DuraLabel LabPRO and is unaffected by the colors shown on your ® computer screen. - Page 38 Picture tab. Under the Image Control section choose the Color pull-down menu and select Black and White. Your image will be instantly converted to a format that the DuraLabel ®...
-
Page 39: Symbols
For your convenience we've included more than 800 ready-to-use symbols, which are divided by category, on your DuraLabel LabPRO CD. Just choose a symbol, insert it ® into your document, then print a visually appealing and informative label or sign. To view or print a list of all of the included symbols, browse to the Symbols folder on the CD. - Page 40 NOTE To Install the Symbols, insert the DuraLabel LabPRO CD into your CD drive. When the ® startup screen appears, simply click the “Install Templates and Symbols” button, follow the on screen directions, and they will be automatically installed on your Desktop in the DLP Templates and Symbols folder.
-
Page 41: Bar Codes
Bar Codes The bar code program we have included easily displays and prints bar codes from your Windows based word processing program. Install the dBest Barcode Package from the CD. When the CD startup screen appears upon inserting the CD in the CD drive, simply click on Install dBest Barcode Package and follow the on-screen instructions. - Page 42 If you do not see the dBest Barcodes Toolbar, you need to run the toolbar as a macro. Refer to the following: 1. Go to the top menu bar in MS Word. Select: Tools >>> Macro >>> Macros 2. A window will appear with a list: Macros in: All Active Templates & Documents. 3.
-
Page 43: Sequencing
Word template (included on your installation CD): 1. Open an existing template from the DuraLabel CD or start a new Word document. 2. Because Excel uses Pixel measurement instead of inches, you will want to set this to match in Word. - Page 44 Now that you have the desired label size, its time to add the text to it. Keeping Word open, browse to the provided Excel template: Number Sequence.xls This is a predefined template with the formula already in place to increment a numeric value by one.
- Page 45 Fig. 4 4. Now that you have the correct size matching your label, change the value in the first cell (column A, row 1) and enter any static text you want. Leave it blank for none. In the next cell (column B, row 1) enter the number you would like to increment.
- Page 46 Once you're satisfied with the amount of increments and cell span, its time to copy this into your Word template. Go back to the Word document that you previously created. !!Remember!! The page layout of the Word template must match the cell size you specified in your Excel template.
-
Page 47: Import From Excel
Import from Excel How to transfer Excel spreadsheet information into a Word label NOTE: These instructions are for users of Windows 2000. If you are using Windows XP, please follow the directions on page 41. A. Merging One Column from a Spreadsheet to a Label: 1. - Page 48 5. Click on column header A, right click the mouse, and select Copy. 6. Toggle (Alt-Tab) over to the Word document and find the Edit button on the Windows Tool Bar (top left of screen) and then click and select Paste Special. 7.
- Page 49 3. On the toolbar on top of Word, click on Insert, then click Text box. 4. Use the cross hair cursor. Click in the field of the document, a text box will appear. 5. Resize the text box to your preference. See below 6.
- Page 50 10. Put a space after “MERGEFIELD” then type in the column heading from your Excel document that you will want to merge into the label (i.e., “Input.”). 11. It will then look like this: “MERGEFIELD Input.” See below 12. Click OK and the box will vanish. 13.
- Page 51 21. On the next box you see, “ENTIRE WORKBOOK” will be blue highlighted. Click OK. 22. You will then see a pop up box with a question mark. Click OK. 23. On your Word document, click on Tools, then Mail merge. 24.
-
Page 52: Cleaning & General Maintenance
Basic cleaning of the print head, cutter and platen roller will prolong the life of the printer and will aid in producing crisp, clear labels and signs with every print. Please refer to page 10 of the User's Guide for better clarifi cation of Printer Inside Parts. Please view the DuraLabel ®... -
Page 53: Cutter
Cutter Fig. 3 Cutter Mechanism (detachable face in front of printer) 1. Open the DuraLabel LabPRO top cover. ® 2. Rewind any supply that may be loaded away from the cutting mechanism. 3. Open a cleaning swab and place the swab between your forefi nger and thumb. -
Page 54: Cleaning The Cutter From The Inside
Cleaning The Cutter From The Inside As an option you may also remove the cutter from the printer to effi ciently clean both sides of the cutting blades. 1. Gently but fi rmly, lift the cutting mechanism out of the printer with both hands. Wires will still be connected, so avoid pulling cutting mechanism too hard or too far from the printer. -
Page 55: Platen Roller
4. Replace platen roller in printer 5. Give the Platen roller a couple minutes to dry, then reload your ribbon and supply. 6. Your DuraLabel LabPRO is now cleaned and ready for use. ® The DuraLabel LabPRO should be cleaned regularly to maintain optimal ®... -
Page 56: Troubleshooting
TROUBLESHOOTING SYMPTOM NUMBER LED is solid red ..............1 Print stops, LED blinks red ........... 2 LED blinks amber & red ............3 LED blinks red when printing die-cuts ......... 4 LED blinks green ..............5 Printer feeds extra tape and blinks red....... 6 Cutter misses gap between die-cut labels ...... - Page 57 Dull side of ribbon should face out and down towards label stock. (See pages 5-9 of User's Guide or see supply loading video on DuraLabel® LabPRO CD.) . SYMPTOM: LED blinks amber and red. Possible Cause: Power was cycled too quickly.
- Page 58 Possible Cause: The printer is set to print on "labels with gaps," even though stock being used is continuous feed. Solution: Open the Printers and Faxes folder. Right-click on the Graphic Products DuraLabel LabPRO. ® Select "Printing Preferences." Click the STOCK tab.
- Page 59 Possible Cause: Printer could not recognize the label stock. Solution: Only authorized supplies from Graphic Products will print correctly in the DuraLabel LabPRO. If error occurred with Graphic Products ® supplies, contact Graphic Products for a replacement roll of label stock.
- Page 60 Possible Cause: Print darkness is set too high or too low. Solution: Adjust the print darkness. (See page 27 of User's Guide) Open the Printers and Faxes folder. Right-click on the Graphic Products DuraLabel LabPRO and select ® "Printing Preferences."...
- Page 61 . SYMPTOM: Streaking occurs while printing. a. Possible Cause: Ribbon was installed with too much slack or it was not centered, creating a crease in the ribbon. Solution: Tighten the slack and eliminate all creases in the ribbon. b. Possible Cause: Printer requires service. Solution: Contact Graphic Products.
-
Page 62: Specifications
SPECIFICATIONS Printer ▪ Type: Thermal Transfer ▪ Print Speed: Selectable speeds of 2 and 3 inches per second ▪ Resolution: 300 DPI ▪ Max. Print Width: 4 in. ▪ Max. Print Length: 40 in. ▪ Ribbon Capacity: 984 ft. Indicators & Buttons ▪... - Page 64 P.O. Box 4030 1-800-788-5572 www.DuraLabel.com Beaverton, OR 97076 © 2008-2011, Graphic Products, Inc. All Rights Reserved v. 1.0 - 2/3/11...
Need help?
Do you have a question about the LabPRO and is the answer not in the manual?
Questions and answers