Extron electronics Annotator 300 User Manual
Hdcp-compliant annotation graphics processor
Hide thumbs
Also See for Annotator 300:
- Setup manual (4 pages) ,
- User manual (116 pages) ,
- User manual (90 pages)

Related Manuals for Extron electronics Annotator 300


Summary of Contents for Extron electronics Annotator 300
- Page 1 User Guide Signal Processors Annotator 300 HDCP-Compliant Annotation Graphics Processor 68-2378-01 Rev. A 08 14...
-
Page 2: Safety Instructions
Precautions Safety Instructions Safety Instructions • English Инструкция по технике безопасности • Русский WARNING: This symbol, , when used on the product, is intended to ПРЕДУПРЕЖДЕНИЕ: Данный символ, , если указан alert the user of the presence of uninsulated dangerous voltage within the на... - Page 3 “Extron Safety and Regulatory Compliance ” Guide on the Extron website. Copyright © 2014 Extron Electronics. All rights reserved. Trademarks All trademarks mentioned in this guide are the properties of their respective owners. ® The following registered trademarks , registered service marks...
-
Page 4: Conventions Used In This Guide
Conventions Used in this Guide Notifications The following notifications are used in this guide: CAUTION: Risk of minor personal injury. ATTENTION : Risque de blessure mineure. ATTENTION : • Risk of property damage. • Risque de dommages matériels. NOTE: A note draws attention to important information. Software Commands Commands are written in the fonts shown here: ^AR Merge Scene,,Op1 scene 1,1 ^B 51 ^W^C... -
Page 5: Table Of Contents
Operation ............. SIS Commands ........42 Front Panel Overview ........14 Using the Command/Response Table The Annotator 300 Menu System ....15 for IP SIS Commands ........57 Overview of Menus ........15 Symbol Definitions ........57 Using the Menus........17 Command/Response Table for User Presets .......... - Page 6 Configure This Device ........ 96 Device Info ..........96 Passwords..........97 Ethernet Connection ........Ethernet Link ..........99 Ethernet Connection ........99 Default Address ......... 99 Telnet Tips ..........101 Subnetting Basics ........102 Warranty ............. Contact Information ........Annotator 300 • Contents...
-
Page 7: Introduction
HDMI and bidirectional control signals to a DTP receiver over a shielded twisted pair cable up to 330 feet (100 meters). The Annotator 300 offers a wide range of annotation tools and controls, all easily accessible by the presenter using an intuitive on-screen GUI. -
Page 8: Features
Features • Live annotation capabilities plus high performance scaling and switching — The Annotator 300 allows a presenter to draw, point, or add text in real-time over live video and graphics presentations. • Inputs — Includes one HDMI; one DisplayPort; one universal 15-pin HD input for RGB, component video, S-video, or composite video. - Page 9 • Remote powering of DTP receiver — The Annotator 300 can provide remote power to a DTP receiver over the twisted pair connection, eliminating the need for a separate power supply at the remote unit.
- Page 10 Ethernet monitoring and control — Enables control and proactive monitoring over a LAN, WAN, or the Internet. Built-in Web pages — Enables the use of a standard browser for monitoring over an • intuitive Web interface. Annotator 300 • Introduction...
- Page 11 Rack-mountable 1U, full rack width metal enclosure • Includes LockIt HDMI cable lacing brackets • Highly reliable, energy-efficient internal universal power supply — The 100-240 VAC, 50/60 Hz, international power supply provides worldwide power compatibility with high demonstrated reliability. Annotator 300 • Introduction...
-
Page 12: Installation
Installation This section contains installation information for the Extron Annotator 300. It covers the following subjects: • UL/Safety Requirements • Mounting the Annotator 300 UL/Safety Requirements The Underwriters Laboratories (UL) requirements listed below pertain to the safe installation and operation of this Annotation Graphics Processor. -
Page 13: Mounting The Annotator 300
Mounting the Annotator 300 If the Annotator 300 is to be rack mounted, it is important to mount it before cabling it. Four rubber feet are included with the unit. Install the feet only if the unit is to be mounted on a table top (see “Tabletop Placement”... -
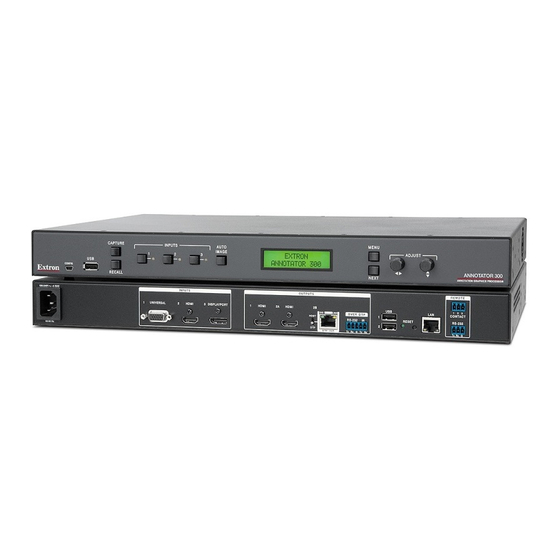
Page 14: Rear Panel Features And Connections
Rear Panel Features and Connections This section describes the rear panel features and how to connect the cables. Rear Panel Features The illustration below shows the rear panel features of the Annotator 300. 100-240VAC --A MAX OUTPUTS REMOTE INPUTS UNIVERSAL... -
Page 15: Output, User Interface, And Control Connections
HDMI connectors — Connect suitable HDMI or DVI (with an adapter) displays to these two connectors for HDMI or DVI output. RJ-45 connector — Connect the Annotator 300 to a DTP receiver for selectable DTP or HDBaseT output that supports the digital signal transmission of HDMI with embedded audio and control up to 330 feet (100 meters) over shielded twisted pair (STP) cable. -
Page 16: Installation And Cabling
Step 4 — Connect user interface devices Connect user interface devices (mouse and keyboard) or touch panels to the Annotator 300 using either of the rear panel USB ports (see on page 9). Alternatively the front panel USB port can also be used to connect a user interface device. -
Page 17: Powering Up
Powering Up When applying power to the Annotator 300, the unit undergoes a start-up self testing sequence (see image below) and then the LCD displays the default display cycle. Default display cycle When in use but not in any menu mode, the LCD screen defaults to cycling through the input/output configuration currently installed. -
Page 18: Resetting The Unit With The Reset Button
NOTES: • After a mode 1 reset is performed, update the firmware for the Annotator 300 to the latest version. Do not operate the firmware version that results from the mode 1 reset. If the factory default firmware is to be used, that version must be uploaded again. - Page 19 Reset momentarily (for <1 sec.) within 1 configurations. second. • Resets all IP options. • Removes scheduling settings. NOTE: Nothing happens if the • Removes/clears all files from the unit. momentary press does not occur within 1 second. Annotator 300 • Rear Panel Features and Connections...
-
Page 20: Operation
Operation This section of the manual discusses the operation of an Annotator 300 unit and is divided into four sections: • Front Panel Overview • The Annotator 300 Menu System • Setting the Front Panel Locks (Executive Modes) Front Panel Overview... -
Page 21: The Annotator 300 Menu System
The Annotator 300 Menu System The Annotator 300 can be configured using the menu system, via the Extron Simple Instruction Set (SIS) of commands, or via the Extron Products Configuration Software (PCS 2.1 or higher) software program, through an RS-232 or LAN connected PC. - Page 22 Temperature 96 F 35 C to change address. Indicates Internal temperature (not adjustable). Next Factory Reset Hold Auto Img Press and hold Auto Image to reset unit to factory settings. Figure 8. Annotator Menu System Overview Annotator 300 • Operation...
-
Page 23: Using The Menus
Using the Menus To configure the Annotator 300 using any of the menus, do the following: Press the Menu button repeatedly to reach the desired configuration menu. Press the Next button repeatedly to go to the desired submenu. The LCD shows the current values. Observe the LCD and rotate either (or both) Adjust knob to change the values as desired. -
Page 24: Input Configuration
Repeat steps 3 and 4 for each setting as desired. When complete, press Menu once or Next repeatedly to return to the top level menu. Alternatively, allow the unit to time out to return to the default cycle. Annotator 300 • Operation... -
Page 25: Output Configuration
Off, a black or muted output is displayed. Rotate either front panel Adjust knob ([{) to turn the note off or on. Press Next or Menu to return to the Output Configuration top level menu. Annotator 300 • Operation... -
Page 26: Advanced Configuration
Repeat for each connected touchpanel screen. Press any front panel button to exit the sequence and save the data. Annotator 300 • Operation... -
Page 27: View Comm Settings
When already connected to a remote PC via LAN, changing the IP address can result in the loss of connection. • The Annotator 300 default IP address is 198.162.254.254. Press Menu to exit the Edit Comm Settings menu, saving the new settings. Exit Menu Within this menu press Next to exit the menu system and return to the default display cycle. -
Page 28: Capture/Recall Settings (Front Panel Activated)
A snapshot of the currently displayed image (including annotations) can be captured and saved to the Annotator 300 memory using the front panel Capture/Recall button, the Next button, and the two Adjust knobs. This image or any other saved image can then be recalled and output to the active display at a later time. - Page 29 Press and release the Recall button. The LCD displays “Recall Image <None>”. Press Next. The LCD displays “Recall: <None>”. The current image is removed from the display, but not from the Annotator 300 memory. To recall the image follow the steps described in the “To recall an image” section above.
-
Page 30: Setting The Front Panel Locks (Executive Modes)
Setting the Front Panel Locks (Executive Modes) The Annotator 300 has two levels of front panel security lock that limit the operation of the device from the front panel. Executive mode 0 (disabled) — The front panel is fully unlocked. This is the default setting. -
Page 31: On Screen Annotation
If a USB touchpanel is part of the system, confirm the panel is supported by the firmware on the Annotator 300 by reviewing the compatibility list available on the product page of the Extron website (www.extron.com). If the touchpanel is not supported by the firmware, a supporting module must be uploaded to the Annotator 300 using PCS version 2.1 (or greater). -
Page 32: Usb Port Connections
Using a suitable USB A cable, connect a touchscreen device or hubs to the either of the two USB A ports on the rear panel of the Annotator 300. Do not connect more than three hubs in line (three deep). -
Page 33: Annotation Overview
Annotation Overview The Annotator 300 output has the capability to include a graphical tool bar which is used for annotation. The tool bar can be enabled or disabled as desired. When enabled, the... -
Page 34: Default Annotation Buttons
Default Annotation Buttons Input selection — Selecting this button opens a pop-up palette displaying the three inputs of the Annotator 300. Selecting any input button switches the display to that input. Pointer — Selecting this button changes the cursor to an extra- large arrow of the currently selected color. - Page 35 Zoom — Select this to zoom in to a specific area of the screen. Using the cursor, create a rectangle at the desired area and the Annotator 300 zooms in to view that area. If the boundaries of the area are beyond the zoom capabilities, then the view will not change.
- Page 36 Enter key, or releasing the primary mouse button. • Using SIS commands, the Capture tool can be customized to send out an unsolicited response, indicating an image is ready to be streamed directly to an external PC. Annotator 300 • On Screen Annotation...
-
Page 37: Sis Communication And Control
106, for cable termination details. Default IP Addresses To access the Annotator 300 via the Ethernet port, you need the Extron IP address and may need the subnet mask and the gateway address. If the IP address has been changed... -
Page 38: Establishing A Connection
Number of Connections The Annotator 300 can have up to 200 simultaneous TCP connections, including all HTTP sockets and Telnet connections. When the connection limit is reached, the processor accepts no new connections until some have been closed. No error message or indication is given that the connection limit has been reached. -
Page 39: Processor-Initiated Messages
Processor Error Responses When the Annotator 300 receives an SIS command and determines that it is valid, it performs the command and sends a response to the host device. If the processor is unable to perform the command because the command is invalid or contains invalid parameters, the processor returns an error response to the host. -
Page 40: Using The Command/Response Table For Sis Commands
= Detected Input Video Format: 0 = No signal present 5 = Composite 1 = RGB 6 = DVI 2 = Auto YUV 7 = HDMI 3 = RGBcvS 8 = DisplayPort 4 = S-Video Annotator 300 • SIS Communication and Control... - Page 41 11 = 1.78 aspect ratio 4 = crosshatch 12 = 1.85 aspect ratio 5 = 4x4 crosshatch 13 = 2.35 aspect ratio 6 = color bars 14 = blue mode 7 = grayscale Annotator 300 • SIS Communication and Control...
- Page 42 480p @ 60 Hz = 1080p @ 59.94 Hz 576p @ 50 Hz = 1080p @ 60 Hz 720p @ 23.98 Hz = 2048x1080 @ 23.98 Hz 720p @ 24 Hz = 2048x1080 @ 24 Hz Annotator 300 • SIS Communication and Control...
- Page 43 0 = AUTO – HDMI output is only encrypted when viewing an encrypted input – slower switching (default) 1 = ON – HDMI output is always encrypted regardless of input selection – faster switching Annotator 300 • SIS Communication and Control...
- Page 44 0 = None – Input muted (EDID has no CEA extension) 1 = LPCM-2Ch (LPCM-2Ch audio requested from source via EDID) 2 = Full Digital (allows any digital audio format from source via EDID) Annotator 300 • SIS Communication and Control...
- Page 45 1 = Gives priority to the highest numbered active input 2 = Gives priority to the lowest numbered active input = DTP Output Format 0 = DTP format (Default) 1 = HDBaseT Format Annotator 300 • SIS Communication and Control...
- Page 46 = Filename with extension = Configuration type 0 = IP config (ip.cfg) 1 = Event config (event.cfg) 2 = Box specific parameters (box.cfg) = Number of copies to print (printer quantity): 1-50 (default = 1) Annotator 300 • SIS Communication and Control...
- Page 47 = Input standard: 0 = No signal, 1 = NTSC, 2 = PAL, 3 = SECAM, - = N/A (when input is set to a high resolution signal format) = EDID emulation: see page 36 for EDID resolution and refresh rates = EDID Table; 128 or 256 Bytes. Annotator 300 • SIS Communication and Control...
-
Page 48: Command/Response Table For Sis Commands
X^ = Pixel phase; 0-63 (default = 31) X& = Total pixels; (±512 of the default value) X* = Active pixels; (±512 of the default value) = Auto-Image Threshold Value; 0 (black) through 100 (white), default = 25 Annotator 300 • SIS Communication and Control... - Page 49 = Video Mute: 0 = Unmute video/sync, 1 = Mute video to black, 2 = Mute video and sync = Output Group Selection; 0 = All outputs (Default), 1 = Output 1 Only (HDMI), 2 = Output 2A and 2B Only (HDMI & DTP), 3 = None Annotator 300 • SIS Communication and Control...
- Page 50 = Picture adjustment; 0 to 127 (default 64) (Three digit response – 0 padding) X1^ = H or V position (range -11000 to +11000) X1& = H or V size (range 10 to 11000) Annotator 300 • SIS Communication and Control...
- Page 51 = Screen Saver Status; 0 = Active Input; timer not running, 1 = No active input; timer is running; output sync still active, 2 = No active input; timer has expired; output sync disabled = DTP Output Format; 0 = DTP format (Default), 1 = HDBaseT Format Annotator 300 • SIS Communication and Control...
- Page 52 = Audio input type; 0 = None – Input muted (EDID has no CEA extension), 1 = LPCM-2Ch (LPCM-2Ch audio requested from source via EDID), 2 = Full Digital (via EDID allows digital audio format from source) Annotator 300 • SIS Communication and Control...
- Page 53 = Video Switching Effect; 0 = Cut, 1 = Fade through Black (default) = Auto Switch Mode; 0 = Disable (Default), 1 = Gives priority to the highest numbered active input, 2 = Gives priority to the lowest numbered active input Annotator 300 • SIS Communication and Control...
- Page 54 = HDCP status; 0 = no sink or source device detected, 1 = sink or source detected with HDCP, 2 = sink or source detected but no HDCP is present = Video Signal Status; 0 = Video / TMDS signal not detected, 1 = Video / TMDS signal detected Annotator 300 • SIS Communication and Control...
- Page 55 = Power Save modes; 0 = Full Power mode (Default), 1 = Low Power state = Printer URI address, Example: lpd://10.13.1.22 = Number of copies to print (printer quantity): 1-50 (default = 1) Annotator 300 • SIS Communication and Control...
- Page 56 = Annotation coordinates — 8 digit number with first four being the X coordinate, the last four the Y coordinate, limits = 1000,1000. Fixed for any output rate. Example, (0,0) = 00000000 = top left; (500,500) = 05000500 = screen center. = All ports (0), USB device (1-64) Annotator 300 • SIS Communication and Control...
- Page 57 (HDMI & DTP), 3 = None = Keyboard Locale Selection; 1033 = US Keyboard layout (Default), 1031 = German Keyboard layout, 1034 = Spanish Keyboard layout, 1036 = French Keyboard layout, 2057 = Great Britain Keyboard layout Annotator 300 • SIS Communication and Control...
- Page 58 = Auto Annotation Clear; 0 = Disabled (default), 1 = Clear after an input switch; 2 = Clear after an input switch or when a new input frequency is detected = White/Blackboard status; 0 = Disabled (Default), 1 = Whiteboard is enabled, 2 = Blackboard is enabled Annotator 300 • SIS Communication and Control...
- Page 59 1 to 500, in 1 second increments = Output Group Selection; 0 = All outputs (Default), 1 = Output 1 Only (HDMI), 2 = Output 2A and 2B Only (HDMI & DTP), 3 = None Annotator 300 • SIS Communication and Control...
- Page 60 X6$ = File location; 0 = Internal Flash, 2 = Attached USB drive (Only ONE USB drive can be connected), 3 = Network location (location must be configured or E25 will be issued) = Filename/prefix name without extension (12 characters) = Filename with extension X7& Annotator 300 • SIS Communication and Control...
- Page 61 No blank or space characters are permitted as part of a name. No distinction is made between upper and lower case. The first character must be an alpha character. The last character must not be a minus sign/hyphen. X13# = Password 12 alphanumeric characters Annotator 300 • SIS Communication and Control...
- Page 62 = Horizontal and vertical frequencies (format is three digit with single decimal and leading zeros< for example, 075.3) = Configuration type: 0 = IP config, 1 = Event config, 2 = Box config Annotator 300 • SIS Communication and Control...
-
Page 63: Using The Command/Response Table For Ip Sis Commands
4 asterisk (****) if password exists and empty if not, instead of actual password. X14( = Default name, (Annotator-300 + last 3 pairs of the MAC address) X16( = Time-out in 10 second steps,, 1-65000 (default = 30 = 30 seconds) Annotator 300 • SIS Communication and Control... - Page 64 Annotator 300 • SIS Communication and Control...
- Page 65 Annotator 300 • SIS Communication and Control...
-
Page 66: Command/Response Table For Ip Sis Commands
Annotator 300 • SIS Communication and Control... - Page 67 Annotator 300 • SIS Communication and Control...
- Page 68 Annotator 300 • SIS Communication and Control...
-
Page 69: Product
Accessing the This section describes the software installation and communication (see Web Page on page 92, or see the Annotator 300 Product Configuration Software help file for detailed control information). Topics in this section include: • Installing the Software •... -
Page 70: Starting The Software
PCS versions prior to version 2.1 do not have the configuration pages for the NOTE: Annotator 300 device. Ensure you download PCS version 2.1 or later. On the Extron website, select the tab (see figure Download From the left sidebar, click the... -
Page 71: Tcp/Ip Panel
Cancel Device Discovery panel. TCP/IP Panel The TCP/IP panel contains a means of connecting to a specific (IP address known) device through Ethernet. Figure 23. TCP/IP Panel Annotator 300 • Product Configuration Software... -
Page 72: Offline Device Preview
Click the Connect button. A new device tab opens. Offline Device Preview It is possible for the Annotator 300 pages to be viewed without connecting directly to a device, but the settings cannot be changed or saved. To open an offline device, click on the drop-down arrow and select . -
Page 73: Using The Software
NOTE: For general software navigation, see on page 92 or open the Annotator 300 Product Configuration Software Help file. When connected to an online device, a connection status icon shows green on the device name tab. The configuration page has a global navigation bar (ribbon) from which each of the individual configuration pages (Input/Output Config, EDID Minder, Image Settings, Size and Position, Annotation Settings, OSD Settings, and General Settings) can be accessed. -
Page 74: Device Menu
From the drop-down menu, select . The Device Settings > Hardware Settings... Hardware Settings dialog box opens. For configuration details, see the Annotator 300 PCS Help file. Annotator 300 • Product Configuration Software... - Page 75 Alternatively, to manually assign an IP address, complete all the fields as desired. Click the button to accept pending changes. Apply Clicking the button cancels any pending changes and closes the dialog box. Cancel Annotator 300 • Product Configuration Software...
- Page 76 Navigate to the desired save location on the host device and click the button. Save The window closes. Click the button to save the configuration to an external file to the host Backup device. Click the button to close the System Backup and Restore window. Close Annotator 300 • Product Configuration Software...
-
Page 77: Update Firmware
This option contains the device module part number, version, and build number. From the drop-down menu, select . The About This Device About This Module... Module dialog box opens. Figure 32. About This Module Dialog Box Click the button to close the dialog box. Close Annotator 300 • Product Configuration Software... -
Page 78: Software Menu
Figure 35. Software Settings Dialog Box Click the button. The dialog box closes and the Re-enable Confirmation Dialogs reset is complete. Click the button to close the dialog box without re-enabling Close the confirmation dialogs. Annotator 300 • Product Configuration Software... - Page 79 If necessary, click the button to disconnect the Close Session(s) and Exit software from connected devices, close all offline device tabs, and close the software. Click the button to leave the software open. Cancel Annotator 300 • Product Configuration Software...
-
Page 80: Av Controls Panel
The signal status indicators on the AV input buttons display green when a NOTE: signal is present on the corresponding input or gray when there is no signal present. Auto-Image button Clicking the button starts a one-time Auto-Image on the currently selected Auto-Image input. Annotator 300 • Product Configuration Software... - Page 81 The button turns red along with Sync Mute the Video Mute button To unmute any signal, click the appropriate button. The button reverts to the default color, indicating the signal has been unmuted. Annotator 300 • Product Configuration Software...
-
Page 82: Configuration Pages
— Scales the input signal to fill the entire video output. Fill • — Follows the signal aspect ratio, with respect to the current output Follow resolution setting. Black letter box or pillar box bars may be applied for aspect ratio compensation. Annotator 300 • Product Configuration Software... - Page 83 Disable HDCP Authorized to allow the output of the scaler to remain unencrypted. Film Detect Select the check box of the desired input to enable automatic 3:2, 2:2, and Film Detect 24:1 film pulldown detection for NTSC, PAL, SECAM, and 1080i input signals. Annotator 300 • Product Configuration Software...
-
Page 84: Refresh Rate
— Frame lock is enabled. Input AFL NOTE: AFL is a patented technology exclusive to Extron that locks the output frame rate to a designated input to eliminate stuttering caused by frame rate conversion. Annotator 300 • Product Configuration Software... -
Page 85: Edid Minder Page
The EDID properties currently assigned to each input are displayed in the table of inputs. The audio input format listed in an EDID is determined by the audio input format selected on the Input Configuration page. Annotator 300 • Product Configuration Software... - Page 86 EDID. Select Save to EDID Library Click the button to save the file. NOTE: Saving a factory EDID exports an HDMI, LPCM-2Ch EDID to the PC. The file is saved as a .bin file. Annotator 300 • Product Configuration Software...
-
Page 87: Image Settings Page
An Down asterisk beside a chosen value for a signal sampling setting indicates that it is a default value for the applied video signal. Annotator 300 • Product Configuration Software... - Page 88 Presets save output settings to be recalled through RS-232 or Ethernet (see the table on next page for a comparison of saved settings for input and user presets). Figure 47. Input and User Presets Panel Annotator 300 • Product Configuration Software...
- Page 89 From the Input Presets list select the desired preset. Click the button. The Presets dialog box opens. Clear Click the button to erase saved data. Click the button to return to the Clear Cancel Image Settings page. Annotator 300 • Product Configuration Software...
-
Page 90: Size And Position Page
The Size and Position page provides three methods of adjusting image output size and position: graphically, numerically, or automatically with Auto-Image. Click the Size and icon on the global navigation bar to open the Size and Position page. Position Figure 48. Size and Position Page Annotator 300 • Product Configuration Software... -
Page 91: Annotations Settings Page
The Annotations Settings page shows details of installed USB devices (touchpanels connected the Annotator 300), the currently used and installed fonts, selected display options, and a list of images ( in bmp and jpeg formats) saved in the 42 MB of memory. - Page 92 The device is removed from the listing. To add a USB device to the list ensure the device is connected to the Annotator 300 and click the Add button. The device is added to the listing and is ready for calibration.
-
Page 93: Display Options
Select the desired image (hover curser over image name). The Preview button appears. Click the Preview button. The image opens in a separate window. Click the “x” in the top right corner to close the preview window. Annotator 300 • Product Configuration Software... -
Page 94: Osd Settings Page
A separate Network Drive Settings dialog box opens after clicking the Change button. This allows the user to browse to a folder of choice and, if required, enter a user name and password. Annotator 300 • Product Configuration Software... - Page 95 Select the check boxes as desired. To change the font, click the Font button and select a font from the newly opened dialog box. Click Apply when all changes have been made. Click Cancel to exit the OSD options procedure without any changes being made. Annotator 300 • Product Configuration Software...
-
Page 96: General Settings Page
The General Settings page allows the user to set the front panel lockout mode (Exec Mode) for the Annotator 300, and to enable and sets, or disable auto switching. In addition it gives access to the hardware settings page. Click the... - Page 97 Hardware Setting details. To set the front panel lockout mode, click the applicable Front Panel Lockout (Exec Mode) radio button as desired. See the Annotator 300 Help file for Exec Mode settings. To enable auto switch, check the Auto Switch check box and then click the applicable radio button.
-
Page 98: Accessing The Web Page
Press the keyboard <Enter key>. The device checks to see if it is password protected. If password protected, the Annotator 300 downloads the Connect to (IP address) page. If it is not password protected, proceed to step 7. Click in the Password field and type in the appropriate administrator or user name and password. -
Page 99: Navigating The Default Web Page
Navigating the Default Web Page The Annotator 300 default web page has six sections: Communication Settings, Input/Output Status, Date/Time Settings, Configure This Device, Device Info, and Passwords. When logged in as an administrator, configuration of some of the device settings is possible by clicking on the applicable buttons. -
Page 100: Input/Output Status
IP Reset to Default address (192.168.254.254). Input/Output Status This read-only section displays the current input and output status. These are not configurable via the web page. Figure 57. Input and Output Status Section Annotator 300 • Accessing the Web Page... -
Page 101: Date And Time
In the Time field, enter the time directly, or click on each drop-down arrow to set the hours, minutes, and seconds. Select AM or PM as applicable Click Apply. Clicking the button cancels any pending changes and closes the dialog box. Cancel Annotator 300 • Accessing the Web Page... -
Page 102: Configure This Device
Cancel Clicking the button resets the device to the factory default device Reset to Default name. Default name, (Annotator-300 + last 3 pairs of the MAC address). Annotator 300 • Accessing the Web Page... -
Page 103: Passwords
Passwords Section To set or change existing passwords click on the Set button. The Passwords dialog box opens. Figure 65. Passwords Dialog Enter a password in the administrator password field for the administrator. Annotator 300 • Accessing the Web Page... - Page 104 After a password has been set for the administrator, a user password can be set. Enter a password in the user password field for the user. Enter the same password in the confirm password field and click Apply. The user password is now set. Annotator 300 • Accessing the Web Page...
-
Page 105: Ethernet Connection
RJ-45 Connector Pinout Tables Default Address To access the Annotator 300 via the Ethernet port, you need the unit’s IP address. If the address has been changed to an address comprised of words and characters, the actual numeric IP address can be determined using the ping utility. If the address has not been changed, the factory-specified default is 192.168.254.254. - Page 106 Connect as a Telnet client The Telnet utility is available from the command prompt. Telnet allows you to input SIS commands to the Annotator 300 from the PC via the Ethernet link and the LAN. Access the prompt and start Telnet as follows: From the Windows Start menu, select Run...
-
Page 107: Telnet Tips
Annotator 300 via Telnet. Connecting to the Annotator 300 (Open command) You connect to the Annotator 300 using the Open command. Once your computer is connected to the unit you can enter the SIS commands the same as you would if you were using the RS-232 link. -
Page 108: Subnetting Basics
Local echo can be turned off by entering unset local_echo at the Telnet prompt. If your computer is connected to the Annotator 300, and you need to access the Telnet prompt to turn local echo off, enter the escape sequence (Ctrl + ]). - Page 109 Gateways The Annotator 300 can communicate with the e-mail server that it uses for e-mail notification directly (if they are on the same subnet), or the communication can be routed via a gateway (a computer that provides a link between different subnets).
- Page 110 255.255.0.0 (?.?.X.X) 255.255.0.0 (?.?.X.X) 255.255.0.0 (?.?.X.X) Remote IP Address: 192.168.2.25 190.190.2.25 192.190.2.25 Match?: =.=.X.X — Match ≠.≠.X.X — No match =.≠.X.X — No match (Same subnet) (Different subnet) (Different subnet) Figure 71. Comparing the IP Addresses Annotator 300 • Ethernet Connection...
- Page 111 Annotator 300 • Ethernet Connection...
-
Page 112: Warranty
Extron Electronics makes no further warranties either expressed or implied with respect to the product and its quality, performance, merchantability, or fitness for any particular use. In no event will Extron Electronics be liable for direct, indirect, or consequential damages resulting from any defect in this product even if Extron Electronics has been advised of such damage.
Need help?
Do you have a question about the Annotator 300 and is the answer not in the manual?
Questions and answers