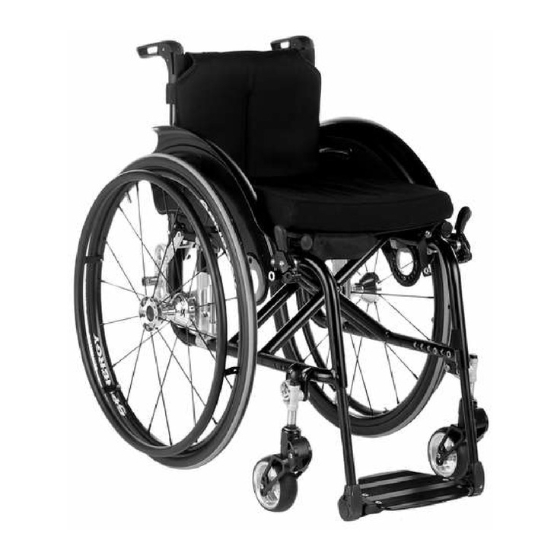
Otto Bock Avantgarde CV Instructions For Use Manual
Hide thumbs
Also See for Avantgarde CV:
- Instructions for use manual (32 pages) ,
- Service manual (56 pages) ,
- Service manual (64 pages)
Table of Contents
Advertisement
Quick Links
Download this manual
See also:
Service Manual
Advertisement
Table of Contents

Related Manuals for Otto Bock Avantgarde CV


Summary of Contents for Otto Bock Avantgarde CV
- Page 1 Avantgarde CV/CS/CLT Instructions for Use (Qualified Personnel) ...............
- Page 2 2 | Ottobock Avantgarde CV/CS/CLT...
-
Page 3: Table Of Contents
................6.8.1 Adjustment of the lower leg length ......................6.8.1.1 Footrests/foot brackets on Avantgarde CS/CLT ..................6.8.1.2 Footrests/foot brackets on Avantgarde CV ..................... 6.8.1.3 Folding footrest with automatic length adjustment .................. 6.8.1.4 Footrest for short lower leg lengths ....................... Avantgarde CV/CS/CLT... - Page 4 Transport to the customer ........................Handover ............................Maintenance/Repair ............................Disposal ................................Disposal information ..........................Information on re-use ........................... Legal Information .............................. 10.1 Liability .............................. 10.2 CE Conformity ............................ 10.3 Warranty Terms and Conditions ......................Technical Data ..............................4 | Ottobock Avantgarde CV/CS/CLT...
-
Page 5: Foreword
Disorders such as cardiac or circulatory insufficiency, equilibrium disturbances or cachexia as well as geriatric patients who still have usable residual strength in the upper limbs. The wheelchair was designed in particular for individuals who are generally able to move around actively and freely in the wheelchair. Avantgarde CV/CS/CLT Ottobock | 5... -
Page 6: Contraindications
Incorrect fitting of the rear wheels Risk of falling or tipping due to wheels coming loose ► After every assembly, check the proper mounting of the rear wheels. The wheel axles must be securely locked in the fitting. 6 | Ottobock Avantgarde CV/CS/CLT... -
Page 7: Name Plate
The functionality and operation of the options are described in more detail in the instructions for use (user). All of the available options/accessories are listed on the order form. 4.3 Storage The wheelchair must be stored in a dry place. Avantgarde CV/CS/CLT Ottobock | 7... -
Page 8: Preparation For Use
2) Loosen the safety strap. 3) Fold the wheelchair open. 4) Fold the footrest(s) down. When using a single-panel footrest, be sure the support of the footplate is locked into the receiver. 5) Place the cushion onto the seat. 8 | Ottobock Avantgarde CV/CS/CLT... -
Page 9: Adjustments
Lack of fine adjustment of the rear wheel Risk of falling or tipping of the user ► Check the standard adjustments of the wheelchair for stability against tipping and function of the rear wheels. Avoid any extreme settings. Avantgarde CV/CS/CLT Ottobock | 9... -
Page 10: Adjustment Of Horizontal Rear Wheel Position
3) Insert the lock rings and tighten the Allen head screws to 7 Nm (see Fig. 1, item 1). → Once changed, the left and right rear wheel adapter must have the same horizontal position on the frame. 10 | Ottobock Avantgarde CV/CS/CLT... -
Page 11: Adjustment Of The Shock Absorber In The Frame
2) Move the shock absorber. Use the bores in the frame for orientation (see Fig. 8, item 1). 3) Tighten the clamping screws to 8 Nm (see Fig. 8, item 2). → Once changed, the left and right shock absorber must have the same horizontal position on the frame. Avantgarde CV/CS/CLT Ottobock | 11... -
Page 12: Adjustment Of The Seat Height And Seat Angle
6) Insert the spirit level and align the camber washers upright (see Fig. 12, item 2). 7) Tighten the nuts on both sides of the fitting to 50 Nm. → After adjusting, the left-hand and right-hand fittings must have the same horizontal position in the frame. 12 | Ottobock Avantgarde CV/CS/CLT... -
Page 13: Adjustment In The Shock Absorber
6.3.4 Adjustment of the rear wheel camber The rear wheel camber is adjusted by exchanging the camber washers in the fitting (wheel axle mounting). This has the following effect: Avantgarde CV/CS/CLT Ottobock | 13... -
Page 14: Adjustment Of The 0°/2°/3°/4° Rear Wheel Camber
The threaded axle in the caster wheel adapter should be perpendicular to the ground to ensure optimum rolling behaviour of the wheelchair. The caster wheel adapter permits a continuous adjustment of this angle. 14 | Ottobock Avantgarde CV/CS/CLT... -
Page 15: Repositioning The Front Wheel
6) Push on the 2nd spacer bush (see Fig. 25, item 1). 7) Tighten the nut of the screw shaft to 8 Nm. → After adjusting, the left and right front wheel must have the same vertical position in the front wheel fork. Avantgarde CV/CS/CLT Ottobock | 15... -
Page 16: Adjusting The Brakes
5 mm (see Fig. 27). 3) Tighten the Allen head screws. → After adjustment the left and right knee lever wheel locks must both have the same braking force. 16 | Ottobock Avantgarde CV/CS/CLT... -
Page 17: Adjusting The Braking Force Of The Drum Brake
3) Remove the mounting screw for the desk side panel bracket (see Fig. 30). 4) Adjust the desired backrest height. 5) Tighten the removed Allen head screws to 7 Nm. → Both backrest tubes must be adjusted to the same height. Avantgarde CV/CS/CLT Ottobock | 17... -
Page 18: Adjusting The Back Angle
Fig. 33) can be adjusted to make pushing easier for the attendant. 1) Release the clamping lever. 2) Adjust the height of the push handle. 3) Lock the clamping lever securely. → Both push handles must be adjusted to the same height. 18 | Ottobock Avantgarde CV/CS/CLT... -
Page 19: Adjusting The Back/Seat Upholstery
3) Pull the seat cover out of the cross-brace (see Fig. 36). 4) Loosen the Velcro fastener on the underside of the seat cover (see Fig. 37). 5) Pull the seat cover tauter. 6) Close the Velcro fastener. Avantgarde CV/CS/CLT Ottobock | 19... -
Page 20: Seat Cover Adaptable
The foot supports are the supporting surfaces for the feet. Their distance from the seat surface influences sitting stability. The height adjustment acts on the pelvis and ischial bones. The angle of the foot supports should permit a comfortable ankle position. 20 | Ottobock Avantgarde CV/CS/CLT... -
Page 21: Adjustment Of The Lower Leg Length
Allen head screw may have to be completely removed and inserted into the second hole. 3) Tighten the Allen head screw to 10 Nm. 6.8.1.2 Footrests/foot brackets on Avantgarde CV 1) Loosen the set screws (see Fig. 41, see Fig. 42). 2) Adjust the lower leg length (continuously adjustable). Ensure that the footplate bar is inserted into the swivel segment by at least 40 mm. -
Page 22: Footrest For Short Lower Leg Lengths
The footrest angle allows for a relaxed, comfortable ankle position. Attention must be paid to the residual limb flexion when adjusting the amputation leg rest. 6.8.2.1 Angle-adjustable foot supports with locking joint The angle-adjustable locking joint is used for different foot supports. 22 | Ottobock Avantgarde CV/CS/CLT... -
Page 23: Angle-Adjustable Foot Brackets
4) Tighten the Allen head screw to 5.5 Nm. 5) Close the side cover of the adjustment angle. 6.8.2.3 Amputation leg rest 1) Release the clamping lever. 2) Turn the leg rest to the desired angle. 3) Engage the clamping lever. Avantgarde CV/CS/CLT Ottobock | 23... -
Page 24: Adjustment Of The Side Panels
9) Securely retighten all the screws. 10) Push on the rear wheel and ensure that it can rotate freely. → After adjustment of both side panels, both rear wheels must rotate freely without scraping noises. 24 | Ottobock Avantgarde CV/CS/CLT... -
Page 25: Installing/Adjusting The Anti-Tipper
Before using the anti-tipper, the vertical accessory mount must first be fitted (see Fig. 59, item 1). It serves to hold the anti-tipper and transit roller. The vertical accessory mount can be installed in two positions. 1) Remove the rear reflector from the rear frame (see Fig. 60). Avantgarde CV/CS/CLT Ottobock | 25... -
Page 26: Installing The Anti-Tipper
The anti-tipper can be installed at 5 positions on the vertical accessory mount (see Fig. 63, item 1). 1) Push the anti-tipper tube from below into the vertical accessory mount. 2) Tighten the anti-tipper tube in the vertical accessory mount with the Allen head screw to 7 Nm (see Fig. 63, item 2). 26 | Ottobock Avantgarde CV/CS/CLT... -
Page 27: Adjustment Of The Anti-Tipper
1) Press the button on the pivot arm (see Fig. 66). 2) Adjust the length of the pivot arm. The anti-tipper rollers must at least be completely projecting beyond the largest diameter of the tyre (see Fig. 67). 3) Allow the spring button to engage. Avantgarde CV/CS/CLT Ottobock | 27... -
Page 28: Installing/Adjusting The Safety Belt
7.2 Transport to the customer The wheelchair should be transported to the user in disassembled state using the outer packaging. 7.3 Handover The following steps must be performed for the safe delivery of the product: 28 | Ottobock Avantgarde CV/CS/CLT... -
Page 29: Maintenance/Repair
I device according to the classification criteria outlined in appendix IX of the guidelines. The declaration of conformity was therefore created by the manufacturer with sole responsibility according to appendix VII of the guidelines. Avantgarde CV/CS/CLT Ottobock | 29... -
Page 30: Warranty Terms And Conditions
36 – 52 Min. tyre pressure [bar] The specified weights vary according to the selected options and model. Varies according to tyre option; see the print on the tyre wall Avantgarde CV – Overall length [cm] Seat depth Lower leg 22"... - Page 31 82.5 83.5 With wheelbase extension: rear axle position +9.5 cm. For CLT Ultra model: Rear axle position -2 cm. Avantgarde CV/CS/CLT – Overall width with rear wheel with hollow rim 1), 2), 3) [cm] Seat width Side panels, standard and clothing protector Desk side panel with armrest, height- adjustable 50.5...
- Page 32 From position E, the rear wheel adapter must be turned around (see Fig. 70): right side to the left side and left side to the right side. Avantgarde CLT, fixed welded variant: for the exact values for "posterior seat height", see 647F105* Order Form. 32 | Ottobock Avantgarde CV/CS/CLT...
-
Page 33: Avantgarde Cv/Cs/Clt Ottobock
Technical Data Avantgarde CV/CS/CLT Ottobock | 33... - Page 34 34 | Ottobock Avantgarde CV/CS/CLT...
- Page 35 · www.ottobock.com.au Otto Bock Bulgaria Ltd. info@ottobock.sk · www.ottobock.sk 41 Tzar Boris III‘ Blvd. · 1612 Sofia · Bulgaria Beijing Otto Bock Orthopaedic Industries Co., Ltd. T +359 (0) 2 80 57 980 · F +359 (0) 2 80 57 982 Otto Bock Sava d.o.o. B12E, Universal Business Park info@ottobock.bg · www.ottobock.bg Industrijska bb ·...
- Page 36 Ihr Fachhändler | Your specialist dealer Versandanschrift für Rücksendungen/Adress for Returns: Otto Bock Manufacturing Königsee GmbH Lindenstraße 13 · 07426 Königsee-Rottenbach/Germany Otto Bock Mobility Solutions GmbH Lindenstraße 13 · 07426 Königsee-Rottenbach/Germany T +49 (0) 69 9999 9393 · F +49 (0) 69 9999 9392 ccc@ottobock.com ·...
Need help?
Do you have a question about the Avantgarde CV and is the answer not in the manual?
Questions and answers