Table of Contents
Advertisement
Available languages
Available languages
Quick Links
Nutzung Ihres Rollstuhls/Sitzschalenuntergestells oder
Buggies zum Transport in Behindertentransportkraftwagen
.................................................................................................. 3
Using your wheelchair/ mobility base with seating shell
or buggy for transportation in motor vehicles
................................................................................................ 39
Utilisation de votre fauteuil roulant / châssis de coque d'assise
ou de poussettes lors du transport dans des véhicules destinés
au transport de personnes à mobilité réduite
................................................................................................ 79
Benyttelse af kørstol eller klapvogn som sæde under
transport i bil mv.
.............................................................................................. 115
© Otto Bock · 646D158-12-1004
Advertisement
Chapters
Table of Contents

Related Manuals for Otto Bock LISA 2005


Summary of Contents for Otto Bock LISA 2005
- Page 1 Utilisation de votre fauteuil roulant / châssis de coque d’assise ou de poussettes lors du transport dans des véhicules destinés au transport de personnes à mobilité réduite ....................79 Benyttelse af kørstol eller klapvogn som sæde under transport i bil mv....................115 © Otto Bock · 646D158-12-1004...
-
Page 3: Table Of Contents
3 Hersteller von Sicherungsgurtsystemen ....................8 4 Anleitung zur Sicherung des Rollstuhls / Untergestells / Buggies im Fahrzeug ........9 5 Produktspezifische Anweisungen – Rehabuggy ..................12 – Lisa 2005 – ..........................12 – Lisa – ............................13 – Eco Buggy – ..........................14 – Kimba Spring – ..........................15 –... -
Page 4: Einleitung
Sicherheit der Fahrzeuginsassen während des Transports und während eines Frontalunfalls verbessern. Die Otto Bock Produkte gemäß der in Kapitel 5. aufgeführten Tabelle entsprechen den Anforderungen der ISO 7176-19, ANSI/RESNA WC/ Vol.1 - Teil 19 und/ oder DIN 75078 Teil 2 wenn sie mit den bei den Tests verwendeten und für dieses Einsatzgebiet speziell entwickelten Gurthalteösen / Schlosszungen zur Aufnahme... -
Page 5: Sicherheitshinweise
Sicherheitsrisiko bedeuten, als wenn die im Fahrzeug installierten Sitze und Rückhaltesysteme genutzt werden. Otto Bock empfiehlt daher: Wenn und wann immer möglich sollten die im Fahrzeug instal- lierten Sitze und die dazugehörigen Rückhaltesysteme genutzt werden, d.h. sollten Benutzer in Sitze umge- setzt werden, die im Kraftfahrzeug vorhanden sind. - Page 6 Veränderungen oder Ersatz von Rahmen- bzw. Strukturteilen dürfen nur mit ausdrücklicher Genehmigung von Otto Bock vorgenommen werden. Sollte das Otto Bock Produkt in einen Unfall verwickelt worden sein, so darf es nicht länger zum Transport von Benutzern eingesetzt werden. Wir empfehlen das Produkt auszutauschen oder zur Prüfung an Otto Bock zurück zu schicken.
- Page 7 Um den Insassen des Rollstuhls/ Untergestells/ Buggies herum muß der umgebende Raum frei gehalten werden wie in der Figur unten beschrieben. Nach vorne beträgt der Freiraum 650 mm bei Verwendung von Schulter- und Beckengurten und 950 mm bei der ausschließ- lichen Verwendung eines Beckengurtes zur Personenrückhaltung.
-
Page 8: Hersteller Von Sicherungsgurtsystemen
800-987-9987 Ankerplatten-Sets Otto Bock bietet für die hier aufgeführten Produkte Ankerplatten-Sets für Rückhaltesysteme nach ISO Norm an. Ankerplatten-Sets für das Autogurtschlosssystem werden nicht von Otto Bock geliefert. Eine nach DIN 75078-Teil 2 geprüfte Kombination aus Ankerplatten-Sets und passende Sicherungsgurtsysteme können bezogen werden zum Beispiel bei:... -
Page 9: Anleitung Zur Sicherung Des Rollstuhls / Untergestells / Buggies Im Fahrzeug
4 Anleitung zur Sicherung des Rollstuhls / Untergestells / Buggies im Fahrzeug Der Rollstuhl wird in Fahrtrichtung etwa mittig zwischen die im Fahrzeugboden verankerten Lochschienen ge- schoben und mittels Feststellbremse gesichert. Die Übereinstimmung des im Kraftfahrzeug vorhandenen Systems mit dem am Rollstuhl eingesetzten System muß... - Page 10 Die Rückhaltegurte müssen gemäß den Hersteller- angaben straff gespannt werden Lose Teile sind separat im Fahrzeug zu sichern. Der Rollstuhlinsasse wird in eine annähernd aufrechte Sitzposition gebracht. Der Beckengurt muss beidseitig an den am Roll- stuhl vorgesehenen Verankerungspunkten befestigt werden. Der Schultergurt wird in den Beckengurt eingehakt.
- Page 11 Die Gurte müssen zu jeder Zeit körpernah geführt sein. Niemals dürfen Sie durch Komponenten oder andere Teile vom Körper des Benutzers weggehalten werden. Der Schultergurt muss beim Benutzen über die Schul- ter laufen. Ist dies nicht möglich, darf der Benutzer in dieser Position nicht im Fahrzeug transportiert wer- den.
-
Page 12: Produktspezifische Anweisungen - Rehabuggy
5 Produktspezifische Anweisungen – Rehabuggy – Lisa 2005 – Der Rehabuggy ist permanent mit Fixierungspunkten ausgestattet. Sie benötigen für diese Modelle keine zu- sätzlichen Fixierungssets. Führung des Beckengurtes Lisa Buggy mit richtig angebrachten Befestigungsgurten. Führung des Beckengurtes Stecken Sie je ein Ende des Beckengurtes von der Sitzseite aus, zwischen Bespannung und Rahmen, nach außen durch und hängen Sie das Ende des Beckengurtes am „Pin“... -
Page 13: Lisa
5 Produktspezifische Anweisungen – Rehabuggy – Lisa – Sie benötigen zur Montage des Fixierungssets HR32079700 nachfolgendes Werkzeug: Ringschlüssel Gr. 10, Innensechskantschlüssel Gr. 4, Spitzzange Montage der Fixierungspunkte am Produkt Schrauben Sie die mitgelieferten Verschrauben Sie je eine Anker- Verschrauben Sie je eine Anker- „Pins“... -
Page 14: Eco Buggy
5 Produktspezifische Anweisungen – Rehabuggy – Eco Buggy – Sie benötigen zur Montage des Fixierungssets HR32549700 nachfolgendes Werkzeug: Ringschlüssel Gr. 10, Innensechskantschlüssel Gr. 4, Spitzzange Montage der Fixierungspunkte am Produkt Verschrauben Sie je eine Anker- Verschrauben Sie je eine Anker- Die Ankerplatten am Vorderrahmen platte, mit den Rohrschellen D20, platte mit vormontiertem Pin, mit... -
Page 15: Kimba Spring
5 Produktspezifische Anweisungen – Rehabuggy – Kimba Spring – Sie benötigen zur Montage des Fixierungssets HR32909700/HR32919700 nachfolgendes Werkzeug: Ringschlüssel Gr. 10, Innensechskantschlüssel Gr. 4, Spitzzange Montage der Fixierungspunkte am Produkt Die Ankerplatten am Vorderrah- Modelle mit lenkbaren Vor- Alle Modelle Modelle mit starren Verschrauben Sie je eine An- men jeweils ca. -
Page 16: Kimba
5 Produktspezifische Anweisungen – Rehabuggy – Kimba – Sie benötigen zur Montage des Fixierungssets HR32549700 nachfolgendes Werkzeug: Ringschlüssel Gr. 10, Innensechskantschlüssel Gr. 4, Spitzzange Montage der Fixierungspunkte am Produkt Die Ankerplatten am Vorderrahmen Verschrauben Sie je eine Ankerplat- Verschrauben Sie je eine Ankerplat- te, mit den Rohrschellen D20, links te mit vormontiertem Pin, mit den jeweils ca. -
Page 17: Leo
5 Produktspezifische Anweisungen – Rehabuggy – LEO – Sie benötigen zur Montage des Fixierungssets HR32909700/HR32919700 nachfolgendes Werkzeug: Ringschlüssel Gr. 10, Innensechskantschlüssel Gr. 4, Spitzzange Montage der Fixierungspunkte am Produkt Die Ankerplatten am Vorder- Modelle mit starren Vorder- Modelle mit lenkbaren Vor- Alle Modelle Verschrauben Sie je eine An- rahmen jeweils ca. -
Page 18: Produktspezifische Anweisungen - Elektro-Rollstühle
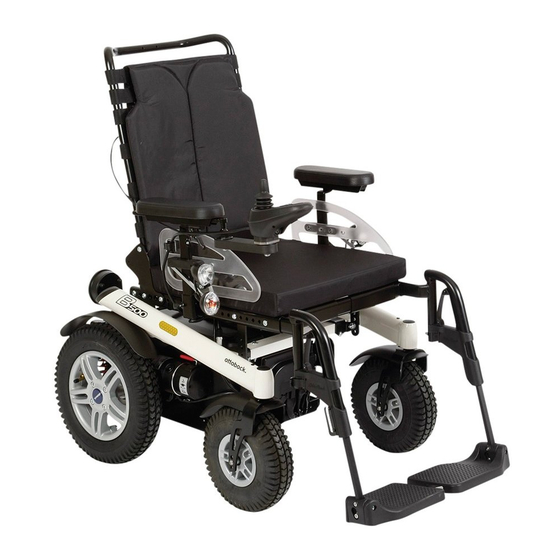
6 Produktspezifische Anweisungen – Elektro-Rollstühle – B500/B600 – Sie benötigen zur Montage des Fixierungssets 491S00=SK022 nachfolgendes Werkzeug: Ringschlüssel Gr. 13 und 17, Innensechskantschlüssel Gr. 4 und Gr. 5 Montage der Fixierungspunkte am Produkt Schrauben Sie die mitgelieferten Verschrauben Sie je einen Anker- Die Ankerplatten am Hinterrahmen „Pins“... -
Page 19: A200
6 Produktspezifische Anweisungen – Elektro-Rollstühle – A200 – Sie benötigen zur Montage des Fixierungssets 491S00=SK024 nachfolgendes Werkzeug: Ringschlüssel Gr. 13 und 17, Innensechskantschlüssel Gr. 10. Montage der Fixierungspunkte am Produkt Schrauben Sie die mitgelieferten Die Gurtösen vorne am Querrohr Die Gurtösen am Sitzwinkel sind „Pins“... -
Page 20: C1000
Produktspezifische Anweisungen – Elektro-Rollstühle – C1000 – Sie benötigen zur Montage des Fixierungssets 491S00=SK025 nachfolgendes Werkzeug: Ring-Maulschlüssel Gr. 10 und 13, , Innensechskantschlüssel Gr. 6. Montage der Fixierungspunkte am Produkt Halten Sie die Abstandshülsen zwi- Entfernen Sie die obere Heckverklei- Stecken Sie die Gurtöse von unten schen Bohrungen der Öse, ober- dung des C 1000 durch lösen der... - Page 21 Führung des Beckengurtes C 1000 mit richtig angebrachten Stecken Sie je ein Ende des Beckengurtes von der Sitzseite aus, nach Befestigungsgurten außen und hängen Sie das Ende des Beckengurtes am "Pin" der ge- genüberliegenden Seite ein. Dieser Elektrorollstuhl ist mit einer winkelverstellbaren Rückenlehne ausgestattet. Vor Fahrtbeginn ist die Rücklehne in eine annähernd aufrechte Position zu bringen und das Einrasten der Verrie- gelung in die Arretierung auf beiden Seiten zu prüfen.
-
Page 22: Skippi
6 Produktspezifische Anweisungen – Elektro-Rollstühle – Skippi – Sie benötigen zur Montage des Fixierungssets 491S00=SK024 nachfolgendes Werkzeug: Ringschlüssel Gr. 13 und 17, Innensechskantschlüssel Gr. 10. Montage der Fixierungspunkte am Produkt Die Gurtösen am Sitzwinkel sind Schrauben Sie die mitgelieferten Die Gurtösen vorne am Querrohr sind „Pins“... -
Page 23: B400
6 Produktspezifische Anweisungen – Elektro-Rollstühle – B400 – Sie benötigen zur Montage des Fixierungssets 491S00=SK027 nachfolgendes Werkzeug: Ringschlüssel Gr. 13 und 17, Innensechskantschlüssel Gr. 6. Montage der Fixierungspunkte am Produkt Befestigen Sie die mitgelieferten Die hinteren Gurtösen sind am An- Schrauben Sie die mitgelieferten Gurtösen an den im Fahrgestell triebsträger schon ab Werk vor-... -
Page 24: Produktspezifische Anweisungen - Manuelle Rollstühle
7 Produktspezifische Anweisungen – Manuelle Rollstühle – Avantgarde T – Sie benötigen zur Montage des Fixierungssets 481S00=SK029 nachfolgendes Werkzeug: Ringschlüssel Gr. 10 und Gr. 13, Innensechskantschlüssel Gr. 4 und Gr. 5 Montage der Fixierungspunkte am Produkt Verschrauben Sie je einen Ankerpunkt Verschrauben Sie je eine Ankerplatte links und rechts innen am hinteren links und rechts am Vorderrahmen Rahmenteil. -
Page 25: Avantgarde Vr
7 Produktspezifische Anweisungen – Manuelle Rollstühle – Avantgarde VR – Sie benötigen zur Montage des Fixierungssets 481S00=SK018 nachfolgendes Werkzeug: Ringschlüssel Gr. 10 und Gr. 13, Innensechskantschlüssel Gr. 4 und Gr. 5 Montage der Fixierungspunkte am Produkt Verschrauben Sie je einen Anker- Verschrauben Sie je eine Ankerplatte links und rechts innen am hinteren punkt links und rechts am Vorder- Rahmenteil. -
Page 26: Start Basic, Start Multi
7 Produktspezifische Anweisungen – Manuelle Rollstühle – Start Basic, Start Multi – Sie benötigen zur Montage des Fixierungssets 481S00=SK019 nachfolgendes Werkzeug: Ringschlüssel Gr. 10 und Gr. 13, Innensechskantschlüssel Gr. 4 und Gr. 5 Montage der Fixierungspunkte am Produkt Verschrauben Sie je einen Anker- Verschrauben Sie je eine Ankerplatte links und rechts innen am hinteren punkt links und rechts am Vorder- Rahmenteil. -
Page 27: Start Hemi
7 Produktspezifische Anweisungen – Manuelle Rollstühle – Start Hemi – Sie benötigen zur Montage des Fixierungssets 481S00=SK017 nachfolgendes Werkzeug: Ringschlüssel Gr. 10 und Gr. 13, Innensechskantschlüssel Gr. 4 und Gr. 5 Montage der Fixierungspunkte am Produkt Verschrauben Sie je einen Anker- Verschrauben Sie je eine Ankerplatte links und rechts innen am hinteren punkt links und rechts am Vorder- Rahmenteil. -
Page 28: Start Plus
7 Produktspezifische Anweisungen – Manuelle Rollstühle – Start Plus – Sie benötigen zur Montage des Fixierungssets 481S00=SK020 nachfolgendes Werkzeug: Ringschlüssel Gr. 10 und Gr. 13, Innensechskantschlüssel Gr. 4 und Gr. 5 Montage der Fixierungspunkte am Produkt Verschrauben Sie je einen Anker- Verschrauben Sie je eine Ankerplatte links und rechts innen am hinteren punkt links und rechts am Vorder- Rahmenteil. -
Page 29: Start M2 Effect
7 Produktspezifische Anweisungen – Manuelle Rollstühle – Start M2 Effect – Sie benötigen zur Montage des Fixierungssets 481S00=SK030 nachfolgendes Werkzeug: Ringschlüssel Gr. 10 und Gr. 13, Innensechskantschlüssel Gr. 4 und Gr. 5 Montage der Fixierungspunkte am Produkt Verschrauben Sie je einen Ankerpunkt Verschrauben Sie je eine Ankerplatte links und rechts innen am hinteren links und rechts am Vorderrahmen. -
Page 30: Start M3 Hemi
7 Produktspezifische Anweisungen – Manuelle Rollstühle – Start M3 Hemi – Sie benötigen zur Montage des Fixierungssets 481S00=SK030 nachfolgendes Werkzeug: Ringschlüssel Gr. 10 und Gr. 13, Innensechskantschlüssel Gr. 4 und Gr. 5 Montage der Fixierungspunkte am Produkt Verschrauben Sie je einen Anker- Verschrauben Sie je eine Ankerplatte links und rechts innen am hinteren punkt links und rechts am Vorder- Rahmenteil. -
Page 31: Start M5 Comfort
7 Produktspezifische Anweisungen – Manuelle Rollstühle – Start M5 Comfort – Sie benötigen zur Montage des Fixierungssets 481S00=SK030 nachfolgendes Werkzeug: Ringschlüssel Gr. 10 und Gr. 13, Innensechskantschlüssel Gr. 4 und Gr. 5 Montage der Fixierungspunkte am Produkt Verschrauben Sie je einen Ankerpunkt Verschrauben Sie je eine Ankerplatte links und rechts innen am hinteren links und rechts am Vorderrahmen. -
Page 32: Start M6 Junior
7 Produktspezifische Anweisungen – Manuelle Rollstühle – Start M6 Junior – Sie benötigen zur Montage des Fixierungssets 481S00=SK030 nachfolgendes Werkzeug: Ringschlüssel Gr. 10 und Gr. 13, Innensechskantschlüssel Gr. 4 und Gr. 5 Montage der Fixierungspunkte am Produkt Verschrauben Sie je einen Ankerpunkt Verschrauben Sie je eine Ankerplatte links und rechts innen am hinteren links und rechts am Vorderrahmen. -
Page 33: Bravo Racer
7 Produktspezifische Anweisungen – Manuelle Rollstühle – BRAVO Racer – Fixierung mit Gurtschlaufen . Sie benötigen zur Montage vier Gurtschlaufen Montage der Fixierungspunkte am Produkt Legen Sie je eine Gurtschlaufe links Legen Sie je eine Gurtschlaufe links und rechts innen um das hintere und rechts am Vorderrahmen hinter Rahmenrohr. - Page 34 7 Produktspezifische Anweisungen – Manuelle Rollstühle – BRAVO Racer – Fixierung mit Halteösen Sie benötigen zur Montage des Fixierungssets 481S00=SK040 nachfolgendes Werkzeug: Ringschlüssel Gr. 10 und Gr. 13, Innensechskantschlüssel Gr. 4 und Gr. 5 Montage der Fixierungspunkte am Produkt Verschrauben Sie je einen Ankerpunkt Verschrauben Sie je eine Ankerplatte links und rechts innen am hinteren links und rechts am Vorderrahmen Rahmenteil.
-
Page 35: Motus
7 Produktspezifische Anweisungen – Manuelle Rollstühle – Motus – Fixierung mit Gurtschlaufen (Chrash getestet nach ISO 7176-19) Sie benötigen zur Montage vier Gurtschlaufen (siehe Kap. 3, Liste der Hersteller von Sicherungsgurtsystemen). Montage der Fixierungspunkte am Produkt Legen Sie je eine Gurtschlaufe links Legen Sie links und rechts je eine Gurtschlaufe um das hintere Rahmenteil und rechts am Vorderrahmen um das unterhalb des Antriebsradadapters. - Page 36 Sie benötigen zur Montage des Fixierungssets 481S00=SK018 nachfolgendes Werkzeug: Ringschlüssel Gr. 10 und Gr. 13, Innensechskantschlüssel Gr. 4 und Gr. 5 Montage der Fixierungspunkte am Produkt (Erfolgt nur durch Otto Bock) Verschrauben Sie je einen Ankerpunkt Verschrauben Sie je eine Ankerplatte links und rechts innen am hinteren links und rechts am Vorderrahmen Rahmenteil.
-
Page 37: Produktspezifische Anweisungen - Sitzschalenuntergestelle
8 Produktspezifische Anweisungen – Sitzschalenuntergestelle – Dino 3 – Sie benötigen zur Montage des Fixierungssets 471S00=SK021 nachfolgendes Werkzeug: Ringschlüssel Gr. 10 und Gr. 13, Innensechskantschlüssel Gr. 4 und Gr. 5 Montage der Fixierungspunkte am Produkt Verschrauben Sie je einen Anker- Verschrauben Sie je eine Ankerplatte links und rechts innen am hinteren punkt links und rechts am Vorder- Rahmenteil. -
Page 38: Technische Daten
9 Technische Daten Produkt Abmessungen Gewicht Wendekreis Max. Zuladung ANSI/RESNA ISO 7176-19 DIN 75078-2 LxBxH (mm) (kg) WC/19 (mm) (kg) 1075x585x1035 13,5 Lisa Gr. 1 1190x635x1045 14,0 Lisa Gr. 2 1075x585x1035 11,0 Lisa Gr. 1 1190x635x1045 13,5 Lisa Gr. 2 960x570x1100 Eco Buggy 1050x630x980... - Page 39 3 Manufacturers of Restraint Systems .....................44 4 Instructions for Securing the Wheelchair/Mobility Base/Buggy in a Motor Vehicle ......45 5 Product Specific Instructions - Rehab Buggy ..................48 – Lisa 2005 – ..........................48 – Lisa – ............................49 – Eco Buggy – ..........................50 –...
-
Page 40: Introduction
1 Introduction This manual is only to be used with Otto Bock products that have been defined in the Instructions for Use Manual as being suitable for transportation of a less able bodied person in a motor vehicle, and should be used in conjunction with the Instruction Manual issued by the Manufacturers of wheelchair restraints equipment. -
Page 41: Safety Instructions
2 Safety Instructions Otto Bock does not recommend the use of a wheelchair/ mobibility base with seating system/ buggy for transportation in a motor vehicle. Our mobility aids are so designed as to be easily maneuverable, light- weight and functional which is in contrast with the requirements a safe seat must fulfill for transport in a motor vehicle. - Page 42 Modifications or replacement of the frame or structural parts are allowed only after express authorisation by Otto Bock. If the Otto Bock product is involved in a collision it must no longer be used for the transport of the user. We recommend that the product be replaced immediately and the involved product be returned to Otto Bock for inspection.
- Page 43 Clear zones around the wheelchair user/ mobility base/ buggy are required as shown in the figure be- low. To the front, a clear zone of 650 mm is needed when the 3-point shoulder and pelvic belt occupant restraint is used . If only a pelvic belt is used as person restraint system the clear zone to the front must be 950 mm.
-
Page 44: Manufacturers Of Restraint Systems
For the products described here, Otto Bock offers anchor plate sets for restraint systems according to ISO standards. Otto Bock does not supply anchor plate sets for the motor vehicle belt buckle system. A combination of anchor plate sets and suitable safety restraint systems tested according to DIN 75078-part... -
Page 45: Instructions For Securing The Wheelchair/Mobility Base/Buggy In A Motor Vehicle
4 Instructions for Securing the Wheelchair/Mobility Base/Buggy in a Motor Vehicle Place the wheelchair in a forward facing direction and centrally between the tie-down metal rails mounted in the floor of the vehicle then apply the wheelchair’s brakes. Check the conformity of the vehicle anchored restraint system and the wheelchair restraint system: Motor vehicle belt buckle system The wheelchair must then be anchored to the vehicle using tie-down-straps mounted in the floor tracks and the anchor points on the left/ right sides of the front frame and at the left/ right sides of... - Page 46 The tie-down straps must be tightened strictly in accordance with the manufacturer’s specifications. Loose parts must be separately secured in the motor vehicle. The wheelchair user must be seated in an almost up- right seating position. The pelvic belt must be attached to the anchoring points on both sides of the wheelchair.
- Page 47 Always ensure that restraint belts are close to the body and never held away from the occupant’s upper body by wheelchair components . The shoulder belt must run over the user’s shoulder. If this is not possible, then the user must not be trans- ported in this position in a motor vehicle.
-
Page 48: Product Specific Instructions - Rehab Buggy
5 Product Specific Instructions - Rehab Buggy – Lisa 2005 – This rehab buggy features anchoring points. For this model, additional fixation kits are not required. Lisa Buggy showing the correct positioning of the tie-down straps. Guidance for fitting the Pelvic Belt Pass one end of the pelvic belt through the rear corner of the seat/backrest upholstery. -
Page 49: Lisa
5 Product Specific Instructions - Rehab Buggy – Lisa – For assembly of the fixation kit HR32079700 you will need the following tools: a ring wrench size 10, an Allen wrench size 4, pointed pliers Attaching the anchoring points to the product Screw the included "Anchor Pins”... -
Page 50: Eco Buggy
5 Product Specific Instructions - Rehab Buggy – Eco Buggy – For assembly of the fixation kit HR32549700 you will need the following tools: a ring wrench size 10, an Allen wrench size 4, pointed pliers Attaching the anchoring points to the product Assemble two D20 pipe clips Assemble two D20 pipe clips Adjust the position of the front an-... -
Page 51: Kimba Spring
5 Product Specific Instructions - Rehab Buggy – Kimba Spring – For assembly of the fixation kit HR32909700/HR32919700 you will need the following tools: a ring wrench size 10, an Allen wrench size 4, pointed pliers Attaching the anchoring points to the product All models Adjust the position of the front Models with rigidly mounted... -
Page 52: Kimba
5 Product Specific Instructions - Rehab Buggy – Kimba – For assembly of the fixation kit HR32549700 you will need the following tools: a ring wrench size 10, an Allen wrench size 4, pointed pliers Attaching the anchoring points to the product Assemble two D20 pipe clips around Assemble two D20 pipe clips around Adjust the position of the front an-... -
Page 53: Leo
5 Product Specific Instructions - Rehab Buggy – LEO – For assembly of the HR32909700/HR32919700 fixation kit you will need the following tools: a ring wrench size 10, an Allen wrench size 4, pointed pliers Attaching the anchoring points to the product Adjust the position of the front Models with rigidly mounted Models with swiveling front... -
Page 54: Product Specific Instructions - Power Wheelchairs
6 Product Specific Instructions – Power Wheelchairs – B500/B600 – For assembly of the 491S00=SK022 fixation kit you will need the following tools: ring wrenches sizes 13 and 17, Allen wrenches sizes 4 and 5 Attaching the anchoring points to the product No extra brackets are required for Screw the included "Anchor Pins"... -
Page 55: A200
6 Product Specific Instructions – Power Wheelchairs – A200 – For assembly of the 491S00=SK024 fixation kit you will need the following tools: ring wrenches sizes 13 and 17, Allen wrench size 10 Attaching the anchoring points to the product No extra brackets are required On the left and right side, screw the No extra brackets are required... -
Page 56: C1000
6 Product Specific Instructions – Power Wheelchairs – C1000 – For assembly of the 491S00=SK025 fixation kit you will need the following tools: combination wrenches sizes 10 and 13, Allen wrench size 6. Attaching the anchoring points to the product Hold the spacer sleeves between the Remove the upper rear covering of Put the anchoring bracket from be-... - Page 57 Guidance for fitting the Pelvic Belt C 1000 showing the correct positio- Pass one end of the pelvic belt through the space between the armrest ning of the tie-down straps. skirt guard and seat cushion. Now clip the pelvic belt buckle onto the "Anchor Pin"...
-
Page 58: Skippi
6 Product Specific Instructions – Power Wheelchairs – Skippi – For assembly of the 491S00=SK024 fixation kit you will need the following tools: ring wrenches sizes 13 and 17, Allen wrench size 10. Attaching the anchoring points to the product On the left and right side, screw the No extra brackets are required for No extra brackets are required for... -
Page 59: B400
6 Product Specific Instructions – Power Wheelchairs – B400 – For assembly of the 491S00=SK024 fixation kit you will need the following tools: Ring wrenches sizes 13 and 17, Allen key size 6 Attaching the anchoring points to the product Affix the supplied belt eyelets to The rear belt eyelets are already Screw the supplied pins into the... -
Page 60: Product Specific Instructions - Manual Wheelchairs
7 Product Specific Instructions – Manual Wheelchairs – Avantgarde T – For assembly of the 481S00=SK029 fixation kit you will need the following tools: ring wrenches sizes 10 and 13, Allen wrenches sizes 4 and 5 Attaching the anchoring points to the product Mount anchoring points to the front Mount anchor plates to the inner sides on the left and right of the rear frame frame on either side of the unit, just... -
Page 61: Avantgarde Vr
7 Product Specific Instructions – Manual Wheelchairs – Avantgarde VR – For assembly of the 481S00=SK018 fixation kit you will need the following tools: ring wrenches sizes 10 and 13, Allen wrenches sizes 4 and 5 Attaching the anchoring points to the product Mount anchoring points to the front Mount anchor plates to the inner sides on the left and right of the rear frame on either side of the unit, just... -
Page 62: Start Basic, Start Multi
7 Product Specific Instructions – Manual Wheelchairs – Start Basic, Start Multi – For assembly of the 481S00=SK019 fixation kit you will need the following tools: ring wrenches sizes 10 and 13, Allen wrenches sizes 4 and 5 Attaching the anchoring points to the product Assemble two pipe clips around the Mount anchor plates to the inner sides on the left and right of the rear front frame on either side of the unit. -
Page 63: Start Hemi
7 Product Specific Instructions – Manual Wheelchairs – Start Hemi – For assembly of the 481S00=SK017 fixation kit you will need the following tools: ring wrenches sizes 10 and 13, Allen wrenches sizes 4 and 5 Attaching the anchoring points to the product Mount anchoring points to the front Mount anchor plates to the inner sides on the left and right of the rear frame on either side of the unit, just... -
Page 64: Start Plus
7 Product Specific Instructions – Manual Wheelchairs – Start Plus – For assembly of the 481S00=SK020 fixation kit you will need the following tools: ring wrenches sizes 10 and 13, Allen wrenches sizes 4 and 5 Attaching the anchoring points to the product Assemble two pipe clips around the Mount anchor plates to the inner sides on the left and right of the rear front frame on either side of the unit. - Page 65 7 Product Specific Instructions – Manual Wheelchairs – Start M2 Effect – For assembly of the 481S00=SK030 fixation kit you will need the following tools: ring wrenches sizes 10 and 13, Allen wrenches sizes 4 and 5 Attaching the anchoring points to the product Mount anchoring points to the front Mount anchor plates to the inner sides on the left and right of the rear frame on either side of the unit, so...
-
Page 66: Start M3 Hemi
7 Product Specific Instructions – Manual Wheelchairs – Start M3 Hemi – For assembly of the 481S00=SK030 fixation kit you will need the following tools: ring wrenches sizes 10 and 13, Allen wrenches sizes 4 and 5 Attaching the anchoring points to the product Mount anchoring points to the front Mount anchor plates to the inner sides on the left and right of the rear frame on either side of the unit, so... -
Page 67: Start M5 Comfort
7 Product Specific Instructions – Manual Wheelchairs – Start M5 Comfort – For assembly of the 481S00=SK030 fixation kit you will need the following tools: ring wrenches sizes 10 and 13, Allen wrenches sizes 4 and 5 Attaching the anchoring points to the product Mount anchoring points to the front Mount anchor plates to the inner sides on the left and right of the rear frame on either side of the unit, so... -
Page 68: Start M6 Junior
7 Product Specific Instructions – Manual Wheelchairs – Start M6 Junior – For assembly of the 481S00=SK030 fixation kit you will need the following tools: ring wrenches sizes 10 and 13, Allen wrenches sizes 4 and 5 Attaching the anchoring points to the product Mount anchoring points to the front Mount anchor plates to the inner sides on the left and right of the rear frame on either side of the unit, so... -
Page 69: Bravo Racer
7 Product Specific Instructions – Manual Wheelchairs – BRAVO Racer – Securing with belt loops . You require four belt loops for installation Attaching the anchoring points to the product Attach one belt loop around the frame Attach one belt loop around the frame tube on the left and right of the rear tube behind the caster journals on frame, respectively. - Page 70 7 Product Specific Instructions – Manual Wheelchairs – BRAVO Racer – Securing with fixing eyelets For assembly of the 481S00=SK040 fixation kit you will need the following tools: Ring wrenches sizes 10 and 13, Allen keys sizes 4 and 5 Attaching the anchoring points to the product Screw one anchoring point to the left Screw one anchor plate to the left and right inside of the rear frame,...
-
Page 71: Motus
7 Product-Specific Instructions – Manual Wheelchairs – Motus – Securing with belt loops You require four belt loops for installation . Attaching the anchoring points to the product Attach one belt loop around the frame Pass one belt loop around the left and right of the rear frame, respectively, tube on the left and right of the front below the drive wheel adapter. - Page 72 7 Product–Specific Instructions – Manual Wheelchairs – Motus – Securing with fixing eyelets For assembly of the 481S00=SK018 fixation kit you will need the following tools: Ring wrenches sizes 10 and 13, Allen keys sizes 4 and 5 Attaching the anchoring points to the product Screw one anchoring point to the left Screw one anchor plate to the left and right inside of the rear frame, and right sides of the front frame,...
-
Page 73: Product Specific Instructions - Seating Shell Mobility Bases
8 Product Specific Instructions – Seating Shell Mobility Bases – Dino 3 – For assembly of the 481S00=SK021 fixation kit you will need the following tools: ring wrenches sizes 10 and 13, Allen wrenches sizes 4 and 5 Attaching the anchoring points to the product Assemble two pipe clips around the Mount anchor plates to the inner sides on the left and right of the rear front frame on either side of the unit. -
Page 74: Technical Data
9 Technical Data Product Dimensions Weight Turning Max. load ANSI/RESNA ISO 7176-19 DIN 75078-2 LxWxH (mm) (kg) WC/19 (mm) (kg) 1075x585x1035 13.5 Lisa size 1 1190x635x1045 14.0 Lisa size 2 1075x585x1035 11.0 Lisa size 1 1190x635x1045 13.5 Lisa size 2 960x570x1100 Eco Buggy 1050x630x980... - Page 75 Kurzanleitung – für den täglichen Gebrauch von Rollstühlen, Sitzschalenuntergestellen oder Buggies (nachfolgend nur als Rollstuhl bezeichnet) zum Transport in Behindertentransportkraftwa- gen. Lesen Sie vor der erstmaligen Nutzung zum Transport im BTW unbedingt die Bedienungsanleitung vollständig durch. 1) Stellen Sie den Rollstuhl etwa in die Mitte zwischen die im Fahrzeugboden vorgesehenen Veranke- rungspunkte, und zwar so das der Patient in Fahrtrichtung sitzt.
- Page 76 Overview of Wheelchair tie-down Information – for the daily use of wheelchairs, mobility bases with seating systems or buggies (hereinafter referred to as wheelchair) for transportation in motor vehicles. Please read the Instructions for Use Manual carefully before using the wheelchair for transportation in vehicles for the first time.
- Page 77 Notice sommaire pour l´utilisation quotidienne des fauteuils roulants, des châssis de coque d´assise ou des poussettes (appelées ci-après “fauteuil roulant”) pour le transport dans le véhicule pour handicapés. Lisez impérativement l´intégralité de cette notice avant d´utiliser les fauteuils roulants pour le transport dans des véhicules destinés au transport de personnes à...
- Page 78 Kort vejledning – Gennemlæs altid kørstolens brugerhåndbog grundigt forinden du første gang benytter den som sæde i bil mv. Gennemlæs altid kørstolens brugerhåndbog grundigt forinden du første gang benytter den som sæde i bil mv. 1) Placer kørestolen ca. i midten mellem forankrings- punkterne i køretøjets gulv og det således, at personen sidder i kørselsretning.
- Page 79 4 Indications pour la sécurité du fauteuil roulant, du châssis ou de la poussette dans le véhicule ......................85 5 Recommandations spécifiques – poussette Reha ................88 – Lisa 2005 – ..........................88 – Lisa – ............................89 – Eco Buggy – ..........................90 – Kimba Spring – ..........................91 –...
-
Page 80: Introduction
Pour vous permettre d’utiliser votre fauteuil roulant, votre châssis de coque d’assise ou votre poussette lors du transport dans des véhicules destinés au transport de personnes à mobilité réduite, Otto Bock a développé, dans le respect des normes de sécurité nationales et internationales, des dispositifs de sécurité qui améliorent la sécurité... -
Page 81: Consignes De Sécurité
En cas d’accident de la circulation, Otto Bock ne peut en aucun cas être tenu pour responsable des dommages corporels occasionnés par des produits Otto Bock. L’utilisation correcte des systèmes de sécurité et de retenue permet de minimiser les risques de blessure sans pour autant les exclure totalement. - Page 82 Toute modification ou remplacement d’éléments du cadre ou de pièces structurelles nécessite l’autorisation expresse d’Otto Bock. Si le produit Otto Bock a été impliqué dans un accident, il ne doit plus être utilisé pour trans- porter des passagers. Nous recommandons de remplacer le produit ou de le retourner à Otto Bock afin de le faire contrôler.
- Page 83 / languettes de fermeture adéquats signalés . Cela est également valable si l’utilisateur ne tolère pas les systèmes de retenue prescrits pour le transport dans un produit Otto Bock à l’intérieur du véhicule. Surfaces d’écart Les ceintures de sécurité...
-
Page 84: Fabricant De Systèmes De Ceintures De Sécurité
800-987-9987 Kits de plaques d’ancrage Otto Bock propose des kits de plaques d’ancrage pour système de retenue pouvant être utilisés sur les produits mentionnés dans cette notice et respectant la norme ISO. Les kits de plaques d’ancrage pour le système de fermeture auto ne sont pas fournis par Otto Bock. Vous pouvez vous procurer un ensemble plaques d’ancrage et systèmes de ceinture de sécurité... -
Page 85: Indications Pour La Sécurité Du Fauteuil Roulant, Du Châssis Ou De La Poussette Dans Le Véhicule
4 Indications pour la sécurité du fauteuil roulant, du châssis ou de la poussette dans le véhicule Le fauteuil roulant est introduit face à la route environ au milieu entre les rails perforés ancrés dans le plancher du véhicule et est assuré au moyen des freins de stationnement. Il faut contrôler l’adéquation entre le système présent dans le véhicule et celui du fauteuil roulant : Système de fermeture auto Les sangles de retenues fixées sur le plancher du véhicule doivent être attachées au fauteuil... - Page 86 Les sangles de retenue doivent être bien tendues conformément aux indications du fabricant. Les parties amovibles doivent être fixées séparément dans le véhicule. La personne installée dans le fauteuil roulant est as- sise dans une position proche de la verticale. La ceinture abdominale doit être fixée dans les points d’ancrage situés sur les deux côtés du fauteuil rou- lant.
- Page 87 Les sangles et ceintures doivent à tout moment se trouver en contact avec le corps. Elles ne doivent en aucun cas être séparées du corps de l’utilisateur par des composants ou par d’autres pièces. Lorsqu’elle est utilisée, la sangle d’épaule doit passer au-dessus de l’épaule.
-
Page 88: Recommandations Spécifiques - Poussette Reha
5 Recommandations spécifiques – poussette Reha – Lisa 2005 – La poussette Reha est équipée de points de fixation permanents. Vous n’avez besoin d’aucun kit de fixation supplémentaire pour ces modèles. Positionnement de la ceinture abdominale Poussette Lisa avec sangles de fixation correctement mises en place Positionnement de la ceinture abdominale Faites passer vers l’extérieur chaque extrémité... -
Page 89: Lisa
5 Recommandations spécifiques – poussette Reha – Lisa – Pour monter le kit de fixation HR32079700, vous avez besoin des outils suivants : clé polygonale taille 10, clé allen taille 4, pince pointue Montage des points de fixation sur le produit Vissez les «... -
Page 90: Eco Buggy
5 Recommandations spécifiques – poussette Reha – Eco Buggy – Pour monter le kit de fixation HR32549700 , vous avez besoin des outils suivants : clé polygonale taille 10, clé allen taille 4, pince pointue Montage des points de fixation sur le produit Vissez une plaque d’ancrage à... -
Page 91: Kimba Spring
5 Recommandations spécifiques – poussette Reha – Kimba Spring – Pour monter le kit de fixation HR32909700/HR32919700 , vous avez besoin des outils suivants : clé polygo- nale taille 10, clé allen taille 4, pince pointue Montage des points de fixation sur le produit Tourner chacune des plaques Modèle avec roues avant Tous les modèles... -
Page 92: Kimba
5 Recommandations spécifiques – poussette Reha – Kimba – Pour monter le kit de fixation HR32549700 , vous avez besoin des outils suivants : clé polygonale taille 10, clé allen taille 4, pince pointue Montage des points de fixation sur le produit Vissez une plaque d’ancrage à... -
Page 93: Leo
5 Recommandations spécifiques – poussette Reha – LEO – Pour monter le kit de fixation HR32909700/HR32919700 , vous avez besoin des outils suivants : clé polygonale taille 10, clé allen taille 4, pince pointue Montage des points de fixation sur le produit Tourner chacune des plaques Modèle avec roues avant Modèle avec roues avant... -
Page 94: Recommandations Spécifiques - Fauteuils Roulants Électriques
6 Recommandations spécifiques – fauteuils roulants électriques – B500/B600 – Pour le montage du kit de fixation 491S00=SK022 , vous avez besoin des outils suivants : clés polygonales tailles 13 et 17, clés allen tailles 4 et 5 Montage des points de fixation sur le produit Vissez les «... -
Page 95: A200
6 Recommandations spécifiques – fauteuils roulants électriques – A200 – Pour monter le kit de fixation 491S00=SK024, vous avez besoin des outils suivants : clés polygonales tailles 13 et 17, clé allen taille 10 Montage des points de fixations sur le produit Vissez les «... -
Page 96: C1000
6 Recommandations spécifiques – fauteuils roulants électriques – C1000 – Pour monter le kit de fixation 491S00=SK025, vous avez besoin des outils suivants : Clés mixtes taille 10 et 13, clé allen taille 6. Montage des points de fixation sur le produit Maintenez les douilles d’écartement Retirez l’habillage arrière supérieur Mettez l’œillet par en dessous autour... - Page 97 Positionnement de la ceinture abdominale C1000 avec sangles de fixation cor- Faites passer vers l’extérieur chaque extrémité de la ceinture abdominale rectement mises en place. hors de l’assise sur le côté et suspendez l’extrémité de la ceinture sur le « crochet »...
-
Page 98: Skippi
6 Recommandations spécifiques – fauteuils roulants électriques – Skippi – Pour monter le kit de fixation 491S00=SK024, vous avez besoin des outils suivants : clés polygonales tailles 13 et 17, clé allen taille 10 Montage des points de fixations sur le produit Vissez les «... -
Page 99: B400
6 Recommandations spécifiques – fauteuils roulants électriques – B400 – Pour pouvoir procéder au montage du kit de fixation 491S00=SK027, vous aurez besoin des outils suivants : clé polygonale de taille 13 et 17, clé à six pans creux de taille 6. Montage des points de fixation sur le produit Fixez les oeillets des sangles aux Les œillets de sangles arrière sont... -
Page 100: Recommandations Spécifiques - Fauteuils Roulants Manuels
7 Recommandations spécifiques – fauteuils roulants manuels – Avantgarde T – Pour monter le kit de fixation 481S00=SK029, vous avez besoin des outils suivants : clés polygonales tailles 10 et 13, clés allen tailles 4 et 5 Montage des points de fixation sur le produit Vissez un point d’ancrage à... -
Page 101: Avantgarde Vr
7 Recommandations spécifiques – fauteuils roulants manuels – Avantgarde VR – Pour monter le kit de fixation 481S00=SK018, vous avez besoin des outils suivants : clés polygonales tailles 10 et 13, clés allen tailles 4 et 5 Montage des points de fixation sur le produit Vissez un point d’ancrage à... -
Page 102: Start Basic, Start Multi
7 Recommandations spécifiques – fauteuils roulants manuels – Start Basic, Start Multi – Pour monter le kit de fixation 481S00=SK019, vous avez besoin des outils suivants : clés polygonales tailles 10 et 13, clés allen tailles 4 et 5 Montage des points de fixation sur le produit Vissez un point d’ancrage à... -
Page 103: Start Hemi
7 Recommandations spécifiques – fauteuils roulants manuels – Start Hemi – Pour monter le kit de fixation 481S00=SK017, vous avez besoin des outils suivants : clés polygonales tailles 10 et 13, clés allen tailles 4 et 5 Montage des points de fixation sur le produit Vissez un point d’ancrage à... -
Page 104: Start Plus
7 Recommandations spécifiques – fauteuils roulants manuels – Start Plus – Pour monter le kit de fixation 481S00=SK020, vous avez besoin des outils suivants : clés polygonales tailles 10 et 13, clés allen tailles 4 et 5 Montage des points de fixation sur le produit Vissez un point d’ancrage à... -
Page 105: Start M2 Effect
7 Recommandations spécifiques – fauteuils roulants manuels – Start M2 Effect – Pour monter le kit de fixation 481S00=SK030, vous avez besoin des outils suivants : clés polygonales tailles 10 et 13, clés allen tailles 4 et 5 Montage des points de fixation sur le produit Vissez un point d’ancrage à... -
Page 106: Start M3 Hemi
7 Recommandations spécifiques – fauteuils roulants manuels – Start M3 Hemi – Pour monter le kit de fixation 481S00=SK030, vous avez besoin des outils suivants : clés polygonales tailles 10 et 13, clés allen tailles 4 et 5 Montage des points de fixation sur le produit Vissez un point d’ancrage à... -
Page 107: Start M5 Comfort
7 Recommandations spécifiques – fauteuils roulants manuels – Start M5 Comfort – Pour monter le kit de fixation 481S00=SK030, vous avez besoin des outils suivants : clés polygonales tailles 10 et 13, clés allen tailles 4 et 5 Montage des points de fixation sur le produit Vissez un point d’ancrage à... -
Page 108: Start M6 Junior
7 Recommandations spécifiques – fauteuils roulants manuels – Start M6 Junior – Pour monter le kit de fixation 481S00=SK030, vous avez besoin des outils suivants : clés polygonales tailles 10 et 13, clés allen tailles 4 et 5 Montage des points de fixation sur le produit Vissez un point d’ancrage à... -
Page 109: Bravo Racer
7 Instructions spécifiques au produit – Fauteuils roulants manuels – BRAVO Racer – Fixation à l’aide de sangles de retenue . Vous aurez besoin de quatre sangles de retenue pour pouvoir procéder au montage . Montage des points de fixation sur le produit Posez une sangle de retenue autour Posez une sangle de retenue autour du tube du châssis et ce à... - Page 110 7 Instructions spécifiques au produit – Fauteuils roulants manuels – BRAVO Racer – Fixation à l’aide d’oeillets de maintien Pour pouvoir procéder au montage du kit de fixation 481S00=SK040, vous aurez besoin des outils suivants : clé polygonale de taille 10 et 13, clé à six pans creux de taille 4 et 5 Montage des points de fixation sur le produit Vissez un point d’ancrage de part et Vissez une plaque d’ancrage à...
-
Page 111: Motus
7 Instructions spécifiques au produit – Fauteuils roulants manuels – Motus – Fixation à l’aide de sangles de retenue Vous aurez besoin de quatre sangles de retenue pour pouvoir procéder au montage . Montage des points de fixation sur le produit Posez une sangle de retenue au- De chaque côté, posez une sangle de retenue autour de la partie arrière tour du tube du châssis, de part et... - Page 112 7 Instructions spécifiques au produit – Fauteuils roulants manuels – Motus – Fixation à l’aide d’oeillets de maintien Pour pouvoir procéder au montage du kit de fixation 481S00=SK018, vous aurez besoin des outils suivants : clé polygonale de taille 10 et 13, clé à six pans creux de taille 4 et 5 Montage des points de fixation sur le produit Vissez un point d’ancrage de part et Vissez une plaque d’ancrage à...
-
Page 113: Recommandations Spécifiques - Châssis De Coque D'assise
8 Recommandations spécifiques – châssis de coque d’assise – Dino 3 – Pour monter le kit de fixation 471S00=SK021, vous avez besoin des outils suivants : clés polygonales tailles 10 et 13, clés allen tailles 4 et 5 Montage des points de fixation sur le produit Vissez un point d’ancrage à... -
Page 114: Caractéristiques Techniques
9 Caractéristiques techniques Produit Dimensions Poids Rayon de bra- Charge maxi. ANSI/RESNA ISO 7176-19 DIN 75078-2 L. x l. x H. (mm) (kg) quage(mm) (kg) WC/19 1075x585x1035 13,5 Lisa taille 1 1190x635x1045 14,0 Lisa taille 2 1075x585x1035 11,0 Lisa taille 1 1190x635x1045 13,5 Lisa taille 2... - Page 115 2 Sikkerhedsanvisninger .........................117 3 Producenter af sikkerhedsselesystemer .....................120 4 Vejledning i fastgørelse af kørestol/klapvogni køretøjer ..............121 5 Produktspecifikke anvisninger – klapvogne ..................124 – Lisa 2005 – ..........................124 – Lisa – ............................125 – Eco Buggy – ..........................126 – Kimba Spring – ..........................127 –...
-
Page 116: Indledning
1 Indledning For benyttelse af kørstol eller klapvogn som sæde under transport i bil mv. har Otto Bock under overholdelse af nationale og internationale standarder udviklet surringsbeslag, som forbedrer passagerernes sikkerhed under transport og i tilfælde af frontalulykker. Otto Bock produkterne i den anførte tabel i kapitel 5. opfylder kravene i ISO 7176-19, ANSI/RESNA WC/ Vol.1 - del 19 og/eller DIN 75078 del 2, under forudsætning af at de er udstyret med samme seleringe/låsespænder,... -
Page 117: Sikkerhedsanvisninger
I tilfælde af en trafikulykke påtager Otto Bock sig ingen form for ansvar for personskade på brugere af Otto Bock produkter. Sikkerheds- og sikrings; systemer kan ved korrekt brug reducere risiko for tilskadekomst;... - Page 118 Ændring eller udskiftning af ramme- eller bærende dele må kun foretages med udtrykkelig tilladelse fra Otto Bock. Hvis Otto Bock produktet har været involveret i en ulykke, må det ikke mere anvendes til transport af brugere. Vi anbefaler at udskifte produktet eller at returnere det til Otto Bock for kontrol.
- Page 119 Pladsen omkring passageren i kørestolen/klapvognen skal holdes fri som beskrevet i figuren nedenfor. Fremad er frirummet på 650 mm ved brug af skulder- og hofteseler og 950 mm, når der kun anvendes en hoftesele til personsikring. Bagud er frirummet på 400 mm. Opad er frirummet på...
-
Page 120: Producenter Af Sikkerhedsselesystemer
Ankerpladesæt Otto Bock tilbyder for de her anførte produkter ankerpladesæt i fastgørelse iht. ISO-standard. Ankerpla- desæt til bilselesystemer leveres ikke af Otto Bock. En iht. DIN 75078, del 2, afprøvet kombination af ankerpladesæt og passende sikkerhedsselesystemer kan bestilles hos f.eks.: AMF Bruns www.amf-bruns.de... -
Page 121: Vejledning I Fastgørelse Af Kørestol/Klapvogni Køretøjer
4 Vejledning i fastgørelse af kørestol/klapvogni køretøjer Kørestollen skubbes i kørselsretning ca. til midten mellem de forankrede hulskinner i køretøjets gulv og bremses. Overensstemmelsen mellem fastgørelsessystemet i motorkøretøjet og det anvendte surringssystem til køresto- len skal kontrolleres: Bilselesystem De fastgjorte sikkerhedsseler på køretøjets gulv skal forbindes med kørestolen. Surringsbøjler befinder sig på... - Page 122 Surringsgjordene skal spændes stramt i henhold til producentens oplysninger. Løse dele skal sikres separat i køretøjet. Kørestolsbrugeren bringes i en tilnærmelsesvis opret siddeposition. Hofteselen skal på begge sider fastgøres på de dertil beregnede forankringspunkter på kørestolen. Skulderselen fæstes til i hofteselen. Hofteselen skal forløbe i en vinkel mellem 45°...
- Page 123 Disse seler skal til enhver tid helt inde ved ved krop- pen. De må aldrig holdes væk fra brugerens krop pga. genstande eller andre dele. Skulderselen skal ligge over skulderen under brug. Hvis dette ikke er muligt, må personen ikke transpor- teres i køretøjet siddende i kørestolen/klapvognen.
-
Page 124: Produktspecifikke Anvisninger - Klapvogne
5 Produktspecifikke anvisninger – klapvogne – Lisa 2005 – Klapvognen er udstyret med integrerede surringsbeslag. Der kræves ikke yderligere surringsbeslag til disse modeller. Lisa buggy med korrekt anbragte surringsgjorde. Hofteselens forløb Før begge hofteselens ender fra sædet ud mellem betræk og ramme, og hægt hofteselens ende på tappen. -
Page 125: Lisa
5 Produktspecifikke anvisninger – klapvogn – Lisa – Til montering af surringsbeslag HR32079700 har du brug for følgende værktøj: ringnøgle str. 10, unbrakonøgle str. 4, spidstang Montering af surringsbeslag på produktet Skru en ankerplade fast på både Skru de medleverede tappe på hol- Skru en ankerplade fast på... -
Page 126: Eco Buggy
5 Produktspecifikke anvisninger – klapvogn – Eco Buggy – Til montering af surringsbeslag HR32549700 har du brug for følgende værktøj: ringnøgle str. 10, unbrakonøgle str. 4, spidstang Montering af surringsbeslag på produktet Drej ankerpladerne på frontram- Skru en ankerplade fast på både Skru en ankerplade med formonte- venstre og højre side af frontram- ret tap fast på... -
Page 127: Kimba Spring
5 Produktspecifikke anvisninger – klapvogn – Kimba Spring – Til montering af surringsbeslag HR32909700/HR32919700 har du brug for følgende værktøj: ringnøgle str. 10, unbrakonøgle str. 4, spidstang Montering surringsbøjer på produktet Drej ankerpladerne på fron- Modeller med drejelige for- Alle modeller Modeller med faste trammen hver ca. -
Page 128: Kimba
5 Produktspecifikke anvisninger – klapvogn – Kimba – Til montering af surringsbeslag HR32549700 har du brug for følgende værktøj: ringnøgle str. 10, unbrakonøgle str. 4, spidstang Montering af surringsbøjer på produktet Drej ankerpladerne på frontrammen Skru en ankerplade fast på både Skru en ankerplade med formonteret venstre og højre side af frontram- tap fast på... -
Page 129: Leo
5 Produktspecifikke anvisninger – klapvogn – LEO – Til montering af surringsbeslag HR32909700/HR32919700 har du brug for følgende værktøj: ringnøgle str. 10, unbrakonøgle str. 4, spidstang Montering af surringsbøjer på produktet Drej ankerpladerne på fron- Modeller med faste forhjul Modeller med drejelige for- Alle modeller Skru en ankerplade med for- Indstil affjedringen på... -
Page 130: Produktspecifikke Anvisninger - Elkørestole
6 Produktspecifikke anvisninger – elkørestole – B500/B600 – Til montering af surringsbeslag 491S00=SK022 har du brug for følgende værktøj: ringnøgle str. 13 og 17, unbrakonøgle str. 4 og 5 Montering af surringsbøjer på produktet Skru de medleverede “tappe” på Skru et ankerpunkt på både ven- Ankerpladerne på... -
Page 131: A200
6 Produktspecifikke anvisninger – elkørestole – A200 – Til montering af surringsbeslag 491S00=SK024 har du brug for følgende værktøj: ringnøgle str. 13 og 17, unbrakonøgle str. 10 Montering af surringsbøjer på produktet Skru de medleverede “tappe” i de Seleringene foran på tværrøret er Seleringene på... -
Page 132: C1000
Produktspecifikke anvisninger – elkørestole – C1000 – Til montering af surringsbeslag 491S00=SK025 har du brug for følgende værktøj: ringgaffelnøgle str. 10 og 13, unbrakonøgle str. 6 Montering af surringsbøjer på produktet Hold afstandsmufferne mellem rin- Fjern C 1000’s øverste bagbeklæd- Skub seleringen nedefra på... - Page 133 Hofteselens forløb C 1000 med korrekt anbragte sur- Før begge hofteselens ender fra sædet udad og hægt hofteselens ende ringsgjorder. på “tappen” på den hver side. Denne elkørestol er udstyret med et vinkeljusterbart ryglæn. Før transporten skal ryglænet bringes i en tilnærmelsesvis opret position og det skal kontrolleres, at låsen er gået i indgreb på begge sider.
-
Page 134: Skippi
6 Produktspecifikke anvisninger – elkørestole – Skippi – Til montering af surringsbeslag 491S00=SK024 har du brug for følgende værktøj: ringnøgle str. 13 og 17, unbrakonøgle str. 10 Montering af surringsbøjer på produktet Skru de medleverede “tappe” i de Seleringene foran på tværrøret er Seleringene på... -
Page 135: B400
7 Produktspecifikke anvisninger – elkørestole – B400 – Til montering af fikseringssættet 491S00=SK027 har du brug for følgende værktøj: ringnøgle str. 13 og 17, unbrakonøgle str. 6. Montering af fikseringspunkterne på produktet Fastgør de medleverede seleringe De bagerste seleringe på drevhol- Skru de medleverede „pins“... -
Page 136: Produktspecifikke Anvisninger - Manuelle Kørestole
7 Produktspecifikke anvisninger – manuelle kørestole – Avantgarde T – Til montering af surringsbeslag 481S00=SK029 har du brug for følgende værktøj: ringnøgle str. 10 og 13, unbrakonøgle str. 4 og 5 Montering af surringsbøjer på produktet Skru et ankerpunkt på både venstre Skru en ankerplade på... -
Page 137: Avantgarde Vr
7 Produktspecifikke anvisninger – manuelle kørestole – Avantgarde VR – Til montering af surringsbeslag 481S00=SK018 har du brug for følgende værktøj: ringnøgle str. 10 og 13, unbrakonøgle str. 4 og 5 Montering af surringsbøjer på produktet Skru et ankerpunkt på både ven- Skru en ankerplade på... -
Page 138: Start Basic, Start Multi
7 Produktspecifikke anvisninger – manuelle kørestole – Start Basic, Start Multi – Til montering af surringsbeslag 481S00=SK019 har du brug for følgende værktøj: ringnøgle str. 10 og 13, unbrakonøgle str. 4 og 5 Montering af surringsbøjer på produktet Skru et ankerpunkt på både ven- Skru en ankerplade på... -
Page 139: Start Hemi
7 Produktspecifikke anvisninger – manuelle kørestole – Start Hemi – Til montering af surringsbeslag 481S00=SK017 har du brug for følgende værktøj: ringnøgle str. 10 og 13, unbrakonøgle str. 4 og 5 Montering af surringsbøjer på produktet Skru et ankerpunkt på både ven- Skru en ankerplade på... -
Page 140: Start Plus
7 Produktspecifikke anvisninger – manuelle kørestole – Start Plus – Til montering af surringsbeslag 481S00=SK020 har du brug for følgende værktøj: ringnøgle str. 10 og 13, unbrakonøgle str. 4 og 5 Montering af surringsbøjer på produktet Skru et ankerpunkt på både ven- Skru en ankerplade på... -
Page 141: Start M2 Effect
7 Produktspecifikke anvisninger – manuelle kørestole – Start M2 Effect – montering af surringsbeslag 481S00=SK030 har du brug for følgende værktøj: ringnøgle str. 10 og 13, unbrakonøgle str. 4 og 5 Montering af surringsbøjer på produktet Skru et ankerpunkt på både venstre Skru en ankerplade på... -
Page 142: Start M3 Hemi
7 Produktspecifikke anvisninger – manuelle kørestole – Start M3 Hemi – Til montering af surringsbeslag 481S00=SK030 har du brug for følgende værktøj: ringnøgle str. 10 og 13, unbrakonøgle str. 4 og 5 Montering af surringsbøjer på produktet Skru et ankerpunkt på både ven- Skru en ankerplade på... -
Page 143: Start M5 Comfort
7 Produktspecifikke anvisninger – manuelle kørestole – Start M5 Comfort – Til montering af surringsbeslag 481S00=SK030 har du brug for følgende værktøj: ringnøgle str. 10 og 13, unbrakonøgle str. 4 og 5 Montering af surringsbøjer på produktet Skru et ankerpunkt på både venstre Skru en ankerplade på... -
Page 144: Start M6 Junior
7 Produktspecifikke anvisninger – manuelle kørestole – Start M6 Junior – Til montering af surringsbeslag 481S00=SK030 har du brug for følgende værktøj: ringnøgle str. 10 og 13, unbrakonøgle str. 4 og 5 Montering af surringsbøjer på produktet Skru et ankerpunkt på både venstre Skru en ankerplade på... -
Page 145: Bravo Racer
7 Produktspecifikke anvisninger – manuelle kørestole – BRAVO Racer – Fiksering med selestropper . Du har brug for fire selestropper til monteringen . Montering af fikseringspunkterne på produktet Læg en selestrop om rammerøret Læg en selestrop om det bagerste rammerør indvendigt på både venstre og på... - Page 146 7 Produktspecifikke anvisninger – manuelle kørestole – BRAVO Racer – Fiksering med holderinge Til montering af fikseringssættet 481S00=SK040 har du brug for følgende værktøj: ringnøgle str. 10 og 13, unbrakonøgle str. 4 og 5 Montering af fikseringspunkterne på produktet Skru et ankerpunkt på både venstre Skru en ankerplade på...
-
Page 147: Motus
7 Produktspecifikke anvisninger – manuelle kørestole – Motus – Fiksering med selestropper (crashtestet iht. ISO 7176-19) Du har brug for fire selestropper til monteringen (se kap. 3, Producenter af sikkerhedsselesystemer). Montering af fikseringspunkterne på produktet Læg en selestrop om rammerøret Læg en selestrop på... - Page 148 7 Instructions spécifiques au produit – Fauteuils roulants manuels – Motus – Fixation à l’aide d’oeillets de maintien Pour pouvoir procéder au montage du kit de fixation 481S00=SK018, vous aurez besoin des outils suivants : clé polygonale de taille 10 et 13, clé à six pans creux de taille 4 et 5 Montage des points de fixation sur le produit Vissez un point d’ancrage de part et Vissez une plaque d’ancrage à...
-
Page 149: Produktspecifikke Anvisninger - Kørestol
8 Produktspecifikke anvisninger – kørestol – Dino 3 – Til montering af surringsbeslag 471S00=SK021 har du brug for følgende værktøj: ringnøgle str. 10 og 13, unbrakonøgle str. 4 og 5 Montering af surringsbøjer på produktet Skru et ankerpunkt på både venstre Skru en ankerplade på... -
Page 150: Tekniske Data
9 Tekniske data Produkt Dimensioner Vægt Vendekreds Max. kapacitet ANSI/RESNA ISO 7176-19 DIN 75078-2 LxBxH (mm) (kg) WC/19(MM) (kg) 1075x585x1035 13,5 Lisa str. 1 1190x635x1045 14,0 Lisa str. 2 1075x585x1035 11,0 Lisa str. 1 1190x635x1045 13,5 Lisa str. 2 960x570x1100 Eco Buggy 1050x630x980 15,6... - Page 151 Tel. +44 1784 744900 · Fax +44 1784 744901 Otto Bock HealthCare India Pvt. Ltd. e-mail: bockuk@ottobock.com · www.ottobock.co.uk Behind Fairlawn Housing Society Otto Bock Ortopedi ve Rehabilitasyon Tekniği Ltd. Şti. Sion Trombay Road Ali Dursun Bey Caddesi · Lati Lokum Sokak Otto Bock France SNC Chembur ·...
- Page 152 · www.ottobock.com Otto Bock Mobility Solutions GmbH has been certifi ed by the German Society for the Certifi cation of Quality Assurance Systems (DQS) in accordance with DIN EN ISO 13 485 : 2007, reg. no. 435514 MP27 (management system)
Need help?
Do you have a question about the LISA 2005 and is the answer not in the manual?
Questions and answers