
Subscribe to Our Youtube Channel
Related Manuals for Digital Projection E-Vision 6000 Series


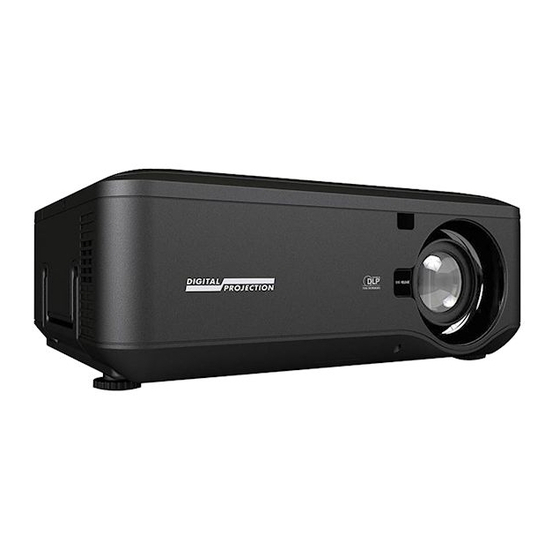
Summary of Contents for Digital Projection E-Vision 6000 Series
-
Page 1: User Manual
USER MANUAL INSTALLATION AND QUICK-START GUIDE CONNECTION GUIDE OPERATING GUIDE E-Vision 6000 Series REMOTE COMMUNICATIONS GUIDE High Brightness Digital Video Projector Rev D July 2014 113-375D... - Page 2 NOTE: this symbol indicates that there is some important information that you should read. Product revision Because we at Digital Projection continually strive to improve our products, we may change specifications and designs, and add new features without prior notice.
- Page 3 Digital Projection E-Vision 6000 Series Introduction Notes Congratulations on your purchase of this Digital Projection product. Your projector has the following key features: • Swappable color wheels for high brightness and color critical applications. • BrilliantColor™ for increased system brightness.
-
Page 4: Table Of Contents
Digital Projection E-Vision 6000 Series CONTENTS INSTALLATION AND QUICK-START GUIDE ......1 Switching the projector off ..............14 WHAT’S IN THE BOX? ..............3 GETTING TO KNOW THE PROJECTOR .......... 4 CONNECTION GUIDE ................15 Front, side and rear views ..............4 Remote control .................. - Page 5 Digital Projection E-Vision 6000 Series Control connections ................27 Information menu ................46 ................27 ..................46 Screen Trigger output Usage time tab ..................27 .................... 46 Serial Port Input tab ..................46 ................. 27 Network tab LAN connection ( ..................
-
Page 6: Installation And Quick-Start Guide
INSTALLATION AND QUICK-START GUIDE E-Vision 6000 Series High Brightness Digital Video Projector Rev D July 2014... - Page 7 Digital Projection IN THIS GUIDE Installation and Quick-Start Guide E-Vision 6000 Series IN THIS GUIDE What’s In The Box? ..................... 3 Getting To Know The Projector..............4 Front, side and rear views ..................Remote control ......................Control panel and remote control ................
-
Page 8: What's In The Box
Digital Projection WHAT’S IN THE BOX? Installation and Quick-Start Guide E-Vision 6000 Series What’s In The Box? Notes Make sure your box contains everything listed. If any pieces are missing, contact your dealer. You should save the original box and packing materials, in case you ever need to ship your projector. -
Page 9: Getting To Know The Projector
Digital Projection GETTING TO KNOW THE PROJECTOR Installation and Quick-Start Guide E-Vision 6000 Series Getting To Know The Projector Notes Remote control Front, side and rear views For full details of how to use the controls and the menu system, see Lamp and color the Operating Guide. -
Page 10: Control Panel And Remote Control
Digital Projection GETTING TO KNOW THE PROJECTOR Installation and Quick-Start Guide E-Vision 6000 Series Control panel and remote control Notes Some of the controls from the remote control are duplicated on the projector control panel, as shown on the right. -
Page 11: Control Panel Indicators
ENTER RETURN Digital Projection GETTING TO KNOW THE PROJECTOR Installation and Quick-Start Guide E-Vision 6000 Series SOURCE AUTO Control panel indicators Notes POWER WARNING LAMP1 LAMP2 The Power indicator The Power indicator will show amber when in standby and green when the projector is on, and will flash when the projector is warming up or cooling down. -
Page 12: The Lamp Indicators
Digital Projection GETTING TO KNOW THE PROJECTOR Installation and Quick-Start Guide E-Vision 6000 Series The Lamp indicators Notes The Lamp indicators will show which lamp is in use, and whether it is in Normal or Eco mode. Condition Lamp indicators behaviour... -
Page 13: Changing The Lens, Lamps And Color Wheel
Digital Projection CHANGING THE LENS, LAMPS AND COLOR WHEEL Installation and Quick-Start Guide E-Vision 6000 Series Changing The Lens, Lamps And Color Wheel Notes Removing the lens Remove the lens cap. Push in the lens release lever, and turn the lens anti-clockwise. -
Page 14: Changing The Lamp
Digital Projection CHANGING THE LENS, LAMPS AND COLOR WHEEL Installation and Quick-Start Guide E-Vision 6000 Series Changing the lamp Notes Slide open the lamp compartment cover as shown in the picture. Unscrew the two captive screws securing the lamp module. -
Page 15: Changing The Color Wheel
Digital Projection CHANGING THE LENS, LAMPS AND COLOR WHEEL Installation and Quick-Start Guide E-Vision 6000 Series Changing the color wheel Notes Slide open the lamp compartment cover as shown in the picture. Unscrew the four captive screws securing the color wheel. -
Page 16: Positioning The Screen And Projector
Digital Projection POSITIONING THE SCREEN AND PROJECTOR Installation and Quick-Start Guide E-Vision 6000 Series Positioning The Screen And Projector Notes Install the screen, ensuring that it is in the best position for viewing by your audience. Mount the projector, ensuring that it is at a suitable distance from the screen for the image to fill the screen. Set the adjustable feet so that Ensure that there is at least 50 the projector is level, and perpendicular to the screen. -
Page 17: Operating The Projector
Digital Projection OPERATING THE PROJECTOR Installation and Quick-Start Guide E-Vision 6000 Series Operating The Projector Notes Switching the projector on Connect the power cable between the mains supply and the projector. Switch on at the switch next to the power connector. -
Page 18: Adjusting The Lens
Digital Projection OPERATING THE PROJECTOR Installation and Quick-Start Guide E-Vision 6000 Series Adjusting the lens Notes Zoom • Use the ZOOM +/− buttons on the control panel to adjust the lens so that the image fills the screen. • Or on the remote control:... -
Page 19: Adjusting The Image
Digital Projection OPERATING THE PROJECTOR Installation and Quick-Start Guide E-Vision 6000 Series Adjusting the image Notes Orientation Press and from the list of options that appears on the screen, select MENU SETTING On the tab, open the setting, then select the desired image orientation. (Choose from INSTALLATION CEILING &... -
Page 20: Connection Guide
CONNECTION GUIDE E-Vision 6000 Series High Brightness Digital Video Projector Rev D July 2014... - Page 21 Digital Projection IN THIS GUIDE Connection Guide E-Vision 6000 Series IN THIS GUIDE Signal Inputs and Outputs ................17 Computer 1 ........................ Computer 2 ........................ Computer 3 ........................ Component ........................ Video or S-Video......................Monitor Out ........................ Supported Signal Input Modes ..............18 Control Connections ..................
-
Page 22: Signal Inputs And Outputs
Digital Projection SIGNAL INPUTS AND OUTPUTS Connection Guide E-Vision 6000 Series Signal Inputs and Outputs Notes Computer 1 For a complete listing of pin • Connect an analog computer (VGA) cable to the 15-pin D-type. configurations for all signal and control connectors, see Wiring •... -
Page 23: Supported Signal Input Modes
Digital Projection SUPPORTED SIGNAL INPUT MODES Connection Guide E-Vision 6000 Series Supported Signal Input Modes Notes Signal Resolution Refresh Total Horizontal Rate number Frequency ( Hz ) of lines (kHz) SDTV 480i 720 x 480 59.94 15.73 ü ü ü... - Page 24 Digital Projection SUPPORTED SIGNAL INPUT MODES Connection Guide E-Vision 6000 Series Notes ...continued from previous page Signal Resolution Refresh Total Horizontal Rate number Frequency ( Hz ) of lines (kHz) COMPUTER WXGA60 1366 x 768 59.8 47.8 ü ü ü...
-
Page 25: Control Connections
Digital Projection CONTROL CONNECTIONS Connection Guide E-Vision 6000 Series Control Connections Notes Screen Trigger For a complete listing of pin • The Trigger output can be connected to an electrically operated screen, configurations for all signal and automatically deploying the screen when the projector is switched on, and control connectors, see Wiring retracting the screen when the projector is switched to standby. -
Page 26: Wiring Details
Digital Projection WIRING DETAILS Connection Guide E-Vision 6000 Series Wiring Details Notes Signal inputs and outputs For full details of all input settings, see the Setting menu in the Computer 1 Operating Guide. Video input: analog computer (VGA) 15 way D-type connector... -
Page 27: Computer 2
Digital Projection WIRING DETAILS Connection Guide E-Vision 6000 Series Computer 2 Notes Video input: RGBHV, RGsB or YCrCb R/Cr B/Cb 5 x 75 ohm BNC For full details of all input settings, RGBHV RGsB YCrCb see the Setting menu in the Operating Guide. -
Page 28: Computer 3
Digital Projection WIRING DETAILS Connection Guide E-Vision 6000 Series Computer 3 Notes Video input: DVI-D 24 way D-type connector High Definition Content Protection TMDS Data 2- (HDCP) is supported on this input. TMDS Data 2+ For full details of all input settings,... -
Page 29: Component
Digital Projection WIRING DETAILS Connection Guide E-Vision 6000 Series Component Notes Video input Pb/Cb Pr/Cr 3 x RCA Phono For full details of all input settings, YCrCb YPrPb see the Setting menu in the Operating Guide. Component video Audio 2 x RCA Phono... -
Page 30: Video And S-Video
Digital Projection WIRING DETAILS Connection Guide E-Vision 6000 Series Video and S-Video Notes Video input 1 x RCA Phono For full details of all input settings, Composite Video Video see the Advanced menu in the Operating Guide. S-Video input 4 pin mini-DIN... -
Page 31: Monitor Out
Digital Projection WIRING DETAILS Connection Guide E-Vision 6000 Series Monitor Out Notes Video output: analog computer (VGA) 15 way D-type connector Monitor Out only displays the input from Computer 1. For full details of all input settings, Monitor Out video:... -
Page 32: Control Connections
Digital Projection WIRING DETAILS Connection Guide E-Vision 6000 Series Control connections Notes Screen Trigger output 3.5mm mini jack Only one remote connection can Sleeve be used at any one time. For more Signal information, see the Installation Sleeve Ground menu in the Operating Guide. - Page 33 Digital Projection Connection Guide E-Vision 6000 Series This page is intentionally left blank.
-
Page 34: Operating Guide
OPERATING GUIDE E-Vision 6000 Series High Brightness Digital Video Projector Rev D July 2014... - Page 35 Digital Projection IN THIS GUIDE Operating Guide E-Vision 6000 Series IN THIS GUIDE Using The Remote Control ................31 Menu Map......................47 Using The Menus ....................32 MAIN ........................... Opening the menus ....................INPUT ......................... Inside a menu ......................ADJUST ........................
-
Page 36: Using The Remote Control
Digital Projection USING THE REMOTE CONTROL Operating Guide E-Vision 6000 Series Using The Remote Control Notes Transmit LED Some options and controls may not be available due to settings in the menus. POWER switch For full details of how to use the menu system, see later in this guide. -
Page 37: Using The Menus
Digital Projection USING THE MENUS Operating Guide E-Vision 6000 Series Using The Menus Notes Opening the menus Access the various menus using either the projector control panel or the MENU remote control. On either device, • press the MENU button. -
Page 38: Navigating The Menus
Digital Projection USING THE MENUS Operating Guide E-Vision 6000 Series Navigating the menus Notes When you open a page with tabs, you can do the following: • move from tab to tab using the arrows. LEFT RIGHT Some menu options and controls •... -
Page 39: Changing Slider Values
Digital Projection USING THE MENUS Operating Guide E-Vision 6000 Series Changing slider values Notes Navigate to the menu item and press the LEFT RIGHT arrow to adjust the value. Some menu options and controls When ready, press MENU RETURN to exit the slider. -
Page 40: A Tour Of The Menus
Digital Projection A TOUR OF THE MENUS Operating Guide E-Vision 6000 Series A Tour Of The Menus Notes Main menu See also Using the Menus, earlier in this guide and Menu Map, later in The projector settings are grouped into six menus as shown in the illustration. -
Page 41: Adjust Menu
Digital Projection A TOUR OF THE MENUS Operating Guide E-Vision 6000 Series Adjust menu Notes Adjust The Adjust menu contains three tabs: Image, Image Options and Video. Image Image Options Video Image Image Image select 1: High-bright Adjust menu The Image tab is used to alter picture settings. - Page 42 Digital Projection A TOUR OF THE MENUS Operating Guide E-Vision 6000 Series Adjust menu continued... Notes Detail setting Basic Image White balance Color correction Detail setting sub-menu The Detail setting menu contains three tabs: Basic, White balance, and Adjust menu Image tab Color correction.
- Page 43 Digital Projection A TOUR OF THE MENUS Operating Guide E-Vision 6000 Series Adjust menu continued... Notes Detail setting White balance and Color correction tabs Basic White Balance White balance Color correction Adjust menu These tabs allow fine adjustment of color settings to correct for the source or Image tab viewing environment.
-
Page 44: Image Options
Digital Projection A TOUR OF THE MENUS Operating Guide E-Vision 6000 Series Adjust menu continued... Notes Adjust Image Image Options Image Options Video Image Options • Adjust menu Screen Image Options tab Screen Set the aspect ratio of the projected image. Choose from... -
Page 45: Video
Digital Projection A TOUR OF THE MENUS Operating Guide E-Vision 6000 Series Adjust menu continued... Notes Adjust Image Image Options Video Video Video • Adjust menu Noise reduction Video tab Noise reduction Set the noise reduction level as required. 3D Y/C separation •... -
Page 46: Volume Control
Digital Projection A TOUR OF THE MENUS Operating Guide E-Vision 6000 Series Volume control Notes Volume Select Volume from the main menu to bring out the volume slider. VOLUME + VOLUME - controls have dedicated buttons To exit the volume slider, press... -
Page 47: Installation Tab
Digital Projection A TOUR OF THE MENUS Operating Guide E-Vision 6000 Series Setting menu continued... Notes Setting Basic Installation Installation Option Installation tab • Ceiling & Rear Desktop front Setting menu Ceiling & Rear Installation tab Communication speed 4800bps Desktop is for a unit standing on its feet;... -
Page 48: Installation Tab - Continued
Digital Projection A TOUR OF THE MENUS Operating Guide E-Vision 6000 Series Setting menu continued... Notes Installation tab - continued • Setting menu RC sensor Installation tab Controls whether the projector will use the infrared sensor at the front, the one at the back, or both. - Page 49 Digital Projection A TOUR OF THE MENUS Operating Guide E-Vision 6000 Series Setting menu continued... Notes Network setting Network setting sub-menu Setting The Network setting menu contains the following settings: Setting menu DHCP Enable Disable • Installation tab DHCP IP address 172 .
-
Page 50: Option Tab
Digital Projection A TOUR OF THE MENUS Operating Guide E-Vision 6000 Series Setting menu continued... Notes Setting Basic Installation Option Option Option tab • Power management Setting menu Power management Option tab Screen trigger Set the amount of time the projector will remain on without an input source before going into standby mode. -
Page 51: Information Menu
Digital Projection A TOUR OF THE MENUS Operating Guide E-Vision 6000 Series Information menu Notes Information The information menu is arranged in four tabs: Usage time, Input, Network Usage time Usage time Input Network Version and Version. The lamp life percentage shown... -
Page 52: Menu Map
Digital Projection MENU MAP Operating Guide E-Vision 6000 Series Menu Map Notes Menu Sub Menus and Controls MAIN Input, Adjust, Volume, Setting, Information, Reset INPUT Computer 1, Computer 2, Computer 3, Component, Video, S-Video ADJUST Image Image select High-bright, Presentation, Video, Movie, Graphic, sRGB... -
Page 53: Setting
Digital Projection MENU MAP Operating Guide E-Vision 6000 Series Menu Sub Menus and Controls Notes Image options Screen 4:3, 16:9, 16:10, Letterbox, True, Normal The range and default values of the Overscan 0%, 5%, 10%, 15% PC adj. settings depend on the input PC adj. - Page 54 Digital Projection MENU MAP Operating Guide E-Vision 6000 Series Menu Sub Menus and Controls Notes Installation Ceiling & Rear Desktop Front, Ceiling Rear, Desktop Rear, Ceiling Front Some of the information in this menu Communication speed 4800bps, 9600bps, 19200bps, 38400bps map is summarised.
- Page 55 This page is intentionally left blank.
-
Page 56: Remote Communications Guide
REMOTE COMMUNICATIONS GUIDE E-Vision 6000 Series High Brightness Digital Video Projector Rev D July 2014... - Page 57 Digital Projection IN THIS GUIDE Remote Communications Guide E-Vision 6000 Series IN THIS GUIDE Introduction ......................53 Serial Port Control Commands ..............54 Header code ........................Examples ........................The Commands ......................Set Commands ....................... Get Commands ....................... Remote Commands ......................
-
Page 58: Introduction
Digital Projection INTRODUCTION Remote Communications Guide E-Vision 6000 Series Introduction Notes The projector can be controlled by using an external control system in three different ways: • The projector’s features can be controlled via a serial connection, using the control strings described in this guide. -
Page 59: Serial Port Control Commands
Digital Projection SERIAL PORT CONTROL COMMANDS Remote Communications Guide E-Vision 6000 Series Serial Port Control Commands Notes There are three types of command, Set commands, Get commands and Remote commands. The individual commands are described later Use a null-modem cable to connect in this guide. -
Page 60: The Commands
Digital Projection SERIAL PORT CONTROL COMMANDS Remote Communications Guide E-Vision 6000 Series The commands Notes The commands are divided into three groups: Set Commands, Get Commands and Remote Commands. Spaces are shown in the examples Set Commands for clarity, but are NOT used in the actual commands or replies. -
Page 61: Get Commands
Digital Projection SERIAL PORT CONTROL COMMANDS Remote Communications Guide E-Vision 6000 Series Notes Get Commands Spaces are shown in the examples ASCII Function Return String for clarity, but are NOT used in the actual commands or replies. ~ q V [CR]... -
Page 62: Remote Commands
Digital Projection SERIAL PORT CONTROL COMMANDS Remote Communications Guide E-Vision 6000 Series Notes Remote Commands ASCII Function Spaces are shown in the examples ~ r U [CR] 7E 72 55 0D UP arrow for clarity, but are NOT used in the actual commands or replies. -
Page 63: Lan Control Utility
Digital Projection LAN CONTROL UTILITY Remote Communications Guide E-Vision 6000 Series Notes LAN Control Utility It is possible to control some basic functions by using the The LAN IP Address of the projector embedded LAN Control Utility. can be set from Installation >... -
Page 64: Lan Configuration
Digital Projection LAN CONFIGURATION Remote Communications Guide E-Vision 6000 Series LAN Configuration Notes It is possible to assign a Host Name and Domain Name to the projector, and to set up an Alert Mail address and PJLink password: The URL of the LAN Configuration page is http://<LAN IP Address>/lanconf.html. -
Page 65: Pjlink
Digital Projection LAN CONFIGURATION Remote Communications Guide E-Vision 6000 Series PJLink Notes When enabled, a password can be set. Press the Apply button to confirm the new password. The projector supports all the commands of PJLink Class 1. The PJLink specification can be...
Need help?
Do you have a question about the E-Vision 6000 Series and is the answer not in the manual?
Questions and answers