
Subscribe to Our Youtube Channel
Related Manuals for Digital Projection E-Vision 6800 3D Series


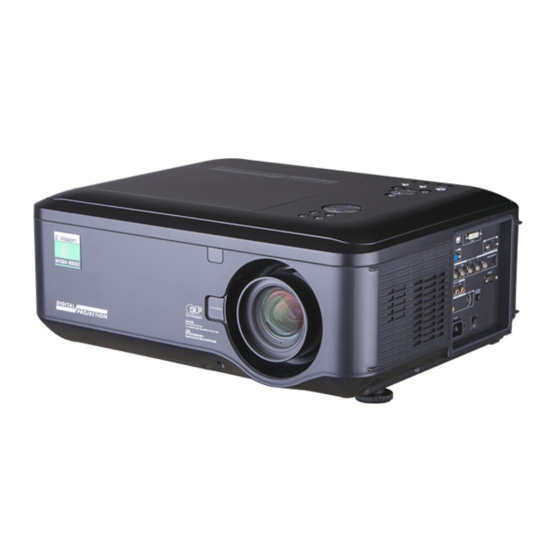
Summary of Contents for Digital Projection E-Vision 6800 3D Series
- Page 1 E-Vision 6800 3D Series High Brightness Digital Video Projector 4INSTALLATION AND QUICK-START GUIDE 4CONNECTION GUIDE 4OPERATING GUIDE 4REMOTE COMMUNICATIONS GUIDE Rev A January 2015 116-281A...
- Page 2 NOTE: this symbol indicates that there is some important information that you should read. Product revision Because we at Digital Projection continually strive to improve our products, we may change specifications and designs, and add new features without prior notice.
- Page 3 Digital Projection E-Vision 6800 3D Series Introduction Notes Congratulations on your purchase of this Digital Projection product. Your projector has the following key features: • Support for most 3D formats. • HDBaseT® for transmission of uncompressed High Definition Video up to 100 m from the source.
-
Page 4: Table Of Contents
Digital Projection E-Vision 6800 3D Series CONTENTS CONNECTION GUIDE INSTALLATION AND QUICK-START GUIDE ................13 ......1 SIGNAL INPUTS AND OUTPUTS ..........15 GETTING TO KNOW THE PROJECTOR .......... 3 Front and rear views ................3 SUPPORTED SIGNAL INPUT MODES .......... 16 Remote control .................. - Page 5 Digital Projection E-Vision 6800 3D Series CONTENTS (continued) Geometry menu .................. 33 COMMAND GUIDE ............... 53 ..................33 Inputs ....................53 Aspect Ratio ..............34 Test Patterns ..................53 H Keystone and V Keystone ................... 36 Lens menu ..................53 Overscan 3D menu....................
- Page 6 Digital Projection E-Vision 6800 3D Series This page is intentionally left blank.
-
Page 7: Installation And Quick-Start Guide
E-Vision 6800 3D Series High Brightness Digital Video Projector INSTALLATION AND QUICK-START GUIDE Rev A January 2015... - Page 8 Digital Projection E-Vision 6800 3D Series IN THIS GUIDE IN THIS GUIDE Getting To Know The Projector..............3 Front and rear views ....................Remote control ......................Control panel and indicators ..................Changing The Lens, Lamps And Color Wheel ..........5 Removing the lens ......................
-
Page 9: Getting To Know The Projector
Digital Projection E-Vision 6800 3D Series GETTING TO KNOW THE PROJECTOR Getting To Know The Projector Notes Front and rear views Remote control The projector uses an infra-red remote control. Lamp and color Some of the controls are duplicated 40°... -
Page 10: Control Panel And Indicators
Digital Projection E-Vision 6800 3D Series GETTING TO KNOW THE PROJECTOR Control panel and indicators Notes Some of the controls from the remote control are duplicated on the projector control panel, as shown FOCUS ZOOM on the right. For full details of how to use the... -
Page 11: Changing The Lens, Lamps And Color Wheel
Digital Projection E-Vision 6800 3D Series CHANGING THE LENS, LAMPS AND COLOR WHEEL Changing The Lens, Lamps And Color Wheel Notes Removing the lens Remove the lens cap. Always allow the lamp to cool for 5 minutes before: Push in the lens release lever, and turn the lens anti-clockwise. -
Page 12: Changing The Lamp
Digital Projection E-Vision 6800 3D Series CHANGING THE LENS, LAMPS AND COLOR WHEEL Changing the lamp Notes Slide open the lamp compartment cover as shown in the picture. Unscrew the two captive screws securing the lamp module. Always allow the lamp to cool for Pull firmly upwards on the handle to remove the lamp module. -
Page 13: Changing The Color Wheel
Digital Projection E-Vision 6800 3D Series CHANGING THE LENS, LAMPS AND COLOR WHEEL Changing the color wheel Notes Slide open the lamp compartment cover as shown in the picture. Unscrew the four captive screws securing the color wheel. Always allow the lamp to cool for Remove the color wheel. -
Page 14: Positioning The Screen And Projector
Digital Projection E-Vision 6800 3D Series POSITIONING THE SCREEN AND PROJECTOR Positioning The Screen And Projector Notes Always allow the lamp to cool for Install the screen, ensuring that it is in the best position for viewing by your audience. -
Page 15: Operating The Projector
Digital Projection E-Vision 6800 3D Series OPERATING THE PROJECTOR Operating The Projector Notes Before switching on the projector Switching the projector on for the first time, make sure • Connect the power cable between the mains supply and the projector. Switch on at the switch next to the power connector. -
Page 16: Adjusting The Lens
Digital Projection E-Vision 6800 3D Series OPERATING THE PROJECTOR Adjusting the lens Notes Zoom • Use the buttons on the control panel or on the remote control to adjust the lens so that the image fills the screen. ZOOM +/−... -
Page 17: Switching The Projector Off
Digital Projection E-Vision 6800 3D Series OPERATING THE PROJECTOR Switching the projector off Notes • Press on the control panel or on the remote control, then press the button a second time within 5 seconds to confirm your STANDBY intention to switch off. - Page 18 Digital Projection E-Vision 6800 3D Series This page is intentionally left blank. Installation and Quick-Start Guide...
-
Page 19: Connection Guide
E-Vision 6800 3D Series High Brightness Digital Video Projector CONNECTION GUIDE Rev A January 2015... - Page 20 Digital Projection E-Vision 6800 3D Series IN THIS GUIDE IN THIS GUIDE Signal Inputs And Outputs ................15 Supported Signal Input Modes ..............16 2D input modes ......................3D input modes ......................Control Connections ..................20 Connection Guide Rev A January 2015...
-
Page 21: Signal Inputs And Outputs
Digital Projection E-Vision 6800 3D Series SIGNAL INPUTS AND OUTPUTS Signal Inputs And Outputs Notes HDBaseT/LAN For a complete listing of pin Receives digital signal from HDBaseT-compliant configurations for all signal and devices. control connectors, see Wiring Details later in this Guide. This input receives analog signals from a computer. -
Page 22: Supported Signal Input Modes
Digital Projection E-Vision 6800 3D Series SUPPORTED SIGNAL INPUT MODES Supported Signal Input Modes Notes 2D input modes Signal Resolution Refresh Rate Total Horizontal ( Hz ) number Frequency of lines (kHz) SDTV 480i 720 x 480 59.94 15.73 ü... - Page 23 Digital Projection E-Vision 6800 3D Series SUPPORTED SIGNAL INPUT MODES Notes Signal Resolution Refresh Rate Total Horizontal ( Hz ) number Frequency of lines (kHz) COMPUTER VGA59 640 x 480 59.94 31.47 ü ü ü VGA60 640 x 480 60.00 31.50...
-
Page 24: 3D Input Modes
Digital Projection E-Vision 6800 3D Series SUPPORTED SIGNAL INPUT MODES 3D input modes Notes Signal Resolution Refresh Rate Total Horizontal ( Hz ) number Frequency Only the HDMI and HDBaseT inputs of lines (kHz) support HDMI 1.4 3D formats. VGA59 Frame Sequential 640 x 480 59.94... - Page 25 Digital Projection E-Vision 6800 3D Series SUPPORTED SIGNAL INPUT MODES Notes Signal Resolution Refresh Rate Total Horizontal ( Hz ) number Frequency of lines (kHz) Only the HDMI and HDBaseT inputs support HDMI 1.4 3D formats. 1080p60 Side-by-Side (Half) 1920 x 1080 60.00...
-
Page 26: Control Connections
Digital Projection E-Vision 6800 3D Series CONTROL CONNECTIONS Control Connections Notes HDBaseT/LAN Receives digital signal from HDBaseT-compliant devices. All of the projector’s features can be controlled via a LAN connection, using commands described in the Remote Communications Guide. 3D Sync Out Connect to a Z Screen or 3D IR emitter as appropriate. -
Page 27: Operating Guide
E-Vision 6800 3D Series High Brightness Digital Video Projector OPERATING GUIDE Rev A January 2015... - Page 28 Digital Projection E-Vision 6800 3D Series IN THIS GUIDE IN THIS GUIDE Using The Remote Control ................23 Setup menu ........................ Network ........................... Using The Projector ..................25 RS232 ..........................Main menu ......................... Security ........................... Lens menu ......................... Filter ..........................
-
Page 29: Using The Remote Control
Digital Projection E-Vision 6800 3D Series USING THE REMOTE CONTROL Using The Remote Control Notes Some options and controls may not be available due to settings in the menus. Power ON For full details of how to use the Power OFF menu system, see later in this guide. - Page 30 Digital Projection E-Vision 6800 3D Series USING THE REMOTE CONTROL Notes TEST PATTERN Select from a list of available test patterns. Some options and controls may not LENS SHIFT be available due to settings in the Press this button, then adjust the lens position using the arrow buttons.
-
Page 31: Using The Projector
Digital Projection E-Vision 6800 3D Series USING THE PROJECTOR Using The Projector Notes E-Vision 6800 WUXGA 3D Input HDMI Main menu If no input is connected, the Image Test Pattern • Input menu will be unavailable. Lens Press ENTER to open the list of available inputs. -
Page 32: Lens Menu
Digital Projection E-Vision 6800 3D Series USING THE PROJECTOR Lens menu Notes Lens Control settings operate in mode. Lens Zoom/Focus Shift When in Zoom/Focus mode: Zoom • Use the arrow buttons to adjust DOWN Zoom Focus • Use the LEFT... -
Page 33: Image Menu
Digital Projection E-Vision 6800 3D Series USING THE PROJECTOR Image menu Notes Image >> Image Mode Image Mode Bright Choose from Bright Presentation Video Brightness Presentation Press ENTER to open the list. Contrast Video Use the arrow buttons to select an image mode from the list,... -
Page 34: Gamma
Digital Projection E-Vision 6800 3D Series USING THE PROJECTOR Image menu continued from previous page Notes Image >> Gamma Image Mode Choose a de-gamma curve from 2.35 Brightness Used correctly, the Gamma setting can improve contrast while maintaining good Contrast details for blacks and whites. -
Page 35: Position And Phase
Digital Projection E-Vision 6800 3D Series USING THE PROJECTOR Image menu continued from previous page Notes Image >> Position And Phase Position and Phase VGA Setup Press ENTER to open a submenu. Digital Alignment • VGA Setup H/V Alignment H Total... -
Page 36: Color Menu
Digital Projection E-Vision 6800 3D Series USING THE PROJECTOR Color menu Notes Color >> Color Space Auto Color Space Color Temperature 6500K In most cases, the Auto setting determines the correct colorspace to use. If it Trim does not, you can choose a specific colorspace:... -
Page 37: Color Temperature
Digital Projection E-Vision 6800 3D Series USING THE PROJECTOR Color menu continued from previous page Notes Color >> Color Temperature Color Space Native Choose a value from 5500K (warmer) to 9300K (cooler) or Native Color Temperature 5500K correction). Trim 6500K... -
Page 38: Trim
Digital Projection E-Vision 6800 3D Series USING THE PROJECTOR Color menu continued from previous page Notes Color >> Trim Trim Red Lift Adjust the RGB lift and gain settings to improve the color balance of the projected Green Lift image. -
Page 39: Geometry Menu
Digital Projection E-Vision 6800 3D Series USING THE PROJECTOR Geometry menu Notes Geometry >> This menu allows you to compensate for image distortions caused by an unusual projection angle or irregular screen surface. Aspect Ratio Source H Keystone V Keystone... -
Page 40: H Keystone And V Keystone
Digital Projection E-Vision 6800 3D Series USING THE PROJECTOR Geometry menu continued from previous page Notes H Keystone and V Keystone Use the H Keystone V Keystone settings to compensate for any distortion H Keystone caused by the projector being in a different horizontal or vertical plane to the screen. - Page 41 Digital Projection E-Vision 6800 3D Series USING THE PROJECTOR Geometry menu continued from previous page Notes Keystone settings Projector to the left The projector is positioned to the left of the screen. To correct, apply a positive value using H Keystone arrow button.
-
Page 42: Overscan
Digital Projection E-Vision 6800 3D Series USING THE PROJECTOR Geometry menu continued from previous page Notes Geometry >> Overscan Aspect Ratio Set to to compensate for noisy or badly defined image edges. H Keystone V Keystone Overscan Select Item [RETURN] Back... -
Page 43: 3D Menu
Digital Projection E-Vision 6800 3D Series USING THE PROJECTOR 3D menu Notes 3D >> Use this menu to enable, disable and set up 3D input, as follows: • 3D Format 3D Format — Auto Side by Side op and Bottom... -
Page 44: 3D Types
Digital Projection E-Vision 6800 3D Series USING THE PROJECTOR 3D menu continued from previous page Notes 3D types In most situations you can use the Auto setting to have the projector automatically detect the format. Otherwise, consider the notes below to help you set up the 3D input manually. -
Page 45: Frame Rate Multiplication In 3D Images
Digital Projection E-Vision 6800 3D Series USING THE PROJECTOR 3D menu continued from previous page Notes Frame rate multiplication in 3D images When displaying a low frame rate 3D video, the projector multiplies the frame rate to obtain a flicker-free image. For... -
Page 46: Lamps Menu
Digital Projection E-Vision 6800 3D Series USING THE PROJECTOR Lamps menu Notes • Lamps >> Lamp Mode Choose from Auto 1 Dual Lamp 1 Lamp 2 Lamp Mode Dual • Power Mode Power Mode Normal will automatically set the lamp power to 80%. -
Page 47: Setup Menu
Digital Projection E-Vision 6800 3D Series USING THE PROJECTOR Setup menu Notes Setup >> • Orientation Choose from Desktop Front Ceiling Front Desktop Rear Orientation Desktop Front Ceiling Rear Network • Network RS232 Set up a LAN network connection. Security •... -
Page 48: Network
Digital Projection E-Vision 6800 3D Series USING THE PROJECTOR Setup menu continued from previous page Notes Setup >> Network Network IP Address 192.168.0.100 DHCP if the IP address is to be assigned by a DHCP server, or if it Subnet Mask 255.255.255.0... -
Page 49: Security
Digital Projection E-Vision 6800 3D Series USING THE PROJECTOR Setup menu continued from previous page Notes Setup >> Security Security Control Panel Lock Security Lock Control Panel Lock Use this setting to lock the control panel keys. To unlock the keys, press the arrow button and hold for 5 seconds. -
Page 50: System
Digital Projection E-Vision 6800 3D Series USING THE PROJECTOR Setup menu continued from previous page Notes Setup >> System System Auto Source • Auto-Source Auto Power Off If this setting is , the projector will automatically search for an active input Auto Power On source. -
Page 51: Information Menu
Digital Projection E-Vision 6800 3D Series USING THE PROJECTOR Information menu Notes Information This menu gives information about software and hardware configuration, input source and lamp operating times It also allows you to restore the factory default Model: E-Vision 6800 WUXGA 3D settings. -
Page 52: Menu Map
Digital Projection E-Vision 6800 3D Series MENU MAP Menu Map Notes Menu Submenus and controls Some of the information in this menu INPUT map is summarised. See the actual menu on the projector for full detail. HDMI, DVI-D, HDBaseT, VGA, Component 1, Component 2, S-Video, Video... - Page 53 Digital Projection E-Vision 6800 3D Series MENU MAP Menu Submenus and controls Notes COLOR Color Space: Auto, YPbPr, YCbCr, RGB PC, RGB Video Some of the information in this menu map is summarised. See the actual Color Temperature: Native, 5500K, 6500K, 7800K, 9300K menu on the projector for full detail.
- Page 54 Digital Projection E-Vision 6800 3D Series MENU MAP Menu Submenus and controls Notes SETUP Some of the information in this menu Orientation: Desktop Front, Ceiling Front, Desktop Rear, Ceiling Rear map is summarised. See the actual Network menu on the projector for full detail.
-
Page 55: Remote Communications Guide
E-Vision 6800 3D Series High Brightness Digital Video Projector REMOTE COMMUNICATIONS GUIDE Rev A January 2015... - Page 56 Digital Projection E-Vision 6800 3D Series IN THIS GUIDE IN THIS GUIDE Introduction ......................51 Network setup ......................Serial Port setup ......................Protocol commands ....................Examples ........................Responses ........................Command Guide ....................53 Inputs ......................... Test Patterns ......................Lens menu .........................
-
Page 57: Introduction
Digital Projection E-Vision 6800 3D Series INTRODUCTION Introduction Notes The projector can be controlled by using an external control system or a PC via an RS232 or LAN interface, using a terminal-emulation Details of how to connect to program. the projector using the LAN or RS232 input, can be found in the Connections Guide. -
Page 58: Protocol Commands
Digital Projection E-Vision 6800 3D Series INTRODUCTION Protocol commands Notes Commands are used to simulate menu operations and determine the settings of the projector, and use the following format: • All commands consist of ASCII text strings starting with an asterisk and ending with an ASCII Carriage Return character... -
Page 59: Command Guide
Digital Projection E-Vision 6800 3D Series COMMAND GUIDE Command Guide Notes Protocol commands below are arranged in the order they appear in the OSD. Not all OSD settings have corresponding protocol commands. <command> <operator> <value> Inputs input 0 = HDMI... -
Page 60: Image Menu
Digital Projection E-Vision 6800 3D Series COMMAND GUIDE Notes <command> <operator> <value> Image menu picture.mode 0 = Bright 1 = Presentation 2 = Video brightness 0 to 200 (integer) contrast 0 to 200 (integer) gamma 0 = 1.0 1 = 1.8 2 = 2.0... -
Page 61: Color Menu
Digital Projection E-Vision 6800 3D Series COMMAND GUIDE Notes <command> <operator> <value> Color menu color.space 0 = Auto 1 = YPbPr 2 = YCbCr 3 = RGB-PC 4 = RGB-Video color.temp 0 = Native 1 = 5500K 2 = 6500K... -
Page 62: 3D Menu
Digital Projection E-Vision 6800 3D Series COMMAND GUIDE Notes <command> <operator> <value> 3D menu 3d.format 0 = Off 1 = Auto 2 = Side by Side 3 = Top and Bottom 4 = Frame Sequential 3d.dlplink 0 = Off, 1 = On 3d.dominance... -
Page 63: Setup Menu
Digital Projection E-Vision 6800 3D Series COMMAND GUIDE Notes <command> <operator> <value> Setup menu orientation 0 = Desktop Front 1 = Ceiling Front 2 = Desktop Rear 3 = Ceiling Rear lan.ip A valid IP address in the following format xxx.xxx.xxx.xxx lan.subnet... -
Page 64: Web Configuration Utility
Digital Projection E-Vision 6800 3D Series WEB CONFIGURATION UTILITY Web Configuration Utility Notes Use the embedded Web Configuration Utility to control the projector via a LAN is set to , the Standby Power network: LAN connection will be disabled when the projector is in STANDBY Make sure the projector is connected to mode. -
Page 65: Email Settings
Digital Projection E-Vision 6800 3D Series WEB CONFIGURATION UTILITY Email settings Notes To receive error warnings and status reports by email: Navigate to the Alert Mail Setup Enter user credentials, SMTP settings, email addresses and preferences as required. Optionally, click... -
Page 66: Projector Controls
Digital Projection E-Vision 6800 3D Series WEB CONFIGURATION UTILITY Projector controls Notes To access projector controls, navigate to the page. Crestron From this page you can do the following: Power the projector ON/OFF Select input source Freeze the image Adjust image settings:... -
Page 67: Pjlink Security Options
Digital Projection E-Vision 6800 3D Series WEB CONFIGURATION UTILITY PJLink security options Notes To access PJLink security options, open the PJLink page. The PJLink TCP Port number is From this page you can enable or disable PJLink 5450. security and set up a password. -
Page 68: Contact Information
Shi Ao International Center (+65) 6284-1238 (+44) 161 947 3300 powerinfo@digitalprojection.com Chaoyang District (+44) 161 684 7674 www.digitalprojection.com www.digitalprojectionasia.com Beijing 100029, PR CHINA enquiries@digitalprojection.co.uk (+86) 10 84888566 service@digitalprojection.co.uk (+86) 10 84888566-805 www.digitalprojection.co.uk techsupport@dp-china.com.cn www.dp-china.com.cn 116-281A E-Vision 6800 3D Series User Manual...
Need help?
Do you have a question about the E-Vision 6800 3D Series and is the answer not in the manual?
Questions and answers