
Related Manuals for Whirlpool LHW0050PQ


Summary of Contents for Whirlpool LHW0050PQ
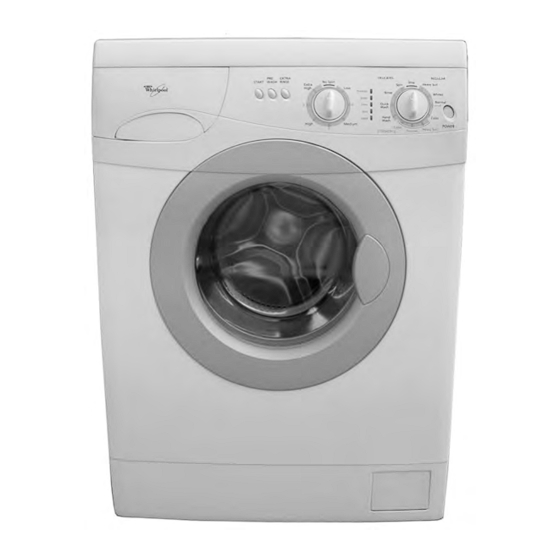
- Page 1 CONSUMER SERVICES TECHNICAL L-75 EDUCATION GROUP PRESENTS 24″ FRONT-LOADING AUTOMATIC WASHER Model LHW0050PQ JOB AID Part No. 8178474...
- Page 2 FORWARD This Whirlpool Job Aid “24″ Front-Loading Automatic Washer” (Part No. 8178474), provides the technician with information on the installation, operation, and service of the 24″ Front-Loading Automatic Washer. It is to be used as a training Job Aid and Service Manual. For specific information on the model being serviced, refer to the “Use and Care Guide,”...
-
Page 3: Table Of Contents
Page GENERAL ..........................1-1 Safety First ......................... 1-1 Model & Serial Number Label Location ................1-2 Specifications ........................1-3 Whirlpool Washer Warranty ....................1-4 INSTALLATION INFORMATION ................... 2-1 Installation Requirements ....................2-1 Installation Instructions ...................... 2-4 PRODUCT OPERATION ......................3-1 Theory Of Operation ...................... - Page 4 — NOTES — - iv -...
-
Page 5: General
GENERAL SAFETY FIRST Your safety and the safety of others is very important. We have provided many important safety messages in this Job Aid and on the appliance. Always read and obey all safety messages. This is the safety alert symbol. This symbol alerts you to hazards that can kill or hurt you and others. -
Page 6: Model & Serial Number Label Location
MODEL & SERIAL NUMBER LABEL LOCATION The Model/Serial Number label location is shown below. Model & Serial Number Label Location... -
Page 7: Specifications
SPECIFICATIONS DIMENSIONS Height ....................33-1/4″ (84.45 cm) Width ....................23-3/8″ (59.37 cm) Depth ....................23-1/8″ (58.74 cm) Depth With Door Open ................. 38-3/4″ (98.42 cm) ELECTRICAL Voltage ....................120 VAC, 60 HZ Fuse ........................15 amps Heating Element Rating .................. 1150 Watts Drain Pump Rating .................... -
Page 8: Whirlpool Washer Warranty
Whirlpool Corporation will pay for FSP replacement parts and repair labor costs to correct defects in materials or workmanship. Service must be provided by a Whirlpool designated service company. SECOND YEAR LIMITED WARRANTY ON ALL ELECTRONIC CONTROL BOARDS For the second year from the date of purchase, when this washer is operated and maintained according to in- ... -
Page 9: Installation Information
INSTALLATION INFORMATION INSTALLATION REQUIREMENTS Alternate Parts TOOLS AND PARTS Gather the required tools and parts before If You Have: You Will Need to Buy: starting installation. The parts supplied are in the washer basket. Laundry tub or Sump pump system (if not standpipe taller already available) Tools Needed... -
Page 10: Location Requirements
LOCATION REQUIREMENTS Recessed Area Or Closet Installation The dimensions shown are for the recom- Selecting the proper location for your washer mended spacing allowed, except the closet improves performance and minimizes noise door ventilation openings. The dimensions and possible washer “walk.” shown for the closet door ventilation openings The washer can be installed in a basement, are the minimum required. - Page 11 ELECTRICAL REQUIREMENTS WARNING GROUNDING INSTRUCTIONS For a grounded, cord-connected washer: This washer must be grounded. In the event of a malfunction or breakdown, grounding will reduce the risk of electrical shock by providing a path of least resis- Electrical Shock Hazard tance for electric current.
-
Page 12: Installation Instructions
INSTALLATION INSTRUCTIONS Next, loosen the two locking screws “A” WARNING and remove the two bars “B,” as illustrated below. Keep the bolts, screws, spacers Excessive Weight Hazard and bars for future use. Use two or more people to move and install washer. -
Page 13: Drain System
DRAIN SYSTEM Floor Drain System (View D) The floor drain system requires a siphon break The washer can be installed using the standpipe that may be purchased separately (see “Tools drain system (floor or wall), the laundry tub and Parts”). drain system, or the floor drain system. - Page 14 Place hooked end of drain hose into laun- Clear The Water Lines dry tub or standpipe. Run water through both faucets and inlet hoses, To prevent drain water from going back into a bucket or laundry tub, to get rid of into the washer: particles in the water lines that might clog the inlet filter washers.
-
Page 15: Level The Washer
Check For Leaks LEVEL THE WASHER Turn on the water faucets and check for leaks. Properly leveling your washer prevents exces- A small amount of water might enter the washer. sive noise and vibration. You will drain this later. Move washer to final location. NOTE: Replace inlet hoses after 5 years of use Check that the washer is level. - Page 16 Plug into a grounded 3 prong outlet. WARNING Read “Washer Use.” To test your washer, measure and add 1/2 the normal recommended amount of High Efficiency (HE) detergent to the washer. Close the door. Select any cycle, and then press START. Allow it to complete one whole cycle.
-
Page 17: Product Operation
PRODUCT OPERATION THEORY OF OPERATION PRESSURE SWITCH HEATING ELEMENT AND TEMPERATURE SENSOR Various water levels will be used during differ- ent cycles. A single level pressure switch is This washer utilizes a fused heating element to utilized to determine the low water level setting. heat the water during certain cycles. - Page 18 DETERGENT DISPENSER Wax Motors ASSEMBLY The detergent dispenser is activated by two wax motors. During the Wash cycle, wax motor A is energized. This moves the diverter, inside the dispenser assembly, to flush the detergent cavity. During the Rinse cycle, wax motor B is ener- gized, to perform the same function for the fabric softener.
-
Page 19: Washer Use
WASHER USE First Wash Cycle Without Laundry WARNING Before washing clothes for the first time, select the REGULAR/NORMAL cycle and run the washer without clothes. Use 1/2 the normal recommended amount of powdered or liquid High Efficiency (HE) detergent. This initial cycle serves to ensure the interior is clean before washing clothes. - Page 20 3. Open the dispenser drawer and add laun- IMPORTANT: To avoid water spillage, do dry products to the detergent or fabric soft- not open the detergent drawer while the ener compartments. Close drawer slowly to machine is operating. avoid spills (see “Using the Dispenser”). 4.
- Page 21 To Fill Dispenser Compartments Main Wash Detergent Compartment (Letter B in Dispenser Illustration) 1. Pull out the dispenser drawer. Add liquid or powdered detergent to this com- 2. Add the desired laundry product to the partment for the main wash cycle. proper compartment.
-
Page 22: Controls
CONTROLS Status Lights As the program progresses, the light for the The control panel is simple to understand and cycle in progress will glow. The Stop indicator easy to operate. The following photos define light glows when the program is complete. At the knobs and buttons, and the paragraphs this point, there will be a 2 minute delay before define the purpose of each. - Page 23 Pre Wash Start Button Press this button to select a Pre Wash. This is After you have selected a cycle and options recommended only for heavily soiled items. (Pre Wash or Extra Rinse), press this button to The button will glow when this option is on. If start the program.
-
Page 24: Washer Care
WASHER CARE CLEANING THE WASHER 1. Place a pan or towel under the filter door, since a small amount of water could spill. WARNING: Before performing the operations described below, make sure that the power is off and the unit is unplugged. Cleaning The Exterior Use a soft damp cloth or sponge to wipe up any spills. -
Page 25: Component Access
COMPONENT ACCESS This section instructs you on how to service each component inside the Whirlpool Front-Loading Automatic Washer. The components and their locations are shown below. COMPONENT LOCATIONS Interference Filter Water Inlet Valves Power Supply Cord Pressure Switch Dispenser Motors... -
Page 26: Removing The Control Panel Components
REMOVING THE CONTROL PANEL COMPONENTS Spin Speed Wash Selector WARNING Selector Switch Switch Electrical Shock Hazard Pushbutton Power Board Board On/Off Switch Disconnect power before servicing. To remove the power on/off switch: Replace all parts and panels before operating. a) Grasp the pushbutton with your fingers and pull it off the power on/off switch Failure to do so can result in death or shaft. - Page 27 To remove the spin speed or wash To remove the LED board: selector switch: a) Remove the component cover (see a) Pull the knob off the switch shaft. step 7). b) Remove the two screws from the com- b) Remove the two mounting screws from ponent cover and remove the cover.
- Page 28 To remove the pushbutton board: c) Remove the board, board seal & holder, and pushbuttons from the control panel. a) Remove the component cover (see d) Pull the two ribbon cable connectors step 7). off the board connectors and remove b) Remove the four mounting screws from the board.
-
Page 29: Removing A Dispenser Motor And The Dispenser Assembly
REMOVING A DISPENSER MOTOR AND THE DISPENSER ASSEMBLY To remove the dispenser assembly: WARNING a) Lift the two dispenser motors from the top of the dispenser (do not disconnect the wires) and move them out of the way. Electrical Shock Hazard Dispenser Motors Disconnect power before servicing. - Page 30 c) Remove the four screws from the front e) Unhook the tub inlet hose from the of the dispenser. dispenser tab, and pull the hose off the dispenser fitting. Dispenser Screws Unhook Tub Inlet Hose d) Loosen the clamps on the inlet and outlet hoses at the bottom rear of the dispenser, and pull the hoses off the dispenser.
-
Page 31: Removing The Control Board & Pressure Switch
REMOVING THE CONTROL BOARD & PRESSURE SWITCH b) Disconnect the wire and ribbon cable WARNING connectors from the board. 10-Pin Connector 1-Pin Connector Electrical Shock Hazard Ribbon Cable Disconnect power before servicing. Replace all parts and panels before operating. Failure to do so can result in death or Edge Connectors electrical shock. -
Page 32: Removing A Water Inlet Valve
REMOVING A WATER INLET VALVE Disconnect the wire connectors from the WARNING water inlet valve you are servicing. Red Wires Hot Water Inlet Valve Cold Water Inlet Valve Black Electrical Shock Hazard Disconnect power before servicing. Replace all parts and panels before operating. -
Page 33: Removing The Power Supply Cord & Interference Filter
REMOVING THE POWER SUPPLY CORD & INTERFERENCE FILTER c) Remove the screw from the power WARNING supply cord strain relief and open the clamp. d) Pull the power supply cord out of the strain relief. Strain Relief Screw Electrical Shock Hazard Disconnect power before servicing. -
Page 34: Removing The Door Switch
REMOVING THE DOOR SWITCH Remove the door switch from behind the WARNING front panel, then remove the two flat-head screws from the door switch bracket, and remove the bracket from the switch. Cut the wire tie, and disconnect the three wire connectors from the switch terminals. -
Page 35: Removing The Door Seal
REMOVING THE DOOR SEAL Pull the front portion of the door seal off the WARNING flange of the front panel. Front Panel Flange Electrical Shock Hazard Disconnect power before servicing. Replace all parts and panels before operating. Failure to do so can result in death or electrical shock. - Page 36 Pull the end of the drain tube at the bottom REASSEMBLY NOTE: The drain tube is held of the door seal out of the tub opening and in place by a high-temperature water sealant. remove the seal from the washer. Make sure that you reseal the drain tube with the proper sealant when you reinstall the door gasket.
-
Page 37: Removing The Drain Pump
REMOVING THE DRAIN PUMP Tilt the washer forward so you can access WARNING the bottom of the washer. Remove the two 10 mm hex-head screws from the drain pump, and then lower the washer. Electrical Shock Hazard Disconnect power before servicing. Bottom Of Washer Replace all parts and panels before operating. -
Page 38: Removing The Motor Control Unit
REMOVING THE MOTOR CONTROL UNIT Tilt the washer forward so you can access WARNING the bottom of the washer. Remove the two T-20 Torx screws from the motor control unit holder, then lower the washer. Bottom Of Washer Electrical Shock Hazard Disconnect power before servicing. -
Page 39: Removing The Heating Element & Temperature Sensor
REMOVING THE HEATING ELEMENT & TEMPERATURE SENSOR b) Loosen the tension nut on the heating WARNING element base, (see the photo in step 5a), and pull the element out of the tub. NOTE: You may have to apply a mod- erate amount of force to remove the element. -
Page 40: Removing The Wash Motor
REMOVING THE WASH MOTOR Squeeze the two locking arms on the WARNING wiring harness connector and pull the con- nector off the motor terminal. Remove the wash motor mounting hard- ware (consists of four 1/2″ hex-head bolts, two flat washers, and locknuts) from the wash motor, and remove the motor from the washer. -
Page 41: Removing The Thermostat
REMOVING THE THERMOSTAT Disconnect the two wire connectors from WARNING the thermostat terminals. Remove the thermostat screw from the tub and remove the thermostat and its holder. Thermostat Wires Electrical Shock Hazard Disconnect power before servicing. Replace all parts and panels before operating. -
Page 42: Removing The Filter Housing
REMOVING THE FILTER HOUSING Lay the washer on a protected surface WARNING with the front side down. Remove the eight screws from the bottom panel and remove the panel from the washer. Electrical Shock Hazard Disconnect power before servicing. Replace all parts and panels before operating. -
Page 43: Removing The Basket From The Tub
REMOVING THE BASKET FROM THE TUB Remove the twelve 10 mm hex-head screws WARNING from the tub. Electrical Shock Hazard Disconnect power before servicing. Replace all parts and panels before operating. Hex-Head Screw (1 of 12) Failure to do so can result in death or electrical shock. - Page 44 — NOTES — 4-20...
-
Page 45: Component Testing
COMPONENT TESTING Before testing any of the components, perform • Check all connections before replacing com- the following checks: ponents, looking for broken or loose wires, failed terminals, or wires not pressed into • Control failure can be the result of corrosion connectors far enough. -
Page 46: Dispenser Motors
WARNING Electrical Shock Hazard Disconnect power before servicing. Replace all parts and panels before operating. Failure to do so can result in death or electrical shock. DISPENSER MOTORS PRESSURE SWITCH 2 BK Refer to page 4-7 for the procedure for servic- Refer to page 4-5 for the procedure for servic- ing the pressure switch. -
Page 47: Water Inlet Valves
WARNING Electrical Shock Hazard Disconnect power before servicing. Replace all parts and panels before operating. Failure to do so can result in death or electrical shock. WATER INLET VALVES DOOR SWITCH 650-850 Ω Refer to page 4-8 for the procedure for servic- Refer to page 4-10 for the procedure for servic- ing the water inlet valves. -
Page 48: Drain Pump
WARNING Electrical Shock Hazard Disconnect power before servicing. Replace all parts and panels before operating. Failure to do so can result in death or electrical shock. DRAIN PUMP HEATING ELEMENT Refer to page 4-13 for the procedure for servic- Refer to page 4-15 for the procedure for servic- ing the drain pump. -
Page 49: Temperature Sensor
WARNING Electrical Shock Hazard Disconnect power before servicing. Replace all parts and panels before operating. Failure to do so can result in death or electrical shock. TEMPERATURE SENSOR WASH MOTOR Refer to page 4-15 for the procedure for servic- Refer to page 4-16 for the procedure for servic- ing the temperature sensor. -
Page 50: Thermostat
WARNING Electrical Shock Hazard Disconnect power before servicing. Replace all parts and panels before operating. Failure to do so can result in death or electrical shock. THERMOSTAT Disconnect the wire connectors from the thermostat terminals. Set the ohmmeter to the R x 1 scale. Touch the ohmmeter test leads to the ther- mostat connector pins. -
Page 51: Diagnostics & Troubleshooting
DIAGNOSTICS & TROUBLESHOOTING DIAGNOSTICS Before servicing, perform the following WARNING checks: • The power cord is firmly plugged into a live circuit with proper voltage. Check the house- hold fuses and circuit breakers. • The washer is not in a Pause mode? •... -
Page 52: Testing Of Circuit Boards
TESTING OF CIRCUIT BOARDS What The Tests Will Check • The temperature thermistor. Start Conditions • The Off position of the pressure switch (with • Set the Program Selector knob at the 6 no water in the tub). o’clock position. •... -
Page 53: Diagnostic Tests
DIAGNOSTIC TESTS PROGRAM KNOB TEST # PROCEDURE LEDS ON POSITION 6 O’Clock The electronic control automatically tests the operation of Position Prewash the thermistor, the pressure switch OFF condition (no Wash water in tub), the program selector, and the door lock Rinse switch. -
Page 54: Troubleshooting Guide
TROUBLESHOOTING GUIDE LEDS PROGRAM KNOB PROBLEM TEST POSITION Try to start the test (see page 6-2). If the control unit does not enter the test mode, check the connections on the con- trol unit. If the connections are good, replace the control unit. - Page 55 LEDS PROGRAM KNOB PROBLEM TEST POSITION Place the control unit in the test mode (see page 6-2), and perform Test 2 to allow water to enter the tub (this is re- quired for the heating element to function). With water in the tub, perform Test 3. Wait until the LEDs switch on, and then test the heating element: Prewash The washer...
- Page 56 PROBLEM TEST - Check that the solenoid valve is working by carrying out the appropriate test for that particular component. - Check that the pressure switch is working by carrying Water out the appropriate test for that particular component. flows into - Check that there are no leaks from the tub unit.
-
Page 57: Pinouts
PINOUTS ELECTRONIC CONTROL Connector M Con. S Connector B Receives power from the ON-OFF button. Feeds door catch contact BP3. Current output to ON-OFF button. Feeds pressure switch contact P11. Feeds the heating element through the internal safety thermo-fuse. Receives the pressure switch level reached signal from contact P14. Feeds door catch contact BP1. - Page 58 MOTOR CONTROL UNIT MAIN MOTOR S1 goes to the Motor Tachometer (TK) S2 goes to the Motor Tachometer (TK) S3 goes to the Main Control Unit - Connector M (CM2) S4 goes to the Main Control Unit Connector M (CM1) S6 goes to the Main Control Unit - Connector M (CM5) S7 goes to the Main Control Unit - Connector M (CM4) S8 goes to the Main Control Unit - Connector M (CM3)
-
Page 59: Wiring Diagram
WIRING DIAGRAM... - Page 60 — NOTES —...
- Page 61 — NOTES —...
- Page 62 — NOTES —...
-
Page 63: Product Specifications
PRODUCT SPECIFICATIONS WARRANTY INFORMATION SOURCES IN THE UNITED STATES: FOR PRODUCT SPECIFICATIONS AND WARRANTY INFORMATION CALL: FOR WHIRLPOOL PRODUCTS: 1-800-253-1301 FOR KITCHENAID PRODUCTS: 1-800-422-1230 FOR ROPER PRODUCTS: 1-800-447-6737 FOR TECHNICAL ASSISTANCE WHILE AT THE CUSTOMER’S HOME CALL: THE TECHNICAL ASSISTANCE LINE: 1-800-253-2870... - Page 64 CORPORATION...
Need help?
Do you have a question about the LHW0050PQ and is the answer not in the manual?
Questions and answers