Flashforge Dreamer User Manual
Desktop 3d printer
Hide thumbs
Also See for Dreamer:
- User manual (69 pages) ,
- Quick start manual (36 pages) ,
- User manual (52 pages)
Table of Contents
Advertisement
Quick Links
Advertisement
Table of Contents

Subscribe to Our Youtube Channel
Related Manuals for Flashforge Dreamer


Summary of Contents for Flashforge Dreamer
- Page 1 User Guide Dreamer Desktop 3D Printer Dreamer User Guide | www.ff3dp.com...
- Page 2 Dreamer User Guide | www.ff3dp.com...
-
Page 3: Table Of Contents
WELCOME TO FLASHFORGE DREAMER How to use this manual The FlashForge Experience and Promise Understanding 3D Printing in 3 Minutes Chapter 1. SETTING UP THE DREAMER Getting to know your Dreamer Unboxing the Dreamer Hardware assembly Changing voltage on Dreamer power supply... -
Page 4: Welcome To Flashforge Dreamer
WELCOME TO FLASHFORGE DREAMER A. How to use this manual B. The FlashForge Experience & Promise C. The 3D printing process Dreamer User Guide | www.ff3dp.com Dreamer User Guide | www.ff3dp.com... -
Page 5: How To Use This Manual
The last chapter includes information regarding obtaining support. PRECAUTION: Prior to powering on the Dreamer, make sure the power supply switch is set to 115V if you are located in the United States and Canada. For other countries, please refer to your country’s AC output voltage. Failure to do so will damage the mainboard . -
Page 6: The Flashforge Experience And Promise
Flashforge products or know the technology behind 3D printing. However, we still recommend that you read this manual as it contains important information helpful to getting the best experience out of the Dreamer. By following the user manual thoroughly and correctly, you will be able to make your first print in no time. -
Page 7: Understanding 3D Printing In 3 Minutes
The Technique Fused filament fabrication is the most common method of 3D printing. It is also the method that the Dreamer uses. It works by melting plastic material called filament onto a print surface using high temperature. The filament solidifies after it cools down, which happens instantaneously after it is extruded from the print head. - Page 8 FlashForge Dreamer. FlashPrint will slice the 3D model into numerous layers and output it as a .g file, which is the format read by the Dreamer. The file is then transferred to the Dreamer by USB cable, SD card, or Wi-Fi.
-
Page 9: Chapter 1. Setting Up The Dreamer
Chapter 1. SETTING UP THE DREAMER A. Unboxing the Dreamer B. Getting to know your Dreamer C. Hardware assembly D. Loading/unloading filament E. Leveling the build plate Dreamer User Guide | www.ff3dp.com Dreamer User Guide | www.ff3dp.com... - Page 10 Unboxing the Dreamer Congratulations on your purchase of the Flashforge Dreamer 3D printer! In about 15 minutes, you will be ready to start making your first 3D object. This section lays out the procedure for correctly removing the Dreamer from its shipping box. The Dreamer contains delicate components;...
- Page 11 4.The Dreamer will have an accessory box on top of it, which will house the extruder set. Remove the box and the foam pad from the Dreamer, and gently lay the extruder set on the Dreamer build plate. Inside the accessory box, you will find a roll of 3M Blue Painter’s...
- Page 12 7.Unboxing has been completed. The illustration to the right includes all the accessories that is included with the Dreamer. Dreamer User Guide | www.ff3dp.com...
-
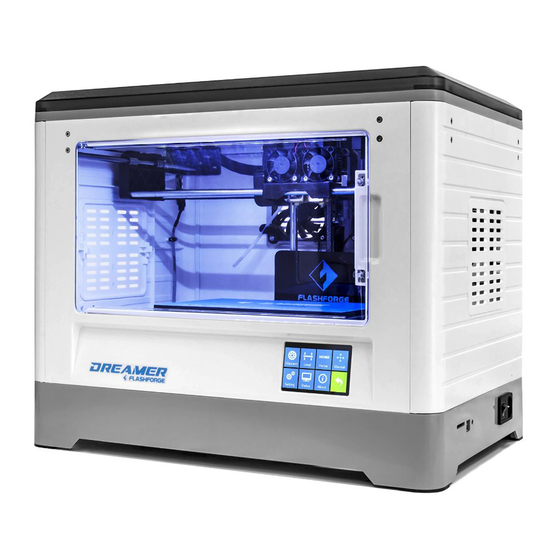
Page 13: Getting To Know Your Dreamer
Getting to know your Dreamer Main view: 1. Top cover 2. Extruder fan 3. Nozzle 4. Ventilating fan 5. Front door 6. Z axis guide 7. Touch screen Top view: 8. Build plate 9. Filament 10. X axis guide 11. Belt 12. - Page 14 ABS and PLA filament (2) power cord USB line vent (2) fan baffle cap Kit box 3M tape tweezers SD card Screwdriver Scraper Screw box Carving knife Sensor line Dreamer User Guide | www.ff3dp.com...
-
Page 15: Hardware Assembly
All you need to do is set the appropriate voltage, mount the extruder set, and install the filament. It will only take between 5 to 10 minutes before you can fire up the Dreamer and prepare for your first 3D print! PRECAUTION: FlashForge Dreamer uses a switching power supply with 115V/230V. -
Page 16: Mounting The Extruder Set
Secure it with the supplied M3x8 screw. Tip: place the M3x12 screw through the mounting hole of the extruder seat first. Afterwards, align the extruder set and tighten. Dreamer User Guide | www.ff3dp.com... -
Page 17: Installing Filament
3. Feed the filament up and through the opening until you see it. Re-tighten the guide tube bracket from step 1. Leave the filament hanging for now as we will feed it into the extruder at a later time. Dreamer User Guide | www.ff3dp.com... -
Page 18: Plugging In Power Cord & Usb Cable
Plugging in Power Cord & USB Cable Locate the power cord, and plug it into the Dreamer. Locate the USB cord and Optional: plug one end into the Dreamer and the other into your computer. The Dreamer supports USB 2.0. Dreamer User Guide | www.ff3dp.com... -
Page 19: Loading/Unloading Filament
In this user guide, we will demonstrate loading and unloading filament using the left side extruder. Loading filament: 1. Remove the lid of the Dreamer 2. From the main menu, press the right icon labeled [ Tools 3.Select... - Page 20 5. Filament will start to extrude out of the nozzle. Continue loading to ensure that the filament is extruding in a straight line. Refer to the troubleshooting section if the filament is extruding at an angle. Dreamer User Guide | www.ff3dp.com...
-
Page 21: Unloading Filament
Unloading filament: 1. Remove the lid of the Dreamer 2. From the main menu, press the right icon labeled [ Tools 3.Select [ Filament ] [ Load Left 4. Wait for the extruder to heat up to the operating temperature. The extruder will alert you once it is at the operating temperature. -
Page 22: Leveling The Build Plate
The Dreamer utilizes a three-point leveling system for its build plate. At the bottom of the build plate, there is one spring-loaded screw in the front and two in the back. - Page 23 Slide the paper back and forth again, and adjust the screw to create the same amount of friction as the previous step. 5. Press [ NEXT ] again and repeat the same leveling technique. Dreamer User Guide | www.ff3dp.com...
- Page 24 Slide the paper through to make sure there is a slight friction. Slowly adjust all the screws by the same amount if there is no friction or too much friction. 6. Press [ FINISH ] once you have finished this. Dreamer User Guide | www.ff3dp.com...
-
Page 25: Chapter 2. A Thorough Look At The Flashprint Software
Chapter2. A THOROUGH LOOK AT THE FLASHPRINT SOFTWARE A. Overview of the function Dreamer User Guide | www.ff3dp.com Dreamer User Guide | www.ff3dp.com... -
Page 26: Overview Of The Functions
Overview of the function FlashPrint is an application with advanced functions that integrates seamlessly with the Dreamer to make it print like a dream. It is an all-in-one solution, with functions such as controlling the Dreamer remotely, printing over Wi-Fi, and having separate, customizable, settings for the left and right extruders. - Page 27 · On Platform: Brings the object to the platform and make sure it prints successfully. · Center: Brings the object to the middle of the platform. · Reset: Reset all the position displacement changes have been made to the object. Dreamer User Guide | www.ff3dp.com...
- Page 28 Simplify, Chinese Traditional, and Japanese. · Checks for update after start: This option allows FlashPrint to check for update. If an update is available, it will prompt users to update the software version. · Quit: Exit the software. Dreamer User Guide | www.ff3dp.com...
- Page 29 · Duplicate: Copy and paste the selected object. · Delete: Delete the selected object. J. Print: · Connect: Allow users to connect the Dreamer to FlashPrint by either USB or Wi-Fi. · Disconnect: Disconnects a connection. This option will be grayed out when there is no connection established.
- Page 30 · Fill Density: Enter the density value of the object. 0% means completely hollow and 100% means completely solid. Typical values are between 3% and 50%. · Fill Pattern: Select the pattern for printing the infill. Available patterns are line, rectangle, and hexagon. Dreamer User Guide | www.ff3dp.com...
- Page 31 Typical values are between 180˚C and 200˚C for PLA, and 200˚C and 240˚C for ABS. Note: Different colors may melt at different temperatures. It is recommended to print with FlashForge or its recommended filament brands as sub-par quality filaments will clog and damage the extruder.
- Page 32 · Show Steep Overhang: Displays steep overhang that possibly needs support when printing. L. Tools ( only available when Dreamer is connected to FlashPrint via USB · Control Panel · Homing · Homing X: Move the extruder set to the right side until it triggers the x-axis sensor and stop.
- Page 33 · Stepper Motor Controls · Enable: Unlock the motor to be controlled manually. · Disable: Lock the motor so it does not allow any movement. · LED Color: Change the LED color of the Dreamer. Dreamer User Guide | www.ff3dp.com...
- Page 34 · Platform Current: Shows the current temperature for the platform. NOTE: There are “heating elements” embedded in the extruders and platform. Applying any temperature lower than the current temperature would not cool down the extruders or platform. Dreamer User Guide | www.ff3dp.com...
- Page 35 · Temperature Chart: After applying temperature target, this chart will show the temperature changes over time. · Update Firmware: Checks and updates Dreamer to the latest firmware version. The Dreamer must be connected via USB in order to update. · On Board Preferences: ·...
-
Page 36: Chapter 3. Making Your First Print
CHAPTER 3 MAKING YOUR FIRST PRINT A. Overview B. Single & dual-extrusion print C. Methods of printing. Dreamer User Guide | www.ff3dp.com Dreamer User Guide | www.ff3dp.com... -
Page 37: Overview
Dual extrusion is useful if you want to print dual colors or complex models that require supporting material. There are three connection methods in order to print using the Dreamer. All methods, which include USB, SD card, and Wi-Fi are covered in this chapter. -
Page 38: Single & Dual-Extrusion Print
NOTE: one object is turned to green, that indicates it will be print wit the left extruder. Now the 3D model is ready to be created. Proceed to part C to select your connectivity method for printing. Dreamer User Guide | www.ff3dp.com... -
Page 39: Methods Of Printing
Printing from USB Connect Dreamer to the computer using the included USB 2.0 cable. Turn on the Dreamer. Make sure the build plate is leveled and filament is loaded to the left extruder. Please refer to page 22 for leveling the build plate and pages 19 and 21 for loading and unloading filament. -
Page 40: Printing From Sd Card
After the object is done slicing, take the SD card from the computer. Insert it into the SD card slot on the Dreamer. Turn on the Dreamer. Make sure the build plate is leveled (page 22) and filament is loaded on the left extruder (page 19). -
Page 41: Printing From Wi-Fi
Printing from Wi-Fi Turn on Dreamer. Make sure the build plate is leveled (page 22) and filament is loaded on the left extruder (page 19). Turn on Wi-Fi on the Dreamer. To do this, press [ Tools [ Setting [ WIFI... - Page 42 Restart the interface, close the page, turn off the Dreamer, disconnect from the network, and wait for 10 seconds. Turn the Dreamer back on and connect to the Dreamer network. In FlashPrint, choose...
-
Page 43: Printing With Support
Now the Dreamer is connected with FlashPrint. A status box at the lower right corner will show the temperature of both extruders and the Platform. In FlashPrint, click [ Print ]. A printing options screen will appear Make sure that “ABS” is selected under “Material... -
Page 44: Chapter 4. Additional Information
CHAPTER 4 ADDITIONAL INFORMATION A. Getting support B. Appendix Dreamer User Guide | www.ff3dp.com Dreamer User Guide | www.ff3dp.com... -
Page 45: Getting Support
E-Mail: flashforgr@sz3dp.com Tel: 0579-82273989 Address: No.518 Xiangyuan Road, Jinhua, China. *When contacting support, please have your serial number ready. The serial number is a bar code on the back of your Dreamer Dreamer User Guide | www.ff3dp.com... - Page 46 Z axis 0.0025mm; XY axis 0.011mm Filament Diameter 1.75mm Nozzle Diameter 0.4mm Current Speed 24CC/Hour software FlashPrint Support Formats stl、obj Windows Mac OS Printer Size 485×400×335mm Weight 11Kg Input Voltage 100-240V, 50-60Hz, 300W Data Transmission USB、SD 卡、wifi Dreamer User Guide | www.ff3dp.com...
Need help?
Do you have a question about the Dreamer and is the answer not in the manual?
Questions and answers