Table of Contents
Advertisement
Advertisement
Table of Contents

Related Manuals for Powertronix Quasar


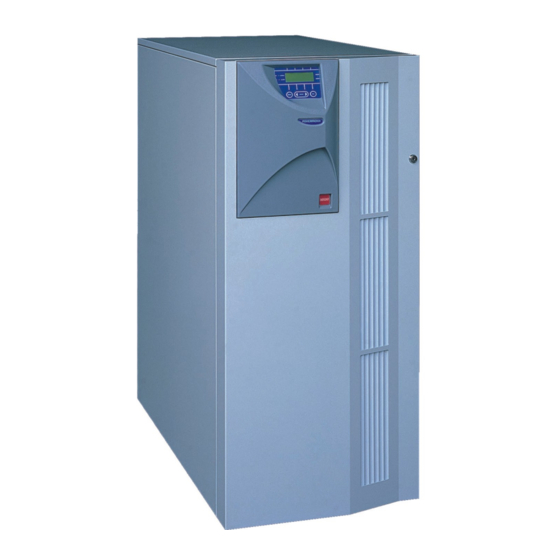
Summary of Contents for Powertronix Quasar
-
Page 3: Manual Registration
Manual Registration Manual Registration S THIS MANUAL IS A CONTROLLED DOCUMENT AND WILL BE PERIODICALLY UP DATED. S IN ORDER TO ENSURE THAT YOU RECEIVE ANY AMMENDMENT PLEASE REG ISTER THIS MANUAL WITH THE TECHNICAL SUPPORT DEPARTMENT BY RE TURNING A COPY OF THIS FORM TO: Manual Registration Number Name of Registered Holder... -
Page 4: Amendment Record
Amendment Record Amendment Record Service Manual Manual Serial Please enter the Manual Serial Nº Number: for future record Issue Issue Amendment Amended By Date Nº Date Initial issue... - Page 5 Service Manual Amendment Record This Service manual contains information concerning the installation operation and service of the fol lowing UPS EQUIPMENT PART NUMBER With battery Without battery 10 kVA UPS 15 kVA UPS 20 kVA UPS 30 kVA UPS 3x3 UPS Preliminary Pages Prelim Page iii...
-
Page 6: Limitations Of Use
Service Manual Limitations of Use Limitations of Use ELECTROMAGNETIC COMPATABILITY The equipment covered by this manual complies with the requirements of the EMC Direc tive 89/336/EEC and the published technical standards. Continued compliance requires installation in accordance with these instructions and use of manufacturer approved acces sories only. -
Page 7: Important Instructions For Safe Use
Service Manual Important Instructions for safe use Important Instructions for safe use GENERAL The UPS must be approved engineer before it is put into ser vice. Failure to observe this condition will invalidate any implied warranty. In common with other types of high power equipment, dangerous voltages are present with the UPS and battery enclosure. -
Page 8: Personnel Categorisation
Service Manual Personnel Categorisation Personnel Categorisation The following definitions are given to categorise the scope, and use of this service manual: Operator/User This service manual is outside the scope for use by personnel who have received instruc tion on the correct operation of the UPS controls; limited to operation of the unit circuit breakers and the Front Control Panel;... -
Page 9: Specification
Service Manual Specification Specification 10kVA 15kVA 20kVA 30kVA Input Data Nominal Input Voltage 400V 3 phase, neutral and earth Input Voltage Range 300 480Vac (330 480Vac full charging capability) Nominal Input Frequency 50/60Hz Input Frequency Range 40 70Hz Maximum Input Current at Nominal Input Voltage 18.5A 25.3A 31.7A... - Page 10 Service Manual Specification 10kVA 15kVA 20kVA 30kVA Intermediate DC Circuit Data Internal Battery Type valve regulated, sealed, lead acid cells Number of Battery Cells Nominal Battery Voltage 384Vdc Internal Battery Rating 7.2Ahr 2 x 7.2Ahr 2 x 7.2Ahr 3 x 7.2Ahr Full Load Autonomy Time With Standard Internal Battery (For part load and battery configuration Autonomy times 6 minutes...
- Page 11 Service Manual Specification 10kVA 15kVA 20kVA 30kVA Bypass Data Nominal ±10% Input Voltage Range For Bypass Switching Overload Capability on Static Bypass 150% for 30 minutes, 1000% for 100 m seconds Mechanical Data Unit Dimensions (w x h x d) 530 x 1220 x 950 mm Unit Weight Without Battery 185kg...
- Page 12 Service Manual Specification BATTERY AUTONOMY TIMES Approximate Autonomy Time in Minutes Stated Load and 25°C Configuration Configuration Part Nº Part N 100% 3 Phase 10kVA UPS with 1 internal set of batteries (Standard configuration) UPS with 2 internal sets of batteries + 1 x BATT UPS with 3 internal sets of batteries + 2 x BATT...
-
Page 13: Table Of Contents
Service Manual Table of Contents Table of Contents Manual Registration ............Amendment Record . -
Page 14: Table Of Contents
Service Manual Table of Contents 3.4 - Initial UPS Start-up........... . . 3 - 4 3.4.1 - Converter and Inverter Output Calibration. - Page 15 Service Manual Table of Contents 6.2.3 - Battery capacity testing........6 - 8 6.3 - Battery Replacement .
-
Page 17: Chapter 1 - Overview
Chapter 1 - Overview 1.1 - Introduction The aim of this chapter is to give a general overview of the, control principles and construction of the series on line Uninterruptible Power Supply (UPS). The UPS is a stand alone, single module, system designed to furnish a well regulated 3 phase power supply to a critical load, such as a computer, under all rated load and input supply conditions. -
Page 18: Principle Of Operation
Chapter 1 - Overview Service Manual Equipment Construction 1.2.1 - Principle of operation Normal operation During normal operation, i.e. when the UPS input supply is present and within specification, both the converter and inverter sections are active and the automatic by pass is turned on to connect the inverter output to the critical load terminals. -
Page 19: Ups Power Configuration
Service Manual Chapter 1 - Overview Equipment Construction Figure 1-2 Split Bypass" configuration Split Bypass Input Link Output Battery 1.2.2 - UPS Power Configuration Common Bypass The UPS is factory set to operate in the Common Bypass" configuration. Split Bypass links shown Figure 1-2 connect the Input Mains supply to the Reserve Input (Bypass) line creating a common input. -
Page 21: Chapter 2 - Installation
Chapter 2 - Installation 2.1 - Installation (Mechanical) 2.1.1 - Preliminary Checks Before installing the UPS hardware the following preliminary checks must be carried out: Verify that the UPS room satisfies the environmental conditions stipulated in the equipment specification, paying particular attention to the ambient temperature and air exchange system. -
Page 22: Raised Floor Installation
Chapter 2 - Installation Service Manual Installation (Mechanical) Locating the unit in the operating position The UPS cabinets are fitted with castors on the base to allow ease of movement and positioning. When the equipment has been finally positioned ensure the adjustable feet are set so that the UPS will remain stationary and stable Ensure the following considerations are observed when locating the equipment: Easy connection. -
Page 23: Installation (Electrical)
Service Manual Chapter 2 - Installation Installation (Electrical) 2.2 - Installation (Electrical) The UPS requires connection of the power cables once it has been mechanically installed. All auxiliary cables, whether screened or not, should be run separate from the power cables in metal conduits, or metal ducts electrically bonded to the cabinet metalwork to which they are connected. - Page 24 Chapter 2 - Installation Service Manual Installation (Electrical) Figure 2-1 Connections to distribution Terminal Block. Ground Ground UPS Output Ext. Battery Input Reserve Input (Bypass) Input Mains Ground (ground lead for load connection) Input reserve (Bypass) phase U3 Output phase U2 Input reserve (Bypass) phase V3 Output phase V2 Input reserve (Bypass) phase W3...
-
Page 25: Safety Earth
Service Manual Chapter 2 - Installation Installation (Electrical) 2.2.3 - Safety Earth The safety earth bus bar is located near the UPS output terminals. The safety earth cable must be con nected to the earth terminal and bonded to each cabinet in the system. All cabinets and cable trunking must be earthed in accordance with local regulations. -
Page 26: Battery Installation
Chapter 2 - Installation Service Manual Battery Installation 2.3 - Battery Installation All UPS models are normally shipped with an internal battery fitted, therefore a thorough check of the battery installation is required before applying power to the unit. The battery capacity, number of cells and installation is dependent on the unit power rating and autonomy option ordered. - Page 27 Service Manual Chapter 2 - Installation Battery Installation Figure 2-3 Battery Tray Installation for one battery string Battery Fuses (shown removed) Battery Earth Bar Battery String Voltage Check Note: Battery fuses are removed for transit and should only be fitted by the commissioning engineer.
- Page 28 Chapter 2 - Installation Service Manual Battery Installation Figure 2-4 Battery Cable Connections for one string Battery Fuses Battery ve Connection Bar Battery String 3 Top Battery Tray (10) Battery String 3 Middle Battery Tray (11) Battery String 3 Bottom Battery Tray (11) Battery String 1 Top Battery Tray (10) Battery String 1 Middle Battery Tray (11) Battery String 1 Bottom Battery Tray (11)
- Page 29 Service Manual Chapter 2 - Installation Battery Installation 2.3.3 - Installing the Battery Upgrade Kit Note: Installation of a battery upgrade kit must only be carried out by a suitably qualified, manufacturer approved engineer. Kit Contents Prior to installing the battery upgrade kit thoroughly check the items for damage and ensure that they are in a serviceable condition.
- Page 30 Chapter 2 - Installation Service Manual Battery Installation Battery Tray Assembly Place the Mylar insulation strip on to the battery tray. With a DVM check each individual battery block terminal voltage is within 12.5V to 13.0V. Voltages measured below this may indicate a defective battery block. Refer to `Battery Maintenance' on Page 6 5 Chapter 6 `Maintenance' for information on battery testing.
- Page 31 Service Manual Chapter 2 - Installation Battery Installation Battery String Voltage Check Ensure the battery fuses are removed from the switched fuse holders. Warning Do not fit the battery fuses into the fuse holders or close the fuse holders. With a DVM set to a DC range of above 450V, check for each individual battery string voltage.
-
Page 32: Setting Standard Relay Interface Pcb
Chapter 2 - Installation Service Manual Setting Standard Relay Interface PCB 2.4 - Setting Standard Relay Interface PCB The pre settings required are only those which concern the interfaces wiring to any external devices, i.e., personal computer, safety switch, remote panel. 2.4.1 - Setting Options on the standard Relay Interface A standard Relay Card is situated on the left side of the rear panel. -
Page 33: Relay Interface Connections
Service Manual Chapter 2 - Installation Setting Standard Relay Interface PCB 2.4.2 - Relay Interface Connections The relay interface PCB provides two sets of volt free contacts rated at 50V 1A the PCB receives the UPS status signals from the Display Control Logic PCB Part Nº CS0073 and is connected to CN1. Output signals from the relay interface are made to the terminal block M1 shown in Figure 2 7, or from... -
Page 34: Remote Epo (Emergency Power Off)
Chapter 2 - Installation Service Manual Setting Standard Relay Interface PCB 2.4.3 - Remote EPO (Emergency Power Off) A connection is provided for a switch, which can be located remotely from the UPS, and which has the same function as the internal EPO switch. When it is operated it shuts down the inverter, and inhibits the static switch so that power is removed from the load. -
Page 35: Ups Monitoring
Service Manual Chapter 2 - Installation Setting Standard Relay Interface PCB 2.4.6 - UPS Monitoring The UPS has the capability of being monitored with stand alone computers, network workstations, network servers, or UNIx hosts via the DB 9 female connector (1) located on the rear of the UPS. The capability is used in applications requiring the UPS to provide status and power monitoring informa tion to the computer system. -
Page 37: Chapter 3 - Commissioning
Chapter 3 - Commissioning 3.1 - Pre power Checks WARNING The UPS must be commissioned by a suitably qualified, and manufacturer approved en gineer. Failure to ensure proper commissioning may invalidate any implied warranty. WARNING During the commissioning procedure the UPS output terminals will become live. If any load equipment is connected to the UPS output terminals, fully isolate it from the UPS to ensure that no damage is caused in the extremely unlikely event of a UPS failure WARNING... -
Page 38: Setting Ups Parameters
Chapter 3 - Commissioning Service Manual Validating the Installation 3.3 - Setting UPS Parameters Check that the following factory set parameters are correct for the normal operating Conditions of the UPS. Standard link positions are shown in bold text. 3.3.1 - Control Logic PCB CS0072. General Operation: LINK FUNCTION... -
Page 39: Auxiliary Dc-Dc Psu Converter Pcb Cs0070 Settings
Service Manual Chapter 3 - Commissioning Validating the Installation 3.3.3 - Auxiliary DC-DC PSU Converter PCB CS0070 Settings No link setting are required. 3.3.4 - Battery Charger PCB CS0074 Setting Set the correct battery current limit according to the following link chart. Link/Ampere 1Amp 3Amps... -
Page 40: Initial Ups Start-Up
Chapter 3 - Commissioning Service Manual Validating the Installation 3.4 - Initial UPS Start-up. The following procedure describes the start-up and calibration of the UPS at the initial Start-up. Figure 3-1 Operator Control Panel Note: The following instructions refer to the controls on the UPS OPERATOR PANEL (shown above). - Page 41 Service Manual Chapter 3 - Commissioning Validating the Installation 1. Close the MAINS INPUT MCB (I1). 2. Close the UPS OUTPUT MCB (I4). 3. Wait approx. 20 seconds and check that the following sequence occurs: D The Operator display Panel LCD energises (if required adjust Language settings as described in chapter 4).
-
Page 42: Inverter To Bypass Synchronisation Check
Chapter 3 - Commissioning Service Manual Validating the Installation 3.4.2 - Inverter to Bypass Synchronisation Check. The following procedure describes the checking of the Inverter Phase-lock-loop circuit. 1. Using an appropriate oscilloscope connect: Probe 1 to the Reserve Mains `U' phase voltage (termial 10). Probe 2 to the UPS Output `U' phase voltage (terminal 2). -
Page 43: Power Checks
Service Manual Chapter 3 - Commissioning Validating the Installation 3.5 - Power Checks Once the initial start up and commissioning have been completed the UPS should be functionally checked and before connecting to the critical load. The following procedure describes the recommended functional checks: 3.5.1 - Bypass failure test. -
Page 44: Test Transfer To The Reserve Line (Automatic Bypass)
Chapter 3 - Commissioning Service Manual Validating the Installation 3. Using a DVM check that the output Voltage and frequency at output Terminals is correct (e.g. 400Vac and 50Hz). Using a DVM check that the Battery Voltage at the battery Terminals is correct (405V +/- 10V). 4. -
Page 45: Manual Bypass Operation Check
Service Manual Chapter 3 - Commissioning Validating the Installation 3.5.4 Manual Bypass Operation Check The manual bypass allows the UPS to be switched OFF while the critical load is maintained. The following procedure describe the confirmation of this function. 1. Press the `MENU' push button (a) on the FRONT PANEL. a) Select the `COMMAND' screen by pressing either the `BACK' (c) or `NEXT' (b) push button. -
Page 46: Local Epo
Chapter 3 - Commissioning Service Manual Validating the Installation d) Select the `INVERTER ON- OFF' screen by pressing either the `BACK' (c) or `NEXT' (b) push button. e) Confirm `INVERTER ON' function by pressing `BACK' and `NEXT' at the same time. D A ***CONFIRMED*** message will be displayed f) Press `CLEAR' (d) twice to return at the main screen. -
Page 47: Normal Ups Start-Up Instructions
Service Manual Chapter 3 - Commissioning Validating the Installation 3.6 - Normal UPS Start-Up Instructions After calibration the following procedure can be used to activate the UPS: Figure 3-4 ups power switches MAINS INPUT MCB RESERVE INPUT MCB MANUAL BYPASS MCB UPS OUTPUT MCB INTERNAL BATTERY FUSED SWITCH... -
Page 48: Lcd Messages And Led Status After Starting The Ups
Chapter 3 - Commissioning Service Manual Validating the Installation 3.6.1 - LCD Messages and LED status after starting the UPS. During the Normal Operation of the UPS LCD panel will show the following messages: D MAINS WITHIN LIMITS. D BYPASS LINE WITHIN LIMITS. D BATTERY VOLTAGE WITHIN LIMITS. - Page 49 Service Manual Chapter 3 - Commissioning Validating the Installation RETURN FROM MANUAL BYPASS TO NORMAL OPERATION 1. Close the `RESERVE INPUT' MCB. ( I2 ) D wait until the fan is running, indicating that the output voltage is present. 2. Close the `MAINS INPUT' MCB. ( I1) Wait until the Operator panel shows the following indications: D LCD is energize and D The alarm buzzer sounds.
-
Page 50: Setting Options
Chapter 3 - Commissioning Service Manual Setting Options 3.8 - Setting Options The pre setting checks required are to the relay interfaces PCB links and wiring, to any fitted external devices, i.e. personal computer, EPO switch, remote panel. 3.8.1 - Setting options on the Relay card The relay card is supplied as an option at the customers request. - Page 51 Service Manual Chapter 3 - Commissioning Setting Options Table 3-2 Serial Port P1 DB9 Connector Connections Link Function Relay Nº COMMON Closed UPS RX Closed UPS TX Closed MAINS Mains Mains OK STATUS PRE ALARM Figure 3-6 Relay Interface Outputs 3x3 UPS Commissioning 3 - 15 Issue 2 - November 2001...
-
Page 53: Chapter 4 - Operation And Control
Chapter 4 - Operation and control 4.1 - Operator Control Panel Introduction On the front of the UPS there is a control panel, from which it is possible to easily verify the status of the UPS, battery and alarms. The operator control panel consists in a LCD display that indicates the operational and alarm status of the UPS and the EPO push-button that is located at the left side. - Page 54 Chapter 4 - Operation and control Service Manual Operator Control Panel Control panel indicator LEDs The Table 4-1 shows that the menu contains three levels. The main level is the State and Alarm Menu. In this menu it is possible to see the state and operative condition of the UPS, the CLEAR Button is used to scroll through the different windows of this menu.
- Page 55 Service Manual Chapter 4 - Operation and control Operator Control Panel From the main menu (STATUS ALARMS MENU) the User may have also access to the Input/Output measured para meters and the internal parameters as well as the UPS temperature and the battery back-up time. To scroll through these parameters use Next and Back Push Buttons.
- Page 56 Chapter 4 - Operation and control Service Manual Operator Control Panel The List of possible Alarm and the associate help messages is displayed below. ALARM MESSAGE CAUSE ACTION Initial Start Up Start the Inverter INVERTER OFF Permanent Overload has been de Check Output tected Check Output Load and Restart...
- Page 57 Service Manual Chapter 4 - Operation and control Operator Control Panel EVENT HISTORY MENU In this menu the user may scroll through the past n°512 Alarm occurrences in chronological order. The Event Log display can be opened from the menu EVENT HISTORY by pressing ENTER twice. The Log screen will display Date and Time of the last EVENT occurred.
- Page 58 Chapter 4 - Operation and control Service Manual Operator Control Panel OPERATING LANGUAGE MENU Up to five language are available in this menu. To select one language first move into the OPERATING LANGUAGE display press ENTER and scroll the different languages up the desired one using NEXT button, than press ENTER to confirm.
-
Page 59: Chapter 5 - Functional Description
Chapter 5 - Functional description This chapter describes the principal PCB `s fitted to the UPS, there function, and configuration of the potentiometers, test points and jumpers. Abbreviations The following abbreviations are used throughout. P = potentiometer TP = test point JP = Jumper 5.1 - Control Logic PCB CS0072... -
Page 60: Auxiliary Supply Pcb Cs0070
Chapter 5 - Functional description Service Manual Auxiliary Supply PCB CS0070 J6 J7 J8 define the overload level related to the UPS ratings Link open close open close open close close close open J9 J10 J12 defines the inverter peak current limit for the appropriate UPS output rating. Link open close... -
Page 61: Driver Interface Pcb Cs007I
Service Manual Chapter 5 - Functional description Driver Interface PCB CS007I 5.3 - Driver Interface PCB CS007I The principle circuit functions of the driver interface PCB are: Inverter and converter IGBT gate drives (connectors JI I J9 J12 for the inverter, J14 for the converter) Static bypass thyristors and inverter gate drives (connectors J3 J4 J5 for the inverter, JI J2 J5 J6 for the static bypass) -
Page 62: Battery Charger Cs0074
Chapter 5 - Functional description Service Manual Battery Charger CS0074 5.4 - Battery Charger CS0074 The battery charger used in the UPS is a PWM controlled `Buck/Boost' DC DC converter which produces a battery recharge float voltage of 230 Vdc. The principals circuit components are: Power section (PD1 2, LI, Q1, Dl, L2). -
Page 63: Battery Test
Service Manual Chapter 5 - Functional description Battery Charger CS0074 5.4.3 - Battery test The battery test circuit will automatically initiate at the time interval selected by the links J4, J5 and J6. The test duration is set at 10 seconds, during this period the battery charger logic switches off the mains power by opening the input test relay K1 which shuts down the charger circuit. -
Page 64: Relay Interface Pcb Cs0082
Chapter 5 - Functional description Service Manual Relay Interface PCB CS0082 5.6 - Relay Interface PCB CS0082 The relay interface PCB provides two sets of volt free contacts rated at 50V 1A which enable the UPS functions listed below in Table 5-1 to be monitored externally. - Page 65 Service Manual Chapter 5 - Functional description Relay Interface PCB CS0082 Figure 5-1 Relay Interface Outputs 3x3 UPS Functional description 5 - 7 Issue 2 - November 2001...
-
Page 66: Lcd Mimic Display Cs0075
Chapter 5 - Functional description Service Manual Relay Interface PCB CS0082 5.7 - LCD MIMIC DISPLAY CS0075 LCD control panel 5.7.1 - Control panel indicator LEDs The menu contains three levels. The main level is the State and Alarm Menu. In this menu it is possible to see the state and operative condition of the UPS, the CLEAR Button is used to scroll through the different windows of this menu. -
Page 67: Chapter 6 - Maintenance
Chapter 6 - Maintenance This section contains the procedures necessary to effect general maintenance of the UPS and battery. Certain procedures entail gaining internal access to the UPS, and should be undertaken only by a com petent engineer who is familiar with the operation and layout of the equipment and is fully conversant with the areas of potential hazard. -
Page 68: Annual Maintenance
Chapter 6 - Maintenance Service Manual Scheduled Maintenance 6.1.3 - Annual Maintenance Caution We strongly recommend that the annual maintenance is carried out by a manufacturer trained engineer who is fully aware of the hazards concerned and will carry out this pro cedure, where necessary with the load connected to the maintenance bypass supply WARNING LETHAL VOLTAGES ARE PRESENT IN THE UPS UNIT EVEN IF THE UNIT HAS BEEN... - Page 69 Service Manual Chapter 6 - Maintenance Scheduled Maintenance D The Yellow `BYPASS ON' LED ( 4 ) will illuminate. D The Green `NORMAL' LED will extinguish. D The LCD will display the following messages: `LOAD ON BYPASS' and `INVERTER OFF'. Remove the Mechanical Lock from the MANUAL BYPASS MCB ( I3 ) Close the.
- Page 70 Chapter 6 - Maintenance Service Manual Scheduled Maintenance Mechanical inspection Carry out the weekly checks detailed above Ensure that the UPS is totally powered down. Check for input AC voltage at the rectifier input connections SKD 82/12 terminals 14, 15 &...
- Page 71 Service Manual Chapter 6 - Maintenance Scheduled Maintenance Table 6-1 Output Voltage PCB Link Settings Link PCB Part Nº 38OVac 400Vac 4l5Vac CS0072 open close open CS0072 close open open CSOO7I close open open CSOQ7I open close open CSOO71 open open close lnverter Bypass Phase Lock check...
-
Page 72: Battery Maintenance
Chapter 6 - Maintenance Service Manual Battery Maintenance 6.2 - Battery Maintenance The batteries fitted within the UPS are valve regulated and require very little maintenance. It is wrong to describe them as completely `maintenance free', because the batteries still require a main tenance check, but at a significantly greater interval than the unsealed type. -
Page 73: Battery Testing
Service Manual Chapter 6 - Maintenance Battery Maintenance The polarization voltage will disappear once loaded, but can lead to misleading terminal voltage measurements. To use the open circuit voltage of a battery as a guide to its capacity it must have been disconnected for at least 72 hours. -
Page 74: Battery Capacity Testing
Chapter 6 - Maintenance Service Manual Battery Maintenance White deposits around the terminal seals which indicate seal failure. Replace any batteries found. Check the security of the terminal connections. Examine for signs of corrosion or overheating. Inspect battery cases for distortion, splits or bulges. Batteries near the end of their effective life, will exhibit bulges in the case, due to increasing pressure of the positive plates as they grow in size. -
Page 75: Battery Replacement
Service Manual Chapter 6 - Maintenance Battery Replacement 6.3 - Battery Replacement When deciding to replace a battery the following must be considered, and a decision taken, to mix old or new batteries in the series string. Adding new batteries to a series string that has been in use for more than 18 months, may induce problems due to the difference in capacity A new undercharged battery placed into a fully charged old string, may fail to achieve full charge. -
Page 77: Chapter 7 - Troubleshooting
Chapter 7 - Troubleshooting 7.1 - Introduction The UPS contain complex electronic control circuits which require a firm understanding, in order to carry out comprehensive fault diagnosis and repair of the equipment. The aim of the informa tion contained in this chapter is to provide sufficient guidance to the trained service engineer, to enable successful fault location to printed circuit board level. -
Page 78: Special Tools
Chapter 7 - Troubleshooting Service Manual Special Tools 7.2 - Special Tools. No special tools are required to service the UPS, a normal electricians tool kit will be adequate. However, to carry out the check procedures contained in this chapter the following test equipment will be required. -
Page 79: Removing The Ups Covers
Service Manual Chapter 7 - Troubleshooting Removing the UPS Covers 7.3 - Removing the UPS Covers To gain access to the UPS components the following covers must first be removed. Figure 7-1 UPS Cover Removal Top Heatsink Cover Top Cover Right Side Cover Main Switch Cover Covers Removed... - Page 80 Chapter 7 - Troubleshooting Service Manual Removing the UPS Covers Ensure that the UPS has been correctly switched off and the battery fuse switches are opened. Wait for at least 10 minutes to allow the DC bus to fully discharge. Carefully lift the cover from the retaining ball studs.
-
Page 81: Component Location
Service Manual Chapter 7 - Troubleshooting Component Location 7.4 - Component Location Before starting to repair or service the UPS models, correct identification of the main compo nents and their location is required. All the main power component are mounted on the power heatsink under the driver interface board. - Page 82 Chapter 7 - Troubleshooting Service Manual Component Location Figure 7-4 Semiconductor Components Bypass SCR's (3) 91A (S2 S4 S6) Part Nº 0CASR212391 Inverter SCR's (x 3) 91A (S1 S3 S5) Part Nº 0CASR212391 Snubber Diodes 30A (CD4 CD5) Part Nº 0CADR210230 Inverter IGBT's 150A 150A (Q1 Q2 Q3) Part Nº...
- Page 83 Service Manual Chapter 7 - Troubleshooting Component Location Figure 7-5 Passive components Thermostat C (ST2) Thermostat Part Nº 0CEX50CLSD C (ST1) Part Nº 0CEX-SONDA Inv Snubber Capacitors Inverter CT's 2.5ìF (C9 C10) 1/1000 (TA1 TA2 TA3) Part Nº 0CPCPP525850 Part Nº 0CEMC316610M019 Sec.
- Page 84 Chapter 7 - Troubleshooting Service Manual Component Location Figure 7-6 Miscellaneous Component Location Battery Charger PCB Part Nº 0SDE0074 LCD Display PCB Power Circuit Breakers Battery Fuses Part Nº 0SDE0075 63A (I1 I2 I3 I4) 32A (FS1 FS2 FS3 FS4) Part Nº...
-
Page 85: Fault Identification
Service Manual Chapter 7 - Troubleshooting Fault Identification 7.5 - Fault Identification The following table lists all alarm conditions shown on the Operator panel LCD, the cause of the alarm, what checks should be carried out and possible solutions. The activation of any alarm condition will illuminate the Red ALARM LED on the OPERATOR PANEL. Table 7-1 General Fault Identification Check List LCD MESSAGE... - Page 86 Chapter 7 - Troubleshooting Service Manual Fault Identification LCD MESSAGE CAUSE CHECKS SOLUTIONS Check the integrity of the internal EMERGENCY POWER The front panel EMERGENCY EPO push button contact (Normally If the alarm is genuine then check the OFF (+INVERTER OFF push button or the External open) and the external EPO push reason for the EPO circuit activation...
-
Page 87: Typical Voltage Values
Service Manual Chapter 7 - Troubleshooting Typical Voltage Values 7.6 - Typical Voltage Values The following table of values have been taken from a serviceable UPS and are intended to give a typical reference when carrying out fault diagnosis. Table 7-2 Typical Measured Voltage Values and LED indications Test Point/LED Indication Normal Value... -
Page 88: Fuse Check List
Chapter 7 - Troubleshooting Service Manual Fuse Check List 7.7 - Fuse Check List Prior to any fault diagnosis, a serviceability check of the fuses is recommended. Failure of a fuse can give an indication of a defective power device or component. Using the list shown in Table 7 3 check each fuse for serviceability. -
Page 89: Test Procedures
Service Manual Test Procedures 7.8 - Test Procedures 7.8.1 - DC Bus Discharge Routine, Shutdown to Maintenance Bypass. After calibration the following procedure can be used to shutdown the UPS to a Manual bypass condi tion, and then to normal operation: Press the `MENU' push button ( A ) on the FRONT PANEL. - Page 90 Service Manual Test Procedures Primary and Secondary DC Bus Voltage Check (refer to Figure 7 7) Remove the UPS top cover. With a DVM check the secondary DC bus across F3 and F2 has fallen less than 20V dc. With a DVM check the primary DC bus across F1 and F4 has fallen less than 20V dc. The UPS is now safe to carry out further investigation.
-
Page 91: Fault Indication
Service Manual Test Procedures 7.8.2 - DC offset Fault indication The output of the UPS is monitored by the Inverter Driver Feedback PCB for any DC component on the output waveform. If the level of DC exceeds the limit of 400mV, a signal is generated and switched to the control logic PCB. - Page 92 Service Manual Test Procedures Action To determine if the DC offset problem is load related. Replace the normal load temporarily with a resistive load and monitor the alarm condition, if it disappears then the problem lies with the load. To measure the level of DC offset present, connect the test circuit shown in Figure 7 9 to the output of the UPS.
-
Page 93: Igbt Replacement
Service Manual Test Procedures 7.8.3 - IGBT Replacement General Fitting Information. When fitting heatsink mounted devices the following factors must be observed. Ensure that when handling devices correct anti static precautions are taken and the handler is connected to earth using a antistatic wrist band. Take care when handling devices. - Page 94 Service Manual Test Procedures Disconnect the cables attached to current transformer TA1 TA2 and TA3 IGBT connection extension pillars and lift off the CT's. Note: An in situ test for a short circuit IGBT can be carried out at this point before the devices are removed.
-
Page 95: Igbt Testing
Service Manual Test Procedures 7.8.4 - IGBT testing Two types of IGBT are used on the series UPS. Twin pack devices used in the inverter section. A single pack devices used on the converter. All the devices currently used on the , are the latest `advanced second' or `third' generation type, these have a higher gate emitter impedance. - Page 96 Service Manual Test Procedures Table 7-9 Functional check of power IGBT's DVM/Battery Lead Action Indication Interpretation Connection (mV) +ve to: ve to: IGBT Connect DVM across the emitter cathode IGBT switched off a serviceable condition. junction. [2 5] Reverse DVM leads to check internal 0.355 Diode forward resistance.
- Page 97 Service Manual Test Procedures Figure 7-12 IGBT internal circuit and external connections. Twin pack IGBT (Part Nº OCATR210415) Single pack IGBT (Part Nº OCATD212420) 3x3 UPS 7 - 21 Issue 2 - November 2001...
-
Page 98: Scr Testing
Service Manual Test Procedures 7.8.5 - SCR Testing The UPS use two types of SCR devices, one to switch the reserve bypass and inverter output to the load. The second type to connect the battery to the primary DC bus in the event of failure of the utility supply. - Page 99 Service Manual Test Procedures Figure 7-13 Testing the twin pack SCR 9 volt power Test lamp source Twin pack SCR 9 volt power Test lamp source 9 volt power source 9 volt power source and switch and switch To functionally test a twin pack SCR as shown in Figure 7 12 a DC power source and test lamp is re quired, typically a 9V PP3 battery and 12V bulb.
- Page 100 Service Manual Test Procedures Single SCR and Diode Pack Replacement. (S7 S8) Power down the UPS and carry out the DC bus discharge routine. Gain access to the UPS power section by removing the top and side covers. To gain access to the SCR's disconnect and remove the Input Filter PCB Part NºOSDE0079. Follow the procedure on page 7 SCR S7...
- Page 101 Service Manual Test Procedures To functionally test a single SCR and diode pack as shown in Figure 7 12 a DC power source and test lamp is required, typically a 9V PP3 battery and 12V bulb. Connect the bulb and battery to the SCR as shown, connect the +ve to the anode (1) and ve to the cathode (2) terminal.
-
Page 102: Inverter Drive Signal Testing
Service Manual Test Procedures 7.8.6 - Inverter Drive Signal Testing Equipment required (DC) Power Supply greater than 350Volts (Battery string) Oscilloscope (Isolated or in Differential mode) Linking Wire. Cable with 8 Pin Amphinol style connector or two compatible insulated connectors To carry out test. - Page 103 Service Manual Test Procedures 7.8.7 - Checking the Hinet power circuit capacitors. Failure of one or more capacitors in the power circuits, can normally be determined by a visual inspection. A defective capacitor will normally have distortion to the top of the capacitor can, the ter minals may have splayed apart and in extreme circumstances the cooling oil may leak from the con tainer.
-
Page 104: Pcb Replacement Procedures
Service Manual PCB Replacement Procedures 7.9 - PCB Replacement Procedures 7.9.1 - Auxiliary DC DC Converter Part Nº 0SDE0070 (PCB Label: CS0070 Exx) U2A pin1 P1 (500Vdc) (See 13.) (See 13.) (See 13.) P2 (320Vdc) (DC ve Input 1A) (See 13.) P3 (500Vdc) (DC +ve Input 1A) PM2 pin 1 to 6... -
Page 105: Lcd Ups Monitor Board Osde0077 (Pcb Label: Cs0077 Exx)
Service Manual PCB Replacement Procedures 7.9.2 - LCD UPS Monitor Board 0SDE0077 (PCB Label: CS0077 Exx) Link Link Link Power down the UPS and carry out the DC bus discharge routine. Gain access to the UPS power section by removing the top and side covers Mark all connectors before removal. -
Page 106: Inverter Driver/Feedback Interface Part Nº Osde0071
Service Manual PCB Replacement Procedures 7.9.3 - Inverter Driver/Feedback Interface Part Nº 0SDE0071 (PCB Label: CS0071 Exx) Leave 2 Pins LINK J5A J4A Clear on J21 2 red wires black wire DC Offset brown wire LINK J1A J2A J3A f Rotation (bypass V 10%) (bypass V +10%) R149... - Page 107 Service Manual PCB Replacement Procedures Remove the terminal screws and wires from the static switch SCRs. N7, N8 & N9 Note: N8 has two Red wires attached. N11, N12 & N13 Note: N12 has a Black wire attached. N15, N16 & N17 Note: N16 has a Brown wire attached. Remove the PCB Earth terminal screw N20.
- Page 108 Service Manual PCB Replacement Procedures 7.9.4 - 3ph TL Control Logic Part Nº 0SDE0072 * (PCB Label: CS0072 Exx) TP12 TP9 TP10 TP11 TP14 Link Link TP30 to C30 (See 13.) (See 13.) (Ref. test on page 7-27) J8 J7 J6 Link J1 to J5 AC Power ON...
- Page 109 Service Manual PCB Replacement Procedures Link and Jumper functions J1 J2 J3 define the UPS characteristics. Link Close Open On Line Off line Freq. Tolerance 1% Freq. Tolerance 4% 50Hz 60Hz J4 J5 define the parameters of the inverter output voltage and DC Bus voltage. Output V/Link Service close...
- Page 110 Service Manual PCB Replacement Procedures 7.9.5 - Battery Charger Part Nº 0SDE0074 (PCB Label: CS0074) Links Links JP5 to JP10 J4 to J5 (float volts adj.) (float Charge) (boost volts adj.) (temp. comp float adj.) Battery ve C11 & C12 Link Link Links...
- Page 111 Service Manual PCB Replacement Procedures Important All replacement PCB's leave the manufacturer pre calibrated therefore no adjustment should be necessary. note When fitting a replacement PCB the on board links must be checked to ensure they are in the correct position. Link and Jumper functions JPI JP2 sets the recharging current.
-
Page 112: Input Filter Part Nº Osde0079 (Pcb Label: Cs0079 Exx)
Service Manual PCB Replacement Procedures 7.9.6 - Input Filter Part Nº 0SDE0079 (PCB Label: CS0079 Exx) Power down the UPS and carry out the DC bus discharge routine. Gain access to the UPS power section by removing the top and side covers. Mark filter wiring before disconnection. - Page 113 Service Manual PCB Replacement Procedures 7.9.7 - Removing the Assembly: Power down the UPS and carry out the DC bus Discharge routine. Gain access to the rear of the UPS's Front door. Mark all connectors before removal. Disconnect connectors CN1 and J1. Remove the Left and Right hand fixing bolts in order to remove the assembly.
-
Page 115: Chapter 8 - Optional Equipment
Chapter 8 - Optional Equipment The following optional equipment is available for the UPS DESCRIPTION PART NUMBER Internal Extended Battery Kit BATT Battery Connecting Kit BATTCABLE Optional Communications Cards (Relays) RELAYCARD Upgrade Kit 10 to 15kVA UPGRADE1015 Upgrade Kit 10 to 20kVA UPGRADE1020 Upgrade Kit 10 to 30kVA UPGRADE1030... -
Page 116: Remote Alarm Panel
Chapter 8 - Optional Equipment Service Manual Remote Alarm Panel 8.2 - Remote Alarm Panel The remote indication panel provides duplication of the main functions and operating status of the UPS control panel LED's, at a distance from the main equipment. 8.2.1 - Remote Alarm Panel connection The remote signalling panel is provided with its own power supply unit and a connection cable. -
Page 117: Chapter 9 - Spare Parts
Chapter 9 - Spare Parts The following list describes the most commonly used part on the (3x3) UPS. For additional parts and information on the parts location refer to the section 7-4 Component Identification. Note: In some case the re-order number for the PCBs and the PCB Label may differ.
Need help?
Do you have a question about the Quasar and is the answer not in the manual?
Questions and answers