Automatic Technology GDO-6v3 EasyRoller Installation Instructions Manual
Roll up garage door opener
Hide thumbs
Also See for GDO-6v3 EasyRoller:
- Installation instructions manual (36 pages) ,
- Installation manual (22 pages)

Subscribe to Our Youtube Channel
Related Manuals for Automatic Technology GDO-6v3 EasyRoller


Summary of Contents for Automatic Technology GDO-6v3 EasyRoller
- Page 1 GDO-6v3 EasyRoller ® Roll Up Garage Door Opener Featuring TrioCode ™ Technology Part # 13236 (Manual) INSTALLATION INSTRUCTIONS | OWNERS COPY...
- Page 2 Automatic Technology Australia Pty Ltd to the extent that such may be lawfully excluded hereby expressly disclaims all conditions or warranties, statutory or otherwise which may be implied by laws as conditions or warranties of purchase of an Automatic Technology Australia Pty Ltd Garage Door Opener.
-
Page 3: Table Of Contents
GDO-6v3 EasyRoller ® Roll Up Garage Door Opener Important Safety Instructions Features Operating Controls Package Contents Installation Pre-Installation Requirements Installation Programming the Opener Setting Limits Setting Limits: via Transmitter Safety Obstruction Force Safety Obstruction Force Test Adjusting Safety Obstruction Forces... -
Page 4: Important Safety Instructions
Beam. In most countries P.E. Beams are mandatory on all garage doors fi tted with automatic openers. For a small additional outlay Automatic Technology recommends that Photo Electric Beams be installed with the automatic opener ensuring additional safety and peace of mind. - Page 5 If the power supply cord is damaged, it must be replaced by an Automatic Technology service agent or suitably qualifi ed person. Make sure that the door is fully open before driving in or out of the garage and fully closed before leaving the driveway.
-
Page 6: Features
Features Thank you for purchasing the Automatic Technology EasyRoller® Automatic Garage Door Opener. Designed by our renowned engineers to suit sectional overhead and one piece tilt up doors, the EasyRoller® will provide years of smart, simple & secure convenience to your home. -
Page 7: Manual Operation
Inside the manual release handle is a transmitter designed to be in easy reach so that the garage door can be operated without having to stretch to reach the operate button on the control panel. Owner Installation Instructions GDO-6v3 EasyRoller ®... -
Page 8: Operating Controls
The Set button is also used to re-initialize the Opener. ENGAGE/DISENGAGEMENT CORD enables manual door operation, especially useful during EASY ACCESS TRANSMITTER; power failures. At the cord’ s end is the a wireless door controller. GDO-6v3 EasyRoller ® Owner Installation Instructions... - Page 9 The shunt supplied with the control board (OFF position) must be fitted (ON position) for solar operation. PROG INPUT is used to connect the Automatic Technology Handheld Programmer for editing control and receiver functions, accessing diagnostic tools, and activating special features and operating modes.
-
Page 10: Package Contents
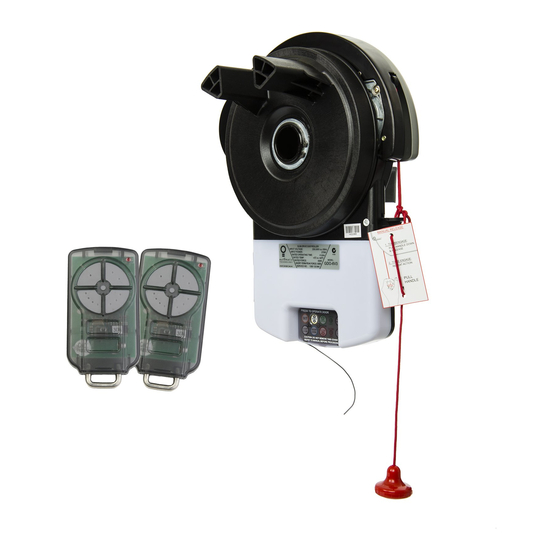
Package Contents GDO-6v3 Easyroller® drive unit w/ EAT TrioCode™ keyring transmitters Alkaline battery A23 12V Screw #6 x 1” Pan head screw M4x50mm (not included in some models) Nilock hex nut M4 (not included in some models) Flat washer I.D. -
Page 11: Installation
The recommended side room from the edge of the door curtain is 95mm to the inside of the door bracket, and 135mm to the wall (Fig. 02). NOTE: Door Axle Diameter must not exceed 35mm. ® Owner Installation Instructions GDO-6v3 EasyRoller... -
Page 12: Installation
WARNING! The door and its springs are under fi g signifi cant tension. Adjustments should only be carried out by experienced persons, as this function can be dangerous if not performed under strict safety procedures. GDO-6v3 EasyRoller ® Owner Installation Instructions... - Page 13 Remove the door bracket allowing the door to rest on the support (Fig. 08). NOTE - For minimum sideroom installations the door may have to be taken down. WARNING! The opener must not be used with a door incorporating a wicket door. ® Owner Installation Instructions GDO-6v3 EasyRoller...
- Page 14 DO NOT SWITCH ON. Secure the power cord away from any moving object (e.g. the door) with the cable clip supplied. With the opener still disengaged, pull the door up and down to make sure it runs freely GDO-6v3 EasyRoller ® Owner Installation Instructions...
-
Page 15: Programming The Opener
To reset the limits press and hold the CLOSE button for 6 seconds until the CLOSE LIMIT LED fl ashes quickly. If no action is taken within 30 seconds, the opener will return to normal operating mode and restore the original limit settings. ® Owner Installation Instructions GDO-6v3 EasyRoller... -
Page 16: Setting Limits: Via Transmitter
Repeat Steps 16.1 and 16.3 to set new travel limit positions. » There is no need to re-code the transmitter (Step 16.2) upon resetting travel limits. The transmitter will still be stored in memory. GDO-6v3 EasyRoller ® Owner Installation Instructions... -
Page 17: Safety Obstruction Force
fi g DANGER! If the door fails these tests, put the opener into manual mode, only operate the door by hand and call for service. Wood (40mm high) ® Owner Installation Instructions GDO-6v3 EasyRoller... -
Page 18: Adjusting Safety Obstruction Forces
(4) times (depending on the position of the door and the power up condition). A single beep will be heard once the process is complete. Test the force again as per Steps 8.1 and 8.2. GDO-6v3 EasyRoller ® Owner Installation Instructions... -
Page 19: Coding Transmitters
Press one of the four buttons on the transmitter for two (2) seconds, pause for two (2) seconds, then press the same button again for two (2) second. Release the DOOR CODE button. Press the transmitter button to test. Owner Installation Instructions GDO-6v3 EasyRoller ®... -
Page 20: Easy Access Transmitter Coding
Hold the new transmitter’s button for two seconds, pause for two seconds, hold again for two seconds and then release. Wait for 10 seconds and then press the new transmitter’s button to test. fi g GDO-6v3 EasyRoller ® Owner Installation Instructions... -
Page 21: Deleting Transmitter Codes
These LED’s will turn off and the CODING LED will illuminate. Release the DOOR CODE BUTTON. All stored codes will now be deleted. Confi rm this pressing buttons on any previously coded transmitters - the opener should not respond. Owner Installation Instructions GDO-6v3 EasyRoller ®... -
Page 22: Accessories
OPEN LIMIT LED will flash to indicate that Auto- close mode is operational. Break the P.E. Beam's path momentarily to initialise Auto-close. When the door reaches the fully opened position, the door will pause for the set Auto-close time and then close. GDO-6v3 EasyRoller ® Owner Installation Instructions... -
Page 23: Final Set Up
Press and hold the SET Button (Fig 31). Turn power on while holding the SET button. fi g Continue to hold until all LEDs are off. » This will not erase transmitter codes stored in memory. Owner Installation Instructions GDO-6v3 EasyRoller ®... -
Page 24: Smartsolar™ Installation
Refi t the timing cover, main cover and light diffuser. Step 20.4 - Re-setup and Test the Opener Setup travel limits and code transmitters as per the GDO-6 instruction manual. Press either the OPERATE button, or use a transmitter to operate the opener. GDO-6v3 EasyRoller ® Owner Installation Instructions... -
Page 25: Battery Back Up Kit Installation
Whilst door is in motion re-connect power. Position 2-wire battery harness neatly and secure The door should complete the cycle as normal. left side of battery kit with cable clamp. Unplug the drive unit from mains power. Owner Installation Instructions GDO-6v3 EasyRoller ®... -
Page 26: Parameters
Beeps as door moves Opener overloaded Alternating fl ashes Alternating fl ashes Door in open position with Auto- One second fl ashes Close mode selected Pet Mode Engaged Mains power interrupted Rapid fl ashes GDO-6v3 EasyRoller ® Owner Installation Instructions... -
Page 27: Button Functions
DOOR CODE (then power on) & hold until all LEDs Deletes all transmitter storage memory are off SET & DOOR CODE (the power on) and hold until all Deletes all control parameters and transmitter LEDs are off storage memory. s i l margin Owner Installation Instructions GDO-6v3 EasyRoller ®... -
Page 28: Default Settings & Specifi Cations
2. Intermittent operations may occur in areas which experience very strong winds. Strong wind puts extra pressure on the door and tracks which may in turn trigger the safety obstruction detection system intermittently. GDO-6v3 EasyRoller ® Owner Installation Instructions... -
Page 29: Troubleshooting
In such an instance please contact your Automatic Technology dealer for an alternative frequency replacement kit. As this is not a warrantable situation but an environmental issue charges may apply for the change-over. -
Page 30: Maintenance
• NOTE: If the door does not operate smoothly, call your installer. Service Record Record any maintenance in the following table to assist in any warranty service. Date Service by Signature Invoice No. Amount GDO-6v3 EasyRoller ® Owner Installation Instructions... - Page 31 ® Owner Installation Instructions GDO-6v3 EasyRoller...
-
Page 32: Spare Parts
Spare Parts GDO-6v3 EasyRoller ® Owner Installation Instructions... - Page 33 ® Owner Installation Instructions GDO-6v3 EasyRoller...
-
Page 34: Warranty
Trade Practices Act 1974 (Cwth). 2. Subject to all of the matters set out below, Automatic Technology Australia Pty Ltd (“ATA”) warrants: (a) overhead door opener drive units for twenty four (24) months or 5000 cycles, whichever occurs fi rst; and (b) all components and accessories for twelve (12) months, from the date of purchase (specifi... - Page 35 ® Owner Installation Instructions GDO-6v3 EasyRoller...
- Page 36 ® are trademarks of Automatic Technology (Australia) Pty Ltd. No part of this document may be reproduced without prior permission. In an ongoing commitment to product quality we reserve the right to change specifi cation without notice. E&OE. Automatic Technololgy (Australia) Pty Ltd...
Need help?
Do you have a question about the GDO-6v3 EasyRoller and is the answer not in the manual?
Questions and answers