Table of Contents
Advertisement
Quick Links
Advertisement
Table of Contents

Related Manuals for Sagem Phonefax 40


Summary of Contents for Sagem Phonefax 40
- Page 1 User Manual...
-
Page 2: Dear Customer
In buying this device you have chosen a quality product With the installation guide on the following pages, you can made by Sagem. Their device fulfils the most varied re- start using your machine quickly and easily. Detailed de- quirements for private use or in your office and business scriptions can be found in the following sections of this everyday. -
Page 3: Installation Guide
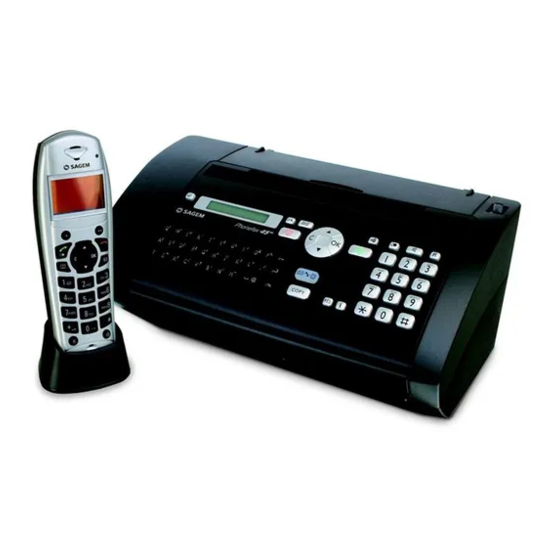
ƒ Paper tray Papierhalter installieren „ Power cord with plug (country-specific) … Telephone cord with plug (country-specific) † Additional document holder Packing contents Sagem basic Dect ‡ Charging station ˆ Three batteries ‰ Cordless telephone User Manual User manual with installation guide (not depicted) -
Page 4: Connecting The Telephone Cord
Connect the mains cable of the charging station to the Never use non-rechargeable batteries in the electrical socket. cordless telephone. Follow the specifications in Ladestation anschließen the technical data. Sagem SPFX 40 · 45... -
Page 5: Putting Cordless Telephone In Operation
2 Place the cover on the battery compartment and slide it upward until it snaps into place. 3 Place the cordless telephone into the charging station. Never place the cordless telephone into the charg- ing station without batteries. Leave the cordless telephone in the charging sta- tion for at least twelve hours. -
Page 6: Table Of Contents
45 Using service codes ........page 42 46 Checking the Ink Film Reserve 46 Checking the ink film reserve ....page 38 47 Checking the Firmware Version 47 Checking the firmware version ....page 42 48 Sudoku 48 Sudoku ............page 29 Sagem SPFX 40 · 45... -
Page 7: Device Overview
‚ Scanner glass Device Overview Basic Description ƒ Rollers of the automatic document feeder ‚ Paper tray „ Rests of the intake rollers ƒ Document feeder (writing facing up) … Document guide / scanner film „ Panel with display † Cover for scanner and automatic document feeder …... -
Page 8: Cordless Telephone Panel
Telephone EXT £—External telephone call _—New SMS received Alarm ¥—Alarm clock switched on Timer ©—Timer switched on Registration number 1 —Number with which the cordless telephone is regis- Rechargeable Batteries tered with the base unit Sagem SPFX 40 · 45... -
Page 9: Panel
Panel Letter Keypad Letter keypad—Entering characters. Entering capital let- Telephone Book ters by pressing and holding + button. Deleting using \. m—Press briefly: Calling up the telephone book entries. Entering a break using |. Entering a space using ½. En- Selecting the entries with the [ / press and hold: tering special characters by pressing and holding CTRL Fax Switch... -
Page 10: General Safety Information
Observe any usage regulations (or restrictions) in the vicinity of such equipment. The batteries used should be disposed of according to the recycling regulations of your country. Sagem SPFX 40 · 45... - Page 11 Table of Contents Dear Customer, ............2 Broadcasting ............22 About this User Manual ..........2 Delayed Fax Transmission ........22 Receiving Faxes ............22 Installation guide ........3 Receiving fax manually ..........22 Contained in the packing .......... 3 Polling Faxes ............
- Page 12 Checking the Firmware Version ......42 Using Service Codes ..........42 Power Cycling ............42 13 Appendix........... 44 Technical Data ............44 Guarantee ..............44 Declaration of Conformity (DoC) ......45 Customer Information ..........48 Sagem SPFX 40 · 45...
-
Page 13: Telephone Functions
1 Telephone functions For information on how to connect additional cordless tel- Calling additional telephone func- ephones and another device and which functions are avail- tions able to you, please refer the chapter on Telephone Connec- Function is not supported in all countries and networks (Function is not supported in all countries and tions and additional devices, Page 35. -
Page 14: Hands-Free
Setting the Country If the Caller Line Identification does not work even though the function is activated for your telephone connection, check if you have set the correct country (also see Chapter Settings, page 30). Sagem SPFX 40 · 45... -
Page 15: Telephone Book Of The Device
2 Telephone book of the device Help 3 · Telephone Functions Deleting an Entry Press î and 3 to print an overview of the tele- phone book functions. 1 Press OK, 16 and OK. Telephone Book 2 Using [ select the entry which you would like to de- In the telephone book of your device, you can save entries lete. -
Page 16: Short Dial
1 Press OK, 14 and OK. 2 Using [ or the relevant numeric key, select the entry which you would like to delete. 3 Press C. 4 Confirm the deletion with OK. Sagem SPFX 40 · 45... -
Page 17: Telephone Book Of The Cordless Tele- Phone
3 Telephone book of the cordless tele- phone Restricted telephone book functions Adding an additional number All functions for the telephone book of the device are Additional number If you have added an additional number to an entry, not available to you on the cordless telephone. this entry appears twice in the telephone book. -
Page 18: Cordless Telephone
14 Enter the time at which you would like to be woken up, 4 Confirm using OK. e.g. 07 00 for 7 a.m. 5 Dial using [ EMERGENCY . 15 Confirm with OK. 6 Confirm using OK. 16 Confirm with OK to switch on the alarm. Sagem SPFX 40 · 45... - Page 19 Deactivating the alarm clock Entering birthday 1 Press [, and using [ to select ACCESSORIES . 1 Press [, and using [ to select ACCESSORIES . 2 Confirm with OK. 2 Confirm with OK. 3 Using [ select ALARM . 3 Dial using [ BIRTHDAY .
- Page 20 1 Press ô ACCEPT on the cordless telephone to accept the call. 2 Press ’ to end the call. The cordless telephone returns to the room monitoring mode. You can place a call when in the room monitoring mode. Sagem SPFX 40 · 45...
-
Page 21: Fax
5 Fax Help 4 · Fax 3 Set the desired resolution. You can choose between Press î and 4 to print the instructions for sending RESOL.: STANDARD (for documents without spe- faxes and for fax switch settings. cial features), RESOL.: FINE (for texts with small Loading Documents print or drawings) and RESOL.: PHOTO (for pho- Do not insert any documents into the machine... -
Page 22: Sending Fax Later
After the ma- select a saved entry. chine has called all recipients, it once again dials the numbers that previously could not be reached. 2 Hold o pressed (for at least two seconds). Sagem SPFX 40 · 45... -
Page 23: Using Fax Templates
Polling Secure Faxes Secure Fax Polling With this function, you can poll faxes that are protected with a code. 1 Press OK, 31 and OK. 2 Enter the code. 3 Confirm with OK. 4 Enter the desired number using the numeric keypad or select a saved entry. -
Page 24: Copier
Press RES. The configured resolution appears on the display. Press RES again to change the resolution. They can adjust the preset contrast (also see Chapter "Settings", page ). Creating a Copy Press COPY briefly. The copy is created. Sagem SPFX 40 · 45... -
Page 25: Sms
7 SMS Function is not supported in all countries and networks (Function is not supported in all countries and On the cordless telephone networks) Sending SMS Help 8 · SMS Press î and 8 to print the instructions for SMS Navigating, Deleting and Back functions. -
Page 26: Notification By Sms
SENT —Contains sent messages that you have saved. 6 Use [ to select whether you would like to be in- DRAFT —Contains message that are yet to be sent formed about new fax messages. 5 Confirm with OK. 7 Confirm with OK. Sagem SPFX 40 · 45... -
Page 27: Calling Sms Functions
6 Select the desired SMS using [. Deleting SMS 7 Press ô Select . On the Device 8 Using [ select READ . Deleting an SMS on the Device SMS Deletion Introduction If the message memory is full, the device cannot receive 9 Confirm with OK. - Page 28 2 Enter the service code 41206. 3 Confirm with OK. 4 Using [ select SURE: YES . 5 Confirm with OK. If you have entered the incorrect code, you can cancel the entry with SURE: NO . Sagem SPFX 40 · 45...
-
Page 29: Fun And Games
8 Fun and Games Help 7 Games and Fun 8 Enter, how many copies of the Sudoku you would like Press î and 7 to print the instructions for the to print (maximum 9 copies). Games and Fun functions of your device. 9 Confirm with OK. -
Page 30: Settings On The Device
You can move the cursor using [. Use C to de- see Chapter Fax Switch). lete individual characters. Setting the Volume on the Machine Using [ you can set adjust the volume when the device 3 Confirm using OK. is ringing. Sagem SPFX 40 · 45... -
Page 31: Printing Fax Journal
Setting the Fax Switch Switching Off All Rings Fax switch All Rings Off The built-in fax switch of your device distinguishes be- If you don't want to be disturbed, e.g. in the night, by any tween fax messages and telephone calls. Faxes are automat- incoming calls, you can set the number of rings to 0 . -
Page 32: Starting The Initial Installation
Press î and 8 to print the instructions for SMS func- tions. Starting the Initial Installation 1 Press î and 2. 2 The machine prints out a help page and starts the initial installation process. Sagem SPFX 40 · 45... -
Page 33: 10 Settings On The Cordless Telephone
10 Settings on the cordless telephone (model dependent) (Model-dependent) 1 Press [, and using [ select RINGER TYPE . Back and Close Press C to return to the previous menu level. Press 2 Confirm using OK. ’ to close the menu and return to the starting 3 Using [ select SILENT MODE . -
Page 34: Resetting The Cordless Telephone
1 Press [, and using [ CALLS select PERSONALIS. . 2 Confirm with OK. 3 Dial using [ EVENTS . 4 Confirm using OK. 5 Use [ to select whether you would like to turn the function on or off. 6 Confirm with OK. Sagem SPFX 40 · 45... -
Page 35: 11 Telephone Lines And Additional Devices
11 Telephone Lines and Additional Devices Configuring Telephone Lines and rings for the fax switch to lower than 5 on your device (also see Chapter Setting the Fax Switch, Page 31). When the fax Services switch accepts the call, the mail-box of the service provider PABX Systems does not step in. -
Page 36: De-Registering Cordless Telephone
If you pick up at an additional device and hear that you are name. receiving a fax (whistling tone or silence), you can start the fax reception by pressing *5 on the additional tele- 16 Confirm using OK. phone or pressing o on the device. Sagem SPFX 40 · 45... -
Page 37: Easylink
Taking Over the Line If you pick up on an additional telephone and the machine continues to ring or attempts to receive a fax, you can dis- connect the machine from the line. Press ** on the ad- ditional telephone. Changing Code Easylink Codes Only change the codes if it is absolutely necessary. -
Page 38: 12 Service
You could be side. injured if the cover falls while you are working on the machine. 3 Grip the rear ink film roll at both the sides and place it next to the front ink film roll. Sagem SPFX 40 · 45... -
Page 39: Fixing A Paper Jam
8 Place the smaller roll without film in the front tray. The Fixing a paper jam blue gear wheel must be on the right hand side and the 1 Remove the paper from the paper feeder and take the pin must be inserted in the depression on the left hand paper tray out of the device. -
Page 40: Fixing A Document Jam
You could be injured if the cover falls while you are working on the machine. 5 Close the scanner cover and the cover of the automatic document feeder. Both the supports must securely snap into place. Sagem SPFX 40 · 45... -
Page 41: Displaying The Battery Charge
3 Open the scanner cover and the cover of the automatic 8 Close the device. Insert the paper tray in the opening document cover by first pushing the support (A) and provided for it behind the paper feeder. Insert paper then the support (B) inside. -
Page 42: En Checking The Firmware Version
The device produces black lines when sending or printing. Clean the scanner and the document feed slot. Copy is blank. Insert the documents face up into the document feeder. Sagem SPFX 40 · 45... - Page 43 Problems when faxing or printing Printing is interrupted. Paper or document jam, no paper or ink film. Follow the instructions on the display and in the error report. There could be a small pause after printing several pages. The device continues printing automatically. No printing Check if you have inserted clamped paper correctly.
-
Page 44: 13 Appendix
Weight ..............1,9¦kg Weight Power Supply Power Supply ......220¦–¦240¦V¦~ / 50¦–¦60¦Hz At the beginning of April 2002, SAGEM SA bought the Power Consumption PHILIPS fax business unit. SAGEM SA is now the Euro- Power Consumption Stand-by mode .......<¦1,5¦W (without Dect) -
Page 45: Declaration Of Conformity (Doc)
SAGEM for an estimate, and he/she must accept the esti- including manufacturing, product use and end of life. mate and agree to pay the charges mentioned in it before Recycling returning the equipment to SAGEM. - Page 46 Should problems arise during use of your machine, please contact your retailer first. Neither Sagem nor its affiliates shall be liable to the pur- chaser of this product or third parties for damages, losses, costs, or expenses incurred by the purchaser or third parties...
- Page 47 Appendix...
-
Page 48: Customer Information
Telephone: 08 71 - 075 07 12 (0,10 £/minute) Fax: 02 07 - 519 50 24 Direct-Sales Sagem Allgemein Use only Sagem accessories. The warranty does not cover damages to the machine resulting from the use of other consumable materials. Direct-Sales Sagem GB · INT In United Kingdom, you can order Sagem accessories by telephone via our toll-free telephone number.
Need help?
Do you have a question about the Phonefax 40 and is the answer not in the manual?
Questions and answers
I want a SAGEM Transfer Ribbon TTR400
You can buy a Sagem Phonefax 40 Transfer Ribbon TTR400 at toner.com and asc-toner.com.
This answer is automatically generated
I want a TTR400